CDC 100 BT - Mp3 player OneConcept - Free user manual and instructions
Find the device manual for free CDC 100 BT OneConcept in PDF.
User questions about CDC 100 BT OneConcept
0 question about this device. Answer the ones you know or ask your own.
Ask a new question about this device
Download the instructions for your Mp3 player in PDF format for free! Find your manual CDC 100 BT - OneConcept and take your electronic device back in hand. On this page are published all the documents necessary for the use of your device. CDC 100 BT by OneConcept.
USER MANUAL CDC 100 BT OneConcept
text_image
QR code image containing encoded data, no visible human-readable textINHALT
CLASS 1 LASER PRODUCT
CLASS 1 LASER PRODUCT APPAREIL LASER DE CLASSE 1 PRODUCTO LASER DE CLASE 1
CAUTION
INVISIBLE LASER RADIATION WHEN OPEN AND INTERLOCKS DEFEATED AVOID EXPOSURE TO BEAM.
natural_image
Warning symbol with a black triangle containing a central sunburst (no text or numbers)This product contains a low power laser device.
Klasse 1 Laser
text_image
OFF HOLD ON 16natural_image
Symbol of a trash bin with crossed lines indicating no waste, and a solid black rectangle below (no text or labels)Berlin Brands Group UK Ltd
PO Box 1145
Oxford
OX1 9UW
United Kingdom
Congratulations on purchasing this equipment. Please read this manual carefully and take care of the following hints on installation and use to avoid technical damages. Any failure caused by ignoring the items and cautions mentioned in the operation and installation instructions are not covered by our warranty and any liability. Scan the QR code to get access to the latest user manual and other information about the product.

text_image
QR code image containing encoded data, no visible human-readable textCONTENTS
Technical Data 17
Safety Instructions....18
Controls....19
Power Source 20
Operation 22
BT Transmitter Mode 25
Care and Maintenance 25
Troubleshooting Guide 26
Disposal Considerations 27
Declaration of Conformity. 27
TECHNICAL DATA
| Item number 10033713, 10033714, 10033715 | |
| Power supply Batteries 2x1.5 V (type LR6, AA)Optional: power adaptor (not included)(output 4.5 V==; 500 mA) via USB port | |
| CD player(compatible formats) | CD, CD-R, CD-RW, CD-MP3 |
| BT specificationsFrequency bandMaximum radio-frequency power | 2402–2480 MHz4 dBm |
Symbols on the device
CLASS 1 LASER PRODUCT
CLASS 1 LASER PRODUCT APPAREIL LASER DE CLASSE 1 PRODUCTO LASER DE CLASE 1
CAUTION INVISIBLE LASER RADIATION WHEN OPEN AND INTERLOCKS DEFEATED AVOID EXPOSURE TO BEAM.
natural_image
Warning symbol with a black sunburst inside a triangle (no text or numbers)This product contains a low power laser device.
- As the laser beam used in this compact disc player is harmful to the eyes, do not attempt to disassemble the casing.
- Stop operation immediately if any liquid or solid object should fall into the cabinet. Unplug the unit and have it checked by qualified personnel.
- Do not touch the lens or poke at it. If you do, you may damage the lens and the player may not operate properly.
- Do not put anything in the safety slot. If you do, the laser diode will be ON when the lid is still opened.
- If the unit is not to be used for a long period of time, make sure that all power sources are disconnected from the unit. Remove all batteries from the battery compartment, and unplug the AC adaptor from the wall outlet
- Make it a practice to remove the AC adaptor by grasping the main body and not by pulling the cord.
- This unit employs a laser. The use of controls or adjustment or performance of procedures other than those specified herein may result in exposure to hazardous radiation.
- Never wrap the earbuds cord around any animal or person. Special care should be taken with long wires.
- Clean the unit with a soft, damp (never wet) cloth. Solvents or detergents should never be used.
- Avoid operating your unit under direct sunlight or in hot, humid or dusty places to reduce the risk of fire or electric shock.
- Unplug the unit from the electrical power outlet immediately in case of malfunction.
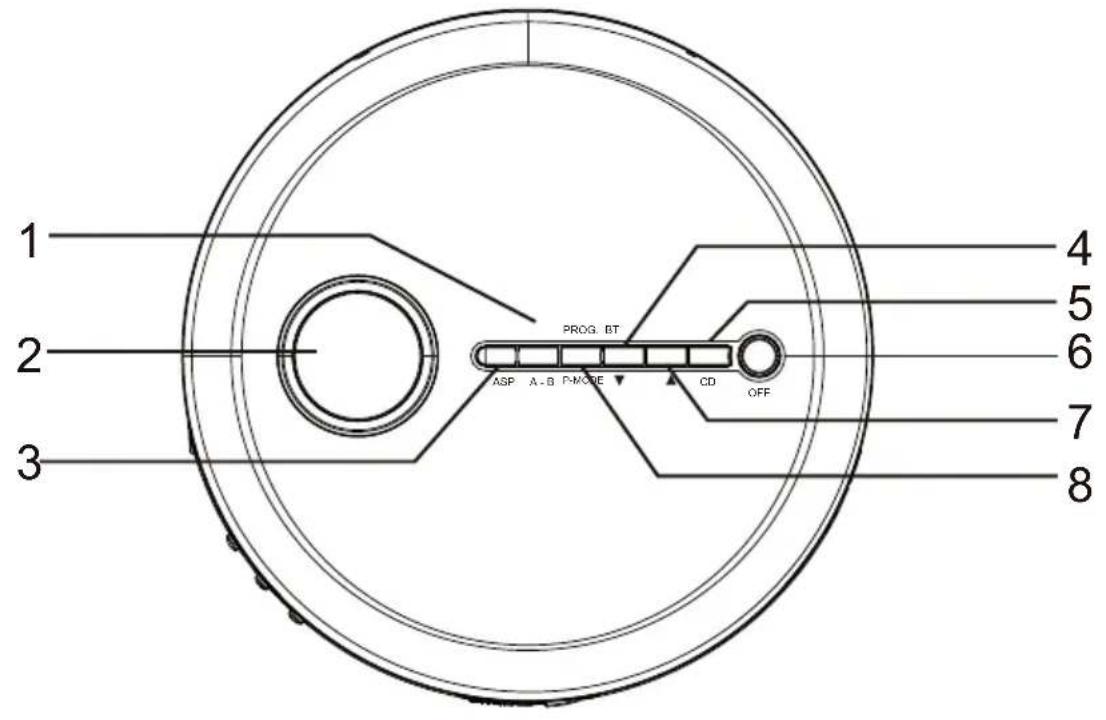
CONTROLS
Top view
text_image
1 2 3 PROG BT ASP A-B PHASE CD OFF 4 5 6 7 8Side view
text_image
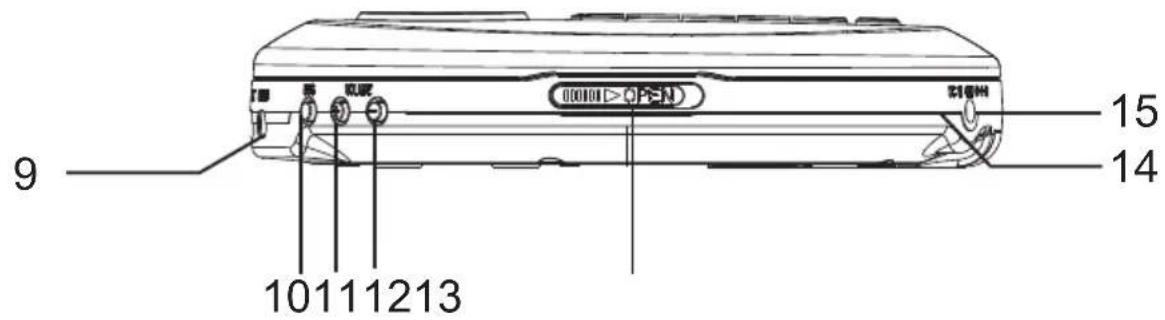
000101 > OPEN 15 14 9 10111213Bottom view
text_image
HOLD OFF ON 161 A-B button, BT transmitter on/off button
2 LCD display
3 ASP button
4 Skip/search backward
5 CD STOP button
6 Power on/off, CD Play button
7 Skip/search forward
8 Program, Play mode button
9 Headphone jack
10 BBS ON/OFF switch
11 Volume up
12 Volume down
13 CD door open switch
14 USB 5 V jack
15 DC IN jack
16 HOLD
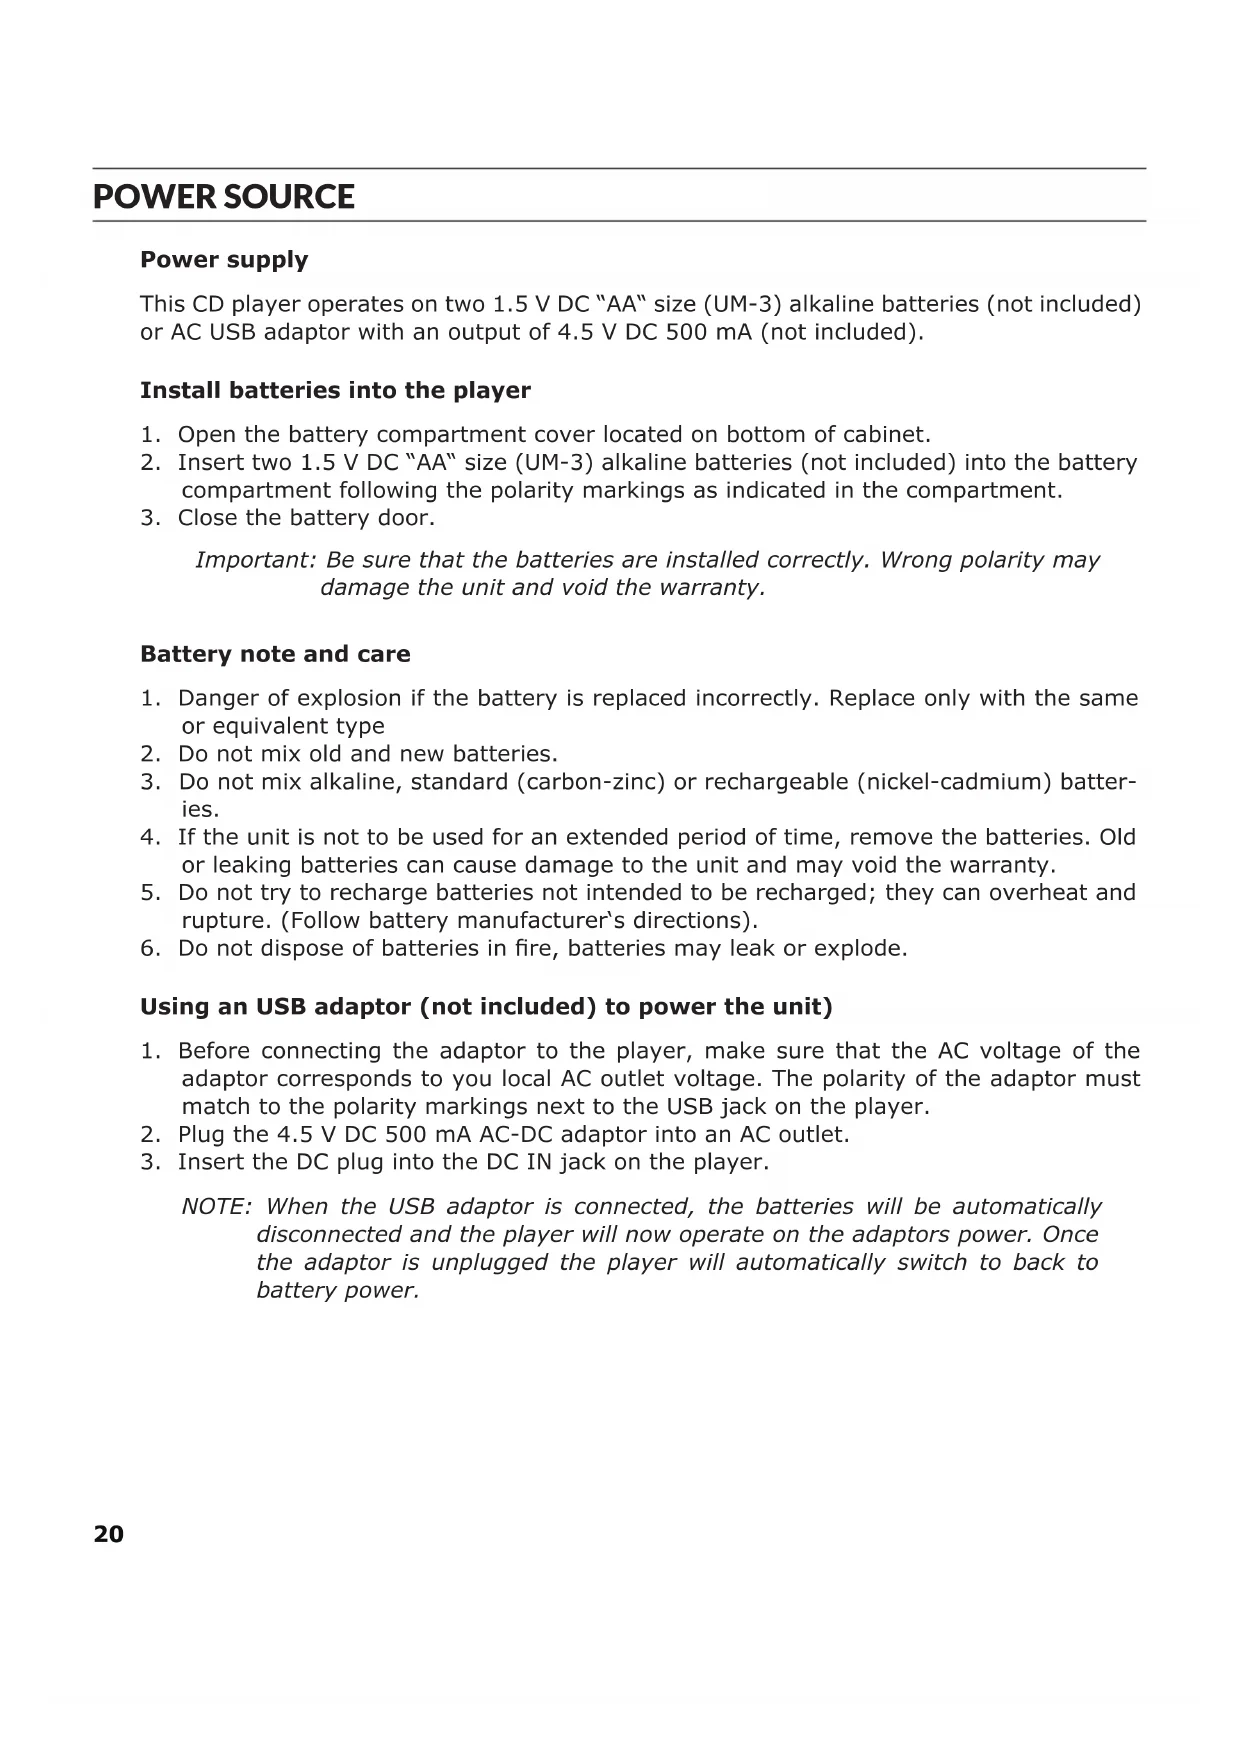
Power supply
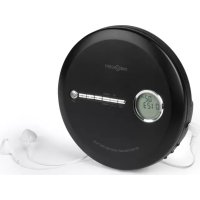
This CD player operates on two 1.5 V DC "AA" size (UM-3) alkaline batteries (not included) or AC USB adaptor with an output of 4.5 V DC 500 mA (not included).
Install batteries into the player
- Open the battery compartment cover located on bottom of cabinet.
- Insert two 1.5 V DC "AA" size (UM-3) alkaline batteries (not included) into the battery compartment following the polarity markings as indicated in the compartment.
- Close the battery door.
Important: Be sure that the batteries are installed correctly. Wrong polarity may damage the unit and void the warranty.
Battery note and care
- Danger of explosion if the battery is replaced incorrectly. Replace only with the same or equivalent type
- Do not mix old and new batteries.
- Do not mix alkaline, standard (carbon-zinc) or rechargeable (nickel-cadmium) batteries.
- If the unit is not to be used for an extended period of time, remove the batteries. Old or leaking batteries can cause damage to the unit and may void the warranty.
- Do not try to recharge batteries not intended to be recharged; they can overheat and rupture. (Follow battery manufacturer's directions).
- Do not dispose of batteries in fire, batteries may leak or explode.
Using an USB adaptor (not included) to power the unit)
- Before connecting the adaptor to the player, make sure that the AC voltage of the adaptor corresponds to you local AC outlet voltage. The polarity of the adaptor must match to the polarity markings next to the USB jack on the player.
- Plug the 4.5 V DC 500 mA AC-DC adaptor into an AC outlet.
- Insert the DC plug into the DC IN jack on the player.
NOTE: When the USB adaptor is connected, the batteries will be automatically disconnected and the player will now operate on the adaptors power. Once the adaptor is unplugged the player will automatically switch to back to battery power.
Earbuds connection
Connect the plug of the stereo earbuds (included) into the PHONES socket.
CAUTION
- Avoid excessive volume levels for long periods of time when using the headphones. Prolonged use at high levels may impair your hearing.
- Do not use ear buds while operating a motorized vehicle, as it may create a traffic hazard and is illegal in many areas.
CD operation
CD mechanisms used in devices like this are designed to fully read all commercial CDs. They will also read self-compiled MP3, WAV, CD-R/CD-RW discs but it may take up to 10 seconds for playback to start. If playback does not start, it is likely due to the quality of the CD-R/RW disc and/or the compatibility of the CD compilation software.
Manufacturer is not responsible for the playback quality of CD-R/RW discs. Do not attach a label or seal to either side of the CD-R/RW disc. It may cause a malfunction.
Turning Unit Power On and Off
- The display will show "no disc".
- To turn ON the unit, press the PLAY/PAUSE button, the LCD display will be on and then read the inserted disc. If no disc is inserted or the inserted disc has an error, to turn OFF, in CD stop mode press and hold the STOP for 3 seconds, display will go off.
NOTE: When the unit is stopped for approximately 10 seconds, the power will automatically turned off.
Play Mode
- In power off mode, press the CD door OPEN switch to open the CD door.
- Insert a CD with the label side facing upward and then close the CD door.
- Press the PLAY/PAUSE button to turn on the unit. Total number of tracks and playing time in sequence and then start to play first track automatically.
- While playing, press the PLAY/PAUSE BUTTON to pause, the elapsed time will flash. Press PLAY/PAUSE BUTTON again to resume playing
- Rotate the VOLUME Up/Down to adjust volume level.
- Press the STOP BUTTON to stop playing.
NOTE: Do not open the CD DOOR when a CD is playing.
To Enhance the Bass Sound: Set the BBS switch to the ON position.
NOTE: The bass boost performance will be increase or decrease depending on the volume level.
Key lock
Move the HOLD slider on the back to the ON position to lock the buttons. Slide it to the OFF position to unlock the buttons.
LCD information
At initial start up
- The disc will start playing and the display will show the playing time.
- The display will show the total number of tracks and total playing time. The first track number & instant.
- To review the total number of tracks and total playing time of the disc, press the STOP button once.
During PLAY mode
- The track number and the elapsed time are displayed.
During PAUSE mode
- When the track playback is paused, the elapsed time fl ashes.
Battery Low Indicator
- The Battery Low Indicator will appear in the display when the batteries need to be changed.
Play mode
Normal playback
The whole disc is played and the player will stop after the last track is fi nished.
Skip and search mode
- During Play or Pause mode, tap the ◀ or ▶ button to go to the next track or go back to the beginning of the current track.
- During play mode or Pause mode, press and hold the ◀ or ▶ button to search within the current track with audible high speed playback.
Every time the MODE button is pressed, the corresponding mode appears in the display window, in the following sequence:
REPEAT 1
When shown on the LCD display, the current track on the disc will be repeated.
REPEAT ALL
When shown on the LCD display, all tracks on the disc will be repeated. To cancel the Repeat function, press the MODE button repeatedly until the icon disappears.
RANDOM
Enables all the tracks on the disc to be played in a random sequence.
To cancel RANDOM function, press the MODE button repeatedly until the icon disappears.
A-B REPEAT PLAYBACK
- During playback, press REPEAT A-B BUTTON (#1) at the point where you want to start playing repeatedly. Repeat A- is displayed on the LCD display (#2).
- Press REPEAT A-B BUTTON (#1) at the point where you want to stop playing repeatedly. Repeat A-B is displayed on the display (#2). and the specified section (point A to point B) is played back repeatedly.
- Tap the STOP BUTTON (#5) to clear the A-B repeat playback setting and stop playback.
Programmed play
- In CD stop mode, press the PROG button once, PROG bumper appears. PROG icon and Track number "01" start flashing in the display.
- Press SEARCH/SKIP / button to select the desired track.
- When the desired track is displayed, press the PROG button to register. The PROG number changes to 02. Track number returns to 00 and flashes together with PROG.
- Repeat above steps 2 and 3 to program more tracks. Up to 20 tracks can be programmed into the memory.
- Press PLAY/PAUSE button to start the programmed play.
- To erase the program, in STOP mode simply press the STOP button.
ANTI-SHOCK PROTECTION
This player incorporates an electronic anti-skip circuit to prevent interruption of the sound output when the unit is subjected to shock, vibration or rolling during disc playback. The anti-shock system will automatically activate when a disc is playing, the ESP indicator will appear in the display and flashing.
Once anti-skip buffer is full, it will give you approximately 120 seconds of protection against interruption of sound output. If the player is subjected to shock or rolling for longer than the buffer memory, some interruption of sound output will occur. This is normal and to be expected and the sound will resume once the player has stabilized from the shock or rolling disturbance.
Note: The anti-skip function provides for continuous sound output when the unit is subjected to shock or vibration. It will not compensate for errors arising from the use of defective, scratched or dirty discs.
Pairing to a BT speaker
The CD player can act as a BT transmitter to a BT speaker. Follow the below steps to connect to a BT speaker and play music from a loaded CD. When the CD player is stopped for approximately 10 seconds, the power will be Automatically turn off, The user will need to repeat below connection steps to play in BT mode again:
- Press and hold the A-B/BT BUTTON to switch to BT Pairing Mode.
- When CD player is in BT mode, "BT" will be seen flashing on the LCD display. The pairing process could take up to 30 seconds. For best results, stay within 3 ft. of the BT speaker you are pairing to.
- When the BT connection is made, the "BT" icon on the LCD display will stop flashing and turn solid, Your BT speaker should indicate when the connection has been made as well. Begin playing music on the CD player to hear it on the connected BT speaker. If you are connected to a BT speaker with a play/pause button and do not hear audio, try pressing the PLAY/PAUSE BUTTON.
- When you are finished listening, Press the STOP BUTTON to stop the player.
- Press and hold the A-B/BT BUTTON to turn off BT transmitter mode.
CARE AND MAINTENANCE
Clean the unit with a soft, damp (never wet) cloth. Solvent or detergent should never be used.
During CD play, or if the CD fails to play at all, its bottom surface may require cleaning. Before playing, wipe the disc from the centre outwards with a lint-free soft cleaning cloth.
Attention: Never allow any water or other liquids to get inside the unit while cleaning.
TROUBLESHOOTING GUIDE
| Problem Possible Reason Solution | ||
| No sound | Battery no power Replace all batteries with new ones. | |
| Volume set at minimum Increase Volume. | ||
| CD player will not play | Unit not in CD mode Switch to CD mode | |
| CD is installed incorrectly Insert CD with label side up. | ||
| Batteries become exhausted Replace all batteries with new ones. | ||
| It the CD is self-compiled, the media used may not be compatible with the player. | Use better quality blank media and retest. | |
| CD skips while playing | Disc is dirty or scratched. Wipe CD with clean cloth or use another disc. | |
| Dirty or defective disc Clean or replace the defective disc | ||
| Dirty pick up lens Use a CD-lens cleaning disc to clean the lens | ||
| Player is subject to excessive shock or vibration | Relocate the player away from shock or vibration | |
| CD skips while playing Batteries become exhausted Replace all batteries with new ones. | ||
DISPOSAL CONSIDERATIONS
natural_image
Symbol of a trash bin with crossed lines indicating no waste, and a solid black rectangle below (no text or labels)If there is a legal regulation for the disposal of electrical and electronic devices in your country, this symbol on the product or on the packaging indicates that this product must not be disposed of with household waste. Instead, it must be taken to a collection point for the recycling of electrical and electronic equipment. By disposing of it in accordance with the rules, you are protecting the environment and the health of your fellow human beings from negative consequences. For information about the recycling and disposal of this product, please contact your local authority or your household waste disposal service.
This product contains batteries. If there is a legal regulation for the disposal of batteries in your country, the batteries must not be disposed of with household waste. Find out about local regulations for disposing of batteries. By disposing of them in accordance with the rules, you are protecting the environment and the health of your fellow human beings from negative consequences.
DECLARATION OF CONFORMITY

text_image
CE UK CAManufacturer:
Chal-Tec GmbH, Wallstrasse 16, 10179 Berlin, Germany.
Importer for Great Britain:
Berlin Brands Group UK Ltd
PO Box 1145
Oxford
OX1 9UW
United Kingdom
The complete declaration of conformity of the manufacturer can be found at the following link: https://use.berlin/Artikelnummer
Cher client,
text_image
QR code image containing encoded data, no visible human-readable textSOMMAIRE
CLASS 1 LASER PRODUCT
CLASS 1 LASER PRODUCT APPAREIL LASER DE CLASSE 1 PRODUCTO LASER DE CLASE 1
CAUTION
INVISIBLE LASER RADIATION WHEN OPEN AND INTERLOCKS DEFEATED AVOID EXPOSURE TO BEAM.
natural_image
Warning symbol with a black triangle containing a sunburst or explosion (no text or numbers)This product contains a low power laser device.
Laser de classe 1
text_image
OFF HOLD ON 16natural_image
Symbol of a trash bin crossed with a diagonal line and a horizontal bar below (no text or labels)DÉCLARATION DE CONFORMITÉ

text_image
CE UK CAFabricant :
Chal-Tec GmbH, Wallstraße 16, 10179 Berlin, Allemagne.
Berlin Brands Group UK Ltd
PO Box 1145
Oxford
OX1 9UW
United Kingdom
text_image
QR code image containing encoded data, no visible human-readable textÍNDICE
CLASS 1 LASER PRODUCT
CLASS 1 LASER PRODUCT APPAREIL LASER DE CLASSE 1 PRODUCTO LASER DE CLASE 1
CAUTION
INVISIBLE LASER RADIATION WHEN OPEN AND INTERLOCKS DEFEATED AVOID EXPOSURE TO BEAM.
natural_image
Warning symbol with a black triangle containing a sunburst or explosion (no text or numbers)This product contains a low power laser device.
Láser clase 1
text_image
OFF HOLD ON 16natural_image
Symbol of a trash bin crossed with a diagonal line and a horizontal bar below (no text or labels)Berlin Brands Group UK Ltd
PO Box 1145
Oxford
OX1 9UW
United Kingdom
text_image
QR code image containing encoded data, no visible human-readable textINDICE
CLASS 1 LASER PRODUCT
CLASS 1 LASER PRODUCT APPAREIL LASER DE CLASSE 1 PRODUCTO LASER DE CLASE 1
CAUTION
INVISIBLE LASER RADIATION WHEN OPEN AND INTERLOCKS DEFEATED AVOID EXPOSURE TO BEAM.
natural_image
Warning symbol with black triangular triangle and sunburst pattern (no text)This product contains a low power laser device.
Laser di classe 1
text_image
OFF HOLD ON 16natural_image
Symbol of a trash bin crossed with a diagonal line and a horizontal bar below (no text or labels)Berlin Brands Group UK Ltd
PO Box 1145
Oxford
OX1 9UW
United Kingdom