
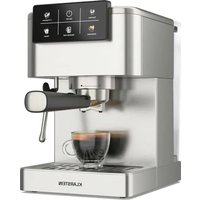
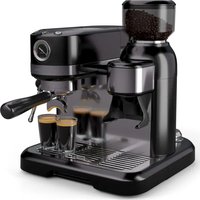
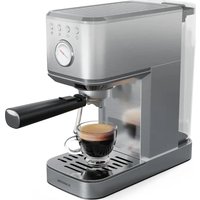
Espressionata Gusto - Coffee machine Klarstein - Free user manual and instructions
Find the device manual for free Espressionata Gusto Klarstein in PDF.
| Product type | Espresso coffee machine |
| Brand | Klarstein |
| Model | Espressionata Gusto |
| Article number | 10033209 |
| Power supply | 220-240 V ~ 50 Hz |
| Power consumption | 1100 W |
| Steam pressure | 15 bar |
| Water tank capacity | 1.25 L |
| Main functions | Espresso, cappuccino, hot drinks (steam), steam function for milk frothing |
| Auto shut-off | Yes, after 30 minutes |
| Control panel | Buttons: ON/OFF, coffee, steam; indicators: water, power, steam, temperature |
| Filter material | Removable metal filter (sieve) |
| Cleaning | Regular cleaning of frother, filter, drip tray; descaling recommended every 1-2 months |
| Safety | Auto shut-off, burn protection (hot steam), overheat protection |
| Included accessories | Filter holder, metal sieve, drip tray, drip grid |
| Intended use | Domestic, indoor |
| Dimensions (approx.) | Approx. 30 x 25 x 35 cm (estimate) |
| Weight (approx.) | Approx. 4.5 kg (estimate) |
Frequently Asked Questions - Espressionata Gusto Klarstein
User questions about Espressionata Gusto Klarstein
0 question about this device. Answer the ones you know or ask your own.
Ask a new question about this device
Download the instructions for your Coffee machine in PDF format for free! Find your manual Espressionata Gusto - Klarstein and take your electronic device back in hand. On this page are published all the documents necessary for the use of your device. Espressionata Gusto by Klarstein.
USER MANUAL Espressionata Gusto Klarstein
Congratulations on purchasing your device. Please, read the following instructions carefully and follow them to prevent possible damage. We accept no liability for damage resulting from not following the instructions and improper use. Please, scan the QR code to get access to the latest user manual and other information about the product.

DECLARATION OF CONFORMITY

Producer
Chal-Tec GmbH, Wallstraße 16, 10179 Berlin, Germany.
This product is in conformity with the following
European Directives:
2014/30/EU (EMC)
2014/35/EU (LVD)
2011/65/EU (RoHS)
TABLE OF CONTENTS
Security Instructions 30
Components of the Appliance 33
Features 33
Assembly 34
Unpacking 34
Placing the Appliance 34
Tightening the Funnel 34
Rinsing the Water Tank Before First Use 35
Operation 36
Operating the Control Panel 36
Filling the Filter 37
Refilling the Filter 37
Emptying the Filter 37
Preparing Beverages 38
Preheating the Appliance 38
Preparing Espresso 39
Preparing Cappuccino 39
Preparing Other Hot Beverages 40
Cleaning and Maintenance 41
Cleaning the Steam Outlet 41
Cleaning the Appliance 42
Decalcifying the Appliance 42
Disposal 44
Technical Data 44
Trouble Shooting 45
SECURITY INSTRUCTIONS
Follow the safety instructions here and in the text to avoid danger to yourself, your health and your property.
Read this brochure carefully.
In these safety instructions and later in the text, you will find the following highlighting:
DANGER: indicates a hazardous situation which will result in death or serious injury, if not avoided.
WARNING: indicates a hazardous situation which can result in death or serious injury, if not avoided.
CAUTION: indicates a hazardous situation which can result in minor or moderate injury, if not avoided.
ATTENTION: indicates a hazardous situation which can result in property damage, if not avoided.
NOTE: Indicates useful hints and advises.
This appliance is intended for preparing:
- coffee using high pressure ("Espresso")
- milk froth using milk and the milk frother
- hot beverages using water and the milk frother
in household indoors environments.
This appliance may be used by persons, including children aged 8 and above, with or without limited physical, sensory or mental capabilities, or lack of knowledge or experience, when you supervise them or when they have been instructed on the safe use of the appliance including the hazards associated with the use and have understood the instructions.

WARNING: The use of this appliance involves general hazards. To prevent from damage:
Do not use the appliance for any purpose other than its designated use.
Do not use this appliance if it has been damaged in any way or malfunctions. Contact a service centre authorised by the manufacturer for inspection, repair, or electrical or mechanical adjustment of the appliance.
Do not leave the appliance unattended during use, since it needs manual operation.
Children are not allowed to play with the appliance.
Do not use this appliance if it has been damaged in any way or malfunctions. Contact a service centre authorised by the manufacturer for inspection, repair, or electrical or mechanical adjustment of the appliance.
Do not modify the appliance and do not attempt to repair the defective appliance yourself.
Please, only use accessories recommended by the manufacturer of this appliance to protect the appliance from damage.

DANGER: The machine is operated electrically. To avoid damage caused by electric shock:
Do not use the appliance in humid or wet environments.
Only connect the appliance if the voltage of the wall socket matches the sppecification on the appliance.
Ensure that the water inlet of the appliance is properly connected to a functioning water supply or that the water tank of the appliance is always filled with the amount of water required for the intended application respectively to prevent damage to the appliance.
Connect the device to an easily accessible socket so that it can be quickly disconnected from the socket in case of a fault.
Do not kink the power cord and do not lead it over sharp edges.
Do not touch the cord with wet hands.
Do not pull cord out of the socket by the cable, but always grip the plug.
Do not use the cord as a carrying handle.
Do not reach for the appliance if it has fallen into water. In this case, disconnect the power plug immediately.
Do not use the appliance with a timer or a remote operating system.
When you dispose of the appliance, please, cut the power cord off to make the appliance unusable. We also recommend that you damage components of the appliance that may be dangerous when playing with it.

WARNING: Hot steam escapes from the appliance during use. Components of the appliance become hot. To prevent burns and scalding:
Allow the appliance to cool off before removing or attaching components to it, before cleaning the appliance and before moving it.
Grab hot components, such as the metal funnel or the froth maker, by their handle, grip or lever when moving them.
Never point the frother at body parts.
Do not reach under the coffee spout during operation.
Do not remove the coffee filter from the coffee outlet when the appliance is running. Hot water may spray.
Place the appliance and especially the power cord out of reach of unauthorised persons, such as little children, elders and persons with disabilities to prevent from scalding when accidentally tearing the appliance down from its surface.
Leave the appliance to cool off completely before cleaning.
Keep this brochure for future reference in a dry and clean place.
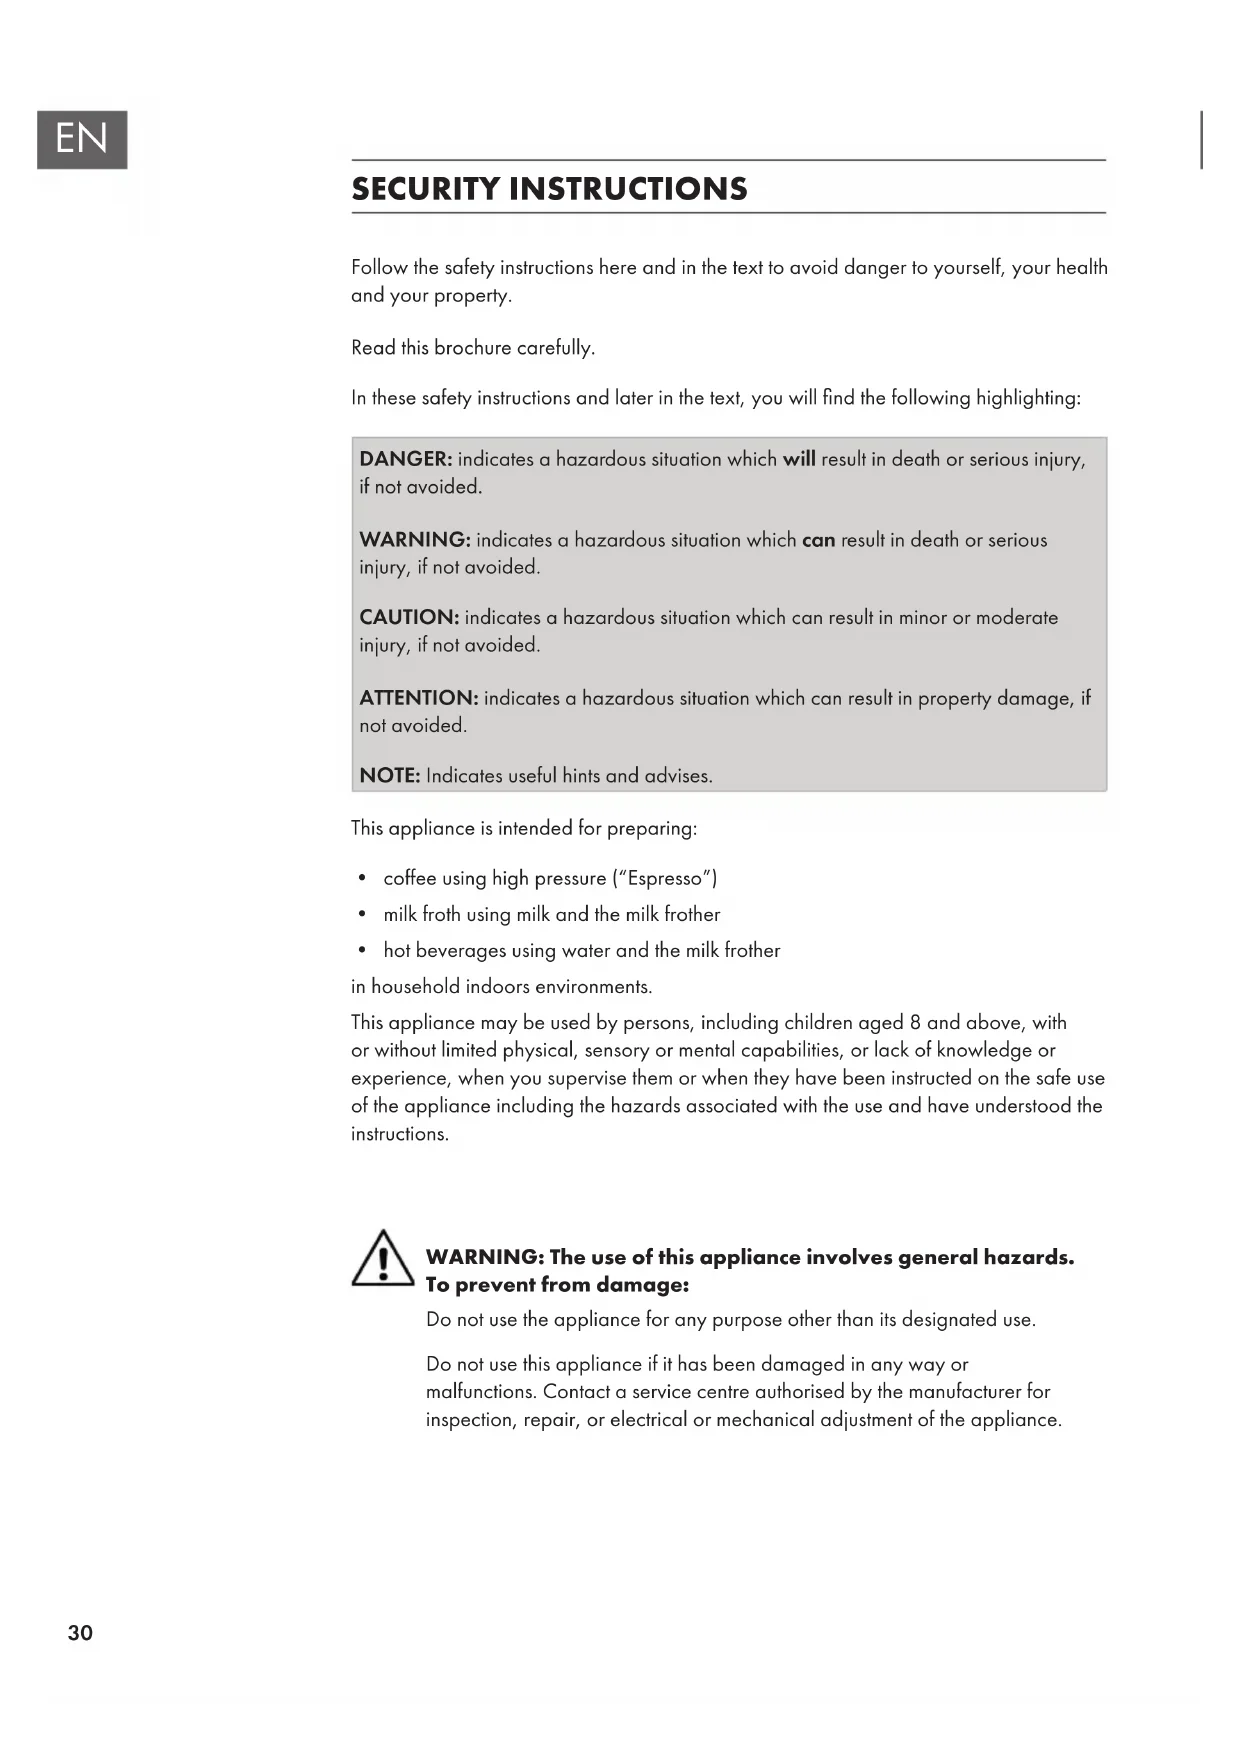
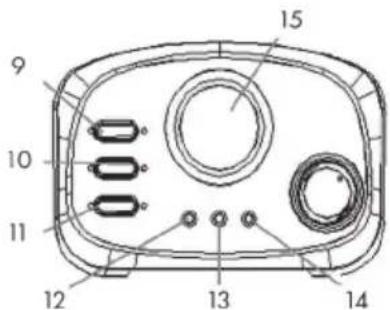
COMPONENTS OF THE APPLIANCE

1 Lid of the Water Tank
2 Water Tank
3 Control Panel
4 Steam Knob
5 Steam Tube
6 Drip Grid
7 Drip Pan
8 Flood Cover
9 Button: steam
10 Button: water
11 Button: Power
12 Indicator: WATER (green light)
13 Indicator: POWER (red light)
14 Indicator: STEAM (yellow light)
15 Indicator: TEMPERATURE
Features
Automatic Power-Off
The appliance will turn off automatically after 30 minutes of idle time.
ASSEMBLY
Unpacking
Carefully remove all packaging material before first use to avoid damaging the appliance or impairing its functionality.
Placing the Appliance
Place the appliance on a plane and clean work surface away from hot surfaces and heat sources such as heaters, stoves, ovens, open fires and surfaces in direct sunlight.
Also make sure that the power cord does not come into contact to hot surfaces and heat sources.
Do not let the power cord hang over the edge of the work surface to prevent the appliance from being accidentally torn off.
Unplug the power cord before cleaning the appliance and when not in use.
To unplug the appliance from the wall socket, turn off all switches, then unplug the power cord from the wall socket by pulling the cord by its plug.
Inserting the Filter
1 To insert the selected filter in the metal funnel, make sure to align the notch on the filter with the groove inside the funnel.
2 Turn the filter to the left or right to lock in place. This will help secure the filter in the funnel.
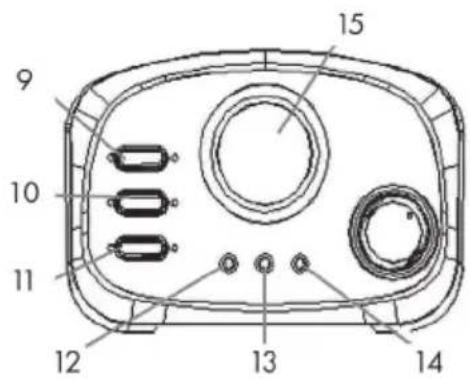
Tightening the Funnel
- Hold the metal funnel below the metal funnel holder and place it in the holder (see Figure 1).
2 NOTE: The metal funnel only fits in the funnel holder in a certain way. Do not force it to fit.
3.3 Rotate the metal funnel counter-clockwise until it is tight in the holder and the handle of the metal funnel points to you (see Figure 2 and 3).
Rinsing the Water Tank Before First Use
The appliance is supplied with a removable tank for easy cleaning.
To ensure that the first cup of Espresso will taste excellent, rinse the appliance with warm water as following:
1 Remove the water tank from the appliance.
2 Fill it with water. The water level should be between the marks MIN and MAX in the water tank.
3 Carefully insert the tank back into the appliance.
4 Place an empty vessel of appropriate size cup on the drip grid.

CAUTION: Make sure the steam knob is at the position 0 when you turn on the appliance to prevent accidental scalding.
Make sure that the funnel is inserted into the funnel holder to prevent scalding from hot liquid pouring out of the outlet.
5 Connect the power cord of the appliance to a power source.
6 Press the button to turn on the appliance. The indicator POWER will now light.
7 Press the button. The appliance will start pumping water through the outlet.
8 When the starts flowing out of the outlet, re-press the button to stop.
HINT: Note: You may hear a noise (a bubbling sound) while rinsing the appliance for the first time. This is normal, as the appliance releases air. After about 20 seconds the noise will disappear.
9 The appliance now begins to heat the water.
10 When the indicator WATER lights heating has finished.
11 Press the button and let water run for 60 seconds or until the vessel is filled.
12 Re-press the button to stop.
13 Pour the water from the vessel into the sink.
14 Repeat the steps 9-13 until the water tank is empty.
15 Clean the vessel, drip grid and drip pan thoroughly and dry them. Now the appliance is ready to prepare Espresso!
OPERATION
Operating the Control Panel
Button Team):
Press the button to prepare steam. Unpress (re-press) the button to stop.
Button water):
Press the button to let the appliance pump water from the water tank through the filter outlet, unpress to stop.
Button (power):
Press to turn on the appliance, unpress to turn off the appliance.
Indicator WATER (green light):
It lights when the water temperature is appropriate for making Espresso.
Indicator: POWER (red light):
It lights when the appliance is turned on.
Indicator: STEAM (yellow light):
It lights when the steam temperature is high enough.
Indicator: TEMPERATURE:
Indicates the current temperature.
Filling the Filter
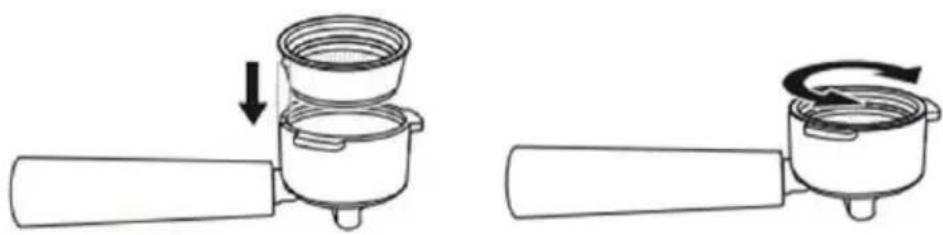
1 Remove the metal funnel by rotating it clockwise.
2 Fill grounded coffee into the steel mesh. A measuring spoon full of coffee powder makes about a cup of first-class coffee.
3 Press the coffee powder tightly into the steel mesh.
4 Place the steel mesh into the metal funnel.
5 Hold the funnel below the funnel holder.
6 Lock the funnel by turning it counter-clockwise in the holder until it is tight in the holder and the handle of the funnel points to you.
The funnel only fits in the holder in a certain way. Do not force it to fit.
Refilling the Filter
1 To fill fresh coffee into the filter hold the metal funnel by its handle and remove the funnel from the appliance.
2 Hold the funnel and remove the residual coffee grounds. Use a food safe and heat-resistant kitchen utensil for removing the residue to prevent the mesh from damage.
3 Fill fresh grounded coffee into the mesh.
Emptying the Filter
1 To fill fresh coffee into the filter hold the metal funnel by its handle and remove the funnel from the appliance.
2 Hold the funnel and remove the residual coffee grounds. Use a food safe and heat-resistant kitchen utensil for removing the residue to prevent the mesh from damage.
3 Leave the mesh and funnel to cool off completely on a heat-resistant working surface.

ATTENTION: Do not rinse the hot mesh and funnel under cold water, as this may damage the components.
4 After cooling off rinse them under hot running water and clean them with a food safe detergent and soft brush.
PREPARING BEVERAGES

CAUTION: To avoid burns do not touch or remove metal components of the appliance with your bare hands when the appliance is in use. The metal components of the appliance are hot during operation. Make sure to always grab metal components by their handle, lever or knob only. Leave metal components to cool off after use for 15 minutes before moving or cleaning.
Preheating the Appliance
To make a cup of good Espresso, we recommend preheating the metal components of the appliance and the coffee cup. That way the flavour of the Espresso will not be influenced by cold components.

CAUTION: Make sure that the funnel is inserted into the funnel holder to prevent scalding from hot liquid pouring out of the outlet.
NOTE: Do not put any coffee into the steel mesh yet.
1 Make sure that there is enough water in the water tank and refill it if necessary.
2 Make sure that the steam knob is at position 0 and the button is off to prevent accidental scalding.
3 Place a coffee cup on the drip grid.
4 Connect the power cord of the appliance to a power source.
5 Press the button to turn on the appliance. The indicator POWER will now light.
6 Press the button. The appliance will start pumping water through the outlet.
7 When water starts flowing out of the outlet, re-press the button to stop.
8 The appliance now begins to heat the water.
9 When the indicator WATER lights heating has finished.
10 Press the button and let the water run until the vessel is filled.
11 Re-press the button to stop.
12 Pour the water from the vessel into the sink.
13 Dry the vessel, drip grid and drip pan.
Now the appliance is ready to prepare Espresso!
Preparing Espresso

ATTENTION: Do not leave the appliance unattended during use, as it requires manual operation.
1 Make sure that there is enough water in the water tank and refill it if necessary.
2 Make sure that the steam knob is at position 0 and the button is off to prevent accidental scalding.
3 Press the button and wait a moment until liquid runs out of the outlet.
4. Re-press the button. The appliance begins to heat the water.
5 Place a cup on the drip grid under the outlet.
6 Wait until the indicator WATER lights to show that the water has reached the appropriate temperature for making Espresso.
7 Press the button and wait a moment until liquid runs out of the outlet.
8 When the desired amount of espresso has been dispensed, re-press the button
NOTE: When the colour of the coffee changes to a weaker shade, refill with fresh coffee powder as described.
9 Press the button to turn off the appliance. The indicators POWER and WATER turn off.
Preparing Cappuccino
You get a cup of Cappuccino by topping a cup of Espresso with a froth of milk.

CAUTION: When preparing steam, place the metal funnel in the funnel holder to prevent burns from pouring hot liquid.
1 Make sure that there is enough water in the water tank and refill it if necessary.
2.2 Make sure that the steam knob is at position 0 and the button is off to prevent accidental scalding.
3 Prepare an Espresso.
4 Fill a jug with about 100ml of milk for each Cappuccino to be prepared.
HINT: We recommend using whole milk at refrigerator temperature and not hot milk.
5 Press the button
6 Wait until the indicator STEAM lights.
7 Slowly turn on the steam knob for about 15 seconds to empty the tube from watery steam.

CAUTION: When turning the steam knob always turn it slowly to avoid scalding. The amount of steam leaving the steam outlet increases with the total you have turned the knob. Turn it gently to slowly increase the amount of steam leaving the steam outlet. Keep your hands away from the opening of the steam outlet to prevent scalding.
8 Turn the knob back to position 0.
9 Place the jug of milk below the steam tube.
10 Plunge the steam tube about 2cm (about 0.8 inches) into the milk.
11 Turn the steam knob slowly and counter-clockwise to prepare froth. Move the milk vessel up and down and around with the tube in it, as you would do when using a mixing rod, to produce the best froth.
12 When you have prepared the desired amount of milky froth, turn the steam knob back to position 0.
13 Pour the frothed milk into the Espresso.
Now you have prepared a Cappuccino! Sweeten it as desired. Sprinkle the froth with a little of cocoa powder.

WARNING: When using milk to froth, clean the steam outlet after each use as described in CLEANING to avoid it from being blocked. A blocked steam outlet may cause explosion, scalding by hot liquid and damage to the appliance.
Preparing Other Hot Beverages
The function STEAM, besides preparing froth, may be used to prepare hot beverages like drinking chocolate, water or tea, as well. Simply replace the "jug of milk" with a jug of a beverage you would like to steam-heat.
1 First, check if the water tank needs to be filled. The water in the tank should be at level between the marks MIN and MAX. Refill the tank, if necessary, as described, and place it into the appliance.
2 Make sure that the steam knob is at position 0 to prevent accidental scalding.
3 Connect the appliance to a power supply.
4 Press the button to turn on the appliance. The indicator POWER will now light.
5 Press the button. The appliance will start pumping water through the outlet.
6 When the starts flowing out of the outlet, re-press the button to stop.
7 The appliance now begins to heat the water.
8 Place the jug of your beverage below the steam tube.
9 Press the button.
10 Wait until the indicator STEAM lights.

CAUTION: When turning the steam knob always turn it slowly to avoid scalding. The amount of steam leaving the steam outlet increases with the total you have turned the knob. Turn it gently to slowly increase the amount of steam leaving the steam outlet. Keep your hands away from the opening of the steam outlet to prevent scalding.
11 Plunge the steam tube into the liquid.
12 Turn the steam knob slowly and counter-clockwise to heat the liquid.
13 When you have prepared the hot beverage, turn the steam knob back to position 0.
14 Press the button to turn off the appliance. The indicators POWER and WATER turn off.

WARNING: Clean the steam outlet after each use as described in CLEANING to avoid it from being blocked. A blocked steam outlet may cause explosion, scalding by hot liquid and damage to the appliance.
CLEANING AND MAINTENANCE
Cleaning the appliance regularly will ensure a long life and proper functioning of the appliance.

ATTENTION: Use solvent-free and alcohol-free detergents to prevent dissolving of the housing.
ATTENTION: Do not wash the metal funnel in a dishwasher.

DANGER: Do not immerse the appliance into water for cleaning to prevent damage from electrical shock.
Cleaning the Steam Outlet
Clean the steam outlet after each use or if it is blocked to ensure proper functioning of the appliance.
1 Make sure that there is enough water in the water tank and refill it if necessary.
2.2 Make sure that the steam knob is at position 0 and the button is off to prevent accidental scalding.
3 Put an empty jug under the steam tube to prevent steam from escaping.
4 Press the button
5 Wait until the indicator STEAM lights.
6 Turn the steam knob on slowly and counter-clockwise to produce steam.
7 After 30 seconds or when the jug is full, re-press the button to stop.
8 Press the button to turn off the appliance.
9 Leave the appliance to cool off completely.
10 Clean the outside of the steam outlet with a wet clean sponge.
NOTE: If the steam outlet is blocked even after cleaning and not capable of preparing steam, contact a service centre authorised by the manufacturer.
Cleaning the Appliance
1 Press the button to turn off the appliance.
2 Disconnect the appliance from the wall socket.
3 Leave the appliance to cool off completely before cleaning.
4 Detach the metal funnel by turning it clockwise.
5 Remove coffee residue inside the funnel and mesh.
6 Remove the water tank.
7 Clean the components with hot water and a food safe detergent and a non-abrasive sponge.
8 Let the components dry.
9 Clean the housing of the appliance with a damp cloth.
10 Reassemble the components to the appliance.
Decalcifying the Appliance
To ensure that your appliance works efficiently, that internal piping is clean and clear, and first-class flavour of coffee, remove the mineral deposits accumulating within the appliance every 1-2 months.
Dscaling
1 Turn off the button 品
2 Fill the water tank to maximum level with a mixture of water and a household decalcifier in the proportion that is mentioned in the instructions written on the label of the decalcify. If you use citric acid instead of a decalcifier, mix the water with citric acid in the proportion of 100:3 (water:citric acid)
3 Place the metal funnel in the metal funnel holder, no coffee powder in it, and a jug below the steam tube.
4 Make sure that the steam knob is at position 0 and the button is off to prevent accidental scalding.
5 Press the button.
6 Press the button and wait a moment until liquid runs out of the outlet.
7 Re-press the button. The appliance begins to heat the water.
8 Place an empty jug on the drip grid below the outlet.
9 Wait until the indicator WATER lights.
10 Now press the button to prepare two cups of "detergent coffee" (about 2 OZ).
11 Re-press the button to stop.
12 Deposit of the water in the vessel into the sink.
13 Wait for 5 seconds and press the button.
14 Wait for the indicator STEAM to light.
15 Turn the steam knob slowly and counter-clockwise and produce steam for about 2 minutes.
16 Turn the steam knob back to the position 0.
17 Press the button to turn off the appliance.
18 Leave the decalcifier-mixture in the appliance for at least 15 minutes.
19 Restart the appliance by pressing the button 品
Repeat the steps of 4-18 at least 3 times.
1 Make sure to turn the button STEAM off to prevent accidental scalding.
2 Press the button
3 Wait a while for water to run.
4.4 Re-press the button to stop the water from running.
5 Wait until the indicator WATER lights.
6 Press the button until no decalcifir is left.
7 Press the button to turn off the appliance.
Rinsing
1 Fill the water tank to maximum level.
2 Make sure that the steam knob is at position 0 and the button is off to prevent accidental scalding.
3 Press the button and wait a moment until liquid runs out of the outlet.
4. Re-press the button. The appliance begins to heat the water.
5 Place an empty vessel on the drip grid below the outlet.
6 Wait until the indicator WATER lights.
7 Press the button and let the water run until the tank is empty.
Repeat the steps 1-7 for 3 times to make sure the appliance is clean from the descaler.
DISPOSAL
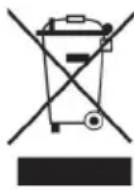
If you recognise the symbol on the left (crossed-out wheeled bin) on your product, the European Directive 2012/19/EU will apply. Do not dispose of these products with normal household waste. Find out about local regulations for separate collection of old electrical and electronic appliances and follow these regulations. The disposal of your old appliance in compliance with local regulations helps protecting the environment, your health and that of your fellow human beings from possible negative consequences. The recycling of material helps to reduce the use of raw materials.
TECHNICAL DATA
| Article number 10033209 | |
| Power supply 220-240 V ~ 50 Hz | |
| Water Tank Volume 1.25 l | |
| Power consumption 1100 Watt | |
| Steam pressure 15 bar |
TROUBLE SHOOTING
| Symptom Possible Cause Solution | ||
| Water leaks from the bottom of the appliance. | There is too much water in the drip pan. | Empty the drip pan. |
| The Espresso Maker malfunctions. | Please, contact a service centre authorised by the manufacturer. | |
| Water leaks out of the filter. | There is coffee powder on filter edge. | Remove the excess coffee from the filter |
| The Espresso has got an acidic (vinegar-like) taste. | Uncorrect cleaning of mineral deposits. | Clean the Espresso Maker as described in Cleaning and Maintenance. |
| The coffee powder has been stored in a hot, wet place for a long time. The coffee powder has turned bad. | Use fresh coffee powder. After opening a package of coffee powder, reseal it tightly. Store coffee powder in a cool, dry place, such as a refrigerator. | |
| The Espresso Maker oes not work. | The power supply is not connected to the wall socket. | Plug the power cord into a wall outlet. If the appliance still does not work, contact a service centre authorised by the manufacturer. |
| The steam does not froth. | The water for preparing steam is not hot yet. | Wait until the STEAM indicator lights to show that the water is hot. |
| The vessel is too big. The shape of the vessel is inappropriate. | Use a high and narrow cup. | |
| You have used skimmed milk Use whole milk or half-skimmed milk | ||
Chere cliente, cher client,
- DECLARATION OF CONFORMITY
- Producer
- This product is in conformity with the following
- TABLE OF CONTENTS
- SECURITY INSTRUCTIONS
- WARNING: The use of this appliance involves general hazards. To prevent from damage:
- DANGER: The machine is operated electrically. To avoid damage caused by electric shock:
- WARNING: Hot steam escapes from the appliance during use. Components of the appliance become hot. To prevent burns and scalding:
- COMPONENTS OF THE APPLIANCE
- Features
- Automatic Power-Off
- ASSEMBLY
- Unpacking
- Placing the Appliance
- Inserting the Filter
- Tightening the Funnel
- Rinsing the Water Tank Before First Use
- OPERATION
- Operating the Control Panel
- Filling the Filter
- Refilling the Filter
- Emptying the Filter
- PREPARING BEVERAGES
- Preheating the Appliance
- Preparing Espresso
- Preparing Cappuccino
- Preparing Other Hot Beverages
- CLEANING AND MAINTENANCE
- Cleaning the Steam Outlet
- Cleaning the Appliance
- Decalcifying the Appliance
- Dscaling
- Rinsing
- DISPOSAL
- TECHNICAL DATA
- TROUBLE SHOOTING
- Chere cliente, cher client,
Brand : Klarstein
Model : Espressionata Gusto
Category : Coffee machine