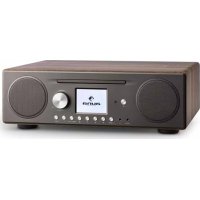
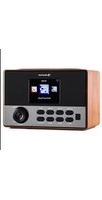
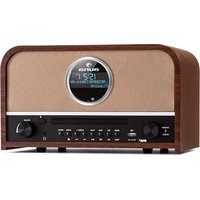
USER MANUAL Connect CD Auna
https://www.spotify.com/connect/third-party-licenses
DLNA-STREAMING (DMR)
Unit 6 Riverside Business Centre
Brighton Road
Shoreham-by-Sea
BN436RE
United Kingdom
Congratulations on purchasing this device. Please read the following instructions carefully and follow them to prevent possible damages. We assume no liability for damage caused by disregard of the instructions and improper use. Scan the QR code to get access to the latest user manual and more product information.

CONTENT
Technical Data 34
Safety Instructions 36
Overview and Functions 38
Getting Started 40
General Operation 42
System Settings 44
Internet Radio 48
Spotify Connect 50
Media Player 51
DLNA Streaming (DMR) 53
DAB Radio 54
FM Radio 55
Establish BT connection 56
Playing a CD 56
AUX Input 58
Alarm & Sleep timer 58
Other Features 59
Troubleshooting 60
Hints on Disposal 62
Declaration of Conformity 62
TECHNICAL DATA
Device
| Item number 10030588, 10030589, 1003 | 1944 |
| Display TFT 2.8", 320x240 px | |
| Data transmission | WLAN (IEEE 802.11b/g/n wireless)
BT |
| Encryption profiles WEP, WPA, WPA2 | (PSK), WPS |
| Streaming UPnP, DLNA | |
| Playable formats (Streaming/USB) | MP3 (up to 320kbps), WMA (up to 384 kbps), WAV (up to 1536 mbit/s), AAC/AAC+ (up to 96 kHz, 24bit) |
| CD player Supports CD-ROM, CD-R, CVD-RW | |
| Playable formats (CD) | CD-DA, MP3, WMA (bis 48 kHz, 384 kbps) |
| DAB/DAB+ Band III (174.928 - 239.200 MHz) | |
| FM 87.5 - 108.0 MHz (+ RDS) | |
| Power supply | AC/DC adapter 16V DC, 2250mA
(for mains 100-240V AC, 50/60Hz) |
| Power supply remote control 2 x AAA (1,5 V) Batterie | |
| Power consumption | Standby < 1 W |
| Network power standby < 2 W |
| Output power 2 x 15 W RMS | |
| Connections | Headphones out (3,5mm), USB
(playback only), AUX in (3.5mm), DC in |
| Dimensions / Weight | 350 x 105 x 250 mm (B x H x T) / 3,7 kg |
| Scope of delivery | Device, AC/DC adapter, remote control, user manual |
Power adapter
| Input voltage AC 100 – 240 V | |
| Input AC frequency 50/60 Hz | |
| Output voltage DC 16.0 V | |
| Output current 2.25 A | |
| Output power 36.0 W | |
| Average active efficiency | 88.9 % @ 115 V AC / 60 Hz |
| 89.32 % @ 230 V AC / 50 Hz |
| Efficiency at low load (10%) | 88.94 % @ 115 V AC / 60 Hz |
| 88.36 % @ 230 V AC / 50 Hz |
| No-load power consumption | 0.039 W @ 115 V AC / 60 Hz |
| 0.07 W @ 230 V AC/ 50 Hz |
SAFETY INSTRUCTIONS
- Lightning - If you are not going to use the device for a long time or if there is a storm, disconnect the plug from the electrical outlet and disconnect the device from the antenna connector. This will avoid damage to the product that may be caused by lightning or overvoltage.
- Overload - Do not overload power outlets, extension cords, or built-in power outlets, as this may result in a fire or electric shock.
- Foreign objects and liquid - Never push objects of any kind through openings in the device as they may touch dangerous voltage points or short out parts, which could result in a fire or electric shock. Never spill liquids of any kind on the device.
- Repairs and maintenance - Do not attempt to service this product yourself, as opening or removing covers will expose you to dangerous voltages or other hazards. Leave all maintenance to qualified service personnel.
- Damage requiring service - Disconnect the power plug from the outlet and consult a qualified specialist if any of the following conditions occur:
a) If the power cord or plug is damaged.
b) If liquid has been spilled or objects have fallen onto the product.
c) If the product has been exposed to rain or water.
d) If the product has been dropped or damaged.
e) If the product has a markedly reduced performance.
- Replacement parts - When replacement parts are required, make sure that the service professional who replaces the parts only uses replacement parts that have been approved by the manufacturer or that have the same characteristics as the original part. Unauthorized replacement may result in fire, electric shock or other hazards.
- Heat - Do not place the unit near heat sources such as radiators, heaters, stoves or other products (including amplifiers).
Special Instructions
- This device may be only used by children 8 years old or older and persons with limited physical, sensory and mental capabilities and / or lack of experience and knowledge, provided that they have been instructed in use of the device by a responsible person who understands the associated risks.
- Children should be supervised to ensure that they do not play with the appliance.
- Ensure children and babies do not play with plastic bags or any packaging materials.
- Mains plug/Power adaptor is used as disconnect device and it should remain readily operable during intended use.
- In order to disconnect the apparatus from the mains completely, the main plug/power adaptor should be disconnected from the mains socket outlet completely.
OVERVIEW AND FUNCTIONS

| On/Standby Press to toggle between On and Standby. |
| ▲ | Eject Open/close the CD tray. |
| Home button Press to enter the Horne menu. |
| MENU
INFO | Selection menu
Info button | Press and hold to open the menu.
Press briefly to display information. |
| FOLDER
UP | Folder up To the higher-level directory. |
| FOLDER
DOWN | Folder down To the subordinate directory. |
| Previous title | Press briefly: to the previous track.
Long press: fast rewind. |
| Play/Pause Press to play or pause. |
| Stop Stop and return to the playlist. |
| Next title | Press briefly: to the next title.
Long press: fast forward. |
| EQ | Equalizer Direct change to the equalizer. |
| Volume level+ Increase | the playback volume. |
| Up button/
Frequency+ | In menu: up.
DAB: station list.
FM: frequency +0.05 MHz. |
| Left button In menu: left (back). |
| OK
SCAN | Select
Search | Confirm selection.
FM search to the next station. |
| Right button Move right in the menu. |
| Down button/
Frequency- | In menu: downwards.
DAB: station list.
FM: frequency -0.05 MHz. |
| Mute Mute playback/unn mute. |
| Volume- Decrease the playback volume. |
| 1-10 | Retrieve favorites | Press and hold to save favourites.
Press briefly to call up Favourites. |
| ★ | Favorites | Press briefly: Open favorites list.
Press and hold: Save Favourites. |
| SHUFFLE
REPEAT | Long press
Short press | Random playback on/off.
Repeat on/off. |

GETTING STARTED
Remote control: Insert the batteries:
- Gently press down the battery compartment cover as shown in the illustration.
- Slide the cover out to open the compartment.
- Insert two AAA batteries into the compartment. Pay attention to the polarity markings (+ and -) in the compartment and on the battery. Slide the compartment back in until it clicks into place.
Note: Remove the safety strip to use the battery.
Safety Instructions for the Battery:
- CAUTION: Batteries may explode if replaced improperly. Replace them only with those of the same type.
- Use only batteries of the same type and size.
- Be sure to insert the battery the right way round. Inserting a battery the wrong way around can damage the unit.
- Remove the batteries if you do not intend to use the device for a long time. Otherwise, the battery may leak.
- Do not attempt to recharge the battery. It is not designed for this purpose and may overheat, explode or leak.
- Never expose the battery to excessive heat, direct sunlight or fire.
Device: Power Connection
The mains adapter can be operated with alternating current of 100 240 V. However, use a suitable plug adapter if the plug does not fit into the mains socket. Plug the power cable into the power socket on the back of the device. Insert the plug into the power outlet.
Network
- Check whether the indicator lights of your router signal an existing Internet connection.
- Follow the instructions in the section "Commissioning". It is recommended that you go through the setup wizard.
Note: Walls or other obstacles may interfere with W-LAN reception. Try to find a location with the best possible reception.
From a computer on the network, you can play files in MP3, WAV, WMA, AAC, and FLAC formats. To do this, the computer must be set to share files and media.
UPnP media sharing allows devices such as this Internet radio to play music from shared media libraries, and to browse the library for information such as artist, album, or genre.
To play music from your PC, you must complete the following steps.
- Connect your PC to the network.
- Make sure that Internet radio is turned on and connected to the same network.
- Open the UPnP platform Windows Media Player (11 or new). Alternatively, other programs such as Windows Media Connection can be used.
- Add the desired audio files and folders to the Media Library.
- Turn on media sharing.
- Allow media to be transferred to the „Wireless LAN Internet Radio" in the settings.
- The PC is now ready to stream music to the Internet radio.
Note: iTunes does not currently function as an UPnP media server. However, there are add-ons that allow you to use iTunes.
GENERAL OPERATION
Switching on/off
If the appliance is connected to the AC adapter and this is connected to a working household outlet and the power switch on the rear panel is set to I, you can switch on the appliance with On the front panel or remote control. Press and hold turn off.

Initial Power On / Setup Wizard
The first time the unit is switched on, the system asks you whether you want to start the SETUP WIZARD. Select YES to start the SETUP WIZARD or NO to continue without the settings. The SETUP WIZARD can also be called up at any later time.
Navigating through menus and lists
All menus and options (here: select and confirm YES / NO, main menu) are selected by turning the multifunction knob OK/NAVIGATE. Confirm the (highlighted) selection by pressing OK/NAVIGATE.
Press BACK (or the left arrow key) to go to the previous/previous menu. The control via the arrow keys and OK on the remote control works in the same way.
You can also select the main functions (USB/FM/DAB/AUX/SPOTIFY/BT ...) by pressing the MODE button several times to jump directly to them.
Adjust volume
Turn NAVIGATE/OK/VOLUME to adjust the volume (if no lists or menus are open at that time). Alternatively, use the VOL+/- buttons on the remote control.
Main Menu
Press turn on the unit and enter the main menu. In the main menu you can access all operating modes and settings. Select the desired function and confirm by pressing OK (NAVIGATION/OK) or ENTER on the remote control.

SYSTEM SETTINGS
Setup wizard
The wizard helps you to set up time/date and network settings. When you have completed it, the machine is ready for use.
- Time display format: Choose between a 12-hour display and a 24-hour display.
- Time/Date/Auto-Update: The time can be set manually or obtained automatically via DAB, FM or network. Auto Update works with data transmitted via DAB, FM or the Internet. The clock is updated only when the corresponding mode is used. Therefore, it is recommended to select a mode that you use regularly.
- Select the function to retrieve the time and date.
- Select the time zone if the data is to be retrieved via the Internet.
- If your region uses time changeovers and this is active, you can also set this here.
Manual setting:
If you choose not to set it automatically, you can enter the time and date manually here. This is displayed in the following format: dd-mm-yyyy and hh:mm. The selected value is displayed flashing. Adjust each value using the navigation wheel or the < / > buttons on the remote control. Once a value is entered, press OK to proceed to the next value.
Network:
This unit is compatible with all major network protocols and network encryption, including WPS. If an unprotected network is available, it will automatically connect to it and no further settings are necessary.
Network region:
Select the region of your location from the list.
Standard encrypted network:
Use the navigation wheel or the direction keys on the remote control to move the cursor and enter the password. Press OK to confirm. The password is displayed at the top as you enter it.
WPS encrypted networks:
WPS encrypted networks are marked as such in the list. Use one of the following methods to connect.
- Enter WPS key: Enter the WPS key as explained in the previous section.
- Press WPS key: You are prompted to press the Connect (WPS) key on the router. It will search for a network ready to connect and establish the connection.
- Enter the PIN: The device generates an 8-digit code that must be entered into the router or access point.
Complete the setting:
The device will attempt to connect to the network. If the connection fails, return to the previous screen. Then try again.
Equalizer
Various equalizer modes are available: Normal, Flat, Jazz, Rock, Movie, Classic, Pop and News. Custom EQ is also available, allowing you to adjust bass and treble yourself.
Network
Network Wizard:
Search for your SSID and connect by entering the WEP/WPA password or select one of the other connection types and authentication methods (Push/ Pin/Skip) to connect to your wireless LAN.
PBC:
Select PBC to go directly to the push button configuration.
View settings (View/Settings):
View information on the currently connected network: Active Connection, MAC Address, W-LAN Region, DHCP, SSID, IP Address, Subnet Mask, Gateway Address, Primary and Secondary DNS.
W-LAN region:
Select the appropriate region to obtain the best possible connection.
Manual setting:
Choose between wireless or wired network and enable/disable DHCP (Dynamic Host Configuration Protocol)
Network profile:
The device remembers the last 4 wireless networks it was connected to and automatically tries to connect to one of them if one of them is found. Here you can view the list of saved networks. You can remove unwanted networks by selecting them, pressing Select and confirming the deletion.
Maintain network connection:
Activate this option to keep the Connect connected to the W-LAN even in standby mode. This allows the Connect to be ready for DLNA streaming even in standby mode.
Time / Date
Setting of time, date, display format, auto update function, time zone and summer/winter time.
Language
The factory default menu language is English. Choose from a variety of functions in this submenu. Use the NAVIGATION/OK dial to select and press to confirm.
Factory Settings
Here you can reset all settings to the default values. Please note that this will cause all entries to be lost. However, the software version is retained, as is the registration on the Internet Radio Portal. Unless you log in with another user account, your radio favorites will also be retained.
Software update
Firmware upgrades are offered at irregular intervals. You can check for them yourself or set the device to automatically check for updates and install them as soon as one is available. When new software is found and downloaded, a message will appear and you must confirm it by clicking OK to install it. The settings you have previously made and saved channels etc. will be retained after an update.
Note: Make sure that the network connection is stable before downloading. If the power supply is interrupted during download or software installation, this may cause malfunctions.
About
Displays the firmware version and the Radio ID.
Display illumination
Set the display illumination to HIGH, MEDIUM or LOW. You can also set the duration after which the device should automatically switch off if it is inactive (Off >2 hours >4 hours >5 hours >6 hours) Select NAVIGATE with and press to confirm.
INTERNET RADIO
Internet radio can receive many thousands of radio stations and podcasts via a broadband Internet connection. When you select "Internet Radio", the unit will contact the Frontier Silicon Internet Portal for a list of available stations.
Since this station list is provided by the station portal, it is only available when an Internet connection is available. Menus and submenus may change from time to time.
Press PLAY/PAUSE to listen to the currently selected station.
Last Heard
When the Internet Radio mode is started, the last station is selected. To select another recently listened station, go to this menu item and select the station.
Station list
Browse the channel list by different categories such as genre, location, popular and new. You can also search for a station by keyword.
Playback Information
While a station is playing, its name and description are displayed. Press INFO repeatedly to display additional information such as genre, location, play buffer.
Favorites
- Favorites are stored in the radio portal and are available on all Internet radios that are logged in with the same user account. Before Favorites can be used, you must log on to the Internet portal with the device.
To register your device, go to the station list > Help > Get access code. You will need this code when you log in.
Go to the website www.wifiradio-frontier.com. Register for a new user account if this is your first visit to the site with the following information
- Access code
- your email address
- Password
- Radio model or Radio ID
Note: The Radio ID is a combination of numbers and letters that are permanently assigned to this device. You can find this information under System Settings > Info.
Press and hold OK/ENTER to add a station to Favorites. The display confirms your selection. The station will now appear in the default Favorites list.
My Stations
You can add your own channels in addition to those already listed. You can do this via the Internet portal. You will then find these stations under „My added Stations".
Station presets
These station memories are stored in the radio and are not available on other radios.
Press and hold P to add a station to the preset. After a short time, the display shows the Save to Preset screen. Select one of the 10 available presets.
Press P to access the preset stations. When a preset station is playing, the display will show P1-P10 is displayed. You can also access these 10 preset stations using the number buttons on the remote control.
Note: The operation of the preset stations is the same for Internet Radio, DAB and FM.
SPOTIFYCONNECT
Your new device has Spotify Connect built in
Use your phone, tablet or computer as a remote control for Spotify. Go to Spotify.com/connect to learn how.
Licenses
The Spotify Software is subject to third party licenses found here:
https://www.spotify.com/connect/third-party-licenses
All listed brands are trademarks of their companies. Errors and omissions excepted, and subject to technical change. Our general terms of delivery and payment are applied.
From a computer on the network, you can play files in MP3, WAV, WMA, AAC, and FLAC formats. To do this, the computer must be set to share files and media.
UPnP media sharing allows devices such as this Internet radio to play music from shared media libraries, and to browse the library for information such as artist, album, or genre. To play music from your PC, you must complete the following steps.
- Connect your PC to the network.
- Make sure that Internet radio is turned on and connected to the same network.
- Open the UPnP platform Windows Media Player (11 or new). Alternatively, other programs such as Windows Media Connection can be used.
- Add the desired audio files and folders to the Media Library.
- Turn on media sharing.
- Allow media to be transferred to the „Wireless LAN Internet Radio" in the settings.
- The PC is now ready to stream music to the Internet radio.
Note: iTunes does not currently function as an UPnP media server. However, there are add-ons that allow you to use iTunes.
Use the MODE button to go to the media player or alternatively select the music player from the main menu. If you're playing a file, you can press BACK to go back to the previous section of the menu tree.
Press /to play back the previous or next track. Press to start or pause playback.
During playback, the display shows title and artist. There is also a timeline that shows played and total playback time. At the bottom of the screen, the source is displayed. Press INFO repeatedly for more information.
If you have set up media sharing, you should see an entry consisting of the computer name and the name of the media. If you have more than one computer that shares media, the alternatives are listed. Select the media you want to play.
From this point on, the lists are created by the shared media server. The first menu displays a list of media types. For example, music, video, pictures, and playlists. Internet radio can only play music and playlists.
There is also a search function that finds titles in a similar way to Internet radio, using categories such as genre, artist or album.
Press OK/NAVIGATE once you have found a track to play it.
Inactive servers: From time to time it may be necessary to remove servers from the list that are marked with a question mark. Go to the section „Prune Servers".
USB
From this point on, the menus are created from the folders on the USB memory. Browse the folders using the navigation wheel and the return key, or the direction keys on the remote control. The display shows the folder names and file names, but not necessarily the title names.
Repeat / Random Playback
You can set the unit to play tracks repeatedly or in random order. Press on the remote control.
Now Playing
Available information on the current track/album is shown on the display. Press MENU/INFO repeatedly during playback to display additional (ID3) information.
DLNA STREAMING (DMR)
You can stream media content from your computer via DLNA over the CONNECT CD. Follow the steps described below to prepare your computer for DLNA streaming.
Note: You need a computer with Windows 7 (or higher) and Windows Media Player 12 (or higher).
1 First release the desired content in the network: System settings -> Network and Internet -> Network and Sharing Center -> Media Streaming.
2 Open the Windows Media Player and activate the remote operation of the player.
3 Right-click on any track and select Play with CONNECT CD.
4 A new window will open in which you can control the music playback.
Control via Smartphone / Tablet
Install a DLNA app from Google Play or from the Apple Store BubbleUPnP for Android or iOS is recommended.
In the App, select CONNECT CD as the playback device. Then select the music server (usually your computer) and choose the music you want to play.
Please consult the app's info or help file for more detailed instructions.
DAB RADIO
You can receive digital DAB/DAB+ radio via DAB mode. Information about the sender and music is displayed.
Search for stations
When you select DAB mode for the first time, the station list is empty. The Internet radio performs a full search for available stations. However, for one of the following reasons, you will need to start a manual search yourself.
- The available stations change from time to time.
If reception was not good enough the first time you searched, the list of available stations may be incomplete.
- If you have stations with poor reception in the list and you only want stations with good reception in the list.
To start the search manually, select Full Scan. To add only stations with good reception, select local scan.
Once the search is complete, a list of available stations will be displayed. Turn the navigation wheel and press it to select a station. Once the station is selected, the display will show information about the station, track or broadcast.
Station Presets
Press and hold Preset to add a station to the memory. After a short time, the display will show you the memory screen. Select one of the 10 available presets.
While a station is playing, the display shows its name and DLS information (Dynamic Label Segment). This gives you real-time information such as the name of the programme or the name of the title. Stereo broadcasts are marked at the top of the screen. Press Info repeatedly for more information.
Settings
Dynamic Range Compression: If you listen to music with a wide dynamic range in a noisy environment, it may be useful to compress this range. This makes soft sounds louder and loud sounds quieter. The compression options are Off, Low or High.
Station order: Here you can set the order of the DAB stations.
FM RADIO
The FM radio mode receives analogue radio signals and the display shows RDS (Radio Data System) information about the station.
Press OK to find a station. The frequency display appears when the unit searches the FM frequency band. Alternatively, you can search the frequencies by pressing and holding < or > , or you can change quickly from station to station by pressing the buttons briefly or turning the navigation dial.
Station Presets
- Press and hold Preset to add a station to the memory. After a short time, the display will show you the memory screen. Select one of the 10 available presets.
- Press Preset to access the preset stations. When a preset station is playing, the display will show P1-P10. Use the P1-P10 buttons on the remote control to access the preset stations.
While a station is playing, the display shows its frequency and - if available - RDS information, such as the name of the programme or the name of the title. If no RDS information is available, the display shows only the frequency. Stereo transmissions are marked at the top of the screen. Press Info repeatedly for more information.
Settings
Search settings: By default, the search registers every station found. This can result in many stations being stored that do not have a good signal. You can activate the option to register strong stations only here.
Audio settings: All stations are transmitted in stereo. This can lead to a bad sound with weak signals. You can activate the option to play weak stations in mono here (weak reception/listen to mono).
ESTABLISH BT CONNECTION
- Select BT mode from the main menu to play audio content from external devices (smartphone, tablet or computer) via BT over Internet radio.
- Enable BT on your external BT device and connect to the device. Use the Play/Pause, Arrow and Stop buttons on the remote or your external device to navigate your media library.
- Disconnect from your smart phone/tablet to pair another device.
PLAYING A CD
Insert a disc into the CD tray with the printed side facing up. The disc is loaded automatically. The unit checks the CD type and loads the track list. The display shows "Load" and then "Read" while the information is being read.
Press to play the previous or next track. Press to start or pause playback. For MP3 CDs, use the FOLDER UP/DOWN buttons to change the folder.
During playback, the display shows the title and artist. There is also a timeline that shows played and total playing time. At the bottom of the screen the source is displayed. Press INFO repeatedly for more information.
Repeat / Random Play
You can set the unit to play tracks repeatedly or in random order. Press on the remote control.
Programming CD tracks
- Stop a running song and press P to program tracks.
- Use the / buttons to select a title. Press the controller or OK (SCAN) to confirm the song and select the next song.
- Repeat the steps. When you have entered all the titles, press P again.
- Press to start playing the tracks.
The Connect CD can play back audio CD-R / CD-RW discs in CD-DA format that have been finalized after recording is complete (see Note). Some CD-R / CD-RW discs cannot be played back due to poor recording and large differences in quality on the CD-R / CD-RW.
Note: Finalizing enables playback of a CD-R / CD-RW disc on audio players. A disc that has not been finalized can be supplied with information from a computer but may not always be playable.
In AUX mode, you can play music from an external source such as an MP3 player over Internet radio. To do this, follow the steps below.
- Turn down the volume on the Internet radio and external device.
- Connect the external audio source to the AUX input.
- Press either Mode until the display shows AUX IN or select AUX from the main menu.
- Adjust the volume of the Internet radio and external device if necessary.
ALARM & SLEEP TIMER
There are 2 wake-up calls with snooze function. Each alarm can be set in different ways. Select Alarm (Alarm) in the main menu to set an alarm.
Select Alarm 1 or 2 and configure it according to the following properties:
Active: Off, Daily, One time, Weekdays, Weekends
Time
Mode: Buzzer, Internet radio, DAB, FM
- Preset: Last heard 110
Volume:0-32
Scroll down and select save to activate the new settings. The screen indicates active alarms with an icon in the lower left corner. You can press SNOOZE to temporarily suspend the alarm call. The unit returns to standby mode and displays the snooze icon on the screen. You can change the snooze duration while the alarm is active by pressing SNOOZE several times.
Sleep function
To activate the sleep timer, you can select Sleep in the main menu or press SLEEP repeatedly. The following options are available: Off, 15, 30, 45 and 60 minutes.
Once you have activated a time for the timer, the system returns to the main menu.
OTHER FEATURES
Headphone output
The unit has a rear headphone output, so you can enjoy the music even in noisy environments, or in those that require quiet. Once you connect the headphones, the speakers will be muted.
Note: It is recommended that you first turn down the volume and then turn it up after connecting the headphones.
TROUBLESHOOTING
| Problem Possible cause and solution approach |
| The device cannot be switched on | Check the power connection, the mains adapter and the functioning of the socket (for example by connecting a lamp. Is the power switch on the rear panel set to „I“? |
| No sound · Have you activated the mute function (MUTE)?
· Is VOLUME turned down completely?
· Are headphones connected? |
| The network connection cannot be (re-)established | Check the WLAN function.
Try to enter your IP address using the manual setting screen.
Activate the DHCP of your router.
Does a firewall possibly block the access of the CONNECT CD? If so, set it up to allow access.
Restart the router.
Check the WLAN access of your router.
Place the CONNECT CD closer to the router.
Make sure that the WLAN password has been entered correctly. |
| No stations are found. · Check the network, router and firewall.
· Does the transmitter have a 24-hour program? You may simply have to try again at a later time.
· Perhaps the transmitter link is invalid (has become invalid) or has been entered incorrectly. Check the transmitter's website for information. |
| Problem Possible cause and | solution approach |
| FM radio rustles. • Check the | antenna and frequency.
Change the location of the radio if necessary. |
| FM radio rustles. • Reposition | the radio.
• Perform a new station scan using the „high strength stations only“ option.
• Check the local DAB coverage. |
| Alarm clock doesn't work. • | Did you activate the alarm?
• Set the volume and alarm volume to a medium level.
• The alarm source may have been set to Internet radio, but there is no Internet connection? Switch to FM or DAB if necessary. |
| USB media/MP3 player is not recognized. | • Make sure the unit is connected correctly.
• Some USB storage devices rely on external power. Make sure that it is available. |

If there is a legal regulation for the disposal of electrical and electronic devices in your country, this symbol on the product or on the packaging indicates that this product must not be disposed of with household waste. Instead, it must be taken to a collection point for the recycling of electrical and electronic equipment. By disposing of it in accordance with the rules, you are protecting the environment and the health of your fellow human beings from negative consequences. For information about the recycling and disposal of this product, please contact your local authority or your household waste disposal service.
This product contains batteries. If there is a legal regulation for the disposal of batteries in your country, the batteries must not be disposed of with household waste. Find out about local regulations for disposing of batteries. By disposing of them in accordance with the rules, you are protecting the environment and the health of your fellow human beings from negative consequences.

Manufacturer:
Chal-Tec GmbH, Wallstrasse 16, 10179 Berlin, Germany.
Importer for Great Britain:
Chal-Tec UK limited
Unit 6 Riverside Business Centre
Brighton Road
Shoreham-by-Sea
BN43 6RE
United Kingdom
The complete declaration of conformity of the manufacturer can be found at the following link: use.berlin/10031944
Estimado cliente:
Examiner ajustes(View/Setting):
https://www.spotify.com/connect/third-party-licenses
Unit 6 Riverside Business Centre
Brighton Road
Shoreham-by-Sea
BN43 6RE
United Kingdom
https://www.spotify.com/connect/third-party-licenses
STREAMING DLNA (DMR)
ALARME & ARRÉT PROGRAMMABLE
Unit 6 Riverside Business Centre
Brighton Road
Shoreham-by-Sea
BN43 6RE
United Kingdom
Selection are PBC per acceder e a Push-Button-Configuration.
https://www.spotify.com/connect/third-party-licenses
STREAMING DLNA (DMR)
Unit 6 Riverside Business Centre
Brighton Road
Shoreham-by-Sea
BN436RE
United Kingdom