PDX 1409 S2 - DVD player Trevi - Free user manual and instructions
Find the device manual for free PDX 1409 S2 Trevi in PDF.
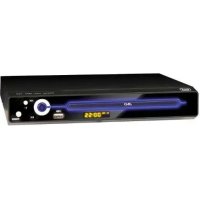
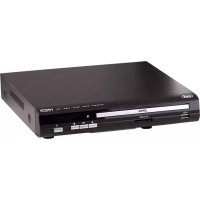
| Product type | Portable DVD player with TFT LCD 9" (16:9) |
| Brand | Trevi |
| Model | PDX 1409 S2 |
| Supported video formats | MPEG4, DVD, VCD, SVCD |
| Supported audio formats | DVD, Audio CD, CDr, CDrw, MP3 |
| Video system | NTSC/PAL |
| Video output | 1 Vpp (75 ohms) |
| Audio output | 1.4 Vrms / 10 kOhms |
| Screen | 9-inch TFT LCD (16:9) |
| Power source | AC adapter 100-240 V~ 50/60 Hz, output 12 V --- 1 A |
| Rechargeable battery | Lithium 7.4 V, 1500 mAh |
| Battery life | Approximately 3 hours in DVD mode |
| Charging time | Approximately 4 hours |
| Power consumption | Less than 10 W |
| Connectivity | USB port, card reader SD, AV output, AV input, 3.5 mm headphone jack, 12 V charge port, game controller port |
| Remote control | Yes, with AAA batteries (not included) |
| Frequency response | 20 Hz - 20 kHz (±1 dB) |
| Audio signal-to-noise ratio | Greater than 80 dB |
| Dynamic range | Greater than 85 dB |
| Maintenance and cleaning | Use a soft, slightly damp cloth. Avoid solvents and abrasives. |
| Safety | Do not open the device (risk of electric shock). Avoid exposure to water. Do not look directly at the laser. |
| Repairability | Consult an authorized service center. |
Frequently Asked Questions - PDX 1409 S2 Trevi
User questions about PDX 1409 S2 Trevi
0 question about this device. Answer the ones you know or ask your own.
Ask a new question about this device
Download the instructions for your DVD player in PDF format for free! Find your manual PDX 1409 S2 - Trevi and take your electronic device back in hand. On this page are published all the documents necessary for the use of your device. PDX 1409 S2 by Trevi.
USER MANUAL PDX 1409 S2 Trevi
natural_image
Black foldable open TV with a colorful abstract screen on top, displayed in front of a smaller black device (no visible text or symbols on the device body)ITA MANUALE D'USO E COLLEGAMENTO
ENG USER'S MANUAL
FRA GUIDE RAPIDE
DEU URZANLEITUNG
ESP GUÍA RÁPIDA

natural_image
Black triangular warning symbol with a white lightning bolt inside (no text or numbers)ATTENZIONE
RISCHIO DI SCOSSE ELETTRICHE NON ESPORRE A PIOGGIA E UMIDITÀ

natural_image
Black triangular warning symbol with exclamation mark (no text or numbers)ATTENZIONE: NON APRITE L'APPARECCHIO. ALL'INTERNO NON VI SONO COMANDI MANIPOLABIL DALL'UTENTE NE PARTI DI RICAMBIO. PER TUTTE LE OPERAZIONI DI SERVIZIO RIVOLGERSI AD UN CENTRO DI ASSISTENZA AUTORIZZATO TREVI

VOLTAGGIO PERICOLOSO
natural_image
Illustration of a bookshelf with a crossed-out X symbol (no text or labels)
text_image
in figura;UTILIZZO E RICARICA DELLA BATTERIA
natural_image
Interior view of a laptop showing internal components including battery, circuit board, and wiring (no readable text or symbols)
natural_image
Black triangular warning symbol with a white lightning bolt inside (no text or numbers)ATTENTION
RISK OF ELECTRIC SHOCK
DO NOT EXPOSE
IN RAIN AND HUMIDITY

natural_image
Black triangular warning symbol with exclamation mark (no text or numbers)ATTENTION: DO NOT OPEN THE APPLIANCE. THERE ARE NO USER MANIPULABLE COMMANDS OR SPARE PARTS INSIDE. FOR ALL SERVICE OPERATIONS PLEASE CONTACT AN AUTHORIZEDTREVISERVIC

DANGEROUS VOLTAGE
This symbol shown on the back of the appliance and in this manual indicates the pre-appliance of components operating at high voltage, do not open it to avoid the risk of electric shock.

ATTENTION
This symbol shown on the back of the device and in this manual indicate t of important instructions for safe use. Read them carefully before using the appl

WARNINGS ON THE LASER
This appliance is equipped with a laser beam reading system. Although the laser is of low power and with a safety device that prevents it from functioning with the door open following warnings:
- DO NOT PUT YOUR EYE CLOSE TO THE LASER LENS WITH THE APPLIANCE OPEN, DANGER OF INJURY OF THE NET.
• DO NOT ATTEMPT TO DISASSEMBLE OR TAMPER THE LASER UNIT, DANGER OF ABSORPTION OF RADIATION.
INSTALLATION
- Place the player on a flat, vibration-free surface.
- Make sure there is enough space around it (at least 4-5 cm.) To ensure good ventilation.
-
In particular, do not place the player on top of other appliances that produce a lot of heat, such as high-power amplifiers.
-
Do not block the ventilation slots.
- Do not use the appliance in too hot or too humid environments.
- The appliance must not be exposed to dripping or splashing water. No objects filled with liquid, such as vases, must be placed on the appl
- Keep the manual for future reference.
- If liquids penetrate inside the appliance, immediately disconnect the plug from the socket and take the appliance to the nearestTREVI authorized service center.
- No naked flame sources, such as lighted candles, must be placed on the appliance.

natural_image
Illustration of a bookshelf with a crossed-out black X symbol (no text or symbols present)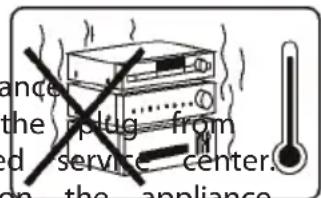
text_image
encel the plug from d service center. on the appliance.CARE AND MAINTENANCE: For cleaning, we recommend using a soft, slightly damp cloth. Avoid solvents or abrasive substances.
IMPORTANT: The good construction of this appliance guarantees its perfect functioning for a long time. However, should any problems arise, it will be advisable to consult the nearest authorized Service Center.
TREVI pursues a policy of continuous research and development. Therefore the products may have characteristics different from those described.
PRODUCT DESCRIPTION
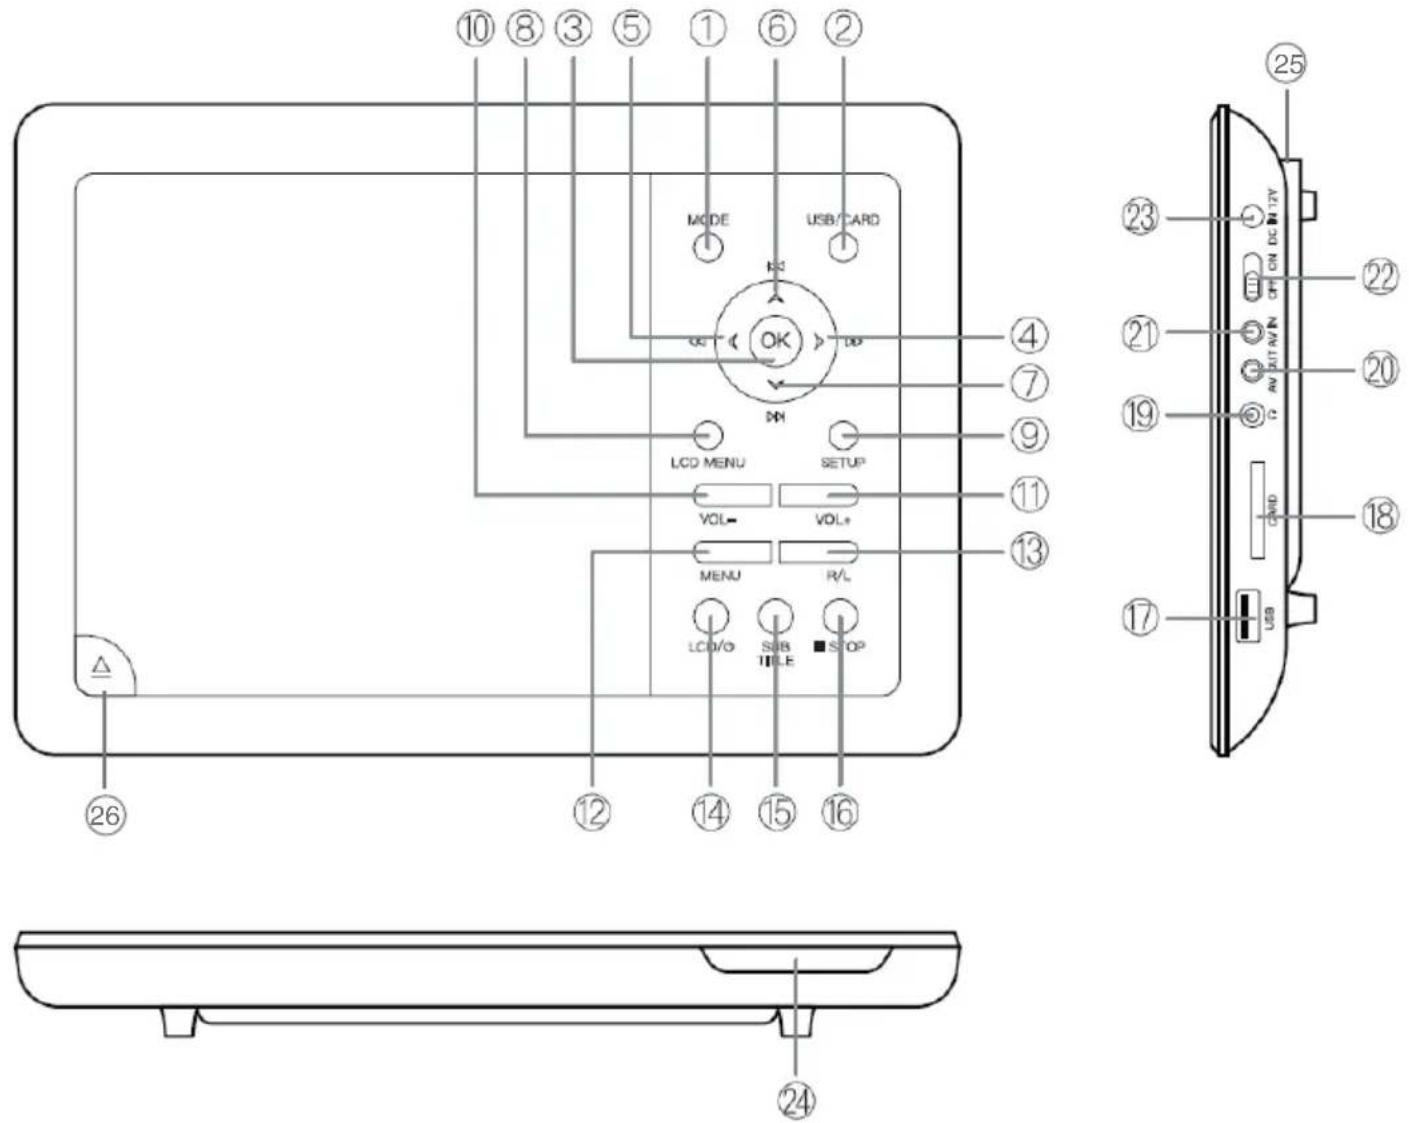
BUTTON INTRODUCTION
- MODE button
- USB/CARD button
- OK button + PLAY/PAUSE
- ▶ button, fast forward
- ◀ button, fast rewind
- ◀ button, Previous
- ▶ button, Next
- LCD MENU button
- SETUP button
- VOL - button
- VOL+ button
- MENU button
-
R/L button
-
LCD button
- SUBTITLE button
- STOP ■ button
- USB
- SD Card
- 3.5mm Audio port
- AV OUT
- AV IN
- Power switch ON/OFF
- Charging port 12V---
- Power indicator
- USB Game,for Gamepad connection
- Open button DVD/CD door
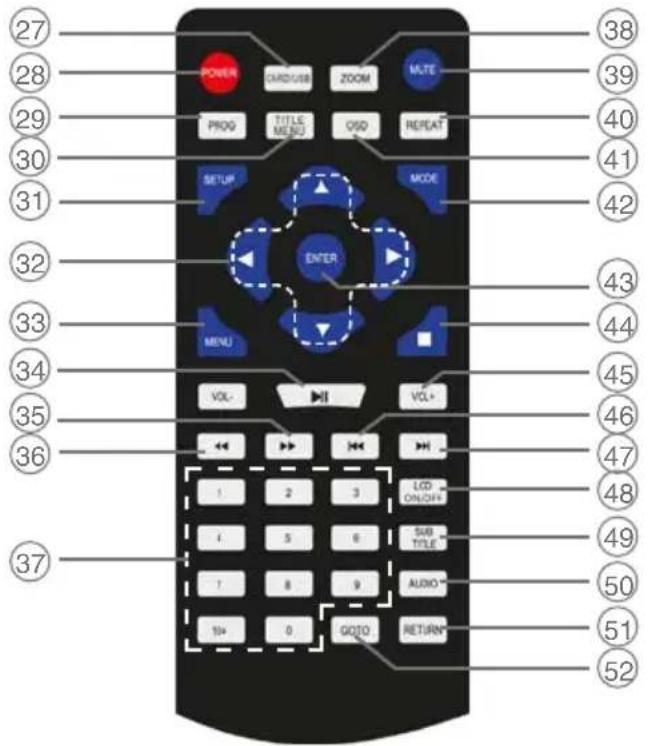
REMOTE CONTROL
text_image
27 28 29 30 31 32 33 34 35 36 37 POWER CARD/USB ZOOM MUTE PROG TITLE OSD REPEAT SETUP MODE ENTER MENU VOL- VOL+ 1 2 3 LCD ON/OFFS 1 5 6 SUB TITLE 1 8 9 AUDIO 10+ 0 GOTO RETURN 38 39 40 41 42 43 44 45 46 47 48 49 50 51 52BUTTON INTRODUCTION
- CARD/USB button
- POWER button
- PROG button
- TITLE/MENU button
- SETUP button
- Navigation buttons
- MENU button
- PLAY/PAUSE/II button
- FWD▶ button
- REV ◀ button
- Numeric keypad
- ZOOM button
-
MUTE button
-
REPEAT button
- OSD button
- MODE button
- ENTER button
- STO■ button
- VOL+/VOL- buttons
- PRE▼ button
- NEX▶ button
- LCD ON/OFF button
- SUBTITLE button
- AUDIO button
- RETURN button
- GOTO button
REMOTE CONTROL BATTERY REPLACEMENT
Before using the remote control, insert the batteries as follow description:
- Remove the battery compartment cover as shown in the figure;
- Insert 2 "AAA" size batteries paying attention to the polarities indicate and close the lid.

text_image
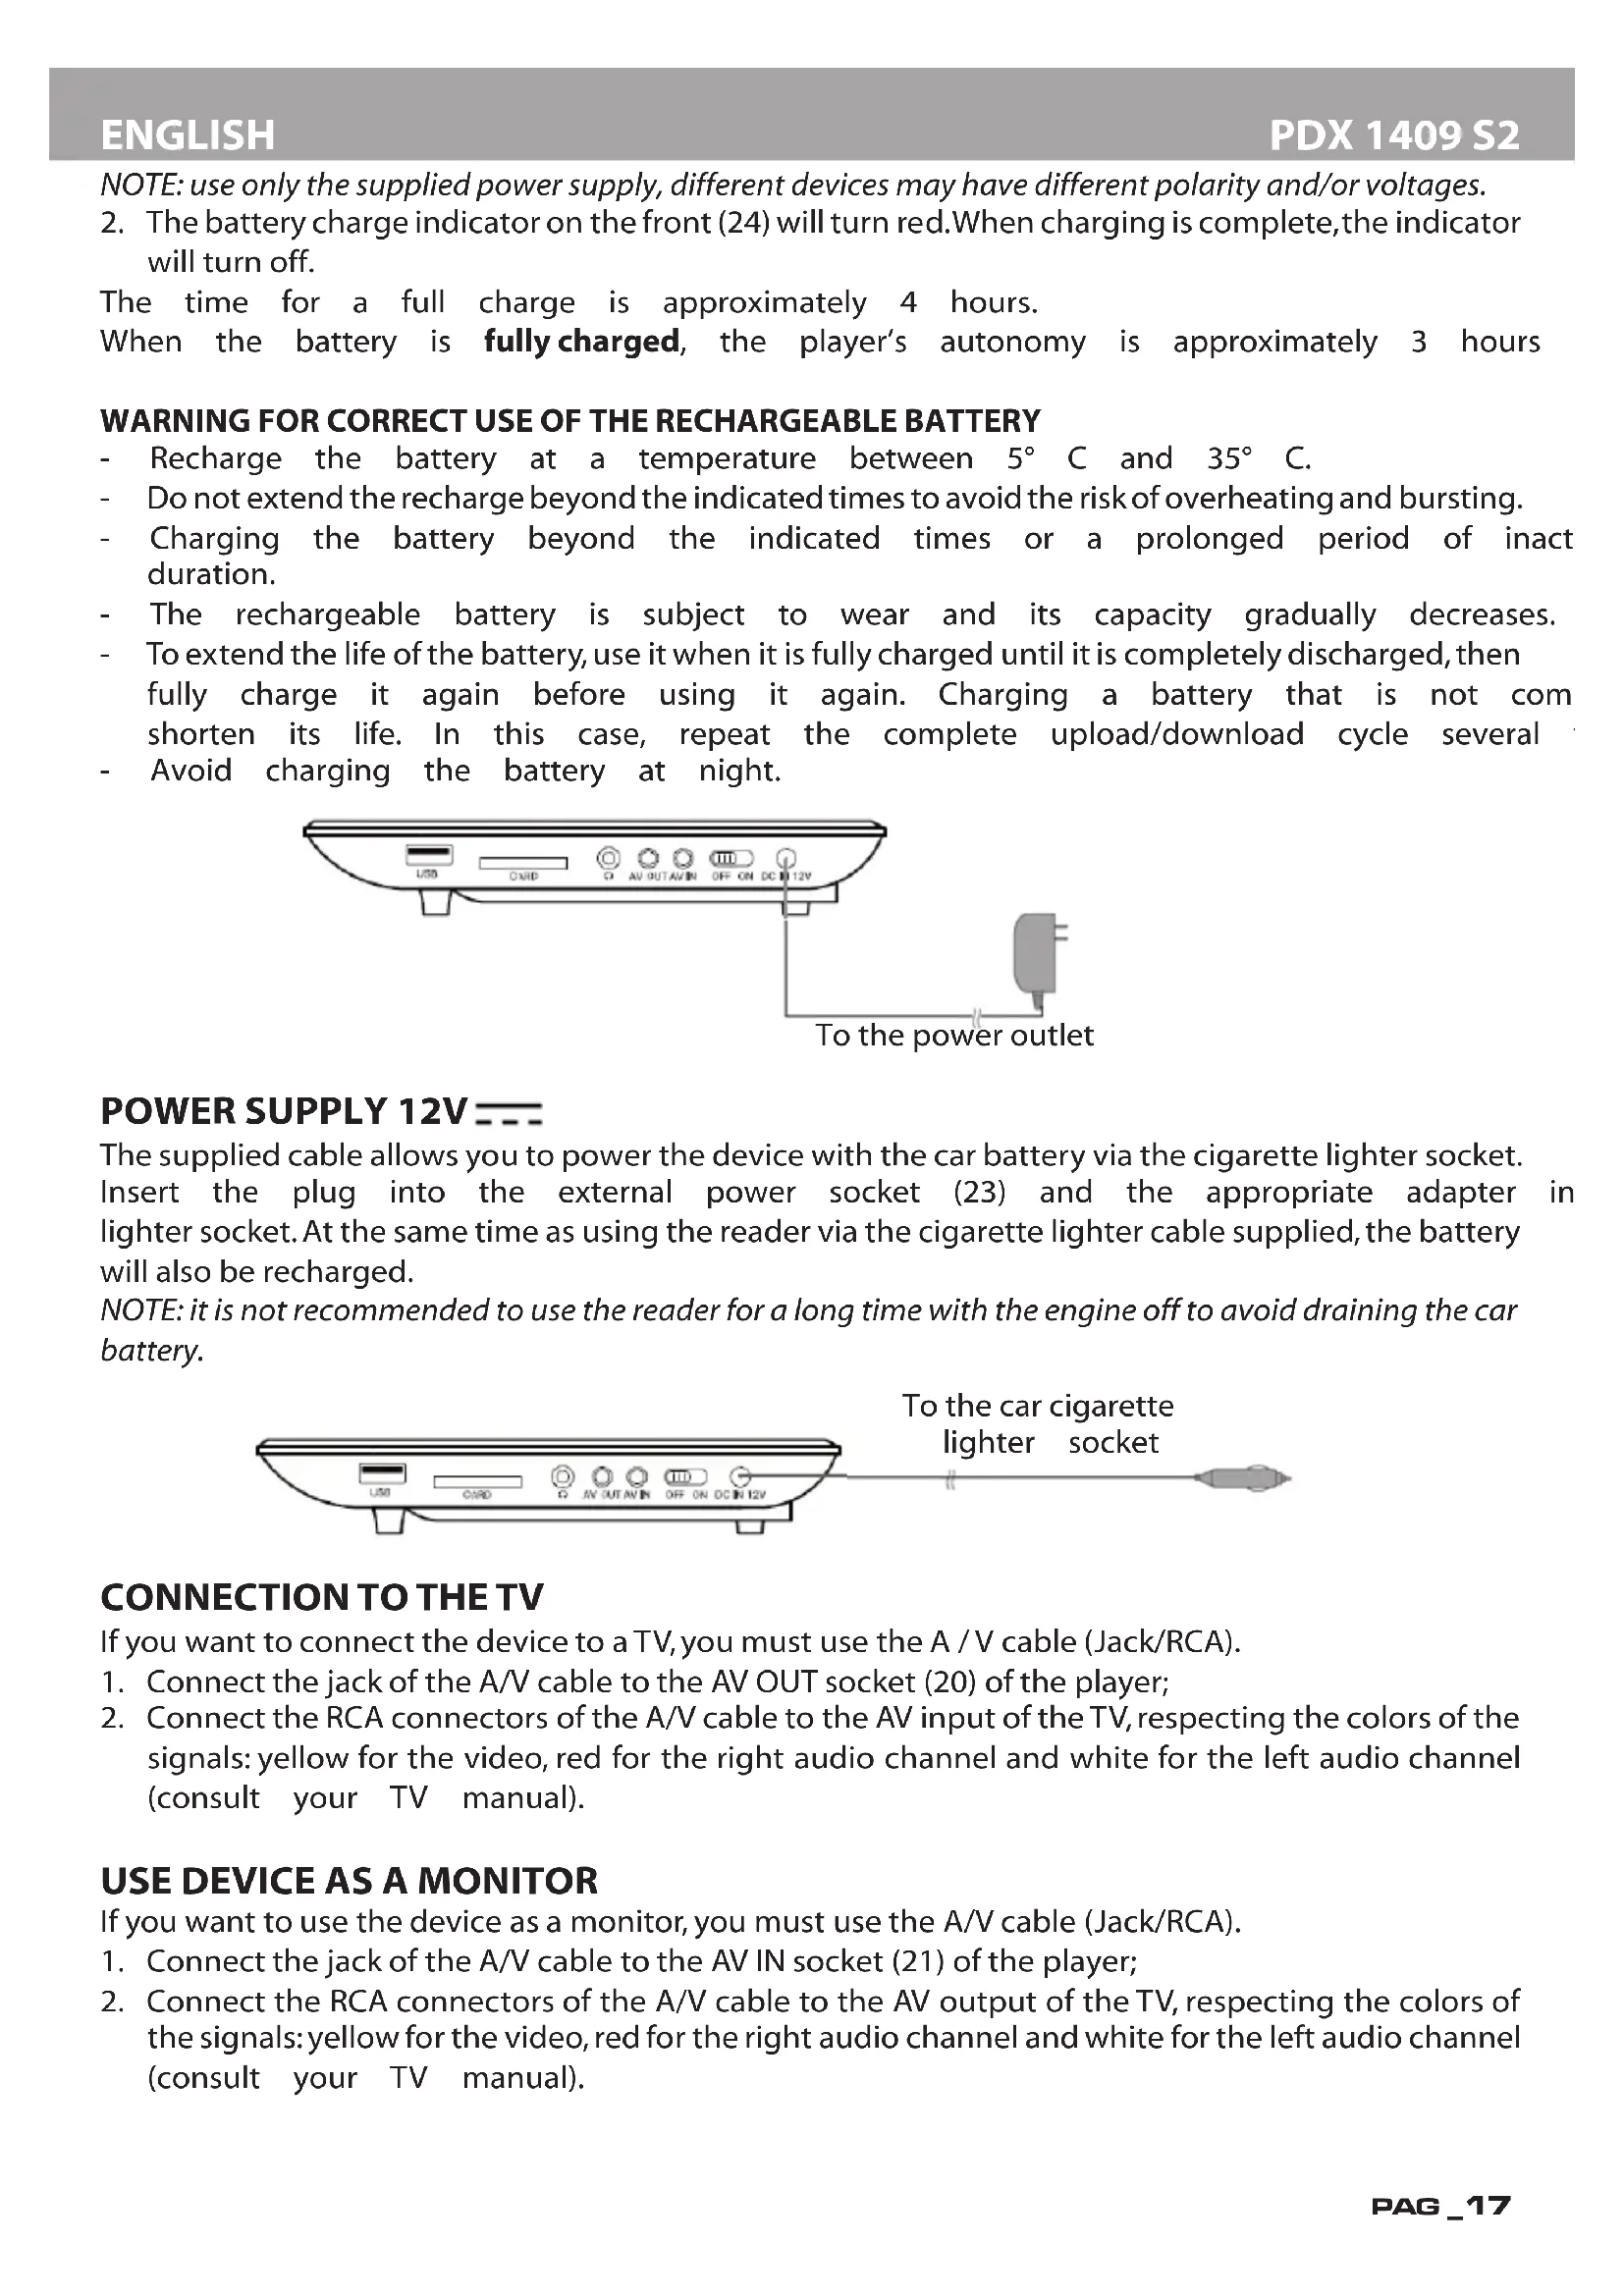
figure; ities indicateUSE AND CHARGING THE BATTERY
This portable DVD uses a rechargeable lithium battery inside. When charging is con without being plugged into a power outlet.
The supplied power supply works with 110-240V \~ 50/60Hz current.
Only charge the battery when the player is turned off and indoors.
- Insert the plug of the power supply into the socket for external power supply (23) and the plug into a power socket;
NOTE: use only the supplied power supply, different devices may have different polarity and/or voltages.
- The battery charge indicator on the front (24) will turn red. When charging is complete, the indicator will turn off.
The time for a full charge is approximately 4 hours.
When the battery is fully charged, the player's autonomy is approximately 3 hours
WARNING FOR CORRECT USE OF THE RECHARGEABLE BATTERY
- Recharge the battery at a temperature between 5°C and 35°C.
- Do not extend the recharge beyond the indicated times to avoid the risk of overheating and bursting.
- Charging the battery beyond the indicated times or a prolonged period of inact duration.
- The rechargeable battery is subject to wear and its capacity gradually decreases.
- To extend the life of the battery, use it when it is fully charged until it is completely discharged, then fully charge it again before using it again. Charging a battery that is not com shorten its life. In this case, repeat the complete upload/download cycle several
- Avoid charging the battery at night.

text_image
USB CARD AV OUT AIN OFF ON DC 12V To the power outletPOWER SUPPLY 12V ---
The supplied cable allows you to power the device with the car battery via the cigarette lighter socket. Insert the plug into the external power socket (23) and the appropriate adapter in lighter socket. At the same time as using the reader via the cigarette lighter cable supplied, the battery will also be recharged.
NOTE: it is not recommended to use the reader for a long time with the engine off to avoid draining the car battery.

text_image
To the car cigarette lighter socketCONNECTION TO THE TV
If you want to connect the device to a TV, you must use the A / V cable (Jack/RCA).
- Connect the jack of the A/V cable to the AV OUT socket (20) of the player;
- Connect the RCA connectors of the A/V cable to the AV input of the TV, respecting the colors of the signals: yellow for the video, red for the right audio channel and white for the left audio channel (consult your TV manual).
USE DEVICE AS A MONITOR
If you want to use the device as a monitor, you must use the A/V cable (Jack/RCA).
- Connect the jack of the A/V cable to the AV IN socket (21) of the player;
- Connect the RCA connectors of the A/V cable to the AV output of the TV, respecting the colors of the signals: yellow for the video, red for the right audio channel and white for the left audio channel (consult your TV manual).

text_image
USB OVID G AV UT AV IN OFF ON DC IN 12V TV Monitor AUDIO IN VIDEO INYou can connect headphones or earphones with a 3.5mm stereo jack to the headphone socket (19).

text_image
USB CARD AV OUT AV IN OFF ON DC IN 12V
To prevent possible hearing damage, limit the amount of time listening at high volumes.
CONNECTION VIA USB SOCKET
To this reader it is possible to connect, through the USB input (17) on the side, a USB memory device, or, through the SD card input (18), an SD memory.

text_image
USB Device CARD SD CardPOWER ON/OFF
- Move the ON/OFF switch (22) to the ON position to turn on the player.
- Move the ON/OFF switch (22) to the OFF position to turn off the player.
BASIC OPERATION
VOLUME ADJUSTEMENT
To adjust the volume, hold down the VOL-/VOL + buttons (10/11) on the player or using the VOL -/+ buttons (45) on the remote control.
MUTE FUNCTION
It allows you to completely exclude the audio of the player.
- Press the MUTE button (39) on the remote control, the word "MUTE" will appear on the screen and the audio will be muted.
- Press the MUTE button (39) on the remote control a second time to restore the audio, the message "MUTE Off" will appear on the screen for a few seconds.
PLAYING A DVD/CD AUDIO DISC
Unless otherwise specified, the remote control commands also refer to the commands on the player.
PLAYING A DVD/CD DISC
- Switch On the player;
- Open the disc compartment by pressing the DVD/CD door opening button (26);
- Insert a DVD/CD disc with the titles facing up;
- Close the disc compartment, the message "Loading" will appear on the screen to indicate the disc has been loaded;
- The DVD/CD will play automatically.
STOP PLAYBACK
- Press the STOP ■ button (44) once to stop playback momentarily;
- Press again STOP ■ button (44) to stop playback definitively;
- Press the OK button (3) on the unit, or then Play/Pause on the remote con resume playing the disc from the beginning.
SKIP TO PREVIOUS/NEXT VIDEO/CHAPTER/TRACK
Press the PREVI◄ button (46) to go to the previous video/chapter or the NEXT► button (47) to go to the next video/chapter.
QUICK SEARCH
- Press FWD▶ button (35) to fast forward the images.
- Press REV ◀ button (36) to fast reverse the images.
- Each time the button is pressed, the speed increases:
The numerical indicators on the screen next-to symbol indicate the speed (x2 - x4 - x8 - x16 - x32).
- To return to normal playback, press PLAY/PAUSEtton (34).
REPEAT FUNCTION
- Press REPEAT button (40) once to repeat the same chapter over and over, "Chapter" appears on the screen.
-
Press REPEAT button (40) a second time to repeat the same title over and over, the message "Title" will appear on the screen.
-
Press the REPEAT button (40) three times to repeat all titles continuously, "All" will appear on the screen.
- To deactivate the repeat function, press the REPEAT button (40) a fourth time, no writing will appear on the screen.
GOTO FUNCTION
- Press the GOTO button (52) to go directly to a specific chapter of the video displayed; a bar will appear where you can select the number of your favorite chapter;
- Using the numeric keypad (37), enter the chapter number.
ZOOM FUNCTION
- Press the ZOOM button (38) several times to enlarge the image displayed on
- The numerical indicators on the screen indicate the size of the image (Zoom : Zoom 1/2, Zoom 1/3, Zoom 1/4);
- To return to normal playback, press the ZOOM button (38) until the indicator no longer appears and the image returns to the standard format.
OSD FUNCTION
- Press the OSD button (41) in sequence to view the information relating to the title/chapter, the elapsed time and the remaining time directly on the display;
- Keep pressing the OSD button (41) until the information disappears to exit the OSD function.
AUDIO FUNCTION
- If the disc is designed to change the listening language during playback (consult the disc packaging to be sure), press the AUDIO button (50) to select the desired one;
- The display shows the languages (eg 1 Italian, 2 English) and the available channels (Ch 5.1 to indicate the 5.1 channels of Dolby Digital, Ch 2 to indicate 2 stereo channels, etc.).
SUBTITLE FUNCTION
- If the disc is set up for subtitles (consult the disc packaging to make sure) press the SUBTITLE button (49) to select the one you want;
- The language indication appears on the screen (eg 1 Italian, 2 English);
- To deactivate this function, press the SUBTITLE button (49) in sequence, until the message "Subtitle Off" appears on the screen.
TITLE FUNCTION
- Press the TITLE/MENU button (30) to show the DVD disc title menu.
NOTE: The DVD must be prepared for this option, otherwise the function will be ineffective.
PLAY GAMES
- Connect the gamepad supplied to the USB Game socket (25);
- Open the CD door and insert the game disc supplied;
- Select the game and press the ENTER key (43) to start it.
Your player has a Setup menu you can use to adjust settings.
To use the Setup menu:
- Press SETUP button (31). The Setup Menu - Main page shows with General Setup Highlighted.

text_image
-- General Setup Page -- TV Display Wide Angle Mark Off OSD Lang Eng Screen Saver On Last Memory On Mp3 Lyric On2 Press ◀ or ▶ to select the menu option you want, then press OK button (3) to confirm.
3 Press ▲ or ▼ to select an option.
4 Press◀◀ or ▶▶ to change the setting, then press OK button (3) to confirm.
-
Repeat Step 2 through Step 4 to change other menu options.
-
Press SETUP button (31) to exit.
GENERAL SETUP
Select to adjust the following:
• TV Display: Selects the aspect ratio. You can select:
- Normal/PS: Select this option when the player is connected to a normal TV (4:3 aspect ratio). Wide-screen images are shown on the screen, but with some parts cropped a - Normal/LB: Select this when the player is connected to a normal TV (4:3 aspect ratio).Wide-screen images are shown on the screen with a black band on the top and bottom. - Wide displays the video image full-screen when your player is connected to a widescreen TV (16:9 aspect ratio).
- Angle Mark: If this option is turned on and the DVD you are watching has multiple viewing angles, the icon appears in scenes that have multiple viewing angles.
- OSD Language: Selects the language for the Setup menu. You can select English, French, German, Italian, etc.
- Screen Saver: When this option is turned On, your player displays a screen saver when the same image stays on the screen for five minutes.
- Last memory: This option allows you to activate or deactivate the memory function, that is, it allows the device to continue playing from where the user left off or before turning off the device.
- MP3 Lyric: This option allows you to Activate or Deactivate the display of the text, during playback, of the MP3 songs if present in the file.
AUDIO SETUP
- Downmix: allows you to set the stereo audio output mode of the player. You can choose between: Lt/Rt and Stereo.
• Dual Mono: mono output on the speakers.
PANEL SETUP
Select to adjust the following:
- Sharpness: You can select High, Medium, low level - Brightness: Increases the brightness to add more light to dark areas of the picture or decreases the brightness to add more dark to light areas of the picture. - Contrast: Increases the contrast level to adjust the white areas of the picture or decreases the contrast level to adjust the black areas of the picture.
- Saturation: Adjusts the color saturation. - Hue: Increases the color level to add more green to skin tones or decreases the color level to add more purple to skin tones.
PREFERENCE
Select to adjust the following:
• TV Type: Selects the TV type. Options are PAL (typically Europe) or NTSC (typically USA) or AUTO.
- Audio: Selects the audio language. If the language you select is not recorded on the DVD, your player plays the default audio language.
- Subtitle: Select the subtitle language. If the language you select is not recorded on the DVD, your player displays the default subtitle language.
- Disc Menu: Selects the DVD menu language. If the language you select is not recorded on the DVD, your player displays the default language.
- Parental:Blocks DVD playback based on ratings. Select this option to set the parental control level. Options include: KID SAFE, G, PG,PG 13,PGR, R, Nc17, and ADULT.The default is
- Password: It allows you to activate or deactivate the insertion of a password and to enter a preferred password.
- Default: Reset all settings except the password and parental controls back to the factory default.
SPECIFICATION
General
Panel size: 9" TFT LCD (16:9)
Screen ratio: 16:9/4:3
Power source: ....DC adaptor: 100-240V \~ 50/60Hz, OUT: 12V--- 1A
Lithium battery 7.4V --- 1500mAh
Power consumption: ....<10W
Semi conductor Laser: ....Wave Lenght 650nm/795nm
Frequency response: 20Hz - 20kHz (1dB)
Audio S/N: ....>80dB
Dynamic range: ....>85dB
Dimensions: 240x171x42mm
Video and Audio
Supported Video formats:......MPEG4, DVD, VCD, SVCD
Supported Audio formats: ......DVD, CD Audio, CDr, CDrw, MP3
Signal system: NTSC/PAL
Video output: 1Vpp (75ohm)
Audio output: 1,4Vms/10KOhm

Precautions for correct disposal of the product.
The symbol shown on the equipment indicates that waste must be disposed of in "separate collection" and so the product must not be disposed of together with urban waste.
The user must take the product to special "separate waste collection centres" provided by local government, or deliver it to the retailer against the purchase of a new product.
Separate collection of waste and subsequent treatment, recycling and disposal operations, the production of equipment with recycled materials and limits negative effects on and on health caused by improper handling of waste.
Illegal disposal of the product leads to the enforcement of administrative penalties.
INFORMATION NOTE ON THE REMOVAL AND DISPOSAL OF BATTERIES Warning: Only high-qualified personnel should perform this operation!
BATTERY REMOVAL
The appliance should not be plugged to the mains socket when performing this operation!
- Remove the screws tightening the lower part of the appliance;
- Select the battery and disconnect and remove the battery.
Whatever the type of exhausted battery, it must not be thrown away in household waste, in fire or water. Each type of exhausted battery must be recycled or disposed of at the ap collection centers.

natural_image
Interior view of a laptop showing internal components including battery, circuit board, and wiring (no readable text or symbols)
natural_image
Black triangular warning symbol with a white lightning bolt inside (no text or numbers)ATTENTION
RISQUE DE CHOC ELECTRIQUE
NE PAS EXPOSER
A LA PLUIE ET A L'HUMIDITE

natural_image
Black triangular warning symbol with exclamation mark (no text or numbers)ATTENTION: NE PAS OUVRIR L'APPAREIL. IL N'Y A PAS DE COMMANDES MANIPULABLES PAR L'UTI-LISATEUR OU DE PIÈCES DE RECHANGE À L'INTÉRIEUR. POUR TOUTES LES OPÉRATIONS DE SERVICE VEUILLEZ CONTACTER UN CENTRE DE SERVICE AGRÉÉ TREVI

TENSION DANGEREUSE
text_image
agree TREVI le plusDimensions: 240x171x42mm
Vidéo et audio
RECOMMANDATIONS POUR L'ÉLIMINATION CORRECTE DU PRODUIT.
natural_image
Interior view of an electronic device showing a battery pack, circuit board, and wiring with a red arrow pointing to a component (no visible text or symbols)
natural_image
Black triangular warning symbol with a white lightning bolt inside, indicating electrical hazard (no text)BEACHTUNG
natural_image
Black triangular warning symbol with exclamation mark (no text or numbers)ACHTUNG: DAS GERÄT NICHT ÖFFNEN. ES GIBT KEINE BENUTZERMANIPULIERBAREN BEFF ERSATZTEILE IM INNEREN. FÜR ALLE SERVICEARBEITEN KONTAKTIEREN SIE BITTE EIN A TREVI SERVICE CENTER

Audio S/N: ....>80dB
natural_image
Black triangular warning symbol with a white lightning bolt inside (no text or numbers)ATENCIÓN
RIESGO DE DESCARGA ELÉCTRICA NO EXPONER
CON LLUVIA Y HUMEDAD

natural_image
Black triangular warning symbol with exclamation mark (no text or numbers)natural_image
Diagram showing two U-shaped containers with a submerged object and an arrow pointing to a rectangular object inside (no text or symbols)USO Y CARGA DE LA BATERÍA
natural_image
Interior view of an electronic device showing a battery pack, circuit board, and wiring (no readable text or symbols)Simplified EU Declaration Of Conformity
Hereby TREVI S.p.a declares that the radio equipment type "DVD player" model PDX 1409S2
is in compliance with Directive 2014/53/EU.
The full text of the EU declaration of conformity is available at the following internet address
https://www.trevi.it/dms/zidi/TREVI/DOCPDX1409S2.pdf

EN If you will not find your language on the instruction manual, please go on our website www.trevi.it to find it
FR Si vous ne trouverez pas votre langue sur le mode d'emploi, veuillez vous visiter sur notre site Web www.trevi.it de le trouver
DE Wenn Sie Ihre Sprache auf die Bedienungsanleitung nicht finden, gehen Sie bitte auf unsere Webseite www.trevi.it zu finden
ES Si no encuentras tu idioma en el manual de instrucciones, por favor vaya a nuestra página web www.trevi.it se encuentra
PT Se você não vai encontrar sua língua sobre o manual de instruções, por favor, vá em nosso site www.trevi.it para encontrá-lo

Trevi S.p.A.
Strada Consolare Rimini-San Marino, 62
47924 RIMINI (RN) Italy
Tel.0541/756420 - Fax 0541/756430
www.trevi.it - E-mail: info@trevi.it

text_image
CE No longer text ©Made in China