
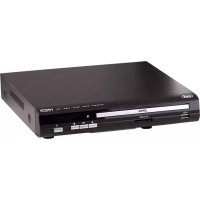
DVMI 3580 HD - DVD player Trevi - Free user manual and instructions
Find the device manual for free DVMI 3580 HD Trevi in PDF.


| Product type | DVD player |
| Brand | Trevi |
| Model | DVMI 3580 HD |
| Dimensions (L x D x H) | 43 x 26 x 4 cm |
| Weight | 2 kg |
| Power supply | 100-240 V, 50/60 Hz |
| Power consumption | 20 W (max) |
| Supported disc formats | DVD, DVD±R/RW, CD, CD-R/RW |
| Video output | HDMI (1080p upscaling), composite, component YUV |
| Audio output | Analog stereo, digital coaxial |
| Main functions | Playback of DVD and CD, zoom, repeat, programming, quick search |
| USB port | Yes, for playing multimedia files |
| Maintenance and cleaning | Clean with a soft dry cloth, avoid abrasive products |
| Safety | Do not expose to moisture, do not block ventilation slots |
| Spare parts and repairability | Parts available from Trevi after-sales service |
| Remote control included | Yes |
| Region code | Europe (Region 2) |
Frequently Asked Questions - DVMI 3580 HD Trevi
User questions about DVMI 3580 HD Trevi
0 question about this device. Answer the ones you know or ask your own.
Ask a new question about this device
Download the instructions for your DVD player in PDF format for free! Find your manual DVMI 3580 HD - Trevi and take your electronic device back in hand. On this page are published all the documents necessary for the use of your device. DVMI 3580 HD by Trevi.
USER MANUAL DVMI 3580 HD Trevi
For information and update of this product visit WWW.TREVI.IT

natural_image
Black triangular warning symbol with a white lightning bolt inside, indicating electrical hazard (no text)ATTENZIONE
RISCHIO DI SCOSSE ELETTRICHE NON ESPORRE A PIOGGIA E UMIDITÀ

natural_image
Black triangular warning symbol with exclamation mark (no text or numbers)ATTENZIONE: NON APRITE L'APPARECCHIO. ALL'INTERNO NON VI SONO COMANDI MANIPOLABILI DALL'UTENTE NE PARTI DI RICAMBIO. PER TUTTE LE OPERAZIONI DI SERVIZIO RIVOLGERSI AD UN CENTRO DI ASSISTENZA AUTORIZZATO TREVI

VOLTAGGIO PERICOLOSO
natural_image
Front view of a black electronic device with control buttons and indicator lights (no readable text or symbols)
natural_image
Front view of a gray remote control with keypad and buttons (no visible text or symbols)
natural_image
Diagram showing a car with a battery and two cylindrical batteries, one emitting a wavy line (no text or symbols)natural_image
Black triangular warning symbol with a lightning bolt symbol (no text or numbers)CAUTION
SHOCK HAZARD ELECTRIC DO NOT EXPOSE RAIN AND MOISTURE

natural_image
Black triangular warning symbol with exclamation mark (no text or numbers)ATTENTION: DO NOT OPEN THE APPLIANCE. INSIDE THERE ARE NO USER MANIPULABLE CONTROLS OR SPARE PARTS. FOR ALL SERVICE OPERATIONS CONTACT AN AUTHORIZED TREVI SERVICE CENTER

DANGEROUS VOLTAGE
This symbol on the back of the appliance and in this manual indicates the presence of high voltage components inside this appliance, do not open it to avoid the risk of electric shock.

CAUTION
This symbol on the back of the appliance and in this manual indicate the presence of important safety instructions for use. Read them carefully before using the appliance.
WARNINGS ON THE LASER
This device is equipped with a reading system with laser beam. Although the laser is of low power and with a safety device that prevents it from operating with the door open, scrupulously comply with the following warnings:
- DO NOT BRING YOUR EYE TO THE LASER LENS WITH THE APPLIANCE OPEN, DANGER OF INJECTION OF THE NET.
- DO NOT ATTEMPT TO DISASSEMBLE OR TAMPER THE LASER UNIT, DANGER OF ABSORPTION OF RADIATION.

WARNINGS ON THE LASER
This symbol indicates that this appliance contains a class 1 laser product. The laser beam can produce harmful radiation if in direct contact with the human body.
1 FOREWORD
Thank you for purchasing this appliance!
Before using the product, please read the following user manual carefully.
■ Make sure that the appliance is not damaged, in this case contact the seller.
- Check that all accessories are present.
- Do not open the appliance: inside there are no controls that can be manipulated by the user or spare parts. For all operations, contact an Authorized Trevi Service Center.
- Keep the following user manual.
2 SAFETY PRECAUTIONS
This appliance is a high precision electronic instrument, therefore avoid using it in the following cases:
• Near magnetic fields.
- Near heat sources such as heaters and stoves.
- In very humid places such as bathrooms, swimming pools, etc ...
• In very dusty places.
• In places subject to strong vibrations.
- Do not bring your ear close to the speaker during the adjustment and volume adjustment phases, and in particular to keep the volume to a minimum in the ignition phase.
- Position the appliance so that there is always enough space on its sides for the free circulation of air (at least 5 cm).
- If liquids penetrate inside the appliance, immediately disconnect the plug from the socket and bring the appliance to the nearest authorized TREVI service center.
• Always check before recharging the appliance, that the power and connection cables are installed correctly.
- No naked flame sources, such as lighted candles, should be placed on the appliance.
- The appliance must not be exposed to dripping or splashing water and no objects filled with liquid, such as vases, must be placed on the appliance.
- Keep this manual for future reference.
CARE AND MAINTENANCE
For cleaning, we recommend the use of a soft, slightly moistened cloth. Avoid solvents or abrasive substances.
IMPORTANT
This device is designed for non-professional home use. The good construction of this appliance guarantees perfect operation for a long time. However, should any inconvenience arise, it is advisable to consult the nearest TREVI Authorized Service Center.
TREVI pursues a policy of continuous research and development. Therefore the products may have different characteristics from those described.
3 CARE AND MAINTENANCE
■ Unplug the appliance before cleaning it.
- Do not use solvents or liquids, only a soft, dry cloth.
- The good construction of this appliance guarantees perfect operation for a long time. However, should any inconvenience arise, it is advisable to consult the nearest Authorized Trevi Service Center.
natural_image
Front view of a gray electronic device with control buttons and indicator lights (no visible text or symbols)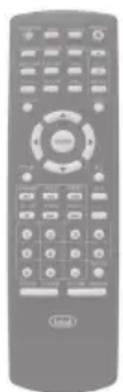
natural_image
Front view of a gray remote control with keypad and buttons (no visible text or symbols)
- Open the battery compartment on the back of the remote control;
- Insert 2 AAA size batteries (not supplied) making sure to respect the polarity and guide signs inside the battery compartment;

natural_image
Diagram showing a car with a battery and two cylindrical batteries, illustrating electrical or mechanical components (no text or symbols)- Close the battery compartment.
To prevent battery leakage and consequent damage to the remote control, make sure to install them correctly and not to install different types of batteries (old and new, alkaline and zinc-carbon, etc...). Remove the batteries from the remote control if you are not going to use it for long periods.
6.2 REMOTE CONTROL

- POWER button, power the unit On and Off.
- Number keypad, for inputting Number Digits.
- MENU button, to bring up the DVD Player Menu.
- Arrows + ENTER button, arrows are used for moving around the Menu, Enter is used for Selecting.
- TITLE button, to show the DVD title.
- VOLUME buttons, to adjust the DVD Player Volume.
- STOP ■ button, to Stop the DVD.
- DVD/USB button, to select between DVD and USB.
- OSD button, On Screen Display.
- L/R button, Switches between the Left and Right audio channels.
- N/P button, to select between NTC and PAL.
- REV ◀ button. FWD ▶ button, to search forward and backward.
- STEP button, Plays video frame by frame.
- A-B button, press to create a repeating loop on a specified section of a loader DVD.
- SLOW button, to view slowly.
- REPEAT button, to toggle between different repeat models.
- WIDE button, cahnge to wide view.
- ZOOM button, to enlarge the Picture.
- PLAY ▶ / II button, to Play or Pause.
- PREV ◀ button, NEXT ▶ button.
- SUBTITLE button, to Switch subtitles.
-
SETUP button, to access or exit the Setup Menu.
-
ANGLE button, to switch between Multiple Camera Angles.
- PROG button, to play contents of disc in the order you want by programming the track to be played.
- GO TO button, to go to a particular title, chapter or time point.
- AUDIO button, to change the Audio setting.
- MUTE button, to mute the DVD player.
- ▲OPEN/CLOSE button, to open and close the DVD drawer.
7 INSTALLATION AND CONNECTIONS
7.1 DVD PLAYER - TV CONNECTION
Connecting the DVD player to a TV for audio/video playback.
NOTE:
- Before making or changing any connections, make sure that all the devices are disconnected from the power outlet.
- Both Video and Audio connections must be made from the DVD Player to your Television.

- Connect the SCART output (4) of the DVD player to the TV with a SCART cable.
Note: It is imperative to use a good quality SCART cable with all 21 poles connected. SCART cables that do not have all pins connected can cause vision problems.
Note: If your TV is equipped with a SCART socket capable of accepting RGB signals (check the manual of the TV), connect the player to that socket to obtain the best quality of the video signal.
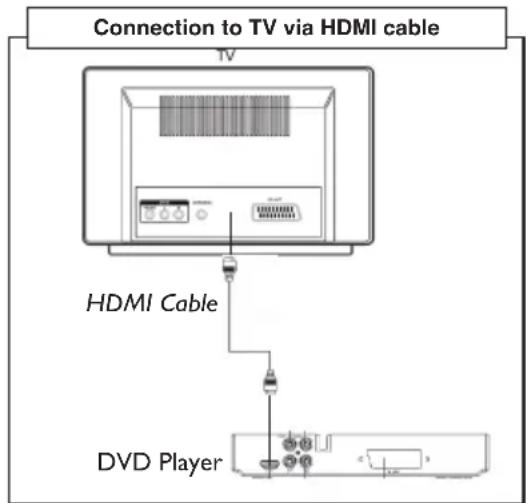
- Use a HDMI cable to connect the HDMI Output (1) to a HDMI input on a television;
- Adjust the connected televisions input setting to match the input used in the previous step;
- Press the Video button on the remote control to adjust the display resolution.

- Use the Composite Video Output to send video from the DVD player to television; Use the RCA Stereo Audio Output to send audio from the DVD player to television;
- Requires an RCA video cable; requires an RCA audio cable;
- Use the RCA video cable to connect the Composite Video Output to a composite Video input on a television; Use the RCA audio cable to connect the RCA Stereo audio output to a RCA stereo audio input on a television;
- Adjust the connected televisions input setting to match the input used in the previous step.
COAXIAL DIGITAL AUDIO OUTPUT
☐ Use the Coaxial Digital Audio Output to send high quality audio from the DVD player to an Audio system;
☐ Requires an RCA audio cable;
☐ Use the RCA audio cable to connect the Coaxial Digital Audio Output to a coaxial digital input on a Audio system;
Adjust the connected audio system's input setting to match the input used in the previous step;
In the Digital Out portion of the setup menu, adjust to PCM, RAW or Off.
8 PRELIMINARY OPERATIONS
8.1 SWITCHING ON/OFF
Connect the power cable to an electrical outlet;
Press the POWER button on the remote control (15) to switch on the appliance;
Press the POWER button on the remote control (15) again to activate stand-by mode.
8.2 VOLUME ADJUSTMENT
Press the VOL+/VOL- (20) buttons on the remote control to increase/decrease the volume.
8.3 MUTE FUNCTION
Allows you to completely mute your player's audio.
Press the MUTE button (41) on the remote control, "MUTE" appears on the screen and the audio is muted;
Press the MUTE button (41) on the remote control a second time to restore the audio.
9 DVD player
The controls on the front of the appliance have the same function as those on the remote control.
9.1 PLAYING A DVD DISC
DVD DISC
Turn on the player;
Open the disc compartment using the OPEN/CLOSE open button (9);
☐ Insert a DVD disc with the titles facing upwards;
☐ Close the disc compartment, the word “Loading...” appears on the screen to indicate the loading of the disc;
☐ The DVD will play automatically.
MPEG DISC
Turn on the player;
Open the disc compartment using the OPEN/CLOSE open button (9);
☐ Insert an MPEG disc with the titles facing upwards;
☐ Close the disc compartment, the word “Loading...” appears on the screen to indicate the loading of the disc;
☐ Playback will start automatically or the window with the contents of the disc to be selected for playback will appear;
If the disc contains multiple, stop playback, select the title with the navigation keys ▲ and press the PLAY ▶ (33) or ENTER (18) key to start playback.
9.2 MAIN FUNCTIONS
STOPPING REPRODUCTION
- Press the STOP ■ button (21) once to stop playback temporarily;
- Press the PLAY ▶ / II button (33) to resume playing the disc;
- Press the STOP ■ button (21) twice to stop playback permanently;
- Press the PLAY ▶ / II button (33) to resume playing the disc from the beginning.
FAST SEARCH
- Press the FWD ▶ button (26) to fast forward the pictures;
- Press theo REV ◀ button (26) to fast reverse the pictures;
- ach time the button is pressed, the speed increases;
- The numeric indicators on the screen next to the ↔ - symbol indicate the speed (x2 - x4 - x8 - x16 - x32);
- To return to normal playback, press the PLAY ▶ button (33).
SKIP TO VIDEO/CHAPTER/PREVIOUS/NEXT TRACK
- Press the PREV ◀ button (34) to go to the previous video/chapter/picture and the NEXT ➤ button (34) to go to the next video/chapter/picture.
9.3 PLAYBACK FUNCTIONS
SLOW FUNCTION
- Press the SLOW button (29) to slow down the playback;
- Each time the button is pressed, the speed decreases;
- The numeric indicators on the screen next to the symbol ▶ indicate the speed (x1/2 - x1/4 - x1/8 - x1/16);
- To return to normal playback, press the PLAY ▶ button (33).
STEP FUNCTION
- Press the STEP button (27) to advance frame-by-frame playback;
- Each press of the button advances one frame at a time;
- Press the PLAY ▶ button (33) to return to normal playback.
SEARCH FUNCTION
- Press the GO TO button (39) to search for a particular of the film you are watching;
- Select the chapter using the numeric keypad. Playback will start automatically.
REPEAT FUNCTION
- Press the REPEAT key (30) once to repeat the same chapter continuously, the word “Chapter” appears on the screen.
- Press the REPEAT button (30) a second time to repeat the same title continuously, the word "Title" appears on the screen.
- Press the REPEAT key (30) a third time to repeat the entire disc continuously, the word “All” appears on the screen.
- To deactivate the repeat function, press the REPEAT button (30) a fourth time, any type of writing disappears on the screen.
A-B FUNCTION
- Press the A-B key (28) for the first time to select a starting point, the word “A” is displayed on the screen.
- Press the A-B button (28) a second time to select an arrival point, the word “AB” is displayed on the screen.
- The player continuously repeats the passage between points A and B.
- Press the A-B button (28) a third time to return to normal playback, all types of writing disappear on the screen.
ZOOM FUNCTION
- Press the ZOOM button (32) to enlarge the image displayed on the screen;
- The numeric indicators on the screen indicate the size of the image (2X - 3X - 4X - 1/2X - 1/3X - 1/4X - normal size);
- To return to normal playback, press the ZOOM button (32) in sequence until the graphic indicator disappears and the original display is shown.
Note: If it is an image disc, press the ZOOM button (32) and then use the FWD ▶ (26) or REV ◀ (26) keys to zoom in (125% / 150% / 200%) or zoom out (75% / 50%) the image.
To move the zoom to a larger image use the navigation keys ▲ ▼ ◀ ▶.
ANGLE FUNCTION
- If the disc is set up for multi-angle viewing (consult the disc packaging to make sure of it) press the ANGLE button (37) to switch to a different viewing angle;
- An indication of the various viewpoints available appears on the screen (1,2,3, etc.).
AUDIO FUNCTION
- If the disc is designed to change the listening language during playback (consult the disc packaging to make sure) press the AUDIO button (40) to select the one you want.
- The display shows the languages (e.g. 1/4 - 2/4 - 3/4 - 4/4) and the available channels (5.1CH to indicate the 5.1 channels of Dolby Digital, 2CH to indicate 2 stereo channels, etc.).
SUBTITLE FUNCTION
- If the disc is prepared for subtitles (consult the disc package to make sure of it) press the SUBTITLE button (35) to select the one you want;
■ The language indication appears on the screen (e.g. 1/4 - 2/4 - 3/4 - 4/4); - To deactivate this function, press the SUBTITLE button (35) in sequence, until the message “Dis. S.Title”.
OSD FUNCTION
- Press the OSD button (23) in sequence to view the data relating to the title/chapter, the elapsed/remaining time and the audio / video settings of the film directly on the screen;
- To exit the OSD function, press the OSD button (23) in sequence until the data disappears on the screen.
TITLE FUNCTION
- If the disc is set up for this function (consult the disc packaging to make sure of it) press the TITLE button (19) to show the title menu of the DVD disc.
MENU FUNCTION
- Press the MENU button (17) on the remote control to switch to viewing the main menu of the movie at any time.
PROGRAM FUNCTION
This function allows you to watch your DVD movie according to a schedule that you set yourself.
- Press the PROG button (38), a menu appears on the screen where you can enter chapters and titles of the film you are watching;
- Select the line on which you want to set the chapter and title with th ▲▼ keys and confirm with the ENTER key (18);
- First select the title and then the chapter using the numeric keypad;
■ Proceed with the second and third points until reaching the lines to be programmed; - To activate the programming function, select the START item and confirm with the ENTER key (18). The reading will start automatically according to the sequence of the programmed lines;
- To cancel the programming, press the PROG key (38), select the EXIT item and confirm with the ENTER key (18).
IMAGE ROTATION
If it is a disc, images can select four different transformation modes: "Specular left / right", "Specular up / down", "Rotate anticlockwise" and "Rotate clockwise". These functions can only be set during normal viewing of a photograph and reset when you switch to viewing a new photograph. To select the different transformation modes, use the navigation keys ▲▼◀▶:
UP ▲ - Mirror Up/Down
DOWN ▼ - Mirror Left/Right
LEFT ◀ - Rotate counterclockwise
RIGHT ▶ - Rotate clockwise
10 USB INPUT
CAUTION:
Insert a USB device, only and exclusively with the reader off. Once inserted, turn on the player. If you insert a USB device with the player on, it may not be recognized by the unit and therefore not work.
- Connect the USB device to the USB socket (14).
- Switch on the player.
- Press the DVD/USB button (22) and wait for the recognition of the device until the screen with the contents of the USB memory appears; select the file you want to play.
For all playback functions, refer to paragraphs 9.2 and 9.3.
NOTE:
The reader may not support some devices equipped with a USB socket, this is due to the incompatibility of some processors.
11 DVD SETUP
- Press the SETUP key (36) to enter the main menu.
To enter the submenus, press the ▼ button.
To exit the submenus, press the ◀ button.
To navigate within the submenus, press the ▲▼ buttons.
To confirm the selected item, press the ENTER button (18).
GENERAL CONFIGURATION PAGE
Visual. on TV: allows you to set the appearance of the screen.
You can choose between: 4:3 PS (Pan & Scan), 4:3 LB (LetterBox), 16: 9.
Angle mark: allows you to activate / deactivate the multi-angle view of the DVD.
OSD Language: allows you to change the default language of the main menu (OSD).
Subtitles: allows you to activate subtitles for the hearing impaired if available on the DVD being played (consult the disc packaging to make sure).
Screen Saver: allows you to activate/deactivate the screen saver.
Last Memory: allows you to activate/deactivate the last reading status before turning off the unit.
Speaker Configuration>Downmix: allows you to set the stereo audio output mode of the player.
You can choose between: Lt/Rt and Stereo.
Lt/Rt: mono output on the speakers.
Stereo: stereo output on speakers.
Spdif configuration: allows you to set the audio output mode. It is possible to choose between:
Spdif Off: Digital audio output disabled.
Spdif RAW
Spdif Pcm
Component: allows you to select the type of video signal output RGB or CVBS.
Resolution: allows you to set the video resolution output from the HDMI socket.
Quality: allows access to the color adjustment menu. The following adjustments are present:
Sharpness: allows you to set the screen sharpness through three preset levels: High, Medium, Low.
Brightness: allows you to set the screen brightness.
Contrast: allows you to set the screen contrast.
HDMI setting: the following settings are present:
HDMI: allows you to activate/deactivate the signal on the HDMI socket.
PREFERENCES PAGE
TV type: allows you to set the video system. You can choose between: PAL, AUTO, NTSC.
Audio: allows you to change the default listening language of the DVD (consult the disc packaging to make sure).
Subtitles: allows you to change the default subtitle language of the DVD (consult the disc packaging to make sure).
Disc Menu: allows you to change the default language of the DVD menu (consult the disc packaging to make sure).
Parental control (Parental): DVDs can be encoded according to their content with a level from 8 (adult film, containing scenes of violence and/or sex) to 1 (film for all).
The encoding can concern the whole disc or only some scenes contained in them, sometimes alternative scenes are available to those with content not suitable for minors.
It is the disc manufacturer who decides whether and at what level to implement the encoding level.
The player can be set to a level from 1 to 8.
When a level is set in the player, only discs and scenes with an encoding level equal to or greater than that set are played.
Password: allows the setting of a new password. The factory default password is 0000.
Default (Default): returns the values of the settings to the factory settings.
12 PROBLEMS AND SOLUTIONS
If your DVD player does not work properly, check this short list before taking it to an authorized TREVI service center.
In any case, do not attempt to repair the appliance yourself, this would void the warranty. Only TREVI technical assistance centers are authorized to carry out work on this TV.
No iPictures
- Check the correct insertion of the SCART cable.
- Check the correct insertion of the HDMI cable.
- Check the correct insertion of the composite Audio/Video cable.
No Sound
- Check that the MUTE function is not activated.
- Adjust the volume.
The Remote control does not work properly
- Replace the batteries
The commands does not responding
- Unplug the appliance from the power supply for 30 seconds to perform a reset.
13 TECHNICAL SPECIFICATION
General
| Power | supply | ~ 50/60Hz 110-240V |
| Power | Consumption | 10W |
| Dimensions | 225x201x44mm | |
| Weight | 680g |
Video
| ■ Supported formats | DVD, DVD+R/RW, DVD-R/RW, VCD, SVCD, CD, CD | R/RW |
| ■ Video System | PAL - NTSC | |
| ■ Video Formats | 16:9 - 4:3 |

natural_image
Black triangular warning symbol with a white lightning bolt inside (no text or numbers)MISE EN GARDE
DANGER DE CHOC ÉLECTRIQUE NE PAS EXPOSER PLUIE ET HUMIDITÉ

natural_image
Black triangular warning symbol with exclamation mark (no text or numbers)MISE EN GARDE: N'OUVREZ PAS L'APPAREIL. À L'INTÉRIEUR, IL N'Y A AUCUN CONTRÔLE OU PIÈCE DE RECHANGE MANIPULABLE PAR L'UTILISATEUR. POUR TOUTES LES OPÉRATIONS DE SERVICE, VEUILLEZ CONTACTER UN CENTRE DE SERVICE TREVI AGRÉÉ.

TENSION DANGEREUSE
natural_image
Front view of a black electronic device with control buttons and indicator lights (no visible text or symbols)
natural_image
Front view of a gray remote control with keypad and buttons (no visible text or symbols)
5 DESCRIPTION DES COMMANDES DU LECTEUR DVD

natural_image
Diagram showing a car with a battery connected to a sensor and two cylindrical components (no text or symbols)8.1 MISE EN MARCHE/ARRÊT
natural_image
Black triangular warning symbol with a white lightning bolt inside, indicating electrical hazard (no text)VORSICHT
natural_image
Black triangular warning symbol with exclamation mark (no text or numbers)ACHTUNG: ÖFFNEN SIE DAS GERÄT NICHT. INNEN GIBT ES KEINE MANIPULIERBAREN BEDIENUNGSELEMENTE ODER ERSATZTEILE. FÜR ALLE SERVICEVORGÄNGE WENDEN SIE SICH BITTE AN EIN AUTORISIERTES TREVI-SERVICEZENTRUM

natural_image
Front view of a black electronic device with control buttons and indicator lights (no visible text or symbols)
natural_image
Front view of a gray remote control with keypad and buttons (no visible text or symbols)
natural_image
Diagram showing a car with a battery connected to a sensor and two cylindrical batteries (no text or symbols)natural_image
Black triangular warning symbol with a white lightning bolt inside (no text or numbers)PRECAUCIÓN
PELIGRO DE DESCARGA ELÉCTRICO NO EXPONGA LLUVIA Y HUMEDAD

natural_image
Black triangular warning symbol with exclamation mark (no text or numbers)natural_image
Front view of a gray electronic device with control buttons and indicator lights (no visible text or symbols)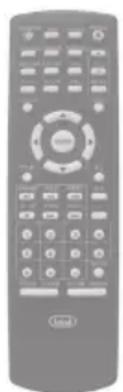
natural_image
Front view of a gray remote control with keypad and buttons (no visible text or symbols)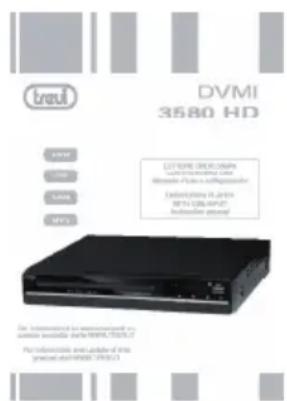
natural_image
Diagram showing a car with a battery and two cylindrical batteries, one emitting a wavy line (no text or symbols)natural_image
Grid of nine grayscale speech bubble icons with national flags, no text or symbols presentEN If you will not find your language on the instruction manual, please go on our website www.trevi.it to find it
■ Precautions for correct disposal of the product.
The symbol shown on the equipment indicates that waste must be disposed of in “separate collection” and so the product must not be disposed of together with urban waste.
The user must take the product to special “separate waste collection centres” provided by local government, or deliver it to the retailer against the purchase of a new product.
Separate collection of waste and subsequent treatment, recycling and disposal operations promotes the production of equipment with recycled materials and limits negative effects on the environment and on health caused by improper handling of waste.
Illegal disposal of the product leads to the enforcement of administrative penalties.

SIMPLIFIED EU DECLARATION OF CONFORMITY
Hereby TREVI Spa declares that equipment type DVMI 3580 HD is in compliance with directive 2014/53/EU.
The full text of the EU declaration of conformity
is available at the following internet address:
https://www.trevi.it/dms/zidi/TREVI/DOCDVMI3580HD.pdf

Trevi S.p.A.
Strada Consolare Rimini-San Marino, 62
47924 Rimini (RN) Italy
Tel. 0541/756420 - Fax 0541/756430
www.trevi.it - e-mail: info@trevi.it


- ATTENZIONE
- RISCHIO DI SCOSSE ELETTRICHE NON ESPORRE A PIOGGIA E UMIDITÀ
- VOLTAGGIO PERICOLOSO
- CAUTION
- SHOCK HAZARD ELECTRIC DO NOT EXPOSE RAIN AND MOISTURE
- DANGEROUS VOLTAGE
- WARNINGS ON THE LASER
- FOREWORD
- SAFETY PRECAUTIONS
- CARE AND MAINTENANCE
- IMPORTANT
- CARE AND MAINTENANCE
- REMOTE CONTROL
- INSTALLATION AND CONNECTIONS
- DVD PLAYER - TV CONNECTION
- NOTE:
- COAXIAL DIGITAL AUDIO OUTPUT
- PRELIMINARY OPERATIONS
- SWITCHING ON/OFF
- VOLUME ADJUSTMENT
- MUTE FUNCTION
- DVD player
- PLAYING A DVD DISC
- DVD DISC
- MPEG DISC
- MAIN FUNCTIONS
- STOPPING REPRODUCTION
- FAST SEARCH
- SKIP TO VIDEO/CHAPTER/PREVIOUS/NEXT TRACK
- PLAYBACK FUNCTIONS
- SLOW FUNCTION
- STEP FUNCTION
- SEARCH FUNCTION
- REPEAT FUNCTION
- A-B FUNCTION
- ZOOM FUNCTION
- ANGLE FUNCTION
- AUDIO FUNCTION
- SUBTITLE FUNCTION
- OSD FUNCTION
- TITLE FUNCTION
- MENU FUNCTION
- PROGRAM FUNCTION
- IMAGE ROTATION
- USB INPUT
- CAUTION:
- DVD SETUP
- GENERAL CONFIGURATION PAGE
- PREFERENCES PAGE
- PROBLEMS AND SOLUTIONS
- No iPictures
- No Sound
- The Remote control does not work properly
- The commands does not responding
- TECHNICAL SPECIFICATION
- MISE EN GARDE
- DANGER DE CHOC ÉLECTRIQUE NE PAS EXPOSER PLUIE ET HUMIDITÉ
- TENSION DANGEREUSE
- DESCRIPTION DES COMMANDES DU LECTEUR DVD
- MISE EN MARCHE/ARRÊT
- VORSICHT
- PRECAUCIÓN
- PELIGRO DE DESCARGA ELÉCTRICO NO EXPONGA LLUVIA Y HUMEDAD
- ■ Precautions for correct disposal of the product.
- SIMPLIFIED EU DECLARATION OF CONFORMITY
Brand : Trevi
Model : DVMI 3580 HD
Category : DVD player