00053305 - USB Drive HAMA - Free user manual and instructions
Find the device manual for free 00053305 HAMA in PDF.
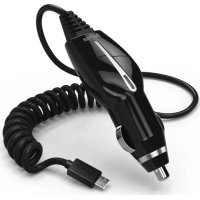
| Product Type | WiFi USB Key |
| Brand | Hama |
| Model | 00053305 |
| Compatible Operating Systems | Windows 10, 8.1, 8 |
| WiFi Standards | IEEE 802.11 b/g/n (2.4 GHz), IEEE 802.11 ac (5 GHz) |
| Max Transmission Rate (2.4 GHz) | Up to 200 Mbps |
| Max Transmission Rate (5 GHz) | Up to 433 Mbps |
| Encryption Types | WEP (64/128 bits), WPA, WPA2, TKIP, AES |
| Power Supply | 5 V DC, 100 mA (via USB port) |
| Dimensions (L x W x H) | Approximately 50 x 20 x 10 mm |
| Weight | Approximately 10 g |
| Operating Frequencies | 2.4 GHz (2412-2472 MHz), 5 GHz (5150-5250 MHz), 5.8 GHz (5725-5850 MHz) |
| Maximum RF Power | 2.4 GHz: 39.719 mW (EIRP); 5 GHz: 39.902 mW (EIRP); 5.8 GHz: 21.677 mW (EIRP) |
| Package Contents | 1 WiFi USB key, instruction manual |
| Care and Cleaning | Clean with a slightly damp lint-free cloth, avoid harsh detergents |
| Safety Instructions | Protect from moisture and heat, do not open, keep out of reach of children |
| Recycling | Do not dispose of with household waste, return to a collection point |
| Warranty | 2 years (generic) |
Frequently Asked Questions - 00053305 HAMA
User questions about 00053305 HAMA
0 question about this device. Answer the ones you know or ask your own.
Ask a new question about this device
Download the instructions for your USB Drive in PDF format for free! Find your manual 00053305 - HAMA and take your electronic device back in hand. On this page are published all the documents necessary for the use of your device. 00053305 by HAMA.
USER MANUAL 00053305 HAMA
natural_image
Technical line drawing of a mechanical component with rounded ends and two mounting holes (no text or symbols)OperatingInstructions
Bedienungsanleitung
Moded'emploi
Istruzioniperl'uso
Gebruiksaanwijzing
GB
D
F
1
NL

Further information (features, languages, and so on) are available on /
00053305:www.hama.com/53305#downloads
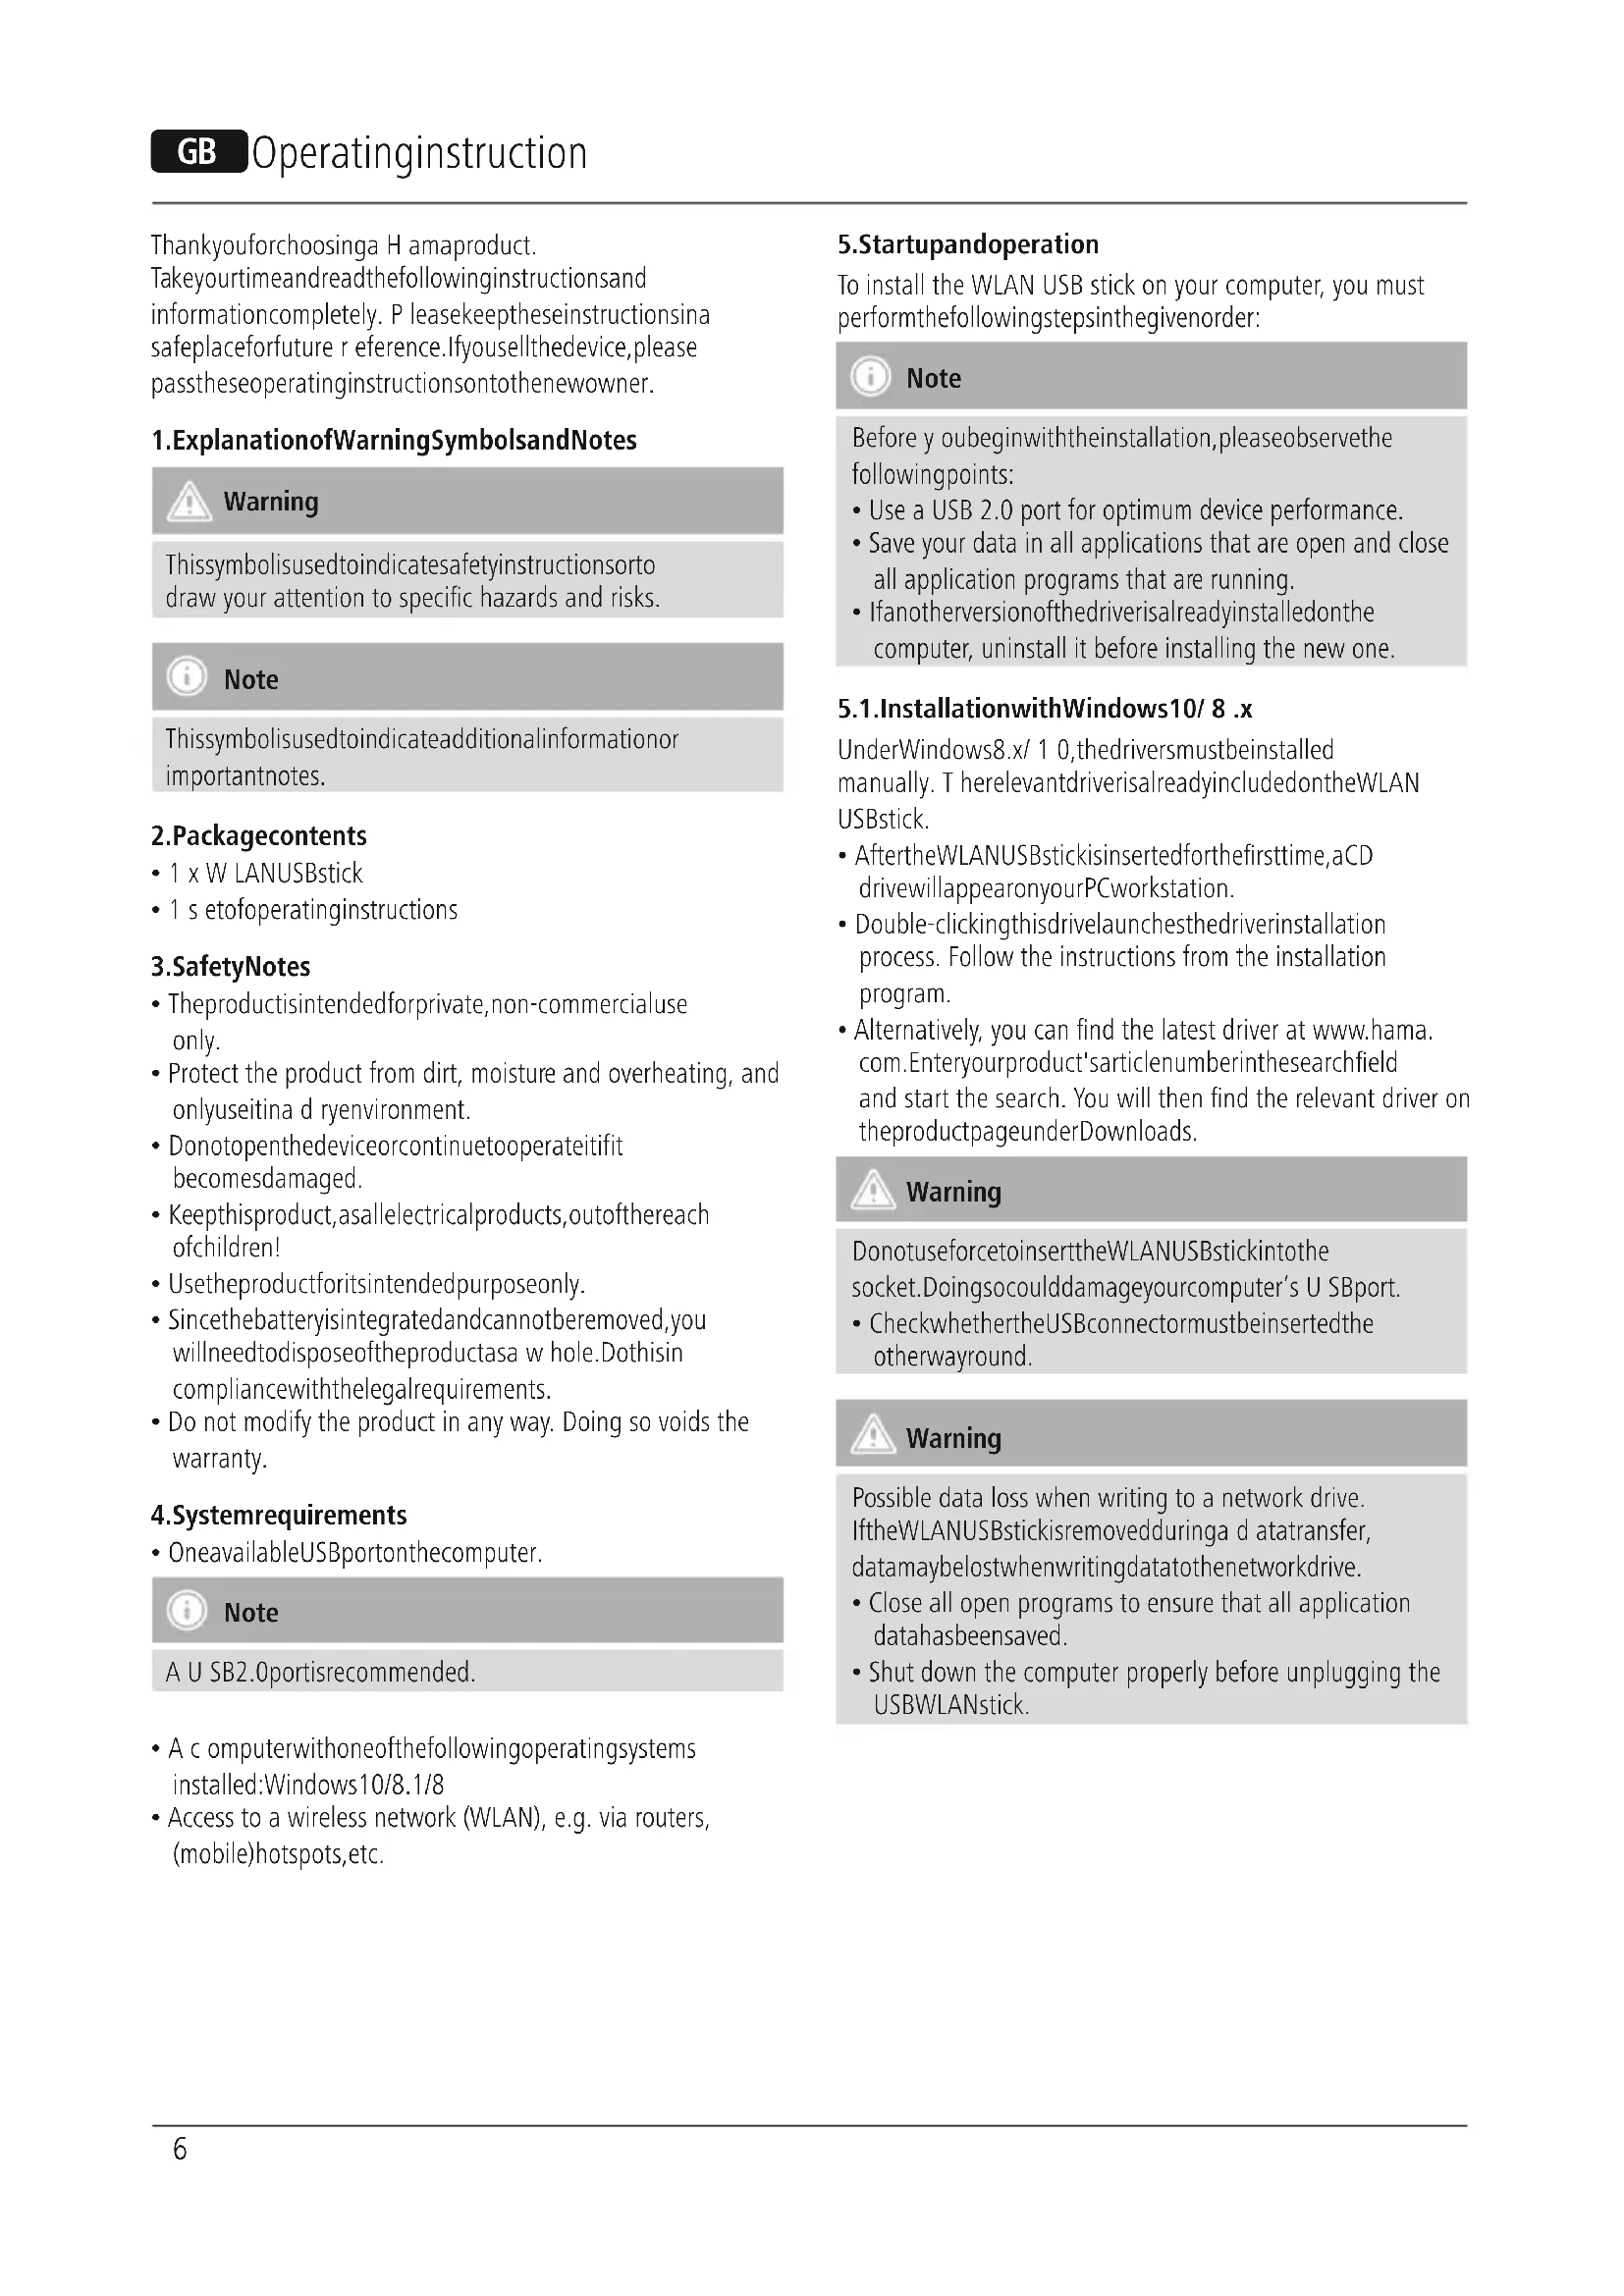
Thankyouforchoosinga H amaproduct.
Takeyourtimeandreadthefollowinginstructionsand informationcompletely. P leasekeeptheseinstructionsina safeplaceforfuture r eference.Ifyousellthedevice,please passtheseoperatinginstructionsontothenewowner.
1. ExplanationofWarningSymbolsandNotes

Warning
This symbol is used to indicate safety instructions to draw your attention to specific hazards and risks.

Note
This symbol is used to indicate additional information or important notes.
2.Packagecontents
- 1 x W LANUSBstick
- 1 s etofoperatinginstructions
3. SafetyNotes
- Theproductisintendedforprivate,non-commercialuse only.
- Protect the product from dirt, moisture and overheating, and only use itina dry environment.
- Donotopenthedeviceorcontinuetooperateitifit becomesdamaged.
- Keep this product, as all electrical products, out of there each of children!
- Usetheproductforitsintendedpurposeonly.
- Sincethebatteryisintegratedandcannotberemoved,you willneedtodisposeoftheproductasa w hole.Dothisin compliancewiththelegalrequirements.
- Do not modify the product in any way. Doing so voids the warranty.
4. Systemrequirements
- OneavailableUSBportonthecomputer.

Note
A U SB2.0portisrecommended.
- A computerwithoneofthefollowingoperatingsystems installed:Windows10/8.1/8
- Access to a wireless network (WLAN), e.g. via routers, (mobile)hotspots,etc.
5. Startupandoperation
To install the WLAN USB stick on your computer, you must perform the following steps in the given order:

Note
Before you begin with the installation, please observe the following points:
- Use a USB 2.0 port for optimum device performance.
- Save your data in all applications that are open and close all application programs that are running.
- Ifanotherversionofthedriverisalreadyinstalledonthe computer, uninstall it before installing the new one.
5.1.InstallationwithWindows10/8.x
UnderWindows8.x/ 1 0, the drivers must be installed manually. Therelevant driver is already included on the WLAN USBstick.
- AftertheWLANUSBstickisinsertedforthefirsttime,aCD drivewillappearonyourPCworkstation.
- Double-clicking this drivelaunchesthedriverinstallation process. Follow the instructions from the installation program.
- Alternatively, you can find the latest driver at www.hama.com. Enteryourproduct'sarticlenumberinthesearchfield and start the search. You will then find the relevant driver on theproductpageunderDownloads.

Warning
DonotuseforcetoinserttheWLANUSBstickintothe socket.Doingsocoulddamageyourcomputer's U SBport.
- CheckwhethertheUSBconnectormustbeinsertedthe otherwayround.

Warning
Possible data loss when writing to a network drive. If the WLAN USB stick is removed during a datatransfer, datamaybelost when writing datatothenetworkdrive.
- Close all open programs to ensure that all application datahasbeensaved.
- Shut down the computer properly before unplugging the USBWLANstick.
5.2 Supported encryption types
TheWLANUSBsticksupportsthefollowingencryption processesforpreventingunauthorisedaccesstoyourwireless network:
•WPA
•WPA2
• WEP(64/128bit)

Note
- WPA and WPA2 (Wi-Fi Protected Access) are the current standardsforencryptionofwirelessnetworksandthe datatransmitted.Onlyuserswhoknowthesetkeycan accessthewirelessnetwork.
- WEP(WiredEquivalentPrivacy)isanolderencryption processandisrequiredwhenevera u serinthewireless networkdoesnotsupportthenewerWPA/WPA2 encryptionprocess.
- We recommend using the WPA or WPA2 encryption processwheneverpossible.
5.3 Network configuration (aftersuccessful installation)
OnceyouhavesuccessfullyinstalledtheWLANUSBstickon yourcomputerandinsertedit,youcanestablisha c on ne c t i o n betweena w irelessnetworkandyourcomputer.
TheWLANUSBstickallowsbothinfrastructure mode and ad-hocmode.
Infrastructuremode
Wirelessconnectionofoneormore computersandother networkuserstoanaccesspointiscalledinfrastructure mode. AccesspointssuchasWLANroutersallowfunctionssuchas accessingtheInternetora wirednetwork.
NetworkconfigurationviaWPS

Note- W P S
- If your access points supports WPS (Wi-Fi Protected Setup), this standard can simplify configuration of your wireless network.
- Pleaserefertotheinstructionsintheoperatingmanual ofyourterminaldevice.
-
WPScanonlybeusedincombinationwiththeWPA/WPA2encryptionprocesses(WEPIsnotsupported).
-
PresstheWPSbuttonattheaccesspoint(buttonmayhave a d differentname)toactivatetheWPSfunctionattheaccess pointandonthecomputerwiththeinsertedWLANUSB stick.
- The available network is automatically selected in this process and these security data transferred.
- You may be prompted to enter a security/network key, password, etc.
- If necessary, follow the instructions for your operating system.
Manualnetworkconfiguration
- Selectanavailablenetwork.
- You may be prompted to enter a security/network key, password, etc.
• After you have entered it correctly, the connection is established. - If no networks have been set up/are available, configure the appropriatenetworkusingthesettingsandconfigurationsin theoperatingsystemyouuse.

Note- Configuration
- Notetheinformationintheoperatinginstructionsfor yourterminaldeviceandoperatingsystem.
- If necessary, follow the instructions for your operating system.
- ThefunctionLEDintegratedintothedeviceflasheswhen thenetworkisaccessed.
6. Care and Maintenance
- Only clean this product with a slightly damp, lint-free cloth anddonotuseaggressivecleaningagents.
• Make sure that water does not get into the product.
7.WarrantyDisclaimer
Hama GmbH & Co. KG assumes no liability and provides no warrantyfordamageresultingfromimproperinstallation/mounting, improperuseoftheproductorfromfailuretoobservetheoperatinginstructionsand/orsafetynotes.
8. Service and Support
PleasecontactHamaProductConsultingifyouhaveany questionsaboutthisproduct.
Hotline:+499091502-115(German/English)
Furthersupportinformationcanbefoundhere:
www.hama.com
9.TechnicalData
| Encryption modes | WEP, WPA, WPA2, TKIP, AES |
| OperatingSystemWindows10/8.1/8 | |
| WLANStandards | IEEE802.11b/g/n(2.4GHzupto200Mbps)IEEE802.11ac(5GHzupto433Mbps) |
| Powerconsumption5V | --- 100mA |
10.RecyclingInformation
Noteonenvironmentalprotection:
AftertheimplementationoftheEuropeanDirective 2012/19/EUand2006/66/EUinthenationallegal system,thefollowingapplies:
Electricandelectronicdevicesaswell as batteries
mustnotbedisposedofwithhouseholdwaste. Consumers are o bligedbylawtoreturnelectricalandelectronicdevices aswell a s b atteriesattheendoftheirservicelivestothe publiccollectingpointssetupforthispurposeorpointofsale. Details to this are defined by the national law of the respective country. Thissymbolontheproduct,theinstructionmanual or the package indicates that a product is subject to these regulations. By recycling, reusing the materials or other forms ofutilisingolddevices/Batteries,youare m akinganimportant contributiontoprotectingourenvironment.
11. Declaration of Conformity
CE Hereby, Hama GmbH & Co KG declares that the radio equipmenttype[00053305]isincompliancewith Directive 2014/53/EU. The full text of the EU
declarationofconformityisavailableatthefollowinginternet address:www.hama.com->00053305->Downloads.
| Frequencyband(s) | 2.4GHz(2412MHz- 2 472MHz)5 G Hz(5150MHz- 5 250MHz)5.8GHz(5725MHz- 5 850MHz) |
| Maximumradio-frequency powertransmitted | 2.4GHz/ 3 9.719mW(EIRP)5 G Hz/ 3 9.902mW(EIRP)5.8GHz/ 2 1.677mW(EIRP) |
RestrictionsorRequirementsin
Belgium, Bulgaria, Czech Republic, Denmark, Germany, Estonia, Ireland, Greece, Spain, France, Croatia, Italy, Cyprus, Latvia, Lithuania, Luxembourg, Hungary, Malta, the Netherlands, Austria, Poland, Portugal, Romania, Slovenia, Slovakia, Finland, Sweden, United Kingdom

Note
Ifchannels36–64(frequency5.150–5.350GHz)are used in a 5-GHzWLAN, theproductmayonlybeusedinclosed rooms.
SummaryofMaximumSARValue
| OperatingMode | HighestBodySAR10g(0.5cmGap)(W/kg) |
| 2.4G W LAN0.01 | |
| 5 G WLAN0.08 |
Restrictionsouexigencesen
All listed brands are trademarks of the corresponding companies. Errors and omissions excepted, and subject to technical changes. Our general terms of delivery and payment are applied.