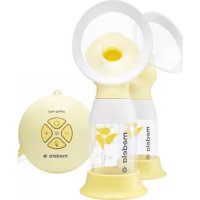
Swing Maxi Flex - Breast pump MEDELA - Free user manual and instructions
Find the device manual for free Swing Maxi Flex MEDELA in PDF.



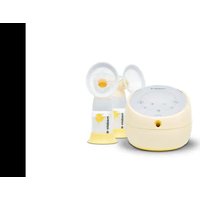
| Product Type | Double electric breast pump |
| Brand | Medela |
| Model | Swing Maxi Flex |
| Dimensions (L x W x H) | 121 x 129 x 57 mm |
| Weight (without batteries) | 290 g |
| Power supply | Mains (100-240 V~, 12 V---1 A/1.5 A adapter) or batteries (6 x 1.5 V AAA) |
| Suction strength | -35 to -250 mmHg (-5 to -33 kPa) |
| Suction phases | Stimulation (2 min max.) then expression, adjustable intensity |
| Main functions | Double pumping, hands-free possible (Easy Expression bustier sold separately), automatic stop after 30 min without handling, LED indicator |
| Box contents | Motor unit, mains adapter, 1 Swing Maxi Flex tube, 2 bottles 150 ml, 2 bottle holders, 2 breast shields (21 mm and 24 mm), 2 membranes, 2 multifunction lids |
| Parts care | Clean with soapy water or dishwasher (except tubing), disinfect by boiling 5 min or microwave (Quick Clean bag) |
| Safety | Waterproof IPX? (not specified, but splash protection), single user only, automatic stop, do not immerse motor unit |
| Spare parts available | Breast shields (21, 24, 27, 30 mm), bottles 150 ml and 250 ml, membranes, connectors, tubing, motor unit, mains adapters (EU, UK, US, AUS, CN) |
| Warranty | 2 years |
| Lifespan | 250 hours of operation |
| Intended use | Breast milk expression, relief from engorgement, mastitis, sore nipples, flat/retracted nipples |
Frequently Asked Questions - Swing Maxi Flex MEDELA
User questions about Swing Maxi Flex MEDELA
0 question about this device. Answer the ones you know or ask your own.
Ask a new question about this device
Download the instructions for your Breast pump in PDF format for free! Find your manual Swing Maxi Flex - MEDELA and take your electronic device back in hand. On this page are published all the documents necessary for the use of your device. Swing Maxi Flex by MEDELA.
USER MANUAL Swing Maxi Flex MEDELA
Swing Flex™ Swing Maxi Flex™
EN Instructions for use

Gebruiksaanwijzing

Mode d'emploi
Thank you for choosing the Swing Flex / Swing Maxi Flex breast pump. Breast milk is the natural choice for your baby, but there are reasons and situations where breastfeeding is not possible. For over 50 years, it has been Medela's conviction that these mothers and babies can be supported. In close cooperation with breastfeeding experts, Medela, one of the market leaders, has researched and developed breast pumps that perfectly meet breastfeeding mother's needs. For mothers who insist on the best for their babies and themselves. Because you care.
- Intended use / Population - Contraindication 5
- Meaning of symbols 6
- Important safety information 9
4.Product description Swing Flex 10
5.Product description Swing Maxi Flex 11 - Cleaning 12
6.1 Cleaning overview 12
6.2 Disassemble 13
6.3 Wash 14
6.4 Sanitise 14
6.5 Cleaning tubing 15
6.6 Cleaning the motor unit 15
7.Preparing for pumping 16
7.1 Mains operation 16
7.2 Battery operation 16
7.3Assembling the pump set 18
- Expression 20
8.1 Swing Flex-Preparing for single pumping 20
8.2 Swing Maxi Flex - Preparing for single pumping 20
8.3 Swing Maxi Flex - Preparing for double pumping 22
8.4 Swing Maxi Flex - Preparing for hands-free expression with the Easy Expression Bustier 24
8.5 Pumping 26
- Storing and thawing breast milk 28
9.1 Storage 28
9.2 Freezing 28
9.3 Thawing 28
10.Troubleshooting 29
11. Warranty/Disposal 30
12. Spare parts and Accessories 31
13. EMC/Technical description 33
14. Technical specifications 34
1. Intended use / Population - Contraindication

The intended use and indications of breast pumps
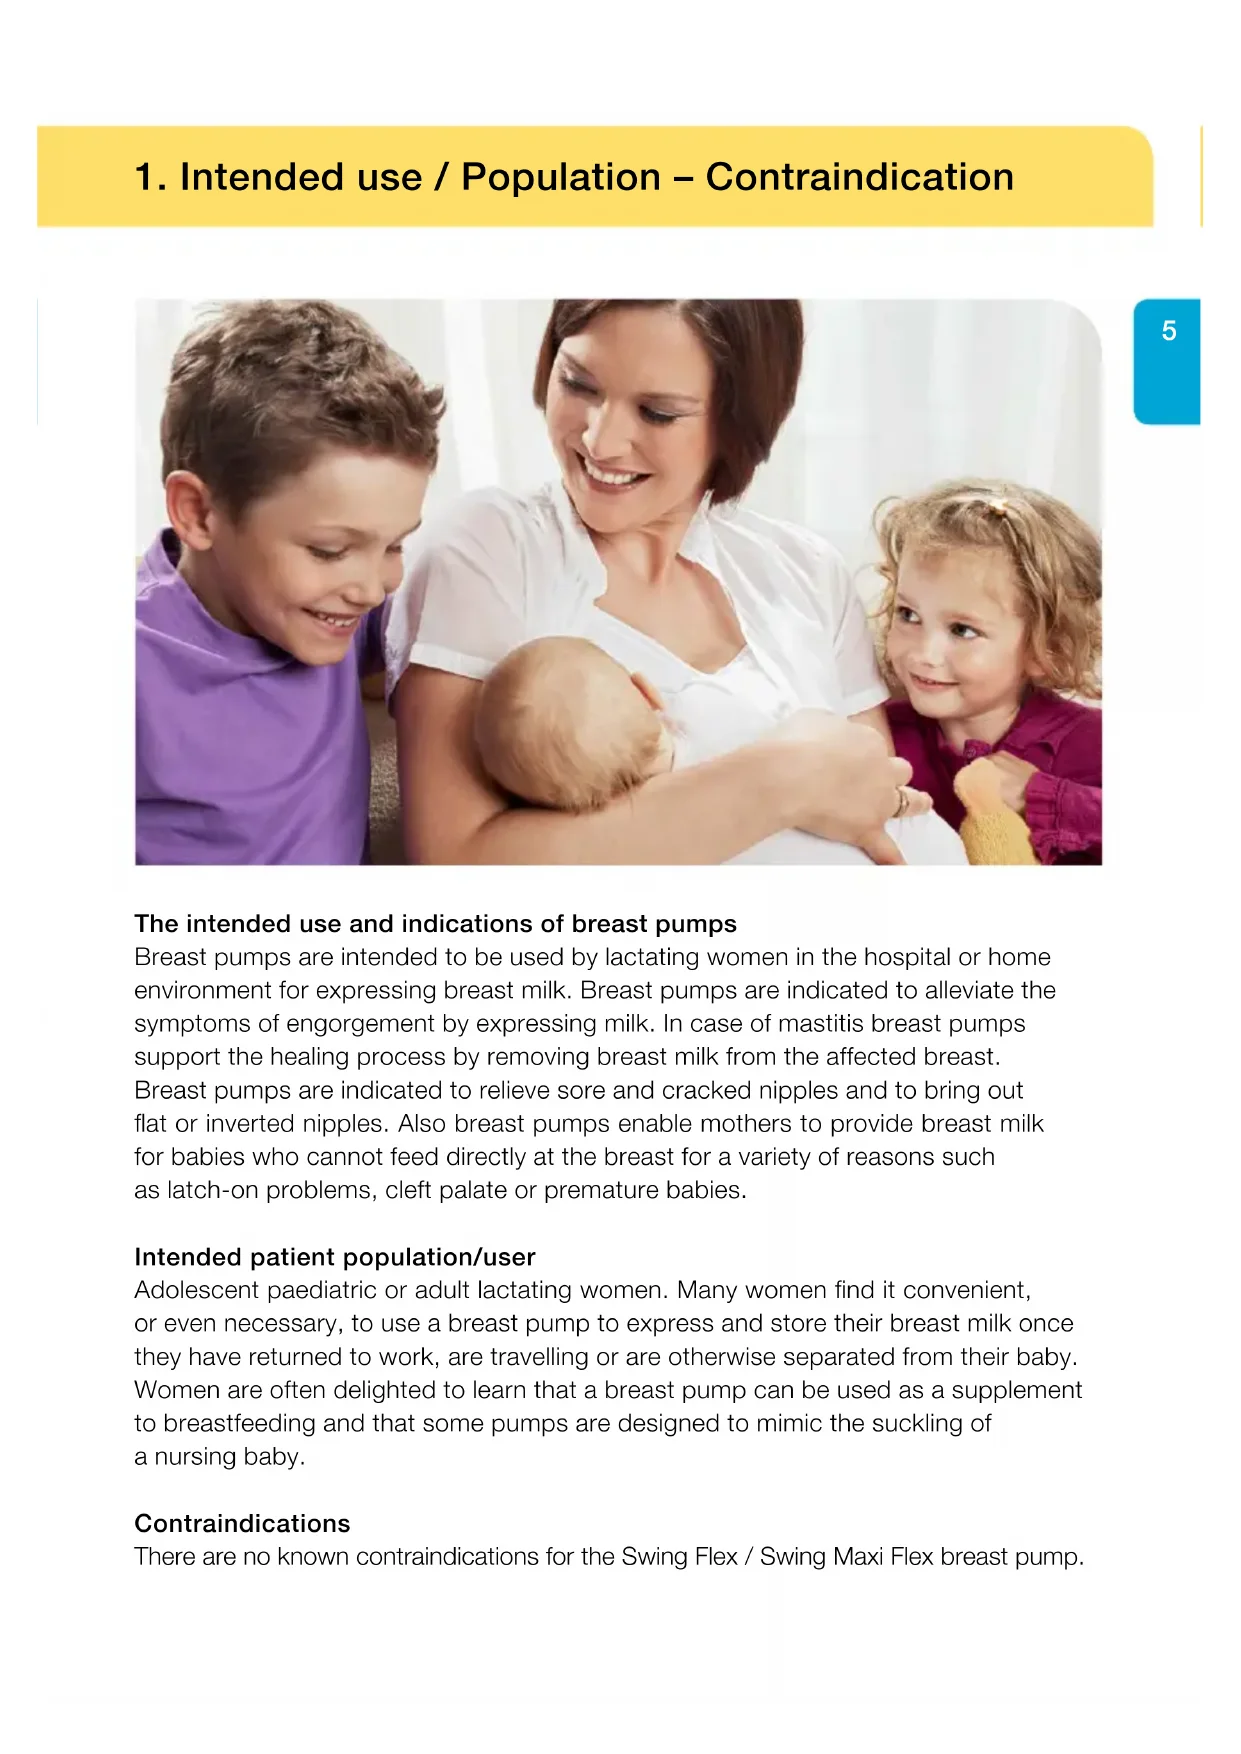
Breast pumps are intended to be used by lactating women in the hospital or home environment for expressing breast milk. Breast pumps are indicated to alleviate the symptoms of engorgement by expressing milk. In case of mastitis breast pumps support the healing process by removing breast milk from the affected breast.
Breast pumps are indicated to relieve sore and cracked nipples and to bring out flat or inverted nipples. Also breast pumps enable mothers to provide breast milk for babies who cannot feed directly at the breast for a variety of reasons such as latch-on problems, cleft palate or premature babies.
Intended patient population/user
Adolescent paediatric or adult lactating women. Many women find it convenient, or even necessary, to use a breast pump to express and store their breast milk once they have returned to work, are travelling or are otherwise separated from their baby. Women are often delighted to learn that a breast pump can be used as a supplement to breastfeeding and that some pumps are designed to mimic the suckling of a nursing baby.
Contraindications
There are no known contraindications for the Swing Flex / Swing Maxi Flex breast pump.
2. Meaning of symbols
The warning symbol identifies all instructions that are important for safety. Failure to observe these instructions can lead to injury or damage to the breast pump! When used in conjunction with the following words, the warning symbol stands for:
Warning
Can lead to serious injury or death.
Caution
Can lead to minor injury.
Note
Can lead to material damage.
Info
Useful or important information that is not related to safety.
Symbols on the packaging
This symbol indicates that the material is part of a recovery/recycling process.
This symbol indicates a carton package.
This symbol indicates to keep the device away from sunlight.
This symbol indicates to handle the fragile device with care.
This symbol indicates the temperature limitation for operation, transport and storage.
This symbol indicates the humidity limitation for operation, transport and storage.
This symbol indicates the atmospheric pressure limitation for operation, transport and storage.
This symbol indicates to keep the device dry.
This symbol indicates that the packaging contains products intended to come in contact with food according to regulation 1935/2004.
This symbol indicates unique GSI Global Trade Item Numbers (GTIN).
This symbol indicates do not dispose the device together with unsorted municipal waste (for EU only).
This symbol indicates to follow instructions for use.
Symbols on the device
This symbol indicates to follow instructions for use.
This symbol indicates the compliance with the essential requirements of the Council Directive 93/42/EEC of 14 June 1993 concerning medical devices.
This symbol indicates the manufacturer.

This symbol indicates do not dispose the device together with unsorted municipal waste (for EU only).
This symbol indicates the compliance with additional USA and Canada safety requirements for medical electrical equipment.
This symbol indicates a type BF applied part.
This symbol indicates manufacturer's serial number of the device.
This symbol indicates the positioning of battery cell.
This symbol indicates the protection against ingress of solid foreign objects and against harmful effects due to the ingress of water.
This symbol indicates the date of manufacture (four digits for the year and two digits for the month).
Symbols on the mains adapter

This symbol indicates that the mains adapter is a class II device.
This symbol indicates the compliance with China Compulsory Certification.
This symbol indicates that the mains adapter is for indoor use only.
This symbol indicates the compliance with USA and Canada safety requirements.
This symbol indicates the compliance with Federal Communications Commission requirements.
This symbol indicates polarity of d.c. power connector.
This CE-mark indicates the compliance with the low voltage and electromagnetic compatibility directive.
This symbol indicates to not dispose the device together with unsorted municipal waste (for EU only). The solid bar symbol indicates that mains adapter is put on the market after 13 August 2005.
This symbol indicates the compliance with energy efficiency requirements.
This symbol indicates alternating current.
This symbol indicates direct current.
| 8 | VI | This symbol indicates the compliance with energy efficiency requirements. |
| S66 | This symbol indicates that the mains adapter is safety tested. | |
| This symbol indicates a short-circuit proof safety isolating transformer. | ||
| SAFETY TRY053-12 | Singapore Consumer Protection Registration. | |
| IS | This symbol indicates that the electronic device incorporating transformer(s) and electronic circuitry(ies), converts electrical power into single or multiple power outputs. | |
| V | This symbol indicates the compliance with AUS/NZ requirements N5586 (regulatory compliance mark). | |
| TUV SUD PSB | This symbol indicates the compliance with PSE requirements (Japan, Product Safety Electrical Appliance and Material Safety Law). | |
| IP20 | This symbol indicates the protection against ingress of solid foreign objects and against harmful effects due to the ingress of water. |
3. Important safety information

Failure to follow these instructions/safety information can lead to danger from the device. Subject to technical changes.
Device

Danger of electrocution! Keep the device dry! Never immerse in water or other liquids!

Do not expose the motor unit to direct sunlight
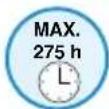
The operating life of the Swing Flex breast pump is 275 hours.
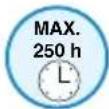
The operating life of the Swing Maxi Flex breast pump is 250 hours. The service life is two years.

The Swing Flex / Swing Maxi Flex breast pump is not heat-resistant: Keep away from radiators and open flames.
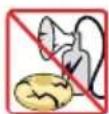
Never use a damaged device. Replace damaged or worn parts.

Repairs must be performed only by an authorised service agency. Do not repair yourself! No modifications to the device are permitted.
Electrical use
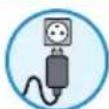
Separation from the mains is only assured through the disconnection of the mains adapter from the wall socket outlet.
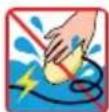
Do not reach for any electrical device if it has fallen into water. Unplug immediately.

Keep the mains adapter away from heated surfaces.
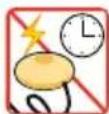
The breast pump should never be left unattended when plugged into a power source.
Use

Use the Swing Flex / Swing Maxi Flex breast pump only for its intended use as described in this manual.

Do not use the Swing Flex /Swing Maxi Flex breast pump while bathing or showering.
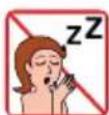
Do not use the Swing Flex / Swing Maxi Flex breast pump while sleeping or overly drowsy.
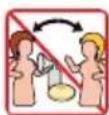
This is a single user product. Use by more than one person may present a health risk.

Do not drive whilst hands-free pumping.

Supervision is necessary when the Swing Flex / Swing Maxi Flex breast pump is used in the vicinity of children.

Contact your lactation consultant or breastfeeding specialist if you experience problems or pain.
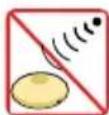
Portable and mobile radio frequency communications equipment can affect the Swing Flex / Swing Maxi Flex breast pump.
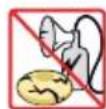
Never operate an electrical device if it has a damaged cord or plug, if it is not working properly, if it has been dropped or damaged, or dropped into water.
4. Product description Swing Flex
10
Swing Flex - single electric 2-Phase breast pump
1x motor unit:
article 600.0975
pare part 099.0015
breast shields:
1 x 21 mm (article 101035239)
1 x 24 mm (article 101035240)
1x mains adapter
article spare part
Euro 4.8V 201.1055 099.0016
UK 4.8V 201.1056 099.0017
AUS/NZ 4.8V 201.1057 099.0018
CN 4.8V 201.1058 099.0276
US/JP 4.8V 201.1059 101033542
1x Swing Flex tubing
article 201.1079
pare part 101034002
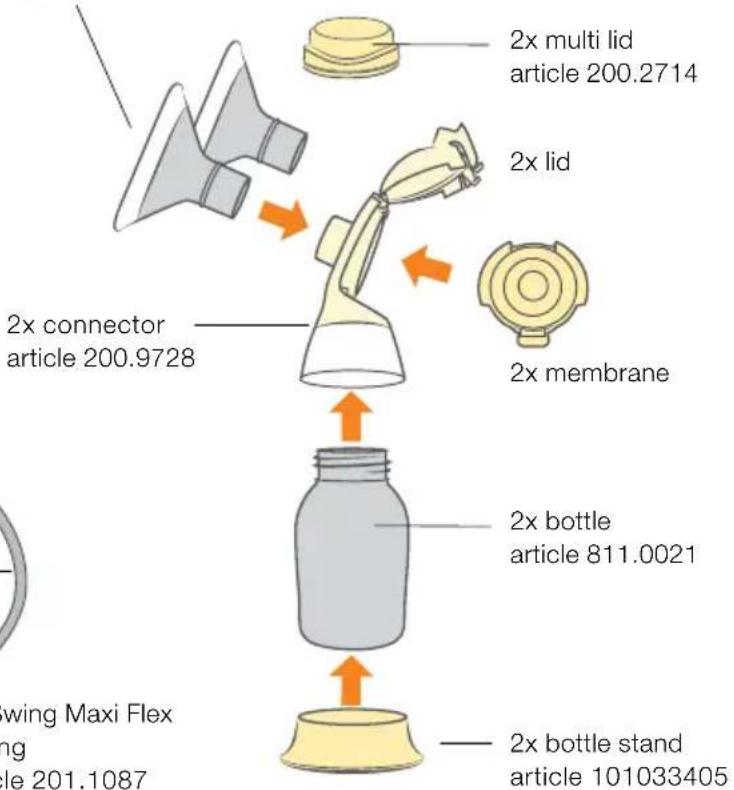
1x connector
article 200.9728
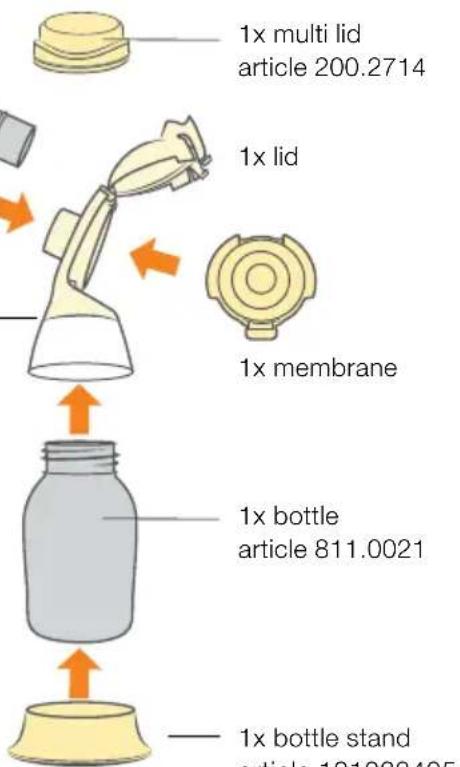
1x bottle
article 811.0021
1x bottle stand
article 101033405
5. Product description Swing Maxi Flex
Swing Maxi Flex - double electric 2-Phase breast pump
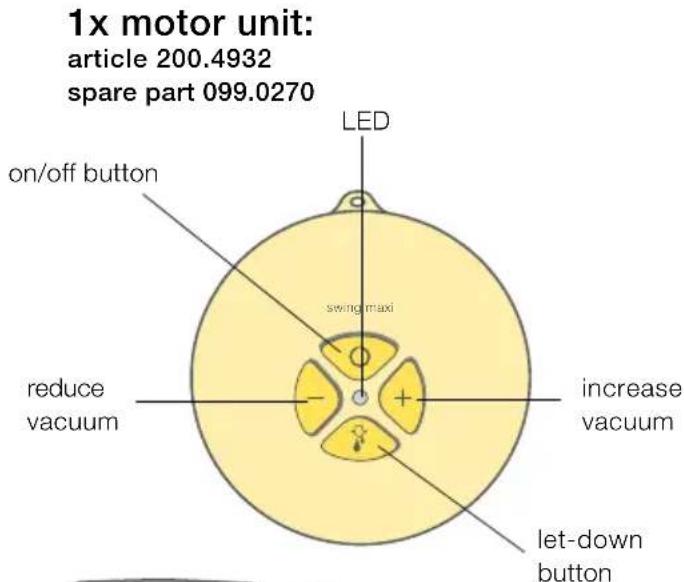
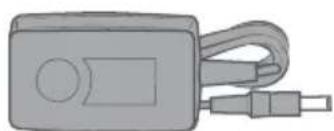
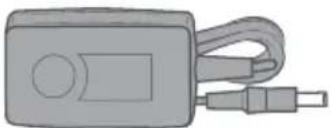
1x mains adapter
article spare part
Euro 12V 201.1146 099.0271
UK 12V 201.1147 099.0272
US/JP 12V 201.1148 101033543
AUS/NZ 12V 201.1149 099.0273
CN 12V 101032865 099.0274
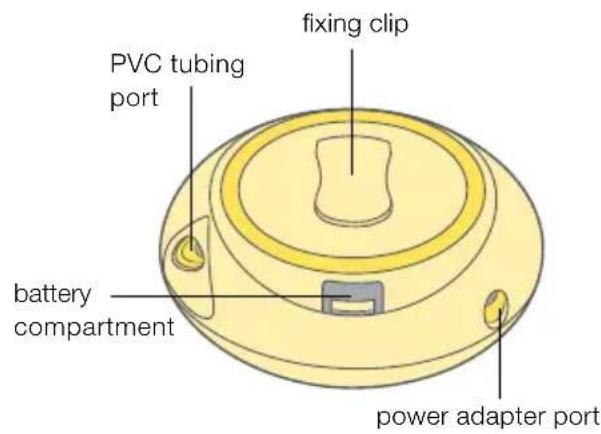
breast shields:
2× 21 mm (article 101033239)
2× 24 mm (article 101035240)
6. Cleaning

6.1 Cleaning overview
Washing and sanitising are two different activities. They must be done separately to protect you, your baby and the performance of your breast pump.
Wash - To clean the surfaces of the parts by physically removing contamination.
Sanitise - To kill living organisms, such as bacteria or viruses, that may be present on the surfaces of the parts.
| When to clean | Breast shield(s) | Connector and membrane | Bottles & lids |
| Before 1st use | ✓ 6.3 wash ✓ 6.4 sanitise | ✓ 6.2 disassemble ✓ 6.3 wash ✓ 6.4 sanitise | ✓ 6.2 disassemble ✓ 6.3 wash ✓ 6.4 sanitise |
| After each use | ✓ 6.3 wash | ✓ 6.3 wash | ✓ 6.3 wash |
| Once per day | ✓ 6.4 sanitise | ✓ 6.4 sanitise | ✓ 6.4 sanitise |
| When to clean | Tubing | Motor unit |
| As needed see chapter 6.5 see chapter 6.6 |
6.2 Disassemble
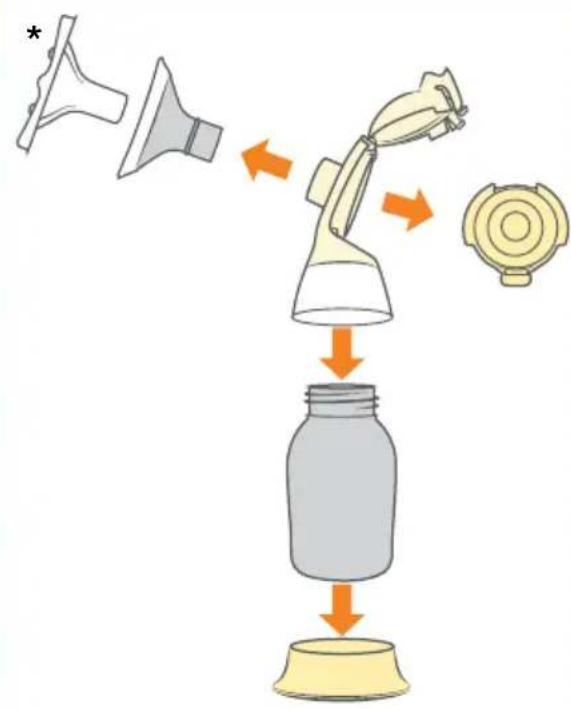
1 Remove and dispose the protective cover* from the breast shield before first use.
Disassemble the pump set into its individual parts (breast shield, connector, membrane, milk bottle).
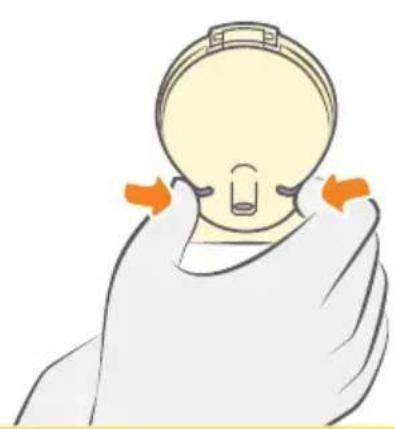
1 Open back cap of the connector by squeezing both flaps.
I Check all parts for damage.
I Replace damaged or worn parts.

Caution
I Do not spray or pour liquid directly onto the pump.
I Only use drinking-quality water for cleaning.
Take apart and wash all parts that come in contact with the breast and breast milk immediately after use to avoid drying up of milk residues and to prevent growth of bacteria.
I Do not clean the tubing with Quick Clean bags in the microwave.
I Unplug the breast pump before cleaning the motor unit.

Note
The pump set requires no maintenance.
I Take care not to damage parts of the pump set during cleaning.
I Do not use the breast milk if bottles or components become damaged.
6. Cleaning

6.3 Wash
Before first use and after each use
Sink Stovetop
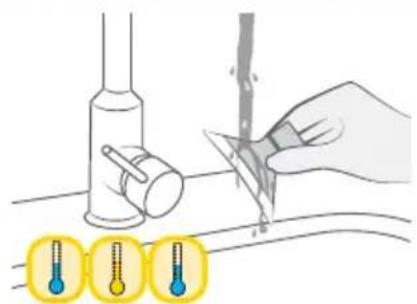
- Rinse all parts with cold, clear drinking-quality water (approx. 20^ ).
- Clean these parts with plenty of warm, soapy water (approx. 30^ ). Use a commercially available washing-up liquid, preferably without artificial fragrances and colouring (pH neutral).
- Rinse the parts with cold, clear drinking-quality water for 10-15 seconds (approx. 20^ ). Dry after washing.
OR
Dishwasher
Place all parts, except for the tubing, on the top rack or in the cutlery section. Use a commercially available dishwashing detergent. Dry after washing.
6.4 Sanitise
Before first use and once per day
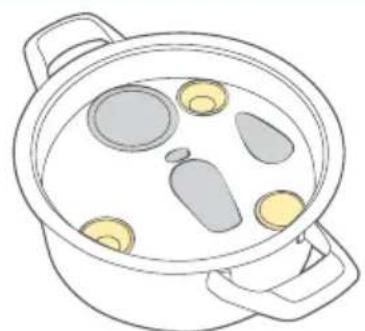
Cover all parts, except the tubing, with water and boil at least for 5 minutes. Dry after sanitising.
OR
Microwave

Use Quick Clean* bags in the microwave in accordance with the instructions. Dry after sanitising.
- Accessories available for order: see chapter 12. For more information, visit www.medela.com.
Drying
Dry with a clean cloth or leave to dry on a clean cloth. Put the clean parts in a clean storage bag or a clean environment. Do not store parts in an airtight container/bag if moist. It is important that all residual moisture dries.
6.5Cleaning tubing
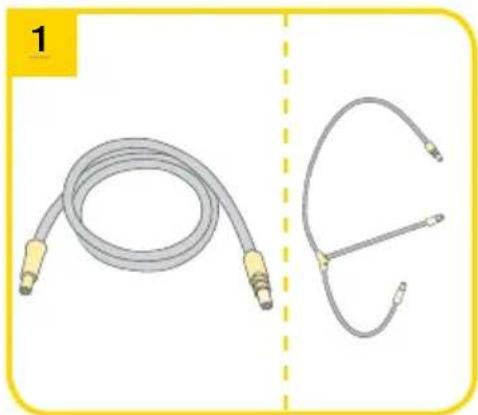
I No visible residues
No cleaning needed.
With visible residues
- Rinse tubing in cool water
- Wash tubing in warm, soapy water
- Rinse tubing with clear water
- Shake out water droplets
- Hang to air dry
Do not sanitise the tubing.
6.6 Cleaning the motor unit
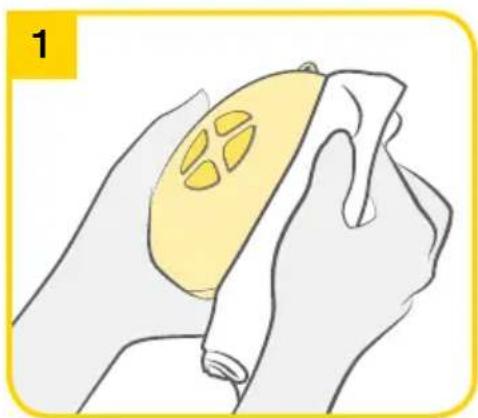
To clean the motor unit, wipe the housing with a clean, damp (not wet) cloth. You may use drinking-quality water and a basic washing-up liquid or a non-abrasive detergent.
! Note
If the individual components of the pump set are cleaned in a dishwasher, parts may be discoloured by food pigments. This has no impact on the function.
The membrane at the connector prevents the milk from flowing into the tubing, however, inspect the tubing after each pumping session for visible residues. If there are visible residues in the tubing, follow the instructions in chapter 6.5.
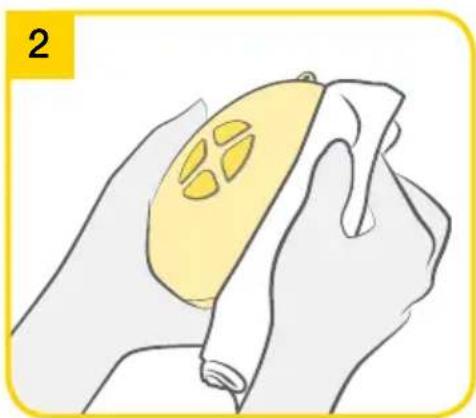
Additionally you may use an alcohol-based disinfecting agent.
7. Preparing for pumping


Warning
I Mains operation:
Follow the exact order of the steps.
I Only use the mains adapter supplied with the Swing Flex / Swing Maxi Flex.
I Make sure the voltage of the mains adapter is compatible with the power source.

Info
You can operate the
Swing Flex / Swing Maxi Flex breast pump via battery or mains.
I Battery operation:
The batteries do not need to be removed when the mains adapter is used for pumping.
Regularly check the condition of the batteries in the motor unit.
If Swing Flex / Swing Maxi Flex will remain unused for a longer period of time, remove the batteries from the battery compartment.
Batteries last for 4 - 6 pumping sessions (approx. 112 hours pumping time).
7.1 Mains operation
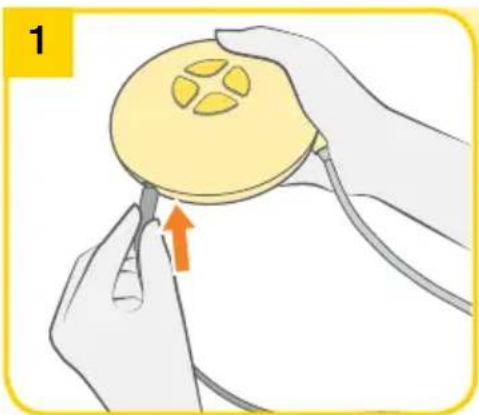
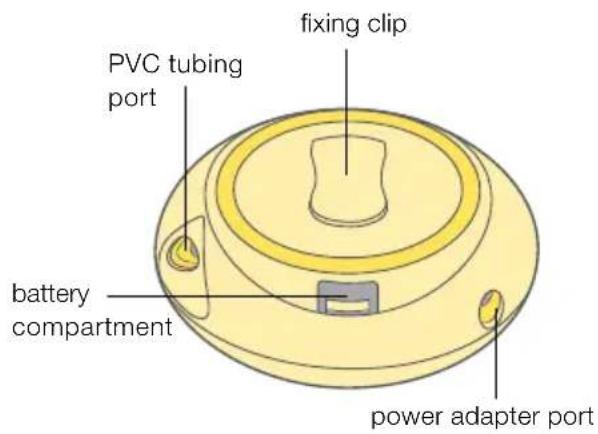
Plug the mains adapter cord into the motor unit.
7.2 Battery operation
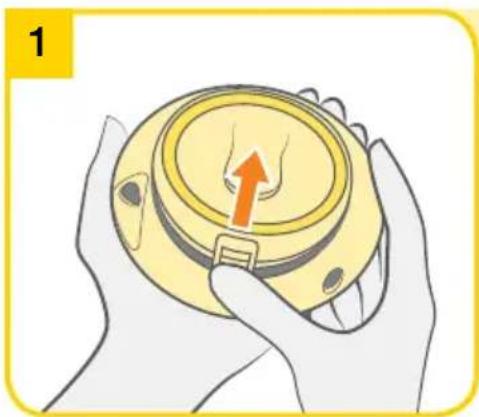
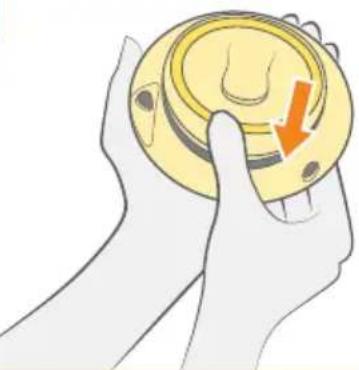
Open the battery compartment on the back in the direction of the arrow.
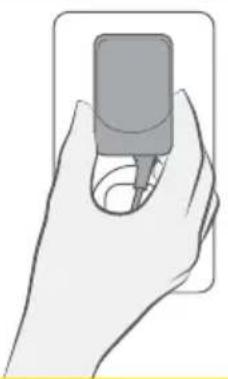
2
Plug the mains adapter into the mains socket. The motor unit is now ready for operation.
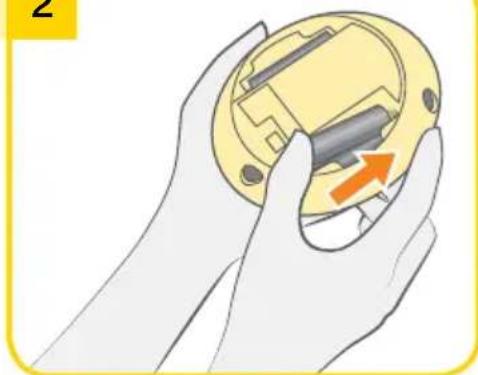
2
Insert four AA Mignon LR6 batteries for Swing Flex. Insert six AAA Micro 1.5 V batteries for Swing Maxi Flex.
3
Close the battery compartment. The pump is ready for operation via battery.
7. Preparing for pumping


Caution
I Wash hands thoroughly (at least one minute) with soap and water before touching the breast and pump parts. Dry your hands with a fresh towel or a single-use paper towel.
Also, bottles and component parts may become damaged if mishandled, e.g. dropped, over-tightened, or knocked over.
Take appropriate care in handling bottles and components.

Note
I Use Medela original accessories only.
Hold the tubing by the connecting piece while attaching and detaching it.
All components must be completely dry before use.

Info
I Carry out all the steps with care and assemble the pump set correctly. Otherwise a good vacuum may not be achieved.
7.3 Assembling the pump set
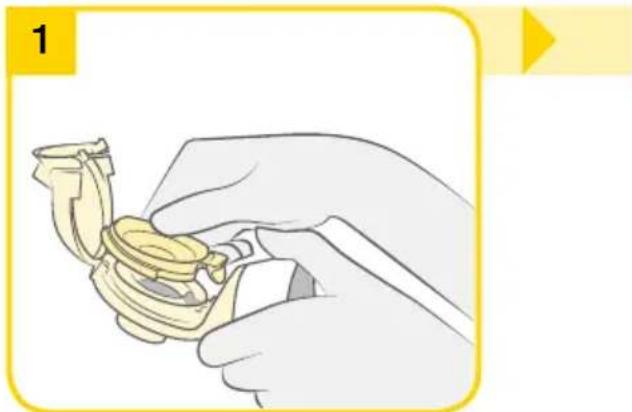
Check pump set components for wear or damage before use and replace if necessary.
Make sure parts are cleaned according to chapter 6 before assembling the pump set.
Carefully place the membrane into the connector with the flap into the opening of the connector.
Make sure that the membrane forms a seal around the edge of the connector.
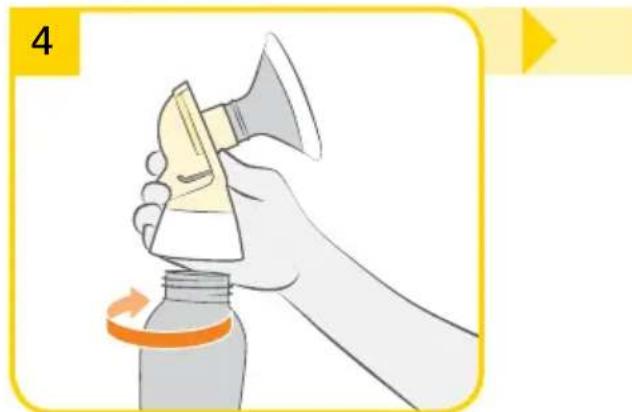
Screw bottle into connector.
2
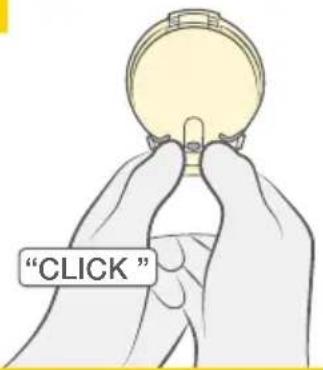
Close the lid of the connector until it audiably clicks.
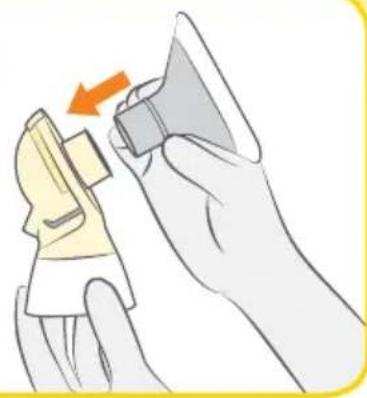
3
Insert the breast shield onto the connector.
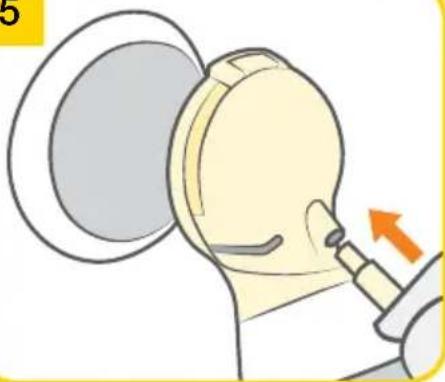
5
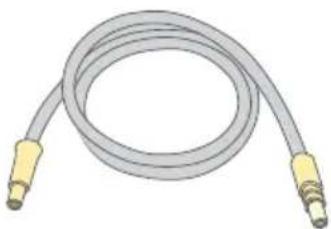
Insert the tubing into the corresponding opening in the lid of the connector.
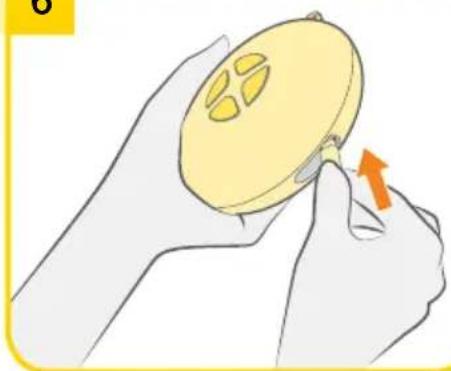
6
Insert the other end of the tubing into the motor unit.
8. Expression
2

Caution
I Step 2 (chapters 8.1, 8.2, 8.3):
The product comes with two different breast shield sizes 21 mm and 24 mm.
Answer the following questions to find out whether the available breast shield sizes fit:
Does your nipple rub the tunnel sides to the point of causing discomfort?
Do you see excessive areola being pulled into the tunnel?
I Do you see any redness?
I Is your nipple or areola turning white?
I Do you feel unexpressed milk after breast milk pumping?
If you answered "YES" to any of these questions, consider trying a new size by following the measuring instructions at www.medela.com.
If you are still unsure that you selected the right breast shield size, contact your lactation consultant or breastfeeding specialist.
See brochure "Choosing your Medela breast shield size".
!
Note
I Step 3 (chapters 8.1, 8.2, 8.3):
Do not hold the pump set by the bottle. This can lead to blockage of the milk ducts and engorgement.
8.1 Swing Flex - Preparing for single pumping
1
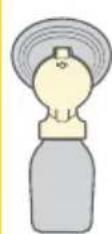
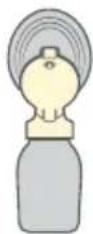
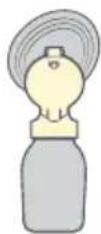
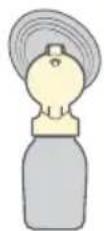
The oval breast shield can be rotated (360^) and placed in the desired position to have the most comfortable fit for you.
8.2 Swing Maxi Flex - Preparing for single pumping
1
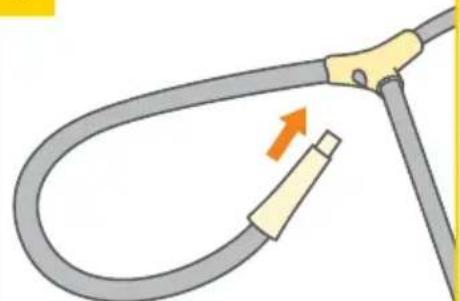
Insert the unused short tubing into the tubing holder.
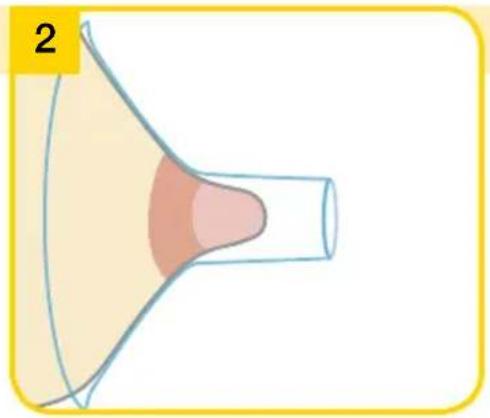
Place the breast shield on your breast so that your nipple is properly centred in the tunnel.
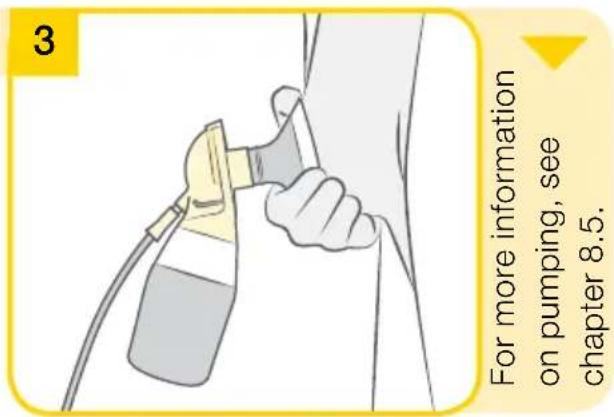
Hold the breast shield onto your breast with your thumb and index finger.
Support your breast with the palm of your hand.
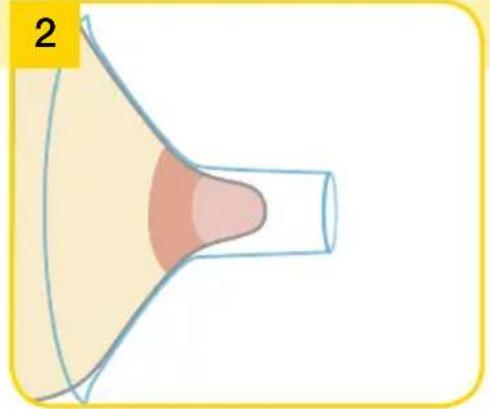
Place the breast shield of one bottle on the first breast so that the nipple is properly centred in the tunnel.
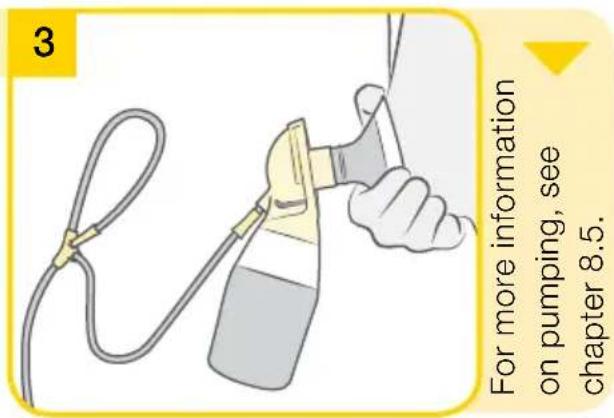
Hold the breast shield onto your breast with your thumb and index finger.
Support your breast with the palm of your hand.
8. Expression
2

Caution
I Step 2 (chapter 8.3):
I Wash hands thoroughly (at least one minute) with soap and water before touching the breast, the clean pump parts and clean pump set. Dry your hands with a fresh towel or a single-use paper towel.
I Do not hold the pump set by the bottle. This can lead to blockage of the milk ducts and engorgement.
i
Info
Double pumping saves time and increases the energy content of the milk.
8.3 Swing Maxi Flex - Preparing for double pumping
1
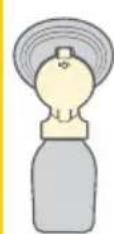

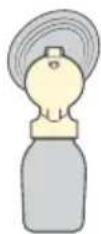
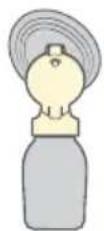
The oval breast shield can be rotated (360^) and placed in the desired position to have the most comfortable fit for you.
4
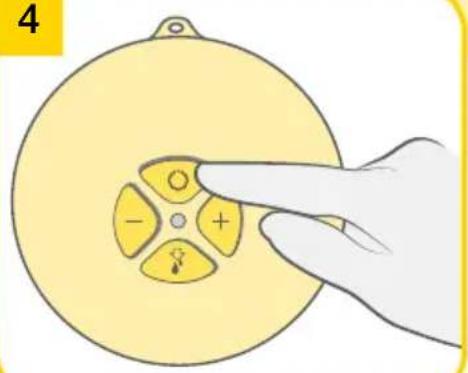
Switch on the breast pump with
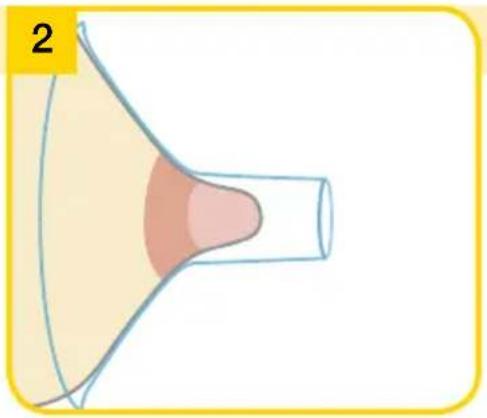
Place the breast shield on your breast so that your nipple is properly centred in the tunnel.
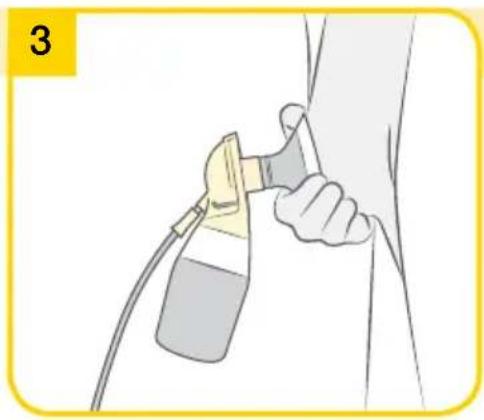
Hold the breast shield onto your breast with your thumb and index finger.
Support your breast with the palm of your hand.
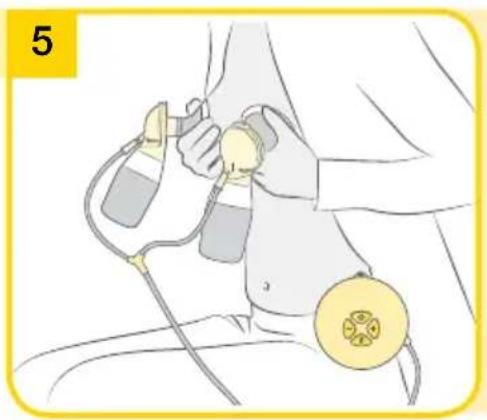
Place the second breast shield on your breast so that your nipple is properly centred in the tunnel.
For more information
on pumping, see
chapter 8.5.
8. Expression
2

Note
Easy Expression Bustier must be purchased separately. More information on www.medela.com
8.4 Swing Maxi Flex - Preparing for hands-free expression with the Easy Expression Bustier
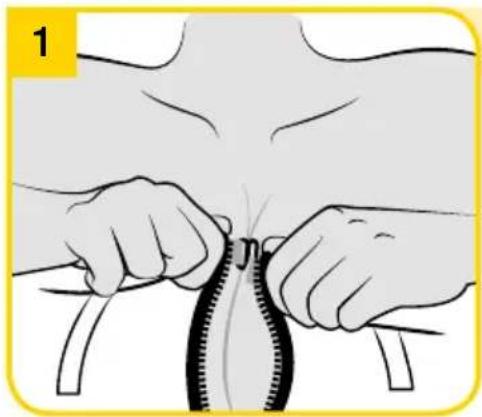
Put on the Easy Expression Bustier and close it using the hook on top.
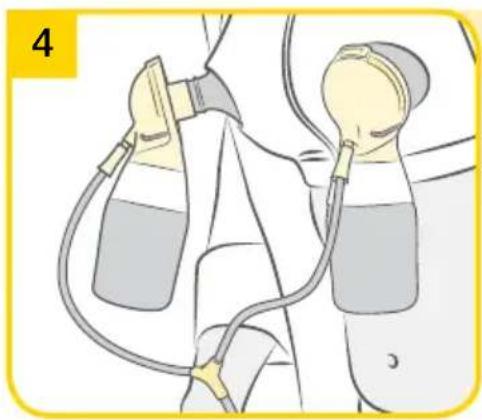
Connect the assembled pump set to the breast shields.
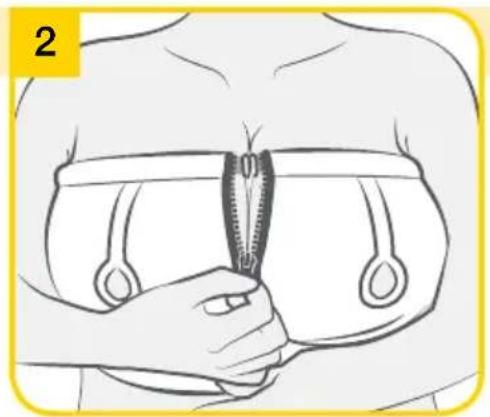
Leave the zip open slightly.
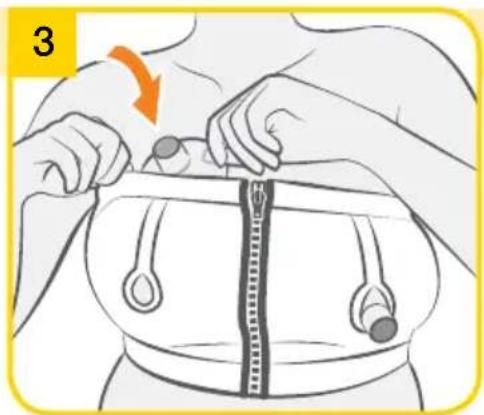
Place the breast shield on your breast under the bustier such that your nipple is centred in the tunnel of the breast shield.
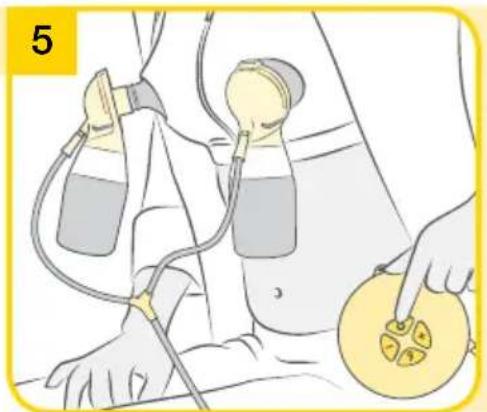
Start pumping.
rannnnnne
on pmpnng, see
chcerer 8.5.
8. Expression
2

Caution
I Contact your your lactation consultant or breastfeeding specialist if you can express only minimal or no milk, or if expression is painful.

Note
Always disconnect the Swing Flex / Swing Maxi Flex from the power source after expression.
I Only fill the bottle to the 150ml mark.

Info
Swing Flex / Swing Maxi Flex switches off automatically if it has been running for 30 minutes with no interaction.
I Do not kink the tubing during expression.
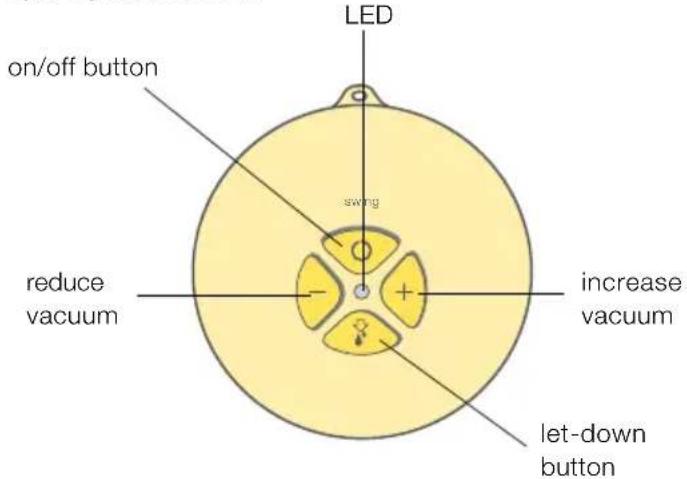
The following table shows the different LED status:
Lights up On
Does not light up Off
Even, regular flashing Stimulation phase
Light constantly on Expression phase
Rapid flashing Min./Max. vacuum
8.5 Pumping
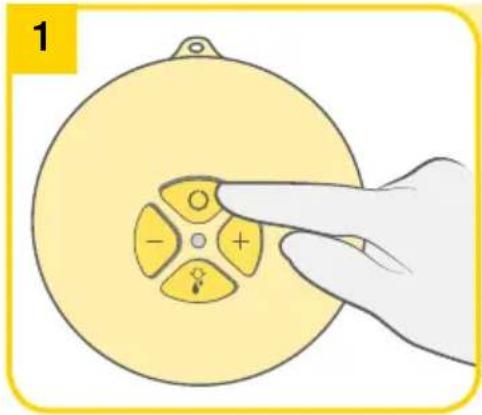
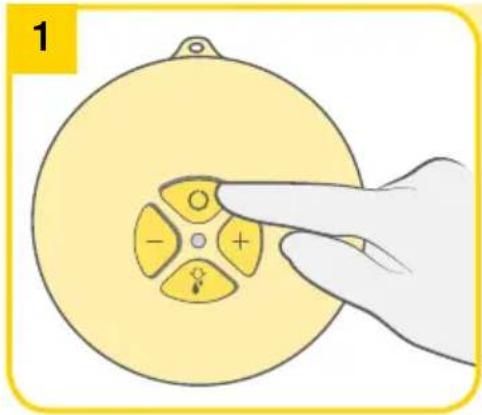
Switch on the breast pump with
The stimulation phase lasts a maximum of two minutes. The stimulation phase will then automatically change to the expression phase.
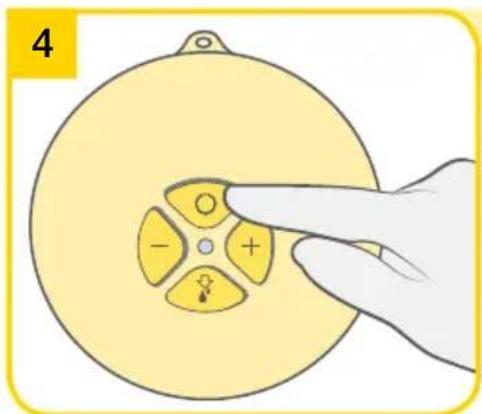
Switch off the breast pump with
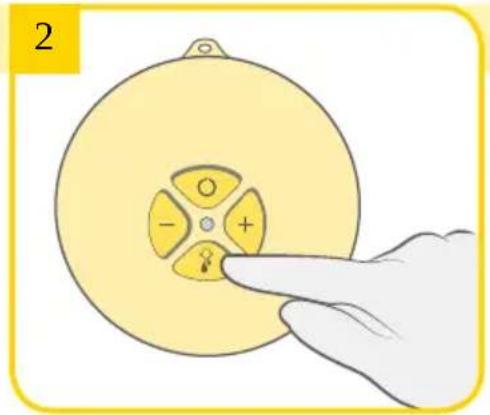
If your milk starts to flow earlier, press the button to change to the expression phase.
Make sure that the milk is flowing into the bottle properly.
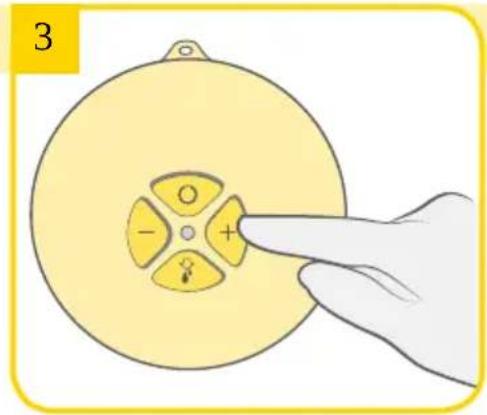
The Max. Comfort vacuum can be adjusted in every phase.
Max. Comfort vacuum: Use to increase the vacuum until it is slightly uncomfortable.
Press to reduce the vacuum, until it is comfortable again.
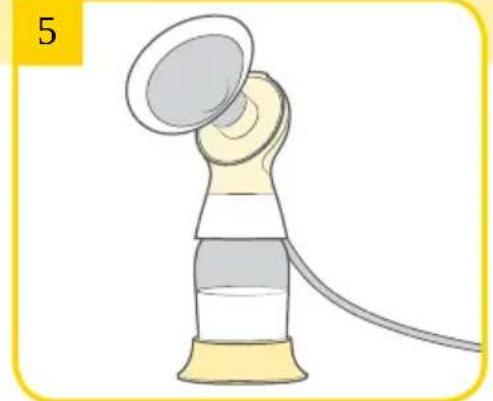
Use the bottle stand to prevent the bottle from tipping over.
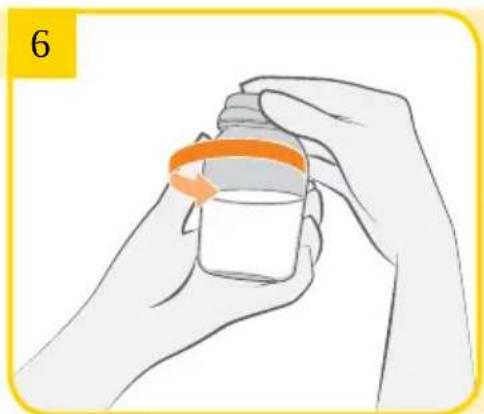
Close the bottle with a lid.
Follow the instructions in chapter 9 "Storing and thawing breast milk".
9. Storing and thawing breast milk
9.1Storage
Storage guidelines for freshly expressed breast milk (for healthy term babies)
| Room temperature 16 to 25 °C (60 to 77 °F) | Refrigerator 4 °C (39 °F) or colder | Freezer -18 °C (0 °F) or colder | Breast milk thawed in the refrigerator |
| Up to 4 hours is best | Up to 3 days is best | Up to 6 months is best | At room temperature: Up to 2 hours |
| *Up to 6 hours for milk expressed under very clean conditions | *Up to 5 days for milk expressed under very clean conditions | *Up to 9 months for milk expressed under very clean conditions | Refrigerator: Up to 24 hours Do not refreeze! |
*Guidelines for expressing milk under very clean conditions:
Before expressing breast milk, mothers should wash their hands with soap and water or an alcohol-based hand sanitiser. The pump parts, bottles and pumping area must be clean. Breasts and nipples do not need to be washed before pumping.
These guidelines for storage and thawing of breast milk are a recommendation. Contact your lactation consultant or breastfeeding specialist for further information.
- Store breast milk in the coldest spot of the refrigerator (at the back of the glass shelf above the vegetable compartment).
9.2 Freezing
Freeze expressed breast milk in plastic bottles or milk storage bags. Do not fill the bottles or bags more than 34 full to allow space for possible expansion.
Label the bottles or bags with the date and volume of expression.
I Plastic bottles and component parts become brittle when frozen and may break when dropped.
I Do not use the breast milk if bottles or components become damaged.
9.3Thawing

Caution
Do not thaw or warm breast milk in a microwave or a pan of boiling water. This helps preserve important components and prevents burns.
To preserve breast milk components, thaw the milk overnight in the refrigerator. Alternatively, hold the bottle or bag under warm water (max. 37^ / 98.6^ ).
Gently swirl the bottle or bag to mix any fat that has separated. Avoid shaking or stirring the milk.
10. Troubleshooting
| Problem Solution | |
| If the motor is not running | Check presence of mains current. Check the position of the batteries in the battery compartment. |
| If there is low or no suction | Verify the membrane is clean and not damaged. Ensure the membrane is attached correctly to the connector. Check all connections. Check the ends of the tubing fit securely into the back of the connector and into the port on the breast pump. Do not kink the tubing during expression. Ensure the breast shield forms a complete seal around the breast. |
| If condensation appears in the tubing | Clean the tubing as described in chapter 7.5. Shake out any water drops. |
| The pump becomes wet | Unplug the mains adapter from the socket. Switch off the pump. Do not place the pump upside down. Control panel must point upwards. Store the pump in a dry, warm place for 24 hours. Note: Do not expose the pump to direct sunlight. Do not accelerate the drying process by use of heat. |
11. Warranty/Disposal

Warranty
The "International Warranty" brochure contains detailed warranty information.
Disposal
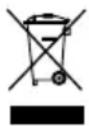
This is a single user product. Use by more than one person may present a health risk. The unit is made of metals and plastics and should be disposed of in accordance with the European directives 2011/65/EU and 2012/19/EU. Additional, local guidelines must also be observed. Please take care that you dispose of the unit and its accessories in accordance with your local disposal guidelines.
12. Spare parts and Accessories
The following accessories for Swing Flex / Swing Maxi Flex are available from Medela distribution partners by specifying the product number.
Sales articles Swing Flex / Swing Maxi Flex
Article number Product
| 101033773 | Swing Flex EN NL FR |
| 101036226 | Swing Flex EN NL FR |
| 101033777 | Swing Flex EN |
| 101033793 | Swing Flex EN |
| 101033775 | Swing Flex EN NL FR |
| 101036238 | Swing Flex EN NL FR |
| 101033817 | Swing Maxi Flex EN NL FR |
| 101036232 | Swing Maxi Flex EN NL FR |
| 101033825 | Swing Maxi Flex EN |
| 101033845 | Swing Maxi Flex EN |
| 101033819 | Swing Maxi Flex EN NL FR |
| 101033821 | Swing Maxi Flex EN NL FR |
Spare parts Swing Flex
Article number Product
| 099.0016 | Swing Flex adapter (100-240V; 4.8V) Euro |
| 099.0017 | Swing Flex adapter (100-240V; 4.8V) UK |
| 101033542 | Swing Flex adapter (100-240V; 4.8V) US / JP |
| 099.0018 | Swing Flex adapter (100-240V; 4.8V) AUS / NZ |
| 099.0276 | Swing Flex adapter (100-240V; 4.8V) CN / KO |
099.0015 Swing Flex motor unit
101034002 Swing Flex tubing
101034005 connector
12. Spare parts and Accessories

Spare parts Swing Maxi Flex
| Article number Product | |
| 099.0271 | Swing Maxi Flex adapter (100-240V; 12V) Euro |
| 099.0272 | Swing Maxi Flex adapter (100-240V; 12V) UK |
| 01033543 | Swing Maxi Flex adapter (100-240V; 12V) US / JP |
| 099.0273 | Swing Maxi Flex adapter (100-240V; 12V) AUS / NZ |
| 099.0274 | Swing Maxi Flex adapter (100-240V; 12V) CN |
| 099.0270 Swing Maxi Flex motor unit | |
| 101034003 Swing Maxi Flex tubing | |
| 101034005 connector | |
Accessories for Swing Flex / Swing Maxi Flex
| Article number Product | |
| 101033953* | breast shield S (21 mm) |
| 101033964* | breast shield M (24 mm) |
| 101033992* | breast shield L (27 mm) |
| 101033997* | breast shield XL (30 mm) |
| 800.0796 | 150 ml breast milk bottles (3 pcs) |
| 200.1659 | 250 ml breast milk bottles (2 pcs) |
| 008.0040*Quick clean | |
Other Medela products are available at www.medela.com
13. EMC/Technical description
Swing Flex and Swing Maxi Flex are EMC-tested in conformity with the requirements of IEC 60601-1-2:2007 3rd Edition and IEC 60601-1-2:2014 4th Edition according to clause 7 and 8.9.

Warning - The electric breast pumps Swing Flex and Swing Maxi Flex should
not be used adjacent to or stacked with other equipment. If adjacent or stacked use is necessary, the electric breast pumps Swing Flex and Swing Maxi Flex should be observed to verify normal operation in the configuration in which it will be used.
Wireless communications equipment such as wireless home network devices, mobile phones, cordless telephones and their base stations, walkie-talkies can affect the electric breast pumps Swing Flex and Swing Maxi Flex and should be kept at least a distance 30 cm away from the equipment.
14. Technical specifications
Swing Flex

vacuum (approx.)
-35 ... -250 mmHg
-5…-33kPa
45 ... 111 cpm
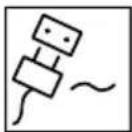
| In Out | |
| 100-240V~ 50/60Hz | 4.8 V- - - |
| 230-240V~ 50Hz | 0.6/1.2A |
| AUS/NZ only |
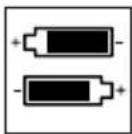
4 × 1.5 ~V , Alkaline
AA, Mignon, LR6
121 × 129 × 57 mm
300g
200g
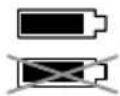
Swing Maxi Flex

vacuum (approx.)
-35 ... -250 mmHg
-5…-33kPa
45 ... 111 cpm
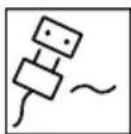
| In Out | |
| 100-240V~ 50/60 Hz | 12 V —— 1 A / 1.5 A |
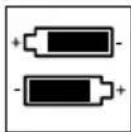
6 × 1.5 ~V , Alkaline
AAA, Micro, LR03
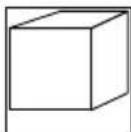
121 × 129 × 57mm
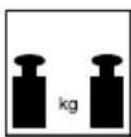
290g
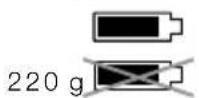
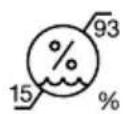
Operation/Transport/Storage

Operation/Transport/Storage

Operation
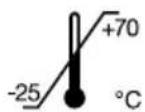
Transport/Storage

Operation/Transport/Storage
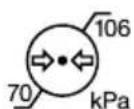
Operation/Transport/Storage

Operation
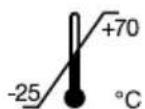
Transport/Storage
Inhoudsopgave
Lampje brandt constant
Afkolffase
Knippert snel Min./max. vacuum
8.5 Kolven
Phase de-stimulation
Lumière constante
Phase d'expression
Clignote rapidement
45 ... 111 cycles/min

45 ... 111 cycles/min

6341 Baar, Switzerland
www.medela.com
International Sales
Medela AG
Lattichstrasse 4b
6341 Baar
Switzerland
Phone +41 41 562 51 51
www.medela.com
Australia
Medela Pty Ltd, Medical
Technology
3 Arco Lane, Heatherton
Vic 3202
Australia
Phone +61 3 9552 8600
Fax +61 39552 8699
contact@medela.com.au
www.medela.com.au
United Kingdom
Medela UK Ltd.
Huntsman Drive
Northbank Industrial Park
Irlam, Manchester M44 5EG
United Kingdom
Phone +44 161 776 0400
Fax +441617760444
info@medela.co.uk
www.medela.co.uk
Netherlands & Belgium
Medela Benelux BV
Uilenwaard 31
5236 WB's-Hertogenbosch
The Netherlands
Phone +31 73 690 40 40
Fax +31 73 690 40 44
info@medela.nl
info@medela.be
www.medela.nl
www.medela.be
France
Medela France SAS

- Swing Flex™ Swing Maxi Flex™
- Intended use / Population - Contraindication
- The intended use and indications of breast pumps
- Intended patient population/user
- Contraindications
- Meaning of symbols
- Warning
- Caution
- Note
- Info
- Symbols on the packaging
- Symbols on the device
- Symbols on the mains adapter
- Important safety information
- Device
- Electrical use
- Use
- Product description Swing Flex
- Swing Flex - single electric 2-Phase breast pump
- 1x motor unit:
- Product description Swing Maxi Flex
- Swing Maxi Flex - double electric 2-Phase breast pump
- Cleaning
- Cleaning overview
- Disassemble
- Wash
- Sink Stovetop
- Dishwasher
- Sanitise
- Microwave
- Drying
- 6.5Cleaning tubing
- I No visible residues
- With visible residues
- Do not sanitise the tubing.
- Cleaning the motor unit
- ! Note
- Preparing for pumping
- Mains operation
- Battery operation
- Assembling the pump set
- Expression
- Swing Flex - Preparing for single pumping
- Swing Maxi Flex - Preparing for single pumping
- Swing Maxi Flex - Preparing for double pumping
- For more information
- on pumping, see
- chapter 8.5.
- Pumping
- Storing and thawing breast milk
- 9.1Storage
- Freezing
- 9.3Thawing
- Troubleshooting
- Warranty/Disposal
- Warranty
- Disposal
- Spare parts and Accessories
- Sales articles Swing Flex / Swing Maxi Flex
- Spare parts Swing Flex
- EMC/Technical description
- Technical specifications
- Swing Flex
- Swing Maxi Flex
- Inhoudsopgave
- Kolven
- International Sales
- Australia
- United Kingdom
- Netherlands & Belgium
- France
Brand : MEDELA
Model : Swing Maxi Flex
Category : Breast pump