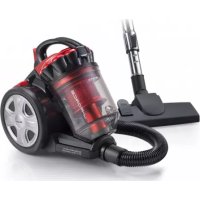
JForce 2753 - Vacuum Cleaner ARIETE - Free user manual and instructions
Find the device manual for free JForce 2753 ARIETE in PDF.



| Brand | Ariete |
| Model | JForce 2753 |
| Product type | Bagless vacuum cleaner |
| Intended use | Vacuuming dust on domestic surfaces |
| Power supply | 220-240 V ~ 50/60 Hz |
| Power | 800 W (estimated) |
| Cable length | 5 m (estimated) |
| Tank capacity | 1.5 L (estimated) |
| Filtration system | Washable permanent filter, motor protection filter, air outlet filter |
| Included accessories | Floor brush, crevice tool with brush, telescopic tube, suction hose |
| Main functions | Power adjustment (minimum at start), hard floor/carpet selector, automatic cord rewind, automatic shut-off in case of blockage |
| Maintenance and cleaning | Emptying the tank, washing filters with clean water every 6 months or as needed, exterior cleaning with damp cloth |
| Safety | Do not vacuum liquids, hot ashes, sharp objects. Unplug before maintenance. Do not use without filter |
| Spare parts and repairability | Filters, brush, telescopic tube available. Contact Ariete customer service for cord or other components |
| Weight | 4.5 kg (estimated) |
| Dimensions (L x W x H) | 30 x 25 x 35 cm (estimated) |
| Noise level | 78 dB (estimated) |
| Warranty | 2 years (standard) |
Frequently Asked Questions - JForce 2753 ARIETE
User questions about JForce 2753 ARIETE
0 question about this device. Answer the ones you know or ask your own.
Ask a new question about this device
Download the instructions for your Vacuum Cleaner in PDF format for free! Find your manual JForce 2753 - ARIETE and take your electronic device back in hand. On this page are published all the documents necessary for the use of your device. JForce 2753 by ARIETE.
USER MANUAL JForce 2753 ARIETE
READ THESE INSTRUCTIONS BEFORE USING THE APPLIANCE:
When using the appliance, it is necessary to follow some basic precautions:
1 Always make sure that the voltage of the mains electricity supply is the same as that indicated on the rating plate of the appliance and that the system is compatible with the appliance power.
2 This appliance conforms to the 2014/35/EU and EMC 2014/30/EU directives.
3 The appliance may only be used for its intended purpose, which is for vacuuming dust from surfaces within the home. Any other use is to be considered improper and therefore, dangerous. The manufacturer may not be held liable for any damages caused by improper, incorrect or unreasonable use.
4 Do not use to vacuum hot ash, large pieces of glass, rubble, sharp or pointed items or liquids.
5 To prevent dangerous overheating, always unwind the power cord fully and unplug the appliance from the mains when the appliance is not in use.
6 Only plug the appliance into an AC socket.
7 Never use the appliance without a bag or motor filter or if the bag or filter are broken or damaged.
8 Never use the appliance on wet surfaces.
9 Never suck up liquids.
10 NEVER PLACE THE APPLIANCE IN WATER OR OTHER LIQUIDS.
11 Do not touch the appliance when hands or feet are wet or moist.
12 Never use the appliance with bare feet.
13 Do not leave the appliance exposed to the elements (rain, sun, etc.).
14 Do not store the appliance in proximity to sources of heat (e.g. radiators).
15 Always unplug the appliance before cleaning it or changing the filters.
16 This appliance is not intended for use by persons with reduced physical, sensory or mental capabilities, or lack of experience and knowledge, unless they have been given supervision or instruction concerning use of the appliance by a person responsible for their safety.
17 This appliance shall not be used by children. Keep the appliance and its cord out of reach of children.
18 Children should be supervised to ensure that they do not play with the appliance.
19 Never unplug the appliance by pulling on the power cord.
20 Make sure that the power cord does not come into contact with sharp or hot
surfaces.
21 Never use the appliance if the power cord is damaged.
22 If the cord is damaged, it must be replaced by the Manufacturer, by an Authorised Technical Assistance Centre or in any case, by a similarly qualified person, in order to prevent any risks.
23 Always switch on the appliance with the power regulator set to minimum.
24 Unplug the appliance from the mains electricity after each use.
25 In the event that you decide to dispose of the appliance, we advise you to make it inoperative by cutting off the power cord. We also recommend that any parts that could be dangerous be rendered harmless, especially for children, who may play with the appliance or its parts.
26 Packaging must never be left within the reach of children since it is potentially dangerous.
To dispose of product correctly according to European Directive 2012/19/EU, please refer to and read the provided leaflet enclosed with the product.
DO NOT THROW AWAY THESE INSTRUCTIONS
DESCRIPTION OF THE APPLIANCE (Fig. 1)
A Dust container
B Appliance body
C Foot-operated cord rewind button
D Dust container lock/release button
E Dust container handle
F Foot-operated on/off switch
G Suction device coupling
H Handle
1 Hard floor / carpet selector switch
L Floor brush
M Suction device
N Slider device
O Telescopic tube
P Narrow suction nozzle with brush
ATTACHMENTS
Telescopic tube (O)
Insert the extension tube onto the handle and then fit the required attachment.
Once the attachment has been fitted, it is possible to extend the telescopic tube using the lever (FIG. 4) to move it to the required length. Release the lever to stop the tube in the required position.
Floor brush (L)
- Ideal for cleaning large areas as well as corners that are difficult to reach.
- We advise against using the brush to clean carpets and resistant floors. The brush has wheels to allow it to glide over all surfaces. Select the required projection for the bristles by pressing the lever at the end of the brush. To retract the bristles, press the lever marked with the carpet symbol.
EN
- For better preservation and protection of smooth flooring such as PVC, parquet or tiles, it is better to use the brush. To lower the bristles, press the lever marked with the smooth flooring symbol.
Narrow suction nozzle with brush (P)
This suction device is ideal for cleaning between the folds on fabrics, joints, corners or niches that are impossible to reach using the floor cleaning device. This attachment can also be fitted directly to the handle (H).
VACUMM CLEANER ASSEMBLY
IMPORTANT: Before fitting or removing attachments, always make sure that the vacuum cleaner has been unplugged from the power mains.
- Insert the suction device (M) into the air inlet opening (G) by slightly rotating it until it locks (Fig. 2).
- Insert the telescopic tube (O) into the handle (Fig. 3).
- Push the slider device (N) forwards and pull the bottom section of the tube out to the required length (Fig. 4). To shorten the tube, push it back in the opposite direction.
- Fit the required attachment to the telescopic tube.
USING THE APPLIANCE
CAUTION: Before using the vacuum cleaner, remove all large or sharp objects from the floor to avoid any possible damage to the cleaner itself.
First of all, before using this appliance, unwind the power cord completely and plug the appliance into the mains socket.
To switch on, press the foot switch (F) on the appliance. The cleaner is equipped with wheels to move it easily during use.
IMPORTANT: The appliance might make a whistling sound that will stop after a few seconds.
WARNING: Switch off the vacuum cleaner immediately if the air inlets, brushes or telescopic tube become blocked. Remove the cause of the blockage before switching the vacuum cleaner on again.
After using the cleaner
Switch off the appliance using the foot switch (F).
Then unplug the appliance from the mains power and hold down the foot pedal (C) on the appliance until the power cord is fully rewound.
WARNING: While rewinding the power cord, guide it in the right direction by hand to prevent any risk of injury to yourself.
Put away the appliance, placing the floor brush (L) on the special hook in the back (Fig. 5).
Carrying the vacuum cleaner
Only carry the appliance using the special handle on the top part (E).
CLEANING AND MAINTENANCE
WARNING: Before carrying out any cleaning or maintenance operation, switch off the appliance and unplug it from the mains power.
The dirt vacuumed up enters the dust container (A). The air is cleaned by a permanent, washable filter located inside the dust container, by a motor protective filter and an air outlet filter situated on the rear side of the appliance.
WARNING: Never use the vacuum cleaner if any filter is missing or damaged. Any dust cleaned up will enter the appliance and damage the motor.
WARNING: Clean the filters regularly or in any case, whenever the suction power seems to be reduced.
How to empty the dust container (A)
- Press the release button (D) and at the same time take out the dust container (A) using the handle (E) (Fig. 6).
- Empty the dust container (A), opening the lid with the release button (Fig. 7).
IMPORTANT: To empty the container and prevent any dirt from leaking out, we recommend first placing it inside a plastic bag and emptying it there.
- To clean the container (A) fully, it is necessary to disassemble it completely, as described here below:
- open the filter lid by means of the apposite lever (Fig. 8) and then extract the filter beneath and the sponge filter (Fig. 9).
- remove the complete filter by rotating it clockwise (Fig. 10).
IMPORTANT: Always wash the filters with fresh water only without using soap or detergents. It is advisable to clean the filter at least every 6 months or in any case, when suction is visibly reduced.
- Reassemble the container (A) before proceeding with a new use.
- Insert the filters into the apposite housing and close the filter lid by lowering the closing lever until it locks in place.
- Insert the complete filter into the container (A) and lock it counter-clockwise.
- Now refit the whole dust container (A) onto the appliance body, pressing gently until it clicks into place (Fig. 11).
Cleaning the air outlet filter
This filter cleans the air one last time before it leaves the vacuum cleaner. To clean the filter proceed as follows:
- Use the lever to remove the small hatch on the back of the appliance (Fig. 12).
- Clean the filter in cold water and leave it to dry (Fig. 13).
- Refit the clean (or new) air outlet filter into the grid and return this to the appliance, pressing it down until it clicks into place.
WARNING: Only wash the filter in clean water, without using soap or detergents.
Cleaning the vacuum cleaner
The casing, dust container and filter seats can be wiped with a damp cloth if necessary. No liquid must enter the vacuum cleaner in the process. Never use heavy-duty cleaning substances (stain removers, thinners) because they can corrode the plastic surfaces. Only put the plug back into the mains socket when you are sure that all parts are thoroughly dry.
IMPORTANT: Do not lubricate or oil any rotating parts, since this could cause dirt and fluff to stick even further
WARNING: It is advisable to clean the filter at least every 6 months or in any case, when suction is visibly reduced.
Cleaning the brushes
While the appliance is switched on, move your hand between the bristles on the brush to free them of any trapped dust, which will then be sucked into the cleaner.
SERVICE AND CUSTOMER ASSISTANCE
In case of damage to the power cord of other parts of the appliance, please contact an ARIETE authorised assistance service.
For assistance and repairs (under or post guarantee), please contact your local authorised ARIETE assistance centre.
IMPORTANT: The serial number of the appliance can be found on its rating plate.
NOTES IMPORTANTES
LIRE ATTENTIVEMENT CES INSTRUCTIONS AVANT D'UTILISER L'APPAREIL:
TEXNIKH EeynHPETHsH NEATON
OBCLNYKBAHNE KJNEHTOB
B cnyuae noBpeKdEHHa Hn npyn KOMnoHENTOB npnbopa npocm obaatbca B ynoHoomoehh bI cepBnchbI cHTp ARIETE. B OTHoSeHHn OBcnykBaHn I pemOnTa (B npedeJax N BHe rapaHTnHorO cPoka): obpaTntecb HenocpeDCTBeHHo B ynoHOMooeHHbI cepBnchbI cHTp ARIETE.
BAXHO: Homep MoJeN u3eJn yKa3aH Ha Ta6JIuYKe nacnpTHbIX daHHbIX, paCNoIooKeHHoH Na camOM np6ope.
Дату n3roTOBNeHЯ уka3aHa Na kopnyce n3deJIЯ B 3aIuФрOBaHHOM BnDE SN wk/yrabcdefg, rDe wk - HeJIЯ npON3BOJCTBa
yr- roD npOn3BOOCTBa
abcdefg - cepnHbI HOpE n3dEIna
CoOTBcTByeT Tpe6OBAHnA M
TP TC 004/2011 «O 6e3oNaChocTn Hn3KOBolbTHoro o6OpyIDobAHn, yTbepxdEn PeSeHneM
Komnccn TamoxeHHoro coo3a Ng768 ot 16 abrycta 2011 roda
3EPIATN L I HCTPyKlI 3 EKCJIyATAIi
ONICAHNII PNUCTPOIO (MaI.1)
A KoHTeINHeP dIa nnIy
B Kopnyc npictpoio
C PndaJIb-BMnKau HaMoTyBaHHn npOBdy
D KhoNka 6IOKyBaHHra/po36JIOkyBaHHra KOHTeHepa dIra Nnly
E PyuKa KOHTeHepa IyI nnNy
Fпеталь Вмкання/Вмкання
G Micce kpinlennnaanhy nnilococa
H Pyka
I Iepemnkaay Tbepa nlaor/knilm
L ⅢIrkA nIy nIINorN
M LJIaHr BCMOKTyBaHHa
N Pnpntpi nOIOBKeHnTpy6n
O TeleckoniuHa Tpy6a
PПиносдяцин3iцitkoio
HACADKN
TeleckoniuHa Tpy6a (O)
BCTaBnTu Tpy6y Ha pyuKy,notIM BCTaHOBnTu Heo6xidHy Hacaiky.PicJy BCTaHOBneHna HacaKn MOxHa NpObXnTu TeJeckOniHy Tpy6y Do Notpi6HOI DOBXHH,HaTNCyBShn Ha BiINOBIHN BaJIb (MAJ.4).BiDnyctTu Baxilb npN doCraHHeHn Iotpi6HOI DOBXHH.
Uitka dnniin (L)
- BnKOpNCToBvEbCra k dIy npupaHnB BeNkx nobepxohb, TaK i dIy BaXko DoCaxhnx KytKIB.
- He pekomeHdyctbca BnKOpNCTOByBaTu 10 1tKy dIa YIeHHa KINIMIB Ta TBepdoi nIDnOrn. 1tka oIbnHaHa koniiataMn, 1o6 3a6e3neHTn II IerKe npocyBaHHa NO BCix Bnax nobepxohb. Bn6patn notpi6Hy DOBXInHy BncyBaHHa 1eTnHOK 1tKn, HATNCHyBm Ha BiDnOBiHN peryJrTop no KpaIO 1tKn. 1o6 NiHNr Tn 1tKy, cIiD hATNCHTn Ha BMnKaU, nO3HaueHm CmBOJOM KIIMMa.
- Σο6 ποκραψιτη πριδυρανή τα 3axnct rλaδκοί πιπογι, λκ ΠBX, napket a6o πΠιΤΚa, κραupe cκοριστατις Σιτκού. Σο6 Bνcγυτη Σιτκу, σπιδ Ḁπιχυτη Ḁν ḅνιμκαύ, ΠΟ3haueHη ΣΜΒΟ-JOM Σιτκατιπογι.
Hacadka dny 3i tko (P)
Приз nauseя почесни сдл очшени ведимахок та 3моршок тkaHH, wBiB, kYTKiB ta hiш, як hemoxльноочтпг 3ВИЧАМОДУ HACADKOIO ДЯ ПIDЛORN. LIO HACADKY MOXHA CTaBHTN 6e3nocepeHbO Ha pyuKy (H).
3БИРАнгЯ ПИЛOCOCA
YBAGA: Ipeed TmM, kCtabTn a6o 3Himatn Hacaikn, nepekoHaTncs B TOMy, 10 npobid nIIOOCcy BnHrTO 3 pO3ETKn KINBHeHHa.
- BCTaBHTn ⅢnaHr (M) y oTbip BxOy nobiTp8 (G), IereHbKO nobePtaHouN Ioro do nobHoro 6IokyBaHHra (MaI.2).
- Bctabnti TeleckoniuHy Tpy6y (O) B pyky (MaI. 3).
-ПдштOBxHуТnpистрий подовжehня trpy6n (N)Впeрeд i ВИТЯгн Ижню чаctину trpy6n Ha notpi6Hy doBxHny (MaI.4).Якso сиiod BkopOTHTn trpy6y,ВИКОHATN 3ВОРOTHIO DiI0. - BctaHOBNTI noTpbiHy hacaKy Ha TeleckoniuHy Tpy6y.
ПРавILA POБOTN 3 ПИЛАДOM
OuHCTHTN pINbTp HAcTyNHm YHOM:
- HatnchutyHa BaxkInb Ta 3HrTn DBepuTa Ha 3aHi n CtiHci npucToPO (Man. 12).
- Ppomntn pijbtp nD xoJODHO BOIO TO BA BcCyuHTN Ioro (MaI. 13).
- BCTAHOBHTN BUNyCKHn NOBITpHn FJIbTp (a6o 3amIHNTn Ioro HOBNM) Ha peWitKy Ta BCTaBHn peWitKy 3 FJIbTpOM Ha Mice y npNCpti, PnTnCHyBwn, UO6 NouyNoCJereHbKe KnaCaHHra, JKe Bka3ye Ha ycPiwHe 6NoKvBaHHra.
YBAGA:ΦIbTp MoXHa MNTiTbKn YnCTOIO BDOIO,6e3 BnKOpncTaHnMnJa nn MInOuNx 3acO6iB.
YBAGA: PekomeHdyEbCBAKohyBaTN Take OunuHHe pIDwe, HIX pa3 y nIBpOKy, a60 KoxHoro pa3y, KOJIcNoCTepiraEbC3HNXeHHN NOTUxHOCTi BCMOKTyBaHHa.
OuHHeHHnIococa
CtiHKn, KOHTeHep dIy 360py nIy, BiDJIeHnI dIy fIbTpIB npN Heo6xIDHOCTi MOXHa npOTnpaTH BONoro TKaHHIO. IiD yac Takoro OunSeHHr Heo6xIDHO cIkyBaTN 3a TmM, IooB BCEpeHNHy He notpanna pIiHa. 3abOpOHcTBcR BYBaTN CIIbHi MIOUci 3acO6n (pIINH dIy BVBeDeHNr PIIAM, PO3uHHNK), OckJIbKn BOH NMOKytB NOsKOHTN PIACTMaCOBI qACTHNI pPcTPOIO. PpNCtpi MoXHaPiKlHouATn Do MepeKi JINBJeHHr TiIbKn B TOMy pa3i, kIzO BCI IORO qACTHNI NOBHICTO cyXi.
BAXJIINBA IHΦOPMAU: He peKOMeHdyEcTbcra 3MaJyBaTn pyxomi yactnH npncTroIO, 06 3ano
6iTn HakoHueHHIO Nmny Ta 6pydy Ha Hnx.
OuHnHnHn HnHn
YbIMKHyTN NINOCOC, NOUCTNTN UeTINKN UITKN BID HAKONUHeHOro Ha HnX NnIy Ta 6pydy, kI npu CbOMy 6yDyTB BCMOKTyBaTnCRA BCEpeDnHy.
OBCJNYROBYAHH KJIIEHTIB
Y BnnaIky NooKoJKeHHa npObUy a60 iHux CKJaIOBHX YactIN H pNCTpoI npOxAHHa 3BepTaTncd do ynoBHOaxeHoro cepBicHoro ceHTpy ARIET.
3 nntaHb texhiHoiPiTpumKn Ta peMOHTy (Ha npotra3i TepmiHy dii rapaHTT Ta niCn yoro 3akHHeHHa): 3BepTaTncs6e3nocepedHbdo do periohaIbHoro ynoBHObaxeHoro cepbichoro uehtpy ARIETE.
BAXINBA IHOPMALI: Homep moJIeI Bnp6y 3a3NaueHn Ha 3aBOcBki TaBnUci TexHiuHnx DaHx, 0 BCTaHOBHeHa npcTpoi.
WAZNE OSTRZEZENIA
gllp! n c aabb oagaw
aclll blae o jie aie (A) 100000000000000000000000000000000000000000
(1)
1g 2
i 1
:
a a a a a a a a a a a a a a a a a a a a a a a a a a a a a a a a a a a a a a
J 1
I 131 baa aaii Iaag g y jg jy ggl .jglg SiiuLl Jkgl Jk
Lalai d Jauie 15
jL 1
A
eXaill aoi
a
"ARIETE"
Jlac y slabbiy goll "ARIETE" 15
()
jgljg jglg jglg jglg jglg jglg jglg jglg jglg jglg jglg jglg jglg jglg jglg jglg jglg jglg jglg jglg jglg jglg jglg jglg jglg


- READ THESE INSTRUCTIONS BEFORE USING THE APPLIANCE
- DO NOT THROW AWAY THESE INSTRUCTIONS
- DESCRIPTION OF THE APPLIANCE (FIG. 1)
- ATTACHMENTS
- TELESCOPIC TUBE (O)
- FLOOR BRUSH (L)
- EN
- NARROW SUCTION NOZZLE WITH BRUSH (P)
- VACUMM CLEANER ASSEMBLY
- USING THE APPLIANCE
- AFTER USING THE CLEANER
- CARRYING THE VACUUM CLEANER
- CLEANING AND MAINTENANCE
- HOW TO EMPTY THE DUST CONTAINER (A)
- CLEANING THE AIR OUTLET FILTER
- CLEANING THE VACUUM CLEANER
- CLEANING THE BRUSHES
- SERVICE AND CUSTOMER ASSISTANCE
- NOTES IMPORTANTES
- LIRE ATTENTIVEMENT CES INSTRUCTIONS AVANT D'UTILISER L'APPAREIL
- TEXNIKH EEYNHPETHSH NEATON
- OBCLNYKBAHNE KJNEHTOB
- 3EPIATN L I HCTPYKLI 3 EKCJIYATAII
- ONICAHNII PNUCTPOIO (MAI.1)
- HACADKN
- TELECKONIUHA TPY6A (O)
- UITKA DNNIIN (L)
- HACADKA DNY 3I TKO (P)
- 3БИРАНГЯ ПИЛOCOCA
- ПРАВILA POБOTN 3 ПИЛАДOM
- OUHHEHHNIOCOCA
- OUHNHNHN HNHN
- OBCJNYROBYAHH KJIIEHTIB
- WAZNE OSTRZEZENIA
Brand : ARIETE
Model : JForce 2753
Category : Vacuum Cleaner