Heat Spike - Cooker OneConcept - Free user manual and instructions
Find the device manual for free Heat Spike OneConcept in PDF.

User questions about Heat Spike OneConcept
0 question about this device. Answer the ones you know or ask your own.
Ask a new question about this device
Download the instructions for your Cooker in PDF format for free! Find your manual Heat Spike - OneConcept and take your electronic device back in hand. On this page are published all the documents necessary for the use of your device. Heat Spike by OneConcept.
USER MANUAL Heat Spike OneConcept
Berlin Brands Group UK Ltd
PO Box 1145
Oxford,OX19UW
United Kingdom
Congratulations on purchasing this equipment.
Please read this manual carefully and take care of the following hints to avoid damages. Any failure caused by ignoring the items and cautions mentioned in the instruction manual are not covered by our warranty and any liability. Scan the QR code to get access to the latest user manual and other information about the product.

CONTENTS
Technical Data 17
Safety Instructions 18
Installation 19
Operation 21
Cleaning and Maintenance 25
Disposal Considerations 26
Manufacturer & Importer (UK) 26
TECHNICAL DATA
| Item number 10033139 | |
| Power supply 220-240 V ~ 50 Hz | |
| Power consumption Heating level 1: 1000 WHeating level 2: 2000 W | |
SAFETY INSTRUCTIONS
Read the safety instructions carefully and keep them for future reference.
- This appliance can be used by children aged from 8 years and above and persons with reduced physical, sensory or mental capabilities or lack of experience and knowledge if they have been given supervision or instruction concerning use of the appliance in a safe way and understand the hazards involved. Children shall not play with the appliance. Cleaning and user maintenance shall not be made by children without supervision.
Children of less than 3 years should be kept away unless continuously supervised. - Children aged from 3 years and less than 8 years shall only switch on/off the appliance provided that it has been placed or installed in its intended normal operating position and they have been given supervision or instruction concerning use of the appliance in a safe way and understand the hazards involved. Children aged from 3 years and less than 8 years shall not plug in, regulate and clean the appliance or perform user maintenance.
Caution
- Some parts of this product can become very hot and cause burns.
Particular attention has to be given where children and vulnerable people are present. - If the supply cord is damaged, it must be replaced by the manufacturer, its service agent or similarly qualified persons in order to avoid a hazard.
INSTALLATION
CAUTION
- In order to avoid a hazard due to inadvertent resetting of the thermal cutout, this appliance must not be supplied through an external switching device, such as a timer, or connected to a circuit that is regularly switched on and off by the utility.
WARNING
- In order to avoid overheating, do not cover the heater.
- The heater must not be located immediately below a socket-outlet.
- The heater must be installed at least 1.8m above the floor.
- Means for disconnection having a contact separation in all poles must be incorporated in the fixed wiring in accordance with the wiring rules.
- Fixed heaters are to be installed so that switches and other controls cannot be touched by a person in the bath or shower.
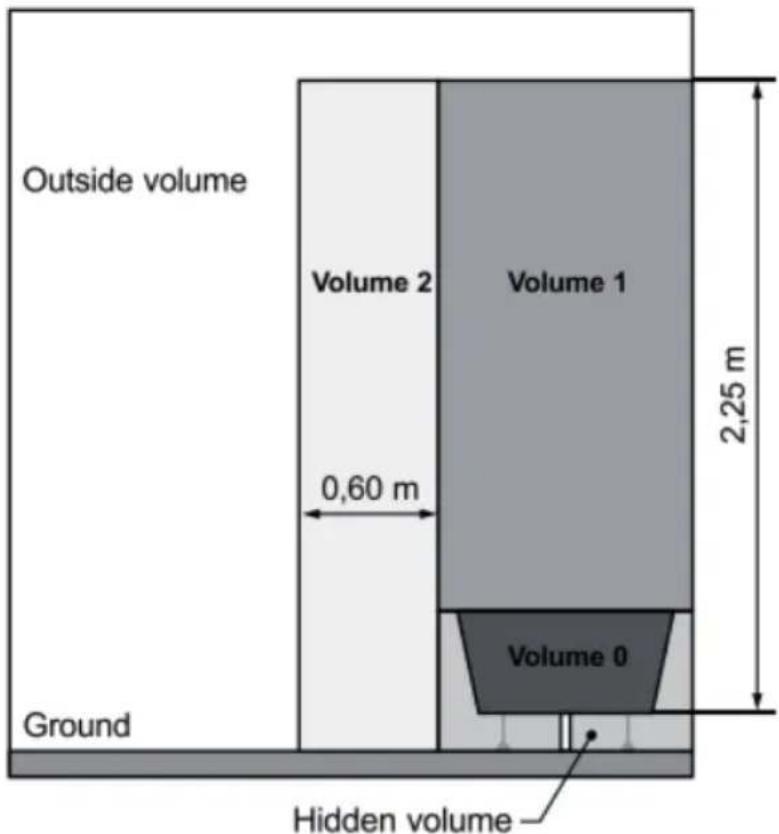
- This product can be installed in bathrooms but only out of the volumes according the national wiring rules (For France NF C 15-100).
Note: : The above drawing is for reference only. We suggest that you to contact a professional electrician for assistance.
- INDOOR USE ONLY
- Choose a correct location for the heater in taking into account the safety instructions:
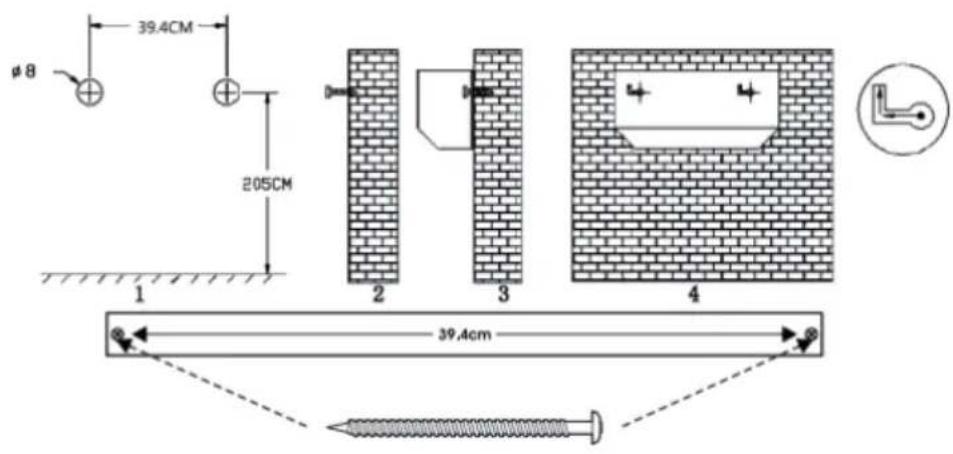
- To hang you heater on the wall: Drill two holes at the level of the slots located at the back of the heater then put two pegs in the holes.
- Hang the heater to the wall by inserting the two screws into the slots of the back panel of the heater the fix the screws on the pegs.
Note: Always be sure that the heater is correctly fixed and stable after performing the installation.
Let a minimum safety distance of 1m between each side of the heater and any obstacle (walls for example).
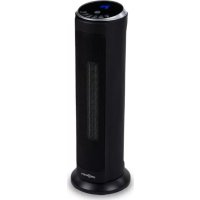
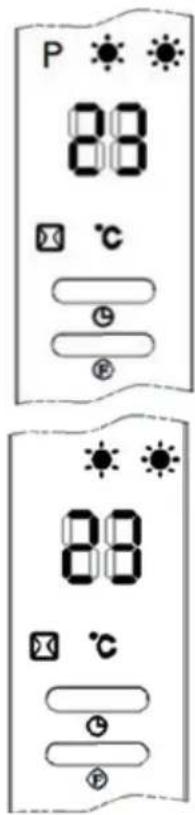
OPERATION
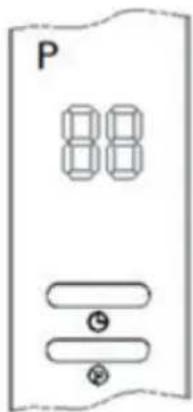
Control elements
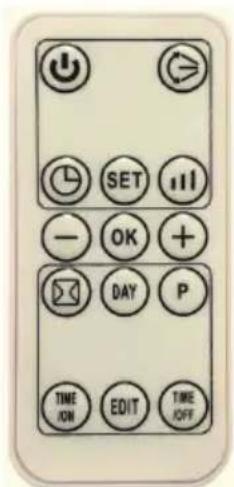
Remote control Control panel
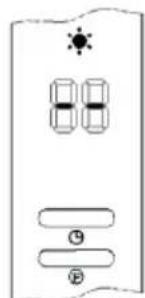
- Plug in and switch on by pressing the red switch 0/1 , enter into standby mode and display shows,5".
- Press F. " button for one time, enter into fan mode and the display show
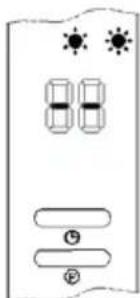
Press second time, the product works with low heating(1000 W) and display shows -
Press third time, changes to high heating(2000 W) and display shows - / " .
press fourth time, enter into swing and display shows n - / 水 Press fifth time, change to stand by.and display shows n - / 水
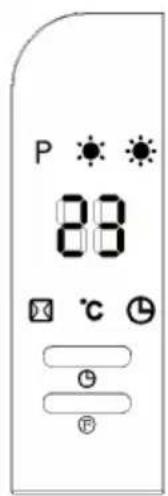
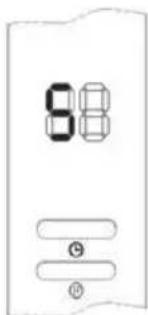
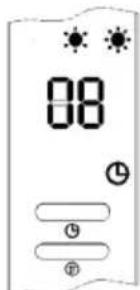
- Press button to set timer(00-12 hours). Pressing the button one time increases one hour for timer. After setting time, the display will show current setting time for 5 seconds, then resume to previous display, meanwhile the light of will on. Below photo is an example of setting 8h.
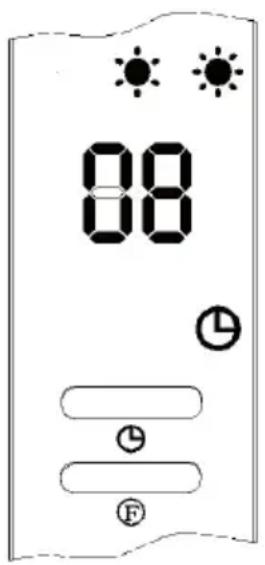
- Appointment "ON": In standby mode, press timer button, you can set the appointment turn-on time in 00-12 hours. After complete setting, the display shows the appointment turn-on time and also the light on. The display automatically decreases 1 hour for each hour passed. When the appointment power-on time arrived, the product will automatically turns on. The default setting temperature is 23^ during appointment turn-on.
The side image is an example to set appointment turn-on time to 8 hours:
Note: If not setting the temperature and weekly program, the product will automatically turn-off after 12 hours of continuous work, and enter into standby.
Function operation (ONLY by remote control)
- Press , the product enter into working status.
- Press " , the product enter into working status. The product works with low heating(1000W) and display shows ,--/Press again, changes to high heating(2000W) and display shows ,--/
- Press button to set swing function, press again, will stopped.
- Press button to set timer(00-12hours) and lighted
Set current TIME/DAY (can set both under standby mode & working status)
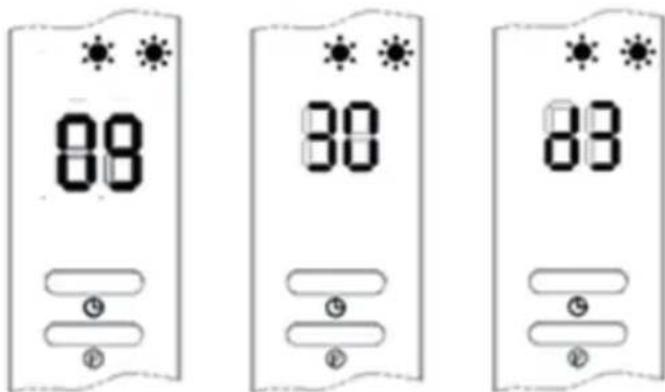
Press SET button for one time, the display shows "12" as default: Press +/- to set current hour. Press SET again, the display shows minute "30", press +/- to set current minute. Then press SET for third time, the display shows the day "d7". Press +/- to set current day (Monday-Sunday: d1-d7). Then press OK to confirm the setting, the display will show previous settings.
For example: Setting to Wednesday, 9:30 AM under 25^ under II heating, please refer to the following photos.
Note:
- Press SET to check the current time & day in turn;
- The LCD was display off if no any operation during 5 seconds;
The timer is in 24 hours.
00~59 minutes.
Set temperature
- During working status, Press 12 ,the display shows " 23 " as default.
- Press +/- to set desired temperature (temperature range 10-49 °C), press OK to confirm the setting.
When setting temperature, it will use SMART working way
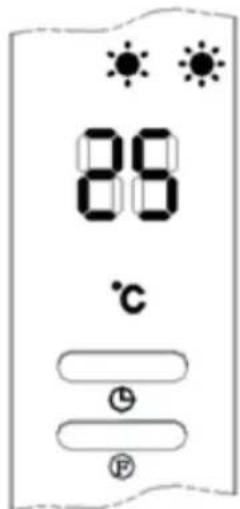
For example: The current ambient temperature is 15^ , when set temperature to 25^ , the display shows as below:
- Setting temperature - ambient temperature >2^ , working with high power-2000 W.
- 0^ < Setting temperature - ambient temperature = < 2^ , working with low power-1000 W.
- Setting temperature - ambient temperature = 0^ . The cool fan will work for 30 seconds to below out the heating left inside, then enter into standby mode.
- After enter into standby mode, if the machine cool down.
- Setting temperature - ambient temperature > = 2^ , the machine will wake up and resume to heating.
If you want to cancel the setting temperature, press key to choose the heating product will work without setting temperature. While the display "C" will go off, and will show --".--". After continuous heating for 12 hours, the cool fan will work for 30 seconds and enter into standby mode.

After complete setting of current TIME/DAY, below is the steps to set weekly program
After complete setting of current TIME/DAY, below is the steps to set weekly program:
- Press , the product enter into working status.
- Press P. The display shows ,P, it enter into weekly program setting.
- Press DAY: The display shows d1~d7, set to working day(Monday-Sunday: d1~d7). Such as set Monday:
Note: In order to distinguish between setting current day & working day: Current day - Monday-Sunday: d1~d7
- Press EDIT, the display shows P1~P6(for each day, it can be set maximum 6 time periods).Such as setting P1:
- Press TIME/on, the display shows "00" as default. Press TIME/on continuously to set the turn-on time. Such as set the turn-on time 7:00am (Memo: the setting time 0-24 for choice):
- Press "TIME/on", the display shows the pervious step turn-on time by default. Press "TIME/on" continuously to set the turn-off time. Such as set the shutdown time at 13:00 pm (the display as figure), (Note: turn-off time later than turn-on time, when turn-on time same as turn-off time, the unit in stand by mode):
- Press +/- to set the target temperature (temperature range 10 - 49 °C).
- Repeat steps 2-7 above. You can set the whole weekly program (and each day. The work of each segment opens, the time of shutdown).
- After above setting, press DAY choose the unit turn-on day of the week, then press EDIT to choose the turn-on time of the day, then Press + / - to set desired temperature (temperature range 10-49 °C). Press OK to confirm the setting.
- To cancel the weekly function, press the "P" again. The light "P" will go off. The weekly program is off. The product will revert to the previous function working status.
Note: After the above settings are completed and P program is working, press DAY/ EDIT/ TIME/ON/ TIME/OFF to check the setting time of each day and time periods.
- The turn-on time periods 00-24 hours. It cannot be set to minutes.
- The "TIME/OFF" cannot be less than "TIME/ON".
- When the "TIME/ON" is the same as "TIME/OFF", the time period enters into standby mode.
Note: If main switch off, power cut off, or plug out, it need reset. You can press SET to check you set Time /Day.
Set open-window detection(ONLY by remote control)
- Press , the product enter into working status. Heating for a moment until stable.
- Press on the remote control. will light on. The temperature is displayed "23" by default.
- Press +/- to set target temperature.
- During open-window detection mode, once the ambient temperature drops 5 - 10^ within 10 minutes, then the product will stop working within 30 minutes and enter into stand by mode. Then press to turn on the product.
- Press again to turn off the open-window detection, the light. will go off and the product will resume to previous working mode. Below is an example to set 23^ during open-window detection:
- When turn on at the same time for both open-window detection and weekly program, during the OFF period of weekly program, the product doesn't work. During the working status of weekly program, the temperature is subject to the setting temperature of open-window detection.
Note: - Before turn on weekly program: it must set day and time period, otherwise the weekly default state is "00", which does not work.
CLEANING AND MAINTENANCE
- Switch off from the power supply before cleaning.
- Using a soft, moist cloth, with or without a mild soap solution, carefully clean the exterior surface of the product.
- CAUTION: Allow the product to completely cool before handling or cleaning it.
- Do not allow water or other liquids to run into the interior of the product, as this could create a fire and/or electrical hazard.
- We also recommend the periodic cleaning of this appliance by lightly running a vacuum cleaner nozzle over the guards to remove any dust or dirt that may have accumulated inside or on the unit.
- CAUTION: Do not use harsh detergents, chemical cleaners or solvents as they may damage the surface finish of the plastic components.

If there is a legal regulation for the disposal of electrical and electronic devices in your country, this symbol on the product or on the packaging indicates that this product must not be disposed of with household waste. Instead, it must be taken to a collection point for the recycling of electrical and electronic equipment. By disposing of it in accordance with the rules, you are protecting the environment and the health of your fellow human beings from negative consequences. For information about the recycling and disposal of this product, please contact your local authority or your household waste disposal service.
This product contains batteries. If there is a legal regulation for the disposal of batteries in your country, the batteries must not be disposed of with household waste. Find out about local regulations for disposing of batteries. By disposing of them in accordance with the rules, you are protecting the environment and the health of your fellow human beings from negative consequences.
MANUFACTURER & IMPORTER (UK)
Manufacturer:
Chal-Tec GmbH, Wallstrasse 16, 10179 Berlin, Germany.
Importer for Great Britain:
Berlin Brands Group UK Ltd
PO Box 1145
Oxford,OX19UW
United Kingdom
Technical parameters
| Model identifier(s): | 10033139 | |||||
| Item Symbol Value Unit Item | Unit | |||||
| Heat output Type of heat input, for electric storage local space | heaters only | |||||
| Nominal heat output P | nom | 2.0 kW | manual heat | charge control, with integrated thermostat | no | |
| Minimum heat output (indicative) | Pmin | 0 kW | manual heat | charge control with room and/or outdoor temperature feedback | no | |
| Maximum continuous heat output | Pmax | 2.0 kW | electronic heat | heat charge control with room and/or outdoor temperature feedback | no | |
| Auxiliary electricity consumption | fan assisted heat output no | |||||
| At nominal heat output (fan motor) | elmax | 0 | kW | Type of heat output/room temperature control | ||
| At minimum heat output (fan motor) | elmin | 0 kW | single stage | heat output and no room temperature control | no | |
| In standby mode el | SB | 0.001 kW | Two or more | manual stages, no room temperature control | no | |
| with mechanic thermostat room temperature control | no | |||||
| with electronic room temperature control no | ||||||
| electronic room temperature control plus day timer | no | |||||
| electronic room temperature control plus week timer | yes | |||||
| Other control options (multiple selections possible) | ||||||
| room temperature control, with presence detection | no | |||||
| room temperature control, with open window detection | yes | |||||
| with distance control option no | ||||||
| with adaptive start control | no | |||||
| with working time limitation | yes | |||||
| with black bulb sensor | no | |||||
| Contact details | Chal-Tec GmbH, Wallstraße 16, 10179, Berlin, Germany | |||||
Chere cliente, cher client,
Berlin Brands Group UK Ltd
PO Box 1145
Oxford,OX19UW
United Kingdom
FICHE DE DONNÉES PRODUIT
Berlin Brands Group UK Ltd
PO Box 1145
Oxford,OX19UW
United Kingdom
HOJA DE DATOS DEL PRODUCTO
PRODUTTORE IMPORTATORE (UK)
Produtlore:
Chal-Tec GmbH, Wallstraße 16, 10179 Berlin, Germania.
Berlin Brands Group UK Ltd
PO Box 1145
Oxford,OX19UW
United Kingdom
SCHEDA INFORMATIVA DEL PRODOTTO