OX - Bike trailer Klarfit - Free user manual and instructions
Find the device manual for free OX Klarfit in PDF.

| Product type | Bicycle trailer |
| Brand | Klarfit |
| Model | OX |
| Article number | 10034797 |
| Dimensions | 132 x 70 x 84 cm |
| Weight | 11.65 kg |
| Maximum load | 40 kg |
| Tire size | 16 x 1.75 inches |
| Frame material | Steel |
| Assembly required | Yes (wheel assembly, hitch, reflectors) |
| Hitch type | Fastening to the rear axle of the bike, rotating with pin |
| Recommended maximum speed | 40 km/h |
| Intended use | Transport of goods (not people) |
| Safety | Bicycle brakes in good condition, increased braking distance |
| Maintenance | Check tire pressure and hitch before each use |
| Reflectors | Included, to be attached to the wheels |
| Folding | Foldable chassis |
| Manufacturer | Chal-Tec GmbH, Wallstraße 16, 10179 Berlin, Germany |
Frequently Asked Questions - OX Klarfit
User questions about OX Klarfit
0 question about this device. Answer the ones you know or ask your own.
Ask a new question about this device
Download the instructions for your Bike trailer in PDF format for free! Find your manual OX - Klarfit and take your electronic device back in hand. On this page are published all the documents necessary for the use of your device. OX by Klarfit.
USER MANUAL OX Klarfit
Congratulations on purchasing this device. Please read the following instructions carefully and follow them to prevent possible damages. We assume no liability for damage caused by disregard of the instructions and improper use. Scan the QR code to get access to the latest user manual and more product information.

CONTENT
Safety Instructions 12
Product Overview 12
Assembly 13
Important Notes on Fastening and Use 17
TECHNICAL DATA
| Item number 10034797 | |
| Dimensions trailer 132 x 70 x 84 cm | |
| Weight trailer 11.65 kg | |
| Maximum loading weight 40 kg | |
| Tire size 16*1.75 Inch |
PRODUCER
Chal-Tec GmbH, Wallstraße 16, 10179 Berlin, Germany.
SAFETY INSTRUCTIONS
- The trailer should not be loaded with more than 40kg .
The trailer must not be used to carry persons. - Do not make any technical modifications to the equipment. This may result in road hazards and void the manufacturer's warranty.
- Do not use the trailer on stony, uneven terrain or in dangerous traffic situations.
- The towing bicycle must be in perfect condition. The brakes should work perfectly. A trailer (and load) will increase your braking distance.
- Do not drive the trailer faster than 40km / h
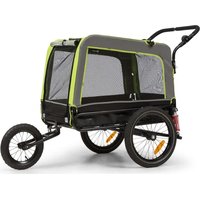
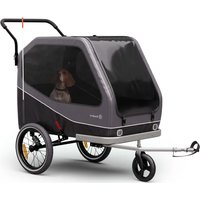
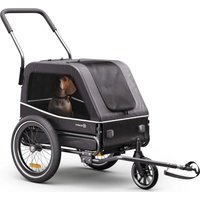
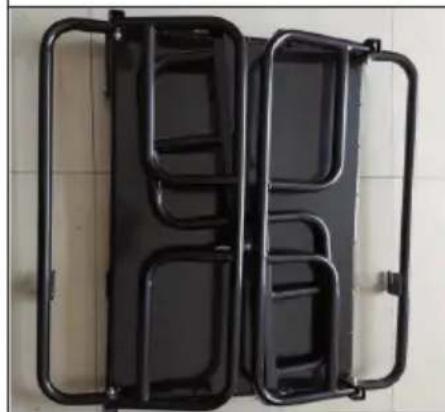
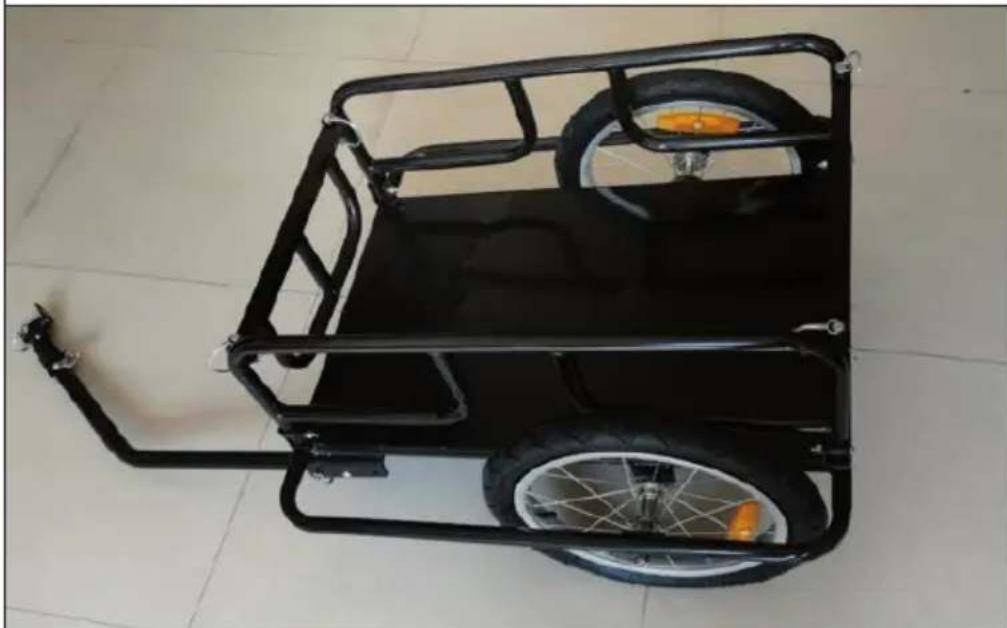
PRODUCT OVERVIEW
Assembled trailer
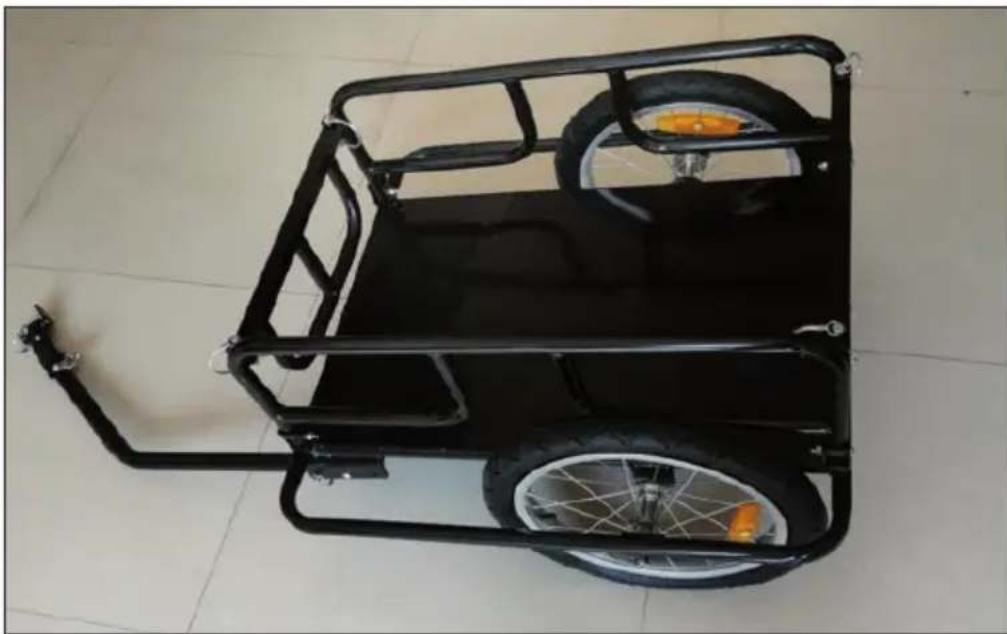
ASSEMBLY
Step 1: Open the trailer
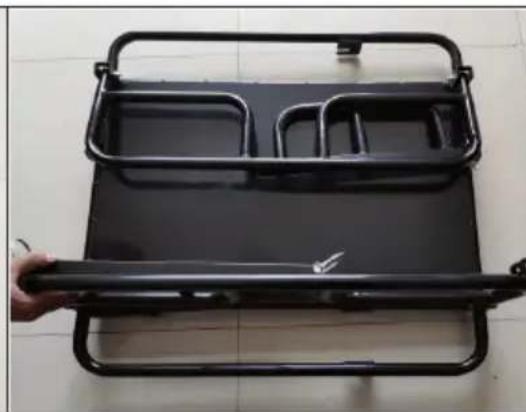
Open the trailer frame.
Remove the locking pins from the trailer frame.
Open the front and rear sides of the trailer frame, slide the locking pins through the holes and secure the locking pins.
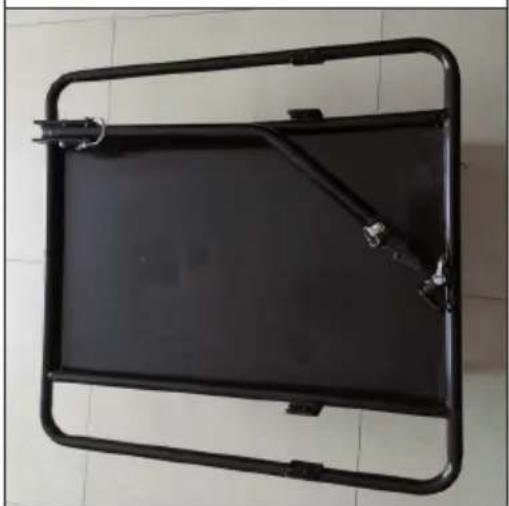
Step 2: Rotate frame
Turn the trailer frame.
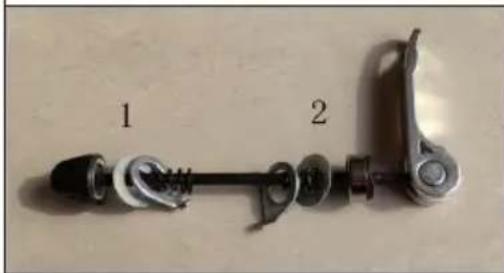
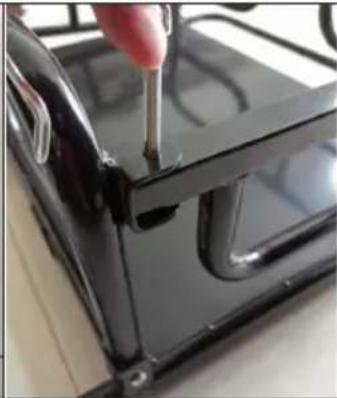
Step 3: Fixing the wheels

Remove part 1 of the quick release. Part 2 remains on the axle.
Insert the wheel into the axle receptacle.
Attach part 2 to the outside of the axle.
Make sure that the washers are on the outside of the axle receptacle.
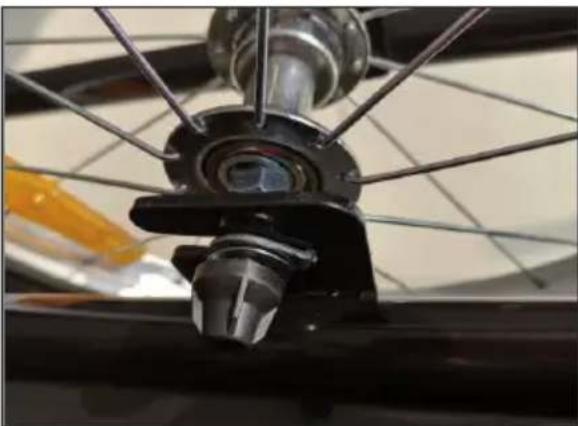
Attach part 1 to the inside of the axle.
Make sure that the washers are on the outside of the axle receptacle.
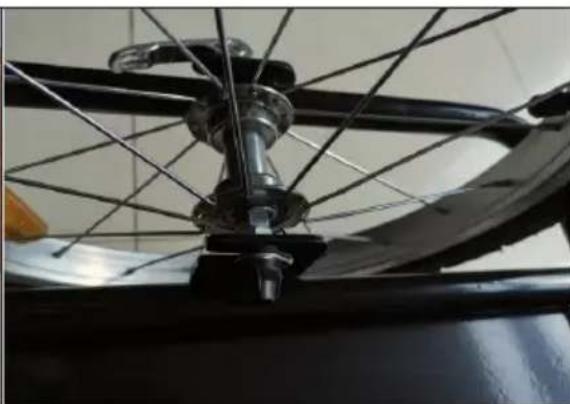
Tighten the axles with the quick release.
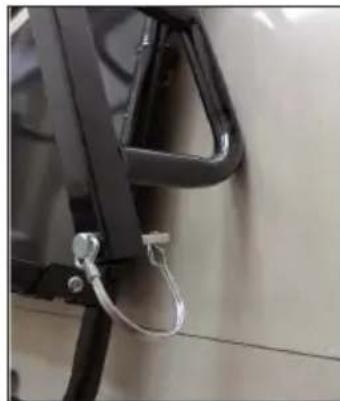
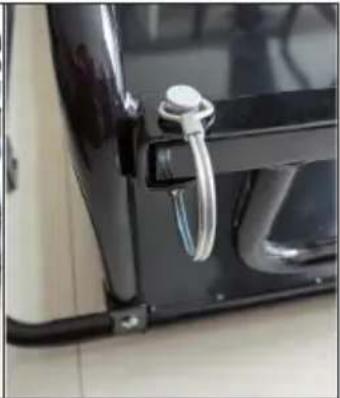
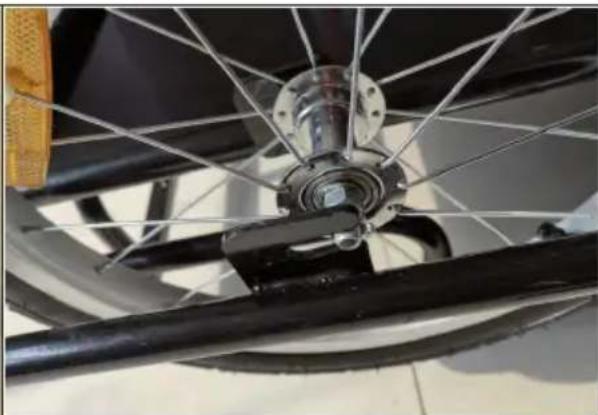
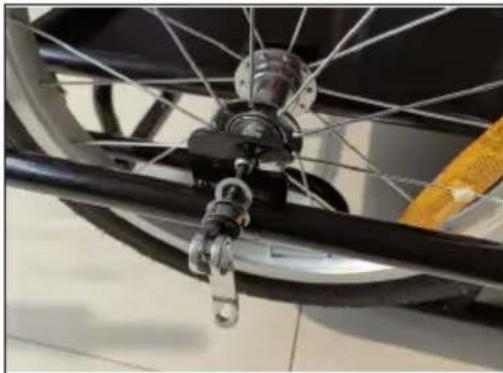
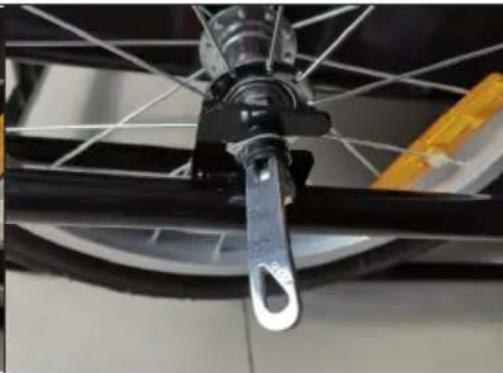
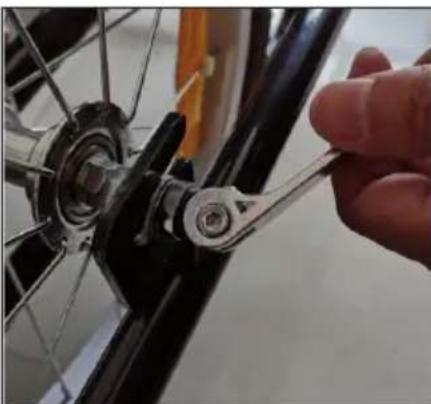
Step 4: Fastening the trailer hitch
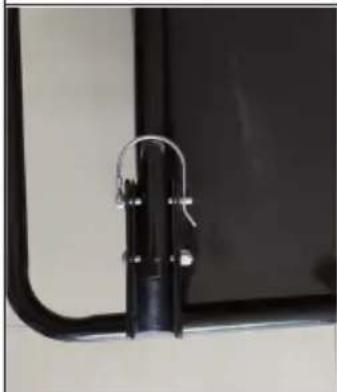
Remove the locking pin from the trailer coupling.

Turn the trailer coupling by 180^ and secure it with the safety pin when the trailer coupling is open.
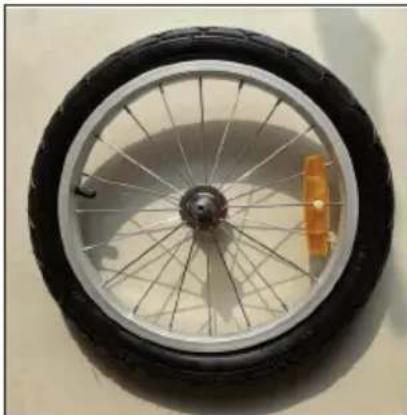
Step 5: Fixing the reflectors
Finally, attach the reflectors to the wheels.
IMPORTANT NOTES ON FASTENING AND USE
Note: The connection between bicycle and trailer is the most important step in the assembly process. Make sure that the trailer is securely attached to the bicycle. If the trailer hitch cannot be securely attached or tightened to your bicycle, do not use it. Contact your bicycle dealer for help with correct installation.
- Check the condition of the bicycle and trailer before each use.
- Always ride defensively. During use, observe local traffic regulations.
- If you have a trailer, you will need additional stopping distance.
- Practice your trailer before use until you are familiar with it.
- Make sure that your load is secured before driving. Do not exceed the maximum load weight.
- Make sure that you use a suitable bicycle. If in doubt, consult your local bicycle dealer or manufacturer.
- After assembly and before riding, check that the hitch is fully engaged.
- Check the tyre pressure regularly.
- If possible, use the trailer only on slippery roads. Avoid kerbs, potholes or uneven surfaces.
- If you drive downhill or around a bend, you must drive slower.