Door Contact - Alarm system IMOU - Free user manual and instructions
Find the device manual for free Door Contact IMOU in PDF.



User questions about Door Contact IMOU
0 question about this device. Answer the ones you know or ask your own.
Ask a new question about this device
Download the instructions for your Alarm system in PDF format for free! Find your manual Door Contact - IMOU and take your electronic device back in hand. On this page are published all the documents necessary for the use of your device. Door Contact by IMOU.
USER MANUAL Door Contact IMOU
natural_image
Illustration of a person sitting on a sofa using a tablet, with a coffee table and mug nearby (no text or symbols)Imou
Contents
Quick Start Guide....1
1 Packing List....1
2 Introduction ....1
3 Start to Use .... 3
4 Installation....3
Kurzanleitung....5
natural_image
Two rectangular electronic devices with rounded corners, one labeled 'sachanga' and the other empty (no visible text or symbols on device surfaces)Door Contact ×1
natural_image
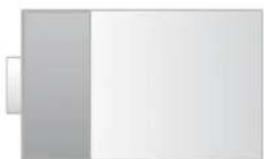
Simple diagram of a battery cell with one side and one side, no text or symbols present.CR123A Battery ×1
Mounting foam *1
natural_image
Blank white image with a small orange bookmark icon on the left side (no text or symbols)QSG×1
natural_image
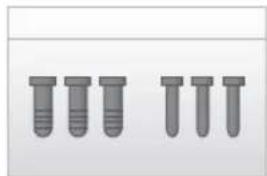
Six identical gray test tubes arranged in two rows (no text or symbols visible)Screw Package ×1
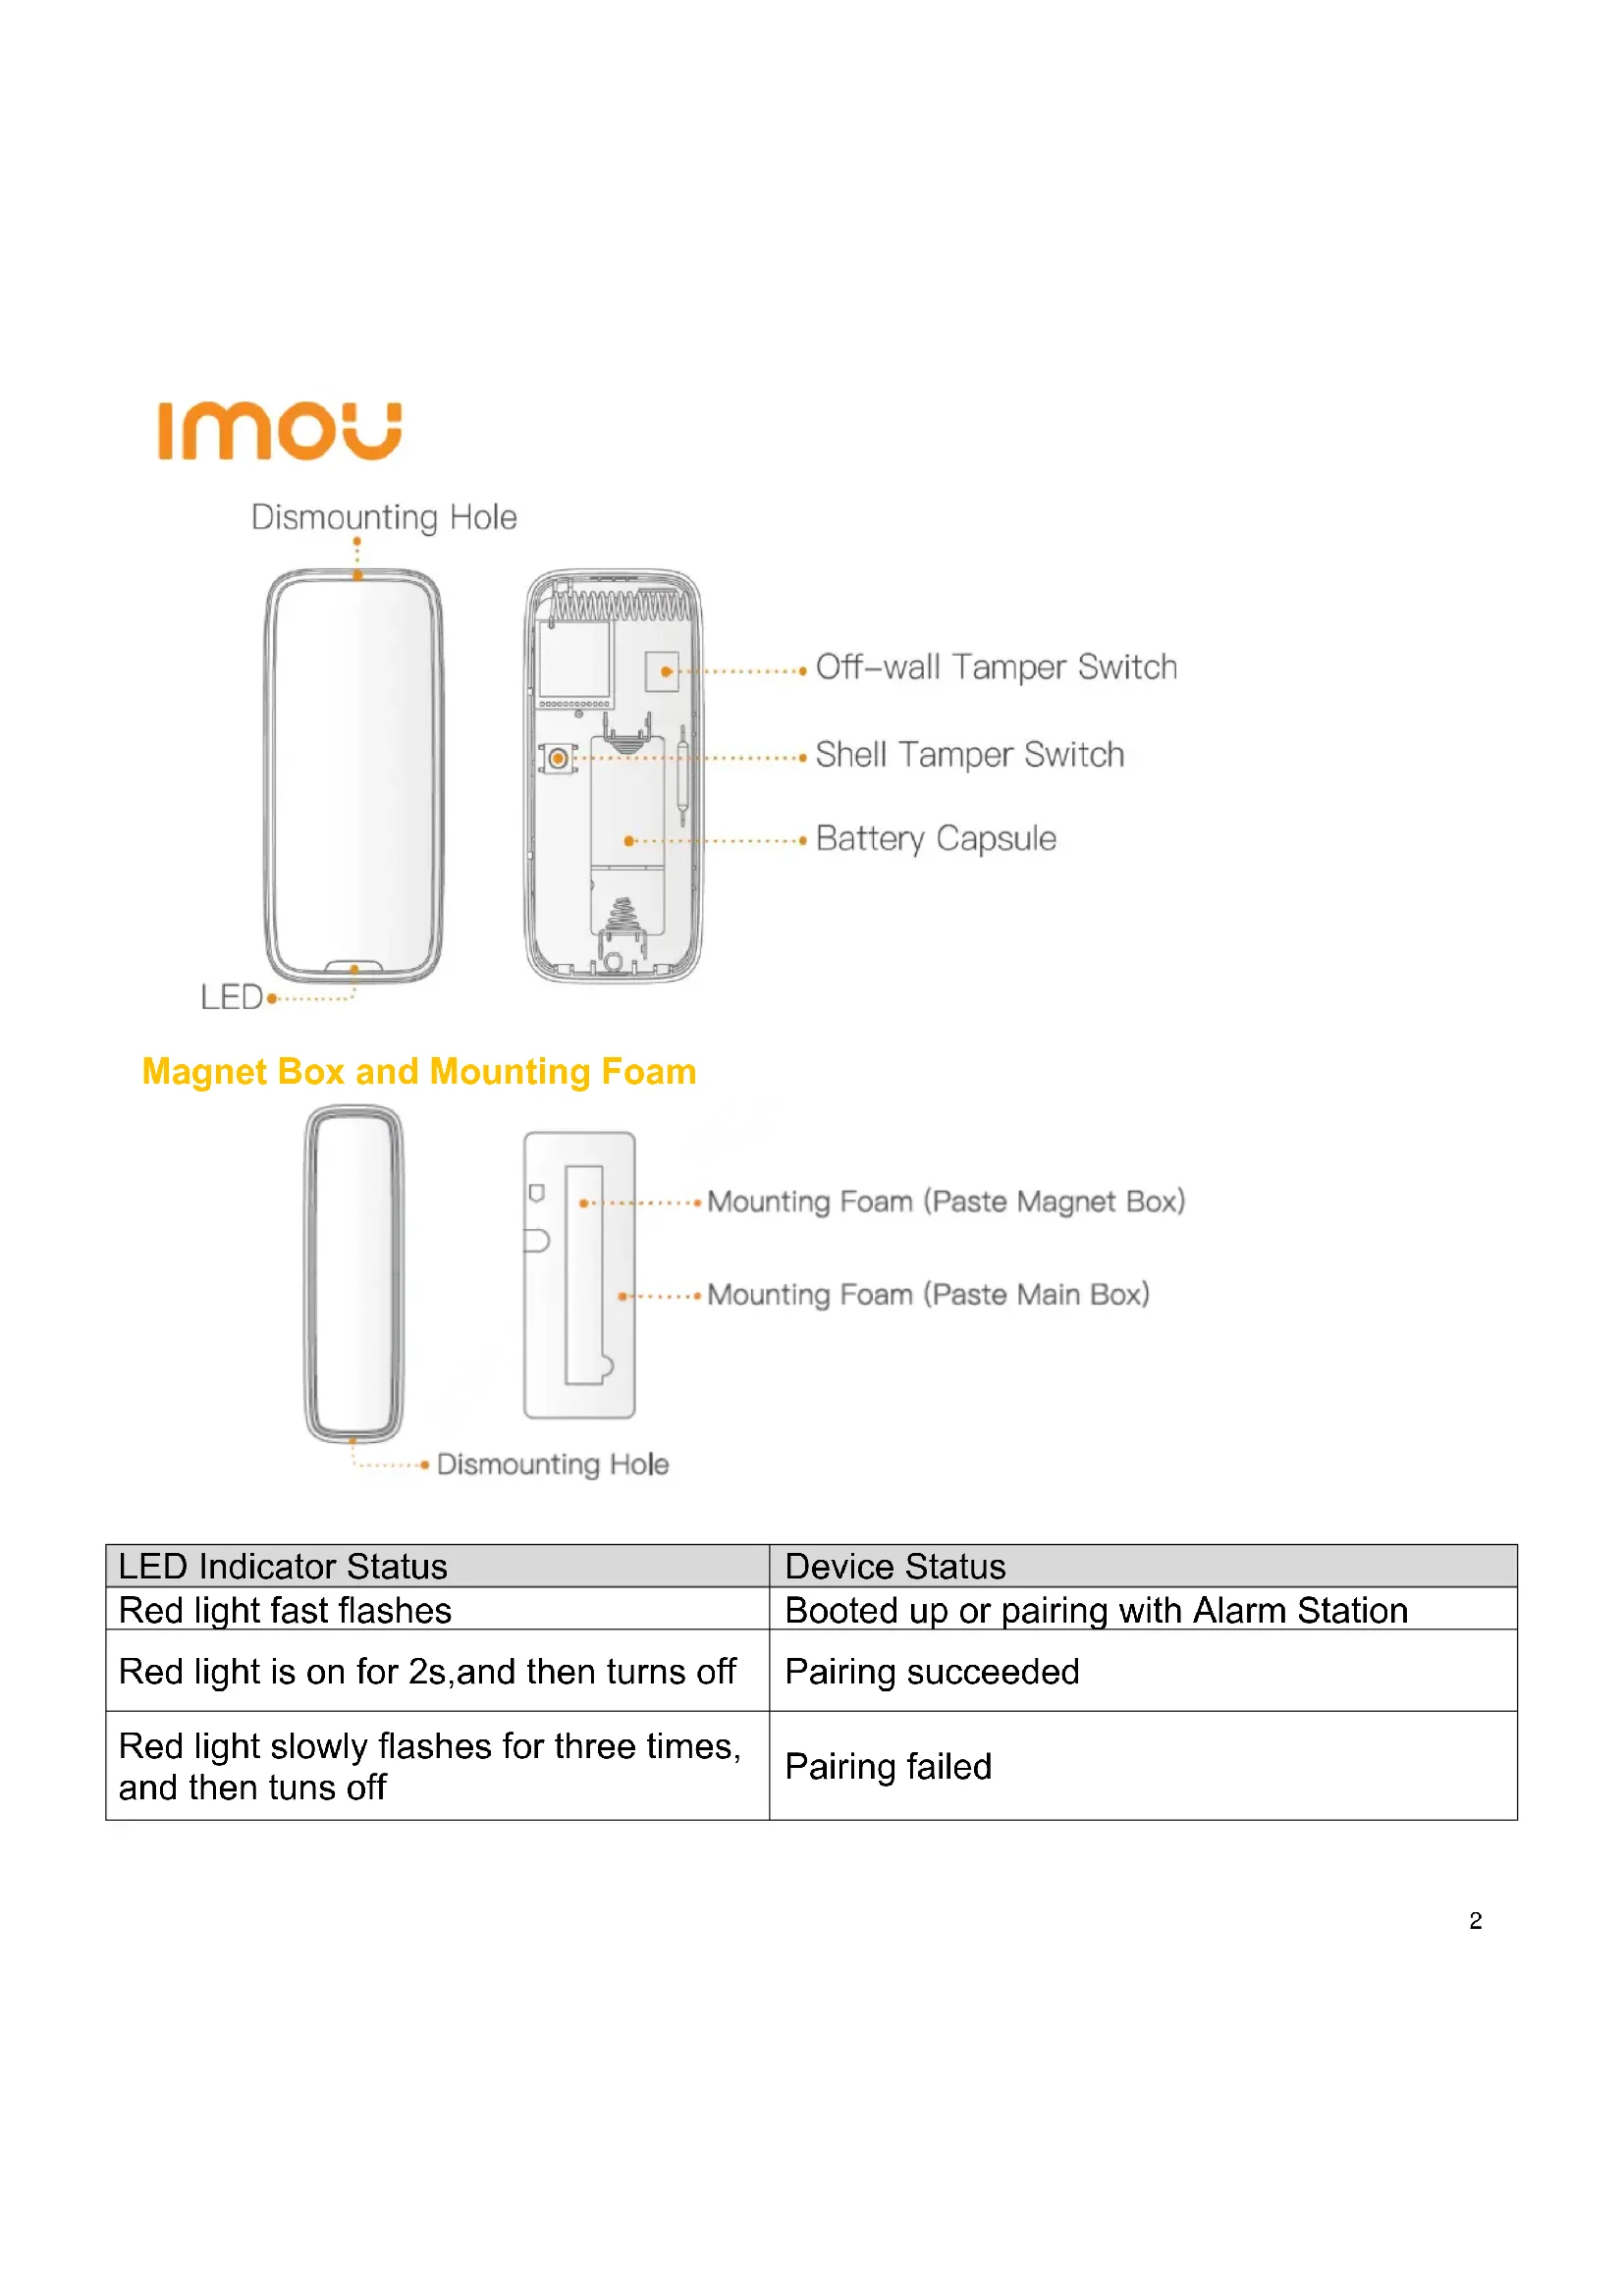
Introduction 2 Main box
Imou
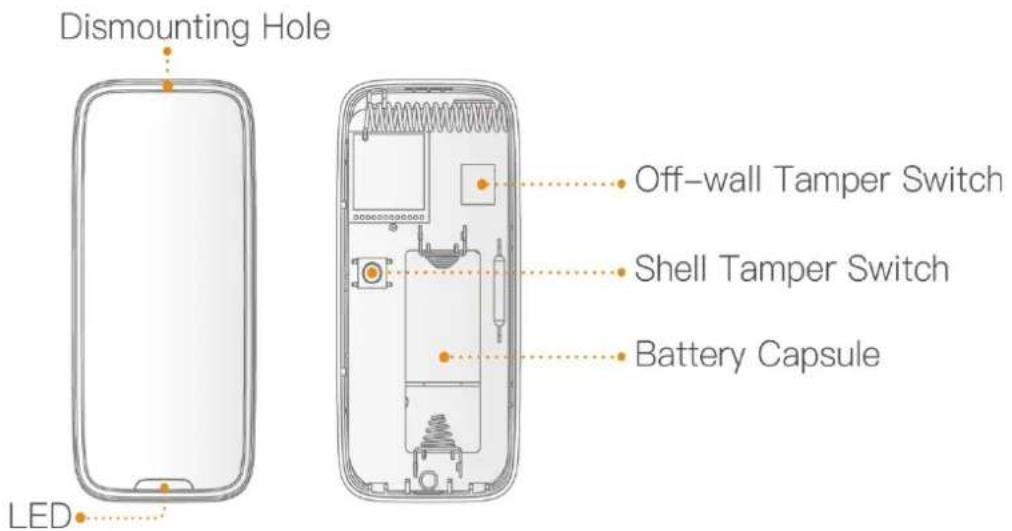
text_image
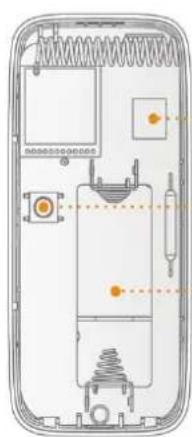
Dismounting Hole LED Off-wall Tamper Switch Shell Tamper Switch Battery CapsuleMagnet Box and Mounting Foam
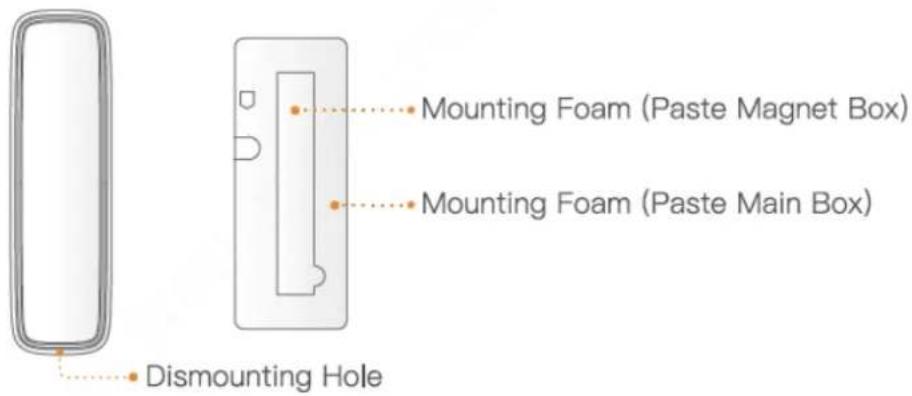
text_image
Mounting Foam (Paste Magnet Box) Mounting Foam (Paste Main Box) Dismounting Hole| LED Indicator Status | Device Status |
| Red light fast flashes | Booted up or pairing with Alarm Station |
| Red light is on for 2s,and then turns off | Pairing succeeded |
| Red light slowly flashes for three times, and then tuns off | Pairing failed |
Imou
Start to Use 3
Imou APP
If Imou app has added the Alarm Station, add the detector according to app prompts.
Note: If the detector has paired with another Alarm Station, you can undo previous pairing by quickly clicking tamper switch for 5 times to clear the existing pairing configuration.
Installation 4

Caution:
— Stick magnet box tightly to the side pointed by triangular arrow on the rear of main box.
— We suggest pasting the main box on door/window frame, and magnet box on door/window.
Install main box as follows:
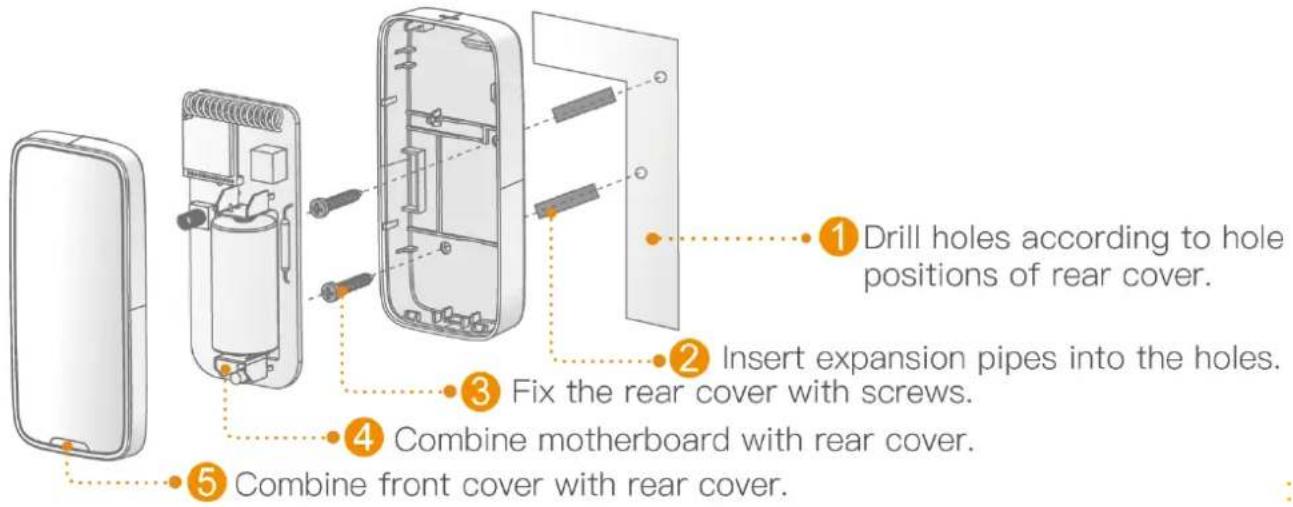
text_image
Drill holes according to hole positions of rear cover. Insert expansion pipes into the holes. Fix the rear cover with screws. Combine motherboard with rear cover. Combine front cover with rear cover.lmou
Install magnet box as follows:
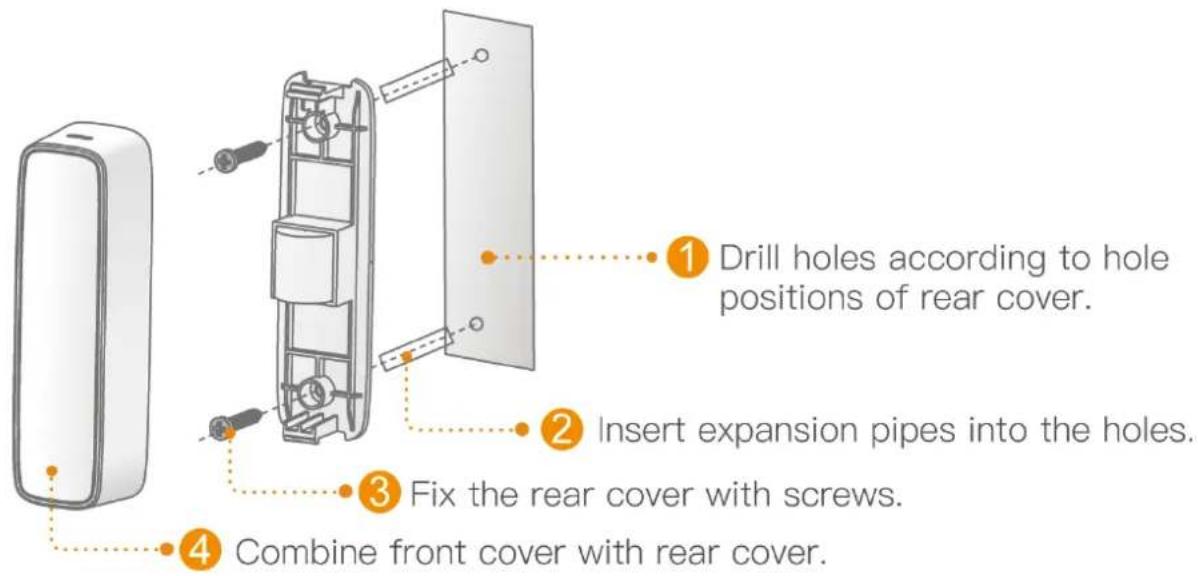
text_image
Drill holes according to hole positions of rear cover. Insert expansion pipes into the holes. Fix the rear cover with screws. Combine front cover with rear cover.Disclaimer
- This quick start guide is for reference only. Minor difference might be found in user interface.
- All the designs and software here are subject to change without prior written notice.
- All trademarks and registered trademarks mentioned are the properties of their respective owners.
- Please visit our website or contact your local service engineer for more information.
- If there is any uncertainty or controversy, please refer to our final explanation.
Imou
Kurzanleitung
Lieferumfang 1
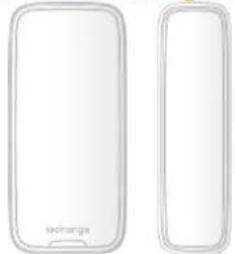
natural_image
Two white rectangular electronic devices side by side, one with a logo and the other with a label 'techmarge' (no additional text or symbols)Türkontakt × 1
natural_image
Blank white panel with a gray side, no text or symbols visibleCR123A -Batterie × 1
natural_image
Blank white image with a small orange bookmark icon on the left side (no text or symbols)Kurzanleitung × 1
Montageschaum × 1
natural_image
Six identical gray test tubes arranged in two rows (no text or symbols visible)natural_image
Two white rectangular electronic devices with rounded corners, one labeled 'bectanics' (no other text or symbols visible)natural_image
Blank white rectangle with a gray vertical bar on the left (no text or symbols)1 pila de CR123A
natural_image
Blank white image with a small orange bookmark icon on the left side (no text or symbols)natural_image
Six identical gray test tubes arranged in two rows (no text or symbols visible)natural_image
Simple line drawing of a rectangular device with a dotted line and 'LED' label at the bottom (no text or symbols on the device itself)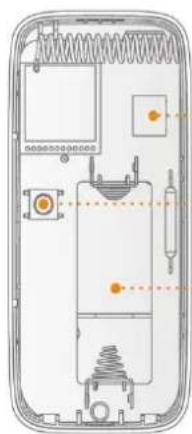
natural_image
Cross-sectional diagram of a mobile phone showing internal components and wiring (no text or labels)Interruptor anti-sabotaje de pared
Interruptor anti-sabotaje de carcasa
Compartimento de la pila
lmou
natural_image
Two rectangular electronic devices with rounded corners, one labeled 'savangia' and the other empty (no visible text or symbols on device surfaces)natural_image
Blank rectangular panel with a gray left-side vertical stripe and white top edge (no text or symbols)Pile CR123A × 1
natural_image
Blank white image with a small orange bookmark icon on the left page (no text or symbols)natural_image
Six identical gray test tubes arranged in two rows (no text or symbols visible)Jeu de vis × 1
Introduction 2
natural_image
Two rectangular electronic devices with rounded corners, one labeled 'ator image' (no other text or symbols visible)Deur detector × 1
natural_image
Blank rectangular panel with a gray left-side stripe and white top, no text or symbols present.CR123A batterij × 1
natural_image
Blank white image with a small orange bookmark icon on the left side (no text or symbols)QSG × 1
Montageschuim × 1
natural_image
Six identical gray test tubes arranged in two rows (no text or symbols visible)Schroeven pakket × 1
Introductie 2
natural_image
Simple line drawing of a rounded rectangle with two small dots at the bottom (no text or symbols)Led
natural_image
Interior view of a mobile phone case with visible circuitry and wiring (no text or symbols)natural_image
Two rectangular electronic devices with rounded corners, one labeled 'savangia' and the other empty (no visible text or symbols on device surfaces)natural_image
Blank rectangular panel with a gray left-side vertical stripe and white top edge (no text or symbols)Batteria al CR123A x 1
natural_image
Blank white image with a small orange bookmark icon on the left page (no text or symbols)natural_image
Six identical gray test tubes arranged in two rows (no text or symbols visible)Kit di viti x 1
natural_image
Two rectangular electronic devices with rounded corners, one labeled 'sawlinga' and the other empty (no visible text or symbols on device surfaces)natural_image
Blank white rectangle with a gray vertical bar on the left (no text or symbols)Pilha de CR123A × 1