AR5W40R - Fan ARDES - Free user manual and instructions
Find the device manual for free AR5W40R ARDES in PDF.
Download the instructions for your Fan in PDF format for free! Find your manual AR5W40R - ARDES and take your electronic device back in hand. On this page are published all the documents necessary for the use of your device. AR5W40R by ARDES.
USER MANUAL AR5W40R ARDES
Swallowing can lead to chemical burns, perforation of soft tissue, and death. Severe burns can occur within 2 hours of ingestion. Seek medical attention immediately.
2. Do not allow children to replace batteries.
3. Always insert batteries correctly with regard to polarity (+ and -)
marked on the battery and the equipment.
4. Do not short-circuit batteries.
5. Do not charge batteries.
6. Do not force discharge batteries.
7. Do not mix new and used batteries or batteries of dierent types or
8. Exhausted batteries should be immediately removed from
equipment and properly disposed of.
9. Do not heat batteries
10. Do not weld or solder directly to batteries.
11. Do not dismantle batteries.
12. Do not deform batteries.
13. Do not dispose of batteries in re.
14. A lithium battery with a damaged container should not be exposed
16. Store unused batteries in their original packaging away from
metal objects. If already unpacked, do not mix or jumble batteries.
17. Remove batteries from equipment if it is not to be used for an
extended period of time unless it is for emergency purposes.
18. Clean the battery contacts and also those of the equipment prior to
battery installation.
19. In case of leak from batteries, avoid any contact with it; in case of
contact, wash the aected part with water and seek medical attention.
5. Lock ring of the back grille
11. Fixing plate to the wall
12. Screws and plugs
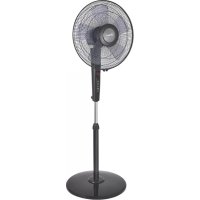
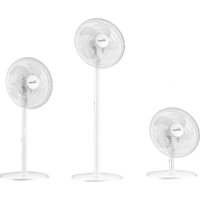
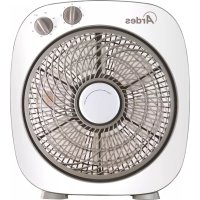
Instructions for use Unscrew the lock ring of the back grille (5) from the motor shaft (7) by turning counter clockwise. Insert the back grille (6) on the motor shaft (7) and x it by screwing clockwise the lock ring of the back grille (5). Insert the fan (4) on the motor shaft (7) and x it by screwing counter clockwise the lock ring of the fan (3). Open the clips of the front grille (2) and place it on the back grille (6) making sure that the logo on the central stud is placed horizontally, parallel with the oor. Find the proper position to lock the clips and insert the safety screw of the grille (1). After the installation, the product is ready to use. For your convenience the unit can be operated by using control panel in the main body or using remote control included. Wall installation: Fix the plate to the wall (11) by using the 3 screws and plugs provided (12). Fix the fan on the wall’s plate (11) making sure that the ap ts into the xing plate (9) on the back of the fan.20 Remote control