
Z31712A - Motion detector POWERFIX - Free user manual and instructions
Find the device manual for free Z31712A POWERFIX in PDF.
| Product type | Motion detector |
| Brand | Powerfix |
| Model | Z31712A |
| Rated voltage | 220-240 V, 50 Hz |
| Rated load (incandescent lamps) | Max. 1200 W |
| Rated load (energy-saving lamps) | Max. 300 W |
| Minimum time delay | 10 s ± 3 s |
| Maximum time delay | 7 min ± 2 min |
| Ambient light range | 3-2000 lux (adjustable) |
| Detection range | Max. 12 m |
| Detection angle | Max. 160° |
| Operating temperature | -20 to 40 °C |
| Relative humidity | < 93 % RH |
| Recommended installation height | 1.8 to 2.5 m |
| Protection rating | IP44 |
| Package contents | 1 detector, 2 screws, 2 wall plugs, 1 instruction manual |
| Warranty | 3 years |
| Care and cleaning | Clean with a dry, lint-free cloth. Do not use detergents. |
| Safety | Disconnect power before installation. Do not leave children unsupervised. |
| Repairability | Not repairable. Internal fuse not replaceable. |
Frequently Asked Questions - Z31712A POWERFIX
User questions about Z31712A POWERFIX
0 question about this device. Answer the ones you know or ask your own.
Ask a new question about this device
Download the instructions for your Motion detector in PDF format for free! Find your manual Z31712A - POWERFIX and take your electronic device back in hand. On this page are published all the documents necessary for the use of your device. Z31712A by POWERFIX.
USER MANUAL Z31712A POWERFIX
Operation and Safety Notes
SE
rörelsedeteKtOr
GB/IEOperation and Safety NotesPage 5
Select a suitable place for installation.. 10
Installation 10
Start-up
Setting the sensitivity of the sensor.. 11
Setting the lighting duration of the device.. 12
Setting the day light level.. 12
Cleaning and Care.. 13
Disposal
Warranty.. 14
Motion Sensor
- Intended use
The motion detector is intended for the automatic control of light sources. The product is not intended for commercial use.
- Technical Data
Rated voltage: 220 - 240V 50Hz
Nominal load: max. 1200 watt (for LED bulb / halo
gen bulb) max. 300 watt (for energy
saving bulb)
Delay time min.: 10 s - + / - 3 s
Delay time max.: 7min + / - 2min
Surrounding light: 3-2000 Lux (can be set)
Range: max. 12 m
Coverage area: max. 160^
Operating temperature: -20 - 40^
Operating humidity: < 93% rF
Recommended installation height: 1.8 - 2.5m
Model no: Z31712A/C (black)/Z31712B/D (white)
- Scope of delivery
1 motion sensor
2 screws
2 dowels
1 instruction manual
- Parts description
Sensor
Screw
3 Block terminal
4 Base plate
5 Dowel (ø approx. 6 mm)
6 Control dial TIME
7 Control dial LUX
9 Internal wiring of the article (do not modify)
10 Clamp room of the article
Lamp (not included)
only Z31712C/D
8 Control dial SENS
Safety
YOU SHOULD STORE ALL SAFETY INFORMATION AND INSTRUCTIONS IN A SAFE PLACE IN CASE YOU NEED TO REFER TO THEM AGAIN IN THE FUTURE!
When passing this product on to others please be sure to also include all of its documentation.
Avoid the danger of death from electric shock!
Before installation, check the motion detector, as well as connection cords to ensure that these are intact. A defective product and defective cords increase the risk of electrical shock. A defective product and defective cords increase the risk of electrical shock.
WARNING! DANGER TO LIFE BY ELECTRIC SHOCK! Before installation or performing any work on outdoor lamp with LED/halogen/energy-saving bulb, switch off the electrical circuit at the circuit breaker box or remove the fuse from the fuse box.
How to avoid personal injury and damage to the product!
RISK OF FATAL INJURY AND
ACCIDENT HAZARD FOR TODDLERS AND SMALL CHILDREN! Never leave children unattended with the packaging material or the product. Please keep children away from the device at all times.
This appliance can be used by children aged from 8 years and above and persons with reduced physical, sensory or mental capabilities or lack of experience and knowledge if they have been given supervision or instruction concerning use of the appliance in a safe way and understand the hazards involved. Children shall not play with the appliance. Cleaning and user maintenance shall not be made by children without supervision.
Before use, ensure that the mains voltage available is the same as the required operating voltage for the device (220-240 V~).
- Avoid extreme temperature fluctuations. Install the product only if the ambient temperatures are acceptable.
Installation shall only be performed by an electrician who is familiar with the regulations and risks.
The fuse in the product is not replaceable.
- Mounting
- Select a suitable place for installation
Ensure that
- the motion detector will not be functionally inhibited at the desired place of installation due to obstacles or constantly moving objects.
- the motion detector is not installed where there are strong temperature fluctuations, e.g. due to heating devices or air conditioners.
Installation
WARNING! DANGER TO LIFE BY ELECTRIC SHOCK! Before installation, switch off the electrical circuit at the circuit breaker box or remove the fuse from the fuse box.
Note: The recommended installation height is between 1.8 and 2.5m
Note: Before installation, ensure an optimal direction of motion. The motion detector reacts more sensitively to movement from the side than to motion from the front (see III. A). Therefore, we recommend installing the motion detector 1 to the side of the direction of movement.
Note: To attach the base plate 4 it is necessary to drill two holes.

WARNING!
Ensure that you do not damage any electricity cable!
Remove the screws 2 from the front of the motion detector (see III. B).
Insert the cable through the cable opening of the base plate 4.
Screw the base plate 4 to the desired position.
- Connect the cable to the screw terminal 3 of the motion detector as depicted in III. C.
- Attach the cover of the connection area back to the base plate 4 by screwing the screws 2.
- Start-up
Turn the electricity back on. The device is now ready for use.
- Setting the sensitivity of the sensor (III. D)
Only models Z31712C/D
Note: the sensor range is max. 12m (depending on the surrounding temperature).
Turn the control knob SENS in the direction ^ in order to reduce the sensor range 1.
Turn the control knob SENS 8 in the direction ^ + ^ in order to increase the sensor range 1.
- Setting the lighting duration of the device (III. D)
Note: the lighting duration of the device can be set from min. 10 seconds to max 7 minutes
Turn the control knob TIME 6 in the direction "--" in order to decrease the lighting duration of the device.
Turn the control knob TIME in the direction ^ + ^ in order to increase the lighting duration of the device.
Note: The lighting duration is always calculated based on the respective last movement recorded by the sensor [1].
- Setting the day light level (III. D)
Turn the control knob LUX in the direction, The sensor is in the night operation mode.
Turn the control knob LUX in the direction The sensor is in the night and day operation mode.
Note: the intermediate range is for various light values.
- Cleaning and Care
Never use cleaners or a rough cloth. These may damage the sensor 1.
Clean the product with a dry, lint-free cloth.
Disposal
The packaging is made of environmentally friendly materials that can be disposed at your local recycling facilities.
Contact your local refuse disposal authority for more details on how to dispose of your worn-out product.
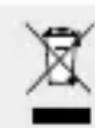
When your device has come to the end of its life, please do not throw it out with your household refuse, but in the interest of the environment, take it to a suitable centre where it can be disposed of properly. Please contact your local authority for information on collection points and their opening hours.
Warranty
The device has been manufactured to strict quality guidelines and meticulously examined before delivery. In the event of product defects you have legal rights against the retailer of this product. Your legal rights are not limited in any way by our warranty detailed below.
The warranty for this device is 3 years from the date of purchase. Should this device show any fault in materials or manufacture within three years from the date of purchase, we will repair or replace it - at our choice - free of charge to you.
The warranty period begins on the date of purchase. Please keep the original sales receipt in a safe location. This document is required as your proof of purchase. This warranty becomes void if the device has been damaged or improperly used or maintained.
The warranty applies to faults in material or manufacture. This warranty does not cover product parts subject to normal wear, thus possibly considered consumables (e.g. batteries) or for damage to fragile parts, e.g. switches, rechargeable batteries or glass parts.
C∈IP44
14 GB/IE
ADVARSEL! Sorg for at kablerne/DDek beskadiges.
ANGIRSDEMORPAR ELECTROCU
LEVENSGEVA/ARSNEERING!


- rörelsedeteKtOr
- Start-up
- Motion Sensor
- - Intended use
- - Technical Data
- - Scope of delivery
- - Parts description
- only Z31712C/D
- Control dial SENS
- Safety
- Avoid the danger of death from electric shock!
- How to avoid personal injury and damage to the product!
- RISK OF FATAL INJURY AND
- - Mounting
- - Select a suitable place for installation
- Ensure that
- Installation
- WARNING!
- - Start-up
- Only models Z31712C/D
- - Setting the lighting duration of the device (III. D)
- - Setting the day light level (III. D)
- - Cleaning and Care
- Disposal
- Warranty
- C∈IP44
- ANGIRSDEMORPAR ELECTROCU
- LEVENSGEVA/ARSNEERING!
Brand : POWERFIX
Model : Z31712A
Category : Motion detector