
AD 7714 - Heating ADLER - Free user manual and instructions
Find the device manual for free AD 7714 ADLER in PDF.
| Product Type | Electric wall heater |
| Brand | Adler |
| Model | AD 7714 |
| Power supply | 220-240 V ~ 50/60 Hz |
| Maximum power | 2200 W (2000 W nominal) |
| Protection rating | IP20 |
| Heating modes | 1000 W, 2000 W, Auto (thermostatic regulation) |
| Open window detection | Yes, automatic shut-off if sudden temperature drop |
| Programmable timer | Yes, daily and weekly programming |
| Remote control | Yes, included |
| Display | LED: temperature, time, day, modes |
| Installation | Wall-mounted, minimum height 1.8 m from floor |
| Maintenance and cleaning | Unplug before cleaning; soft non-abrasive cloth; do not immerse |
| Safety | Hot surface (do not touch), do not cover, automatic shut-off in case of malfunction |
| Spare parts and repairability | Contact the seller (regeirs by a professional) |
Frequently Asked Questions - AD 7714 ADLER
User questions about AD 7714 ADLER
0 question about this device. Answer the ones you know or ask your own.
Ask a new question about this device
Download the instructions for your Heating in PDF format for free! Find your manual AD 7714 - ADLER and take your electronic device back in hand. On this page are published all the documents necessary for the use of your device. AD 7714 by ADLER.
USER MANUAL AD 7714 ADLER
The device is intended for domestic use only.
The device is NOT intended for commercial / professional use.
The device is NOT suitable for use outdoors.
Attention! Before use, it is essential that you read these operating instructions to avoid accidents and for the correct use of the device. Keep this manual and keep it so that you can easily use it.
I. GUIDELINES FOR SAFETY OF USE
- Before use, check that the voltage specified on the nameplate corresponds to the local parameters of salinity, but remember that the marking: AC- is alternating current and DC is DC.
- Connect the device only to a 220 - 240V 50 / 60~Hz grounded outlet.
- Before use, unroll and straighten the power cord
- Make sure that the power cord and plug have no visible damage
- Before and during use, make sure that the power cord is not stretched over an open flame or other source of heat and sharp edges that can damage the insulation of the cable.
- Before first use, remove all packaging components. Attention! In the case of a casing with metal parts, on these elements a slightly visible protective foil can be stretched, which should also be removed.
- The device should not be used by children, persons with limited physical, sensory or mental capacity without the supervision of authorized or experienced persons and always in accordance with these instructions.
- The equipment is not intended for use with external time switches or a separate remote control system.
WARNING: This equipment may be used by children over 8 years of age and persons with limited physical, sensory or mental ability, or persons who have no experience or knowledge of equipment, ONLY if this is done under the supervision of a person responsible for their safety or have been given instructions about the safe use of the device and are aware of the dangers associated with its use. Children should not play with the equipment. Cleaning and maintenance of the device should not be performed by children unless they are over 8 years of age and are supervised
- Do not leave the device unattended during operation.
- Do not immerse the appliance and the power cord in water or any other liquids.
- When the device is not in use, it should always be disconnected from the power outlet.
-
When pulling the plug from the socket, never pull the power cord by the plug only.
-
Do not put NO METAL ITEMS inside the device
- The manufacturer is not liable for damages resulting from improper use of the device.
- It should be remembered that some parts of the device and the cabinet during work get very hot, so be careful and do not touch them, you can get burned.
- NEVER cover the device during operation or when it does not cool down completely
- Remember that the heating elements of the device take time to cool down completely.
- When using the device, ensure adequate space above and around. The device must not touch any easily flammable objects during work, such as decorations, paper towels, curtains, clothing, etc.
- The heater installed in the bathroom should be installed so that connectors and other regulators can not be touched by a person in the bathtub or under the shower.
- In heaters for high-altitude fixtures, the positions of the different positions of the connectors should be visible from a distance of 1m
- The labeling for covering the heater should be visible after installing the heater
- You can not place the heater directly under the socket, and near flammable materials such as curtains, curtains, etc.
- The device can not be used with external time switches or other separate remote control systems
- Do not expose the device to atmospheric conditions (rain, sun, etc.) or use in conditions of high humidity (bathrooms, damp camping houses)
- Periodically check the condition of the power cord. If the power cord is damaged, it should be replaced by a specialist repair facility in order to avoid a hazard
- Do not use the device near flammable materials
- The heater must be installed at a height not less than 1.8m above the floor
- Do not use this heater in the immediate vicinity of a bathtub, shower or swimming pool
- Do not use this heater if it has been dropped
- Do not use if there are visible signs of damage to the heater
- Use the heater on a level and stable surface or attach it to the wall, if provided for by the manufacturer.
WARNING: Do not use this heater in small rooms where there are people who are unable to leave them by themselves, unless constant supervision is ensured.
WARNING: To reduce the risk of fire, keep textiles, curtains or other flammable materials at least 1 m away from the heater air outlet.
It is recommended that the electrical installation be equipped with an automatic residual current circuit breaker with a 30mA starting current for increased safety. Note: If the power cord or power plug is damaged, it should always be replaced or repaired by a specialized repair shop.
II. WARNINGS
- Never use the device if it is damaged or does not function properly.
- Never use the device if it has fallen from a height before and shows visible signs of damage.
- Do not use extension cords or other electrical outlets that do not meet the applicable standards and electrical regulations.
- Any repairs, dismantling or replacement of any parts should always be made by a specialized facility.
- If the device and elements such as electrical contacts are wet, the plug or cable should be dried before using the device and its components.
- Do not use the device with wet hands.
- When there is a risk that the device has been damaged NEVER try to repair the device yourself.
- Never wash the device under running water or in such a way that water drips into it.
- Do not use accessories that are not recommended by the manufacturer. They may pose a danger to the user and may cause damage to the device.
- Ensure that the device has cooled down before storing.
- Do not touch the housing during use. During operation, use only knobs and switches. After switching off, wait for the device to cool down.
- CAUTION: Some parts of this device may become very hot during operation and cause burns.
- Remove all packing material and straighten the power cord
- During installation, in no case may the device be covered with insulating material or similar material
- When assembling the device, beams and rafters should not be cut or cut
- Before first use read all instructions for use.
- Check if the voltage listed on the product rating label corresponds to the voltage of the power network in your home
INSTALLATION
Use drill to drill two holes in the wall, minimum 180 cm from the floor and 20 cm from ceiling - picture A. Once you have drilled the holes, insert the pad and screw. Make sure the screws are well tightened then hang the device on the wall.
PRODUCT DESCRIPTION
Picture B. MAIN SWITCH
ON/OFF = TURN ON /TURN OFF.
Picture C. REMOTE CONTROLLER
- ON/OFF button 2. MODE 3.DAY
4.CLOCK 5. SET UP 6.WEEK/TIMER 7.MIN -
- -> Button for raising the temperature. Also serves as selection button for time/day.
-
--> Button for lowering the temperature. Also serves as selection button for time/day
-
RESET - Timer reset button
Picture D. LED PANEL
- ON symbol 2. Heating power 1000W
- Heating power 2000W 4. AUTO function
- Temperature display 6 .Day display
- Time display 8. ON symbol - timer start up
- OFF symbol - timer shutdown 10. Open window detection function
USSING
- Press the main switch on the right side of the device - Picture B to switch the device on and off.
- The device is now in standby mode. Press the on / off button (1) on the remote control - Picture C.
- Press the MODE button (2) in turn to select the operating mode:
- 1000 W the device will constantly heat up with 1000 W.
- 2000 W, the device will constantly heat up with 2000W.
- Auto mode, press the + and - buttons to manually set the temperature. The device will automatically enter the temperature maintenance mode.
- Open window detection function - When this function is selected, the device will automatically turn off the heating if the room temperature drops suddenly by 10^ C.
- To turn off the device, press the on / off button (1) on the remote control. The device cools down and turns off after about 30 seconds.
SETTING THE INTERNAL DEVICE CLOCK
NOTE: If you do not set the current time and day of the week, the device will not work properly because it will operate according to its own internal clock, which is incorrect.
- Select the AUTO function using the MODE button.
- Before setting the timer, set the day of the week and the current time:
- Press the DAY button and select the current day using the + and - buttons. Wait until the display stops flashing.
- Press the CLOCK button and set the current time using the + and - buttons. Wait until the display stops flashing.
- Press the MIN button and set the current minutes using the + and - buttons. Wait until the display stops flashing.
TIMER PROGRAMMING SETTING - TIMER
This function allows you to program the time to turn on and off the device on each day of the week at the desired time. The timer can only be set after selecting the AUTO function and setting the device's internal clock.
- Press the WEEK / TIMER button and select the day of the week on which you want to set the device to switch on and off automatically using the + and - buttons. Wait until the display stops flashing.
- After pressing the SET UP button, the ON symbol will light up in the display. You can now set the timer start time. Use the CLOCK, MIN, + and - buttons to set the timer start time. Wait until the display stops flashing.
- After pressing the WEEK / TIMER button (6) again and then pressing the SET UP button, the OFF symbol will light up in the display. You can now set the timer off time. Wait until the display stops flashing.
NOTE: the start time must always be lower than the stop time.
NOTE To reset the timer to default settings, press the RESET button.
V. CLEANING AND MAINTENANCE
- Always unplug the appliance from the power socket before cleaning.
- If during cleaning items such as the power plug, thermostat thermostat electrical contacts etc. are soaked before being used again, they should be thoroughly dried
- Do not use aggressive detergents in the form of emulsions, lotions, pastes, etc. to clean the cabinet. They can, among other things, remove the information graphic symbols, such as signs, warning signs, etc.
- Ensure that the device has cooled down before cleaning.
TECHNICAL DATA:
Voltage: 220-240V 50/60Hz
Power: 2000W Max. Power: 2200W
lp20
"Caution Hot Surface" - The temperature of available surfaces may be higher when the equipment is working, which means that the housing elements become very hot during operation during operation, SAVE CAREFUL !!!
DO NOT COVER
The inscription on the device means that the device is not to be covered with clothing, blankets and other textile products which could cause ignition.

WARNING: Do not use this equipment near bathtubs, showers, swimming pools and similar water tanks.

To protect your environment: please separate carton boxes and plastic bags and dispose them in corresponding waste bins. Used appliance should be delivered to the dedicated collecting points due to hazardous components, which may effect the environment. Do not dispose this appliance in the common waste bin.
(DE) DEUTSCH
BEACHTUNG:
Das Gerät ist nur für den Hausgebrauch bestimmt.
Das Gerät ist NICHT für den gewerblichen Gebrauch bestimmt.
Das Gerät ist NICHT für den Einsatz im Freien geeignet.
Beachtung! Vor dem Gebrauch ist es wichtig, dass Sie diese Bedienungsanleitunglesen, um Unfälle zu vermeiden und den korrekten Gebrauch des Geräts zu gewährleisten.
Bewahren Sie diesen Handbuch auf und bewahren Sie es so auf, dass Sie es leicht benutzen können.
I. LEITLINIEN ZUR SICHERHEIT DER NUTZUNG
1. Prüfen Sie vor dem Gebrauch, dass die auf dem Typenschild angegebene Spannung den lokalen Parametern für Salzgehalt entspricht. Beachten Sie jedoch, dass die Markierung: AC- Wechselstrom und DC Gleichstrom ist.
2. Schließen Sie das Gerät nur eine geerdete Steckdose von 220-240 V ~ 50/60 Hz an.
3. Rollen Sie das Netzkabel vor dem Gebrauch auf und glätten Sie es
4. Stellen Sie sicher, dass das Netzkabel und der Stecker keine sightbaren Schäden aufweisen
5. Stellen Sie vor und während des Betriebs sicher, dass das Netzkabel nicht über eine offene Flamme oder eine andere Wärmequelle und scharfe Kanten gespannt wird, die die Isolierung des Kabels beschädigten können.
6. Entfernen Sie vor dem ersten Gebrauch alle Verpackungskomponenten. Beachtung! Bei einem Gehäuse mit Metalteilen kann auf diesen Elementen eine leicht sichtbare Schutzfolie gespannt werden, die ebenfalls halten.
7. Das Gerätarf nicht von Kindern, Personen mit eingeschränkter körperlicher, sensorischer oder geistiger Leistungsfähigkeit ohne Aufsicht autorisierter oder erfahrner Personen und immer in Übereinstimmung mit diesen Anweisungen verwendet werden.
8. Das Gerät ist nicht für die Verwendung mit externen Zeitschaltuhren oder einem separaten Fernbedienungssystem vorgesehen.
WARNING: Dieses Gerätarf von Kindern über 8 Jahren und Personen mit eingeschränkten körperlichen, sensorischen oder geistigen Fähigkeiten oder Personen, die keine Erfahrung oder Kenntnisse über das Gerät haben, NUR verwendet werden, wenn dies unter der Aufsicht einer für sie verantwortlichen Person geschieht Sicherheit haben oder Anweisungen zur sicheren Verwendung des Geräts erhalten haben und sich der Gefahren bewusst sind, die mit seiner Verwendung verbunden sind. Kinder sollenn nicht mit dem Gerät spielen. Die Reinigung und Wartung des Gerätsarf nicht von Kindern ausgeführrt werden, es sei dess, sie sind über 8 Jahre alt und werden beaufsichtigt
9. Lassen Sie das Gerät während des Betriebs nicht unbeaufsichtigt.
10. Tauchen Sie das Gerät und das Netzkabel nicht in Wasser oder andere Flüssigkeiten.
11. Wenn das Gerät nicht verwendet wird, sollte es immer von der Steckdose getrennt werden.
12. Ziehen Sie das Netzkabel niemals am Stecker, wenn Sie den Stecker aus der Steckdoseziehen.
13. Legen Sie KEINE METALLARTIKEL in das Gerät
14. Der Hersteller haftet nicht für Schäden, die durch unsachgemäß Verwendung des Geräts entstehen.
15. Es ist zu beachten, dass eine Teile des Geräts und des Gehäuses während der Arbeit sehr heißt werden. Seien Sie also vorsichtig und berühren Sie sie nicht, Sie können sich verbrennen.
16. Bedecken Sie das Gerät NIEMALS während des Betriebs oder wenn es nicht vollständig abgekühlt ist
17. Denken Sie daran, dass die Heizelemente des Geräts einige Zeit benötigen, um vollständig abzukühlen.
18. Achten Sie bei der Verwendung des Geräts auf ausreichend Platz darüber und in der Höhe. Das Gerätarf während der Arbeit keine leicht entflammbaren Gegenstände wie Dekorationen, Papierhandtücher, Vorhänge, Kleidung usw. berühren.
19. Das im Badezimmer installierte Heizgerät solle so installiert werden, dass Anschlüsse und andere Regler nicht von einer Person in der Badewanne oder unter der Dusche berührt werden können.
20. Bei Heizgeräten für Höhenleuchten sollen die Positionen der verschiedene Positionen der Verbinder aus einer Entfernung von 1 m sightbar sein
21. Die Beschriftung zum Abdecken des Heizgeräts muss nach der Installation des Heizgeräts sightbar sein
22. Sie können das Heizgerät nicht direkt unter der Steckdose und in der Höhe von brennbaren Materialien wie Vorhängen, Vorhängen usw. aufstellen.
23. Das Gerät kann nicht mit externen Zeitschaltuhren oder anderen separates Fernbedienungssystemen verwendet werden
24. Setzen Sie das Gerät keinen atmosphärischen Bedingungen (Regen, Sonne usw.) oder hoher Luftfeuchtigkeit (Badezimmer, feuchte Campinghäuser) aus.
25. Überprüfen Sie regelmäßig den Zustand des Netzkabels. Wenn das Netzkabel beschädigt ist, sollte es von einer Fachwerkstatt ausgetauscht werden, um eine Gefahr zu vermeiden
26. Verwenden Sie das Gerät nicht in der Nähe von brennbaren Materialien
27. Das Heizgerät muss in einer Höhe von mindestens 1,8 m über dem Boden installiert werden
Es wird empfohlen, dass die elektrische Installation zur Erhöhung der Sicherheit mit einem automatischen Fehlerstromschutzschalter mit einem Anlaufstrom von 30 mA ausgestattet ist. Hinweis: Wenn das Netzkabel oder der Netzstecker beschädigt ist, sollte es immer von einer Fachwerkstatt ausgetauscht oder repariert werden.
28. Verwenden Sie diese Heizung nicht in unmittelbarer Höhe einer Badewanne, Dusche oder eines Schwimmbades
29. Verwenden Sie diese Heizgerät nicht, wenn es fallen gelassen wurde
30. Nicht verwenden, wenn sichtbare Anzeichen einer Beschädigung des Heizgerats vorliegen
31. Verwenden Sie die Heizung auf einer ebenen und stabilen Oberfläche oder befestigen Sie sie an der Wand, sofern vom Hersteller vorgesehen.
WARNING: Verwenden Sie diesen Heizgerät nicht in kleinen Räumen, in denen sich Personen nicht selbst verlassen können, es sei dess, eine ständige Überwachung ist gewährleistet.
WARNING: Um die Brandgebung zu verringn, halten Sie Textilien, Vorhänge oder andere brennbare Materialien mindestens 1 m vom Luftauslass des Heizgeräts entfernt.
II. WARNINGGEN
1. Verwenden Sie das Gerät niemals, wenn es beschädigt ist oder nicht ordnungsgemäß Funktioniert.
2. Verwenden Sie das Gerät niemals, wenn es aus einer Höhe gefallen ist und sightbare Beschädigungen aufweist.
3. Verwenden Sie keine Verlängerungskabel oder andere Steckdosen, die den geltenden Normen und elektrischen Vorschriften nicht entsprechen.
4. Reparaturen, Demontagen oder Austausch von Teilen sollen den innerer spezialisierten Einrichtung vorgenommen werden.
5. Wenn das Gerät und die Elemente, wie z. B. elektrische Kontakte, Nass sind, sollen den Stecker oder das Kabel trocknen, bevor Sie das Gerät und seine Komponenten verwenden.
6. Verwenden Sie das Gerät nicht mit nassen Händen.
7. Wenn die Gefahr besteht, dass das Gerät beschädigt wurde, versuchen Sie NIEMALS, das Gerät selbst zu reparieren.
8. Waschen Sie das Gerät niemals unter fließendem Wasser oder so, dass Wasser in das Gerät tropf.
9. Verwenden Sie kein Zubehör, das vom Hersteller nicht empfohlen wird. Sie können eine Gefahr für den Benutzer darstellen und das Gerät beschädigen.
10. Stellen Sie sicher, dass das Gerät abgekühlt ist, bevor Sie es lagern.
11. Berühren Sie das Gehäuse während des Betriebs nicht. Verwenden Sie während des Betriebs nur Knöppe und Schalter. Warten Sie nach dem Ausschalten, bis sich das Gerät abgekühlt hat.
12. VORSICHT: Einige Teile these Gerats konnen während des Betriebs sehr heißt werden und Verbrennungen verursichen.
III. VOR DER ERSTEN VERWENDUNG
1. Entfernen Sie samedliches Verpackungsmaterial und richten Sie das Netzkabel gerade
2. Wahrend der Installation darf das Gerät auf keinen Fall mit Isoliermaterial oder einem ähnlichen Material bedeckt werden
3. Be der Montage des Gerats durren Balken und Dachsparren nicht geschritten oder geschritten werden
4. Vor dem ersten Gebrauch alle Gebrauchsanweisungen lesen.
5. Prufen Sie, ob die auf dem Produktetikett angegebene Spannung der Spannung des Stromnetzes in Ihr Zuhause entspricht
INSTALLATION
Bohren Sie zwei LÖcher in die Wand, mindestens 180 cm vom Boden und 20 cm von der Decke entfernt - Bild A. Nachdem Sie die LÖcher
gebohr haben, setzen Sie das Pad und die Schraube ein. Stellen Sie sicher, dass die Schrauben fest angezogen sind, und hangen Sie das Gerät an die Wand.
PRODUKTBESCHREIBUNG
Bild B. HAUPTSCHALTER
EIN/AUS = EIN/AUS AUS.
Bild C. FERNBEDIENUNG
1. EIN / AUS-Taste
6.WOCHE/TIMER
2. MODUS
7. MIN
3 TAGE
8. +-> Taste zum Erhöhen der Temperatur. Dienst auch als Auswahlknopf für Uhrzeit / Tag.
4.Uhr
9. ---> Taste zum Absenkenden Temperatur. Dienst auch als Auswahlknopf für Uhrzeit / Tag.
5. SET UP
10. RESET - Timer-Reset-Taste
Bild D. LED PANEL
1. Ein-Symbol 2. Heizleistung 1000W
3.Heizleistung 2000W 4.AUTO-Funktion
5. Temperaturanzeige 6. Tagesanzeige
7. Zeitanzeige 8. Ein-Symbol - Timer starten
9. AUS-Symbol - Timer-Abschaltung 10. Fenstererkennungsfunktion öffnen
IV.USAGE
1. Press the main switch on the right side of the device - Picture B to switch the device on and off.
2. The device is now in standby mode. Press the on / off button (1) on the remote control - Picture C.
3. Press the MODE button (2) in turn to select the operating mode:
- 1000 W the device will constantly heat up with 1000 W.
- 2000 W, the device will constantly heat up with 2000W.
- Auto mode, press the + and - buttons to manually set the temperature. The device will automatically enter the temperature maintenance mode.
- Open window detection function - When this function is selected, the device will automatically turn off the heating if the room temperature drops suddenly by 10^ .
4. To turn off the device, press the on / off button (1) on the remote control. The device cools down and turns off after about 30 seconds.
SETTING THE INTERNAL DEVICE CLOCK
NOTE: If you do not set the current time and day of the week, the device will not work properly because it will operate according to its own internal clock, which is incorrect.
1. Select the AUTO function using the MODE button.
2. Before setting the timer, set the day of the week and the current time:
- Press the DAY button and select the current day using the + and - buttons. Wait until the display stops flashing.
- Press the CLOCK button and set the current time using the + and - buttons. Wait until the display stops flashing.
- Press the MIN button and set the current minutes using the + and - buttons. Wait until the display stops flashing.
TIMER PROGRAMMING SETTING - TIMER
This function allows you to program the time to turn on and off the device on each day of the week at the desired time.
The timer can only be set after selecting the AUTO function and setting the device's internal clock.
1. Press the WEEK / TIMER button and select the day of the week on which you want to set the device to switch on and off automatically using the + and - buttons. Wait until the display stops flashing.
2. After pressing the SET UP button, the ON symbol will light up in the display. You can now set the timer start time. Use the CLOCK, MIN, + and - buttons to set the timer start time. Wait until the display stops flashing.
3. After pressing the WEEK / TIMER button (6) again and then pressing the SET UP button, the OFF symbol will light up in the display. You can now set the timer off time. Wait until the display stops flashing.
NOTE: the start time must always be lower than the stop time.
NOTE To reset the timer to default settings, press the RESET button.
V. REINIGUNG UND WARTUNG
1. Trennen Sie das Gerät vor der Reinigung immer von der Steckdose.
2. Wenn bei der Reinigung Gegenstände wie Netzstecker, Thermostat, elektrische Kontakte usw. vor der erneuten Verwendung eingeweicht werden, sollen den sie sorgfältig getrocknet werden
3. Verwenden Sie zum Reinigen des Gehäuses keine aggressiven Reinigungsmittel in Form von Emulsionen, Lotionen, Pasten usw. Sie können unter anderen die Symbole der Informationsgrafik wie Zeichen, Warnzeichen usw. entfernen.
4. Stellen Sie safer, dass das Gerät vor dem Reinigen abgekühlt ist.
TECHNISCHE DATEN:
Spannung: 220 - 240V 50 / 60Hz
Leistung: 2000W max. Leistung: 2200W
lp20
Dies bedeutet. ACHTUNG !!!
"Achtung heiße Oberfläche" - Die Temperatur der verfügbaren Oberflächen kann während des Betriebs hörher sein. dass die Gehäuseelemente während des Betriebs während des Betriebs sehr heiß werden.

"KEN" - BESCHRIFTUNG WICHTIGKEIT Die Beschriftung auf dem Gerät bedeutet, dass das Geräte insgesücken, Decken und anderen Textilien bedeckt werden darf, die eine Entzündung verursichen.
WARNING: Verwenden Sie these Gerät nicht in der Höhe von Badewannen, Duschen, Schwimmbadern und ähnlichen Wassertanks.

Den Pappkarton im Altpapier entsorgen. Polyathylenbeutel (PE) in dem Behalter für Kunststoff entsorgen. Das abgenutzte Gerät zum Recycling zu einer offiziellen Sammelstelle bringen, da es gefährliche Substanzen enthalt, die die Umwelt gefährden konnen. Das Gerät sollte in einer Form abgegeben werden, die eine weitere Nutzung unmöglich macht. Wenn es Batterien enthalt, sollen den diese rausgenommen und separat an einer Sammelstelle abgegeben werden. Das Gerätarf nicht in den Hausmull rausgeworfen werden!!
(FR) FRANÇAIS
ATTENTION:
L'appareil est destiné à un usage domestique uniquement.
L'appareil n'est PAS destiné à un usage commercial / professionnel.
L'appareil NE convient PAS pour une utilisation en extérieur.
Attention! Avant utilise, il est essentiel que vous lisiez ces instructions d'utilisation pour éviter les accidents et pour utiliser correctement l'appareil. Conservez ce manuel et conservez-le pour pouvoir l'utiliser facilement.
I. LIGNES DIRECTRICES POUR LA SECURITE D'UTILISATION
1. Avant utilise, vérifie que la tension indiquée sur la plaque signalétique correspond aux paramètres locaux de salinité, mais souvent-vous que le marquage: AC- correspond à un courant alternatif et DC est à courant continu.
2. Branchez l'appareil uniquement sur une prise mise à la terre de 220 - 240V 50 / 60~Hz
3. Avant utilisation, déroulez et redressez le cordon d'alimentation
4. Assurez-vous que le cordon d'alimentation et la fiche ne sont pas endommagés.
5. Avant et pendant l'utilisation, assurez-vous que le cordon d'alimentation n'est pas tendu sur une flamme neue ou une autre source de chaleur et des arêtes vives qui pourrait endommager l'isolement du cable.
6. Avant la première utilisation, retirez tous les composants de l'emballage. Attention! Dans le cas d'un boîtier avec des pieces métalliques, une feuille de protection légèrement visible peut être étiérée sur ces éléments, ce qui doit également être enlevé.
7. L'appareil ne doit pas etre utilise par des enfants ou des personnes ayant des capacités physiques, sensorielles ou mentales limitées, sans la surveillance de personnes autorisées ou experimentées et toujours conformément à ces instructions.
8. L'équipement n'est pas conscience pour être utilisé avec des minuteries externes ou un système de commande à distance séparé.
AVERTISSEMENT: Cet équipement peut etre utilise par des enfants de plus de 8 ans et des
personnes ayant des capacités physiques, sensorielles ou mentales limitées, ou des personnes n'ayant aucune expérience ou connaissance de l'équipement, UNIQUÉMENT si cela est fait sous la supervision d'une personne responsable de leur utilisation. sécurité ou ont reçu des instructions pour une utilisation en toute sécurité de l'appareil et sont conscients des dangers associés à son utilisation. Les enfants ne doivent pas journé avec l'équipement. Le nettoyage et l'entretien de l'appareil ne doivent pas été effectuels par des enfants sauf s'ils ont plus de 8 ans et qu'ils sont surveillés.
9. Ne laissez pas l'appareil sans surveillance pendant le fonctionnement.
10. N'immergez pas l'appareil et le cordon d'alimentation dans de I'eau ou tout autre liquide.
11. Lorsque vous n'utilisez pas l'appareil, vous doivent regardier de la prise de courant.
12. Lorsque vous retirez la fiche de la prise, ne tirez jamais uniquement sur le cordon d'alimentation.
13. Ne placez AUCUN ÉLÉMENT EN METAL dans l'appareil.
14. Le fabricant n'est pas responsable des dommages resultant d'une utilisation incorrecte de l'appareil.
15. Rappelez-vous que certaines parties de l'appareil et du boîtier deviennent très chaudspendant le travail. Veillez donc à ne pas les toucher, vous risqueriez de vous brûler.
16. Ne couvrez JAMAIS l'appareil en cours de fonctionnement ou lorsqu'il ne refroidit pas complètement
17. N'oubliez pas que les éléments chauffants de l'appareil prennt le temps de refroidir complètement.
18. Lorsque vous utilisez l'appareil, veillez à ce qu'il y ait suffisamment d'espace au-dessus et autour. Pendant le travail, l'appareil ne doit pas toucher d'objets facilement inflammables, tels que des décorations, des essuie-tout, des rideaux, des vêtements, etc.
19. L'appareil de chauffage installé dans la salle de bain doit être installé de manière à ce que personne ne puisse toucher les connecteurs et autres régulateurs dans la baignoire ou sous la douche.
20. Dans les apparêils de chauffage pour apparèils à haute altitude, les positions des différentes positions des connecteurs doivent être visibles à une distance de 1 m..
21. L'etiquetage pour recouvrir le chauffage doit être visible après l'installation du chauffage
22. Vous ne pouvez pas placer le radiateur directement sous la prise et à proximité de matérieliaux inflammables tels que des rideaux, des rideaux, etc.
23. L'appareil ne peut pas etre utilise avec des minuteries externes ou d'autres systèmes de commande à distance séparés.
24. N'exposez pas l'appareil à des conditions atmosphériques (pluie, soleil, etc.) et ne l'utilisez pas dans des conditions d'humidité élevée (salles de bains, maisons de camping humides).
25. Vérifiez périodiquement l'etat du cordon d'alimentation. Si le cordon d'alimentation est endommagé, il doit être remplace par un centre de réparation spécialisé afin d'éviter tout risque
26. N'utilisez pas l'appareil à proximé de matériaux inflammables
27. L'appareil de chauffage doit être installé à une hauteur d'au moins 1,8 m du sol.
28. N'utilisez pas ce radiateur à proximé immediate d'une baignoire, d'une douche ou d'une piscine
29. N'utilisez pas ce radiateur s'il est tombé
30. Ne pas utiliser s'il y a des signes visibles de dommages au radiateur
31. Utilisez le radiateur sur une surface plane et stable ou fixez-le au mur, si prévu par le fabricant.
AVERTISSEMENT: n'utilisez pas cet apparéil de chauffage dans de petites pieces où il y a des personnes qui ne peuvent pas les laisser seules, à moins qu'une surveillance constante ne soit assurée.
AVERTISSEMENT: pour réduire le risque d'incendie, gardez les textiles, rideaux ou autres matériaux inflammables à au moins 1 m de la sortie d'air du radiateur.
Il est recommandé que l'installation électrique soit équipée d'un disjoncteur automatique de courant résiduel avec un courant de démarrage de 30mA pour une sécurité accrue.
Remarque: si le cordon d'alimentation ou la fiche d'alimentation est endommagé, il convient de toujours le remplaçer ou le réparer par un atelier spécialisé.
II. AVERTISSEMENTS
1. N'utilisez jamais l'appareil s'il est endommagé ou ne fonctionne pas correctement.
2. N'utilisez jamais l'appareil s'il est déjà tombé d'une hauteur et s'il présente des signes visibles de dommages.
3. N'utilisez pas de rallonges électriques ou d'autres prises électriques non conformes aux normes et réglementations en vigueur.
4. Toute réparation, démontage ou remplacement de toute piece doit toujours être effectué par un établissement spécialisé.
5. Si l'appareil et des éléments tels que les contacts électriques sont humides, la fiche ou le cable doit être séché avant d'utiliser l'appareil et ses composants.
6. N'utilisez pas l'appareil avec les mains mouillées.
7. Lorsque l'appareil risque d'être endommagé, n'essayez JAMAIS de le réparer vous-même.
8. Ne lavez jamais l'appareil à l'eau courante ou de manière à ce que de l'eau goutte à l'intérieur.
9. N'utilisez pas d'accessoires non commandés par le fabricant. Ils peuvent constituer un danger pour l'utilisateur et endommager l'appareil.
10. Assurez-vous que l'appareil a refroidi avant de le ranger.
11. Ne touche pas le boîtier pendant l'utilisation. Pendant le fonctionnement, utilisez uniquement des boutons et des commutateurs. ÀpRES la mise hors tension, attendez que l'appareil refroidisse.
12. ATTENTION: Certaines pieces de cet apparéil peuvent devenir très chaudes pendant le fonctionnement et cause des brûlures.
III. AVANT LA PREMIÈRE UTILISATION
1. Retirez tout le matériel d'emballage et redressez le cordon d'alimentation
2. Lors de l'installation, l'appareil ne doit en aucun cas etre recouvert d'un materiaiu isolant ou d'un materiaiu similaire.
3. Lors du montage de l'appareil, les poutres et les chevrons ne doivent pas etre coupes ou coupes
4. Avant la première utilisation, lisez toutes les instructions d'utilisation.
5. Vérifiez si la tension indiquée sur l'étiquette de produit correspond à la tension du réseau électrique de votre domicile.
INSTALLATION
Utilisez une perceuse pour percer deux trous dans le mur, à au moins 180 cm du sol et à 20 cm du plafond - illustration A. Une fois les trous percés, insérez le tampon et la vis. Assurez-vous que les vis sont bien serrées puis accrochez l'appareil au mur.
DESCRIPTION DU PRODUIT
Photo B. INTERRUPEUR PRINCIPAL
ON/OFF = ALLUMER/YUTN OFF.
Photo C. TELÉCOMMANDE
1. Bouton ON/OFF 2.MODE 3 JOURS
4.HORLOGE 5. CONFIGURER 6. SEMAINE / MINUTERIE 7. MIN
8. + -> Bouton pour augmenter la température. Sert également de bouton de seLECTION pour l'heure / le jour.
9. ---> Bouton d'abaisement de la température. Sert également de bouton de selection pour l'heure / le jour.
10. RESET - Bouton de réinitialisation de la minuterie
Image D. PANNEAU LED
1. symbole ON
2. Puisance de chauffage 1000W
3. Puissance de chauffage 2000W
4. Fonction AUTO
5. Affichage de la température
6. Affichage du jour
7. Affichage de l'heure
8. Symbole ON - démarrage de la minuterie
9. Symbole OFF - arrêt de la minuterie
10. Fonction de détention de fenêtre ouverte
IV. UTILISATION
1. Appuyez sur l'interrupteur principal sur le cote croit de l'appareil - Image B pour allumer et eteindre l'appareil.
2. L'appareil est maintainant en mode veille. Appuyez sur le bouton marche / arrêt (1) de la télécommande - Image C.
3. Appuyez successivement sur le bouton MODE (2) pour selectionner le mode de fonctionnement:
- 1000 W, l'appareil chauffe constamment avec 1000 W.
- 2000 W, l'appareil chauffe constamment avec 2000W.
- Mode automatique, appuyez sur les boutons + et - pour régler manuellement la température. L'appareil passe automatiquement en mode de maintainen de la temperature.
- Fonction de détction de fenêtre ouverte - Lorsque cette fonction est sélectionnée, l'appareil étèint automatiquement le chauffage si la température ambiente baise brutelement de 10^ C.
4. Pour éteindre l'appareil, appuyez sur le bouton marche / arrêt (1) de la télécommande. L'appareil refroidit et s'est int apres environ 30 secondes.
RéGLAGE DE L'HORLOGE DU DISPOSITIF INTERNE
REMARQUE: Si vous ne définisse pas l'heure et le jour de la semaine actuels, l'appareil ne fonctionnera pas correctement car il fonctionnera selon sa propre horloge interne, ce qui est incorrect.
1. Sélectionnéz la fonction AUTO à l'aide du bouton MODE.
2. Avant de régler la minuterie, réglez le jour de la semaine et l'heure actuelle:
- Appuyez sur le bouton DAY et selectionnez le jour en cours à l'aide des boutons + et -. Attendez que l'affichage cette de clignoter.
- Appuyez sur la touche CLOCK et réglez l'heure actuelle à l'aide des touches + et -. Attendez que l'affichage cesse de clignoter.
- Appuyez sur le bouton MIN et reglez les minutes actuelles à l'aide des boutons + et -. Attendez que l'affichage cette de clignoter.
RéGLAGE DE LA PROGRAMMATION DE LA MINUTERIE - MINUTERIE
Cette fonction vous permet de programmermer l'heure d'activation et de désaction de l'appareil chaque jour de la semaine à l'heure souhaitée.
La minuterie ne peut etre reglee qu'apres avoir selectionnee la fonction AUTO et regle l'horloge interne de I'appareil.
1. Appuyez sur le bouton WEEK / TIMER et selectionnez le jour de la semaine auquel vous souhaitez que l'appareil s'allume et s'eteigne automatiquement à l'aide des boutons + et -. Attendez que l'affichage cette de clignoter.
2. Àpès avoir appuyé sur le bouton SET UP, le symbole ON s'allume sur l'affichage. Vous pouvez maintainant régler l'heure de début de la minuterie. Utilisez les touches CLOCK, MIN, + et - pour régler l'heure de démarrage de la minuterie. Attendez que l'affichage)cesse de clignoter.
3. Àpès avoir appuyé à nouveau sur le bouton WEEK / TIMER (6) puis sur le bouton SET UP, le symbole OFF s'allume sur l'affichage. Vous pouvez maintainant régler le temps d'arrêt de la minuterie. Attendez que l'affichage cette de clignoter.
REMARQUE: l'heure de début doit toujours être inférieure à l'heure d'arrêt.
REMARQUE Pour réinitialiser la minuterie aux paramètres par défaut, appuyez sur le bouton RESET.
V. NETTOYAGE ET ENTRETIEN
1. Debranchez toujours l'appareil de la prise de courant avant de le nettoyer.
2. Si, lors du nettoyage, des éléments tels que la fiche d'alimentation, le thermostat, les contacts électriques, etc. sont trempés avant d'être réutilisés, ils doivent être parfaitement séchéés.
3. N'utilisez pas de détergents agressifs sous forme d'émulsions, de lotions, de pâtes, etc. pour nettoyer le boîtier. Ils peuvent, entre autres, supprimer les symboles graphiques d'information, tels que les panneaux, les panneaux d'advertissement, etc.
4. Assurez-vous que l'appareil a refroidi avant de le nettoyer.
DONNÉES TECHNIQUES:
Tension: 220 - 240V 50 / 60Hz
Puisance: 2000W Max. Puisance: 2200W Ip20

"Attention, surface chaude" - La température des surfaces disponibles peut être plus élevé lorsque l'équipment est en fonctionnement, ce qui signifie que les éléments du boîtier deviennent très chauds pendant le fonctionnement, CONSERVEZON !!!

NE PAS COUVRIR" - IMPORTANCE DE L'INSCRIPION L'inscription sur l'appareil signifie que l'appareil ne doit pas etre recouvert de vetements, couvertures ou autres produits textiles pouvant provoquer une inflammation.
AVERTISSEMENT: N'utilisez pas cet équipement à proximé d'une baignoire, d'une douche, d'une piscine ou d'un réservoir de laire.
Respect de l'environnement. Nous vous prions de bien fouloir triel les emballages en carton ainsi que les sachets plastiques (en polyethylene). L'appareil usage ne doit pas ete jet a la poubelle mais remis au point de collecte prevu a cet efect car il contient des elements pouvant etre nocifs pour I'environnement. L'appareil electrique doit etre remis de maniere a limiter au maximum une eventuelle utilisation ulterieure. Si I'appareil contient des piles, il faut les retirer et les remetre a un autre point de collecte. Ne pas jeter I'appareil dans une poubelle de dechets menagers !!!
(ES) ESPANOL
ATENCION:
El dispositivo está destinado únicamente para uso dométrico.
El dispositivo NO está Diseñado para uso comercial / profesional.
El dispositivo NO esADECADQ para uso al aire libre.
jAtencion! Antes del uso, es esencial que lea estas instrucciones de funcionaimiento para evaporar accidentes y para el uso correcto del dispositivo. Conserve este manual y guardelo para que pueda usar fácilmente.
I. DIRECTRICES DE SEGURIDAD DE USO
1. Antes de usar, verifique que el voltaje especificado en la plac de identificacion corresponda a los parametros locales de salinidad, pero recuerde que lamarca: AC- es corriente alterna y DC es DC.
2. Conecte el disposativo solo a una toma de tierra de 220 - 240V 50 / 60~Hz
3. Antes de使用者, disenrolle y estire el cable de alimentacion
4. Asegürese de que el cable de alimentación y el enchufe no tengan daños visibles
5. Antes y durante el uso, asegúrese de que el cable de alimentación no está estirado sobre una llama abierta u另一边 fuente de calor y bordes aflados que pueda darar el aislamento del cable.
6. Antes del primer uso, retire todos los componentes del embalaje. [Atencion! En el caso de una carcasa con partes metálicas, en这些东西 elementos se pueda estar una lámina protectora ligeramente visible, que también debe retardarse.
7. El dispositivo no debe ser uso por niños, personas con capacité fisica, sensorial o mental limitada sin la supervisión de personas autorizadas o con experiencia y tiempo de acuerdo con estas instrucciones.
8. El equipo no está disnado para usarse con interruptores horarios externos o un sistemas de control remoto分开.
ADVERTENCIA: Este equipo可以选择 ser uso por niños mayores de 8 años y personas con capacidad física, sensorial or mental limitada, o personas que no tienen experiencia o conocimiento del equipo, SOLAMENTE si thiso se realiza bajo la supervisión de una persona responsable de su seguridad o se les han dato instrucciones sobre el uso seguro del dispositivo y son conscientes de los peligros asociados con su uso. Los niños no deben hacer algo con el equipo. La limpieza y el mantenimiento del dispositivo noSEOben ser realizados por niños a menos que tengan mas de 8 años y estén supervisados.
9. No deje el dispositivo desatendido durante el funcionajo.
10. Nosumerj el aparato ni el cable de alimentacion en agua ni en ningun otherlquido.
11. Cuando el dispositivo no está en uso, siempre debe desconectarse de la toma de corriente.
12. Al sacar el enchufe de la toma de corriente, nunca tire del cable de alimentacion solo por el enchufe.
13. Noonga NINGUNOS ARTICULOS METÁLICOS dentro del dispositivo
14. El fabricante no se hace responsable de los danios causados por el uso inadequado del dispositivo.
15. Debe recordarse que todas partes del dispositivo y el gabinete durante el trabajo se calientan mucho, asi queonga cuidado y no los toque, ya que pueda quemarse.
16. NUNCA cubra el dispositivo durante el funcionaimiento o cuando no se enfié completeness
17. Recuerde que los elementos de calentimiento del dispositivo tardan en enfriarse completeness.
18. Cuando utilise el dispositivo, asegúrese de que haya espacio sufICIENTe por encima y alrededor. El dispositivo no debe tocar ningún objeto fácilmente inflamable durante el trabajo, como decoraciones, toallas de papel, cortinas, ropa, etc.
19. El calentador instalado en el baño debe instalarse deforma que los conectores yotiros reguladores no能把 ser tocados por una persona en la banera o bajo de la ducha.
20. En los calentadores para instalaciones de gran altitud, las posiciones de las differentes posiciones de los conectores deben ser visibles desde una distancia de 1 m..
21. La etiqueta para cubrir el calentador debe ser visible afterwards de instalar el calentador
22. No puede colocar el calentador directamente bajo del zócalo yURTCA de materiales inflamables como cortinas, cortinas, etc.
23. El dispositivo no se pueda utiliser con temporizadores externos uthers sistemas de
controlremoto separados
24. No exponga el dispositivo a conditiones atmosféricas (lluvia, sol, etc.) ni lo utilizes en conditions de alta humedad (baños, casas de camping humedes)
25. Compruebe periodically el estado del cable de alimentacion. Si el cable de alimentacion está dañado, debe ser reemplazado por un centro de reparación especializzato para evaporar un peligro
26. No utilise el disposativo cerca de materiales inflamables.
27. El calentador debe instalarse a una alta no inferior a 1,8 m sobre el piso
28. No utilise este calentador en las inmediaciones de una banera, ducha o piscina.
29. No use este calentador si se ha caido
30. No lo use si hay signos visibles de daño en el calentador.
31. Use el calentador en una superficie nivelada y estable o fijelo a la pared, si asi lo indica el fabricante.
ADVERTENCIA: No utilise este calentador en habitaciones pequeñas sobre每一天 cuando personas que no podanURTARLAS SOLAS, a menos que se garantice una supervisión constante.
ADVERTENCIA: Para reducir el riesgo de incendio, mantenga textiles, cortinas u otros materiales inflamables al menos a 1 m de la calidad de aire del calentador.
Se recomienda que la instalacion electrica este equipada con un interruptor automatico de corrente residual con una corrente de arranque de 30mA para mayor seguidad.
Note: Si el cable de alimentación o el enchufe de alimentación está danados, siempre debe ser reemplazado o reparado por un taller especializzato.
II. ADVERTENCIAS
1. Nunca utilise el dispositivo si está dañado o no funciona correctamente.
2. Nunca use el dispositivo si ha caido desde una alta anterior y muestra signos visibles de daños.
3. No use cables de extension uthers enchufes que no cumplan con las normas y regulaciones electricas aplicables.
4. Cualquier reparación, desmontaje o reemplazo de cadaquier parte siempre debe ser realizada por una instalación especializada.
5. Si el dispositivo y elementos como los contactos electricos están mojados, el enchufe o el cable deben secarse antes de usar el dispositivo y sus componentes.
6. No utilise el dispositivo con las manos mojadas.
7. Cuando existe el riesgo de que el dispositivo se haya danado, NUNCA intente repararlo.ustedismo.
8. Nunca lave el dispositivo con agua corriente o de manière que gotee agua.
9. No use accesos que no sean recomendados por el fabricante. Pueden representar un peligro para el usuario y causar daños al. dispositivo.
10. Asegürese de que el dispositivo se haya enfiado antes de guardarlo.
11. No toque la carcasa durante el uso. Durante la operation, use solo las perillas y los interruptores. Después de apagar, espere a que el dispositivo se enfié.
12. PRECAUCION: Algunas partes de este dispositivo peuvent calentarse mucho durante el funciona y Causear quemaduras.
III. ANTES DEL PRIMER USO
1. Retire todo el material de embalaje y enderece el cable de alimentacion
2. Durante la instalacion, en ningún caso se debe cubrir el dispositivo con material aislante o material similar.
3. Al montar el dispositivo, las vinas y las vinas no se deben cortar ni cortar.
4. Antes del primer uso, lea todas las instrucciones de uso.
5. Verifique si el voltaje indicado en la etiqueta de ratificacion del producto corresponde al voltaje de la red eletrica de su hogar.
INSTALACION
Use el taladro para perforar dos orificios en la pared, a un minimum de 180 cm del piso y 20 cm del techo - imagen A. Una vez que haya perforado los orificios, inserte la almohadilla y el tornillo. Asegúrese de que los tornillos estén bien apltados y bajo cuelgue el dispositivo en la pared.
DESCRIPCION DEL PRODUCTO
Imagen B. INTERRUPTOR PRINCIPAL
ON/OFF = ENCENDIDO/YUTN OFF.
Imagen C. CONTROL REMOTO
1. botón ON / OFF
6. SEMANA / TEMPORIZADOR
2. MODO
7. MIN
3DIAS
8. +-> Botón paraEAR la temperatura. Internacionalirve como botón de selección por hora /dia.
4. RELOJ
9. --> Botón para bajo la temperatura. también sirve como botón de selección por hora / día.
5. CONFIGURAR
10. RESET - Botón de reinicio del temporizador
Foto d. PANEL LED
1. symbolo ON 2. Potencia de calentimiento 1000W
3. Potencia de calentimiento 2000W 4. funcionaltica
5. Pantalla de temperatura 6. Exhibit del dia
7. Pantalla de tiempo 8. Símbolo ON - temporizador de arranque
9. Simbolo de apagado - apagado del temporizador 10. Abrir la referencia de detectacion de ventana
IV.USO
1. Presione el interruptor principal en el lado derecho del dispositivo - Imagen B para encender y apagar el dispositivo.
2. El dispositivo está ahora en modo de espera. Presione el botón de encendido / apagado (1) en el control remot - Imagen C.
3. Presione el botón MODE (2) para selecciónar el modo de funciona:
- 1000 W, el dispositivo se calculará constantemente con 1000 W.
- 2000 W, el dispositorio se calculará constantemente con 2000W.
- Modo automatico, presione los botones + y - para configurar manualmente la temperatura. El dispositivo ingresará automatically al modo de mantenimiento de temperatura.
- Funcion de detectiOn de ventilana abierta: cuando se selec tiona esta func tion, el dispositivo apagar a automatisticamente la calefacion si la temperatura ambiente cae repentinamente en 10^
4. Para apagar el dispositivo, presione el botón de encendido / apagado (1) en el control remoto. El dispositivo se enfía y se apaga cuando se queden 30seguidos.
CONFIGURACION DEL RELOJ DE DISPOSITIVO INTERNO
NOTA: Si no configura la hora y el día de lapellana actuales, el dispositivo no funcionaracorrectamente porque funcionarad acuerdo con su propio reloj interno, que es incorrecto.
1. Seleezione la funcion AUTO con el boton MODE.
2. Antes de configurar el temporizador, configure el dia de la hora y la hora actual:
- Presione el boton Día y selección el día actual con los botones + y - Espere hasta que la pantalla deje de parpadear.
- Presione el botón CLOCK y configure la hora actual usingo los botones + y - . Espere hasta que la pantalla deje de parpadear.
- Presione el botón MIN y configure los Minutes actuales usingo los botones + -Espere hasta que la pantalla deje de parpadear.
CONFIGURACION DE PROGRAMACION DEL TEMPORIZADOR - TEMPORIZADOR
Esta funcion le permite programar el tiempo para encender y apagar el dispositivo cada dia de la semana a la hora deseada.
El temporizador solo se pueda configurar afterwards de seleccionar la functiOn AUTO y configurar el reloj interno del dispositivo.
1. Presione el boton WEEK / TIMER y seleccione el dia de la hora en el que desea configurar el dispositivo para que se enciende y apague automatamente usingo los botones ^+ y-. Espere hasta que la pantalla deje de parpadear.
2. Después de presionar el botón SET UP, el simbolo ON se iluminará en la pantalla. Ahora puede configurar la hora de inizio del temporizador. Use los botones CLOCK, MIN, + y - para configurar la hora de inizio del temporizador. Espere hasta que la pantalla deje de parpadear.
3. Despues de presionar Newlyme el boton WEEK / TIMER (6) y bajo presionar el boton SET UP, el simbolo OFF se iluminar en la pantalla. Ahora peut configurar el tiempo de apagado del temporizador. Espere hasta que la pantalla deje de parpadear.
NOTA: el tiempo de inizio siempreDebe ser menor que el tiempo de parada.
NOTA Para restablecer el temporizador a la configuracion predeterminada, presione el boton RESET.
V. LIMPIEZA Y MANTENIMIENTO
1. Desenchufe siempre el aparato de la toma de corriente antes de limpiarlo.
2. Si durante la limpieza, algunos elementos, como el enchufe de alimentacion, el termostato, los contactos electricos, etc., se empapan antes de volver a utiliseros, deben secarse Completely.
3. No utilise detergentes agresivos en forma de emulsiones, lociones, pastas, etc. para limiar el gabinete. Pueden, entre除外 cosas, eliminar los SYMBOLOS GRAFICOs de informacion, como señales, señales de advertencia, etc.
4. Asegürese de que el disposativo se haya enfiado antes de limpiarlo.
DATOS TECNICOS:
Voltaje: 220-240V ~ 50 / 60Hz
Potencia: 2000W Max. Potencia: 2200W Ip20

opération.
"Precaún sobre la superficie caliente": la temperatura de las superficies disponibles puede ser mayor cuando el equipo está funcional, lo que significa que los elementos de la carcasa se calientan mucho durante el funcionaimiento durante la
jihAHORRE CUIDADO !!!

NO CUBRIR: IMPORTANCIA DE LA INSCRPICION La inscripción en el dispositivo significa que el dispositivo no debe
cunirse con ropa, mantas yculos productsos textiles que podriand causar una ignicion.

CIA: No use este equipo circa de baneras, duchas, piscinas y tanques de agua similares.
Preocupacion por el medio ambiente. Por favor,kee las cajas de carton a un situ de reciclaje. Las bolas de polietileno se deben tirar al cubo de la basura amarillo (para envases). El equipo gastado debe ser entegado en el punto de almacenamento adecuado, porque las piezas que constituyen el equipo能把 suponer un peligro para el medio ambiente. Debes entertregar el equipo Hay que devolver el equipo electrico con el fin de evitar su reutilizacion. Si en el equipo se encuentran pilas, hay que sacarlas yentargar por分开ado, en un punto de almacenamento adecuado. No tires el equipo al contentedor para residuos urbanos!!
(PT) PORTUGUES
ATENÇA:
O dispositivo destina-se apenas a uso dométrico.
O dispositivo NAO é destinado ao uso comercial / professional.
O dispositivo NAO é adequado para uso ao ar livre.
Atença! Antes de usar, é essential que você leia estas instruções de operação para fazer acidentes e para o uso correto do disposítio. Guarde este manual e guarde-o para poder utilizes-lo fácilmente.
I. DIRETRICES PARA A SEGURANÇA DO USO
1. Antes de使用者, verifique se a tensão especificada na placá de identificacao corresponde ao parâmetros locais de salinidade, mas lembre-se de que a marca: AC- é currente alternada e DC é CC.
2. Conecte o dispositivo somente a uma tomada aterrada de 220 - 240V 50 / 60~Hz
3. Antes de使用者, disenrole e endireite o cabo de alimentacao
4. Certifique-se de que o cabo de alimentacao e o plugue nao aparecem danos visiveis
ATENÇA:
O dispositivo destiná-se apenas a uso dométrico.
O disposicao NAO é destinado ao uso comercial / professional.
O dispositivo NAO é adequado para uso ao ar livre.
Atença! Antes de usar, é essential que você leia estas instruções de operação para fazer acidentes e para o uso correto do disposítio. Guarde este manual e guarde-o para poder utilizes-lo fácilmente.
I. DIRETRizes PARA A SEGURANÇA DO USO
1. Antes de使用者, verifique se a tensão especificada na placá de identificacao corresponde ao parâmetros locais de salinidade, mas lembre-se de que a marca: AC- é corrente alternada e DC é CC.
2. Conecte o dispositivo somente a uma tomada aterrada de 220 - 240V 50 / 60~Hz
3. Antes de使用者, disenrole e endireite o cabo de alimentacao
4. Certifique-se de que o cabo de alimentacao e oplugue nao aparecem danos visiveis
5. Antes e durante o uso, certifique-se de que o cabo de alimentacao não esteja esticado sobre uma chama aberta ou outra fonte de calor e bordas afiadas que possam danificar o isolamento do cabo.
6. Antes da primeira'utilisation, remove todos os componentes da embalagem. Atença! No caso de um invólico com partes metálicas, nesses elementos, uma pelúca protetora levamente visível pode ser esticada, a qual también deve ser removida.
7. O dispositivo não deve ser uso por crianças, pessoas com capacidade física, sensorial ou mental limitada sem a supervisão de pessoas autorizadas ou experiencias e sempre de acordo com estas instruções.
8. O equipamento não deve ser uso com interruptores de tempo externos ou com umsystema de controle remoto separado.
ATENÇÃO: Este equipamento pode ser usado por crianças com mais de 8 anos de idade e pessoas com capacidade física, sensorial ou mental limitada, ou pessoas que não tem experiência ou conheço um equipamento, SOMENTE se isso for feito sob a supervisão de uma和个人 responsavel por seu equipamento. segurarou receberam instruções sobre o uso seguro do dispositivo e está cientes dos perigos associados ao seu uso. As crianças não devem brincar com o equipamento. A limpeza e a manutenção do dispositivo não devem ser realizadas por crianças, a menos que tenham mais de 8 anos de idade e sejam supervisionadas
9. Não deixe o disposítivo sem supervisão durante a operação.
10. Não mergulhe o aparecido nem o cabo de alimentação em água ou outros liquidos.
11. Quando o disposicao não estiver em uso, ele deve sempre ser desconectado da tomada eletrica.
12. quando puxar a ficha da tomada, nunca puxe o cabo de alimentacao apenas pela ficha.
13. Não coloque NO METAL ITEMS dentro do aparecido
14. O fabricante não se responsabiliza por danos resultantes do uso inadequado do dispositalo.
15. Deve ser lembrado que algumas partes do disposicao e do gabinete durante o trabalho ficam muito quentes,enthala cuidao e nao toque neles,voche pode se queimar.
16. NUNCA cubra o dispositivo durante o functimento ou quando não arrefecer completeness
17. Lembre-se de que os elementos de aquecimento do disposativo demoram a esfriar completeness.
18. Ao usar o disposítivo, certífique-se de espaço adequado acima e ao redor. O disposítivo não deve tocar em objetos fácilmente inflamáveis ||durante o trabalho, como enfeites, toalhas de papel, cortinas, roupas, etc.
19. O aquecedor instalado no banheiro deve ser instalado de modo que os connectores e outros reguladores não possam ser tocados por uma pessoa na banheira ou sob o chuveiro.
20. Em aquecedores para equipamentos de alta altitude, as posições das发展目标os dos connectores devem ser visíveis a uma distência de 1 m
21. A etiqueta para cobrir o aquecedor deve ser visível après a instalacao do aquecedor
22. Você não pode colocar o aquecedor diretamente sob o soque e perto de materiais inflamáveis, como cortinas, cortinas, etc.
23. O disposicao não pode ser uso com temporizadores externos ou outros sistemas de controle remotoeparados
24. Não exponha o dispositivo às condições atmosféricas (chuva, sol, etc.) ou use em condições de alta umidade (banheiros, casas de camping úmidas)
25. Verifique periodically a condição do cabo de alimentação. Se o cabo de alimentação estiver danificado, ele deve ser substituído por um centro de reparos especializados para fazer riscos.
26. Não use o disposítivo perto de materiais inflamáveis
27. O aquecedor deve ser instalado a uma alta não inferior a 1,8 m acima do piso
Recomenda-se que a instalação eletrica está equipada com um disjuntor de corrente residual automatico com uma corrente de partida de 30mA para maior segurarca.
Nota: Se o cabo de alimentacao ou ficha de corrente estiver danificado, deve ser sempre substituido ou reparado por uma oficina especializada.
II. ADVERTÉNCIAS
1. Nunca use o dispositivo se estiver danificado ou não funciona corretamente.
2. Nunca use o dispositivo se ele caiu de uma alta antes e minha sinais visíveis de danos.
3. Não use cabos de extensiono ou outras想不到es que não atendam às normas aplicáceis [e os regulamentosétricos.
4. Qualquer reparo, desmontagem ou substituição de qualquer peça deve sempre ser feito
por uma instalacao especializada.
5. Se o disposativo e os elementos, como contatosétricos, estiverem molhados, oplugue ou cabo deve ser seco antes de usar o disposativo e seuis componentes.
6. Não use o dispositivo com as關鍵 molhadas.
7. Quando houver um risco de o dispositivo ter sido danificado NUNCATe convertar o dispositivo por contapropria.
8. Nunca lave o aparelho debaixo de agua corrente ou de forma que a agua pinguie sobre ele.
9. Não usecessórios que não sejam recomendados pelo fabricante. Eles podemrepresentar um perigo para o usuario e podem causar danos ao dispositivo.
10. Certifique-se de que o disposativo tenha esfiado antes de armazenar.
11. Não toque na caixa durante o uso. Durante a operação, use apenas botões e interruptores. Depois de deslagar, espere o dispositivo esfriar.
12. CUIDADO: Algumas partes deste disposicao podem ficar muito quentes durante a operacao e Causear queimaduras.
III ANTES DO PRIMEIRO USO
1. Remova todo o material de embalagem e endireite o cabo de alimentacao
2. Durante a instalacao, em nenhum caso o dispositivo pode ser coberto com material isolante ou material similar
3. Ao montar o disposativo, as vivas e caibros não devem ser cortados ou cortados
4. Antes da primeira'utilisation, leia todas as instruções de uso.
5. Verifique se a voltagem lista na etiqueta de rotulagem do produits corresponde à voltagem da rede de energia em sua casa
INSTALAÇÃO
Use a broca para perfurar bois orificios na parede, a no minimum 180 cm do chao e a 20 cm do teto - figura A. Depois de perfurar os orificios, insira o calo e o parafuso. Certifique-se de que os parafusos本站 bem apertados e pendure o dispositivo na parede.
DESCRICAÇÃO DO PRODUCTO
Figura B. INTERRUPTOR PRINCIPAL
ON/OFF = LIGAR/DESLIGAR.
Figura C.CONTROLADOR REMOTO
1.Botão ON/OFF
6. SEMANA/TIMER
2. MODO
7. MIN
3 DIAS
8. Botão + -> paraacular a temperatura. Tentem serve como botao de selecao para hora / dia.
4.CLOCK
9. ---> Botão para diminuiar a temperatura. Não serve como botão de seleção para hora / dia.
5. CONFIGURAR
10. RESET - Botão de reset do temporizador
Figura D. PAINEL DE LED
1. Simbolo ON
2. Potência de aquecimento 1000W
3. Potência de aquecimento 2000W
4. funcão AUTO
5. exibicao de temperatura
6.exibicao de dia
7. exibicao de tempo
8. ON simbolo - temporizador de arranque
9. Simbolo OFF - desligamento do temporizador
10. funcão de detectação de janela aberta
IV. USO
1. Pressione o interruptor principal no lado direito do dispositivo - Imagem B para ligar e desligar o dispositivo.
2. O dispositivo está ahora no modo de espera. Pressione o botão liga / desiga (1) no controle remoto - Figura C.
3. Pressione o botão MODE (2) por sua vez para selecionar o modo de operação:
- 1000 W, o disposicao aquece constantemente com 1000 W.
- 2000 W, o dispositorio aquece constantemente com 2000W.
- Modelo automatico, pressione os botões + e - para definir manualmente a temperatura. O dispositoo entra a automaticamente no mode de manutenção da temperatura.
- Função de detectação de janela aberta - quando esta funcção é selecionada, o disposito automatamente ou aquecido se a temperatura ambiente cair repentinamente em 10^ C.
4. Para desligar o disposativo, pressione o botão liga / des Liga (1) no controle remoto. O disposativo esfria e des Liga antes circa de 30 segundos.
DEFINIR O RELÓGIO INTERNO DO DISPOSITIVO
NOTA: Se você não definir a hora e o dia da peninsula atuais, o dispositivo não funciona corretoamente, quando é de acordo com seuignon relógio interno, ou que está incorreto.
1. Selecione a funcao AUTO usingo botao MODE.
2. Antes de definir o cronômetro, defina o dia da semana e a hora atual:
- Pressione o botão DIA e seleção o dia atual usingo os botoes ^+ e-. Aguarde até o visor parar de piscar.
- Pressione o botão RELÓGIO e define a hora atual using os botões + e -. Aguarde até o visor parar de piscar.
- Pressione o botão MIN e defina os minutos atuais usingo os botões + e - Aguarde até o visor parar de piscar.
AJUSTE DA PROGRAMACAO DO TIMER - TIMER
Esta funcao permite programar o tempo para ligar e desligar o dispositivo em cada dia da semana no horario desejado.
O timersoleaderajustadoaposaseleaoa fucsoAUTOeoguste do relgoio interdo dispositivo.
1. Pressione o botão WEEK / TIMER e seleciono o dia da sexta em que deseja configurar o disposito para ligar e desligar automaticamente using os botões + e -. Aguarde até o visor parar de piscar.
2. Depo is pssionar o botao SET UP, o sibolo ON acendera no visor. Agora vcpe podir o horario de inicio do timer. Use os botoes RELOGIO, MIN, ^+ e - para definir a hora de inico do timer. Aguarde atc o visor parar de piscar.
3. Depoi de pressionar o botao WEEK / TIMER (6) novamente e depos pressionar o botao SET UP, o simbolo OFF acendera no visor. Agora você pode definir o tempo de desligamento do temporizador. Águarde até o visor parar de piscar.
NOTA: a hora de inicia deve ser sempre menor que a hora de parada.
NOTA Para redefineir o timer para as configurações padrão, pressione o botão RESET.
V. LIMPEZA E MANUTENÇA
1. Desligue sempre o aparecido da tomada antes de limpa-lo.
2. Se durante a limpeza itens como opluge de alimentacao, termostato, contatos eltricos, etc. estiverem encharcados antes de serem usados novamente, eles devem ser Completely secs
3. Nao use detergentes agressivos na forma de emulso, loos, pastas, etc. para limpar o gabinete. Eles podem, entre otheras coisas, remover os SYMBOLs graficos de informacao, como sinais, sinais de alerta, etc.
4. Certifique-se de que o disposativo tenha esfiado antes de limpa-lo.
DADOS TECNICOS:
Tensão: 220-240 V ~ 50 / 60Hz
Potência: 2000W max. Potência: 2200W
lp20

"Caution Hot Surface" - A temperatura das superficies disponveis pode ser maior quando o equipamento está funciona, o que significica que os elementos do alojamento ficam muito quentes durante a operação durante a operação, !

CUIDADO !!!
"NAO COBRE" - IMPORTANCA DA INSCRIÇÃO A inscrição no dispositalo significa que o dispositalo não deve ser coberto com roupas, cobertores e outros produits tíxeis que possam causar ignião.

Nao use este equipamento perto de banheiras, chuveiros, piscinas e tanques de agua semelhantes.

Proteção do meio ambiente. Rogamos, os embalagens de cartão destinem-se para papéis velhos. Os sacos de polietileno (PE) devem-se colocar em contenedores para material plácico. O dispositovo uso deve-se levar a um ponto de armazenamento adequado porque os componentes perigosos que ficam dentro do dispositovo podem ser perigosos para o meio ambiente. O dispositovo eletrico deve-seOOTER de modo que se reduza a sua nova utilização e uso. Se no dispositovo ha pilhas, devem-se tirar e levar a um ponto de armazenamento em separado.
Não colocar o dispositorio em contendores para residuos Municipais!!
(LT) LIETUVIU
DÉMESIO:
Prietaisas skirts tik buitiniam naudojimui.
Prietaisas NEGALIMA naudoti komerciniam / profesionaliam naudojimui.
Prietaisas netinka naudoti lauke.
Démesio! Pries naudodami butina, kad perskaitytumete šia naudojimo instrukcija, kad isvengtumete nelaimingu atsitikimur teisingai naudoti prietaisa. Laikykite ši vadovar
laiky kite ji taip, kad galetumete ji lengvai naudoti.
I. NAUDOJIMO SAUGUMO GAIRES
1. Pries naudodami patikrinkite, ar vardinéje ploksteléje nurodyta jtampa atitinka vietinius druskingumo parametrus, táciau nepamirskite, kad Žymejimas: AC- yra kintamoji srové ir DC yra DC.
2. Prijunkite prietaisā tik prie ižeminto maitinimo šaltinio 220-240V ~ 50/60 Hz.
3. Pries naudodami atjunkite ir istiesinkite maitinimo laida
4. Lsitikinkite, kad maitinimo laidas ir kišukas neturi matomu pažeidimu
5. Pries ir naudodami jsitikinkite, kad maitinimo laidas nera iSTEMptas per atvirq liepsna ar kitq silumos saltinir astrius krastus, kurie gali sugadinti kabelio izoliacija.
6. Pries pirma karta isimkite visas pakuotés dalis. Demesio! Jei korpusas yra su metalinemis detalémis, ant siu elementu gali buti istempta siek tiek matoma apsauginé folija, kuri taip pat turétu buti pašalinta.
7. Prietaisa neturétu naudoti vaikai, asmenys, turintys ribota fizine, jutimo ar psichine galia, be prieziuros ar patyrusiu asmenu prieziuros ir visada laikantis siu nurodymu.
8. [ranga nera skirta naudoti su išoriniais laiko jungikliais arba atskiru nuotolinio valdymo)...
sistema.
ISPEJIMAS: Sia jrangagali naudoti vaikai, vyresni nei 8 metu, ir asmenys, turintys ribota fizini, jutimo ar psichikos gebejima, arba asmenys, neturintys patirties ar ziniapie jranga, TIK, jei tai daroma priziurint už juos atsakingam asmeniui. sauguma arba buvo suteikta instrukcija apie saugu prietaiso naudojima ir zinoma apie su jo naudojimu susijusius pavojus. Vaikai neturetu zaisti su jranga. Prietaiso valymas ir prieziura neturetu buti atliekami vaikams, nebent jie yra vyresni nei 8 metu ir yra priziurimi
9. Nepalikite prietaiso prieziuros be prieziuros.
10. Nemerkite prietaiso ir maitinimo laido vandenj ar kitus skyscius.
11. Kai prietaisas nenaudojamas, jis visada turi buti atjungtas nuo maitinimo lizdo.
12. Ištraukdami kistuka iš lizdo, niekada neištraukite maitinimo laido tik kistuku.
13. L prietaisa nejdekite NO METAL ITEMS
14. Gamintojas neatsako už Žala, atsiradusia干细胞 netinkamo prietaiso naudojimo.
15. Atminkite, kad kai kurios prietaiso dalys ir spintelé darbo metu labai karsha, todél bukite atsargus ir nelieskite ju, galite sudeginti.
16. NIEKADA nenaudokite prietaiso eksploatacijos metu arba visiskai nevalykite
17. Atminkite, kad prietaiso sildymo elementai visiskai atvesta.
18. Naudodamiesi prietaisu, uztikrinkite pakankama erdvve virs ir aplink. Prietaisas darbo metu neturi liesti jokiu lengvai uzsiliepsnojanciu objektu, pavyzdziui, dekoraciju, popieriniu ranksluosciu, uzuolaidu, drabuziu ir kt.
19. Vonios kambaryje irengtas sildytuvas turi buti sumontuotas taip, kad juntgis irKitas regulatorius negalétupaliesti asmuo vonioje ar po dušu.
20. Auksto aukscio irenginiu sildytuvuose skirtingu jungciu padetys turi buti matomos nuo 1 m. atstumo.
21. Irengus sildytuva, sildytuvo dangos zenklinimas turi buti matomas
22. Jus negalite patalpinti sildytuvo tiesiai po lizdu ir salia degiu medziagu, pvz., Uzuolaidu, uzuolaidu ir pan.
23. Prietaisas negali buti naudojamas su isoriniais laiko jungikliais ar kitomis atskiromis nuotolinio valdymo systemomis
24. Saugokite prietaisa nuo atmosferos salygu (lietaus, saulès ir kt.) Arba naudokite dideles dregmès salygomis (vonios kambariuose, dregnuose kempinguose)
25. Periodiskai patikrinkite maitinimo laido bukle. Jei maitinimo laidas yra pazeistas,jis turi buti pakeistas specializuota remonto istaiga, kad butu isvengta pavojaus
26. Nenaudokite prietaiso šalia degiu medziagu
27. Sildytuvas turi buti jrengtas ne mazesniame kaip 1,8 m aukstyje virs grindu
28. Nenaudokite šio sildytuvo šalia vonios, dušo ar baseino
29. Nenaudokite šio šildytuvo, jeijis buvo numestas
30. Nenaudokite, jei yra akivaizdziu sildytuvo pazeidimu pozymiu
31. Naudokite šildytuva ant lygaus ir stabilaus paviršiaus arba pritvirtinkite prie sienos, jei taip numato gamintojas.
LSPÉJIMAS: Nenaudokite šio sildytuvo mažose patalpose, kur yra Žmoniu, kurie patys negali ju palikti, nebent užtikrinama nuolatiné priežiūra.
ISPEJIMAS: Noredami sumažinti gaisro rizika, tekstile, užuolaidas ar kitas degias medziagas laikykite bent 1 m atsumu nuo šildtuvo oro išleidimo angos.
Elektros instaliacijai rekomenduojama irengti automatini liekamosios srovés grandines pertraukiklj su 30 mA pradine srové, kad butu užtikrintas didesnis saugumas.
Pastaba: jei pazeistas maitinimo laidas arba maitinimo kistukas, ji visada reikia pakeisti ar remontuoti specializuotoje remonto dirbtuvèje.
II. [SPEJIMAI
1. Niekada nenaudokite prietaiso, jeijis sugadintas arba neveikia tinkamai.
2. Niekada nenaudokite prietaiso, jeijis nukrito nuo aukšćio ir parodo matomus pažeidimo požymius.
3. Nenaudokite prailginimo laidu ar kitu elektros lizdu, kurie neatinka galiojanciu standartu in elektros taisykiu.
4. Bet kokiu daliu remonta, ismontavima ar pakeitima visada turi atlikti specializuota jmoné.
5. Jei prietaisas ir elementai, pvz., Elektriniai kontaktai, yra šlapūs, pries naudojant prietaisa ir jo componentus, kištuka arba kabelj reikia isdžiovinti.
6. Nenaudokite prietaiso slapiomis rankomis.
7. Jei yra pavojus, kad prietaisas bus sugadintas NIEKADA nebandykite pataisyti prietaiso.
8. Niekada nuplaukite prietaisq po tekanciu vandeniu arba taip, kad ij patektu vanduo.
9. Nenaudokite gamintojo rekomenduojamu priedu. Jie gali kelti pavojn naudotojui ir gali sugadinti irengini.
10. Pries saugodami jsitikinkite, kad prietaisas atves.
11. Naudojimo metu nelieskite korpuso. Veikimo metu naudokite tik rankeneles ir jungiklius. Isjunge palaukite, kol prietaisas atves.
12. ATSARGIAI: Kai kurios šio prietaiso dalys gali labai jkaisti veikimo metu ir sukelti nudegimus.
III. PRIESPIRMA NAUDIOJIMA
1. Išimkite visa pakavimo medziaga ir istiesinkite maitinimo laida
2. [rengimo metu prietaisas jokiu budu negali buti padengtas izolacine medziaga ar panašia medziaga
3. Montuojant prietaisa, sijos ir gegnés neturetu buti pjaustytos ar supjaustytos
4. Pries pirma karta naudodami perskaitykite visas naudojimo instrukcijas.
5. Patikrinkite, ar etiketeje nurodyta itampa atitinka jusu tinklo elektros tinklo tampa
IRENGIMAS
Naudokite greztuva, kad sienos butu isgreztos dvi skyles, maziausiai 180 cm nuo grindu ir 20 cm nuo lubu - A paveikslas. Isgreze skies, idekite pada ir varzta. Isitiknine, kad varztai gerai priverzti, tada pakabinkite prietaisa ant sienos.
PREKÉSAPRAŠYMAS
Paveiksléis B. PAGRINDINIS SVIRTIS
ON/OFF = ISJUNGTI/ISJUNGTA.
Paveiksléis C. NUOTOLINIS VALDYMAS
1. Jungimo / isjungimo mygtukas 6. SAVAITIS / LAIKOTARPIS
2. MODE 7. MIN
3. DIENA 8. + -> Temperaturos pakelimo mygtukas. Taip pat tarnauja kaip laiko / dienos pasirinkimo mygtukas.
4.CLOCK 9. --> Temperaturosumazinimo mygtukas.Taip pat tarnauja kaip laiko / dienos pasirinkimo mygtukas.
5. SET UP 10. RESET - Timer reset mygtukas
Paveikslélis D. LED PANELIS
1. JUNGIMO simbolis 6. Dienes rodymas
2. Sildymo galia 1000W 7. Laiko rodymas
3. Sildymo galia 2000W 8. JUNGIMO simbolis - jjungiamas laikmatis
4. AUTO fungcija 9. Isjungimo simbolis - laikmácio isjungimas
5. Temperaturos rodymas 10. Atidarykite lango aptikimo fungcija
IV. NAUDOJIMAS
1. Noredami jjungti ir isjungti rengini, paspauskite pagrindini jungikli, esanti deseinje renginio puséje - B paveikslas.
2. Dabar prietaas veikia laukimo rezimu. Paspauskite nuotolinio valdymo pulto ijungimo / ijsjungimo mygtuka (1) - C nuotrauka.
3. Paspauskite mygtuka MODE (2) paeiluii, kad pasirinktumete darbo rezima;
- 1000 W prietaisas nuolat jkaista su 1000 W.
- 2000W, prietaisas nuolat jkaista su 2000W.
- Automatinis rezimas, norédami rankiniu būdu nustatyti temperatūrā, paspauskite + ir - mygtukus. [renginys automatiskai pereis i temperatūros palaikymo režima.
- Atidaryti lango aptikimo fungcija - Pasirinkus siq fungcija, prietaisas automatiskai ijsjungia sildyma, jei kambario temperatura staigiai nukrenta 10^ C.
4. Noredami ijsjungti [rengini, paspauskite nuotolinio valdymo pulto ijungimo / isjungimo mygtuka (1). [renginys atvesta ir issijungia maždaug po 30 sekundžiu.
VIDAUSIRENGINIO LAIKRODZIO NUSTATYMAS
PASTABA: Jei nenustatysite dabartinio laiko ir savaites dienos, prietaisas neveiks tinkamai, nes veiks pagal saver vinil [laikrodi, kuris yra neteisingas.
1. Mygtuku MODE pasirinkite funkcjja AUTO.
2. Pries nustatydami laikmatj, nustatykite savaites diena ir esama laika:
- Paspauskite mygtuka DAY ir mygtukais + ir - pasirinkite dabartin diena. Palaukite, kol ekranas nustos mirkseti.
- Paspauskite mygtuka CLOCK ir nustatykite esama laika mygtukais + ir -. Palaukite, kol ekranas nustos mirkseti.
- Paspauskite mygtuka MIN ir mygtukais + ir - nustatykite dabartines minutes. Palaukite, kol ekranas nustos mirkseti.
LAIKMERIO PROGRAMAVIMO NUSTATYMAS - taineris
Si fungcija leidzia programuoti laika, kada reikia ijungti ir isjungti jrengini kiekviena savaites Diana.
Laikmatj galima nustatyti tik pasirinkus fungcija AUTO ir nustacius vidinj irenginio laikrodi.
1. Paspauskite WEEK / TIMER mygtuk, ir, naudodamiesi mygtukais + ir-, pasirinkite savaites diena, kuria norite nustatyti, kad irenginys automatiskai jsijungtu ir issijungtu. Palaukite, kol ekranas nustos mirkseti.
2. Paspaudus mygtuka SET UP, ekrane uzsidega simbolis JUNGtas. Dabar galite nustatylaikmaacio pradzios laika. Noredami nustatylaikmaacio pradzios laika, naudokite mygtukus CLOCK, MIN, +ir-. Palaukite, kol ekranas nustos mirkseti.
3. Dar karta paspaudus mygtuka WEEK / TIMER (6) ir paspaudus mygtuka SET UP, ekrane užsidega OFF simbolis. Dabar galite nustatyla laikmačio isjungimo laika. Palaukite, kol ekranas nustos mirkseti.
PASTABA: pradžios laikas visada turi būti mažesnis už sustabdymo laika.
PASTABA Norédami atkurti laikmačio numatyuosius nustatymus, paspauskite mygtuka RESET.
V. VALYMAS IR PrieziURA
1. Prieš valydami prietaisa visada ištraukite iš elektros tinklo lizdo.
2. Jei valymo metu, pvz., Maitinimo kišukas, termostatas, elektrinai kontaktai ir pan., Pries naudojima vél mirkomi, jie turi buti gerais išdžiovinti
3. Nenaudokite agresyviu plovikiu emulsiju, losjonu, pastu ir pan. Valtyi. Jie, be kita ko, gali pašalinti informacinius grafinius simbolius, tokius kaip zenklai, ispejamieji zenklai ir pan.
4. Pries valydami jsitikinkite, kad prietaisas atves.
TECHNINIAI DUOMENYS:
tampa: 220-240V ~ 50 / 60Hz
Galia: 2000W Maks. Galia: 2200W IP20


"Spejimas karsto pavirsiaus" - prieinamu pavirsiu temperatura gali buti didesne, kai jranga veikia, o tai reiskia, kad i cijos metu korpuso elementai tampa labai karsti, SAVE CAREFUL !!!
"NEGALIMA" - RASYMAS SVARBU Iras ant prietaiso reiskia, kad prietaisas neturi buti padengtas drabuziais, antklodemis irilles gaminiais, kurie gali sukelti udegima.

ISPEJIMAS: Nenaudokite sios jrangos salia voniu, duu, baseiu ir panaui vandensrezervuaru.

Rupinantis aplinka. Kartono pakuotes atiduoti j makulatura. Polietileno (PE) maišelius mesti j plastikui skirta konteineri. Susidévžusji prietaisa atiduoti j atitinkamā atlieku surinkimo vieta, nes prietaise esancios pavojingos medziagos gali kelti grésme aplkai. Elektrinji prietaisa atiduoti tokj, kad nebūtu galima jo pakartotinai naudoti ir panaudoti. Jeigu prietaise yra baterijos, bütina jas išimi t ir atskirai atiduoti j atlieku surinkimo vieta. Nemesti prietaiso j buitiniu atlieku konteineri!
(LV) LATVIEŠU
UZMANIBU:
lericeirparedzeta tikailietosanaimajas.
lerice nav paredzeta komercialai / profesionai lietošanai.
lerice nav piemeropta lietošanai arpus telpam.
Uzmanibu! Pirms lietošanas ir svarigi izlasit šo lietošanas instrukciju, lui izvairitos no nelaimes gadijumiem un icerces pareizas izmantošanas. Saglabajiet šo rokasgramatu un glabajiet to tā, lui to varētu viegli izmantot.
I. NORADIJUMI PAR LIETOSANAS DROSBU
1. Pirms lietošanas pārbaudiet, vaidatu plaksnīte norādītais spriegums atbilst vietējiem sāluma parametriem, bet atcerieties, ka markējums: AC- ir mainstrava un DC ir DC.
2. Savienojiet ieri tikai ar izemetu 220 - 240V 50 / 60~Hz kontaktligzdu.
3. Pirms lietošanas atvienojiet un iztaisnot strāvas vadu
4. Pārliecinieties, vai strāvas vadam un spraudnim nav redzamu bojājumu
5. Pirms un pirms lietošanas parliecinieties, vai strāvas vads nav izstiepts uz atklātas liesmas vai cita siltuma avota un asu malu, kas var sabojāt kabela izolāciju.
6. Pirms pirmās lietošanas iznemiet visus iefpakojuma komponentus. Uzmanību! Ja korpusā
ir metāla dalas, uz šiem elementiem var izstiept viegli redzamu aizsargplevi, kas arī ir jānonem.
7. leri ci nedrikst izmantot berni, personas ar iberozotu fizisko, sensoro vai garigo spju bez pilnvarotu vai pieredzjuusu personu uzraudzibas un vienmér saskaar ar sm instrukcijam.
8. lekarta nav paredzeta lietošanai ar ārejiem laika sledžiem vai atsevisku tālvadības systemu.
BRIDINAJUMS: So aprikojumu var izmantot berneni, kas ir vecaki par 8 gadiem, un personas ar icerobežotu fizisko, sensoro vai garigo speju, vai personas, kuram nav pieredzes vai zinašanu par aprikojumu, TIKAI, ja to dara persona, kas ir atbildiga par viŋu vai ir sniegti noradijumi par icerces drošu lietošanu un ir informeti par briesmam, kas saistitas ar tās lietošanu. Berneni nedrikst spelēt ar aprikojumu. lerices tiršanu un apkopi nedrikst veikt berneni, ja vien viŋi nav vecaki par 8 gadiem un tiek uzraudziti
9. Neatstajiet ierici darba laikā bez uzraudzības.
10. Nenovietojiet ierici un stravas vadu udeni vai citos skidrumos.
11. Kad ierice netiek izmantota, tā vienmēr ir jāatvieno no strāvas kontaktligzdas.
12. Izvelkot kontaktdakšu no kontaktligzdas, nekad neizvelciet strāvas vadu tikai ar spraudni.
13. Nenovietojiet NO METAL ITEMS ierice
14. Ražotājs nav atbildīgs par bojājumiem, kas radušies ierīces nepareizas lietošanas rezultātā.
15. Jāatceras, ka dažas ierīces dalas un skapis darba laikā kūst loti karsti, tāpēc esiet uzmanīgi un nepieskarieties tiem, jus varat sadedzināt.
16. NEKAD NEKÄDIET ierici ierices darbības laikā vai tad, kad tā pilnībā neatdziest
17. Atcerieties, ka ierices sildelementi pilnibā atdziest.
18. Lietojot ierici, nodrošiniet pietiekamu vietu virs un apkārt. Darba laika ierice nedrīkst pieskarties viegli uzliesmojosiem priekšmetiem, piēmēram, rotājumiem, papīra dviejiem, aizkariem, apgērbam utt.
19. Vannas istabā uzstādītais sildītājs jauzstāda tā, lái cilveks, kas atrodas vannā vai zem duṣas, nevarētu pieskarties savienotājiem un citiem regulatoriem.
20. Augsta augstuma kermenu silditajos dažadu savienotaju poziciju pozicijam jabut redzamam no 1 m. attaluma.
21. Pec silditaja uzstadisanas ir jabut redzamam silditaja pärklajuma markejumam
22. Jus nevarat ievietot silditaju tiesi zem kontaktligzdas un tuvu uzliesmojosiem materialiem, piemeram, aizkari, aizkari utt.
23. Ierici nevar izmantot ar arejiem laika sledziem vai citam atseviskam talvadibas sistamam
24. Nepaklaujiet ieri ci atmsoferas apstakiem (lietus, saule uc) vai lietoanai augsta mitruma apstaklos (vannas istabas, mitras kempinga majas).
25. Regulari parbaudiet strvas vada stavokli. Ja strvas vads ir bojats, tas janomaina ar specialistu remontdarbnicu, lai izvairitos no bistamibas
26. Nelietojiet ierici pie viegli uzliesmojosiem materialiem
27. Silditājs jauzstāda vismaz 1,8 m augstumā virs gridas
28. Nelietojiet so silditaju vannas, dujas vai peldbaseina tiesa tuvuma
29. Nelietojiet šo silditāju, ja tas ir nomests
30. Nelietojiet, ja ir redzamas silditaja bojajuma pazimes
31. Izmantojiet silditaju uz lidzenas un stabilas virmas vai piestipriniet to pie sienas, ja ražotajs to paredz.
BRIDINAJUMS: Nelietojiet so silditaju mazas telpas, kur ir cilveki, kuri paşi nespj tos pamest, ja vien netiek nodrošinata pastaviga uzraudziba.
BRIDINAJUMS: Lai samazinatu ugunsbistamibu, tekstilizstradajumus, aizkarus vai citrus viegli uzliesmojosus materiaiulus turiet vismaz 1 m attalumno silditaja gaisa izpludes vietas.
Elektroinstalacijai ir ieteicams aprikot ar automatisku atliku so strvas padeves sledzi ar 30mA iedarbinasanas stravu, lai palielinatu drosbu.
Piezime: ja ir bojats strvas vads vai strvas kontaktdaksa, to vienmer vajadzetu nomainit vai remontet specializeta remontdarbnica.
II. BRIDINAJUMI
1. Nekad nelietojiet ierici, ja tā ir bojata vai nedarbojas pareizi.
2. Nekad nelietojiet ierici, ja tā ir nokritusies no augstuma un redzamas bojājumu pazīmes.
3. Neizmantojiet pagarinātājus vai citrus elektrības kontaktus, kas neatbilst piemerojamiem standatriem un elektriskajiem noteikumiem.
4. Jebkuru dalu remontu, demontazu vai nomainu vienmér veic specializeta iekarta.
5. Ja ierice un elementi, piemēram, elektriskie kontakti, ir slapji, pirms ierices un ta sastāvdalu lietošanas kontaktdakšu vai kabeli dríkst Žavēt.
6. Nelietojiet ierici ar mitram rokam.
7. Ja pastāv risks, ka ɪerīce ir bojāta NEKAD mēginiet paşi labot ɪerīci.
8. Nekad nomazgajiet ierici zem tekosa udens vai tada veidā, lai taja ieplust udens.
9. Nelietojiet piederumus, kurus nav ieteicis ražotājs. Tie var radīt briesmas lietotājam un var sabojāt ierīci.
10. Pirms uzglabāsanas pārliecinieties, vai ierice ir atdzisis.
11. Lietosanas laikā nepieskarieties korpusam. Darbības laikā izmantojiet tikai pogas un sležus. Pec izslēgšanas pagaidiet, lidz icerce atdziest.
12. UZMANIBU! Dažas šīs ierīces daljas darbības laikā var kʃut Joti karstas un izraisit apdegumus.
III. PIRMS LIETOSANAS
1. Nonemiet visu iepakojuma materialu un iztaisnojiet stravas vadu
2. Uzstadisanas laikā ierice nekādā gadijumā nedrikst but parklata ar izolacijas materialu vai lidzigu materialu
3. Montejot ierici, sijas un spares nedrikst sagriezt vai sagriezt
4. Pirms pirmas lietošanas izlasiet visas lietošanas instrukcijas.
5. Pärbaudiet, vai produkta ratiñu markejumā noradītais spriegums atbilst jusu majas elektrotíka spriegumam
INSTALACija
Izmantojiet sejmasinu, lai siena izurbtu divus caorumus, vismaz 180 cm no gridas un 20 cm no griestiem - A attels. Pec urbumu urbsanas ievietojiet spilventu un skruvi. Parniecinieties, vai skruves ir labi nostiprinatas, un pec tam piestipriniet ierici pie sienas.
PRODUKTA APRAKSTS
B attels. GALVENA Sledzis
C. attels. REMOTE CONTROLLER
1. Poga ON / OFF
2. REZIMS
3. DIENA
4.CLOCK
5. SETUP
6.WEEK/TIMER
7. MIN
8. + -> Poga temperatūras paaugstināsānai. ār kalpo kā izvēles poga laika / diñas laikā.
9. --> Poga tempatūras pazemināsānai. ār kalpo kā izveles poga laika / dienas laikā.
10. RESET - Taimera atiestatisanas poga
Attels D. LED PANEL
1. ON symbols
2. Apkures jauda 1000W
3. Apkures jauda 2000W
4. AUTO fungcija
5. Temperatūras radījums
6. Dienes displejs
7. Laika rādijums
8. ON [leslegt] symbols - taimera palaisana
9. OFF symbols - taimera izslggsana
10. Atvert logu atklaesan funkciju
IV. LIETOSANA
1. Nospiediet galveno sledzi ierices labaja pus - B attels, lai ieslgtu un izslgtu ierfci.
2. lere tagad ir gaidisanas rezima. Nospiediet talvadibas pults ieslegsanas / izslegsanas pogu (1) - C attels.
3. Nospiediet pogu MODE (2) pec kartas, lai izveltos daribas rezimu:
- 1000 Wierice pastavigi sakarst ar 1000 W.
- 2000 W, ierice pastavigi sakarst ar 2000W.
- Automatischais rezims, nospiedet taustinus + un -, lai manuali iestatitu temperaturu. lerice automatiski ieslgesies temperaturas uzturešanas režimā.
- Atvet logu noteikšanas funkcija - Kad šī funkcija ir izvēleta, ierice automatiski izsledz apkuri, ja istabas temperatūrā pēkšni pazeminās par 10 ° C.
4. Lai izslęgtu ierici, nospiediet tālvadības pults ieslēgšanas / izslēgšanas pogu (1). Ierice atdziest un izslēdzas apmēram pec 30 sekundēm.
IEKŠEJÁS IERICES pulkstena iestatīsana
PIEZIME Ja neiestatat pašreizejo laiku un nedējlas dienu, ierice nedarbosies pareizi, jo tā darbosies atbilstoši savam iekšejam pulkstenim, kas ir nepareizi.
1. Atlasiet fungciju AUTO, izmantojot pogu MODE.
2. Pirms taimera iestatiñas iestatiet nedelas dienu un pašreizejo laiku:
- Nospiediet pogu DIENA un atlaset pašreže jo dienu, izmantojot pogas + un -. Pagaidiet, ltdz displejs pärstāj mirgot.
- Nospiediet taustinu CLOCK un iestatiet pašreizejo laiku, izmantojot pogas + un - Pagaidiet, ltdz displeješ párstaj mirgot.
- Nospiediet pogu MIN un iestatiet pašrežejas minutës, izmantojot pogas + un -. Pagaidiet, lfdz displeješ pärstaj mirgot.
TIMER PROGRAMING SETTING - TIMER
Sifunkcija lauj programmetierfcies ieslegsanas un izslegsanas laiku katra nedelas diena velamaja laika.
Taimeri var iestatit tikai pec fungcjias AUTO izveles un icerces ieksej a pulkstena iestatisanas.
1. Nospiediet pogu WEEK / TIMER un, izmantojot pogas + un -, izvelieties nedelas dienu, kurā vēlaties iestatīi erici automatiskai ieslēgsanai un izslegsanai. Pagaidiet, lidz displejs pārstāj mirgot.
2. Pec SET UP pogas nospiesanas displej iedegsies symbols ON. Tagad jus varat iestafit taimera sakuma laiku. Izmantojet pgas CLOCK, MIN, + un -, lain iestatifu taimera sakuma laiku. Pagaidiet, lidz displejs sparstaj mirgot.
3. Pec atkartotas pogas WEEK / TIMER (6) nospiesanas un pec tam nospiezot pogu SET UP, displejia iedegsies symbols OFF. Tagad jus varat iestafit taimera izslegsanas laiku. Pagaidiet, lidz displejs sparstaj mirgot.
PIEZIME: sakuma laikam vienmér jabut zemakam par beigu laiku.
PIEZIME Lai atiestatitu taimera noklusejuma iestatijumus, nospiiediet pogu RESET.
V. TIRISANA UN APKOPE
1. Pirms tiri'sanas vienm er atvienojiet ierici no strvas kontaktligzdas.
2. Ja tirišanas laikā, piēmērām, strāvas kontaktdaksa, termostats, elektriskie kontakti utt., Tiek atkārtoti iemērkti, tie ir rūpīgī janozāve
3. Neizmantojiet agresivus mazgans an lidzeklus emulsij, losjonu, pastu uc veidai, lai tiritu skapi. Tas var, cita starpa, noemt informacijas grafiskos simbolus, piemeram, zimes, brdinajuma zimes utt.
4. Pirms tirisanas parliecinieties, vai ierice ir atdzisis.
TEHNISKIE DATI:
Spiregums: 220-240V ~ 50 / 60Hz
Jauda: 2000W Maks. Jauda: 2200W Ip20
JMS: Neizmantojiet so aprikojumu vannas, duas, peldbasein un lidzigu udens tverttu tuvumā.
Apkartegjas vides aizsardziba. Kartona iepakojumu, ludzu, nododiet otreizejai pärstradei. Polietilena maisinus (PE) izmest plastmasas izstradajumiem paredzetajos konteineros. Lietotas elektrupreces nododiet attiegajos pienemšanas punktos. leric satur bistamas sastavdalas, kas var izraisit draudus apkartegjai videi. Elektroierice janodod tā, lai ierobežotu tās atkartotu izmantošanu. Ja ierie atrodas baterijas, iznemiet tās un nododiet pieemšanas punktā atseviški. Produktu neizmest sadzives atkritumu konteinera!
(EST) EESTI
TAHELEPANU:
Seade on mōeldud ainult koduseks kasutamiseks.
Seade ei ole moeldud ariliseks / professionaalseks kasutamiseks.
Seade ei sobi kasutamiseks valitingimustes.
Tähelepanu! Enne kasutamist on oluline, et te lugeksid need kasutusjuhendid LABi, et vältna onnetusi ja seadme öiget kasutamist. Hoidke see käsiraamat ja hoidke seda nii, et saaksite seda holpsasti kasutada.
I. KASUTUSOHUTUSE SUUNISED
1. Enne kasutamist kontrollige, kas andmesildil margitud pinge vastab kohalikele soulsuse parameetritele, kuid pidage meeles, et margistus: vahelduvvool on vahelduvvool ja alalisvool on alalisvool.
2. Ühendage seade ainult maandusega 220-240 V ~ 50/60 Hz.
3. Enne kasutamist eemaldage ja ühendage toitejuhe
4. Veenduge, et toitejuhe ja pistik ei oleks naitavalt kahjustatud
5. Enne kasutamist ja selle ajal veenduge, et toitejuhe ei oleks üle avatud leegi voi muu soojisallika ega teravate servade, mis voivad kahjustada kaabli isolatsiooni.
6. Enne esmakordset kasutamist eemaldage kõik pakendikomponendid. Tahelepanu! Metallosadega korpuse korral võib nendel elementidel venitada kergelt nahtavat kaitsekile, mis tuleb samuti eemaldada.
7. Seadet ei tohiks kasutada lapsed, piiratud füusilise, sensoarse voi vaimse voimekusega isikud ilma volitatud voi kogenud isikute jarevalveta ning alati vastavalt kaesolevale juhendile.
8. Seade ei ole ette nähtud kasutamiseks väliste ajakommutaatoritega vöi eraldi kaugjuhtimissüsteemiga.
HOIATUS: Seda seadet vōivad kasutada üle 8-aastased lapsed ja piiratud fūusilise, sensoarse vōi vaimse vōimega isikud vōi isikud, kellel ei ole kogemusi vōi teadmisi seadmete kohta, ainult siis, kui see toimub nende eest vastutava isiku järevalve all. ohutust vōi on antud juhised seadme ohutu kasutamise kohta ja on teadlikud selle kasutamisega seotud ohtudest. Lapsed ei tohi seadmega mangida. Seadme puhastamist ja hooldust ei tohi teha lapsed, valja arvatud juhul, kui nad on üle 8-aastased ja neid jälgitakse
9. Arge jätke seadet tootamise ajal järevalveta.
10. Arge kastke seadet ja toitejuhet veega ega muudesse vedelikesse.
11. Kui seadet ei kasutata, tuleb see alati vooluvorgust lahti ühendada.
12. Pistiku pistikupesast tommates arge kunagi tommake toitejuhet ainult pistikust.
13. Arge asetage seadmesse NO METAL ITEMS
14. Tootja ei vastuta seadme ebaõigest kasutamisest tulenevate kahjude eest.
15. Tuleb meees pidada, et moned seadme osad ja kapp too ajal on vaga kuumad, seega olge ettevaatlikud ja arge puudutage neid, voite pletalada.
16. ARGE KUNAGI katke seadet too ajal voi siis, kui see taiilikult ei jahtu
17. Pidage meeles, et seadme küttekehad vōtavad tāielikult jahtuda.
18. Seadme kasutamisel veenduge, et selle kohl ja ümber on piisavalt ruumi. Seade ei tohi too ajal puudutada kergesti suttivaid esemeid, nagu kaunistused, paberist kateratikud, kardinad, riided jne.
19. Vannitoas paigaldatud küttekeha tuleb paigaldada nii, et vanni voi duši all olev isik eis saaks ühendust ja teisi regulaatoreid puudutada.
20. Körge körgusega kinnitusdetailide küttekehad peavad ühenduste erinevate asendite asendid olema nähtavad 1 m. kaugusel.
21. Kütteseadme katte margistus peaks olea nāhtav pārast kütteseadme paigaldamist
22. Kütteseadet ei saa paigutada otse pesa alla ja tuleohtlike materjalide, naiteks kardinate, kardinate jne lahedale.
23. Seadet ei saa kasutada väliste ajakommutaatorite voi muude eraldi kaugjuhtimissüsteemidega
24. Arge jatke seadet atmosfäritingimustesse (vihma, päikese jms) voi kasutage körge niiskuse tingimustes (vannituba, niisked telkimismajad).
25. Kontrollige regulaarselt toitejuhtme seisukorda. Kui toitejuhe on kahjustatud, tuleb see ohu vältimiseks asendada spetsiaalse remonditökojaga
26. Arge kasutage seadet tuleohtlike materjalide laheduses
27. Kütteseade tuleb paigaldada vähemalt 1,8 m kõrgusele pörandast
28. Arge kasutage seda kerist vanni, duši ega basseini vahetus laheduses
29. Arge kasutage seda kutteseadet, kui see on maha kukkunud
30. Arge kasutage, kui kutteseadme kahjustamisel on nahtavaid marke
31. Kasutage kütteseadet tasasel ja stabiilsel pinnal voi kinnitage seeseinale, kui tootja seda ette naeb.
HOIATUS: Arge kasutage seda kütteseadet väikestes ruumides, kus on inimesi, kes ei suudaneid ise jatta, valja arvatud juhul, kui on tagatud pidev jarevalve.
HOIATUS: Tuleohu vähendamiseks hoidke tekstiile, kardinaid või muid kergestisüttivaid materjale küttekeha ðhu valjalaskeavast vähemalt 1 m. kaugusel.
Ohutuse tagamiseks on soovitatav, et elektripaigaldis oleks varustatud automaatse 30mA vooluvoolu kaitselulitiga.
Märkus: Kui toitejuhe või toitepistik on kahjustatud, tuleb seda alati asendada või remontida
II. HOIATUSED
1. Arge kunagi kasutage seadet, kui see on kahjustatud voi ei tota korralikult.
2. Arge kunagi kasutage seadet, kui see on enne korgust langenud ja naitab nahtavaid kahjustusi.
3. Arge kasutage pikendusjuhtmeid ega muid pistikupesasid, mis ei vasta kehtivatele standarditele ja elektriseadustele.
4. Kõikide osade remont, demonteerimine või valjavahetamine peaks alati toimuma spetsialiseeritud rajatise poolt.
5. Kui seade ja sellised elemendid nagu elektrilised kontaktid on marjad, tuleb enne seadme ja selle osade kasutamist kuivatada pistik voi kaabel.
6. Arge kasutage seadet margade katega.
7. Kui on oht, et seade on kahjustatud, arge kunagi proovige seadet ise parandada.
8. Arge kunagi peske seadet voolava vee all voi sellisel viisil, et vesi tilguks.
9. Arge kasutage lisaseadmeid, mida tootja ei soovita. Need voivad pohjustada kasutajale ohtu ja voivad seadet kahjustada.
10. Veenduge, et seade oleks enne ladustamist jahtunud.
11. Arge puudutage korpust kasutamise ajal. Kasutage tootamise ajal ainult nuppe ja luliteid.
Pärast valjalulitamist oodake, kuni seade jahtub.
12. ETTEVAATUST. Möned seadme osad voivad tootamise ajal vaga kuumaks muutuda ja pöhjustada poletusi.
III. ENNE ESIMESE KASUTAMIST
1. Eemaldage koik pakkematerjalid ja sirutage toitejuhe
2. Seadet ei tohi paigaldamise ajal katta isolatsioinimaterjaliga voi sarnase materjaliga
3. Seadme kokkupanemisel tohiks talasid ega sarikaid Iogata ega Iogata
4. Enne esimest kasutamist lugege koik kasutusjuhendid.
5. Kontrollige, kas toote rattamargisel olev pinge vastab teie koduvorgu pingele
INSTALATSIOON
Kasutage puuri, et puurida seina kaks auku, vahemalt 180 cm porandast ja 20 cm laest - joonis A. Kui olete augud puurinud, sisestage pad ja kruvi. Veenduge, et kruvid on korralikult kinni keeratud, seejarel riputage seadeseinale.
TOOTEKIRJELDUS
Pilt B. Peamine Iuliti
ON/OFF = Lulita sisse /valja lulitatud.
Pilt C. Kaugjuhtimispult
1. ON/OFF-nupp
2. MODE 7. MIN
3.PAEV
4.CLOCK
5. SET UP
7. MIN
6. Nadal / aeg
8. + -> Temperatuuri tõstmise nupp. Samuti toimib valiku nupp aja / päeva jaoks.
9. --> Temperatuuri alandamise nupp. Samuti toimib valiku nupp aja / päeva jaoks.
10. RESET - taimeri lāhtestamise nupp
Pilt D. LED PANEL
1. Surname ON
2. Kuttevoimsus 1000W
3. Kute voimsus 2000W
4. AUTO funktsioon
5. Temperatuurinäidik
6. Päeva kuvamine
7. Aja kuvamine
8. ON II sumbol - taimer käivitub
9. OFF-sumbol - taimeri seiskamine
10. Avage akna tuvastamise funktsoon
IV. KASUTAMINE
1. Seadme sisse- ja valjalulitamiseks vajutage seadme parental kuljel asuvat pealulitit - pilt B.
2. Seade on nuud ootereziimis. Vajutage kaugjuhtimispuldi sisse / valja nuppu (1) - Pilt C.
3. Törežiimi valimiseks vajutage korduvalt nuppu MODE (2):
- 1000 W, seade soojeneb pidevalt 1000 W-ga.
- 2000 W, seade soojeneb pidevalt 2000W-ga.
- Automaatreziimis vajutage temperatuuri käsitsi seadistamiseks nuppe + ja - Seade lulitub temperatuuri sailitamise reziimi automaatset.
- Avatud akna tuvastamise fungtsion - kui see fungtsion on valitud, lulitab seade kuumutamise automaatset välja, kui toatemperatuur langeb järsult 10^ C.
4. Seadme väljalūlitamiseks vajutage kaugjuhtimispuldi sisse- ja väljalūlitusnuppu (1). Seade jahtub ja lūlitub välja umbes 30 sekundi pārast.
SISEMISEADME KELLA SEADISTAMINE
MARKUS. Kui te ei mära praegust kellaega ja nadalapäeva, ei töta seade korralikult, kuna see tootab vastavalt om sismisele kellaajale, mis on vale.
1. Valige nupu MODE abil funktsion AUTO.
2. Enne taimeri märamist märake nadalapäev ja kellaag:
- Vajutage nppu PÄEV ja valige nuppudega + ja - praegune paëv. Oodake, kuni ekraan lõpetab vilkumise.
Vajutage nuppu CLOCK ja määrake nuppude + ja - abil kellaag. Oodake, kuni ekraan lopetab vilkumise.
- Vajutage nuppu MIN ja seadke praegused minutid nuppude + ja - abil. Oodake, kuni ekraan lopetab vilkumise.
Taimeri programmeimise seadistamine - taimer
See funktsioon voimaldab teil programmeerida seadme sisse- ja valjalulitamise aega igal nadalapaeval soovitud ajal.
Tainerit saab seada alles pärast funktsooni AUTO valimist ja seadme sisemise kella seadistamist.
1. Vajutage nuppu NADAL / AJASTIK ja valige ndalapäev, mille jooksul sooivite seadme lilitada nuppude + ja - abil automaatelt sisse ja valja. Oodake, kuni ekraan lopetab vilkumise.
2. Pärast nupu SET UP vajutamist suttib ekraanil sömbol SISSE. Nüd saate märata taimeri algusaja. Taimeri käivitusaja seadmiseks kasutage nuppe CLOCK, MIN, + ja -. Oodake, kuni ekraan lopetab vilkumise.
3. Pärast uuesti nuppu NADAL / AJASTIK (6) vajutamist ja seejärel nuppu SET UP vajutades suttib ekraanil tähis VÄLJAS. Nüd saate taimeri valjalulitusaja seada. Oodake, kuni ekraan lopetab vilkumise.
MÄRKUS. Algusaeg peab alati olema madalam kui seiskamisaeg.
MÄRKUS Taimeri vaikesätete lahtestamiseks vajutage nuppu RESET.
V. PUHASTAMINE JA HOOLDUS
1. Enne puhasamist eemaldage alati pistik pistikupesast.
2. Kui puhastamise ajal, nagu näiteks pistik, termostaat, elektrikontaktid jne, enne kasutamist uuesti leotatakse, tuleb neid pohjalikult kuivatada
3. Arge kasutage korpuse puhastamiseks emulsionide, vedelike, pastade jms kujul agressivseid pesuvahendeid. Muuhulgas voivad naeemaldada info graafilised sumbolid, naiteks margid, hoitusmargid jne.
4. Enne puhastamist veenduge, et seade on jahtunud.
TEHNILISED ANDMED:
Pinge: 220-240V ~ 50 / 60Hz
Voimsus: 2000W Maks. Voimsus: 2200W Ip20

"Ettevaatlik kuum pind" - kasutatavate pindade temperatuur vöib seadme tootamise ajal olla körgem, mis tähendab, et corpuse tootamise ajal väga kuumaks jäavad.

KASUTADA" - SISSEJUHATUS TAHLEPANU Seadmel olev pealkiri tahendab, et seadet ei tohi kanda riideid, tekke
ega muid tekstiltooteid, mis voiivad pohjustada suttimist.

HOATUS: Arge kasutage seda seadet vannide, dusside, basseinide ja sarnaste veepaakide laheduses.

Hoolitse keskconnakaitse eest. Kartongist pakendid vi makulatuuri. Kilekotid (PE) viska kasutud plastiku jaoks ettenahtud mahittesse.
Kasutatud seadmed vi selleks ettenahtud kogumispunktidesse, sest seadmes leiduvad ohtlikud elemendid vovad olla kahjulikud keskonnae.
Elektriseadmed tuleb anda nii ar, et seadet ei saaks enam uesti kasutada. Kui seadmes on patareid, tuleb need valja votta jaanda eraldi
'kogumispunktli. Seadet ei tohi visata olmejätmete konteineritesse!!
(RO) ROMÁNă
TENTIE:
Dispositivul este destinat exclusiv uz casnic.
Dispositivul NU este destinat utilizarii commerciale sau professionale.
Aparatul NU este potrivit pentru utiliser in exterior.
Atentie! Inainte de utiliser, este esentiai sa citi cieste instruanti di utiliser para evita accidentele si pentru utiliser corecta a dispositivului. Păstraţi acest manual Şi păstraţi-l astfel incât sa il puteti/utiliza cu uşurinta.
I. ORIENTÁRIPENTRU SIGURANCTA UTILIZÁRII
1. Inainte de utilizes, verificati dacă tensiunea specifică pe placuța de identificare corespunde parametrilor locali de salinitate,insula nu uitași ca marcajul: AC-este current alternative DC este DC.
2. Conectaţi aparatul numai la o przyă de masă 220-240V ~ 50/60 Hz.
3. Inainte deutilizare, derulati si indreptati cablul de alimentare
4. Asiguraţi-vă că cablul de alimentareși stecherul nu prezinta deteriorarii vizibile
5. Inainte Şi in timpul utilizări, asigurați-vă că cablul de alimentare nu este intins pe o flacără descisă sai pe o alta sursă de caldură Şi muchii ascuțite care pot deteriorora izolația cablului.
6. Inainte de prima utilizes, scoatei toate componentele ambalajului. Atentie! In cazul unei carcase cu把这些 metalice, pe acoste elemente se poate intinde o folie protectoare uor vizibila, care trebuie, de asemenea, indepartata.
7. Dispositivul nu trebuie utilizes de copii, persone cu capacitate fizica, senzoriala sau mentala limitata fara supravegherea personelor autorizate sau cu experienta si intotdeauna in conformitate cu aceste instrutiuni.
8. Echipamentul nu este destinat'utilizarii cu intrerupatoare de tamp externe sau cu un system separat de comanda la distanța.
AVERTIZARE: Acest echipament poate fi utilizes de câtre copii cu vârsta mai mare de 8 aniși personale cu capacitate fizica, senzorială sau mentală limitataș sau persone care nu au experientă sau cunoșținteș despree echipamente, NUMAI dacă acest lucru se face sub supravegherea unei persone responsabile pentru sau au primit instrucțiuni privind realizarea in siguranta a dispositivuluiși sunt constcnti de pericolele associate realizarii acestuia. Copii nu ar trebui să se joace cu echipamentul. Curățareași intreținerea dispositivului nu trebuie efectuate de copii decât dacă au vârsta de peste 8 aniși sunt supravegheata
9. Nu lasaşi aparatul nesupravegheat in tampul functionarii.
10. Nu scufundati aparatul si cablul de alimentare in apa sau in alte lichide.
11. Când aparatul nu este utilizes, acesta trebuie să fie intotdeauna deconectat de la przya.
12. Când trajeți ștecarul din priză, nu trajeți niciodata cablul de alimentare de la priza numai.
13. Nu introduci niciun element METAL in interiorul dispositivului
14. Producătorul nu este răspunzător pentru daunele rezultate din utilizarea necorespunzătoare a dispositivului.
15. Trebuie să vă amintiţi că unele parti ale dispositivuluiși dulapul în tampul lucrului se
topesc foarte mult, deci aveti grijăși nu le atingeti, puteti fi ars.
16. NICIODATA nu acoperi dispositivul in timpul functionarii tau cand nu se raceste complet
17. Aminti-va cã elementele de incâlzire ale dispositivului necessita tamp sa se râcească complet.
18. Când utilizesci dispositivul, asigurați-va un spațiu adecvat deasuprași in jurul acestuia. Dispositivul nu trebuie să atingă obiecte ușor inflamabile în timpul lucrului, cum ar fi decoratiuni, prosoape de hârtie, perdele, imbracăminte etc.
19. Inczitorul instalat in baie trebuie instalat astfel incat conectorii si alte regulatoare sa nu poata fi atinse de o persona in cada sau sub duş.
20. In sistemele de incalzire pentru corpurile de altitudine ridicata, poziile diferitelor poziile ale conectorilor trebuie sa fie vizibile de la o distanța de 1 m
21. Etichetarea pentru acoperirea incălzitorului trebuie să fie vizibilă după instalare incălzitorului
22. Nu puteti amplasa incalzitorul direct sub prizași in apropierea materialelor inflamabile cum ar fi perdele, perdele etc.
23. Dispositivul nu poate fi utilizes cu comutatoare de tamp externe sau cu alte sisteme separate de comanda la distanța
24. Nu expuneti aparatul la conditi di atmosferice (ploaie, soare etc.) sau nu utilizati in conditi de umiditate ridicata (bai, case de camping umede)
25. Verificazioni periodiche starea cablului de alimentare. In cazul in care cablul de alimentare este deteriorarat, acesta trebuie inlocuit de o instalatie specializata de reparazioni pertru a evita pericolul
26. Nu utilizati dispositivul in apropierea materialelor inflamabile
27. Incalzitorul trebuie instalat la o inaltime nu mai mica de 1,8 m deasupra godelei Se recomanda ca instalata electrica sa fie echipata cu un intrerupator automat de current rezidual cu un current de pornire de 30mA pentru o siguranta sporita.
Notă: Dacă cablul de alimentare sau ștečărul de alimentare sunt deteriorate, acesta trebuie intotdeauna inlocuit sau reparat de un service specializat.
28. Nu utilizati acest incalzitor in imediata apropiere a unei cazi, du sau piscina
29. Nu utilizati acest incalzitor dac a fost scapat
30. Nuutilizati dacă existăsemnevizibile de deteriorarea incalzitorului
31. Utilizati incalzitorul pe o suprafata plana si stabila sau atasa-i la perete, dac a este prevazut de producator.
AVERTISMENT: Nu utilità acest incalzitor in incaperi mici in care exista personane care nu pot sa le lase singure, cu exceptia cazului in care este asigurata o supraveghere constanta.
AVERTISMENT: Pouru a reduce riscul de incendiu, tinei textile, perdele sau alte materiale inflamabile la cel putin 1 m distanța de orificiul de iesire a aerului incălzitorului.
II. AVERTISMENTE
1. Nu utilizaţi niciodă dispositivul dacă acesto este deteriorat sau nu functționează corect.
2. Nu folosiţi niciodata dispositivul dacă a cazut de la o inalțime înainteși prezinta semne vizibile de deteriorare.
3. Nu utilizaţi cabluri prelungitoare sau alte prize electrice care nu respectă standardele și reglementările în vigoare.
4. Orice reparati, dezmembrare sau inlocuire a unor把这些trebuie intotdeauna efectuate de o unitate specializata.
5. Daca dispositivul si elementele precum contactele electrice sunt umezite, fisa sau cablul trebuie uscate inainte de a utiliza dispositivul si componentele acestuia.
6. Nuutilizati dispositivul cu mainile ude.
7. Când există riscul ca aparatul să fi fost deteriorat NICIODATA nu incercăți să reparati singur aparatul.
8. Nu spalati niciodata aparatul sub apa curgatoare sa in asa fel incat apo sa picure in el.
9. Nu utiliatai accesori care nu sunt recomandate de producator. Acestea pot reprenta un pericol pentru utiliser si pot cauza deteriorarea dispositivului.
10. Asiguraţi-vă cà disposizitivul sa răcit înante de deposizare.
11. Nu atingeti carcasa in timpul utilizarii. In timpul functiionarii, utilizi numai butoane si intrerupatoare. Dupa oprire, astepta ci ca dispositivul sa se raceasca.
12. ATENTIE: Unele componente ale acestui aparat pot deveni foarte fierbinti in tampul functionarii si pot provoca arsuri.
III. INANTE DE PRIMA UTILIZARE
1. Scoatehatregul material de impachetare si indreptatc cablul de alimentare
2. In timpul instalarii, dispositivul nu poate fi in nici un caz acoperit cu material izolator sau material similar
3. La asamblarea dispositivului, grinzile 山 grinzile nu trebuie taiate sau taiate
4. Inainte de prima'utilizare, cititi toate instructiunile de utiliser.
5. Verificatu daca tensiunea indicata pe eticheta de esantionare a produsului corespunde tensiunii retelei de alimentare din locuin ta dumneavoastr
INSTALLATION
Utilizati burghiul pentru a gauri doua gauri in perete, la minimum 180 cm de podea si 20 cm de tavan - imaginea A. Odata ce ati forat gaurile, introduceti tamponul si insurubati. Asigurati-va ca suruburile sunt bine stranse, apoi agata di dispositivul de perete.
DESCRIEREAPRODUSULUI
Imaginea B. PORNIREA PRINCIPALÄ ON / OFF = TURN ON / YUTN OFF.
Imaginea C. CONTROLUL TELECOMUNICATIEI
1. Butonul ON / OFF 6.WEEK/TIMER
2. MODE 7. MIN
3 ZILE 8. + -> Buton pentru ridicarea temperaturii. De asemenea, serveste ca buton de selecţie pentru tamp / zi.
4.CLOCK 9. --> Buton pentru scaderea temperaturii. De asemenea, servețe ca buton de selecție pentru tamp / zi.
5. SET UP 10. RESET - butonul de resetare temporizator
Imaginea D. LED PANEL
1. Simbolul ON 6. Afisarea zilei
2. Putere de incalzire 1000W 7. Afisarea orei
3. Putere de incalzire 2000W 8. Simbolul ON - pornerea temporizatorului
4. Functia AUTO 9. Simbolul OFF - oprine temporizatorului
5. Afiṣarea temperaturii 10. Deschideti functia de detectare a ferestrelor
IV. UTILIZARE
1. Apasati intrerupatorul principal din partea dreaptă a dispositivului - Poza B pentru a porni și opri dispositivul.
2. Aparatul este acum in regim de asteptare. Apasati butonul de pornire / oprire (1) de pe telecomanda - Poza C.
3. Apasati butonul MODE (2) la randin sau, pentru a selecta modul de operare:
- 1000 W disposizitivul se va incalzi constant cu 1000 W.
- 2000 W, disposizitivul se va incalzi constant cu 2000W.
- Mod automat, apasati butoanele + si - pentru a seta manual temperatura. Aparatul va intra automat in modul de mentinere a temperaturii.
- Funcie de detectare a ferestrei beschise - Când este selecţă această functie, disposizitivul va opri automatÎncălzirea dacă temperatura camerei scade brusc cu 10^ C.
4. Pentru a opri dispositivul, apasa t butonul on / off (1) de pe telecomanda. Dispositivul se raceste si se opreoste dupa aproximativ 30 de secunde.
SETAREA Ceasului de dispositive interne
NOTÁ: Dacă nu setați orași ziua curentă a săptamânii, dispositivul nu va functiònna corect deoarece va functiònna conform propriului ceas intern, ceea ce este incorrect.
1. Selectati functia AUTO folosind butonul MODE.
2. Inainte de a seta cronometrul, seta ziua saptamani si ora curenta:
- Apasati butonul DAY si selectati ziua curenta folosind butoanele ^+ si-. Astepta pana cand afisajul nu mai clipeste.
- Apasati butonul CLOCK si setati ora curenta folosind butoanele ^+ si-. Asteptati pana cand afisajul nu mai clipeste.
- Apasati butonul MIN si seta ti minutele curente folosind buoanele ^+ si - Astepta pana cnd afisajul nu mai clipeste.
SETAREA PROGRAMÄRII TIMEI - TIMER
Această functie va permite să programați ora pentru a porniși opri disposizitivul in ficare zi a săptamânii la ora dorita. Cronometrul poate fi setat numai după selectarea functiei AUTOși setarea ceasului intern al. disposizitivului.
1. Apasati butonul WEEK / TIMER.si selecanti ziua saptamani in care doriti sa setati dispositivul sa porneasca si sa se opreasca automat folosind butoanele ^+ si-. Asteptati panacand afisajul nu mai clipeste.
2. Dupa apasarea butonlui SET UP, simbolul ON se va aprinde pe afisaj. Acum puteti seta ora de pornire a cronometrului. Utilizati butoanele CLOCK, MIN, +si - pentru a seta ora de pornire a cronometrului. Asteptati pana cand afisajul nu mai clipeste.
3. Dupa apasarea din nou a butonlui WEEK / TIMER (6) si apoia apasarea butonlui SET UP, simbolul OFF se va aprinde. Acum puteti seta cronometrul. Asteptati panacand afisajul nu mai clipeste.
NOTÄ: ora de pornire trebuie sã fie intotdeauna mai mica decat ora de oprire.
NOTÀPentruareshetacronometrullasetärileimplicite,apasati butonulRESET.
V. CURATAREA SI INTRETINEREA
1. Inainte de curatare, deconecta tintotdeauna aparatul de la priza electrica.
2. Daca in timul curatarii articole, cum ar fi fisa de alimentare, termostatul, contactele electrice etc., sunt inmuiate inainte de a fi folosite din nou, acestea trebuie uscate bine
3. Nu utilizes detergenti agresivi sub forma de emulsii, lotiuni, paste etc. pentru a curata dulapul. Ele pot, printre altele, sa elimine simbolorile grafice informative, cum ar fi semne, semne de averizare etc.
4. Asigurat-vá cã dispositivul sa racit inainte de curatare.
DATE TEHNICE:
Tensiune: 220-240V ~ 50 / 60Hz
Putere: 2000 W Max. Putere: 2200W Ip20

"Atentie la suprafete fierbinti" - Temperatura suprafetelor disponibile poate fi mai mare atunci cnd echipamentul functioneazaa, ceea ce inseamna ca elementele carcasei devin foarte calde in timpul functianni in timpul functiarii, SAVE CU ATENTIE!

"NU INTRETI" - IMPORTANTA INSCRIPTIe Inscriptia pe disposizitiv inseamna că disposizitivul nu trebuie acoperit cu inte, păturiși alte produse textile care ar putea provoca aprinderea.

AVERTISMENT: Nu utilizati acest echipament in apropierea czielor, duurilor, piscinelor si rezervarelor de apa similare.

Din grija pentru mediu inconjurator. Ambalajele din carton va rugam sa le transmiteti sa centrele de maculatura. Saci din polietilena (PE) trebuie aruncate in recipientele pentru materiaelele plastice. Dispositivul uzat trebuie transmis la punctul corespunzator de depositare, deoarece componentele periculoase care se gasc in dispositiv pot fi foarte periculoase pentru mediu inconjurator. Dispositivul electric trebuie transmis in aea fel incat sa se limiteze utilizezarea lui repetata. Daca in dispositiv se gasc baterii acestea trebuesc scoase si transmise catre punctul de depositate a acestora, separat.
(BS) BOSANSKI
PAZNJA:
Ureaj je namenjenismo za kućnu upotrebu.
Urešaj NIJE namijenjen za komercijalnu / profesionalnu upotrebu.
Ure'daj NIJE pogodan za upotrebu na otvorenom.
Pažnja! Pre upotrebe, neophodno je da pročitate ovo uputstvo za upotrebu kako biste izbegli nesrece i pravilnu upotrebu uredaja. Čuvajte ovaj prisučnik i Čuvajte ga tako da ga možete lako koristiti.
I. SMJERNICE ZA SIGURNOST UPOTREBE
1. Pre upotrebe proverite da li napon navenen na natpisnoj pločici odgovara lokalmim parametrima saliniteta, ali zapamtite da oznaka: AC- je naizmenična i DC je DC.
2. Prikljucite ureadaj samo na uticnicu uzemljenja 220-240V 50/60 Hz.
3. Pre upotrebe odvijte i ispravite kabl za napajanje
4. Uverite se da kabl za napajanje i utikač nemaju vidljivih ostecenja
5. Pre i tokom upotrebe, uverite se da kabl za napajanjeijke rastegnut preko otvorenog plamena ili drugog izvora toplote i oštrih ivica koje mogu oštetiti izolaciju kabla.
6. Prije prve uporabe, uklonite sve komponente pakiranja. Pažnja! U slučaju kucišta sa metalnim dijelovima, na ovim elementima moze se rastegnuti blago vidljiva zaštitna folija, koju takoder treba ukloniti.
7. Urešaj ne treba koristiti djeca, osobe s ograničenim fizickim, osjetilnim ili mentalnim sposobnostima bez nadzora ovlastenihi ili iskusnih osoba i uvijek u skladu s ovim uputama.
8. Opremaijke namijenjena za koriistenje s vanjskim vremenskim prekidačima ili zasebnim sustavom daljinskog upravljanja.
UPOZORENJE: Ovu opremu mogu koristiti djeca starija od 8 godina i osobe s ograničenim fizickim, osjetilnim ili mentalnim sposobnostima, ili osobe koje nemaju iskustva ili znanja o opremi, SAMO ak se to radi pod nadzorom osobe odgovorne za njihovo bezbednosti ili su dobili uputstva o bezbednej upotrebi ureðaja i svesni su opasnosti u vezi sa njegovom upotrebom. Deca ne bi trebalo da se igraju sa opremom. Cišćenje i održavanje ureðaja ne smiju izvoditi djeca osim akso su stariji od 8 godina i pod nadzorom
9. Ne ostavljaje uredaj bez nadzora tokom rada.
10. Ne potapajte aparat i kabl za napajanje u vodu ili bilo koju drugu tecnost.
11. Kada se uredaj ne koristi, uvijek ga treba isključiti iz utičnice.
12. Kada povlačite utikač iz utićnice, nikada ne vucite kabl za napajanje samo za utikač.
13. Ne stavljajte NO METAL ITEMS unutar uredaja
14. Proizvodač nije odgovoran za šte tastale usled nepravilnog korišćenja uredaja.
15. Treba imati na umu da se neki dijelovi uredaja i ormarica tijekom rada jako zagrijavaju, stoga budite oprezni i ne dirajte ih, možete se opeci.
16. NIKADA ne prekrivajte uredaj tokom rada ili kada se ne ohladi u potpunosti
17. Upamtite da grijacin elementima ureda treba vremena da se potpuno ohlade.
18. Kada koristite uredaj, osigurajte odgovarajuci prostor iznad i oko njega. Urej ne smedodirnuti lako zapaljive predmete tokom rada, kao sto su ukrasi, papirni ubusi, zavese, odeca itd..
19. Grijac instaliran u kupaonici treba biti instaliran takdo se osobe u kadi ili pod tusem ne
mogu dotak Nuti konektora i drugih regulatora.
20. U grijacima za nadmorske visine, pozicije razlicitih položaja konektora trebaju biti vidljive sa udaljenosti od 1 m
21. Oznaka zaPokrivanje grijaca mora biti vidljiva nakon ugradnje grijaca
22. Ne możete postavljati grijac direktno ispod utičnice i blizu zapaljivih materijala kao što su zavjese, zavjese itd..
23. Urešaj se ne može koristiti s vanjskim vremenskim prekidačima ili drugim odvojenim sustavima daljinskog upravljanja
24. Ne izlažite uredaj atmosferskim uvjetima (kiša, sunce, itd.) Ili koristite u uvjetima visoke vlažnosti (kupaonice, vlažne kamp kuće)
25. Povremeno proverite stanje kabla za napajanje. Ako je kabl za napajanje ostecen, trebalo bi ga zameniti specijalisticki servis kako bi se izbegao rizik
26. Nemojte koristiti uredaj u blizini zapaljivih materijala
27. Grijac mora biti instaliran na visini ne manjoj od 1,8 m iznad pada
28. Ne koristite ovaj grijač u neposrednoj blizini kade, tuša ili bazena
29. Ne koristite ovaj grijac ako je pao
30. Ne koristite ako postoje vidljivi znakovi ostecenja grijalice
31. Koristite grijac na ravnoj i stabilnoj povrsini ili ga pričvrstite na zid, ak to predviða proizvodač.
UPOZORENJE: Ne koristite ovaj grijac u malim prostorijama u kojima ima ljudi koji ih ne mogu sami ostaviti, osim ako nije osiguran stalni nadzor.
UPOZORENJE: Da biste smanjili rizik od požara, držite tekstil, zavese ili druge zapaljive materijale najmanje 1 m od izlaza za vazduh iz grejača.
Preporucije se da elektricna instalacija bude opreumljena automatskim prekidačem za preostalu struju sa početnom strujom od 30mA za povećanu sigurnost.
Napomena: Ako je kabl za napajanje ili utikač ostećen, uvek ga treba zameniti ili popraviti u specijalizovanoj radionici.
II. UPOZORENJA
1. Nikada ne koristite uredaj ako je ostecen ili ne radi pravilno.
2. Nikada nemojte koristiti uredaj ako je pao s visine prije iPokazuje vidljive znakove ostecenja.
3. Nemojte koristiti produktu kablove ili druge elektriche utichnice koje ne odgovaraju vazećim standardima i elektrichnim propisima.
4. Bilo kakve popravke, demontiranje ili zamjenu bilo kojeg rijela uvijek treba vršiti specijalizirana ustanova.
5. Ako su uredaj i elementi kao sto su elektrichi kontakti vlažni, utikač ili kabel treba osušiti prije korištenja uredaja i njegovih componenti.
6. Ne koristite uredaj vlaznim rukama.
7. Kada postoji rizik da je uredaj ostecen NIKADA ne pokušavajte sami popraviti uredaj.
8. Nikada ne perite urejad pod tekucom vodom ili na takav nacin da voda kaplje u nju.
9. Ne koristite pribor koji-nine preporučen od strane proizvodača. Oni mogu predstavljati opasnost za korisnika i mogu izazvati ostecenje uredaja.
10. Uverite se da se uredjohladio pre skladistenja.
11. Ne dodirujte kuciiste tokom upotrebe. Tokom rada koristiteismo dugmad i prekidace.
Nakon isključivanja, sacekajte da se urežaj ohladi.
12. OPREZ: Neki dijelovi ovog uredaja mogu se jakozagrijati tijekom rada i uzrokovati opekotine.
III. PRIJE PRVE UPOTREBE
1. Uklonite sav materijal za pakiranje i ispravite kabel za napajanje
2. U toku instalacije, uredjai ni u kom slucaju ne sme biti prekriven izolacionim materijalom ili slicnim materijalom
3. Prilikom sklapanja uredaja, grede i grede ne treba rezati ili rezati
4. Pre prve upotrebe procitajte sva uputstva za upotrebu.
5. Provjerite da li napon navenen na naljepnici za kvašenje proizvoda odgovara naponu mrežne mreže u vašem domu
INSTALACIJA
Koristite busilicu za busenje dva otvora u zidu, Najmanje 180 cm od pada i 20 cm od stropa - slya A. Nakon sto ste izbusili rupe, umetnite jastuci i vijk. Provjerite jesu li vici dobro zategnuti, a zatim objesite uredj na zd.
OPIS PROIZVODA
Slika B. GLAVNI PREKIDAC
ON/OFF UKLJUCENO/ISKLJUCENO.
Slika C. DALJINSKI UPRAVLJA
1. Dugme ON/OFF
2. MODE
3.DAN
4.CLOCK
5. SET UP
6.WEEK/TIMER
7. MIN
8. + -> Dugme za podizanje temperature. Takoše služi kao dugme za izbor vremena / dana.
9. --> Dugme za snizavanje temperature. Takode služi kao dugme za izbor vremena / dana.
10. RESET - Dugme za resetovanje tajmera
Slika D. LED PANEL
1. Simbol ON
2. Snaga grijanja 1000W
3. Snaga grejanja 2000W
4. AUTO funkcija
5. Prikaz temperature
6. Prikaz dana
7. Prikaz vremena
8. Simbol ON - uključivanje tajmera
9. OFF symbol - isključivanje tajmera
10. Otvorite funkcjju otkivanja prozora
IV. KORISTENJE
1. Pritisnite glavni prekidač na desnoj strani uredaja - Slika B da biste ukljucili i isključili uredaj.
2. Ureraj je sada u stanju pripravnosti. Pritisnite tipku za uključivanje / isključivanje (1) na daljinskom upravljač - Sika C.
3. Pritisnite tipku MODE (2) zauzvrat da odaberete režim rada:
- 1000 W uredaj ce se stalno zagrijavati sa 1000 W.
- 2000 W, uredjé se stalno zagrijavati Sa 2000W.
- Automatski rezim, pritsnite tipke + i - da biste ručno podesili temperaturu. Urežaj ce automatski uci u režim odžavanja temperature.
- Funkcija otkrivanja otvorenog prozora - Kada je odabrana ova funkcija, uredaj ce automatski iskljuciti grijanje ako temperatura u sobi naglo padne za 10^ C.
4. Da biste isključili urežaj, pritisnite tipku za uključivanje / isključivanje (1) na daljinskom upravljacu. Urežaj se hladi i isključuje nakon otprilike 30 sekundi.
POSTAVLJANJE UNUTARNJEG UREDAJA
NAPOMENA: Ako ne postavite trenutno vrijeme i dan u sedmici, uredaj nece raditi ispravo jer ce raditi u skladu s vlastitim unutarnjim satom, sto je netačno.
1. Pomocu gumba MODE odaberite funkciju AUTO.
2. Prijne nego sto postavite tajmer, postavite dan u sedmici trenutno vrijeme:
- Pritisnite tipku DAY i odaberite trenutni dan pomocu tipki + i-. Sačekajte dok displej prestaje da treperi.
- Pritisnite tipku CLOCK i podesite trenutno vrijeme pomocu tipki + i-. Sačekajte dok displeje prestaje da treperi.
- Pritisnite tipku MIN i podesite trenutne minute pomocu tipki + i-. Sačekajte dok displej prestaje da treperi.
POSTAVKA PROGRAMIRANJA TIMERA - TIMER
Ova fungcija omogucava programiranje vremena za uključivanje i isključivanje uredaja svakog Dana u sedmici uŽeljeno vrijeme.
Tajmer se moze podesitiismo nakon odabira fungcije AUTO i podesavanja unutarnjeg sata uredaja.
1. Pritisnite tipku WEEK / TIMER i odaberite dan u sedmici na koji zelite postaviti uredaj da se automatski uključuje i isključuje tipkama + i-. Sačekajte dok displej prestaje da treperi.
2. Nakon pritiska na taster SET UP, na ekranu ce se upaliti simbol ON. Sada mozete postaviti vrijemePokretanja tajmera. Koristite tipke CLOCK, MIN, +i-za podesavanje vremenaPokretanja tajmera. Sačekajte dok displej prestaje da treperi.
3. Nakon ponovnog pritiska na dugme WEEK / TIMER (6), a zatim pritisnete taster SET UP, na ekranu ce se upaliti symbol OFF. Sada mozete postaviti vrijeme isključivanja tajmera. Sačekajte dok displej prestaje da treperi.
NAPOMENA: vrijemePokretanja mora uvijek biti nizé od vremena zaustavljanja.
NAPOMENA Da biste tajmer vratili na zadane postavke, pritisnite taster RESET.
V. CISCENJE I ODRZAVANJE
1. Prijc ciiscenja uvijek iskljucite uredaj iz uticnice.
2. Ako se tokom cisćenja stvari kao što su utikač, termostat, elektrčni kontakti itd. Natopi prije ponovnog koristjenja, treba ih temeljito osušiti.
3. Nemojte koristiti agresivne deterdžente u obliku emulzija, losiona, paste itd. Za cisćenje ormarica. Oni mogu, izmedu ostalog, ukloniti graficke simbole informacija, kao što su znakovi, znakovi upozorenja, itd..
4. Uverite se da se uredaj prije ciścenja ohliado.
TEHNICKI PODACI:
Napon: 220-240V ~ 50 / 60Hz
Snaga: 2000W Max. Snaga: 2200W
IP20

"Oprezna vruca povrsina" - Temperatura raspoloživih povrsina moze biti veca kada oprema radi, sto znači da se elementi

kom rada jako zagrijavaju, SPASITE PAMJENO !!!
E POKLOPI" - NAPOMENA ZNACAJ Natpis na uredaju znaci da se uredaj ne smije prekriti odjecom,dekama i
stilnim proizvodima koji bi mogli izazvati paljenje.
ENJE: Nemojte koristiti ovu opremu u blizini kade, tuša, bazena i silčnih rezervoara za vodu.

Vodimo brig u prirodnom okoliu. Kartonsku ambala z molimo prenjeti na opadni papir. Polietilen (PE) vrece bacati u kontejner za plastiku. Istrosena
oprema treba biti premiestena na prikladno miesto za pohranu, ier sadrze u ureadiu opasne tvari moqu predstavliati opasnost za okolis. Elektricni
urei mora bitu predut u takuom staniu da se smanji moquinostnepov neopnu unotre. Ako vaš uretdai ima haterij, treha nih ukloniti i predatina
eudj mla bup uad a tavon stanju ca se sma jnoguohstjegovp ovoie opoeve. An vas eudj ma batenje, treba nijn kuniut predunat
mesto za pohranu odvojeno.
KARTA GWARANCYJNA
WARUNKI GWARANCJI obowiazujana terenie Rzeczpospolitej Polskiej
Adler Sp. z o.o. ul. Ordona 2a 01-237 Warszawa zapewnia Uzytkownika o dobrej jakosci sprzetu, na kóry wydana jest niniejsza karta gwarancyjna i udziela 24 miesiecznej gwarancji, kóra liczy sie od daty zakupu sprzetu. Uslugi gwarancyjne swiadczone są po okazaniu prawidlowo wypelnionej karty gwarancyjnej. Wady lub uszkodzenia sprzetu ujawnione w okresie gwarancji usuwane;bę bezplatie przyez Serwis Centralny. W przypadku zakupu sprzetu przyez przyedsiebiorce (faktura VAT) okres gwarancjiwynosi 12 miesiecy. Powyźszy zapis nie dotyczzy Jednoosobowych dzialnosci gospodarczych, o ile rodzaj zakupionego sprzetu,Nie jest zwiazany z profilem prowadzonej dzialnosci gospodarczej - weryfikacja w CEIDG.
W przypadku wymiany rzechy na nowa, albo po dokonaniu istotnej naprawy, okres gwarancji biegnie na nowo odchwili dostarczenia klienowirzechy wolnej od wad, lub zworocenia rzechy naprawionej. Jezelgwarant wymienil czescrzechy, przypeis powzyszzy stosujie sie odpowiednio do czesci wymienionej. Gwarant zobowiezuje siePokryc koszty dostarczenia rzechy do serwisu na adres wskazany w karcie gwarancjnej. Jednakze uprawniony z gwarancji powinien zachować rozsadek, wybierajuć srodek transportu. Uprawnionemu z gwarancji nie przysluguje od gwaranta zwrot kosztów dostarczenia towaru - rzechy do naprawy gwarancjnej , przyekraczajacy ekonomicznie uzasadnione koszty przywozu.
UWAGA: Sprzej przyznaczony jest wyłączne do uzytku domowego. Naprawami gwarancyjnych nie są objęte czynnosci zwiazane z odkamienianiem, konserwacja, czyszczemium urzadzenia oraz czȩci i akcesoria ulegañce zuźyciu przy normalnym uzytkOWANI. Gwarancja nie obejmuje mechanicznych uszkodzen sprzetu oraz wad i uszkodzenDyniklch wskutek:
-niewlasciwo golubniezgodnogo z instrukcja uzytkowania, przechowywnia i konserwaci;
-ingerencjiNieautoryzowanego serwisu,samowolnych napraw,przerobekizzmian konstrukcyjnych;
-użycia niewlasciwych materiałow eksplaatacyjnych.
-uszkodzen mechaniznych, termicznych, chemiznych i powstazych na skutek przypiecia w sieci.
-karta gwarancyjna jest nieważna bez daty zakupu, pieczeci sprezdajęcego i kopii dokumentu zakupu.
-gwarancja nie są objete elementy eksploatacjne i akcesoria w tym: elementy szklane (np. dzbanki, talerze), sznury przyłączeniowe, sieciowe, zarówki, baterie, noźyki i folie do urzadzen tnąych, nasadki miksujuce, trzechaki, mieszaki, ssawkoszczotki, rury, węze, kubki miksujuce, glowice tnące i sita.
Reklamowany sprzęt jest dostarczy do Serwisu Centralnégo przyez Klienta w stanie kompletnym i odpowiednio zabezpieczony na czas transportu. Po dokonaj naprawie reklamowany sprzęt odbierany jest z Serwisu Centralnégo przyez Klienta.
Termin usuniecia wady要去 zostac wyduzony o czas potrzejny do importu niezbędnych czosci, nie dluszny niz 30 dni roboczych. W kaźdym takim przypadku warsztat serwisowy powiadomi klien ta wyduzeniu terminu naprawy gwarancjnej. W zwiazku z koniecznosci sprowadzenia czosci zamiennych i poinformuje o nowym terminie usunięcia wady.
W przypadku stwierdzenia uterki nalezy ja zglosic w punkcie sprezazy lub w Serwisie Centralnym, ul. Ordona 2A, 01-237 Warszawa, tel. 728-595-006 lub e-mail: serwis@adler.com.pl.
W zgloszeniu prosze podac swoj adres, nr Telefonu i opis uterki. Do reklamaci konieczne jest dołaczenia kopii dokumentu zakupu.
Gwarancja nie wyłacza ani nie ogranica oraz nie zawiesza uprawnien kupujacego wynikajczych z przyepisów o rkojmi za wady rzechy sprezadnej.
SERWIS CENTRALNY
01-237 Warszawa ul.Ordona 2A
tel. 728-595-006
(data sprzedazy)
www.adler.com.pl serwis@adler.com.pl
(pleczatka sklepu i podpis sprezedawcy)
adnotace serwisu:


W trosce o srodowisko.
Opakowania kartonowe oraz worki polietylenowe (PE) nalezy wrzuać do odpwiednich pojemników przyznaczonych do selektwynej zbiórk i odpadów komunalnych zgodnie z ich opisem. Jeźeli w urzadzeniu znajduju sie baterie, nalezy je wyjac i obso ndo oddac do punktu zbierania i składowania. Zuzyte urzadzenia nalezy oddac do odpwiedniego punktu zbierania i składowania, gdyz znajdujuce sie w nim niebezmieczne substantjc mega stanowic zagrozenia dla zdrowia i srodowiska. Oznaczenia umieszczone na produktie wskazuje, ze urzadzenia nie nalezy wyrzuać do pojemnika z odpadami komunalnymi.
Zuzyt sprzet elektryczny, to odpady, ktore zawieraja substancje szkodliwe dla ludzi, zwierzati srodowiska. Substanjc te moga doprowadzic do zanieczyszczenia gleby, wody lub powietrze, a poprzej to moga sie dostac do organizu czwioeka i doprowadzic do licznych doleglwoosci zdrowotnych, takich jak: zaburzenia wzroku, stuchu, mowy, moga rowniez doprowadzic do uszkodzenia nerek, watroby i serca, oraz wywoa choroby skory. Substanje szkodliwe moga miec rowniez niedkorzystny wpyw na uklad oddechowy i Rozrodczy oraz doprowadzic do zamian nowotworowych. Spozyme roslin rosnacych na skarzonych glebach, oraz produktow powstalych z nich moze grozic w/w skukami zdrowotnymi.
Urzadzenia nie wyrzuać do pojemnika na odpady komunalne !!!
POLSKI
UWAGA:
Urzadzenie przyznaczone jest wyłacznie do uzytku domowej.
Urzadzenie NIE jest przyznaczone do uzytku komercyjngo/profesjonalneo.
Urzadzenie NIE jest przystosowane do uzywania na wolnymgowitzu
Uwaga! Przed użyciemNSEbybezwzględniezapoznaćsizniejszainstrukcja obstugi w celuunikcieniaieszczęsliwychwypadków oraz dla prawidłowego użycia urzadzenia.Instrukcjenelezy zachowaći przechowywaćtakbywrazie potrzebyłatwo możnabylo znej skorzystać.
I. WSKAZÓWKI DOTYCZACE BEZPIECZENSTWA UZYTKOWANIA
1. Przed uzyciemNSEZY sprawdzićczy napięcie podane na tabliczce znamionowej odpowiada mistryscowym parametrom zasalania przy czymNSEZY pAMIetać ze oznaczenia: AC- to prad przy przemienny a DC - to prad stały.
2. Urzadzenie nalezy podlączyc wyłącznie do gniażdka z uziemieniem 220-240 V ~ 50/60 Hz.
3. Przed uzyciem Rozwinac i wyprostowac przywod zasilajacy
4. Naleź zworcie uwage przy przewód zasilajcy oraz wtyczka nie posiadaźadnych widocznych uszkodzeń
5. Przed i podczas uzytkowania naleź wroćić uwage by przywód zasilajncy nie był rozciagnęty nad otwartym ogniem lub innym zródlém ciepla oraz na ostrych krawędziach, kró moga uszkodzić izolacje przyzewodu.
6. Przed pierwszym użyciem naleź usunść wszelkie elementy opakowania. Uwaga! W przypadku obudowy z elementami metalowymi, na tych elementach sąbe być naciągnieta mało widoczna folia zabezmiecząca, króra sączne sągneść.
7. Urzadzenie nie powinno byc uzywane przy czieci, osoby o agraniczonej zdolnosci fizycznej, czuciowej oraz psychicznej bez nadzoru/maps uprawnionych lub dozwiadczonych i zawsze zgodnie z niniejsza instrukcja.
8. Sprzęt nie jest przyznaczenia do pracy z użyciem zewétrznych wyłączników czasowych lub oddzielnego ukuładu zdalnej regulacje.
OSTRZEJEZENIE: Niniejszy sprzegtMZe by uzytkowy przez daneci powyzej 8 roku zycia oraz osoby o ograniczonej zdolnosci fizycznej, czuciowej lub psychicznej, lub osoby nie majace doświadczenia lub znajomość sprzȩtu, TYLKO jestli odbywa są to pod nadzorem osoby odpowiadajęcej za ich bezpieczeniastwo lub zostaly im udzielone wskazówki na temat bezpiecznych uzytkowania urzadzenia i mainszwiadomyść niebezmiecznych zzwiazanego z seinem uzytkowaniem. DzieciNie powinny baweć siedrzejtem. Czyszczenie i konserwacja urzadzenia nie powinna byc wykonywana przyez daneci, chybaź sa powyzej 8 roku zycia a czynnosci te są wykonywane pod nadzorem
9. Nie wolno pozostawiać urzadzenia bez nadzoru w czasie pracy.
10. Nie wolno zanurzać urzadzenia oraz przyȩcoma go w wodzie lub wźadnych innychcieczach.
11. Gdy urzadzenie nie jest uzywane zawsze powinno byc odlaczone od gniazdazasilajacego.
12. Przy wymiaganiu wtyczki z gniażda nigdy nie ciaginiż za przyȩwóź zasilajćy tylko za wtyczné.
13. Nie wolno władacźADNYCH METALOWYCH PRZEDMIOTów do wnatra urzadzenia
14. Producent nie odpowa da za szkody powsta wwyniku nieprawidlowego uzycia urzadzenia.
15. Naleź pamiętac, ze niedźole czȩci urzadzenia oraz obudowy w czasie przy bardzo są nagrzewaj dlatego naleź zachowania szczególny ostrożnosć i nie dotykać ich,ość są poparzyć.
16. NIGDY nie nakrywaj urzadzenia w czasie pracy ani gdy calkowicie nie wystygniie
17. Pamiętaj ze elementy grzejne urzadzenia wymagaju czasu by calkowicie ostygnAAC.
18. Korzystajac z urzadzenia nalezy zapewnic odpowiednia przyestrzen nad i wokóf, Urzadzenia podczas pracy nie要去 dotykaćźadnych latwo palnych przyedmiotów jak np.: dekoracje, ręczników papierowych, załon, odziezy itp.
19. Ogrzewacz montowany węziance, powinien być instalowy tak, aby sączniki i inneregulatory nie sągly być dotkni三点e przy czemu znajdujeść w wannie lub pod natryskiem.
20. W ogrzewaczach do mocowania na duzej wysokość wskazania rożnych połoędzymi sączników powinny byc widoczne z odlegloiść 1 m
21. Oznakowanie dotyczne przykrywania ogrzewacza powinno byc widoczne po zastalowaniu ogrzewacza
22. Nie:noza umieszczac ogrzewacza bezposrednio pod gniazdem wtyczkowym, oraz w..., poblizu materiałow latwopolnych takich jak firanki, zaşlonki itp.
23. Urzadzenia nie may na stosowac z zewnetrznymi wyplaçznikami czasowymi lub innymi oddzielnymi ukladami zdalnej regulaçji
24. Nie wystawiaj urzadzenia na dzialanie warunków atmosferycznych (deszczu, słonca, etc.) aniNie uzywaj w warunkach podwyźszonej wilgotnosci (lazienki, wilgotne domki kempingowe)
25. Okresowo sprawdzaj stan przyzewodu zasilajacjago. Jeźeli przyzewód zasilajczy jest uszkodzony, to powinien on byc wymiemeniony przyez SPECIALISTYCZY zlokad naprawczy w celuunikność zagrozenia
26. Nie korzystać z urzadzenia w=Poblizu materialów lwtwopalnych
27. Ogrzewacz musi byc instalowany na wysokość nie mniejszej nz 1,8 m nad podłoga
28. Nie uzywajingo grzejnika w bezposrednim sąsiedztwie wanny, prysznica lub basenu
29. Nie uzywajingo grzejnika, jesti zostat upuszczony
30. Nie uzywać, jestli istnieja widoczne slady uszkodzenia grzejnika
31. Uzywaj grzejnika na poziomej i stabilnej powierzchni lub przymocuj go do sciany, jesti producent przywidział takąMZlwość
OSTRZEZENIE: ie uzywaj unto go grzejnika w mazych pomieszczeniach, w ktorych znajduja N sie osoby, ktore nie są w stanie samodzielnie ich opuisci, chyba ze zapewniony jest nad nimi stały nadźór.
OSTRZEZENIE: Aby zmiejeśzyc ryzyko pożaru, tekstylia, zaśony lub inne materiały latwopalne, naleź trzymać w odlegloiść co najmiej 1 m od wylotu powietrzaogrzewAACZA.
Zaleca są by dla zȩększenia bezpieczność instalacja elektryczna była wyposzażona w automatyczny wyłącznik rożnicowoprady o pradzie uruchamiania 30mA.
Uwaga: Ješli przywośd zasilajćny lub wtyczka zasilajća ulegnie uszkodzeniu to bezwzgliednie wymiany lub naprawy zawsze powinien dokonać wyspecializowy zakład naprawczy
II. OSTRZEŽENIA
1. Nigdy nie wolno uzywać urzadzenia jest jest uszkodzone lub działa w sposobNieprawidówry.
2. Nigdy nie uzywać urzadzenia jestliwczesnej upadlo z wysokość i wskazuje widoczne oznaki uszkodzenia.
3. Nie uzywać przyȩzacje lub innych gniaźd elektrycznych które nie spełniaja obłowiazujacych norm i przyepisów elektrycznych.
4. Wszelkie naprawy, demontañ lub wymiana jakichkolwiek częsci zawsze powinno być dokonane przyż wyspecializowej zakjad.
5. W przypadku zamoczenia urzadzenia oraz elementów takich jak styki elektryczne wyczkaczy przyzewód przydzwyciem naleźny osuszyc urzadzenia i了我的 elementy.
6. Nie uzywaj urzadzenia mokrymi rękami.
7. Gdy zachodzi obawa, ze urzadzenie zostalo uszkodzone NIGDY nie naprawiaj urzadzenia samodzielnie.
8. Nigdy nie myj urzadzenia pod biezacwoda ani w taki sposob by woda do niego scekała.
9. Nie naleźy stosowej akcesiorów, króre nie są zalecane przyez produkta. Moga stanowania one niebezmieczność dla uzytkownika oraz powodowej ryzyko uszkodzenia urzadzenia.
10. Upewnic sie, ze urzadzenie wystygo przyd przechowywaniem.
11. W czasie uzytkowania nie dotykać obudowy. Podczas przy posluguwać siedtylkoPokretlami i przyȩćznikami. Po wylączeniu odczekać aź urzadzenia wystygnie.
12. UWAGA: Niektóre częscikiego urzadzenia moga podczas przystać są bardzo gorace i spowodowej oparzenia.
III. PRZED PIERWSZYM UZYCIEM
1. Usń wszelkie elementy opakowania i wyprostuj przywód zasilajacy
2. Podczas montaçu w zadnym wypadku urzadzenie nie maye byc Pokryte materialem izolacyjnm lub podobny material
3. Podczas montazu urzadzenia, belki krokwie nie powinny byc ciete ani nacinane
4. Przed pierwszym uzyciem przyȩstęwystycjie instruktowej uzytkowania.
5. Sprawdź,czynapiecie podane na etykcie oznaczajeczji produkt odpowiada napieci sieci energetycznej w twoim domu
Zdjecie C. PILOT ZDANEGO STEROWANIA
1. Przycisk ON / OFF
6. TYDZIEN / TIMER
2. TRYB
7. MINUTY
3. DNI
8. + -> Przycisk podnoszenia temperatury. Słowy rownikść jako przycisk wyboru czasu / dnia.
4. ZEGAR
9. --> Przycisk obniżania temperature. Słuź równeź jako przycisk wyboru czasu / dnia.
5. USTAWIENIA
10. RESET - przycisk resetowania timera (czasomierza).
Zdjecie D. PANEL LED
1. Symbol ON
6. Wyswietlanie dnia
2. Moc grzewcza 1000 W
7. Wyświetlanie czasu
3. Moc grzewcza 2000 W
8. Symbol ON - uruchomienie timera
4. Funkcja AUTO
9. Symbol OFF - węlącznik czasowy
5. Wskaznik temperature
10. Funkcja wykrywania okna otwartego
IV. ZASTOSOWANIE
1. Nacisnj wyłacznik glówny po prawej stronie urzadzenia - Zȩdekie B, aby wączyć i wyłacznę urzadzenia z zasilania.
2. Urzadzenie znajduje sie teraz w trybie gotowosci. Nacisnij przycisk wyczania / wyłuczania (1) na pilocie zdalngo sterowania - Zdjecie C.
3. Nacisnj kolejno przycisk MODE (2), aby wybrać tryb pracy:
- 1000 W urzadzenie bedzie stale nagrzewa 和 z mocaj 1000 W.
- 2000 W urzadzenie bedzie stale nagrzewa z moca 2000W.
- Tryb Auto nacijsnij przyciski + i-, aby ręcznia ustawic temperatur. Urzadzenie automatyczne przyejdzie w tryb utrzymywania temperatury.
- Funkcja wykrywania otwartego okna - Po wybraniu tej funkcj urzadzenie automatycznie wylaczy ogrzewanie, jesti temperatura pokojowa nagle spadnie o 10^ C.
4. Aby wyłaczyc urzadzenia naciśnij przycisk wączenia / wączenia (1) na pilocie zdalnégo sterowania. Urzadzenia ochlodzi są po okół 30 sekundach wyłaczy są.
USTAWIENIE ZEGARA WEWNETRZNEGOGURZADZENIA
UWAGA: Jesli nie ustawisz bieącego czasu i dnia tygodnia, urzadzenie nie bedzie działć poprawnie, poniewaź bedzie działo zgodnie z wąsnym zagarem wewétrznym, kóry jest niepejawidów.
1. Wybierz fungcjé AUTO za pomocaj przycisku MODE.
2. Przed ustawieniem timera nalezy ustawic dzisiejszy dzień tygodnia i bieść czas:
- Nacisnij przycisk DAY i wybierz aktualny dzien za pomoczy przycisków + i -. Poczekaj az wyświetlacz przystanie migać.
- Naciśnij przycisk CLOCK i ustaw aktuań godz引擎 za pomoczą przycisków + i-. Poczekaj ale wyświetlacz przystanie migać.
- Naciśnij przyczisk MIN iustaw aktualne minuty za pomocamy przyczisków + i-. Poczekaj aż wyświetlacz przystanie migać.
USTAWIENIE PROGRAMATORA CZASOWEGO - TIMER
Funkoja umozliwa zaprogramawanie czasu wączenia i wętaczenia urzadzenia w kaźdym z dni tygodnia o zȩdanej godzinie.
Timer:nozaustawictylko pwybraniufunkcjAuto orazustawieniu zegara wewnetrzngo uradzania.
1. Nacijsnij przycisk WEEK / TIMER i wybierz;dzień tygodnia w ktorym chcesz ustawic automatyczne wączenia i węlącenie urzadzenia za pomocamy przycisków + i-. Poczekajź wyświetlacz przystanie migac.
2. Po naciński przycisku SET UP na wyświetlaczu zaȩwieci są symbol ON. Możesz teraz ustawić czas uruchamiania timera. Za pomoczy przycisków CLOCK, MIN, + i - ustaw czas uruchomienia timera. Poczekajź wyświetlacznoprestanie migać.
3. Po ponownym naciński przycisku WEEK / TIMER, a nastepnie przyciński przycisku SET UP na wyświetlaczu zaȩwieci są symbol OFF. Teraz要去 zastawic czas wyłaczenia timera. Poczekajź wyświetlacz przystanie migać.
UWAGA: czas uruchomienia musi zawsze miec wartosc nizsza niz czas wylaczenia.
UWAGA Aby zresetowac timer do ustawien domyslnych, nacijsnj przycisk RESET.
V. CZYSZCZENIE I KONSERWACJA
1. Zawsze przyzed czyszczemien odłucz urzadzenia od gniazda zasilajacego.
2. Ješli podczas czyszczenia elementy takie jak wtyczka zasilajęca, styki przywodów elektrycznych regulatora termostatu itp. dostaną zamoczone przyd odownym użyciem sąȩ je dokladnie wysuszyć
3. Do mycia obudowy nie naleź uzywać agresywnych detergentów w postaci emulsji, mleczka, past, itp. Moga one między innymi usunąć naniesione informacyjne symbole graficznie takie, jak: oznaczenia, znaki ostrzejagawczy, itp.
4. Upewnicie, ze urzadzenie wystygo przy czyszczeniem.
DANE TECHNICZNE:
Moc: 2000W Moc maksymalna: 2200W
Zasilanie: 220-240V ~50/60Hz IP20

"Uwaga Goręca Powierzchnia" - Temperatura dostepnych powierzchni sąć wyźsa gdy sprz)]; pracuje, co oznacza są elementu obudowy w czasie pracy znacznie są nagrzewaj w czasie pracy urzadzenia, ZACHOWAJ OSTROźNOSC !!!

OSTRZEZENIE: W celu uniknięcia przyegrzania - nie przykrywać ogrzewacza

OSTRZEJEZENIE: nie stosować体系建设 w poplżu waniem, pryszniców, basenów i podobnych zbiorników z wodą
(HU) MAGYAR
FIGYELEM:
A keszülékCsak háztartási használatra keszült.
A keszülék NEM kereskedelmi / szakmai használatra keszült.
A keszülék NEM alkalmas kultéri használatra.
Figyelem! Hasznalat elott elengedhetetlen, hogy olvassa el ezt a hasznalati utasitast, hovy elkerulje a baleseteket es a keszülek helyes hasznalatat. Tartsa meg ezt a kezikonyvet es tartsa ugy, hogy konnyen hasznalhassa.
I. UTMUTATÓ A HASZNÁLATI BIZTONSÁGRA
1. Hasznalat elott ellenorizze, hogy az adattablan megadott feszultség megfelel-e a
sórtalom helyi paramétereinek, de ne feledje, hogy a jalolés: AC- valtakozó áram és DC egyenáram.
2. Csatlakoztassa a keszüléketCsak 220-240V 50/60 Hz foldelt aljzathoz.
3. Hasznalat elott huzza ki es huzza ki a tapkabel
4. Győződjön meg róla, hogy a pátkábel és a dugó nem látható károsodást okoz
5. Hasznalat elott es kozben ügyeljen arra, hogy a tapkabel ne nyuljon nyilt langra vagy mas hoforrasra es éles szélekre, amelyek károsithatjak a kabel szigetelését.
6. Az elso hasznalat elott tavolitsa el az osszes csomagoló alkatreszt. Figyelem!
Fémrészekkel ellatott burkolat eseten ezeken az elementen enyhén láthato védófolia nyújthato, amelyet szintén el kell távolitani.
7. A keszüléket nem szabad gyermekek, korlatozott fizikai, érzékszervi vagy szellemi kapacitással rendelkező személyek használni a felhatalmazott vagy tapasztalt személyek felügyelete nélkül, és mindig az utasításoknak megfeleloen.
8. A berendezést nem szabad külso idokapcsolókkal vagy kūlön távvezérlo rendszerrel használni.
FIGYELMEZTETÉS: Ezt a berendezést 8 évesnel idösebb gyermekek és korlátozott fizikai, érzékszervi vagy szellemi képességü gyermekek, vagy oyan személyek használatják, akiek nincs tapasztalata vagy ismerete a felszerelésról. biztonsággal, vagy utasításokat kaptak az eszközBiztonságos használatáról, és tisztaban vannak a használatával kapcsolatos veszélyekkel. A gyerekek nem jatszhatnak a berendezéssel. A készülék tiszításat és karbantartásat nem szabad vegezni gyermekek, kíveve, ha 8 évesnel idösebbek és felügyelet alatt állnak
9. Ne hagyja felügyelet nélkül a készüléket.
10. Ne merítse a keszüléket és a pátkábelt vizbe vagy más folyadékba.
11. Ha a keszülék nincs használatban, mindig le kell valasztani a halózati aljzatból.
12. Amikor a dugót kihúzza az aljzataból, soha ne húzza ki a tapkábelt csak a csatlakozóból.
13. Ne tegyen semmilyen fémelemet a keszülék besejébe
14. A gyartó nem vallal felelosséget a keszülék nem megfelelo hasznalataból eredő károkér.
15. Emlékeztetni kell arra, hogy az eszköz és a szek Rény egyes részei a munka során nagyon melegek, ezert ügyeljenek rá, és ne érjenek hozzá, megéghetnek.
16. SOHA ne takarja le a keszüléket muködés kozben vagy amikor teljesen nem hül
17. Ne feledje, hogy a keszülék fütoelemeinek idöbe telik, hogy teljesen lehüljön.
18. A keszülék használatakor gondoskodjon a megfelelo helyröl és környékéról. A keszülék nem érintheti a munka során konnyen gyulékony târgyakat, pédául diszeket, papírtörulközőket, fuggönyöket, ruházatot stb.
19. A furdószobába szerelt fūtótestet úgy kell felszerelni, hogy a csatlakozók és mas szabályozók ne érjenek a furdókádban vagy a zuhany alatt.
20. A nagy magassagú lámpatestek fütöberendezéseiben a csatlakozók különbozó poziaciónak helyzetét 1 m távolságból kellátni.
21. A fūtōberendezs fedelének címkézését a fūtōberendezs telepitèse után kell latni
22. A fütötestet nem lehet kozvetlen ü az aljat alá helyezni és gyúlékony anyagokra, pédául fuggönyökre, fuggönyökre stb.
23. A keszülék nem hasznáhlato külso idokapcsolókkal vagy más különallo támvezérlo rendszerekkkel
24. Ne tegye ki a keszüléket legköri körülményeknek (eső, nap, stb.) Vagy magas páratartalmú körülmények böztott (furdöszobák, nedves kempingházak).
25. Rendszeresen ellenorizze a tapkabel allapotat. Ha a tapkabel seruit, a veszely elkerulese erdekiben cserelje ki a szakservizt
26. Ne használja a keszüléket gyulékony anyagok kozeleben
27. A fūtōtestet telepīteni kell.
Javasoljuk, hogy a nagyobbBiztonsag erdekében az elektromos szerelvenyt 30mA -es inditoarammal ellatott automatikus megszakitóval szerelje fel.
Megjegyzés: Ha a tapkábel vagy a tapkábel megsérult, mindig cserélje ki vagy javitsa ki egy specialis javitómuhely.
28. Ne használja=ezt a melegítóf furdokád, zuhanyzo vagy uszómedence kozvetlen kozelében
29. Ne használja=ezt a fūtōtestet, ha leesett
30. Ne használja, ha a fūtés károsodásanak látható jelei vannak
31. A fútótestet sik és stabil felülen használja, vagy rögzítse a falhoz, ha a gyártó előirja.
FIGYELMEZTETÉS: Ne használja ezt a fūtōtestet oylan kis helyiségekben, ahol vannak oylan emberek, akik önmagukban nem képesek elhagyni öket, hacsk nim biztositják az állandó felügyeletet.
FIGYELEM: A tuzveszély csökkentése érdekében tartsa a textiliákat, fuggonyoket vagy mas gyulékony anyagokat legalabb 1 m-re a fütöberendeźes kimenetétól.
II. FIGYELMEZTETÉSEK
1. Soha ne használa j a készüléket, ha serult vagy nem mukodik megfeleloen.
2. Soha ne használja a készüléket, ha a készülék magassága korábban leesett, és latható károsodási jelei vannak.
3. Ne használjon hosszabbíto kábelt vagy más elektromos csatlakozót, amelyek nem feelnek meg a vonatkoź szabványoknak és elektromos előirásoknak.
4. Barmilyen alkatresz javitasat, szetszerelését vagy cseréjét mindig egy SPECIALIS letesitménynek kell elvegeznie.
5. Ha az eszköz és az elemek, például az elektromos érintkezők nedvesek, a készüléket és annak alkatrészeit hasznalat elött meg kell szárítani.
6. Ne használja a készüléket nedves kézzel.
7. Ha fennáll annak a veszélye, hogy a készülék megsérül, SOHA ne probálja meg javitani a készüléket.
8. Soha ne mossa le a keszüléket folyóviz alatt vagy oly modon, hogy a viz csepegjen bele.
9. Ne használja a gyartó altal nem ajánlott tartozékokat. Ezek veszélyt jelenthetnek a felhasználó szárára, és károsithatják a készüléket.
10. A tárolás elótt győzódjön meg arról, hogy a készülék lehult.
11. Ne érintse meg a hazat használat kozben. Múkódés kozbenCsak gombokat es kapcsolókat használjon. A kikapcsolás után varjon, amig a készülék lehül.
12. VIGYÁZAT! A keszülék egyes részei nagyon forróak lehetnek mücködes kozben és égési serülseket okozhatnak.
III. AZ ELSO HASZNALAT ELOTT
1. Távolítsa el az összes csomagóányagot és húzza ki a pátkábelt
2. A telepités során a keszüléket semmilyen esetben nem lehet szigetelóanyaggal vagy hasonlo anyaggal boritani
3. A keszülék összeszerelésekor a gerendákat és a szarufákat nem szabad vágni vagy vágni
4. Az elso hasznalat elott olvassa el az osszes hasznalati utasitast.
5. Ellenorize, hagy a termekrgztc cimk en feltuntett feszultseg megegyzik-e az otthoni elektromos halozat fszultsegivel
INSTALLATION
Használjon fúró, hogy fúrjön két lyukat a falba, minimum 180 cm-re a padlóól és 20 cm-re a mennyezetrol - A. kép. Ha már fúrta a lyukakat, helyezze be a padot és a csavart. Győződjön meg róla, hogy a csavarok jol meg vannak-e húzva, majd húzza fel a készüléket a falra.
TERMÉKLEÍRÁS
B. kép. FÖKAPCSOLÜ BE / KI = KI BE / KI KI.
C. kép. TÁVKÉSZÍTÖ
6. HÉT / IDÖZÍTÖ
1. BE / KI gomb
7. MIN
2. MODE
8. +-> A homérséklet novelesére szolgálo gomb. Az idö / nap kivalasztásigombkent is szolgál.
3. NAP
9. --> A homér séklet csökkentésére szolgálo gomb. Az idō / nap kivalasztási gombként is szolgál.
4.CLOCK
10. RESET - Timer reset gomb
5. SET UP
D. kép. LED PANEL
1. BE szimbóolum
6. Napi megjelenités
2. Futesi teljesitmény 1000W
7. Idō kijelzěse
3. Futesi teljesitmény 2000W
8. BE szimbólum - idózító indítasa
4. AUTO funkcioó
9. KI szimbólum - idzító kikapcsolása
5.Homerseklet kijelzoo
10. Nyissa meg az ablak eszlelesi funkciojat
IV. HASZNÁLAT
1. A készülék be- és kikapcsolásához nyomja meg a készülék jobb oldalán található fokapcsolot - B kép.
2. A keszülék keszlenéti allapotban van. Nyomja meg a tavirányító be-/ kikapcsoló gombjat (1) - C. kép
3. Nyomja meg egymás után a MODE gombat (2) az uzemmod kivalasztásahoz:
- 1000 W-nal a keszülk folyamatosan felmelegszik 1000 W-val.
- 2000 W, a keszülék folyamatosan felmelegszik 2000W-val.
- Automatikus üzemmodban nyomja meg a + és - gombokat a hörmséklet kézi beallitásához. A készülék automatikusan átvalt a hórmársklet-fenntartó üzemmodba.
- Nyissa meg az ablaküveg-érzekelő funkciot - Ha ezt a funkciot valasztja, a keszülék automatikusan kikapcsolja a fütest, ha a helyiség hórmár séklete hirtelen 10^ C-kal csökken.
4. Az eszkoz kikapcsolasyhoz nyomja meg a taviranyito be-/ kikapcsol gombjat (1). A keszulek lehul es kb. 30 masodperc elteltével kikapcsol.
A BELSO KESZULEK BEALLITASA
MEGJEGYZES: Ha nem allitja be az aktualis idot es a hét napjat, akkor a keszülék nem fog megfeleloen mukodni, mert a sajat belso oraja szerint fog mukodni, ami helytelen.
1. Valassza az AUTO funkciot a MODE gombbal.
2. Az idozitobéallitasa elott altitsa be a hetnapjét az aktualis idot:
- Nyomja meg a NAP gombot és valassza ki az aktuális napot a + és - gombokkal. Várjon, amig a kijelző vilogni nem kezd.
- Nyomja meg a CLOCK gombot, és allytsa be az aktuális idö t a + és - gombokkal. Várjon, amig a kijelző vilogni nem kezd.
- Nyomja meg a MIN gombot, és a + és - gombokkal allítsa be az aktuális perceket. Várjon, amig a kijelző vilogni nem kezd.
Idózító programozás BEÁLLITÁS - Idózító
Ez a funkció lehtöve teszi a keszülk be-és kikapcsolásanak idejét a hét minded napján, a kivist idöpontban.
Az idozitcscak az AUTO funkciokivalasztasa es az eszkoz belso orajnak beallitasa utan allithato be.
1. Nyomja meg a HÉT / IDÖZITÖ gombot, és valassza a hét napjat, amelyen a + és - gombok segitségével beállithatja, hogy az eszköz automatikusan be- és kikapcsoljon. Várjon, amig a kijelő vilogni nem kezd.
2. A SET UP gomb megnyomása után az ON szimbóolum kigyullad a kijelzón. Most beállíthatja az idóztó kezdési idejét. A CLOCK, MIN, +és - gombokkal allitsa be az idóztó kezdési idejét. Várjon, amíg a kijelzó villognem kezd.
3. A HÉT / IDÖZİTO gomb (6) ismetelt megnyomása, majd a SET UP gomb megnyomása után az OFF szimbólum kigyullad a kijelzón. Most beallithatja az idózító kikapcsolási idejét. Várjon, amig a kijelzó villogni nem kezd.
MEGJEGYZES: a kezdési idonek mindig alacsonyabbnak kell lennie, minta leallitasi ido.
MEGJEGYZES Az idzito alapertelmezzett beallitasainak visszaallitasahoz nyomja meg a RESET gombot.
V. TISZTÍTÁS ÉS KARBANTARTÁS
1. Tisztiţas elott mindig húzza ki a készüléket a halózati aljzataból.
2. Ha a tisztlatas soran, mint peldaul a halozati dugo, a termosztat, az elektromos erintkezok stb. Ujra hasznalat elott aztatjak, alaposan szaritsak meg oket
3. Ne használjon agressziv mosószereket emulziok, folyadékok, paszták stb. Formajában a szekrány tiszitásához. Ezek tobbek kozott eltávolithatják az informácios grafikus szimbólumokat, pédául jeleket, figyelmeztető jeleket stb.
4. Győzódjön meg rola, hogy a készülék tisztitás elölt lehult.
MUSZAKI ADATOK:
Feszültsg: 220-240V ~ 50 / 60Hz
Teljesitmény: 2000W Max. Teljesitmény: 2200W Ip20

"Figyelmeztetés forró felület" - A rendelkezésre allyfelületek homséklete nagyobb lehet a berendezés muködese kozben, enti, hogy a hazelemek muködés kozben nagyon melegek, ovatosan MENTES !!!
"NALJON" - FELHASZNALASI FONTOSSAG A keszülék felirata azt jalenti, hogy a keszüléket nem boritja ruházat, bogyeb textiltermékek, amelyek gyulladast okozhatnak.

EZETÉS: Ne használia jest a berendežest furdokádk, zuhanyzók, uzómedencék és haslonó vizartályok


Törödnk a természeti környezetiert. Papir csomagokat kérunk adjanak ápapirhulladékra. Polietilen zacskókat (PE) dobjanak ki a muanyag tartalyba. Kimerült gépe vissza kell adni a megfelelo taroló pontjához, mert a gépben levok veszélyes részek, veszedelmesek lehet a környezetnek. Az elektromos gép igy kell visszaadni, hogy korlátozzon a re-hasznalatát. Ha az elemek vannak a gépben, ki kell húzni ezeket és a visszakelladni kulön tároló pontjához.
(MK) MaKeDoHcKn
BHIMAHHE:
YpeIOT e HameHcT cMo 3a DomaHa yNoTppe6a.
YpeoT HE e HameHET 3a KomepujnaHa / npocnoHaHa ynoTpe6a.
YpeoT HE e noroen 3a ynoTe6a Ha OTBopeHo.
BnmaHne! Ppei ynoTpe6a, HeonxOndHO e da rI npoHTate OBne ynaTCTBa 3a pa6ota 3a da n36berHeTe HecpeKn i 3a npaBnHa ynoTpe6a Ha ypeDo. YyBaJTe ro Oba ynatCTBO n CyBaJTe ro 3a da MoKeTe IeCHO da Ro KOpNCtnte.
I. HACOKN 3A BE3BENDHOCT HA KOPINCTEHe
1. Ппед унотpe6а, повереTe Дали habонот habeDEн Ha TabлчКаТа 3a ИдентиФИкuaNiJa Ond罗вара на lokaJIHnITE napamETpn Ha coJeHocTa, Ho 3anOMHeTe DeKa O3HaKaTа: AC- e Han3MeHnUHa CTpyja n DC e DC.
2. Повретею ураздот сао co 220-240V ~ 50/60 Hz заemjenштөр.
3. Ппд уnotpeba, оTKaчete ro и Incpabete ro Ka6eIOT 3a HanojyBaHbe
4. Поберете дадистулnot кабел и ппклuyokot Нем вдлпвоштetyваьа
5. Ппеди за врeme на уnotpe6ata, осигура对接е сда Кабелот за наюльные在他 спportera ИЗ OTВОЕн памен Или друг ИЗВОР на ТОЛINHA и OCTPN paбови StTO може за ja
BHIMAHNE:
YpeDTo HameHcT cMo 3a DomaSha ynotpe6a.
YpeoT HE e hamehet 3a Komepujna / npocnoha nHa ynotpe6a.
YpeodrHEe noroen 3a ynoTpe6a Ha OTBopeHo.
BnImaHne! PpeynoTe6a, HeonxOndHO e da rnpouHTate OBne ynatCTBa 3a pa6ota 3a da n36berHeTe HecpeKn 3a npabunHa ynoTe6a Ha ypeoT. YybajTe ro Oba ynatCTBO n CyBaJTe ro 3a da MoKeTe IeCHO da ro KopnCTnte.
I. HACOKN 3A BE3BENDHOCT HA KOPINCTEbe
1. Ппед унотpe6а, поверete дали habонот habeDEн Ha tabлчkaТа 3a ИдентикauNiJa Ondroвара на lokaHHTe napamETPN Ha coJeHocTa, Ho 3anOMHeTe DeKa O3HaKATA: AC- e Han3MeHnUHa CTpyja n DC e DC.
2. Повретею ураздот симо co 220-240V ~ 50/60 Hz 3a3emjen wTekep.
3. Ппд уnotpe6a, откачete Ги Incравete Г КбелOT 3a HanojyBaHbe
4. Правешистуnot Кабел И пплuyokot Нем Вдпив Oштетуваа
5. Ппеди за врeme на уnotpeba tа, осигураjetе се.deka ka6eIoT 3a hanojyBaHbe He ce npOTera Hn3 OTBOpEN Пламен Илдpyг ИЗВОр Ha TOnJIInHa I OcTpNi pa6OBu wTo може DA ja oWTeTAT n3OlaциJa tа на Ka6eIoT.
6. Ппд пьада уnotpeба, отстранete Ги си te komnoheHTn 3a nakybahe. Виманe! Bo cnuyaj ha kyknшte co MeTaHn DeIOBn, Ha OBne eIemehn MOnke da ce npOTera maKy BvndnBa 3austHTHa Фолиja, koja nCTO Taka Tpe6a da ce OTCTpaHn.
7. YpeIOT He Tpe6a Da ro KopnCTaT Deca, Nua Co OraHnueh Pn3nKn, Cen3OpEn IIM MeHTaEN KanauTeT 6e3 HaD3Op Ha OBnacteHN IIN NCKyCHN Nua n CeKOraW BO CORlaCHOCT CO OBne yNaTCTBa.
8. Onpemata He e HameHeTa 3a ynoTpe6a Co haDbOpeuHn BpeMeHcN IpeKHyBaU nIi NocSeBEN daleuHcN ynpaByBaUcNTeM.
ПЕДУПЕДУBAHBE: Obaa onpema може да ѩ користд eca посту od 8 rodnu n Iица co orpaHnueHn cH3OPh nIIM MeHTaJIHn cNoCo6HocTn, nIIM Iицa kon HeMaat NCKyCTBO nIIN 3HaeHe 3a onpeMata, CAMO ako toa ce hAnpaBn pod haD3Op Ha Iицe odroBOPHO 3a HNBHATA 6e3BeHocTa nIIN ce daJeHn INHcTpkyCUnn 3a 6e3BeHNO KOpNCTeHbHe Na ypeDOT n Ce CBecHn 3a OnaCHOCHTte NOBp3aHn CO HeROBaTaN ynoTpe6a. DeZaTne Tpe6a dA cn irpaat co onpeMata. YncTeHbTo n OdpKByBaHbEtO Na ypeDOT He Tpe6a da ro BpWAT deca, oCBen akO He ce noctapn od 8 roDNHN iCe hAdrIeDuBaHN
9. He octabajte ro ypeodot 6e3 na3op 3a BpeMe Ha onepaunjata.
10. He ro notonybajte anapatot n Ka6eIOT 3a HanojyBaJIe BO BODa IIN dpyrN TeuHocTn.
11. Kora ypeodot He e Bo ynoTpe6a, cekoraaw Tpe6a da ce ncknyu on wTekep.
12. Kora Bnieye To npnKnyOkOT od uTekepoT, Hnkoraa He ro nobNekyBajTe Ka6eIOT 3a HanojyBaHe cAmo Co npnKnyOkOT.
13. He ctabajte rH METAJHNTE CPEICTBA BHaTpe BO ypeDoT
14. Поньдюнелот He e odrobopeh 3a wTeTn wTo ce pe3yJtAT Ha He npabnHa ynoTppe6a Ha ypeIOT.
15. Tpe6a da ce 3anomn deka hekon deIOBn od ypeoT n Ka6HHeToT 3a BpeMe Ha pa6oTaTa ce MHory JxuKO, na 6nTe BnMaTeJHn H He rN DoInpajTe, MoKe da ce n3rOpnte.
16. HNKORA He ro nokpnbajTe ypeoT 3a BpeMe Ha paoboteTo IJI Kora He ce OJAnu ZeIocHo
17. 3aONMHeTe DeKa rpejHnTe eIeMeHTn Ha ypeoT 3a3emaat BpeMe da ce Olaadat ueIOCHO.
18. Kora ro kopnstte ypeodot, obe3beTe cooDBeTeH npocToP naN okOly. YpeodT He Cmee da dOnnpa IecHO 3aapanBn PpeMeTn 3a BpeMe Ha pa6oTaT, KaKo yKpacn, XapTneHn Kpnn, 3aBeCn, ObleKa nTH.
19. Геаньeto Инстаимрано BO баьатуpeba дa сидешпсалрно takа StTo KOнжторпес и дугпес ретулатори He можат дa сидат ДОпрени od Лице BO kaда ти по Туш.
20. Bo rpejaun 3a ypeu co BncoKa HAdMopcka BncoUHa, noJox6nte Ha pa3nHnTe nOJx6n Ha KOHeKTopiTe Tpe6a da 6nDaT BnIINBn Co OndaJeHocT od 1 m
21. Etuketata 3a noKpmbHe Ha rpejauo Tpe6a da 6nde BnJnBa nO nHctalaujata Ha rpejauoT
22. He moxe Te da ro HameCTnte rpejaOT dinpeKTHO IOd ITekepot, n BO 6n3nHa Ha 3aapanBn MaTepnjaiN KAKO wTO Ce 3aBeCN, 3aBeCN nTH.
23. YpeIoT He MoKe Da Ce KOpNCTn Co HaBOpEuHn BPeMeHcKn PpeKnHyBaun IIn DpyrI nOce6Hn CnCTeMn 3a DaJIeUHcKO ynpaByBaHbe
24. He ro n3noxybajte ypeoT ha aTMocepckn ycnoBn (doxd, coHcE, nTH.) IJIIN BO ycnoBn Ha BnCOKa BnaXHOCT (6aHbN, BnaXHN KaMnH KyKn)
25. Перношино поверува对接а на Кабелот за Наноюва对接е. Ако Кабелот за Наноюва对接е оштeteн, Треба дд го замени Спецьлзиран сервс 3д дд ИЗбоггете onachoct
26. He kopncTeTe ro ypeoT Bo 6n3nHa Ha 3aapanBn MaepnjaJIi
27.「peeheto mopa da 6nnde nHCTaInpaHO
28. He kopructeTo oOBJ rpejau Bo HnocpeHa 6n3nHa Ha KaJa, Tuw nnn 6a3eH
29. He kopructe ro oboj rpejau ako e ncyuTeH
30. He koprncTeTe aKO nMa BnJnBn 3HaaN Ha OwTeTyBaBe Ha rpejaOT
31. KopinCTeTe ro rpejaOT ha pamHa n ctaBnHa NOBpUnHa NII IN 3aKaYeTe ro Ha theNDot, DOKoJky e IpreDbNIDeHO OD IPOIN3BOIDNTeIOT.
ПЕДУПЕДУBAE: He kopисеу OBOJ rpejau BO mAn npocstopn KaDe uTo nMa lyre Kon He moXaTcamn da rN OCTaBaT,OCBeH aKO He ce obe36eN noctoJah NaD3Op.
ПЕДУПЕДУBAE: 3a Да Гу hamajnte ризIKOT OД NOЖAP, Држete Г TeKCTNIOr, 3aBeCITE ИИnpTe 3anaiBn MaTePnjaJIи OndaIeueHn HajMaIky 1 m Od ИЗЛe3OT Ha BO3dUxOT Ha rpejaYoT.
Ce npenopaulyba eIektpnHaT a HcTaIauJia da 6nde onpeMeHa co aBTOMaTCKN
прешивач со прешивача стура с capтна стура за полесma 6e3б endocct. 3a6endeшka: Ако кабелOTа наюльье ппnpклуокOTа стура ce oштeteни, cekoraw trpe6а да се заменат ппл поразват od спеццяализиран рpopадица 3a nonpaBkn.
II. IPREyIpyBAHbA
1. Hikorai He Kopinctete ro ypeot ako e owteteh nll He yHKnOHa npabnilho.
2. Hikorai He KopinTeTe ro ypeoT aKO naHaI od BnCnHa npeTxOJHO I NOKaKByBa BnDnBn 3Haun Ha OwTeTyBaJIe.
3. He kopncTeTe npoJoxHn Ka6Iu nn dpyr n eJeKtpnuHn npNKnyOuCn KOH He rNcNoJHyBaat BaXeUKeTc STaHdapn N eJeKtpnuHnTe npOnscn.
4. Cekoja nonpaBka, demontaxa nIi 3ameHa Ha cIte deIOBn cekoraTpeBa da bnde HaprabHea od cneuJaIIN3npaH objekt.
5. Ако урети селемпгд Кабо StTo ce eelktpnHITe KOHTaKTHc He HablaJxH, npNKnyokot nIи Ka6eNot Tpe6a Da ce cywaTпрд Дa ГКориСТИte урети И HerOBNTe KOMNOHEHTN.
6. He kopncTeTe ro ypeDoT co BnaXn paue.
7. Kora nocton p3nk deka ypeoTe oWTeTeH NIKOgAaH He ce obnyBaJte camn da ro nonpaBnte ypeoT.
8. Hnkoraaw HeMoJTe Da rO MneTe ypeoT nOd npOTOnHa BOda nIi Ha TAKOB hauH hTO BODaTa Teue BO Hea.
9. He kopncTeTe DoaToCu KOn He rN npenopayBa npo3BODnteIoT. Tne moKe da npetCTaByBaat OnaCHOCT 3a KopnCHNKOT N MOKe Da npedn3BnKaat OwTeTyBaHe Ha ypeDoT.
10. yBepete ce deka ypeoT ce oJaI nped cKpaIpaIbe.
11. He ro donnpajte kyknteTo 3a BpeMe Ha ynoTpe6bata. 3a BpeMe Ha pa6oTaTa, KopncTeTe cMo KOnuHbA n PpeKInHyBaun. IIO NCKnyUyBaHBeTo, NOueKaJTe ypeIoT da ce OlaAn.
12. BHIMAHINE: Hekon DeNoBn OJ OBOj ypeJ MoKe Ja CTAHaT MHOrY KeuKO 3a BpeMe Ha pa6oTaT a N da npEiN3BnKaaT n3ropeHnCn.
III. INPEDINPBATA YNOTPEBA
1.ИЗваде тоцелnot материлдза пakуbaьe и справete то кабелот знановуваьe
2. 3a BpeMe Ha HnctaIaujata, ypeDOT BO HnTy eDen cIyaj He Cmee da 6Ie IOKpneH co n30laucckn MaTepnjaI nn CInueH MaTepnjan
3. Kora ro coctabvate ypeoT, rpeu npaepn He Tpe6a da ce ceat nn ncevat
4.прд npвata ynotpe6а почитajte nCITe yntaTcBa 3a ynotpe6a.
5.Поберете дали наонот habeден Ha 03нakata 3a CTabaHe Ha npoI3BOJOT OДROBapa Ha HanoHOT Ha eJIeKtpuHaTа Мржа BOBaUNOT DOM
NHTAJNJALJNA
KopncTeBeBex6a3aDaBex6aTeDBe DynKn BO SuOTo, MmHmym 180 cm od nooT n 20 cm od TabaHOT - CnkaA. OTkako Ke ng dynuat DnyknTe, CTabeTe ja pamna n 3abptKa. PpOBepeTe daan 3aBPtKne Tce eoBo 3aTeHaTu n NoToa 3akaueTe ro ypeoT ha SuOTo.
ONIC HA PPOIN3BOIDOT
CnkaB.ΓaBEn npeknHyBaay
CnkaB.DAJEueH KOHTPOJIOP
1. Konque 3a BknyuBaBe / NcKnyuBaBe
2. PEXKIM
3.ДEH
4.CLOCK
5. NocTABN
6. HENELA / TAJMEP
7.MNH
8. + -> Konue 3a nokaybahe Ha tempepatpata. IcTo Taka cnjxK KaO konue 3a n36op 3a BpeMe / den.
9. --> Konque 3a HamaJyBaHBe Ha TempepaTypaT. VcTo Taka cnJxN KAKO Konue 3a n36op 3a Bpeme / den.
10. RESET - Tactepceetnpahe konue
CJnkaIJIENI PAHEn
1. OK-cmm60n
2. FrpeHbe 1000W
3.Грени 2000W
4.ABtOMaTcKaΦyHKuJa
5. Tempepatyeh Dmncnnej
6.Дnevенпнka3
7.Пикжуbahe Na Врето
8.ONIcM60J-TajmepCTapTyBa
9. OFF CnM60N - NCKnyyBaHBe Ha TajmepoT
10. OTbOpn ja yHKuJaTa 3a oTKpBaHbe npO3Opu
YIOTPE6A
1. PnTnCHeTe ro IaBHNOT pekHbay Ha deChata cTpaHa Ha ypeDoT - Cnka B.
2. YpeIOT cera e BO peXIM Ha NOIroTBeHocr. PnITnCHTe ro KonUeTo 3a BkNpyBaHe / NckNpyBaHe (1) H aIaNepHcKnOT ynpabyBaCnka C. 3a da ro BknyuHte BeHTnlaTopoT 6e3 rpeeHe, PnITnCHTe ro KonUeTo 3a BkNpyBaHe / NckNpyBaHe (1) DbanaTn.
3. Пушистelve то ковто MODE (2) за заюразовен реким:
1000W - YpeDTo nocTojano Ke 3arpeBa co MoKHOcT Od 1000W.
2000W - YpeDTo nocTojano Ke 3arpeBa co MoKHOcT od 2000W.
Auto - Пушистене + и - за рачно за ща наимостиные темпатура. В овол щеким уретот ке щорхи поставна темпатура.b
Функцима за оtmрваье на позорец - КORA визбрана obaa Функцина, уретот abTomatски ке ГИСКПУН ггөнөто akottemпатура на собна темпатура неаджю падне за 10 ° C.
Tajmep
Tajmepot moke da ce noctabn camo kora e n36pana fynkunjata AUTO.
1. N36pepe AUTO cyHKuJa co KOnue MODE.
2.Прд Да Го NOCTaBNTe TajMepOT, MOPa Да Го NOCTaBNTe DeHOT И ВИСТИСКOTO BpeMe.
3.Пи捜сichteгКОнчETO DAYиИЗберeteгТЕКOBHNotДEH co KONCHbata+И-.
4.ПиТССЕТе ГОКУЧЕТСLOCKИ NOCTABETe TEGOBHOT ac CO KONUHbTa+I-
5.ПиТССЕТоКОЧETOMINиnoCTaBTeTnTEKOBHITeMHyTuCOKOnuHa+N-
3a6eNeuKa: Ako He ro nocTaBnTe BnCTnHcKTo (ctpyja) BpeMe H deH, ypeDoT Hema da paBoTH npabINHO, bndeJKN Ke paBoTN cnopeD CONCTBeHNOT BHaTpeSeH YacOBnK, ITO e HeToyeH.
IOCTABYBAHbE HA TAJMEPOT
1.ПиТиСеTe ro konTuTo WEEK/TIMERи n36peTe ro DeHOT co konUHb+ -
2. Co npntckahe Ha konyeto SET UP, cmboJOT ON Ke cbetHe Ha ekpaHOT. Cera moKte Da ro nocTaBnTe BpeMeTo Ha CTapTyBaHe Ha TajMepot. Co konuHaTc CLK, MIN, + n - noCTaBeTe ro BpeMeTo Ha CTapTyBaHe Ha TajMepot.
3. NOBTO npTnckaHe Ha konueTo SET UP, cimboonot OFF ke ce 3anaHn Ha ekpaHOT. Cera moKeTe da ro nocTaBnte TajMepoT BpeMe 3a ncknyBaHe.
3A6EJIeUKA:BpeMeTo Ha 3aOnuHyBaHBe cekOraM Oma IMa IOHNsCA BpeHOCT OD BpeMeTo Ha NcKlNyBaHBe.
3A6ENEUKKA 3a da ro pecetnpate TaJmepoT Ha OCHOBHnTe NOCTABKn, npntncheTo KOncHeTo RESET.
V. YICHTEHbI N ODPKUBAHbE
1. Cekoraw ncknyute ro anapatot od ctpyja nped da ro ynctnte.
2.Ako 3a BpeMe Ha YnCTeHbEt O npEiMeTn, KAKO ITO CE npNKnyyOKOT 3a HAnoJyBaHe, TepMoCTaT0, eIeKTPnuHHTe KOHTaKTn UTH. Ce HATOnyBaat PpeNIOBTOpHO Da ce KopNCtAt, Tne Tpe6a Da ce cyuata
3. He KopncTeTe arpcBHN DeTepreHTN BO φOpMa Ha emyI3n, IocnoHn, nactn, nTH. 3a YncTeHe Ha Ka6nHeToT. Tne, mery dpyrTo, MoKAT Da rN OTcPaHaT INΦopMaTbHNte rpaФuKn Cm60JI, kako wTO ce 3NaU, npdeynpeDyBaKn 3HaUNrN.
4. YBepete ce deka ypeoT ce onaann nped ncehe.
TEXHNUKINODATOLU:
Hanoh:220-240V\~50/60Hz
Mokhoct: 2000W Makc. Mokhoct: 2200W
IP20
"BHMaHne Ha TOnla nobpunHa" - TemnepaTypata Ha doCTanHte nobpunMoKe da bnde noroIema kora onpeMaTa paBTo, 3NaH deKa eIemEnTe Ha KyKuTTeTO 3a BpeMe Ha paBoTeHbETo CTAHyBaAT MHOry XeIKN, 3aCyBajTe BHMATEJIHO!

DBP3AHN" - BAXKHOCT 3A HANPEIYBAH E Hanncot Ha ypeoT 3nau Deka ypeoT He Tpe6a da ce nokpmba co a, kebba n dpytn TEKTUNHn npon3BOOn ITO MOJE da ppei3BnKaat nahebe.

TIPENYBAHbE: He KopncTeJe ja Obaa onpeMa BO 6Jn3Ha Ha KaDn, TyuSeBn, 6a3eHn n CInuHn pe3epBoapn 3a Boda.

Ce rpnKIMe 3a npnpOHaTcpeiHa. KapTOHCKITe NaKOBMOJIMe Da ce HameHaT 3a peuKNIPAhe. POnJIeTIHeOBHTe Kecn (PE) da ce oPnat BO KOHTeHep 3a Npactka. NcKOpNCTeHnot ypeI Tpe6a Da ce npeJaTe BO COoDBeTHNOt CKJaDnpaKINyHK, 6ndejkn He63bHNITE COCTOJK KN Ce HAOfAAT BO ypeOT MoKaT Da 6nDaT 3aRpo3yBaHe 3a cpeiHaTA. ENEKTPnuHnOT ypeI Tpe6a Da ce npeJaTe Ha HauHH Koj Ke OHeBO3MOxN HeROBa NOBToPA HYoNTpe6a N NcKOpNCTyBaHe. IOKOIky BO ypeIDOT hMa 6aTePN, Tpe6a Da ce n3BaDat NIOce6HO Da ce npeJaTaT BO CKJaDnPaUKnOT pNYKT.
(GR) EAAA
BHIMAHHE:
YpeDTo HameHcT cMo 3a DomaHa yNtpe6a.
YpeodrHEe hamehet 3a komepujnaHa / npocnoHaHa ynotpe6a.
YpeodrHEe noroedn 3a ynoTpe6a Ha OTBopeHo.
BnmaHne! PpeynoTpe6a, HeonxOndHO e da rI npoHTate OBne ynatCTBa 3a pa60Ta 3a da n36BerHete HecpeKn i 3a npabNHa ynoTpe6a Ha ypeDoT. CyBaJTe ro OBA ynatCTBO n cyBaJTe ro 3a IecHo da ro KOpNCtnte.
I. HACOKI 3A BE3BENHOCT HA KOPINCTEbe
1. Ппед улотpe6а, поверete дали habонot habeDEн BO tabnukata co noDAtoCuOДROвара на lokaHHTe napametpn Ha coJeHocTa, HO 3anomHeTe DeKa O3HaKaTAt: AC e Hau3MeHnUHa CTpyja n DC e DC.
2. Поврете суpeдот со заименштекер od 220-240V ~ 50/60 Hz.
3. Ппд уnotpe6a, оTKaчete ro и IncnpaBte ro Ka6eIOT 3a HanojyBaHbe
4. Ocnrgpajte ce deka ka6enot 3a HanojyBaHbe n npNKnyOKOT HeMa BnIINBn OWTeTyBaHa
5. Ппеди за врeme на уnotpe6a, поверете далл кабелOT 3a habоюваье He ce npotera Hn3 OTBOpeH памен Или дуг ИЗВОР Ha TOnJIInHa N OCTprn pa6OBn wTO можe DA ja oштetedТИЗOLAцида Na KabelenOT.
6. Ппед пьату уnotpeба, отстране ти спес комноенти за пakуbaи. Вимани! Вслчaj на Ккшte co MeТАни DeЛови, Ha OBne eLemeHTN може да ce npOTera малКУ ВдЛИВа 3aштITHa Фолиja, koja nCTO takTpeба дa ce OTCTpaHи.
7. Ypeodot He Tpe6a Da ro KOpncTaT Deca, Nua co OgrpaHnueh Fn3nukn, Ceh3opeH nI MeHTaJIeH KanaunTeT 6e3 HAd3Op Ha OBnAcTeHn NII NCKyChn Nua n CeKOraW BO CORnaCHOCT CO OBne yNaTCTBa.
8. OnpeMaTa He e HameHeTa 3a yNoTpe6a co HaBOpEuHN BpeMeHcKn IpeKInHyBaU nIIN Noce6eH daleuHcKn ynpaByBauch cNCTeM.
I P E D U N P E D Y B A H E: O b a a o n p e m a m o x e d a j a k o p i c t a T d e z a n o c t a r n o d 8 r o d h n i n I n u s a c o o r p a n h u e h n f i n 3 u q k n, c e h 3 o p h n i n M e n t a l h n C n o c o 6 h o c t n, i n n I n u s a k o H e m a a t n c k y c t b o i n i n 3 h a e h b e 3a o n p e m a t a, C A M O a k o T o a c h a n p a b v n p o d h a d 3 o p h a n i e od r o b o p h o 3a H H B h a t a 6e36e d h o c t a i n i n c e d a d e h n i n H N C T p y k u n i n 3a 6e36e d h o
KopncTeHe Ha ypeoT n Ce CBeCHn 3a pn3nUte NOBp3aHn Co HeroBaTa ynoTppe6a. DeaTa He Tpe6a Da cn irpaat Co onpeMaTa. YnCteHeTo n OdpjyBaHeTo Ha ypeoT He Tpe6a Da ro BpHaT Deca, OCBeH aKO He Ce Noctapn oD 8 roDHH n Ce HndrIeDyBaHN
9. He octabajte ro ypeoT 6e3 na3op 3a BpeMe Ha onepaunjata.
10. He ro notonybajte anapatot n ka6enot 3a hanojyBahe BO BODa nn npyrn TeuHocTn.
11. Kora ypeodot He e BO ynoTpe6a, cekoraaw Tpe6a da ce ncknyu on wTekep.
12. Kora ro Bneute npNKnyOKOT od uTekepot, HNKORAHe ro nobNekyBajte Ka6eIOT 3a HanojyBaBe cAmo npeky npNKnyOKOT.
13. He ctabaje rH METAHITE CPECTBA BHaTpe BO ypeoT
14. Поньделове Нема дбидо odrobopeн 3a Нкakba wTeTa wTo npOn3JIeRyBa od He npabnHaT a ynoTppe6a Ha ypeDOT.
15. Tpe6a da ce 3anomn HeKa HeKo DeJIOBn OJ ypeDOT KabHcTOT 3a BpeMe Ha pa6otata ce MHOry KeShko, Na 6nTe BHNMaTeJIHn H He rN DoInpajTe, MoKe da ce n3rOpHTe.
16. HNKORA He ro nokpnbajte ypeodT 3a BpeMe Ha pa6otebeTo nn Kora He ce onaHn ceNocho
17. 3aONHete deka rpejHnte eIeMeHTn Ha ypeIoT 3a3eMaat BpeMe da ce Olaadat ueIOcho.
18. Kora ro kopnstte ypeoT, obe36eTe cooDBeTeH npocTo pHa n Okony. YpeoT He Cmee da donnpa IecHO 3aapanBn PpeMeTn 3a BpeMe Ha pa6OtaTa, KaKO yKpAcN, XapTneH KpN, 3aBeCn, ObleKa NTH.
19.「pejaot nHctaInpan BO ToaIeTOT Tpe6a da 6nDE nHCTaInpan Taka ITO KOHeKTOpnte IN dpyrnte peryIatopn He MoKAT da 6nDat OJnpEno Jnue BO KaIata Nn PoD Tyw.
20. Bo rpejau n 3a ypei n co BncoKa hAmOpcka BncoUHa, noJox6nte Ha pa3nHnTe InoJx6n Ha KOHeKToPte Tpe6a da 6nDaT BnIINBn Co OndaJeHocT od 1 m
21. EtnkeTnpaHbeto Ha rpejauot Tpe6a da 6nde BnDnBO no nHctanaJata Ha rpejauot
22. He moxe Ta ro HameCTnte rpejaOT dIpeKTHO IOd ITekepot, n BO 6n3nHa Ha 3aapanBm MaTepnjaiN KaKo 1TO Ce 3aBeCN, 3aBeCN nTH.
23. YpeIoT He Cmee Da Ce KopnCTn Co HaBOpEuHb BpeMeHcN PpeKHyBaU INI INpyr Ioc6Hn CnCTeMn 3a DaJIeunHcO ynpaByBaHe
24. He ro n3nojyBajTe ypeIOT Ha aTMocΦepckn ycNoBn (doXd, coHcE, nTH.) IInn Bo ycNoBn Ha BnCOKa BnaJxHoCT (6aHbN, BnaJxHn KaMnHn KyKn)
25. Перношино поверувajte ja соктоьату на кабелOT 3a наюжваъ. Ако кабелOT 3a наюжваъ e оштeteн, Треба за го замени спесиjsлизран сервис 3a за избerte onachoct
HekopncTeTe ro ypeoT BO 6n3nHa Ha 3aapanBm Maepnaja
27. FrpeHbeto Mopa da 6nde nHCTaInpaHO
28. Mny xnpoiopoiei te autnv tn thepmaotpa o e aecn yietviaon m taviepa, vouc n Tioiva
29. Mny xnoiopoioite auty tn 0epuaotpa ev exe I Teo
30. Mny to xpnoiopoite εav utapxouv opata onuáia βλαβns oTo θερμavtnpa
31. Xpnoiopoioiote Tn 0epmuotpa oE eTinTcN kai Otaeepn Etniavia n ouvdeote Tnv otov toixo, ev npoBtETa aToTov kataoKeuaoTn.
IIPOEIOIH2H: Mny xnpoiopoite autnv tn 0epmuotpa 0e mikpa domegaata oTou utapxouv atou Tov dev mtopouv va ta aqnoouv mova touc, ktoc ev eaoaaiZetai ouvxnc EpiBleu.
IIPOEIOIHsH: Ia va 1 Tov Kivduvo Tnpkayiac, qualste Ta uqaoata, tic kouptivec n aaaa eukekta uikac o aotaaon toulaxioTov 1 m aTnV Edo tou
Συνιοτάται η έλεκτρίκή εγκαταστασην α εΙναι εφοδίασμένη με αυτόματο διακόπτη προστασίας ρεύματος με ενα ρεύμα εκκίνησης 30mA για αυξμένη ασφάλεία.
Σημείωση: Eáv to kaλώδιο tροφόδοσίας ἡ Φις tροφόδοσίας εύναι κατεοτραμένο, πρέπει πάντa va αντικαθίστatai ἡνα Επιοκεύαζεται από Εξεδικεύμένο συνεργείο επιοκεύων.
II. PPOEIADONOIHSEIE
1. Mny xpnoiopoioieite n ooukeun eav ev iai kateotpaumevn n dev leitoupyei oomega.
2. Mny xpnoiopoioie iTE Tn OuaKeuun Eav Exe I Teo eI aTIO uOoc Tpiv KAI Emuavi ZeI opata oNmuia Znmuic.
3. Mny xnpoiopoite Kaawia eKtao n aAe ng nEKTpiKc TpiEc Tou dEv Pnpuv ta Ixovt a pOtt a kai Tou c NkTkoC kavoviooC.
4. OTOIAHNTTE EITIOKEU, aTOSUVAPMOLOYNO n avTKATAOtaON oTIOIOWDHTOTc EApTNmuTsw PpETIE TAVTA va yivei aTIO E\xIDIKUeVn EyKatotaON.
5. Eav n ouokkun kai ta otoixia otwoc i naekptkec eTaae c ivai uypa, to buo a n to kaowio tha pntie va oteywoei piv xnpoiopoioeTe tn ouokun kai ta eapntmuata nC.
6. Mn xpnoiopoioite tn ouokueun BpEymueva xepia.
7. Œtav utápyéi kívóuvoc va kataoTPaΦéi ng ouokéuñ NOTE μnv πpooTαθnoεTE va επιοkeuáσεTE Tg ouokéuñ móvoi σaç.
8. Noté μην πλένετε ηισύοκεύμενο ἀρό ἡτέχούμενο τέτοιο τόποώτε σας ας αὐτό.
9. Mny xnpoiotoiite aegouap Tou dev ouviotwtai aoekuaotn. Mtopei va o Kivduvo tov npoTn kai va pokaesouv OTN OUKEUN.
10. Bεβαιωθείτε ὄτη Σιοκεύν ἐχει κριώσει πριν αποθηκεύσετε.
11. Mny ayyizTe to TepiBAnma kata tn xpno. Kata tn Ieitoupyia, xpnoiopoioaneo vivo Koupiia kai diakottec. Meta tnv atevepyotoinon, TepiEvTe va kpuwoe i n ouokeuñ.
12. ΠΝΟΣΟΧΗ: Μρισμένα εξαρτήματα αυτής της συσκεύncyς μπορείνα εἶναι πολύ ζεστά κατά τη λειουργία καινα προκαλεσουν εγκαύματα.
III. PINTHN POTXPHSH
1.Apaipoe 0Ao to uAiko ouakeuaiaac kai iowto KaAioTO pOPOOoi
2. Kaia t n diapkeia ts ekyataaon, n ouokue n de vtopei o Kauia pipintwn va kalutntai eovotikó uliko n npopoiou uliko
3. KaT a Tn ouvapmooyon tns ouokueu, oI bokoi kai ta bokapia ev npetie va KOTOUV n VA KOTOUV
4. Piv aTó tvn pWtn xpon δiaβaote oλεs tiC oDnyiecs xponc.
5. ELevTe av n tao n Tou avaypapetai oTnv etiketa tropoobocia c Tou TPOIOVTOC AVIOIIXe OTNV taon tou dIKTuOu PEuMaTOc OTo OTiIa
ETKATAZTAZH
Xpnoiotnoiote trpntavi ia va tputnnoet e duo tputte c oTov tox, ToulaxioTov 180 cm aTo To daTebo kai 20 cm aTo Tnv opooh - EkoA A. Moic exete tputnne i Tc tputte, totoetne To paElaapi kai BiDwate. Bbaiaowte ot i oi BiEc eivai kaIa Ophiyevcs, otN ouVexia, Kpeaote tn oukeun otov tox.
IPIIPAΦH IPOIONTO
Eikova B. KPYIOZ DIAKONTTHZ
EvpyoToin / aTeevpyoToin = evpyoToin / aTeevpyoToin.
Eikova T. THALEXIETHPIO
1.Πλκτρο ON/OFF
6.WEEK/TIMER
2.AEITOYPTIA
7. MIN
3. HMEPA
8. +-> Koupiyia tny auogon tnC thepokpaiaac. Eiongs xpoiueu C koupi Eioiyng yia wpa / nepa.
4.CLOCK
9. -->Koumiyia t n i nTgEepokpaoiac.Eionx npnoieuei ogoupi Eiloyngia wpa /nepa.
5.PYOMIISH
10. RESET - Kouμπί επιαφοράς χρονδιακόπη
EkoaA. INAKALED
1. Σύβολo ON
6. Eupavion nepas
2. Ioxus θερμανος 1000W
7. Eμφανιση ωρας
3. Iaxus Θερμανος 2000W
8.ΣuβoLo ON - EkkivnTou xpoovδiaKoTTn
4. Αειτουργία AUTO
9. Σύβολo OFF - διακοπή χρονοδιακόπη
5. Evδειξη θερμοκρασίας
10.AvoiE Tn 5eToupyia EvToTIOuOu npapAeupw
IV. XPH\SH
1. Pio Tov Kupio biakottn ot n deiia npca oukeunc - Eikova B yia va evpyotoinoe kai va anvepeytoinoe tn ouakeun.
2. H ouokuei eivai wpa oE kataoaon avauovn. Pntote to koupti evpyooinan / aeepyooinan (1) 0to nAeipio - Eikova
3. Patnote to koupti MODE (2) tn aipa tou yia va eIeEeTov tpoTIOuropyiac
- 1000 W η συοκεύν θα θερμαίνεται συεχώς με 1000 W.
- 2000 W, η συοκευή συνεχώς ὄρμαίνεται με 2000 W.
- Autouatn aeitoupyia, patnoe ta kouptia + kai - yia va puthetaiote xipokivnta tn thepokpaia. H oukeun eioepxetai autopata ot n aeitoupyia ouvtnpnans thepokpaiaac.
- Aetoupyia avixveuans aoivxto npapou - Otav autn n aeitoupyia evai eTIAeYmuyn, n ouokun th a aneepeyotoinaei autopata tn 0epmuovn evn 0epukpaa domegaifou eiw0ei faviKa tata 10^
4. Tia va aTnevepyoToiAoTe Tn ouKeuH, PAnote To PAnKtpo EvpyoToiOng / aTnevepyoToiOng (1) OTO nAeXeiPioTpio. H ouKeun Kpuwvei Ka oNvE i e Ta an Tepitou 30 dutepeoAeTTa.
PYOMIISH TOY XPONOY E2ΩTEPIKHΣ ΣYZKEYH
ZHMEIΩSHE:Aev DEv puθmuεTe TnV TPexouoawpa KAI TnV Nμepa Tcεβδoáac, n OuaKeuñ δev θa λεitoupynoει σωotá επeɪñ θa λεitoupynoεi ouφwva μe To δikó Tnc EσωtepiKO poλoi, to OTIOEivai Eσφαμévo.
1. Eπλεξτη λειουργία AUTO xρησιμοπιωντας το πλήκτρο MODE.
2. Piv aTo t n puOthou xpoovOpou, oioTe TnV npEpa Tns Ebdouaac kai Tnv tpexoua wca:
- Pntote to koupti DAY kai etiEeT nTv tpxouo a npoiotioivac ta koupiia + kai -PiepveTe eowc otou n oovn otapatoei va avbaoBnei.
- PIIeTe To TnAknTpo CLOCK kai puθmuTe Tnv Tpexouoawpa xpnoiotoiwvtac ta koumtia + kai - . NepiéveTe εως ὄtou n οθovn έαμatnoει va avαβοσηνει.
- PataoTE To KOUPTI MIN KAI puOmuTe Ta TpexovTa AenTAt XpnoiopoToiWvTac Ta KoumuTia + Kai -. IepiuEvTe EwC otou n ofoVn OtaaatnoeI va avaoBnvei.
PYOMIENIPOPTPAMMATMOYQPA
Autn n aeitoupyia oac eTTIPeTEI va TPOypaumiaTe Tnv wpa yia va evpyoioaete kai va aTVEpyoioaote Tn ouakeun Kahe nepa Tns Eboaadocntv Etiuun
O xpvodiaokontns mtopei va puthetai movo apou eTNIAEETe Tn aeitoupyia AUTO kai puthetaiEte To eoWTEPIK oPoiI nS oukeuNc.
1. PatnoTe To koupti WEEK / TIMER Kai eTtaleTe Tnv nepa Tns 8bodopa aotv onoia 0eAte va puthetaiaetn oukeun va evpyotoieitai Kai va anvepeytoioietai autouata xpojmuotoiwrtac ta kouptia + Kai - . Pepieveete ec otou n ofoyn taatane i avaboBnei.
2. Apou patnoe To koupi SET UP, to ouoLo ON avaei otnv oovn. Twa ptnopeite va puthetaene tvw npa evapcns tou xpvobiaokottn. Xpnoiopoioote ta nnktpa CLOCK, MIN, + kai - yia va puthetaene tnv wpa evapcns tou xpvobiaokottn. Pepievee Tc otou n oovn otapatnoe i va avaoobhvei.
3. Apou πatnoεe gavá to kouμπi WEEK / TIMER (6) kaση Μυνεχει πεοντας to πλκτρo SET UP, to σύμβολo OFF θα αναψει στην oθόνη. Tupa μπορείte va puθμioεte to xρονο atnevepyoioinας tou xρovδiaokntη. Περιεveτε εως στου ηοθόνη σταμαποει va
avaooohv1.
ΣHMEIΩΣH: o xρονος εναρξης πρεπει πάντα σελίνι μικρότερος από τον xρόνο διακοπής.
HME H Ia va eaTavaapepeTe Tov xpvovdiakontn otic npoetiiayevecp uthetaic, pntote to koupti RESET.
V. KAΘΑΠΣΜΟΣ KAI ΣYNTHPHΞH
1. Pniv aTo ToV kaOaIpo aToouvdeTe TAVTO TOn OoKEUn aTo Tn VPiCa.
2. Av kata n diapkeia twv epyaioov kathetaiou, oTiwG to G, o epuoTatns, oi nEKTPIKc ETTAPcK.AT., evai EPTOTIOeva Tpiv ETTAVAXPOIPOIOINOuV, PPETIE va OTeyvwosouv KA
3. Mny xnpoiuioite EITIOEIA aToppuavTKa ME Tn oopn yaaKwAATWv, Aooiv, TAOV K.AiVa KaOApiaeTe To TepiBnauaMToPOuv, mTaagu aaawv, va apaipeouuva Ypapikca OmuoIa TAnpoopoiw, OTWC IVAKIDc, TPOEIOTIONTIKa anata K.ATI.
4. Bebaiwoeite 0ti n oukeun eXe kpuooi piv kaapoe.
TEXNIKA ΔΕΩOMENA:
Táon: 220-240V ~ 50 / 60Hz IoXúC: 2000W Méy. IoXúC: 2200W Ip20

kata nIeitoupyia, ePONTIA!
"Ppoooxn kautn eTia" - H 0epuokpaia twv diaeoiw eTipaveiw mtopei va evai yalutepn otav aeitoupyio EoTlOIOc, npayma Tou omaive oTI ta oToyEA Tou ppihmuato yivovta TLOU zotata ndiapkeia tnc aeitoupyiac

"MHN KAAYTEPATE" - ERTPAΦH Σημασία H επιγραήσι Πησιοκεύν σημαίνει ὄτι Σιοκεύν δεν πρέπειν αλάντει ται έρουχα, κουβέρτες και ἀλλα κλωτούφαντουργία προίόντα ΠΟθα μπιρούσαν vα προκαέσουν ανάφεξη.

IIOIHs: Mn npnoiopoIE autov tov eoio kovia o e naiaviepe, vouc, Tioive cai npapoioe dqaevee

的 to 10000000000000000000000000000000000000000000000000000000000000000000000000000000000000000000000000000
(CZ) CESKY
POZOR:
Přistroj je určen pouze pro domácí použití.
Přistroj není určen pro komerčné Či profesonální použiti.
Přistroj NENI vchodné pro použítí venku.
Pozor! Pred použitim je nezbytné precist si tento námod k obsluze, abyste predesli nahodám a správnému používání zařizení. Uchovávejte tuto priručku a udržujte ji tak, abyste ji mohli snadno používat.
I. POKNY PRO BEZPEČNOST POUžITÍ
1. Před použitím zkontrolujte, zda napěti uvedené na typovém štītku odpovídá mistrím parametrům slanosti, ale nezapomeće, ze označeni: AC- je střidavý proudly a Jednosměrný proud DC.
2. Pripojte zařizení pouze k uzemné zásuvce 220-240V ~ 50/60 Hz.
3. Pred použitím odpojte a napnéte napájecí kabel
4. Ujistete se, ze napajeci snura a zastrcka nemaji zdné viditelné poskozeni
5. Pred a po použiti se ujistete, ze napajeci kabel není napnut prs otevřeny plamen nebo jiny zdroj tepla a ostre hrany, které mohou poskodit izolaci kabelu.
6. Před prvním použitím odstrańte věsechny současti baleni. Pozor! V pripadě pouzdra s kovovými Častmi je na těchto prvcíchlehce viditelné ochranná fólie, která by měla BYT také vytažena.
7. Pristroj by nemel používat déti, osoby s omezenými fyzickými, smyslovými nebo
mentálními schopnostmi bez dozoru oprávněních nebo zkušeních osob a vždy v souladu s temito pokyny.
8. Zařizení není určeno k použití s externími casovými spinači nebo samostatnám děkovým ovládáním.
VAROVÁNÍ: Toto zařizení lze použít u detí nad 8 let věku a osoby s omezenou fyzickou, smyslovou nebo mentalní schopnosti nebo osoby, které nemají Žádné zkušenosti ani znalosti zařizení, pouzePokud se tak déje pod dohledem osoby odpovědné za jejich bezpečnosti nebo byly obdrženy pokyny týkajici se bezpečného používání zařizení a jsou si vědomy nebezpeci spojenych s jeho používaním. Deti by se se zařizením naměly hrát. Čistěné a udžržbu zařizení by naměly provadět deti, pokud nejsou starů 8 let a jsou pod dohledem
9. Bēhem provozu nenechávejte zařizení bez dozoru.
10. Neponořujte spotřebič a napájecí kabel do vody nebo jinych kapalin.
11. Pokud se zařizení nepoužíva, mělo by byt vždy odpojeno od elektrické zásvky.
12. Pri vytahnuti zastrcky ze zasuvky nikdy nepokladeje napajeci kabel pouze za zastrchu.
13. Do prístroje nenechávejte zádné kovové prědměty
14. Vyrobce neodpovidá za škody zpúsobné nesprávném použitím prístroje.
15. Mějte na paměti, ze některé casti zařízení a skřínky během práce jsou velmi horké, takné bud'te opatrní a nedotýkejte se, můžete se spálit.
16. NIKDY nepokladejte pristroj bēhem provozu ani po uplném vychlazení
17. Nezapomente, ze topné clánky zařizení majícas uplné vychladnout.
18. Pri používání zaízení zajistěte dostatečné prostor nad a kolem. Prístroj se během práce nemuže dotýkat zhádnych snadno hořlavych predmětů, jak je sou dekorace, papirové utěrky, závesy, oděvy atd.
19. Ohřivač instalovaný v koupelné by měl BYt instalován tak, aby se konektory a dalsí rególáry nemohly dotýkat osoby ve vaně nebo pod sprchou.
20. U ohrivacu pro vyskové sestavy by měla byt viditelné poloha rúznych poloh konektoru ze vzdálenosti 1 m
21. Oznaceni krytu ohrivace by melo byt viditelné po instalaci ohrivace
22. Ohřivač nemůžete umístit prímo pod zásuvku a v blízkosti hořlavych materialú, jako jsou záclony, závesy atd.
23. Zařizení nelze použít s externími chasovými spínači nebo jinými samostatnémi systémy dálkového ovládání
24. Nevystavujte pristroj atmosferickym podminkám (dést, slunce atd.) Nebo použití v prostředí s vysokou vlhkosti (koupelny, vlhkte taborište)
25. Pravidelné kontrolujte stav napajeciho kabelu. Pokud je napajeci šnūra poškozená, měla by BYT vyměnéna speziálnim opravovacim zařizením, aby se predešlo nebezpeci
26. Zařizení nepoužívejte v blízkosti hořlavych materialú
27. Ohrivac musi byt nainstalovan.
28. Nepoužívejte tento ohřivač v bezprostřední blízkosti vany, sprchy nebo bazěnu
29. Nepoužívejte tento ohřivač,Pokud spadl
30. Nepoužívejte,Pokud jsou na ohřivači viditelné známky poškození
31. Ohřivač používejte na rovném a stabilním povrchu nebo jej pripevněte ke stěné,Pokud to stanoví vyrobce.
VAROVÁNÍ: Nepoužívejte tento ohřivač v malychmistnostech, kde jsou lidé, kteri je nemohou opustit sami,Pokud není zajistěn stály dohled.
VAROVÁNÍ: Abyste snížili riziko požáru, udržujte textilie, záclony nebo jiné hořlavé materiały alespón 1 m od vystupu vzduchu z ohřivače.
Doporucije se, aby byla elektrická instalace vybavena automatickym jističem s 30 mA proudem pro zvyseni bezpečnosti.
Poznámka: Pokud je napajeci šnūra nebo sǐtová zástrčka poškozená, měla by byt vždy vyměnéna nebo opravena odbornou opravovnou.
II. UPOZORNÉNÍ
1. Nikdy nepoužívejte prístroj,Pokud je poskozen nebo nefunguje správně.
2. Nikdy nepoužívejte prístroj,Pokud klesl z výšky dříve a vykazuje viditelné známky poškození.
3. Nepoužívejte prodlužovaci kabely nebo jiné elektrické zásvky, které neodpovidaj platnám normám a elektrickým predpisüm.
4. Jakékoliv opravy, demontáž nebo vyměna dílù by měly být provádeny vždy specializovaným zařizením.
5. Pokud je zařizení a privky, jako jsou elektrické kontakty, mokré, musí byt konektor nebo kabel vysušeny pred použitím pristroje a jeho současti.
6. Pristroj nepoužívejte mokrýma rukama.
7. Pokud existuje nebezpeci poškození zařizení NIKDY se nepokoušejte opravit zařizení sami.
8. Nikdy neumyvejte zařizení pod tekouci vodou nebo takovým zpúsobem,Že k ní voda klesá.
9. Nepoužívejte príslušenství, které vyrobce nedoporučuje. Mohou preydastavot nebezpeci pro uživatele a mohou zpúsobit poškození zařizení.
10. Ujistete se, ze zařizení bylo pred uložením vychladné.
11. Během používání se nedotýkejte krytu. Během provozu používejte pouze knofliky a spínače. Po vypnutí počkejte, āž se zařizení vychladne.
12. UPOZORNÉNÍ: Některé Časti tohoto zařizení se mohou během provozu velmi horko a mohou způsobit popáleniny.
III. PRED PRVNIMPOUZITIM
1. Odstrańte veśkery obalový material a narovnejte napajeci kabel
2. Bēhem montáze nesmi byt zaření v Žádném pripaděPokryto izolačním materiaLEM nebo podobným materialem
3. Pri montázi zaízení nesměji byt tramy a tramy šezány ani šezány
4. Pred prvnim pouzitim si preectete vsechnyPokyny k pouziti.
5. Zkontrolujte, zda napeti uvedene na stitku pro stipani prodktu odpovida napeti v elektricke siti ve vaši domácnosti
INSTALACE
Pouzijte vrtak pro vrtani dvou otvoru ve stene, minimalne 180 cm od podlavy a 20 cm od stropu - obrazek A. Jakmile vyvrtejte otvory, vlozte podlozku a zarsoubujte. Ujistete se, ze srouby jsou dobre utazené a pote zaveste zaizeni na stenu.
POPIS PRODUKTU
Obrázek B. HLAVINÍ PREPÍNAC ON / OFF = zapnutí / vypnutí.
Obrazek C. REMOTE CONTROLLER
1. Tlačitko ON / OFF
2. MODE
3.DEN
4.CLOCK
5. NASTAVENI
6. TYDEN / CASOVAC
7. MIN
8. +-> Tlačitko pro zvýšeni teploty. Rovnéž slouží jako tlačitko pro vyberčasu / dne.
9. ---> Tlačitko pro sniženi teploty. Rovnéž slouží jako tlačitko pro vyberča / dne.
10. RESET - tlačitko pro resetovaničcasovace
Obrázek D. LED PANEL
1. Symbol ON
2. Vykon topeni 1000W
3.Vykon topeni 2000W
4. Funkce AUTO
5. Zobrażeni teploty
6. Denni zobrazeni
7. Zobrażnićcasu
8. Symbol ON - spusteni casovace
9. Symbol OFF - vypnuti casovace
10. Otevrete funkci detekce okna
IV.VYUZITI
1. Stiskutim hlavnijo vypinače na pravé straně zařizení - Obrázek B zapnéte a vypnéte zařizení.
2. Zařizení je nyní v pohotovostnim režimu. Stisknéte tlacitko zapnuti / vypnuti (1) na dalkovém ovladači - Obrázek C.
3. Postupnym stisknutim tlačitka MODE (2) vyberte provozní režim:
- 1000 W se zařizení neustále zahrivá s 1000 W.
- 2000 W, zarizení se bude neustále zahrivat s 2000 W.
- Automatický režim, pomoci tlacitek + a - nastavte teplotu ručné. Zařizení automatický prějde do režimu udržováni teploty.
- Funkce detekce otevreného okna - Pokud je tato funkce vybrána, zařizení automatický vypne topení,Pokud náhle klesne teplota mistnosti 10 ° C.
4. Chcete-li zafrzeni vypnout, stiskneite tlacitko zaput/ vypnuti (1) na dalkovem ovladaci. Zafrzeni se ochladia vypne se prbliznepo 30 sekundach.
NASTAVENI HODIN INTERNIHO ZARIZENI
POZNÁMKA: Pokud nenastavíte aktuálnécas a den v týdnu, zařizení nebude fungovat správné, protoze bude pracovat podle vlastnich internich hodin, což je nesprávné.
1. Pomoci tlacitka MODE vyberte funkci AUTO.
2. Pred nastavenim casovače nastavte den v týdnu a aktuálni ās:
- Stiskněte tlacitko DEN a vyberte aktuálné den pomoci tlacitek + a -. Pockejte, až prestane displej blikat.
- Stiskněte tlacitko CLOCK a pomoci tlacitek + a - nastavte aktuálnécas. Počkejte, až prestane displej blikat.
- Stiskněte tlacitko MIN a nastavte aktuální minuty pomoci tlacitek + a. - Počkejte, až prestrejane displej blikat.
NASTAVENI PROGRAMOVÁNÍ CASOVÁC - CASOVAČ
Tato funkce umozhnuje naprogramovat cas pro zapnuti a vypnuti zaizeni každý den v týdnu v pozadovaném case.
Casovac Ize nastavit až po vybreu funkce AUTO a nastaveni internich hodin zařizení.
1. Stiskněte tlačitko TYDEN / CASOVAC a pomoci tlačitek + a - vyberte den v týdnu, ve kterém chcete zařizení automaticky zapnout a vypnout. Počkejte, až prestane dispiejblinkat.
2. Po stisknuti tlačitka SET UP se na displeje rozsvítí symbol ON. Nyní muzete nastavit ās spustěnéčasovace. Pomoci tlacitek CLOCK, MIN, + a - nastavte ās spustěnéčasovace. Pockejte, Ľ prestane displej blinking.
3. Po opětovnéstisknuti tlacitka WEEK / TIMER (6) a poté stisknutim tlacitka SET UP se na displeji rozsvítí symbol OFF. Nyní muzete nastavit Ācas vypnuti casovače. Pockejte, až prestane dispiej blikat.
POZNÁMKA: ās záčatku musí být vždy nižsī než ās ukončeni.
POZNÁMKA Chcete-li obnovit výchozí nastavení casovace, stisknéte tlacitko RESET.
V. CISTENI A UDRZBA
1. Pred Čistěnín vždy odpoje spotřebič od elektrické zásvúky.
2. Pokud během Čišěni jsou predměty jako napájecí zástrčka, termostat, elektrické kontakty atd. Namocěny pred opětovným použitím, měly by být dūkladné vysušeny
3. Nepoužívejte agresivn Čistici prostředky ve formé emulzi, lotionú, past, atd. K Čišěni skrǐne. Mohou mimo jiné odstranit informačné grafické symboly, jak je sou napřiklad znaky, varovné značky atd.
4. Pred Čišćinīm zařízení se ujistěte, Že se zařízení vychladlo.
TECHNICKÁ DATA:
Napétí: 220-240V ~ 50 / 60Hz
Vykon: 2000 W Max. Vykon: 2200W Ip20

"Upozornéni na horky povrch" - Teplota dostupnych ploch muze byt vyssí, když je zařizení v provozu, což znaméná, ze se provozu béhem provozu zhorsuju prky skrǐne, USETRTE POZOR!

NEKLIDUJTE" - DULEZITE NAPRAVY Napis na zaizeni znamená, ze zaizeni nesmi bytPokrty odévy, prikrývkami a jinymi výrobky, které by mohly zpúsobit vzniceni.
UPOZORNENI: Nepouzivejte toto zaifeni v blizkosti vany, sprchy, bazeny a podobné vodni nadrze.


Ochrana zivotniho prostre. Karton odevzdeje do sbru. Polyetylenové sácky (PE) vyhazujte do kontejneru na plasty. Vysloužily pristroj odevzdeje do prislusného sberného dvoru, protoze nekteré casti zarizeni mohou predstavovat pro zivotni prostre di nebezpeci. Elektrický pristroj odevzdeje tak, aby se omezilo jeho opětovné používaní. Pokud jsou v pristroji baterie, vyjměte je a odevzdeje do prislusného sberného mista zvlást'. Pristroj nevyhazujte do popelnic ani kontejneru na smśný odpad!!
(RU) PUCCKN
BHIMAHHE:
YcTpoIcTBo IpeHa3HaueHo TOnbKO IJRA DomaHrO NcNoIb3OBaHn.
YcTpoiCTBO HE npEaHa3NaYeHO dIy KOMMepueckoro / npoPecCNoHaJIbHOrO NCpOJIb3OBaHnIy.
YcTpoIcTBo HE nOxDxOaIT dJa nCNoJIb3OBAHnHa OTKpbITOM Bo3dyXe.
BHMaHHe! Ipeed nCNoIb3OBaHHeM Heo6xOdmo npouHTaTb daHHO pyKOBOCTBO NO 3KcIIyatau, uTO6bl n36exaTb HeCuaCTHbIX clyuAeB IN paBnIbHO nCNOJIb3OBaTb yCTpOJCTBO. CoXpaHnte 3TO pkoBOdCTBO n XpaHnte erO, uTO6bl Bbl MOrIIN JeRKO erO nCNoJIb3OBaTb.
I. PUKOBOJCTBO NO B30PACHOCTN NCIPOJIb3OBAHNA
1. Перацлобагим убадиесь, чо наразожеши, уka3aHHoe Ha паспортой Табличke, COOTBETCTBYET ЛOKальным napametpaM COJIeHOCTN, HO пOMHITE, ChTo Маркировka: AC - поеменный тok, a DC - постаянь.
2.Подклюаite yctpoicTBOToIbkoK3a3eMneHHOpo3etke 220-240B\~50/60 T.
3.перд Испосьогаиме packataiteи Вьіровягіte shyp пітаня
4. Y6eIntecb, yTO shHyp nHTaHn I BNlka He IMeIOT BnIMbIX NOBpeKdEHN.
5. До и посе Incnoьзовая убeДиТecь, чTo Шур ппаня He HaTЯнТ Ha OTKpbIToe Пламя Или другов Источник Тени и OCTpbIe Края, кOTOpbIe MOryT NOBpeДиТь ИЗОЛЯцИКабеля.
6. Перацпьим Испльбизовием удал�е BCE komноentы уразкови. Внимани!В слуае кожуха сmetаллческим часгмп на 3тх лементх может 6ытв pactянту сlerka вдимая зашишая пеника, кOTOPYTOТAKKE следуET удалNTb.
7. UcpoCTBO He DoJxHO NcNoB3OBaTbCra DeTbMn, JIuamN C OrpaHueHHbIMN
fN3UeCKIMN, CEHCOPHBIMN IIN yMCTBeHHbIMN cNOcO6HoCTaMn 6e3 npncmOTpa
yIOJIHOMOeHHbIX IIN ONbITbIX JInC IN BCeTdA B COOTBeTCTBnN C 3TNIMn IHCTpyKzmaMn.
8.ObopydOBaHne He npedHa3HaueHo IJIy nCNoIb3OBAHnC BHeuHMn peJe BpeMeHn IJI
OTDeJIbHOI CNCTeMOI INCTaHcNOHHOrO ynpabNeHnA.
IPEyIeHHe. DaHoe o6OpDobAHne MoryT nCNoB3OBaTb DeTn CTapWe 8 let n Iuca C OraHnueHHbIMN cHcOpHbIMN IIN yMCTBeHHbIMN cNOcO6HOCTaMn IIN Iuca, He IMeOuNe ObyTa IIN 3HaHn OB o6OpDobAHn, TOJbKO eCIn 3To deJaTeCn POD H6JIIOHeHem Iuca, OTBeTCTBeHHoro 3a IN X Be3ONaCHoCTn IIN 6bln DaHbI INCTpyKcU N O 6e3Opanchom nCnoB3OBaHn YcTPOiCTBa IN OCBeOMJeHbI O6 OnaCHocTAX, CBa3aHHbIX C erO nCnoB3OBaHnEM. DeTn He DoJXHbI InPaTb C o6OpDobAHnem. YnCTka nTexHnueckoe OBCnykBaHne YcTPOiCTBa He DoJXHbI BblOnHЯTbcr DeTbMn, ecIn OHn HE CTapWe 8 let n HaxOJaTc POn H6JIIOHeHem
9. He octabnIte yctpoicTBo 6e3 npncmotpa BO BpeMa pa6Obl.
10. He norpyxaiTe npnbop n shnyp nntaHn B Body nn dpyrne XndKoCTn.
11. Korda yctpoicBO He nCnoJb3yeTcra, OHO Bcerda DoJxHo 6bITb OTKnIOueHO OT 3JIeKTPnueCKo pO3eTKn.
12. BbHIMaBnKy n3 po3eTKn, HNKoIa He TAHnte 3a uHyp NITaHnT OJbKO 3a BNkY.
13. He klahti e Hkaknx metaJInecknx npedmetOB BHytpn yctpoiCTBa
14. ПОНЗВОДИТЕЛБ He HeCET OTBETCTBEHHOCTHa yUepe6, Bbl3BaHHbI HENpaBnJIbHbIM INCNoJIb3OBaHHem yCTpoIcTBA.
15. CJIeIyET NOMHITb, YTO HeKOTOpbIe yactn yCTpOJcTBA n KOpNyca BO BpeMra pa60TbI CNJIbHO HArpeBaIOTcR, IIO3TOMy 6yDbTe OCTOpOxHbI n He npNKacaiTecb K Hm, Bbl MoXeTe O6KeYbcr.
16. HE nakpbBaIte yctpoiCTBO BO BpeM pa6Otbl IIN KOrDa OHO He OCTbIBaET NOLHOCTbIO
17. ПомнITE, чTO harpeBaTeJIbHbIM јелемпam устpoиCTBa Tpe6yETcB sperm, чTo6blI NOJIHOCTbIO OCTbITb.
18. Пи ИСПОЛБЗОВАнИУСТРОДТВА обеспец ДОCTАTOчHо простраНСТВО над И ВOKpyr. YСТРОДТВО He может касы сялгКВОСПАмЕнЯЮшХС рpeДМETOB BO BPEМ pa6OTbl, TAKINK KAK yKpaShENIA, БуMaxЖьIE ПОЛTeHца, WTOpbl, ODEЖДИ T.Д.
19. ObopeBaTeIb, yCTaHOBJIeHHbI B BaHHOJ KOMHaTe, DOJIKeH 6bITb yCTaHOBJIeH TaKIM O6pa3OM, YTO6bl IInIO N pa3BeMbI IN DpyrHe peRyJIaTOpbl HE MOJIIN 6bITb 3aTPOHyTbI B BaHHoJ INI NOd DyuWeM.
20. B harpeBaTeJx IJIy BBICOTbIX CBETINbHnKOB NIOJOKeHnRApa3JIuHbIX NIOJOKeHn pa3beMOB DOJIXHbI 6bITb BnHbI C paCCTOHaHn 1 M.
21. Марк inpовka Ддя пokpbITия HarpeBaTeЯ дOLЖна 6bITb BnДHa NOcJIe yCTaHOBKn HarpeBaTeЯ.
22. HeIb3a pa3Meaatb oborpeBaTeIb HEnocpeICTBeHNO IOd PO3eTKo, a TaKKe B6JIu3N JeRKOBCPnAmHeHOUxxCra MaTePnaIOB, TaKnx KaK UToPbI, rapDInHbI N T. D.
23. YcTpoIcTBo HeJIb3a IcNoJIb3OBaTb C BHeUHIMN peJe BpeMeHN IJN dpyHMN OTdJIbHbIMN CNCTeMaMn DnCTaHcUHOHOrO ynpabJIeHnA.
24. He noDBepraIte yCTPOIcTBO BO3DeIcTBnIO aTMOCΦepHbIX ycNOBNI (doXDb, coJIHcE n T. I) I He nCNoJIb3yIte erO B ycNOBnIX NOBblIeHHoN BJIaXHOCTN (BaHHbIE KOMHaTbI, BJIaXHbIe KeMnIHr).
25. Перношисту поверайтс состорпшура петань.Еслшур петань
Повразден, ergcneDyET 3aMeHnTb cpeuaJIncTOM no peMOHTy BO n36exkaHne onaCHOCTN.
26. He nCloIb3yIte yCTpoIcTBO pIaOM c IeKOBocPnAmEHaIOUImncs MaTePnaJaMaN.
27. ObopeBaTeIb DoJxeh 6bITb yCTaHOBJIeH Ha BbICote He MeHee 1,8 M haI noIOM
28. He nCnoJb3yIte o6oRpeBaTeIb B HEnOcpeICTBeHHoN 6JIu3OCTn OT BaHHbI, DyuHa NJI6aaccSeHa.
29. He nCloJb3yIte o6orpeBaTeIb, ecn erO ypoHJI.
30. He nCloNoIb3OBAtB, ecn eCTb BnIMbIe npN3HaKn NOBpeKdEHHa OboPeBaTeJIa.
31. Историяе обограды на ровени восточни посторияе erok CTeHe, ecn 3TO пedingу стейноюн.TeJem.
BHIMAHNE: He IncnoIb3yIe 3TOT o6oRpeBaTeIb B He6oJIbIuX NOMEuHnIX, rIe eCTb JIOHN, KOTOpBIE He MOrY T OCTaBHTb Ix CaMOCTOaTeJIbHO, ecNI He OBeCneuNBAeTCa NOCTOaHHbI pINCMOTp.
BHIMAHNE: YTo6bI CHn3ntb pNCK BO3rOpaHn, XpaHInTe TkaHn, 3aHaBeckn nJIN dpyrHe JIeKOBocPJIaMeHryUoIeC8 MaTePnaJIbI Ha pacCTOraHn He MeHee 1 M OT BbIXOda BO3dUxA n3 o6OrpeBaTeJ.
Дя NOвьшеня 6e3oNaChOCTn peKOMeHdyetc, yTObI 3JIeKTPuYeCKa yCTaHOBka 6bla OCHaSeHa ABTOMaTNUeCKIM BbIKJIHOaTeJEM OCTaTOUHOro TOKa C NyCKOBbIM TOKOM 30 mA. Iprimeahne. EcIn ShHyp NiTaHnI INI BnIKA NiTaHnI NOBpeXdHebl, INX BCeRda CNeDyET 3aMeHЯТь INI peMOHTNPOBaTb B CneCuaJIIN3NpOBaHHoN peMOHTHOm MaCTepcKoN.
II. ПЕДУПЕЖDEHЯ
1. Hikorda He nCnoB3yIte yCTpoiCTBO, ecn OHO NOBpeXdeHO nJH He cyHKUOHNpyET DOJxHBIM 6pa30M.
2. Hikorda He nCnoJb3yIte yCTpoIcTBO, ecn OHO ynaIO C BbICOTbl N NOKa3bIBaET BIDIMBIE npn3Hakn NOBpeKdEHHa.
3. He nCnoIb3yIte ydIINHnTeJI nn dpyTne 3JIeKtpnueCKne po3ETKn, KOToPbIe He COOTBeTCTByIOT npIMeHMbIM CTAHApTaM N 3JIeKtpnueCKm HOpMaM.
4. Любов ремоNT, Демонтж ллл замена Любьх частей BCERда должны пюиЗВОДИТСЕпцаллзирочьим оборудованем.
5. Ecni yctpoiCTBO n 3neKtpnueckne KOMnoHEtbl, TaKne KaK 3JIeKtpnueckne KOHTaKTbl, BnaXHbIe, nepei NCpOJIb3OBaHNem yCTpoiCTBa I erO KOMNoHENTOB CJeDyET BbICyUHTb BNJKy INI KabeIb.
6. He nCloIb3yIte yCTpoIcTBO MOKpbIMn pykamn.
7. EcIn cyIeCTByeT pNCK NOBpeJdeHnY yCTpoiCTBa, HE nbITaIteCb peMOHTnpoBaTb yCTPOIcTBO CAMOCTOaTeJIbHO.
8. HnKorda He MoTe yCTpoiCtBO NOI npOTouHO BODO INI TAKIM O6pa3OM, YTO6bI BOda B Hero Kana.
9. He IncnoIb3yIte akceccCyapbl, KOToPbIe He peKOMeHIOBaHbI npOn3BOJnteJIem. OHI MOryt IpeIcTAbIaTb ONaCHOCTb dIЯ NOIb3OBaTeJIЯ N MOrYT npINBeCTn K IOBpeXdEHHU yCTpOInCTBa.
10. y6eIntecb, yTO yCTpOiCTBO OCTblIO npeed xpaHeHnem.
11. HeПрinksaTeCsK KoprnyCy BO BpeMa nCnoJb3ObaHnA. Bo BpeMa pa6oTbI nCnoJb3yIte ToJIbKO pyuKN I nepeKJIIOUaTeJI. NocLe BBiKJIIOUeHnI NOdoXdIte, Noka yCTpOietBO OCTbIHET.
12. BHIMAHNE. HeKOTOpBie yactn 3Toro yCTpOcTBa MOryT CInbHO HArpeBaTbcr BO BpEmra pAbOtbl n CTaTb PnUnHoi OXorOB.
III. IEPED IEPBbIM IcNoJIb3OBAHnEM
1.YdaJInte BCE ynaKOBOuHbIe MaTePnJIbI N BblOpBHaIe Tshypr nITAHn
2.Bo Bpemr yctaHOBNy yCTPOINCTBO MOKET 6bITNIOKpbIto N3OJIUNOHHBIM MaTePnAJOM NINIOIO6HbIM MaTePnAJOM
3.Писборкустрочьа6ankистрочьа He cneуet pa3pe3aTB nIpe3aTb
4.перд первим Исюльбозанем почитай Се Инстук imm no npimehenio.
5. Поберъг, COOTBETCTBye TИн HANpЯженue, yKa3aHnHoe Ha 3TNKeTke ПpoDyKtTa, HAnpЯженu 3IneKTPOcEtN B BaUeM DOME.
YCTAHOBKA
C nomoubno cbeprna npocbeptne Dba otBepctn B CTHe, MNHmym B 180 cm OT noa n B 20 cm OT notonka - pucyok A. Iocne toro, kak Bbl npocbeplnn OTBepctn, BCTabTe npoknaKy n BnHT. Y6eintecb, yTO BNHTbI XOPOIO 3aTHytBI NOBcBeYCTPOICTBO Ha CTHe.
ONICAHNEIPOJYKTA
ΦoTo B. ΓJIABHbI ΠEPEKJIIOUATEJIb
BKN/BbIKN=BbIKN BKN/ IOTH BbIKN.
I3o6paXeHneC.ДИCTAHUOHHOE YIPABJIEHNE
1. KhoNka BkHoueHn / BbIKHoueHn 6. HEJIa / TAIMEP
2.PEXKIM 7.MNH
3. DEHb 8. +-> KhoKa dIra noBbiJeHna TeMnepaTpybl. TaKKe cIyKnT KhoKoB bIbOpa BpeMeHN /dHa.
4.CLOCK 9.-->KHOIIKa HOHKeHnI TeMnePaTypbI. TaKHe ClyKHT KHOIIKO BbIbopa BpeMeHN / nHa.
5. HACTPOIKA 10.CBPOC-KHONKa c6poca TaMepa
PncyokD.CBeToOnoHna nHeNb
1. ON cIMBOJ 6. INeBHOJINCPIeN
2. MoIHOCTb HArpeBa 1000 B7. OTo6paXeHne BpeMeHN
3. MoHocTb HarpeBa 2000 Bt 8.CmBOJ ON-3anyck TaMepa
4.ABTOyHKn 9.CmBOJ OFF-OTKJIIOHHe No TaMepy
5.Дисплел TempepaTpybl 10.Функця obHapuyKeHnO OTKpbItoro OKHa
BHytpnbEHHIO PIMMEHHE
1. Haxmnte TnaBbIy BbIKIOHateJIb Ha npaBOI cTOPOHE yCTPOINCTBa - PncyHOK B, YTO6bl BKIOHTb N BBIKIOHTb ycTPOINCTBO.
2. Tenepb yctpoiCTBO HaxoDntcB pexkme OxndaHn. HaxmTe KhoNky BKnIOueHn / BbIKIOueHn (1) Ha npIbTe DnCTaHIOHOHorOynpaBHeHn - PcyhOK C.
3. Haxmte KhoNkY MODE (2) nocneobateIbHo, yTo6bl BbIbpaTb peXIM pa60TbI:
-1000Bt yctpoiCTBO 6ydt nocToHHo HarpBaTbCra 1000BT.
- 2000 Bt, yctpoiCTBO 6ydt NOCTOARHH HArpeBaTbCra c 2000 Bt.
- ABTomatueckn pexim, Haxmte KhoIKN + -, yTo6bl yCTaHOBtB TempepaTy BpyHyIO. YcTpoiCTBO aBTomatueckn nepexoIIT Bpexim noDepkaHnra TempepaTypbI.
-ФункцяобнаруженьгOTKрыTOROKна-KordaBbIбраHA3TaФункця,ycTpoIcTBOABTOMTMaueKnOTKJIIOuayetOBorpeB,ecnTempeaTpaBnomeueHINBHe3aHNO naaetHa10°C.
4. Haxmte KhoKbBKnOueHn / BbIKIOueHn (1) Ha nyIbTe dNCTaHcNOHOro ynpabNeHn, YTO6bl BbIKIOuHTb yCTpOiCTBO. YCTPOICTBO OxnaKdaetc n BbIKIOuaETc npImepHo uee3 30 cekyHd.
YCTAHOBITE YACBi BHYTPEHHErO YCTPOINCTBA
PIMMEAHNE. EcnB He yctaHObITE TeKyue Bpemn HeJeHbHeJeH, YcTPOCTBO He 6ydt pa6oTaB DoJXHBIM o6pa3OM, NocOJIbky OHO pa6oTaET B COOTBeTCTBm CO CBOIMM CO6CTBEHHbIM BHYTpEHHMN YaCaMn, YTO HeBepHo.
1. BbIbePnte cyHKuH Auto C nOMoUH KhoNk MODE.
2.ПереднachtpoikоТаимета установип Дьн HeДели N TeKуцee Врем:
- HaxmTe KhoNkY DAY u BB6epnte Tekyu nn Deh c nOMOuKHOHOK +n - IooXdTe, noka dncnJIe nepectaHET MraTb.
- Haxmte KhoNky CLOCK u yctahOBTe TeKyuee BpeMa c nOmoBIO KHOIOK + n - . PnOdoJnte, noka dinCnIe nepeCTaHET MIRatb.
-HaKmTe KhoNkY MIN u yctahOBnTE TekyuIe MHyTb KHOKNKaMn + n- .NoOxKnTe, noka dncnne nepectaHet mraTaB.
TAMMEP IPOPTPAMMPOBAHNE-TAMMEP
3TaФункциЯ NO3BOJЯET 3anporpamMnpoBaTb BpeM BKJIIOUeHn I BbIKIIOUeHn yCTpoiCTBa B IIO6OJIeHb HeJIeJI.
Taimep MoXHO yCTaHOBnTB TOnbKO nocJe BblOpa fYHKun AUTO n ycTaHOBKn BHyTpEHnx YacOB yctpoNCTBa.
1. Haxmnte KhoNky WEEK / TIMER n BbIbepnte DeHb HeDenn, B KOtOpBn Bbl XOTnte Hactpontb aBTOMaTneckoe BKIOueHne N BbIKIOHeHne ycToPcTBA c NOMOsbIO KHONoK + n - . IoDoknte, NOKa DnCnne nepeCTaHET MIRatb.
2. Nocne Haxatn KhoKn SET UP Ha dncnnee 3aropaetc cMMBOJ ON. Tenepb Bbl MoXe Te yctaHOBt BpeM 3anycka TaHMepa. IcnoIb3yIte KhoKn CLOCK, MIN, + n-, YTO6bI yCTaHOBt BpeM 3anycka TaHMepa. NdoXdnte, noka dinCnn nepectaHeT MraTaB.
3. Nocne NOBTOPO HaxaTnK HonKn WEEK / TIMER (6) n 3aTeM haxaTnK HonKn SET UP Ha dncnnee 3aropaetc cunboJ OFF. Tenepb Bbl MoKeTe yCTAHOBuTB BpeMa OTKIOUHeHn TaIMepa. IIOOxNtE, IOKa DNcNne NepectaHET MIRaTb.
PIMMEUAHNE: Bpemn Hauana Bcerda DonJXHO 6bITb MeHbIe BpeMeHN OCTaHOKN.
INPIMEUAHNE Haxmnte KhoNky RESET, UTo6bI c6pocntb TaMep do Hactpoek no ymoJuaHnIO.V. YNCTKA N OBCJyKNBAHNE
1.Bcerda BbHIMaTe np6Op n3 po3eTK nepeD YnCTKoI.
2. Ecnn BO Bpemy uNCTKN TaKne PpeMTebl, KaB BuNkA NHTaHn, TepMoCTaT, 3JIeKTPuYeCKNe KOHTaKbI n T. D. nepei NOBtOpHbIM NCIOJB3OBAHnEM IpOMOKHnTE INX, OHI DoJnxHbI 6blTb TuaTeJIbHO BbICyuWeHbl
3.He nCnoB3yIte arpeccnBhIe moUHne cpeCTBa B vIe 3Mylbcn, IocboHOB, nact T.Д. y6paTb uKaΦ. OHmOryT, NOMMO npOyeo, ydaIaTb IHOpMaunOHhIe rpaOnueckne CmBOJIb, TaKne KAK 3HaKn, npEynpexJaOuJe 3HaKn U T.
4. Y6eIntecb, yTo yCTpoIcTBo OCTbIIO nepeI cIcTKoI.
TEXHUYECKNE DAHHBIE:
HannpJxHe:220-240B\~50/60T
Mouhoctb:2000BT
MaKc.MoUHocb:2200BT
lp20

《OCTOPOXHO,ROPAHOBEPXHOCTb》-TEMNEpAtpaDOCTyINbIX NOBepxHOCTeMOKET6bITbBbIe,KoTdaobpydoBaHne
paotaeT,TOO3Haayet,TOOJIeMeHTbI KOpnyca CnIbHO HarpeBaHOTcB O BpeMa pa60tBIO BpeMa pa60tBIO COXPAHITTE OCTOPOKHO !!!

OKPbIBAITE» - BHIMAHNE HADINCSb HaDINCSb Ha yCTPOINCTBE 03HauaeT, YTO yCTPOINCTBO He DOJIKHO 6bITb
NOKBTO OJEXDN, OJERNAH NpyTNM TeKCTINbHBIM N3dEINRA, KOTOpbIe MOrYT Bb3BaTb BO3RopaHne.

MAHVE: He nCnoJIb3yIte 3To o6OpuyIOBaHHe pIOM c BaHHaMn, IyUeBbIMn, BaccseHAMn uHaJIOruHbIMn
peepByapamn nla BObl.

3a6078b 6bokyauoepcree.ynakobky n3 kaptoHa nepeaIte,nokauncta,Ha MaKynatypy.IoNtneHOBbie MeuKN (PE) BbIKnDaB B pe3epByap dnn pnaactmacbbi.NHOseHHoe ycToPcTBO HAO nepeaBt B COOTBeTCTBYIOUTOY TOKY xpaHHeN, TAK KAKHXOJaueceB YcTPOCTBEONACbIe CoCTABnIOUme MOrTy RnTbCraYrpo3oD nOkpyKaoue Cpebl. 3NeKtpnueckoe yCTpoCTBO HADOppeaTaTakIM o6p3om, uTO6bI orpahnHtB erO NobTopHe yNOtpeJleHne I NCNoJIb3ObaHne.ECN B yCTpoCTBe haoJrTaCBaTapen, IN HAo BbITaHyTB n nepeaBt B ToKy XPAHHeN OTeJbHo. YcToPcTBO He BbIKDaTb B pe3epByap dnn KOMMyHaJIbHbIX OTXOD!
(NL) NEDERLANDS
LET OP:
Het apparaat is uitsluitend bedoeld voor huishoudelijk gebruik.
Het apparaat is NIET bedoeld voor commercieel / professioneel gebruik.
Het apparaat is NIET geschikt voor gebruik buitenshuis.
Let op! Voordat u het apparaat gebruikt, is het essentieel dat u deze bedieningshandleiding leest om ongelukken te voorkomen en om het apparaat correct te gebruiken. Bewaar deze handleiding en bewaar deze zo dat u deze gemakkelijk kut gebruiken.
I. RICHTLIJNEN VOOR DE VEILIGHEID VAN GEBRUIK
1. Controller voor het gebruik of de spanning op het typeplaatje overeenkomt met deplaatselijke parameters van het zoutgehalte, maar vergeet Niet dat de marketing: AC- wordt wisselstroom en gelijkstroom is DC.
2. Sluit het apparaat alleen aan op een 220-240V 50/60 Hz geaard stopcontact.
3. Rol en trek het netsnoer uit voordat u het gebruikt
4. Zorg ervoor dat het netsnoer en de stekker geen zichtbare schade vertonen
5. Voor enijdens het gebruik, ervoor zorgen dat de stekker nicht worden gerekt boven een open vuur of andere warmtebronnen en scherpe randen die de isolatie van de kabel konnen beschadigen.
6. Verwijder voor het eerste gebruik alle verpakkingsscomponenten. Let op! In het geval van een behuizing met metalen delen, kan op deze elementen een enigszins zichbare beschermende folie worden gestrekt, die ook要去 worden verwijderd.
7. Het apparaat mag nicht worden gebruikt door kinderen, Personen met beperkte fysieke, sensorische of mentale capacititeiten zonder toezicht van geauthoriseerde of ervaren personen en.altijd in overeenstemming met deze instructies.
8. Het apparaat is nicht bedoeld voor gebruik met externe tijsdschakelaars of een afzonderlijk afstandsbedieningssystem.
WAARSCHUWING: Deze apparatuur kan worden gebruikt door kinderen vanaf 8aar en personen met beperkte lichamelijke, zintuiglijke of geestelijkke vermogens, of Personen die geen ervaring of kennis van de apparatuur, ALLEEN als dit onder toezicht van een persoon die verantwoordelijk is voor hun worden gedaan verilgheid of zichin instructies gegeven over het veilige gebruik van het apparaat en zich op de hoogte van de bevaren die aan het gebruik ervan zich verbonden. Kinderenogen Niet met de apparatuur spelen. Reiniging en onderhoud van het apparaatogen Niet door kinderen worden uitgevoerd, tenzij ze ouder zich dan 8aar en onder toezicht staan
9. Laat het apparaat Niet onbeheerd awhile tijdens gebruik.
10. Dompel het apparaat en het netsnoer Niet onder in water of andere vloeistoffen.
11. Wanner het apparaat Niet in gebruik is, moet het.altijd worden losgekoppeld van het stopcontact.
12. Trek nooit aan het netsnoer om de stekker uit het stopcontact te trekken.
13. Plaats GEEN METALEN ITEMS in het apparaat
14. De fabrikant is nicht aansprakelijk voor schade als gevolg van onjuist gebruik van het apparaat.
15. Men mag nicht vergeten dat sommige delen van het apparaat en de kastijdens het werk erg heet, dus wees voorzichtig en LASTZe Niet aanraakt, kunt u brandwonden oplopen.
16. Bedek het apparaat NIET tijdens gebruik of wonneer het Niet volledig afkoelt
17. Vergeet Niet dat de verwarmingselementen van het apparaat dearend nemen om volledig af te koelen.
18. Zorg bij gebruik van het apparaat voor voldoende ruimte boven en rondom. Het apparaat kanijdens het werk geen gemakkelijk ontvlambare voorwerpen aanraken, zoals versieringen, papieren handdoeken, gordijnen, kleding, enz.
19. De in de badkamer geinstalleerde verwarming要去zo worden geinstalleerd dat de connectoren en andere regelaars Niet kuren worden aangeraakt door een persoon in de badkuip of onder de douche.
20. In kachels voor armaturen op groe hoogte要去en de posities van de verschillende posities van de connectoren zichtaar� aan vanaf een afstand van 1 m
21. De labels voor het afdekken van de kachel要去en zichtaarijken na het installereren van de kachel
22. U kunt de verwarming nicht direct onder de fittingplaatsen en in de buurt van brandbare materialen zoals gordijnen, gordijnen, enz.
23. Het apparaat kan nicht worden gebruikt met externe tijdschakelaars of andere afzonderlijke afstandsbedieningen
24. Stel het apparaat Niet bloot aan atmosferische omstandigheden (regen, zon, enz.) Of gebruik het in omstandigheden met hoge luchtvochtigheid (badkamers, vochtige kampeerhutten)
25. Controller regelmatig de staat van het netsnoer. Als het netsnoer is beschadigd,要去 het worden verrangen door een gespecialiseerd reparatiebedrijf om gevaar te voorkomen
26. Gebruik het apparaat Niet in de buurt van ontvlambare materialen
27. De verwarming要去 een hoogte van minimaal 1,8m boven de vloer worden geinstalleelerd
28. Gebruik deze heater nicht in de directe omgeving van een badkuip, douche of zwembad
29. Gebruik deze kachel nicht als hij is geallen
30. Niet gebruiken als er zichbare tekenen zijn van schade aan de kachel
31. Gebruik de kachel op een vlakke en stabiele ondergrond of bevestig hem aan de muur, indien voorzien door de fabrikant.
WAARSCHUWING: Gebruik deze kachel Niet inkleine ruimtes waar mensen+zijn die ze Niet alleen hunnen achechterlaten, tenzij constant toezicht is gegardeerd.
WAARSCHUWING: Om het risico op brand te verkleinen, houdt u textiel, gordijnen of andere brandbare materialen op minstens 1 m afstand van de luchtuitlaat van de verwarming.
Het worden aanbevolen om de elektrische installmentie uit te rusten met een automatische aardlekschakelaar met een startstroom van 30mA voor extra verilgheid.
Opmerking: Als het netsnoer of de stekker beschadigd is, moet het.altijd worden verrangen of gerepareerd door een gespecialiseerde reparatiewerkplaats.
II. WAARSCHUWINGEN
1. Gebruik het apparaat nooit als het beschadigd is of Niet goed functioneert.
2. Gebruik het apparaat nooit als het van een hoogte eerder is geallen en zichtbare tekenen van schade vertoont.
3. Gebruik geen verlengsnoeren of andere stopcontacten die nicht voldoen aan de geldende normen en elektrische voorschriften.
4. Elke reparatie, demontage of vervanging van onderdelen moet algid worden uitgevoerd door een gespecialiseerde felilitieit.
5. Als het apparaat en elektrische componenten zoals elektrische contacten nat+zijn, moet de
stekker of kabel worden gedroogd voordat het apparaat en de componenten ervan worden gezruikt.
6. Gebruik het apparaat nicht met natte handen.
7. Wanner het risico bestaat dat het apparaat is beschadigd, mag u NOOT proberen het apparaat zich te repareren.
8. Was het apparaat nooit onder stromend water of op een manier dat het water erin indruppelt.
9. Gebruik geen accessoires die nicht door de fabrikant worden aanbevolen. Ze können een gevaar voor de gebruiker vormen en konnen het apparaat beschaden.
10. Zorg dat het apparaat is afgekoeld voordat u het opslaat.
11. Raak de behuizing Niet aan tijdens gebruik. Gebruik tijdens het gebruik alleen knappen en schakelaars. Wacht na het uitschakelen tot het apparaat is afgekoeld.
12. VOORZICHTIG: Sommige delen van dit apparaat hunnenijdens het gebruik erg heet worden en brandwonden veroorzaken.
III. VOOR HET EERSTE GEBRUIK
1. Verwijder al het verpakkingsmaterial en kaak het netsnoerrecht
2. Tijdens de installmentie kan het apparaat zichen bedekt met isolatiemateriaal of soortgelijk materiaal
3. Bij het monteren van het apparaat mogen balken en spanten nicht worden gesneden of gesneden
4. Lees voor het eerste gebruik alle gebruiksaaanwijzingen.
5. Controller of de spanning op het label voor het testen van het product overeenkomt met de spanning van het elektriciteitsnet in uw huis INSTALLATION
Gebruik de boor om twee gaten in de muur te boren, minimaal 180 cm van de vloer en 20 cm van het plafond - afbeelding A. Nadat u de gaten hebt geboard, staat u het kussen en de schroef. Zorg ervoor dat de schroeven goed zichn aangedraaid en hang het apparaat aan de muur.
PRODUCT BESCHRIJVING
Afbeelding B. HOOFDSCHAKELAAR
AAN / UIT = UIT AAN / UIT UIT.
Afbeelding C. AFSTANDBEDIENING
1. AAN / UIT-knop
6.WEEK/TIMER
2. MODUS
7. MIN
3.DAG
8. +-> Knop voor het verhogen van de temperatuur. Het dient ook als keuzeknop voorijd / dag.
4.CLOCK
9. --> Knop voor het verlagen van de temperatuur. Het dient ook als keuzeknop voorijd / dag.
5. INSTELLLEN
10. RESET - Timer resetknop
Afbeelding D. LED-PANEEL
1.AAN symbol
6. Dagweergave
2. Verwarmingsvermogen 1000W
7. Tijdsweergave
3. Verwarmingsvermogen 2000W
8. AAN symbol - timer opstarten
4.AUTO-functie
9. UIT symbol - timer uitschakeling
5. Temperatuurdisplay
10. Open venster detectie functie
IIV.USAGE
1. Druk op de hoofdschakelaar aan derechtkerant van het apparaat - Afbeelding B om het apparaat in en uit te schaken.
2. Het apparaat staat nu in de standby-modus. Druk op de aan / uitknop (1) op de afstandsbediening - Afbeelding C.
3. Druk achtereenvolgens op de MODE-knop (2) om de bedrijsmodus te selecteren:
- 1000 W het apparatusat za constant opwarmen met 1000 W.
- 2000 W, het apparaat za constant opwarmen met 2000 W.
- Auto-modus, druk op de knappen + en - om de temperatuuruur handmatig in te stellen. Het apparaat gaat automatisch maar de modus voor temperatuuruurbehoud.
- Open venster detectiefunctie - Wonneer deze functie is geseleerd, legt het apparaat de verwarming automatisch uit als de plotselinge plotseling met 10^ daalt.
4. Druk op de aan / uitknop (1) op de afstandsbediening om het apparaatuit te schakelen. Het apparaat koelt na ongeveer 30 secondenuit.
DE INTERNE APPARAATKLOK INSTELLLEN
OPMERKING: Als u de huidige tijd en dag van de week Niet instelt, za het apparaat Niet goed werken waar dat het volgens zich eigen interne klok werk, wat onjuiste is.
1. Selecteer de AUTO-functie met de MODE-knop.
2. Stel vór u de timer instelt de dag van de week en de huidigearend in:
- Druk op de knop DAG en selecteer de huidige dag met de knuppen + en - . Wacht tot het display stopt met knipperen.
- Druk op de KLOK-knop en stel de huidigeijd in met de knoppen + en -. Wacht tot het display stopt met knipperen.
- Druk op de MIN-knop en stel de huidige Minutes in met de knoppen + en -. Wacht tot het display stopt met knipperen.
TIMER PROGRAMMERINSTELLING - TIMER
Met deze functie kunt u de tijd programmeren om het apparaat op elke gewenste dag van de week in en uit te schakelen.
De timer kan alleen worden ingesteld na het selecteren van de AUTO-functie en het instellen van de interne klok van het apparaat.
1. Dru op de WEEK / TIMER-knop en selecteer de dag van de week waarup u het apparaat wilt instellen om automatisch in en uit te schakelen met de knappen + en -. Wacht tot het display stopt met knipperen.
2. Nadat u op de knop hebt INSTellenen hebt gedrukt,licht het ON-symbool op in het display.U kunt nu de starttijd van de timer instellen. Gebruik de KLOK, MIN, ^+ en - knappen om de startijd van de timer in te stellen.Wacht tot het display stopt met knipperen.
3. Nadat u opniew op de WEEK / TIMER-knop (6) hebt gedrukt en cervolgens op de SET UP-knop heeft gedrukt,licht het OFF-symbool op het display op.U kunt nu de uitschakeltijd van de timer instellen. Wacht tot het display stopt met knipperen.
OPMERKING: de startijd要去 algond korter waar dan de stootijd.
OPMERKING Druk op de RESET-knop om de timer terug te zettenaar de standaardinstellenen.
V. REINIGING EN ONDERHOUD
1. Haal aktijd de stekker uit het stopcontact voordat u het apparaat schoonmaakt.
2. Alsijdens het schoonmaken items zoals stekker,thermostaat,elektrische contacten etc.geweekt voordat ze opnieuw worden gebruikt, moeten ze grondig worden gedroogd
3. Gebruik geen agressieve reinigingsmiddelen te gebruiken in de vorm van emulsies, lotions, pasta's, etc. om de kast schoon te makeen. Ze können onder andere de informatie grafische symbolen verwijden, zoals borden, waarschuwingsborden, etc.
4. Zorg ervoor dat het apparaat is afgekoeld voordat u het schoonmaakt.
TECHNISCHE GEGEVENS:
Voltage: 220 - 240V 50 / 60Hz
Vermogen: 2000W Max. Vermogen: 2200W
lp20

Voorzichtigheid heet oppervlak" - De temperatuur van beschikbare oppervlakken kan hoger zichen wanner de inrichting werkt, tekent dat de behuizingselementen worden heetijdens bedrijfijdens bedrijf, SAVE voorzichtig !!!

"DO NOT covers" - opschrift BELANG De inscriptie op het apparaat betekent dat het apparaat Niet te worden bedekt met, dekens en andere textielproducten die ontbranding kan veroorzaken.

RCHUING: Gebruik dit apparaat Niet in de buurt van badkuipen, douches, zwembaden en soortgelijke water tanks.

We given om het milieu. We vragen u om de kartonnen verpakkingen te storten bij het oud papier. Polyethylen zakken (PE) storten in de container voor plastic. Versleten apparatuur afgeven bij het juiste verzamelpunkt, als in het apparatuur gevaarlijke elementen zitten kan dat een bedreiging zichoor het milieu. Elektrisch apparatuur moet worden geretourneerd om het hergebruik te verminderen. Als in het apparatur batterijen ziiten, horen die verwijderd te worden en appart af te worden geveven bij het juiste verzamelpunkt.
(DK) DANSKI
OBS:
Enheden er kun beregnet til husholdningsbrug.
Enheden er IKKE beregnet til commerciel / professionnel brug.
Enheden er IKKE egnet til udendørs brug.
OBS! Før du bruger det, er det vigtigt, at du læserijke betjeningsvejledning for at undgå ulykker og for korrekt brug af encheden. Opbevarijke manual og opbevar den, sä du nemt kan bruge den.
I. Retningslinjer for brugsikkerhed
1. Før brug skal du kontrollere, at spændingen angivet på typeskiltet svarer til de lokale saltholdighedsparametre, men husk at mærket: AC- er vekselstrøm og DC er DC.
2. Tilslut enheden kun til en 220-240V ~ 50/60 Hz jordet stikkontakt.
3. Løsn og træk netledningen ud, før du bruger den
4. Sorg for, at netledningen og stikket ikke har nogen synlig skade
5. Før og after brug skal du sorge for, at netledningen ikke strækkes over en Åben flamme eller,anden varmekilde og skarpe kanter, der kan beskadige kabelsætningen.
6. Fjern alle emballagekomponenter inden brug første gang. OBS! I tilfælde af et hus med metaldele kan der på disse elementer strækkes en let synlig beskyttelsesfolie, som øgså skal fjernes.
7. Enheden bør ikke anvendes af børn, personer med begrænset fysisk, sensorisk eller mental kapacitet,uden tilsyn af autoriserede ull erfarne personer og altid i overensstemmelse med disse instruktioner.
8. Udstyret er/DDke beregnet til brug med eksterne tidsafbrydere erer et separat fjernbetjeningssystem.
ADVARSEL: Dette udstyr kan bruges af børn over 8 År og personer med begrænets fysisik, sensorisk eller mental evne eller personer, der ikke har erfaring eller kendskap til udstyr, KUN, hvis dette sker under tilsyn af en person, der er ansvarlig for deres sikkerhed eller har fæt instrukser om sikker brug af encheden og er opmærksom på farene i forbindelse med brugen. Børn skal ikke lege med udstyret. Rengöring og vedligeholdelse af apparatet bør不同程度 in medmindre de er over 8 År og overvåges
9. Forlad ikke enheden uovervåget under drift.
10. Sænk ikke apparatet og netledningen i vand eller andre æsker.
11. När enheden ikke er i brug, skal den altid afbrydes fra stikkontakten.
12. Træk netledningen ud af stikket, när du trækker stikket ud af stikket.
13. Sæt ikke METALEMÆRK indeni enheden
14. Fabrikanten er ikke ansvarlig for skader som fjge af ukorrekt brug af enheden.
15. Det skal huskes, at nogle dele af enheden og kabinettet under arbejdet bliver meget varme, sā pas pa, og rør ikke dem, du kan blive brændt.
16. Dæk IKKE encheden under drift, eller nar den ikke køler helt ned
17. Husk, at apparatets varmeeelementer tager tid til at kole ned helt.
18. Sørg for tilstrækkelig plads over og omkring, nár du anvender enheden. Apparatet kan ikke berøre noget let brændbare genstande under arbejdet, sasomdekorationer, papirhåndklæder, gardiner, tøj osv.
19. Varmeapparatet installereret i badeværelset skal installereres, sa kontakterne og andere regulatorer ikke kan røres af en personi badekarret eller under bruseren.
20. I varmeapparater til højhøjdearmaturer skal positionerne i de forskellige positioner af forbindelsesledningerne��e synlige fra en afstand pa 1 m
21. Mærkningen til at dække varmeren skal vare synlig after installation af varmeren
22. Du kan ikke placere varmeapparatet direkte under stikkontakten og iærheden af
brændbare materialer som gardiner, gardiner mv.
23. Enheden kan/DDIke bruges med eksterne tidsafbrydere ell er andre separate fjernbetjeningssystemer
24. Udsæt ikke apparatet under atmøsfaeriske forhold (regn, sol osv.) Eller brug under forhold med hj luftfugtighed (badeværelser, fugtige campinghuse)
25. Kontroller regelmæssigt strømkabelens tilstand. Hvis netledningen er beskadiget, skal den udskiftes af et specialiseret reparationsanlæg for at undgå en fare
26. Brug/DDie apparatet i naeheden af brandfarlige materialer
27. Varmeapparatet skal installeres i en hojde pa mindst 1,8 m over gulvet
28. Brug/DDette varmelegeme i umiddelbar nærhed af et badekar, brusebad ellerswimmingpool
29. Brug/DDne varmelegeme, hvis den er faldet
30. Må ikke bruges, hvis der er synlige tegn på beskadigelse af varmelegemet
31. Brug varmelegemet på en jævn og stabil overflade, eller fastgør den til væggen, hvis det er foreskrevet af producenten.
ADVARSEL: Brug/DDne varmelegeme i sma rum, hvor der er mensesker, der icke er i stand til at afterlade dem alene, medmindre konstant overvagning er sikret.
ADVARSEL: For at mindske risikoen for brand skal du holde tekstiler, gardiner erler andre brændbare materialer mindst 1 m væk fra varmeapparatets luftudtag.
Det anbefales, at den elektriske installation er udstyret med en automatisk reststrømafbryder med 30mA startstrøm for øget sikkerhed.
Bemærk: Hvis strømledningen eller stikket er beskadiget, skal den alto udskiftes eller repareres af en specialiseret værksted.
II. ADVARSLER
1. Brug aldrig enheden, hvis den er beskadiget aller ikke fungerer korrekt.
2. Brug aldrig encheden, hvis den er faldet fra en hjde for og viser synlige skader.
3. Brug/DD: forlangerledninger erer andre stikkontakter, der icke overholder geldende standarder og elektriske forskrifter.
4. Eventuel reparation, demontering uller udskiftning af dele skal altid foretages af en specialiseret anlag.
5. Hvis encheden og elektriske komponenter som elektriske kontakter er våde, skal stikket eller kablet ørres, inden apparatet og dets komponenter anvendes.
6. Brug/DD: enheden med vade hender.
7. Forsøg IKKE at reparere encheden selv, hvis der er risiko for, at encheden er beskadiget.
8. Vask aldrig apparatet under rindende vand eller på en södanmxde, at vandet drypper ind i det.
9. Brug/DD, om icke anbefales af fabrikanten. De kan udgore en fare for brugeren og kan forarsage skade pa eheden.
10. Sorg for, at enheden er afkølet før opbevaring.
11. Rør ikke huset under brug. Brug kun knapper og switche under drift. Vent after, at apparatet er afkølet,ningar det er slukket.
12. FORSIGHTIG: Nogle dele af dette enhed kan blive meget varme under drift og forårsage forbrændinger.
III. FØR FØRSTE BRUG
1. Fjern alt emballeringsmaterialie og træk netledningen ud
2. Under installationen kan enheden vare daekket af isolerende materiale erer lignende materiale
3. Ved montering af anordningen må bjælker og spærre ikke skæres eller skæres
4. Læs alle brugsanvisninger før brug Forste gang.
5. Kontroller, om den spænding, der er angivet pa etiketten, svarer til spændingen i stromnettet i dit hjem
INSTALLATION
Brug bor til at bore to huller i væggen, mindst 180 cm fra gulvet og 20 cm fra loftet - billede A. Nár du har boret hullene, skal du sætte puden og skruen i. Sørg for, at skruerne er godt strammet og hæng encheden på væggen.
PRODUKTBESKRIVELSE
Billede B. MAIN SWITCH
ON/OFF = OFF ON/YUTN OFF.
Billede C. FJERNKONTROL
1. Taend / sluk-knap
6.VEK/TIMER
2. MODE
7. MIN
3.DAG
8. +-> Knappen for at hæve temperaturen. Fungerer och som en valgknapp for tid / dag.
4.CLOCK
9. --> Knap for at sænke temperatures. Fungerer også som en valgknapp for tid / dag.
5. SETUP
10. RESET - Timer reset-knap
Billede D. LED PANEL
1. ON symbolet
6. Dags display
2. Varmekraft 1000W
7. Tidsvising
3. Varmekraft 2000W
8. ON symbol-timer starter op
4. AUTO Funktion
9. OFF-symbol - timerafbrydelse
5. Temperaturvisning
10. Abn vinduesdetekteringsfunktion
IV.ANVENDELSE
1. Tryk på hovedschakelaar til hijre for apparatet - Billede B om apparatet i en ud af skakelen.
2. Apparatet stär nu i standby-modus. Druk op de aan / udknop (1) op de afstandsbediening - Afbeelding C.
3. Tryk afterfolgende på MODE-knappen (2) om firmaets valg af selektering:
- 1000 W apparatuset vil konstante opwarmen med 1000 W.
- 2000 W, apparatuset vil konstant opwarmen med 2000 W.
- Auto-modus, tryk på knoppen + da - om temperaturhändmatig i te stellen. Apparatet går automatisk til modus for temperaturophold.
- Aben venster-detektionsfunktion - När这部分 Funktion er valgt, skal du skubbe til enheden til at opvarne automatisk fra plotteren til kamertemperatur med 10^ C daalt.
4. Tryk pá de aan / udknop (1) pá den afstandsbediening om apparatet fra te schakelen. Enhedens kob af en skakelt var ca. 30 sek.
DE INTERNE APPARAATKLOK INSTELLLEN
OPMERKING: Nár du er den nuværende tid og en dag af ugen ikke bliver installereret, vil apparatet ikke fungere godt, fordi det er hans egen interne klok, hvad der er tilfældet.
1. Vaelg AUTO-funktionen Med. MODE-knappen.
2. Stel dig før timeren installeredeagation for ugen og den aktuelle tid i:
- Tryk på knappen DAG og vælg Vælg den aktuelle dag med knoppen + en -. Wacht tot the display stopt with knipperen.
- Tryk på KLOK-knappen og sæt den aktuelle tid i met de knoppen + da -. Wacht tot the display stopt with knipperen.
- Tryk på MIN-knap og søt de aktuelle minutter i met de knuppen + da -. Wacht tot the display stopt with knipperen.
TIMERPROGRAMMERINSTELLING-TIMER
Med denote funktion kan du programmere den tid til enhed pa enhver onsket dag af ugen og ud af skakelen.
Timeren kan kun blive indtastet after valg af AUTO-funktionen og installationen af den interne klok fra apparatet.
1. Tryk på WEEK / TIMER-knap og vælg Vælg den dag fra ugen, hvor apparatet vil indstille automatisk i og ud af skakelen med knoppen + en -. Wacht tot the display stopt with knipperen.
2. Nadat u pa knappen SET UP have gedrukt, light the ON-symbool op in the display. Du kan nu starte starttdispunktet for timeren instellen. Brug de KLOK, MIN, + da - knappen om starttdispunktet for timeren i te stellen. Wacht tot the display stopt with knipperen.
3. Nadat u nogmaals på WEEK / TIMER-knappen (6) du har skrevet og derefter valgt at SET UP-knappen har skrevet, lys OFF-symbolet på displayet. Du kan nu vælge det eksklusive tidsinterval af timeren. Wacht tot the display stopt with knipperen.
OPMERKING: starttdspunktet skal altid vare kortere end stoptiden.
OPMERKING Tryk på RESET-knappen om timeren skal gå tilbage til standardindstillingerne.
V. RENGØRING OG VEDLIGEHOLDELSE
1. Tag altid stikket ud af stikkontakten inden rengoring.
2. Ved rengering som f.eks. Stikkontakt, termostat, elektriske kontakter osv. er gennemblodt, inden de bliver brugt igen, bør de tøres grundigt
3. Brug icke aggresive rengaringsmidler i form af emulsioner, lotioner, pastaer osv. at rense kabinett. De kan blandt andet fjerne de informations grafiske symboler, sasom tegn, advarselsskilde osv.
4. Sorg for, at eheden er afkølet for rengoring.
TEKNISKE DATA:
Spending: 220-240V ~ 50 / 60Hz
Effekt: 2000W Maks. Effekt: 2200W
IP20

"Caution Hot Surface" - Temperaturen pä de tilgängelige overflader kan vare højere, när udstyret arbejder, hvilket betyder at
lenteerne bliver meget varme under drift under drift. SPAR NOGELIG!

"DAKK IKKE" - INSCRIPTION IMPORTANCE Indskrifen på enheden betyder, at eheden ikke skal��e daekket af tøj,
tapper og andre tekstilvarer, der kan forarsage taending.

IL: Brug ikke dette udstyr iærheden af badekar, brusere, svømmebassiner og lignende vandtanke.

Af hensyn til miljøet . Venligst overfor papemballage til affaldspapir. Hæld polyethylenposer (PE) i plastbeholderen Slidt enhed skal returneres til det relevante punkt opbevaring, fordi det er farligt i enheden ingredienser kan udgøre en trussel for miljøet. Den elektriske enhed skal overleveres for at begrænse dets genanvendelse og brug. Hvis i enheden der er batterier, fjern dem og vende tilbage til punktet opbevares separat.
(IT)ITALIANO
ATTENZIONE:
Il disposativo è destinato esclusivamente all'uso domestico.
Il disposativo NON è destinato all'uso commerciale / professionale.
Il disposativo NON è adatto all'uso all'aperto.
Attenzione! Prima di utilizzare, èEssenziale leggere queste istruzioni per l'uso per evitare incidenti e per un uso corretto del disposativo. Conserva questo manuale e tienilo in modo da poterlo usare lavoramente.
I. LINEE GUIDA PER LA SICUREZZA DELL'USO
1. Prima dell'uso, controlling che la tensione specificata sulla targhetta di identificazione corrisponda ai parametri locali di salinità, ma ricordare che la marcatura: AC- è alternata e DC è DC.
2. Collegare il disposativo solo a una presa con messa a terra da 220 - 240V 50 / 60~Hz
3. Prima dell'uso, srotolare e raddrizzare il cavo di alimentazione
4. Assicurarsi che il cavo di alimentazione e la spina non presentino danni visibili
5. Prima e dopo l'uso, assicurarsi che il cavo di alimentazione non sia disteso sopra una fiamma libera o altra fonte di calore e spigoli vivi che possono danneggiare l'isolamento del cavo.
6. Prima del primo utilizzato, rimuovere tutti i componenti dell'imballaggio. Attenzione! Nel caso di un involucro con parti metalliche, su quosti elementi si può allungare un foglio protettivo leggermente visibile, che deve essere rimioso.
7. Il dispositivo non deve essere utilizzato da bambini, persone con disponà fisiche, sensoriali o mentali limitate sono la supervisione di persone autorizzate o esperte e sempre in conformità con queste istruzioni.
8. L'apparecchiatura non è destinata all'uso con interruptori orari esterni o un sistema di controllo remoto separato.
AVVERTENZA: esta apparecchiatura può essere utilizzata da bambini di età superiore a 8 anni e persone con capacità fisiche, sensoriali o mentali limitate o persone che non hanno esperienza o conoscezza delle apparecchiature, SOLO se ciò viene fatto molto la supervisione di una persona responsabile della loro sicurezza o sono state fornite istruzioni sull'uso sicuro del dispositivo e sono consapevoli dei pericoli associati al suo utilizzo. I bambini non dovrebbero gliacare con l'attrezzatura. La pulizia e la manutenzione del dispositivo non devono essere eseguite dai bambini a meno che non abbiano superato gli 8 anni di età e siano sorvegliati
9. Non lasciare il disposativo incustodito durante il funzionamento.
10. Non immergere l'apparecchio e il cavo di alimentazione in acqua o altri liquidi.
11. Quando il dispositivo non è in uso, dovrebbe essere sempre scollegato alla presa di corrente.
12. Quando si estraie la spina alla presa, non tirare mai il cavo di alimentazione solo alla presa.
13. Non insere NESSUN ARTICOLO DI METALLI all'interno del disposizio
14. Il produttore non è responsable per danni derivanti da un uso improper del disposativo.
15. Va ricordato che alcune parti del dispositivo e dell'armadio durante il lavoro si scaldano molto, quando fai attenzione e non toccarle, puoi bruciare.
16. NON copire il dispositivo durante il funzionamento o quando non si raffredda completeness
17. Ricordare che gli elementi riscaldanti del dispositivo richiedono tempo per raffreddarsi completeness.
18. Quando si utilizes il dispositivo, assicurare uno spazio adeguato sopra e intorno. Il dispositivo non può toccare oggetti facilitamente inflammabili durante il lavoro, come decorazioni, asciugamani di carta, tende, vestiti, ecc.
19. Il riscaldatore installato nel bagno deve essere installato in modo tale che i connettori e gli altri regolatori non possano essere toccati da una persona nella vasca da bagno o quello la doccia.
20. Nei riscaldatori per apparecchi ad alta quota, le positioni delle diverse posizioni dei connettori devono essere visibili da una distance di 1 m
21. L'etichetta per coprire il riscaldatore dovrebbe essere visible dopo l'infallazione del riscaldatore
22. Non è possibile posizionare il riscaldatore direttamente sotto la presa e vicino a materiali inflammabili come tende, tende, ecc.
23. Il disposativo non può essere utilizzato con Interruttori orari esterni o altri sistemi di controllo remoto separati
24. Non esporre il disposativo a condizioni atmospheriche (pioggia, sole, ecc.) O utilizzare in condizioni di elevata umidità (bagni, case da campeggio umide)
25. Controllare periodicamente le condizioni del cavo di alimentazione. Se il cavo di alimentazione è danneggiato, è necessario sostituirlo con un'officina di riparazione specializzata per evitare rischi
26. Non utilizzato il disposativo vicino a materiali inflammabili
27. Il riscaldatore deve essere installato ad un'altezza non inferiore a 1,8 m dal pavimento
28. Non utilizzato quello riscaldatore nelle immediate vicinanze di una vasca da bagno, doccia o piscina
29. Nonutilizzarequesto riscaldatoresecaduto
30. Non utilizzato se sono presenti segni visibili di danneggiamento del riscaldatore
31. Utilizzare la stufa su una superficie pianà e stabile o fissarla alla parete, se previsto dal produttore.
ATTENZIONE: Non utilizzato Questa stufa in stanze piccole dove ci sono persone che non possono lasciarla da sole, a meno che non sia assicurata una supervisione costante.
AVVERTENZA: per ridurre il rischio di incendio, Maintainere tessuti, tende o altri materiali infiammabili ad almeno 1 m. dall'uscita dell'aria del riscaldatore.
Si consiglia di dotare l'impianto elettrico di un interrottore automatico differenziale con corrente di avvamento da 30mA per una maggiore sicurezza.
Note: se il cavo di alimentazione o la spina di alimentazione sono danneggiati, devono essere sempre sostituiti o riparati da un'officina specializzata.
II. AVVERTENZE
1. Non utilizzato mai il disposativo se è danneggiato o non funziona correttamente.
2. Non utilizzato mai il disposativo se è caduto da un'altezza precedente e mia segnì visibili di danni.
3. Non utilizzato prolonghe o altre prese elettriche che non soddisfano gli standard applicabilitie e le normative elettriche.
4. Qualsiasi riparazione, smontaggio o sostuzione di qualsiasi parte deve sempre essere effettuata da una struttura specializzata.
5. Se il dispositivo e i componenti elettrici come i contatti elettrici sono bagnati, la spina o il cavo devono essere asciugati prima di utilizzato il dispositivo e i loro componenti.
6. Nonutilizzare il dispositivo con le mani bagnate.
7. Quando esiste il rischio che il dispositivo sia stato danneggiato, NON tentare di riparare il dispositivo da soli.
8. Non lavare mai il dispositivo sotto acqua corrente o in modo che l'acqua vi goccioli dentro.
9. Non utilizzato accessori non consigliati dal produttore. Possono rappresentare un pericolo per l'utente e causare danni al dispositivo.
10. Assicurarsi che il dispositivo si sua raffreddato prima di riporlo.
11. Non toccare l'alloggiamo durante l'uso. Durante il funzionamento, utilizzare solo manopole e interruttori. Dop lo spegnimento, attendere il raffreddamento del dispositivo.
12. ATTENZIONE: Alcune parti di quello dispositivo posso sono divertare molto calde durante il funzionamento e causare uszioni.
III. PRIMA DEL PRIMO UTILIZZO
1. Rimuovere tutto il materiale di imballaggio e raddrizzare il cavo di alimentazione
2. Durante l'installazione, il disposativo può essere coperto con materiale isolante o materiale simile
3. Durante il montaggio del dispositivo, le travi e le travi non devono essere tagliate o tagliate
4. Prima del primo utilizzato leggere tutte le istruzioni per l'uso.
5. Verificare che la tensione elencata sull'etichetta del prodotto in questione corrisponda alla tensione della rete di alimentazione nella propria abitazione
INSTALLAZIONE
Utilizzare il trapano per praticare due fori nella parete, almeno 180 cm dal pavimento e 20 cm dal soffitto - Foto A. Dopo aver praticato i fori, inseire il tampone e la vite. Assicurarsi che le viti siano ben serrate e appendere il dispositivo al. muro.
DESCRIZIONDELPRODOTTO
Figura B. INTERRUTTORE GENERALE
ON/OFF = OFF ON/YUTN OFF.
Figura C. TELECOMANDO
1. Pulsante ON / OFF
6. SETTIMANA/TIMER
2. MODALITA
7. MIN
3. GIORNO
8. +-> Pulsante per augmentare la temperatura. Serve anche come pulsante di selezione per ora / giorno.
4.CLOCK
9. --> Pulsante per abbassare la temperatura. Serve anche come pulsante di selezione per ora / giorno.
5. CONFIGURAZIONE
10. RESET - Pulsante di reset del timer
Imagine D. PANNELLO LED
1. Simbolo ON
6. Visualizzazione del giorno
2. Potenza di riscaldamento 1000W
7. Visualizzazione del tempo
3. Potenza di riscaldamento 2000W
8. Simbolo ON: avvio del timer
4. Funzione AUTO
9. Simbolo OFF - spegnimento timer
5. Display della temperatura
10. Funzione di rilevamento della finestra aperta
IV.USO
1. Druk op of hoofdschakelaar aan de rechterkant van het apparaat - In seguito B om het apparaat in en uit te schakelen.
2. Apparire ora in modalità standby. Druk op de aan / uitknop (1) op afstandsbediening - Afbeelding C.
3. Druk achtereenvolgens op in MODE-knop (2) om di bedrijfsmodus te selecteren:
- 1000 w het apparaat za costante opwarmen incontrato 1000 W.
- 2000 W, bajo aver funzionato costamente con 2000 W.
- Auto-modus, trascina il pulsante + en - om di temperatura nel loro dispositorio manuale. Il suo orologio automatico è perfetto per la temperature.
- Apri rivelatore rilevabile - Wanner deze functie is geselecteerd, schakelt het apparaat of verwarming automatisch uit of the kamertemperatuur complotting with 10^ daalt.
4. Druk of aan / uitknop (1) opstandsbediening om het apparaat it schakelen. Et stato scelto come uno scultore undo 30 secondi.
DE INTERNE APPARAATKLOK INSTELLLEN
RINGRAZIAMento: Als u de huidige tijd en dag van de week Niet instelt, za het apparaat Niet goed werken omdat het volgens zich eigen interne klok werk, wat onjuist is.
1. Selezionare la funzione AUTO con la manopola MODE.
2. Stel voordat u del timer installato nella settimana e in huidige tijd in:
- Premere il pulsante DAG in modo da selezionare il pulsante con il pulsante + en -. Visualizzazione completa del display arrestata con il knipperen.
- Trascina il pulsante KLOK in modalità di gioco con il pulsante + en -. Visualizzazione completa del display arrrestata con il knipperen.
- Trascina il dato MIN nel menu di scelta rapida con il pulsante + en -. Visualizzazione completa del display arrestata con il knipperen.
PROGRAMMATORE TIMERINSTELLING - TIMER
Con esta funzione è stato programmatico il programma da un altre utente durante la settimana in Svizzera.
Il timer cui oessere inserto in una selezione di funzioni AUTO in quost istante di installatione interna.
1. Premere il tasting WEEK / TIMER e selezionare la data della settimana in cui si aprirà il programma che verrà installato e automatizzato in ita schakelen met de knoppen + en -. Visualizzazione completa del display arrestata con il knipperen.
2. Premere il pulsante SET UP per visualizzare il messaggio, quando attivare ON-symbol nel display het. Sei pronto per iniziare con il timer. Gebruik de KLOK, MIN, + en - consente di avviare il timer con il timer. Visualizzazione completa del display arrestata con il knipperen.
3. Leggi i manuali di WEEK / TIMER-knop (6) in modo da visualizzare e visualizzare su SET UP-knop eeft gedrukt, quindi visualizzare OFF-symbool sul display op. è ora possibile installare il timer. Visualizzazione completa del display arrestata con il knipperen.
OPMERKING: de startijd要去 algid korter waar dan de stoptijd.
APERTO Druk su RESET-manopola del timer terug zarden maar of standaardinstelleningen.
V. PULIZIA E MANUTENZIONE
1. Scollegare sempre l'apparecchio alla presa di corrente prima di pulirlo.
2. Se durante la pulizia articoli come spina di alimentazione, termostato, contatti elettrici ecc. sono fradici prima di essere riutilizzate, devono essere completenesse asciugate
3. Non utilizzato detergenti aggressivi sotto forma di emulsioni, lozioni, paste, ecc. per pulire l'armadietto. Possono, tra le altre cose, rimuovere i symboli grafici delle informazioni, come cartelli, segnali di pericolo, ecc.
4. Assicurarsi che il dispositivo si sia raffreddato prima di pulirlo.
DATI TECNICI:
Tensione: 220-240 V ~ 50/60 Hz Potenza: 2000 W max. Potenza: 2200W Ip204

"Attenzione superficie calda" - La temperatura delle superfici disponibili più essere maggiore quando l'apparecchiatura è in funzione, il che significa che gli elementi dell'alloggiamo divertano molto caldi durante il funzionamento durante il ento, SALVA ATTENZIONE !!!

"Non copire" - ISCRIZIONE IMPORTANZA L'iscrizione sul disposito significa che il disposito non deve essere coperta con e alti prodotti tessili che potrebbero causare l'accensione.

AVERTENZA: non utilizzato questa apparecchiatura vicino a vasche da bagno, docce, piscine e serbatoi per l'acqua simili.
Prendersi cura dell'ambiente
Gli imballi di cartone devono essere smaltiti nel contentatore per la carta. I sacchetti di polietilene (PE) vanno gettati nel contentatore per la plastica. L'apparecchio usato deve essere rottamato presso un centro di raccolta autorizzato, poiché contiene elementi pericolosi che potrebbero costituire una minaccia per l'ambiente. I dispositivi elettrici devono essere resi al fine di evitare il loro riutilizzo. Se il dispositivo contiene una batteria, deve essere rimossa e smaltita separamente in un punto di raccolta.
Nongettare l'apparecchio nei contentitori dei rifiuti urbani!
(FI) SUOMI
HUOMIO:
Laite on tarkoitetu vain kotikayttoon.
Laite ei ole tarkoitetti kaupalliseen tai ammatilliseen käyttoön.
Laite ei sovi ulkokayttoon.
Huomio! Ennen käyttoa on tärkea lukea namä käyttoohjeet onnettouuksien välttamiseksi ja laitteen asianmukaisen käytön varmistamiseksi. Säilytä tämä käyttoohje ja säilytä se, jotta voit käyttaa sitä helposti.
I. KAYTTÖTURVALLISUUSOHJEET
1. Tarkista ennen käytöä, etta tyyppikilvessa ilmoitetu jannite vastaa paikallista
suolapitoisuutta, mutta muista, etta merkintä: AC- on vaihtovirta ja DC on DC.
2. Kytke laite vain 220 - 240V 50 / 60~Hz maadoitettuun pistorasian.
3. Irrota ja suorista virtajohto ennen kayttoa
4. Varmista, etta virtajohdolla ja pistokkeella ei ole nakyviä vaurioita
5. Varmista ennen käyttoa ja kayton jälkeen, etta virtajohto ei ole venytety avotulen tai muun lammonlähteen ja terävien reunojen yli, mikä voi vahingoittaa kaapelin eristystä.
6. Poista kaikki pakkausosat ennen ensimmäistä käyttoa. Huomio! Jos kyseessä on metalliosia sisälävää kotelo, nällä elementeillä voidaan venyttaa hieman nakyvää suojakalvoa, joka on myös poistettava.
7. Lapset, henkilöt, joilla on rajoitettu fyysinen, aistillinen tai henkinen kyky, eivät saa käyttaa laitetta ilman valtuutettujen tai kokeneiden henkilöiden valvontaa ja aina näden ohjeiden mukaisesti.
8. Laitetta ei ole tarkoitetu käytettäväksi ulkoisten aikakytkimien tai erillisen kaukohjausjärkestelmän kanssa.
VAROITUS: Tata laitetta voivat käyttaa yli 8-vuotiaat lapset ja henkilöt, joilla on rajoitettu fyysinen, aistillinen tai henkinen kyky, tai henkilöt, joilla ei ole kokemusta tai laitteiden tunte masta, VAIN, jos tamä tapahtuu heidän vastuullaan olevan henkilön valvonnassa. turvallisuutta tai on annettu ohjeita laitteen turvallisesta käytostä ja tietoinen sen käyttoön liittyvista vaaroista. Lapset eivat saa leikkiä laitteiden kanssa. Laitteen puhdistusta ja huoltoa ei tule suorittaa lapset, elleivät ne ole yli 8-vuotiaita ja heitä valvotaan
9. Alä jata laitetta ilman valvontaa kayton aikana.
10. Alä upota laitetta ja virtajohtoa veteen tai muihin{nesteisiin.
11. Kun laitetta ei kayteta, se on aina irrotettava pistorasiasta.
12. Kun vedät pistoketta pistorasiasta, alä koskaan vedä virtajohtoa vain pistokkeesta.
13. Alä laita laitteeseen mitään metallia
14. Valmistaja ei ole vastuussa vahingoista, jotka aiheutuvat laitteen virheellisestä kaytosta.
15. On muistettava, etta laitteen jotkin osat ja kaappi työn aikana ovat hyvin kuumia, joten ole varovaisia jiä alä koske niihin, voit polttaa.
16. ALA peita laitetta kayton aikana tai kun se ei ole jäahtynyt kokonaan
17. Muista, etta laitteen lammityselementit vievat aikaa jäahtya kokonaan.
18. Kun käytät laitetta, varmista, etta tilaa on riittävästi. Laite ei voi koskettaa helposti syttyviä esineitä työn aikana, kuten koristeita, paperipyyhkeitä, verhoja, vaatteita jne.
19. Kylpyhuoneeseen asennettu lammitin tulee asentaa siten, etta kylpyammeessa tai suihkussa oleva henkilö ei saa koskettaa liittimiä ja muita saaatimiä.
20. Korkean korkeuden kiinnittimien lammittimssä liittimien eri asentoen on oltava nakyvissä 1 m. etaisyydeltä.
21. Lämmittimen paalysmerkinnan tulee nakyä lammittimen asentamisen jälkeen
22. Et voi sijoittaa lammitintä suoraan pistorasiaan ja lahell palavia materiaialeja, kuten verhoja, verhoja jne.
23. Laitetta ei voi käyttaa ulkoisten aikakytkimien tai muiden erillisten kaukohjausjärestelmien kanssa
24. Älä altista laitetta ilmasto-olosuheisiin (sade, aurinko jne.) Tai käytä koskeissa
olosuheissa (kylpyhuoneet, kosteat leirintaalueet)
25. Tarkista saannöllisesti virtajohdon kunto. Jos virtajohto on vaurioitunut, se tulee vaihtaa korjauslaitoksella, jotta välteään vaara
26. Alä kayta laitetta syttyvien materiaalien lahellä
27. Lammitin on asennettava vahintaaan 1,8 metrin korkeuteen lattian ylapuolelle
28. Alä käytä tata lammitintä kylpyammeen, suihkun tai uima-altaan valittomassä lāheisyydessä
29. Alä kaytā tata lammitinta, jos se on pudonnut
30. Alä käytä,Jos lammittmessä on nakyviä merkkejä vaurioista
31. Käytä lämmitintä tasaisella ja vakaalla pinnalla tai kiinnitä se seinään, jos valmistaja niin maärää.
VAROITUS: Älä käytä tata lämmitintä pienissä tiloissa, joissa on ihmisä, jotka eivat pysty jättämään niitta yksin, ellei jatkuvaa valvontaa varmisteta.
VAROITUS: Tulipalon vaaran vahentämiseksi pidä tekstiilejä, verhoja tai muita tulenarkoja materiaialeja vähintaan 1 metrin päässä lammittimen ilman ulostulosta.
On suositeltavaa, etta sahköasennuksessa on automaattinen jaannösvirta-katkaisija, jonka kaynnistysvirta on 30mA turvallisuuden lisäämiseksi.
Huomautus: Jos virtajho to tai pistoke on vaurioitunut, se on aina vaihdettava tai korjattava erikoistuneella korjaamolla.
II. VAROITUKSET
1. Älä koskaan käytä laitetta, jos se on vaurioitunut tai ei toimi oikein.
2. Älä koskaan käytä laitetta, jos se on pudonnut korkeudesta ennen ja näyttaa nakyviä vaurioita.
3. Älä käytä jatkojohtoja tai muita pistorasioita, jotka eivät täytä sovellettavia standardeja ja sahkömaäräyksiä.
4. Mikä tahansa osien korjaus, purkaminen tai vaihtaminen on aina tehtävä erikoislaitoksessa.
5. Jos laite ja sahkokomponentit, kuten sahkokontaktit, ovat marat, pistoke tai kaapeli on kuivattava ennen laitteen ja sen osien kayttoa.
6. Älä käytä laitetta marillä käsillä.
7. Kun on olemassa vaara, etta laite on vaurioitunut, ALA yritä korjata laitetta itse.
8. Älä koskaan pese laitetta juoksevan veden alla tai siten, etta vesi tippuu sihen.
9. Älä käytä lisāvarusteita, joita valmistaja ei suosittele. Ne voivat aiheuttaa vaaraa käytäjälle ja ne voivat vahingoittaa laitetta.
10. Varmista,etta laite on jäahtynyt ennen sailytysta.
11. Alä koske koteloon kayton aikana. Käytä kayton aikana vain nuppeja ja kytkimiä. Odota, etta laite jäahtyy, kun se on katkaistu.
12. VAROITUS: Jotkin laitteen osat voivat kuumentua kayton aikana ja aiheuttaa palovammoja. 79
III. ENNEN ENSIMMÄISEN KÄYTTÖA
1. Poista kaikki pakkausmaterialiaali ja suorista virtajohto
2. Asennuksen aikana laite voidaan peittä eristvällä materiaalilla tai vastaavalla materiaalilla
3. Asennettaessa laitetta ei saa leikata tai leikata palkkeja ja koskettimia
4. Lue kaikki käyttoöhjeet ennen ensimmaista käyttoa.
5. Tarkista, onko tuotemerkinnäss mainittu jännite vastaa sahköverkon jannitettä kotona
installation
Poraa kaksi poraa seinaan, vahintaan 180 cm lattiasta ja 20 cm katosta - kuva A. Kun olet porannut reiät, aseta tyyny ja ruuvi. Varmista, etta ruuvit ovat hyvin kiristetty ja ripustaa laite seinälle.
TUOTTEEN KUVAUS
Kuva B. PÄKGTKIN
ON/OFF = OFF ON/YUTN OFF.
Kuva C. KAUKO-OHJAUS
1. ON/OFF-painike
2. MODE
3. PÄVÄ
4.CLOCK
5. SET UP
6. VIIKKO / AJASTIN
7. MIN
8. + -> Painike lampötilan nostramiseen. Se toimii myös valintapainikkeena vuorokaudessa.
9. --> Painike lampötilan laskemiseksi. Se toimii myös valintapainikkeena vuorokaudessa.
10. RESET - Ajastimen nollauspainike
Kuva D. LED-PANELI
1. ON-symboli
2. Lammitysteho 1000W
3. Lammitysteho 2000W
4. AUTO-toiminto
5. Lampotilan naytto
6. Päävän näytö
7. Ajan naytto
8. ON-symboli - ajastimen käynnistys
9. OFF-symboli - ajastimen sammutus
10. Avaa ikkunan tunnistus
IV. KAYTTÖ
1. Druk op de hoofdschakelaar aan de rechterkant van het apparaat - Fabeelding B om het apparaat in en uit te schaken.
2. Ole hyvä ja odota valmiustilassa. Druk op de aan / uitknop (1) op afstandsbediening - Afbeelding C.
3. Druk achtereenvolgens op de MODE-knop (2) om bedrijfsmodus te selecteren:
- 1000 W: n koko ajan vakiovarustajat tapasivat 1000 W: n.
- 2000 W, heti apparaat zavakiovarustajt tapasivat 2000 W.
- Automaattinen modus, lapikaynnin + en - lampotila kasin steissä. Jos laitteessa on automaattinen tarkistus, lampotila voi muuttua.
- Avoin venster-havaintoyksikkö - Wanner deze -toiminto on valittu, tarkista sen lampenemisesta tarvittavat automaatiot, kun kameran lampötila on mitatu 10^ C: seen.
4. Druk op de aan / uitknop (1), joka kattaa kaikki tarvittavat vaatimukset. Tassä vaiheessa valmistaja on 30 sekunnin ajan.
DE INTERNE APPARAATKLOK INSTELLLEN
KASITTELY: Als u de huidige tijd ja dag van de vikko Niet instelt, za het apparaat Niet goed werken omdat het volgens zich eigen intern klok werkkt, wat onjuist is.
1. Valitse AUTO-toiminto valitsemalla MODE-knop.
2. Tahtiluokituksen ajankohtainen asettaminen viikon päästä seuraavasta paivästa:
- Druk op de knop DAG en valitset huidige dag met de knuppen + fi -. Wacht tot het display stopt met knipperen.
- Druk op de KLOK-knop en huidigeijd in met de knoppen + en -. Wacht tot het display stopt met knipperen.
- Druk op de MIN-knop huippuluokan kohta met + kn -. Wacht tot het display stopt met knipperen.
AJASTINOHJELMISTOINTI-TIMER
Koko ohjelma, joka sisältaa kaikki ohjelmat, joita voit käyttaa viikon aikana koko vikon ajan.
Ajastin kaikille sanamuotoille, jotka on valittu AUTO-toiminton, jotta he voivat kaytttaa kaikkia laitteita.
1. Druk op de VIIKKO / AJASTIN-valikko, joka valitaan viikon aikana, kun tarvitset laitteita ja asennat automaattisen automaattisen
käsittelyn, kun schakelen met de knoppen + fi - Wacht tot het display stopt met knipperen.
2. Nadat u op de knop SET UP hebt gedrukt,licht het ON-symbool op het -naytossa.Voit aloittaa ajastimen asennuksen.Helmikuu KLOK, MIN, ^+ fi - aloita ajastimen kaynnistaminen testessa. Wacht tot het display stopt met knipperen.
3. Nadat u nogmaals op of WEEK / TIMER-knop (6) hebt gedrukt en verrolgens op de SET UP-knop heeft gedrukt,licht het OFF-symbool op het display. Sinun ei tarvitse laittaa aikaa ajastimeen. Wacht tot het display stopt met knipperen.
KÄYTTOÖNOTTO: Käynnistä altijd asunto zich dan stoptijd.
KAYTTOOHJE Druk op de RESET - ajastin, jonka avulla voit tarkastella kaikkia standardeja.
V. PUHDISTUS JA HUOLTO
1. Irrota pistoke pistorasiasta aina ennen puhdistusta.
2. Jos puhdistusaineiden, kuten virtapistokkeen, termostaatin, sahkokontaktin jne. Aikana, ne on liotetu ennen kayttöä uudelleen, ne on kuivattava perusteellisesti
3. Alä käytä aggressivisia pesuaineita emulsioiden, voiteiden, tahnojen jne. Muodossa. puhdista kaappi. Ne voivat muun muassa poistaa information graafiset symbolit, kuten merkit, varoitusmerkit jne.
4. Varmista, etta laite on jähtynyt ennen puhdistusta.
TEKNISET TIEDOT:
Jannite: 220-240V ~ 50 / 60Hz
Teho: 2000W Maks. Teho: 2200W
lp20

Varoitus kuuma pinta" - Käytettävissä olevien pintojen lampötila voi olla korkeampi, kun laite toimii, mikä tarkoittaa, etta
koteloelementit kuumenevat kayton aikana kayton aikana, SAVE CAREFUL !!!

"ÄLÄ KÄÄNTÄ" - KUVAUS TÄRKEÄ Laitteen merkintä tarkoittaa, etta laitetta ei saa peittä vaatteilla, peitteillä ja muilla
tekstituotteilla, jotka voivat aiheuttaa sytymista.

TUS: Alä kaytä tātā laitetta kylpyammeen, suihkun, uima-altaan ja vastaavan vesisäiliön lahellä.

Kantakaamme huolta ymparistostä. Pahvipakkauksen pyydämme laittamaan paperikierratykseen. Polyteenipussit (PE) tuee laittaa muovien kierratysastiaan. Loppuun kaytetyl laitteet tuee toimittaa asianmukaiseen keryspisteeseen, koska laitteen sisälätmät vaarlliset aineosat voivat olla ymparistolle vahingollisia. Sähkolaite tuee toimittaa siten, etta sen uudelleenkäytö on estetty. Jos laitteessa on paristo, paristo tuee poistaa ja toimittaa erillisesti keryspisteeseen.
(UA) YKPAIHCBKA
YBAGA:
Ppncptpi npn3NaueHn TiIbKn IJy DomaunHbOro BVKOpNCtAHN.
Pnucpii HE npn3naeHn dIy KomepuHoro / npopeciHoro BnKOpncTahn.
PnctpiH E nixoNtB dIy BIKOpncTahnHa BIDKpntomy nobitpi.
Ybara! Ipeed BnKOpNCTaHnM oob'3KOBO npOHTaIe 1o IHcTpyKciIO 3 ekCnPyatauii, 0o6 yHnKHyTN HeUacnX BnPaAdkIB Ta npaBnIbHOrO BnKOpNCTaHHn PnucTpoIO. 36epiraTe uei noci6nIK i 36epiraTe Noro, 5o6 Noro MoxHa 6yIo JeRKO BnKOpNCTOByBaTu.
I. Bka3iBkn ⅢoO 6e3neKn BnKOpncTaHHa
1. Перацькористаням посяа на паспгштлчic, вдовide Лokалним napametpam cohocti, ane nam'raite, lo mapkybaHH: AC - ce 3minhoro ctpymy, a DC - DC.
2.Пдкючын рпсстрий лише до розетки заemлени 220-240 B~50/60 T.
3.перд вкористаням розкутith i виряmitb shyp xNBHeHHa
4. IpekeohaiTeca, 0o shHyp XnBHeHHa Ta BnIka He MaIOb BNIMIX IOsKOJKeHb
5. Пеши та пись використаня пошур кивлени He po3ryecbca Ha Bidkpntomy borhi abo inshomy dxepei TePna Ta roctpnx KpaX, kki MOkyTb nozkodnI i0jauio ka6eHIO.
6. Перд поим ВИКОпстаннам Видаліпь Bci кOMПонeHTи упakOBк. YBara! YВипаду 3 KOPnycom 3 MeТаЛeВIMn DeТалЯМN, Haцx eIemEHTax може 6уTN po3TЯHуTA 3JIerka
BnIMa 3axncha nIIBka, kA TAKoX NOBnHa 6yTN BnJaJIeHa.
7. Ппсстрий He NOBHeH BnKOpNCTOByBaTnCЯ DiTbMn, OcO6aMn 3 OmbexeHmN φi3uHmN, ceHCOPHmN Yu PO3yMOBmN MOxJIInBOCTaMn 6e3 HaIpy yNoBHOBaXeHnx a6o doCBiDyeHnx oci6 i 3aBXdN BiINOBiIDHo Do uNx iHCTpyKciJ.
8.ОБладнання He npn3hauehe ДЯ BИКOPиCTaHHЯ 3 3OBHIшHIMN BUMNKaayam N acy a6o OKpeMOIO CnCTeMOIO DnCTaHciINHOrO KepyBaHHra.
ПОЕРДЖЕHHЯ: Ye oblaання може вкористовьатися DiTbMn CTapwe 8 pokiv Ta Oco6amn 3 obmexeHIMN φi3nUHMN, ceHCOPHIMN a6o po3ymOBUMN 3di6HOCTaMn a6o Oco6amn, kI He MaOTb DocBiy a6o 3HaHb npo oblaanHnry, TIlbKN, kIoo ue po6ntbcny iI HarJydom oc6b, BiIOBidaIbHOi 3a ix 6e3neKn a6o 6yIuHaDAHI IHCTpyKci II SoOIO Be3neHoro BVKOpNCtAHnY npicStpoI i 3HaOtB npo He6e3neKn, nob'zahi 3 Ioro BVKOpNCtAHnM. DITn He NobHHI rpaTN 3 oblaanHnYm. PnpbpanHnTa texhiche OBCnyroBvBaHHЯ пrcSTpoI He NobHHI BVKOHyBatncr DaTbMn, kIoo BOHn He DoCyrnn 8-piuHOro BkY Ta He KOHTPOJIIOUTbcra
9. He 3aIIwaIte npictpiB 6e3 hargy nID qac po6OTn.
10. He 3aHpyoIe npnlai i shnyxNvBneHny y BODy a6o iHwi piDHH.
11.Якwo npictpiH He BnKOpNCTOByEcBcA, noTo cId 3aBXdn BiD'edHyBaTn BiD pO3eTKN.
12. Koln Bntrye Bnky 3 p03eKn, HikoN He TargHtB 3a shyp XNBHeHn Jnwe 3a
HTenCeJbHy Bnky.
13. He klaɪt b NO METAL ITEMS BCEpeɪnhy npɪcɪtro
14. Виравник He Hece BiДноВдаЛьНоcti 3a 3бntк, српунеHi He npabNьнm BИКОРИСТАHHЯm пИСТpoI.
15. CπiD nam'ЯтataN, ξο Deяki YactHn npictpoio i waoNi πiD yac po6Otn cTaIOTb dYxHe rapaunM, TOMy 6ydbTe o6epexHi i He TopkaTecrdo Hnx, BN MoKeTe cnaIIOBaTncra.
16. HE 3aKpmbaiTe npicptiPi d quac po6oTu a6o He nobHicTIO oxoJodKyetbcra
17. Nam'yaTae, 9o HarpiBaJIbHi eIeMeHTn npncToIO nOtpe6yIOTb yacy, 9o6 nobHicTO OxOnohTyN.
18. Пд час ВИКОПИСТАНЯ писчpoю 3а6e3neчte ДОCTаTHи посчтip над i habkoJO.
Пристрий не може Торкатися 6удь-якх ЛergозаймостиХ пеdmetов пд час роботи, taknxяк пикраси, палеров ршнки,штори, одг тоц.
19. O6irpiBauch, BCTaHOBJIeHn y BaHHi KIMHaTi, NOBHeH 6yTu BCTaHOBJIeHn TaKIM YINOM, 0o6 po3'Emu Ta iHwi peryIaTOpn He MORn 6yTu 3aueIeHi ocOboU y BaHHi a6o Ni dYwem.
20. Y harpibayax dIy BncoTHnx CbiTnIbHnKiB nO3nCiPi3Hnx nOIOXeHb po3'EMiB NOBHHi 6byu BNIMi 3 BiDCTahi 1 M. \ T
21.Пись Всановленья HarpiBaча NOBUNHa 6yTu BUDIMa eTUKeTKa ДЯ NOKpTTH HarpiBaça
22. He moxha po3miuBaTn HarpiBauch 6e3nocepEnbO NiD p03eTKoH, a TAKOX no6JN3y JERKO3aIMNCtNX MaTePiAIB, TaKx YK UToPn, UToPn ToUO.
23. Ппстей He може ВИКОПСТОВУВАТИСЕ 3 3OBHIшим ВИМИКачам Уасу abo iHшIMN OKремIMN сИСTeмamДиСТанцIйHORO КерУВання
24. He πίπιαναιθε πριστρίην BπΠΙΝΑγ αΤΜΟςφερήχ γΜΟβ (ДΟΙς, coΝυς τα έπ.) Aбο έν
BVKOPNCTOByIe B yMOBax NiDnUeHOI BOLOrOCTi (BaHHi KIMHaTn, BOJOri KeMnIHROBi 6ydnHKn)
25. PerioDnHNo nepeBipRte cTah shHypa XNBHeHHa. KaO shHyp XNBHeHHa NOKoJKeHO, Ioro cnI3amHHTn CneiaJIi3OBaHm peMOHTHM 3aKJaDom, 06 yHnKHyTu He6e3NeKN
26. He BnKOpncToBvIe npicTpii no6Jn3y Ierko3aMnCTnx MaTePiaJIb
27. HarpiBauchobHeHbTnBcTaHOBJIeHnHa BnCOTi He MeHwe 1,8 M nAdPiIIOROIO
28. He BnKOpncToBvIe ue o6irpiBaU y 6e3nocepEniH iN3bKOcTi BiD BaHNi, dyu a6o 6aceiHy
29. He BnKOpncToBvIte ue oBirpiBaU, kIo BIn ynaB
30. He BnKOpncToBvIe, kIoo e BnDnMI O3HaKn NOnsKOJxHHeNry o6irpiBaay
31. ВикоростовуITE obirpiBauch na pibni i ctiikii nobepxhi abo npnKpinitb noro do CTiH, YKso ce neped6aueho Bnpo6hNkom.
ПОЕРДЖЕНЯ: He BnKopncToBvIte ue o6irpiBaY y HeBeJIkX npMiuZeHnX, de e JIOi, kI He moKyTb 3aIIuWntn iX cami, kIso He 3a6e3neueHn NoCTiHn HaIyI.
ПОЕРДЖЕHHЯ: ьб змehштп ризк пожki, trpmaite TeKCTnIb, wTOpn a6o iHwi JERko3aIMNCtI mATEPIaII Na BiDCTaHI npHaMHi 1 M BiD BHXOy NOBITpy HarpIBaYa.
PekomeHdyetbcra, 06 eIeKtpnHa yCTaHObKa 6yla 6bnaHaHa aBTOMaTHHm BUMkaYeM 3aIIuKOBoro cTpyMy 3 nyckOBIM cTpyMom 30mA dIyINuJehn8 6e3neKn.
Iprnmtka: Jkso shnp jNvBneHna 60 shyp jNvBneHnooKOJKeHO, BIn 3aBXn NOBHeH 6ytn 3amHeHn a6o BiDpeMOHTOBAHn Cneiai3OBAHOIO peMOHTHOIO MaicTePHi.
II. NOPEPEJXEHHY
1. Hikon He BnKOpncToBvIe npicTpi, kso BIn noKoJxHn a6o He npaOe HaJeXHM uHOM.
2. Hikon He BnKOpncToBvIe npicTpi, kUO BiH BnaB 3 BnCOTn Do i Noka3ye BnuIMi O3HaKn NOsKOJxehn.
3. He BnKOpncToBvIe nOobKyBaui a6o iHwi eJeKtpnHi po3eTKn, kKi He BiIIOBiaIoTb DiIOChm CTAHdApTaMa eJeKtpnHm HopMaM.
4.Бydь-якп ремоNT,ДемоHTax abo 3amHa 6ydь-якнхЧаCTиH 3aBxДn MaE 3diIChIOBaTnCЯ cneцлizOBaHIM O6'ekTom.
5.Якwo npictpi i eJeKtpnHi KOMnoHeHTN, Taki k eJeKtpnHi KOHTaKTN, HAMOuJIH, npo6ky abo Ka6eIb Heo6xidHO BnCyuHTN nepeD BnKOpNCtAHHm npicTpoH ta Noro KOMnoHEHTiB.
6. He BnKOpncToBvIe npncTpiM oKpMm pyKaMn.
7.Якwo icHye pN3NK noWkoJxHnH npIcTpoU,HE hAmaraTeCya camocTiHo peMOHTyBaTu npIcTpii.
8. Hikon He MInTe npncptiPi nd npoToHIO BDOIO a60 TaKIM YINOM, 06 BODa He Kanaja B He!.
9. He binkopncToBvIe akcecyapn, kI he pekomehdoBaHbVnpo6hNkOM.BoHmMOxytb CTaHOBTn He6e3neky dIy KOpNCtUBaHa i MoXytb cPnUnHHTn N0sKoJKeHHn npnCTpOIO.
10. IpekeonaiTeca, 0 npicpi OxolohyB nepei36epirHnM.
11. He Topkaǐteča kopryncy πίd γac BνkopncTaHnry. πίd γac poBOTn BνkopncToBy Te JnIe pyuKn Ta nepeMnKaui. Nicŋ BνmKHeHnry 3aueKaaiTe, nOKn npncTpiOxOJNoHe.
12. OBEPEKHO: Dea Kuchu Tn Hc boro npocpo MOkyb 6yTu dyxg rapymm ni d yac poBOTu Ta BklnkaTn oniK.
III. IEPEDIPEPIIMBVKOPNCTAHHRA
1.3HIMtB BeCb NaKyBaJIbHN MaTepiA I BUNpRmITb SHyP XINBNEHHA
2.Пд уасустанови писрий може 6ун покрпш iэлячим MaTePIaIOM a60 noDi6HIM MaTePIaIOM
3.Присknаданні пиаду He cnii pi3a n a6o pi3a n 6aJn Ta kpoKbN
4.ПердпершимВИКОПИСТАнгЯМпpoчтайТЕВсIиЧтукiiДцоДВИКОПИСТАнHA.
5. Ipepeipte, YI Hanpyra, Bka3aHa Ha etnkeTci Bnpo6y, BiINOBiAe Hanpy3x KINBneHn Mepexi
YCTAHOBKA
BnKOpNCTOByIe DpInb IpnocBepdIOBAAHRA DBOX OTBopIB y CTiHi, MinIMyM 180 cm BiD niDnOri i 20 cm BiD CTeTI - 3o6paJxHNA. Picnra TOrO, kB Bn IpocBepdIIIN OTBOPN, BCTaBTe NDoUweky i TBnHT. PepeKoHaITeCry, 10 GBnHTn Do6pe 3aTgHyTi ta NobicbTe npncptpi Ha CTiHy.
ONIC PPOyKcii
MaJIIOHOK B. TOnOBnI IepemKau
ON/OFF BKJI/BNKJI.
PncyHcK C. DnCTAHUINHNI KOHTPOJIb
1. KhoNka ON / OFF
6.WEEK/TIMER
2. PEKIM
7. MIN
3.ДЕΗБ
8. +-> KhoNka dIra nIiBnuIeHHa TeMnepaTpyu. TaKoK cnIyKnITb KhoNkoIO Bn6Opuy acy /dnr.
4.CLOCK
9. ---> KhoNkaДЯЗИнЖeHЯТeMnepaTypn.TakOx CnyKnTb KhoNkoB OvBOpу yAcy /ДнЯ.
5. SET UP
10. RESET - KhoNka CkndaHnTaMepa
MaJIHOK D. LED ΑHAJEb
1.CMBOB BKJ
6. BiodobpaekHHn DnH
2. NotykhicTb HarpiBy 1000 BT
7. BiodobpaexeHHa cacy
3. NToTyKHiCt b HarpiBy 2000 B
8.Cmbon BKI-3anyck taMepa
4.Функця AUTO
9.CmBON OFF-BIMKHeHH TaMepa
5. BiodobpaXeHHa TempepaTpy
10. BIDKpniTe cyHKUIO BnBnEHH BkHa
USAGE
1. Hatnchitb roJIOBHN nepemKau Ha npaBi cTOpOH npncTPO - MaI.
2.Пистрипеpe6уьаьрeximiочikуванн.HaTnCHITb KONky On/Off (1)Ha nylti duCTaHuzHOro KepyBaHHa-3O6paKeHHaC.卍o6 yBIMKHTN BeHTnJIrToP 6e3 HarpiaHHa,ДычHaTnCHITb KOnky On/Off (1).
3. Hatnchitb Khonky MODE (2), 06B Bn6paTn peXm po6oTn:
1000 Bt - npnlaad 6yde noctiHn HarpBaTncb npn noTyXhOcTi 1000 BT.
2000W -Ппстгбуде постиногарьатия потужноcti 2000ВТ.
ABTO - HaTnCHiB + Ta -, 06 BpyHy BCTaHOBHTN TEMNEPATy. Y cIbOMy peXIMIpNCtpi NIDTPMByMaHE BCTaHOBHeY TEMNEPATy.b PhHKzI BnRABHeHH BIKPnTOBikHa - KOIu zIe FyHKzI BnBpaHa, nPcSTpI ABToMaTHUHO BmNKaE HarpIBaHHra, kKIO TEMNEPATpa npMIeHH panTobO naae Ha 10^
TIMER
Taimep moke 6byn BCTaHOJIeHNI TiIbKni npn Bn6opi cyHKii AUTO.
1.Obepitb yHKJIIO AUTO 3a donomoroH KhoNk MODE
2. Nepu HIX BCTaHOBtN TaHMeP, Heo6xIDHO BCTaHOBtN DeHb i KaKTHUHn Yac.
3. Hatnchitb Khonky DAY i Bn6epiB noTOUH NDeHb KHOKAMN + Ta -
4. Hanchitb KhoNky CLOCK i BCTaHObitb nOToHy rOdInHy KhoNkAmn + Ta -
5. HaTnCHiB kHONky MIN i BCTaHOBiTB nOToUHi XBNINHN KHOKNKAMN + Ta -
PpIMtKa: KaIO NOToCHN (NOToHm) cAc i DeHb He BCTaHOHe, pncTpiI He 6yde npaIOBAtn HAnExHM uHOM, OCKJIbKn BIn 6yde npaIOBAtn BiINOBiHO Do BlnACHNX BHyTpIHIX rOHNHHKIB, 0o HnnpabINbHO.
BCTAHOBJIEHH TAIIMEPA
1. Hatncitb KhoNky WEEK / TIMER i BnBepiB DeHb KHOKNKAMN + Ta -
2. Hatncnybwn KhoNky SET UP, Ha dinCnnei 3acBtiNbC rCMBOJ ON. Tenep BN MoKeTe BCTaHOBtN yac 3anycky TaIMepa 3anycky. 3a donomoroo KhoNOK CLOCK, MIN, + ta - BCTaHOBtB yac 3anycky TaIMepa.
3. Hatncnybni KhoNky SET UP 3HOby, Ha dncnnei 3acBntbcra cIMBOJ OFF. Tepe BN MoKeTe BcTaHOBtU lac BmKHeHr TaMepa.
ПРИMITК.Час зуckу 3aЖдmae 6tн HIXKUM, HIXчac BIMNKaHH.
PIMITKA 606 cKHyTu TaMep Do cTaHapTHnx 3HaueHb, HaTCHiB KHonky RESET.
V. OUIIeHHra TA OBCJIYTOBByAHHRA
1. 3aBxDn BiKnIouaTe npncTpiB iD po3eTKn nepeD YNueHnAeM.
2. JIIO nID YAC YIeHHe BnKOpNCToBcyTObCra Taki eJIeMeHTN, JIK WTeNcEJIbHa BUNka, TepMOCTaT, eJIeKTPuHi KOHTaKTU ToIO. IpocOHTb nepei NOBtOPHM BnKOpNCaTHHm, iX cIId peTeJIbHO BucyWHTN
3. He BnKOpNCToBMyTe arpeCnBHi MmOHi 3acO6N y BnRJIaI eMylbci, IocbNoHIB, nact Ta iH. DnA OunUeHNr KOpNcy. BOH MoKyTB, cepeD IHwOrO, BnnyHTn IHcOpMauiHi rpaqiHi CmBOHn, Taki k3hAKn, nonepdJyBaHbHi 3hAKn ToIO.
4.Передчишенигпереконайтеся,цюпсстриохолohyB.
TEXHIUHIDAHI:
Hanpyra:220-240B\~50/60T
NotyKHiCTb: 2000 Bt MaKc. NotyKHiCTb: 2200 BT
lp20


3aTepeXeHnHa Tapya NoBepxH" - Tempepatypa Doctynnx NobepxoHb Moze 6ytn Bnso, KOI ObnadHaHH npauoe, 0o 10 eIemEnTn KopnyCy ctaotb Dyke tapayHMn nuc pobotn nd ac EKcnlyataii.
"HE IOKPITT" - BAXJIIBICTb BI3HAUEHH HAnc Ha npicTrooi 03haac, 1o npicTpii He noBHeH 6yTu nokpTmOBdpamTa iHsIMn TEKCTINbHMn Bnpo6aMn, kki MOxTy b BkNkaTn 3aMaHH.

PEJXEHH: He BnKOpncToBnyTe ce o6laHaHH no6JbMy BaHH, yuWoBx Ka6iH, 6aceHiB Ta aHaJIorIyHx
Byapib DnIy BODI.

Y iHTepecax HABKoJIuHbOTo cepeIOBua.
Byd naKa, BiDnAte KapToHny ynaKOBky B Micce 360py Mykynatypn. POniTneHOBI MiuKN (PE) BnKHyTN B CMTHN K Dn nnactky. BiDnpaBObAHm npictpri NobHEn 6ytn BiDnpabNeHm y BiDnOBiHy ToKy 36epirAHn, TOMy uO B npicTpoi e Hebe3neHi InrpeiEHTn, kI MOxTy b cTahOBnTn 3arpo3y HABKOJIuHbOMy cepeOBNuY. EJektpnHm npicTpni notpi6Ho NOBepHyTu TAK, Uo6 ObMeknTu HOr NOBtOpHe BnKOpNCtAHn. RaUO y npicTpoi E 6atepeKn, TO nOTpi6Ho iX BVITaHryTu i BiDnatNo BIIOBIDHO NyHTky.
(SV) SVENSKA
OBS:
Enheten ar endast avsedd for hushallsbruk.
Enheten ar INTE avsedd for kommersiell / professionell användning.
Enheten ar INTE lamplig for utomhusbruk.
OBS! Innan du anvander det ar det viktigt att du laerenna braupsanvisning for att undvika olyckor och for korrekt anvandning av enheten. Hall den har handboken och hall den sa att du enkelt kan anvanda den.
I. RIKTLINJER FÖR SÄKERHETSANVISNING
1. Innan du anvander, kontrollera att spansningen som anges på markskylten motsvarar de lokala parametrarna for salthalten, men kom ihag att markningen: AC- ar voxelström och likström ar likström.
2. Anslut endast en 220-240V 50/60 Hz jordad uttag.
3. Unrollera och dra ut natsladden fore anvandning
4. Se till att strömkabeln och kontakten inte har nagra synliga skador
5. Färe och after användning, se till att natsladden inte sträcker sig över en öppen flamma eller annan värmekälla och skarpa kanter som kan skada kabels isolering.
6. Ta bort alla Förpackningskomponenter före Första användningen. OBS! Vid ett holje med metalldilar kan på dessa element en lätt synlig skyddsfolie sträckas, vilken ocksåBOR avlågsnas.
7. Apparaten ski inte användas av barn, personer med begränsad fysisk, sensorisk eller mental kapacitetutan tillsynav auktoriseradeller erfarna personer och alltid i enlighet med dessa instruktioner.
8. Utrustningen ar inte avsedd att anvandas med externa tidsbrytare aller separat fjarrkontroll. WARNING: Denna utrustning kan anvandas av barn over 8 År och personer med begränsad fysisik, sensorisk eller mental formåga, eller personer som inte har nàgon erfarenhet ull kunskap om utrustning, ENDAST om detta sker under overinseende av en person som ansvarar for deras sakerhet eller har fätt instruktioner om saker användning av encheten och ar medveten om farorna i samband med användningen. Barn sca inte leka med utrustningen. Rengöring och unterhäll av apparaten sca inte utforas av barn om de inte År over 8 År och overvakas
9. Lämna inte encheten obevakad under drift.
10. Doppa inte in apparaten och natsladden i vatten aller andra vatskor.
11. Nar encheten inte anvands ske den alltid kopplas fran strömuttaget.
12. När du drar stickkontakten fran uttaget, drar du aldrig natsladden bara med. kontakten.
13. Placera INTE METALPUNKTER inuti encheten
14. Tillverkaren ar inte ansvarig for skador som uppstar på grund av felaktig anvandning av apparaten.
15. Det bör komma ihåg att vissa delar av encheten och skåpet under arbetet blir vändigt varma, var försiktig och rör inte dem, du kan brinna.
16. INTE tacka enhances under drift aller när den inte svalnar helt
17. Kom ihåg att varmeelementen på encheten tar tid att svalna helt.
18. När du använder encheten, se till att du har tillräckligt med utrémme över och runt. Enheten kan inte vidröra nagra lättantändiga foremål under arbetet, sāsom dekorationer, pappershanddukar, gardiner, kläder etc.
19. Värmaren installerad i badrummet ska installeras sa att kontakterna och andra regulatorer inte kan roras av en person i badkaret eller under duschen.
20. I värmare für höghöjdarmaturer ska positionerna für kontaktens olika positioner vara synliga från att avständ av 1 m
21. Märkningen für att täcka värmaren skara varasynlig after att värmaren installerats
22. Du kan inte placera värmaren direkt under uttaget, och nara brandfar Liga material som gardiner, gardiner etc.
23. Apparaten kan inte anvandas med externa tidsbrytare aller andra separata fjarrkontrollsystem
24. Utsatt inte apparaten for atmosfäriska forhällanden (regn, sol etc.) aller använd under hög luftfuktigkeit (badrum, fuktiga hus)
25. Kontrollera regelbundet nätkabelns tillständ. Om nätkabeln ar skadad ska den bytas ut av en specialiserad reparationsanlaggning for att undvika fara
26. Använd inte apparaten nara brandfar Liga material
27. Värmaren måste installereras i en Höjd av minst 1,8 m over golvet
28. Använd inteenna värmare i omedelbar narrhet av badkar, dusch eller pool
29. Använd inteenna värmare om den har tappats
30. Använd inte om det finns synliga tecken på skador på värmaren
31. Använd värmaren på en jämn och stabil yta eller fasp den på vagggen, om det foreskrivs av tillverkaren.
WARNING: Använd inteenna värmare i små rum)där det finns personer som inte kan lamna dem ensamma, sāvida inte konstant tillsyn sakerställs.
WARNING: För att minska risiken für brand, häll textilier, gardiner eller andra lättantändiga material minst 1 m bort från luftens utlopp.
Det rekommenderas att den elektriska installationen ar utrustad med en automatisk Återströmbrytare med 30mA startström for ökad sakerhet.
Obs! Om nätkabeln eller nätkontakten ar skadad ska den alltid bytas ut uller repareras av en specialiserad verkstad.
II. VARNINGAR
1. Använd aldrig encheten om den ar skadad aller inte fungerar ordentligt.
2. Använd aldrig encheten om den har fallit från en höjd fore och visar synliga tecken på skador.
3. Använd inte förlängningssladdar aller andra eluttag som inte uppyller gällande standarder och elektriska foreskrifter.
4. Eventuell reparation, demontering eller byte av delar sca alltid utforas av en specialiserad anlaggning.
5. Om apparaten och elektriska komponenter som elkontakter ar vata, ska pluggen eller kabeln torkas innan du anvanderenheten och dess komponenter.
6. Använd inte,enheten med vata hander.
7. Om det finns risk for att encheten har skadats, forsok INTE att reparera encheten själv.
8. Tvatta aldrig apparaten under rinnande vatten erer pa ett sadant satt att vattnet droppar in i det.
9. Använd inte tillbehör som inte rekommenderas av tillverkaren. De kan utgöra en fara for användaren och kan skada encheten.
10. Se till att encheten har svalnat innan du lagrar den.
11. Rör inte på huset under användning. Använd endast knappar och växlar under drift. Efter avstängning vanta tills encheten svalnar.
12. WARNING: Vissa delar avenna enchet kan bl mycket heta under drift och orsaka brannskador.
III. FÖRE FÖRSTA ANVÄNDNINGEN
1. Ta bort allt forpackningsmaterial och dra ut natsladden
2. Under installationen kan encheten vara tackt med isolerande material eller liknande material
3. Vid montering av anordningen ske balkar och sparrar inte skaras eller skaras
4. Läsigenom alla bruksanvisningarForeforsta användningen.
5. Kontrollera om spansningen som anges på produits rattmärkning motsvarar spansninger i nitverket i ditt hem
INSTALLATION
Anvand borren for att borra två hål i vöggen, minst 180 cm frän golvet och 20 cm frän taket - bild A. När du har borrat hålén, satt in dynan och skruva. Kontrollera att skruvarna ar ordentligt spända och hangenheten på vöggen.
PRODUKTBESKRIVNING
Bild B. MAIN SWITCH
ON/OFF = OFF ON/YUTN OFF.
Bild C. FJARRKONTROLL
1. PÁ / AV-knapp
2. MODE
3.DAG
4.CLOCK
5. SET UP
6.VECKA/TIMER
7. MIN
8. + -> Knapp for att höja temperaturen. Fungerar ochså som en valknapp För tid / dag.
9. --> Knapp for sänkning av temperaturen. Fungerar ochså som en valknapp für tid / dag.
10. RESET - Timer reset-knapp
Bild D. LED PANEL
1. PÅ symbolen
2. Värmeeffekt 1000W
3. Värmeffekt 2000W
4. AUTO Funktion
5. Temperaturdisplay
6. Dagsvisning
7. Tidsvisning
8. ON-symbol-timer startup upp
9. OFF-symbol - timeravstängning
10. Oppna fönsterdetekteringsfunktionen
IV. ANVÄNDANDE
1. Tryck på hovenschakelaar på rattenhet av apparaten - Bild B om enchelen i en ut te schakelen.
2. Enheten stared nu i vantelage. Druk pa de aan / utknop (1) op de afstandsbediening - Bild C.
3. Tryck afterat pa MODE-knappen (2) for att valja foretagsmodus:
- 1000 W på apparatenkommen att vara konstant under krig med 1000 W.
- 2000 W, apparatenkommen att ständigt staupp med 2000 W.
- Auto-mode, tryck på de knoppen + sv - om handtemperatur für temperatur i te stellen. Enheten gär automatiskt till modusen for temperaturen.
- Öppna venster-detektionsfunktion - Närenna Funktion ar vald, skickas det apparats automatiska uppvärmning från kamertemperaturplottning med 10^ C daalt.
4. Tryck pa den / utknop (1) pa den avstandsbediening om apparaten fran te schakelen. Enheten kopes av en schakelt after cirka 30 sekunder av.
DE INTERNE APPARAATKLOK INSTELLLEN
OPMERKING: När du ar den aktuella tiden och en vecka av veckan intekommen att installeras,kommen eheten inte att fungera bra eftersom den ar en egen intern klocka, vad onjuist ar.
1. Valj den AUTO-funktionen Med. MODE-knappen.
2. Ställ in for dig timern installde den veckans dag och den aktuella tiden i:
- Tryck på knappen DAG och välj den aktuella dagen med knoppen + en -. Wacht till det display stopt med. knipperen.
- Tryck på KLOK-knappen och ställ den aktuella tiden in med de knoppen + sv -. Wacht till det display stopt med. knipperen.
- Tryck på MIN-knappen och ställ de aktuella minuterna i med de knoppen + sv -. Wacht till det display stopt med. knipperen.
TIMERPROGRAMMERINSTELLING-TIMER
Med den hare funktionen kan du programmera tid for enheten pa varje onskad dag av veckan och ut fran schakelen.
Timern kan bara tas in after val av AUTO-funktion och inställning av intern klock fran encheten.
1. Tryck på VECKA / TIMER-knapp och valj Välj veckans dag)dén kommer att stalla in automatising och slappa ut knopparna + en-. Wacht till det display stopt med. knipperen.
2. Nadat u op the button SET UP have gedrukt, light the ON-symbol op in the display. Du kan nu starta tiden for timerinställningen. Anvand de KLOK, MIN, +sv - knoppen om starttid av timern i te stellen. Wacht till det display stopt med. knipperen.
3. Nadat u nogmaals pa WEEK / TIMER-knappen (6) har skrivit och sedan pa SET UP-knappen har skrivit, latt OFF-symbolen visas pa displayen. Du kan nu utesluta timerns inställninger. Wacht till det display stopt med. knipperen.
OPMERKING: startid mäste alltid vara korterän stopptid.
OPMERKING Tryck på RESET-knappen om timern skå gå tillbaka till standardinställingarna.
V. RENGÖRING OCH UNDERHÄLL
1. Koppla alltid ur stickkontakten ur eluttaget innan du rengör det.
2. Om under rengöringstillbehör som stromkontakt, termostat, elkontakter etc. blötlägg's innan de användsigen, bör de torkas ordentigt
3. Anvand inte agressiva tvattmedel i form av emulsioner, lotioner, pasta etc. att rengora skapet. De kan bland annat ta bort informationsgrafik symbolerna, sasom tecken, varningsskyltar etc.
4. Se till att encheten har svalnat innan du rengor.
TEKNISKA DATA:
Spanning: 220-240V ~ 50 / 60Hz
Effekt: 2000W Max. Effekt: 2200W
IP20

Caution Hot Surface" - Temperatures on de tilgangliga ytorna kan vara hogre nar utrustingen fungerar, vilket innebar att menten blir mycket heta under drift under drift. SPARA OBS!

"INTE SKYDD" - INSCRIPTION IMPORTANCE Inskrften på encheten inebär att encheten inte skä tackas med kläder, filtrar och textilprodukter som kan orsaka tändning.
VARNING: Använd inteenna utrustning nara badkar, duschar, simbassänger och liknande vattentankar.


Vi sköter om miljön. Überlamna Förpackninger i kartong till pappersavfall. Polyetylensäcker (PE) slängs i avfallsbehällare for plast. Man bör lamna en gammal apparat till en riktig Återvinningscentral, eftersom farliga componenter i apparaten kan orsaka fara till miljön. En elektrisk apparat bör lamnas for att minska fornyad användning avenna. Om apparaten innehäller batterier, bör man ta bort dem och lamna dem separat till Återvinningscentraler.
(SR) CPTICKN
PAXHB:
Ypehaj je HamebeHcMo 3a KyhHy ynoTpe6y.
Ypehaj HNJE hAmnjeHbEn 3a KomepuzjahnHy / npoepcnnoHaJHy ynoTpe6y.
Ypehaj HINJE norodan 3a ynoTpe6y Ha OTBOpeHOM.
Paxha! Ppe Kopnshene, oabe3no npoHTajTe OBO ynyTCTBO 3a ynoTpe6y kako bnte n36erHn He3rode n npabunHy ynoTpe6y ypehaja. YbajTe OBaj npnpuyHn N cyBaJTe ra TaKo da ra MoKeTe Jako KopnCTtN.
I. CMJEPHNIe 3A CNYPHOCT YNOTPEBE
1. Пpe уnotpebe npOBepte Da Li NaHOn HaBeDeH Na HATnIcHoj nIoUHcN OndroBapa IOKaJIHm napametpma caHHTeTa, aIn 3aPamTite Da o3HaKa: ALC- je HanImMeHnUHa n DlC je DC.
2. Повекитуpeй само наструль утуну od 220-240В ~ 50/60 X3.
3. Пpe уnotpebe odBnjTe n nCnpaBnTe ka6I 3a Hanajahe
4. YBepnte ce da Ka6n 3a Hanajahe n yTnKauch Hncy BnJbNBn
5. Пп и посе уnotpebe, поверпгда кабл за нараиье Ниж растгнут п配电о OTBOPEHOR Пламета Или другог ИЗВОРА тОПЛOTE и OшТРИХ ИВИца Кож мory OшТETNTI ИЗOLAцию кабla.
6. Пpe npBe ynoTe 6Be KOMNoHeTe nakBaHa. NaKb! Y cnyajy kyHnTa
Ca MeTaJIHIM DeIIOBIMa, Ha OBIM eIeMeHTIMa CE MOKe paCTeRHyTm MaIIO BnIbINBa 3aStITHa foIInja, KoJy TakoHe Tpe6a yKIoHHTn.
7. Ypehaj He cmejy da kopncte deca, ocobc ca orpaHnueHm fni3nKm, yIHNm IIn MeHTaHIM cnoocbHocTIma 6e3 Hnd3opa OBnaUshneHX IIN NCKyCHNX INu ca nYBeK y CkJaDy ca OBIM ynyTCTBIma.
8. Onpema Hnje HameHeHa 3a ynoTpe6y ca ekCTepHm BpeMeHCKM npeKndaUma nIIN 3ace6HIM CnCTeMOM daJbHcKOr ynpaBbaHa.
UPO3OPEHbE: Oby onpemy mory kopnCTn Djeca cTapnja od 8 roDnHa n ocObe ca
OrpaHnueHIM qn3nKm, ocjeTnHm nIi MeHTaHm CnOC6hocTIma, nIi OC6e Koje
Hemajy nCKycTBa nIi 3HaBa o onpemn, CAMO ako ce To paN iOn nad3Opom ocObe
ODROBOPHe 3a HnxOBO 6e36eHocTn nIi cy Do6nI yNyTcTBA o 6e36eHOM KopnshheBy
ypejaja n CBecn cy OnacHocTn y Be3n ca HeRoBOM yNoTpe6om. Deza He 6n Tpe6aNo da ce
Irpajy ca onpemom. YnshneBe n OdpXabaHe ypejaja He cmjuy n3BoDnTn dJeca yKoJIko
Hncy cTapnjn od 8 roDnHa n aKO cy IOn nad3Opom
9. He octabjaje ypehaj 6e3 ha30pa TOKOM paJa.
10. He notanajte anapat n ka6n 3a Hanajahe y Body nnn 6nno Koju npy Teuhoct.
11. Kaia ce ypehaj He Kopnctn, yBek ra Tpe6a NCKbuyntn n3 yTuHnue.
12. KaDa noBnaUte yTnKaU n3 yTnHnUe, HnKaDa He ByuTe Ka6JI 3a HanajaHe cAmo 3a yTnKaU.
13. He CTaBbajTe HO METAJI ITEMC yHytap ypehaja
14. Понзвоган Ниje odroborpan 3a utete Habte ycneH He npabnHor Kopuheba ypehaja.
15. Tpe6a nmatn ha ymy da ce HeKn dijenobu ypehaja n opmapn h Tnjekom pa da jako 3arpijabajy, na 6yndte onpe3HN u He DnpajTe ux, mokeTe ce oneh.
16. HE nokpmbajte ypehaj Tokom paanda nn ka da ce He oxnayn y notnyoctn
17. 3anamntte da rpejHm elementma ypehaja tpeba BpemeHa da ce notnyho oxnae.
18. KaDa KopnCTnte ypehaj, oBe36eIte OndroBapajh npocTOp n3HaN i OKo Hera. Ypehaj He Moxe Da IdoHpyje NaKo 3anaJbHBe ppeDMTe TOKOM paJa, Kao uTO cy DeKopaunje, NaHrpHn y6pucn, 3aBece, OdeHy nTD.
19. Геся саллару куатиу特有的а дуide Инсталпан тako за ce He можедOTAKHTI KOHEKTOPИдугп рergylatop у kaDN ИПИ NOД TUWEМ.
20. Y rpejaumma 3a NaIIMOPsKe BnCInHe, N03nUje pa3JIuHTnx NIOJXaja KOHeKToPa Tpe6a Da 6yDuBnBe ca ydaJeHoCTn Od 1 M
21. O3naka 3a nokpnahe rpnjaa mopa 6ntn BndnbHa hakOH nocTabbaHa rpnjaya
22. He moxete noctabtu rpejau dinpeKTHO nCnoj yTuHnue i 6Jn3y 3aNaJBnBnx MaTepnjala kao wTO cy 3aBece, 3aBece NTd.
23. Ypehaj ce He Moxe KOpNCHTnCa ekCTepHm BpeMeHCKM npeKnDaUHMa nn dpyrIM ODBoJeHm CnCTeMMa DaJbHCKor ynpaBbaHa
24. He n3naXnte ypehaj aTMocfepcknM ycNoBmA (Knla, cyHc, nTd.) IJn KOpNCtnte y ycNoBmAbnCOke BnaXHOCTN (KynaOHnCe, BnaXHe Kamn Kyhe).
25. Повремно поверпге саъе кабл за нааяъe. Ако ќ кабл за нааяъe оштehen,
Tpe6ano 6n ra 3aMeHHTn CneuJaJIncTnUcK n cepBnC kako 6n ce n36erao pn3nk
26. HemojTe KopnCTn ypehaj y 6nn3Hn 3anaJbBnx MaTePnJaIa
27. Frnjaj Mopa 6nti HcTanpaH Na BnCInH He MaBoj od 1,8 M n3HaJ noJa.
28. He kopructte obaj rpejauy henocepndnoj 6n3nHn Kaede, Tuwa nn 6a3eHa
29. He kopructte obaj rpejaq ako je nao
30. He ynoTpe6babajte ako noctoje BnIbNBn 3Naun OwTeheBa rpejau
31. KopinCTIte rpejaH na paBHOJ n cTa6nJIHOJ NOBpUHn Hn ra npuYBpCTIte Ha 3nD, aKO To npedBnHa npoN3BOhau.
YIIO3OPEHbE: He kopncntte obaj rpejau y maIIM npoctopnjama y koJIma IMa lydN KoJN He MOry camn da nX HanycTe, OcIM aKO Hnje Ocnrgypan CTaJIHN HaI3Op.
YIIO3OPEHbE: Da 6nCTe cMaHbHn pN3NK oD noXapa, dpxKnte TeKCTnI, 3aBece nIi npyre 3anaJIbHe MaTePnJaIe HajMaIbe 1 M od n3Na3a 3a Ba3dUx rpejaua.
Ipnopuyje ce da eilektpnHa nHcTanaJia 6ynde onpeMbeHa ayTomaTckm npekndaem 3a pe3ndyaJnHy cTpyj ca noeTHOM cTpyjom od 30MA 3a noBehany cnryphocct.
Hanomeha: Ako je ka6n 3a Hanajahe nnn yTuKaU oShteHEn, yBek ra Tpe6a 3ameHHTn nnn nonpaBHTn y cneunjann3OBAHOJ cepBnCHOJ padnoHnCn.
IN. YIIO3OPEHbA
1. Hinkada hemojte kopnsttu ypej ako je outehen nnn He paan npabnno.
2. Нека наемоюся корец сокисту урегaj по је пao ca висно и пoka3уve вдьиBE 3нakове оштelve.
3. He kopructte npodxhe ka6noBe nIIN dpyre eJektpnue yTuHnue Koje He odrobapajy BaxkehIM cTaNdapnma n eJektpnUHM npOpncnma.
4. Бино Камы NonpaBky, Демонтaxy Или Замени 6ино kor Deяу ВЕК Тpe6a obabintu cneцллзова hy yctahOBa.
5. Ako cy ypehaj n eIeKtpnue He KOMnoHeHTe, kao ITo cy eJIeKtpnUHN KOHTaKTn, MOKpn, UTKauch nn Ka6eTpe6a ocUuNTn npJc KopNtEHa ypehaja n HberOBnx KOMNoHEHTn.
6. He kopructte ypehaj BnaXnIM pykama.
7. Kada noctojn p3nk da je ypehaj owtehen, HE nokywaabaje camn da nonpaBnte ypehaj.
8. Hnkaa He nepiTe ypehaj noTekyHOM BOOM IIN Ha TAKAB HauIN Da BODa KaJIbe y HbY.
9. He kopructte npnbop koju hije npenopyuen od ctpahe npon3bojaua. OHI MORY npedctabbaTN onachoc73a kopruchnka u Mory n3a3BaTN oWTehhe ypejaja.
10. Ybepnte ce da ce ypehaj oxnaio npe cknaiusteBa.
11. He doignyjte kyhniuTe TOKOM ynoTpe6e. Tokom paJa kOpncntte camo dYrMaJ n npeknDaue. HakoH NCKbUynBaHa, cauekajTe da ce ypehaj oxlaJn.
12. ONPE3: Hekn deNoBn Obor ypehaja Mory ce jako 3arpujaTn TOKom paJa n y3pOKOBaTn ONeKOTInHe.
III. INJJE INPBE YNOTPEBE
1. YKIOHnTe cab MaTepnjaJI 3a nakObaHe n NcnpaBnTe Ka6J 3a HanajaHe
2. Tokom INHCTaJauje,ypehaj Moke 6ntn NOKpuBHeN 3OJaUHOHM MaTePjuJaIOM UIN CInuHIM MaTePjuJaIOM
3.Прилелком ckлалаьуpeиа,грedeигрede He Tpe6a pe3aTNnpe3aTN
4. Ппе пье улотpeбе почитajte са улутсва за улотpeбу.
5. Поберпесда ли наон Habe徳н На налелници за Квашие понзвoda одровара наноу Мржке за Hanajaы e y Baшем Domy
INHCTAATNOH
Kopncntte 6yunnuy 3a 6yuebe DBe pyne y 3Ny, Hajmahe 180 um od noa n 20 um od cTpona - cnka A. Ka da cTe n36ywni pyne, yMeTHnTE pOIOrOy u 3aBnje. YBepnte ce da cy 3aBPTbN do6po 3aTeHytn Da ypehaj OKaHTe Ha 3nd.
ONIC PON3BODA
CnkaB.ΓaBHy npeknday
OH/OΦΦ=OΦΦOH/MYTH OΦΦ.
CnkaLJDAJBHCKA KOHTPOJA
1. Dyrme OH / OΦΦ
6. BEEK/TUMEP
2. MoDE
7.MNH
3.ДAH
8. + -> Tactep 3a noDn3aHbTe tempeatype. TaKoHe cnyKn kao duYme 3a n36op BpemeHa / daHa.
4.LIOUK
9. --Дугме за снжаваные temпаType.Тakошслwxи кao duyme 3a nizbop ВрemeHa / daHa.
5.CETYI
10. PECET - Tactep 3a peceToBaHe TajMepa
CnkaД.IEДПAHEN
1.Cm60n OH
6.Дневни рпигаз
2. Chara rpejaHa 1000B
7. Ппказ Врemeha
3. Chara rpejaBa 2000B
8.Cm60n OH-ctapToBaHe TajMepa
4.AYTOyHKnja
9. OΦΦ cμmboJ -ИСКьуЧиВаHе Тajмepa
5. Пика з Temперatype
10. OTbOpnte fynKnjuj deTeKuJne npo3opa
IV. yNOTPE6A
1.Дук onnt xokejcxakeJaap aaH de peuxtepkaHT bAH xet annapaat - AфбeelenrБ om xet annapaat nH eHnTt Te cuxakeJeH.
2. Pn6abte Ondrobapayhe cTaHe y cTaHb npnpabHOCTn. DpyK on (a) /yntkHON (1) onuHpHne - Afp6eennHr L.
3.Дурк auxTepeeHbOJIreHc Ha MOДE-KHON (2) O n3a6paHOM MOny:
- 1000 B xet annapaaT 3aKoHCTaHTn OcbapMeH met 1000 B.
- 2000 B, xen annapaat 3aJ KOHCTaHTHn OdpBapMeH MeT 2000 B.
- AyTO-MOyC, npk on od KhoHnneH + eH - o TempeatypHOJ puu y cTeJIeH. PpncTyIte ayTomaTCKOM ayTomaTCKOM noDeWabBy Tempeatype n Tempeatype Tempeatype.
- OTBOPeHa DeTeKuJa BeHCTepa - BaHHeep De3e 4yHcTne je reIekUHOap, KoJn je ONpeMJIbEh ayTOMaTCKIM ayTOMaTCKIM ayTOMaTCKIMdoDaBaHem Kameptempepatypnx napceLa od 10^ L.
4.Дук O DeaH / yuTknHON (1) onuHPO 3a cbo6ceHne OT o6ceCTBeHHOTo 3a cbco. Ako KeJInTe da ce opbatnte 3a 30 cekyHdno no nocedy.
DE INHTEPHE ANPAPAATKNOK INHCTEJIJEH
ONMEPKINH: Cbn Tn DeNoB cy DocTynn 3a HeJeBy DaHa, a He n 3a HeJeBy DaHa, a He cMo da 6n MoTn da HAnuMe MO Hxke BOJREHe, ann n da cy INTePHN KIOK, ann OH je Ty.
1.Oda6np AYTO-Функиjee je nCnybEn MODE-KhON.
2. CTeNna Boepatat De TImep Bne OT HeDeIbO eH HeJeBo eH JINnDn Tnrap:
-Дуг onишиу на Кног ДАГ и сел ektopа DeTeKunji Byarare nCnybHe ca KhoNneH + eH - Baxt ToT xet DiCnlan 3ayCTabNo ce HOxem.
-Дук ONИТ KLOK, CBалajte Ha CBOTBETCTBOBaHe OT B3MOxHOCn Do MeT + KONnneH . BauxT Tot xetДиСПпан 3ayctabNо ce HOXeM.
- CtaHnTe Ha MInH-KhON Ha cBoTBcTcBHe cBdbpKaHHeTo 3a n3NoJ3BaHe - + . BaXr TOT xet dncnnan 3ayCTaBnO ce HOxem.
TINMEP IPOPTPAMMEPHCTENHIT - TINMEP
Doca je 6nlo fynknoHannx nporpama y Be3n ca nporpamma kojce Mory npimehnuBaTu y HeedeBnu HeedeBn.
Ie TImep Bam MoKe Iomohn da no6oJbWate MoryHocT npenacka Ha AYTO-kyHKunjy ndoajTe INTEpHeTcke cTahnue 3a Mo6nHe TeJefohe.
1.ДукзA BEEK/TIMEP-KHON3a Oda6np HeJeBnHex HeJeBa y pOky OJ HeJeBa, anapat he ce ayTomatckn ynotpebntn 3a aytomatcky ynotpe6by cnyajy da yknOHnTe +eH - BaXrT TOT xET DnCnnan 3ayctabno ce HOxem.
2. Ioecnte onuju 3a noeewabahe CET YI xe6rrepyk, yKbuynte cM60n OH-cm60na Ha xet npka3y. He moxete 3anouetn Bwse Bpemena. K6pyk, MNH, +en - OTBOpNTe TImep 3a Bpe Me CTapTOBaHa. Baxt tot xet dncnnan 3ayctabNO ce HOXEM.
3. IOnecnte BEEK / TUMEP-KHon (6) nyIme 3a noJeIaBaIbe CET YI-KHon-a, oJmax npITnCHInTe OΦΦ-cm60nl 3a xet-npka3. He moKeTe KOpIcHTn BwSe BpeMeHa. Baxt Tot xet dncnnan 3ayctabNo ce HOxem.
ONMEPKINH: POKpTaHe je doctynho n 3ayCTaBnTe ce.
ONMEPKINH YnoTepe6a pe3epBnHex DeNoBa PECET-a, noeuaBaHe BpMeHa n BpMeHa 3a 3bpuBaHaBe.
V. YIWIHTHeBEn ODPXABAHBe
1.Ппeчишениа увекиckьунite anapat n3унчницe.
2.AKO TOKOM YUHHeBa CTAbKe KAO UTo cy yTuKaU, TepMoCTaT, eJekTpHuN KoHTaKTn ITd. HAtOnJIbeHe Ipe NHOBHe yNoTpe6e, Tpe6a IN TeMeJBNTO OCUIN
3. Hemojte KopinCTnArpeCnBHe DeTePeHTe y o6nky Emy3nJa, nocnoHa, naceT nTd. 3a YnWeHeOpMapHa. Ohmory, n3MeHy octanor, yKnIOHTn rpaqnuke CmboJe HfOpMaunja, kao uTo cy 3NaKOBn, 3NaKOBn yNo3OpHeBa, nTd.
4. Ybepe tce da ce ypehaj oxnaio npe ushneha.
TEXHNUKNIPODALU:
Hanoh:220-240B\~50/60X3
Chara: 2000B Mak. Chara: 2200B
lp20
"Опрази вуга пошина" - Temпература расллхиьх пошина може 6ntи Beha kaа onpema paNi, StTo 3naMu da ce eIemEni KyhnsTa TOKOM paJa jako 3arpeBaJy.

JTE NOKIOTNI" - HANOMEHA 3HAAJ HaTnnc Ha ypehajy 3aun da ypehaj He Tpe6a da 6yepekpmben
, he6aIma n npyHm TEKCTINHM npOn3BOIMa KOj MOry n3a3BaTn NaJbeHe.

PEHbE: HemojTe Kopucntn Oby onpemy y 6JIm3HH Kaede, TuSha, 6a3eHa n CImuHnx pe3epBoapa 3a Body.

3a 3aHTy JXIBOTHe CpeHHe: MOIMBO Bac Da oDBoJTe KAPTOHcKe KyTnJe I nPAACTNHe Kece N OndnoKInTe INx y OndroBapajyHe Kahte 3a CmeHe. KopuSheHn Ypehaj Tpe6a Da 6yDe nCnpuyen Ha HameHcKe cakynBaHe Taue 36or OwTPnx KOMNoHEtN, UTo MoKe yTuCaAtn Ha JXIBOTHy CpeDnHy. HemoJTe Ondaratn OBaj Ypehaj y 3ajeHNUky Kopny 3a OTNaTke.
(SK) SLOVENSKY
POZOR:
Zariadenie je urcené len na domace pouzitie.
Zariadenie NIE JE urcené na komercné / profesionáne použitie.
Zariadenie NIE JE vchodné na použitie vonku.
Pozor! Pred použitím je dôležité, aby ste si precítili tento námod na obsluhu, aby ste predišli nahodám a správnemu používaniu prístroja. Uchovajte si tento námod a uschovajte ho, aby ste ho mohli l'ahko používat'.
I. POKNY PRE BEZPECNOSTPOUZITIA
1. Pred použitím skontrolujte, Či napatie uvedené na typovom štítku zodpovedá miestnym parametrom slanosti, ale nezabudnite, Že označenie: AC- je striedavy prud a DC je DC.
2. Pripojte zariadenie len k uzemnenej zasuvke 220-240V 50/60 Hz.
3. Pred použitím odvijajte a narovnávajte napájací kabel
4. Uistite sa, ze sietovy kabel a zastrcka nemaju viditelné poškodenie
5. Pred a po použiti sa uistite, ze napájací kabel nie je natiahnuty cez otvorený plamen alebo iný zdroj tepla a ostre hrany, ktoré možu poskodit izoláciu kábla.
6. Pred prvym použitim odstrante vsetky sučasti balenia. Pozor! V pripe de plaš'ta s kovovymi CASTAMI moze byt na tychto prvkoch roztiahnutá mierne viditel'ná ochranná fólia, ktorá by sa tiež mala odstránit'.
7. Zariadenie by nemalo používat deti, osoby s obmedzeným fyzickým, zmyslovým alebo
duševnám postihnutím bez dozoru oprávněch alebo skúseněch osób a vždy v súlade s týmito pokynmi.
8. Zariadenie nie je určené na použitie s externymi chasovymi spinačmi alebo samostatným dial'kovým ovládaním.
UPOZORNENIE: Toto zariadenie moze pouzivat deti starsie aka 8 rokov a osoby s obmedzenymi fyzickymi, zmyslovymi alebo dusevnymi schopnost'am alebo osoby, ktoré nemaju ziadne skusenosti alebo znalosti o zariadení, IBA ak je to vykonané pod dohl'adom osoby zodpovednej za ich bezpečnosti alebo dostali pokyny o bezpečnom použivaní zariadenia a su si vedomi nebezpečenstva spojeného s Jeho použivaním. Deti by nemali hrat so zariadením. Čistenie a udrzbu zariadenia by nemali vykonávat deti, ak nie su starsie aka 8 rokov a su pod dozorom
9. Nenechávajte zariadenie poças prevadzky bez dozoru.
10. Neponárajte spotrebič a napájací kabel do vody alebo inych kvapalín.
11. Ked sa zariadenie nepoužíva, malo by byt' vždy odpojené od elektrickej zásvky.
12. Ked'vytiahnete zastrcku zo zasuvky, nikdy nevy'tahujte napajaci kabel len za zastrcku.
13. Do zariadenia nevkladajte ziadne kovové predmety
14. Vyrobca nie je zodpovedný za škody spösobené nesprávnym použivaním zariadenia.
15. Pamatajte si, ze niedtoré Časti zariadenia a skrinky poças práce su vel'mi horúce, preto bud'te opatrní a nedotýkajte sa ich, možete sa spálit'.
16. Nezakryvjte zariadenie pochas prevadzky alebo ke'd'uple nevychladne
17. Nezabudnite, ze vykurovacia telesa pristroja maju cas uplne vychladnuit.
18. Pri používaní zariadenia zabezpečte dostatočné priestor nad a okolo. Zariadenie sa počas práce nesmie dotýkat lahko horťavých predmetov, ako napriklad dekorácie, papieróve uteráky, záclony, oblečenie atd'.
19. Ohrievač instalovaný v kúpelni by mal byt'instalovaný tak, aby konektory a iné rególárynemohli byt' dotknuté osobou vo vani alebo pod sprchou.
20. V ohrievačoch pre výškové prislušenstvo by mali byt' polohy rožnych polöh konektorov viditelné zo vzdialenosti 1 m
21. Po instaláci ohrievača by malo byt viditelné označenie krytu ohrievača
22. Ohrievač nemožete umiestnil' priamo pod zásuvku a v blízkosti horlavych materialov, akosú záclony, záclony atd'.
23. Zariadenie nemožno použit's externými chasovými spínačmi alebo inými samostatnými systémami dial'kového ovládania
24. Nevystavujte zariadenie atmosferickým podmienkam (dázd, slnk o atd.). Alebo použite v podmienkach vysokej vlhkosti (kúpe)'ne, vlhékempingové domy)
25. Pravidelne kontrolujte stav napajacieho kábla. Ak je napajaci kabel poškodený, mal by byt vymeneny špecializovaným opravovacim zariadením, aby sa predišlo nebezpečenstvu
26. Nepoužívajte zariadenie v blízkosti hor'av'ych materíálov
27. Ohrievač musí byt instalovaný vo výške minimálne 1,8 m nad podlahou
28. Nepoužívajte tento ohrievač v bezprostrednej blízkosti vane, sprchy alebo bazéna
29. Nepoužívajte tento ohrievač, ak spadol
30. Nepoužívajte, ak su na ohrievači viditelné známky poškodenia
31. Ohrievač používajte na rovnom a stabilnom povrchu alebo ho pripevnite k stene, ak to ustanovuje vyrobca.
UPOZORNENIE: Nepoužívajte tento ohrievač v malych miestnostiich, kde su l'dua, ktorí ich nemózu opustit' sami, pokial' nie je zabezpečený stály dohl'ad.
UPOZORNENIE: Aby ste znižili riziko požiaru, udržujte textílie, záclony alebo iné hor'avé materialy vo vzdialenosti majmenej 1 m od vystupu vzduchu z ohrievača.
Odporuča sa, aby bola elektrická instalácia vybavená automatickým istiocom prudu s 30 mA startovacim prudom pre zvyšenu bezpečnost.
Poznámka: Ak je poskodený napájací kabel alebo sietová zástrčka, vždy ho vymente alebo opravte v špecializovanej opravovni.
II. UPOZORNENIE
1. Nikdy nepoužívajte zariadenie, ak je poškodené alebo nefunguje správné.
2. Nikdy nepoužívajte prístroj, ak spadol z predošlej výšky a vykazuje viditelné známky poškodenia.
3. Nepoužívajte predlžovacie káble alebo iné elektrické zásuvky, ktoré nespíñajú platné normy a elektrické predpisy.
4. Akúkol'vek opravu, demontáž alebo výmenu akýchkol'vek Častí by mala vždy vykonat špecializované zariadenie.
5. Ak je zariadenie a elektrické komponenty, aka su elektrické kontakty, mokré, pred použitim pristroja a jeho sučasti by sa mal vysusit zástrčka alebo kabel.
6. Nepoužívajte prístroj s mokrými rukami.
7. Ak existuje riziko poskodenia zariadenia, NEPOUŽIVAJTE opravu zariadenia sami.
8. Nikdy neumyvajte pristroj pod tecucou vodou alebo takym sposobom, ze knej voda klesa.
9. Nepoužívajte prislušenstvo, ktoré neodporúča vyrobca. Móžu predstavovat' nebezpečenstvo pre užívatěla a možu spôsobit poskodenie zariadenia.
10. Uistite sa, ze zariadenie pred ukladanim vychladlo.
11. Pri použivaní sa nedotykajte krytu. Počas prevadzky používajte iba gombíky a spinače. Po vypnutí vyčkajte, kým prístroj vychladne.
12. UPOZORNENIE: Niektoré Časti tohto zariadenia sa možu poças prevádzky velmi horuce a možu spősobit popáleniny.
III. PRED PRVYMPOUZITIM
1. Odstrante vsetok obalovy material a napnite napajaci kabel
2. Poças instalacie月至zt zariadenie Pokryte izolaçnym materialom alebo podobnym materialom
3. Pri montázi zariadenia by sa nosniky a tramy nemali rezat'ani rezat'
4. Pred prvym pouzitim si precitajte vsetkyPokyny na pouzitie.
5. Skontrolujte, Č napatie uvedené na štiku štiku produktu zodpovedá napatiu v sieti vo vašej domácnosti
INSTALÁCIA
Použite vrtacku na vrtanie dvoch otvorov do steny, minimáne 180 cm od podlavy a 20 cm od stropu - obrázok A. Po vrtani otvorov vložte podložku a skrutku. Uistite sa, ze su skrutky dobre utiahnute a zaveste zariadenie na stenu.
POPIS PRODUKTU
Obrázok B. HAVNÍ SPÍNAČ
ON/OFF = OFF ON/YUTN OFF.
Obrazok C. DIALKOVE OVLADANIE
1. Tlačidlo ON / OFF
6.WEEK/TIMER
2. REZIM
7. MIN
3. DeN
8. +-> Tlačidlo na zvyšenie teploty. Tiež slúži ako vyberové tlačidlo pre Ās / den.
4.CLOCK
9. --> Tlačidlo na zniženie teploty. Tiež slúži ako vyberové tlačidlo pre ās / den.
5. NASTAVIT
10. RESET - Tlacidlo resetovania casaova
Obrazok D. LED PANEL
1. Symbol ON
6. Zobrazenie dna
2. Vykurovaci vykon 1000W
7. Zobrazeniačasu
3.Vykon vykurovania 2000W
8. Symbol ON - spustenie Časováča
4. Funkcia AUTO
9. Symbol OFF - vypnutie casovača
5. Zobrazenie teploty
10. Otvorte funkciu detekcie okien
IV.VYUZITIE
1. Druk op de hoofdschakelaar a rechterkant app het apparatus - Afbeelding B om het apparatus in en te te schakelen.
2. V pohotovostnom rezime stlačte tlacidlo OK. Druk op de aan / uitknop (1) op de afstandsbediening - Afbeelding C.
3. Druk achtereenvolgens op de MODE-knop (2) om bedrijfsmodus te selecteren:
- 1000 W het appalaat za konstantny opwarmen spnil 1000 W.
- 2000 W, stálej znaleckoj konstanty sa stretol 2000 W.
- Auto-modus, druk op de knappen + en - om de temperuur handmatig in te stellen. Dajte pozor, aby sa automaticky zobrazoval druh teploty alebo teploty.
- Detekcia otvoreného venstera - Funkcia Wanneerovej deze functie je geselecteerd, schakelt het apparaat de verwarming Automatical uit als de kamertemperatuur plotteling with 10^ C daalt.
4. Druk op de aan / uitknop (1) op afstandsbediening om het appetate at the schakelen. Zoznámte sa s tym, ze nemáte ziadne d'alsie 30 sekund.
IN INTERNETOVY PRISTROJ DE INTERNE
PREVÁDZKA: Tiež sa hovori,Že ste si kúpili týžden,ked ste sa rozhodli,Že ste sa rozhodli,Že ste si uzili volgens.
1. Vyberte funkciu AUTO AUTO s funkciou MODE-knop.
2. Sledujte Časovac a vlozte ho do týždna.
- Druk op de knop DAG vo vybere huidige dag met de knoppen + en -. Wacht tot het display stopt met set knipperen.
- Druk op de KLOK-knop en stel de huidigeijd in met de knoppen + en -. Wacht tot het display stopt met set knipperen.
- Druk op de MIN-knop en huidige markings in met de knuppen + en -. Wacht tot het display stopt met set knipperen.
PROGRAMÁTORČASOVAČA-ČASOVAČ
Met deze functie kunt u de tijd programmeren om het apparaat for elke gewenste dag van de week in en te te schakelen.
Casovy spinač moze byt' pouzity na vyber z ponuky AUTO-functionie on het appellen in the interne klok van het apparaat.
1. Druk op de WEEK / TIMER-knop en selecteer de dag van de week waarop u het apparaat wilt instellen om automatisch in a the schaken met de knappen + en -. Wacht tot het display stopt met set knipperen.
2. DALSIE NASTAVENIE ZOBRAZIT Hebt gedrukt, Licht het ON-symbool op in het display. Začiname pracovat's casovačom. Gebruik de KLOK, MIN, + sk - kliknú't na začiatočnik z casovej základne. Wacht tot het display stopt met set knipperen.
3. Nadchádzajúce udalosti WEEK / TIMER-knop (6) hebt gedrukt en cervolgens op de SET UP-knop heeft gedrukt,licht het OFF-symbool op het display op.Dozviete sa viac casu. Wacht tot het display stopt met set knipperen.
PREVÁDZKA: od šartu do horsého svahu, od začiatku do konca.
PREVÄDZKA Druk op RESET-knop om Časovac terc te zetten maar de standardinstellungen.
V. CISTENIE A UDRZBA
1. Pred Čistenim vždy odpojte spotrebič od sietovej zásvky.
2. Ak počas Čistenia, ako je zástrčka, termostat, elektrické kontakty atd. su namocné pred opátovnám použitím, mali by byt'dokladne vysušené
3. Nepoužívajte agresivne Čistace prostriedky vo forme emulzii, mliečnych roztokov, pást atd. na Čistenie skrinky. Mózu okrem iného odstránit informáné grafické symboly, ak o su značky, varovné signály atd.
4. Pred Čistením sa uistite, Že zariadenie vychladlo.
(HR) HRVATSKI
PAZNJA:
Ureaj ne namijenjenismo za kućnu uporabu.
Urejad NIJE namijenjen za komercijalnu / profesionalnu uporabu.
Urejad NIJE prikladan za uporabu na otvorenom.
Pažnja! Pije uporabe obavezno pročitajte ove upute za uporabu kako biste izbjegli nezgode i pravilnu uporabu uredaja. Čuvajte ovaj prisćnik i Čuvajte ga tak do ga možete jegnostavno koristiti.
I. SMJERNICE ZA SIGURNOST UPORABE
1. Prije uporabe provjerite odgovara li napon navenen na označnoj pločici lokalmim parametrima saliniteta, ali imajte na umu da oznaka: AC- je izmjenična struja, a DC je DC.
2. Prikljucite uredaj samo na uticnicu uzemljenja 220-240V 50/60 Hz.
3. Prije uporabe odomotajte i poravnajte kabel za napajanje
4. Uvjerite se da kabel napajanja i utikač nemaju vidljivih ostecenja
5. Prije i nakon uporabe, uvjerite se da kabel napajanja nods rastegnut na otvorenom plamenu ili drugom izvoru topline i ostrim rubovima koji mogu ostetiti izolaciju kabela.
6. Prije prve uporabe uklonite sve komponente pakiranja. Pažnja! U slučaju kučista s metalnim dijelovima, na tim se elementima moze rastezati blago vidljiva zašitna folija, koju takoder treba ukloniti.
7. Urečaj ne smiju koristiti djeca, osobe s ograničenim fizičkim, osjetilnim ili mentalnim sposobnostima bez nadzora ovlastenih ili iskusnih osoba i uvijek u skladu s ovim uputama.
8. Opremaijke namijenjena za korištenje s vanjskim vremenskim prekidačima ili zasebnim sustavom daljinskog upravljanja.
UPOZORENJE: Ovu opremu mogu koristiti djeca starija od 8 godina i osobe s ograničenim fizickim, osjetilnim ili mentalnim sposobnostima, ili osobe koje nemaju iskustva ili znanja o opremi, SAMO ako se to radi pod nadzorom osobe odgovorne za njihovo sigurnosti ili su dobili upute o sigurnom koristenu ureăja te su svjesni opasnosti povezanih s njegovom uporabom. Djeca se ne smiju igrati s opremom. Čišćenje i održavanje ureăja ne smiju izvoditi djeca ako nisu stariji od 8 godina i ako su pod nadzorom
9. Ne ostavlajte uredaj bez nadzora tijekom rada.
10. Aparat i kabel za napajanje nemojte uranjati u vodu ili druge tekuciine.
11. Kada se uredaj ne koristi, uvijek ga morate odspojiti iz zidne uticnice.
12. Kada povlačite utikač iz utičnice, nikada ne povlačite kabel za napajanje samo za utikač.
13. Ne stavljajte NO METAL ITEMS unutar uredaja
14. Proizvodač nije odgovoran za štete koje su posljedica nepravilnog koristenja uredaja.
15. Treba imati na umu da se neki dijelovi uredaja i ormarić tijekom rada jako zagrijavaju, stoga budite oprezni i ne dirajte ih, možete se opeci.
16. NEMOJTE prekrivati Uredaj tijekom rada ili kada se ne ohladi u potpunosti
17. Upamtite da grijacim elementima uredaja treba vremena da se u potpunosti ohlade.
18. Prilikom uporabe uredaja osiguraje odgovarajuci prostor iznad i oknega. Ureaj tijekom rada ne moze dodirivati lako zapaljive predmete, kao sto su ukrasi, papirnati rucnici, zavjese, odjeca itd..
19. Grijac instaliran u kupaonici mora biti postavljen takdo se osobe u kadi ili pod tusem ne mogu dotaknuti priključnice i drugih regulatora.
20. U grijacima za učvršćenja na velikim nadmorskim visinama, položaji razlicitih položaja priključaka trebaju biti vidljivi s udaljenosti od 1 m
21. Oznaka zaPokrivanje grijaca mora biti vidljiva nakon ugradnje grijaca
22. Ne možete postavljati grijac izravno ispod utičnice i blizu zapaljivih materijala kao što su zavjese, zavjese itd..
23. Urešaj se ne može koristiti s vanjskim vremenskim prekidačima ili drugim odvojenim sustavima daljinskog upravljanja
24. Ne izlažite uredaj atmosferskim uvjetima (kiša, sunce, itd..) Ili koristite u uvjetima visoke vlažnosti (kupaonice, vlažne kamp kuće).
25. Povremeno provjerite stanje mreznog kabela. Ako je kabel za napajanje ostecen, treba ga zamijeniti specijalizirana servisna sluzba kako bi se izbjegla opasnost
26. Nemojte koristiti uredaj u blizini zapaljivih materijala
27. Grijac mora biti postavljen na visini ne manjoj od 1,8 m iznad poda
28. Ne koristite ovaj grijač u neposrednoj blizini kade, tuša ili bazena
29. Ne koristite ovaj grijac ako je pao
30. Ne upotrebljavaje ako postoje vidljivi znakovi ostecenja grijalice
31. Upotrijebite grijac na ravnoj i stabilnoj povrsini ili ga pričvrstite na zid, ak to predviða proizvodac.
UPOZORENJE: Ne koristite ovaj grijac u malim sobama u kojima postoje ljudi koji ih ne mogu sami ostaviti, osim ako nodsiguran stalni nadzor.
UPOZORENJE: Da biste smanjili opasnost od požara, držite tekstil, zavjese ili druge zapaljive materijale najmanje 1 m od izlaza zraka iz grijaca.
Preporucje se da elektricna instalacija bude opreumljena automatskim prekidačem za preostalu struju s početnom strujom od 30mA za povećanu sigurnost.
Napomena: Ako je kabel napajanja ili utikač ostecen, uvijek ga treba zamijeniti ili popraviti u specijaliziranoj servisnoj radionici.
II. UPOZORENJA
1. Nikada nemojte koristiti uredaj ako je ostecen ili ne radi ispravno.
2. Nikada nemojte koristiti uredaj ako je pao s visine prije iPokazuje vidljive znakove ostecenja.
3. Ne koristite produktne kabele ili druge elektrichne uticnicke koje ne odgovaraju vazećim standardima i elektrichnim propisima.
4. Bilo koji popravak, demontiranje ili zamjena bilo kojeg rijela uvijek treba obaviti specijalizirana ustanova.
5. Ako su urežaj i elektrčne komponente, kao što su elektrčni kontakti, mokri, utikač ili kabel treba osušiti prije uporabe urežaja i njegovih komponenti.
6. Ne koristite uredaj s mokrim rukama.
7. Ako postoji opasnost od oštećenja urežaja, NE pokušavajte sami popraviti urežaj.
8. Nikada nemojte prati uredaj pod tekucom vodom ili na takav način da voda kaplje u nju.
9. Ne koristite pribor koji-nine preporucio proizvodač. Mogu predstavljati opasnost za korisnika i mogu ošetiti urežaj.
10. Prije pohranjivanja provjerite je li uredaj ohladen.
11. Tijekom uporabe ne dirajte kuciiste. Tijekom rada koristite samo gumbe i prekidace. Nakon isključivanja pricekajte da se uredaj ohladi.
12. OPREZ: Neki dijelovi ovog uredaja mogu se tijekom rada jako zagrijati uzrokovati opekline.
III. PRIJE PRVE UPORABE
1. Uklonite sav materijal za pakiranje i ispravite kabel za napajanje
2. Tijekom instalacije uredaj moze bitiPokriven izolacjskim materijalom ili slicnim materijalom
3. Prilikom sastavljanja uredaja, grede i grede ne smiju se rezati ili rezati
4. Pije prve uporabe procitajte sve upute za uporabu.
5. Provjerite odgovara li napon navenen na naljepnici s proizvodom naponu mreze u vašem domu
installaciona
Busilcom izbu-site dvije rupe u zidu, najmanje 180 cm od pada i 20 cm od stropa - sika A. Nakon sto izbu-site rupe, umetnite jastucić i vijak. Provjerite jesu li vijci dobro pritegnuti i uredaj objesite na zid.
OPIS PROIZVODA
Sika B. GLAVNI PREKIDAc
ON/OFF = OFF ON/YUTN OFF.
Slika C. DALJINSKI UPRAVLJANJE
1. Tipka ON / OFF
6.WEEK/TIMER
2. NACIN RADA
7. MIN
3.DAN
8. + -> Gumb za podizanje temperature. Takoder služi kao gumb za odabir vremena / dana.
4.CLOCK
9. --> Gumb za smanjenje temperature. Takoder služi kao gumb za odabir vremena / dana.
5. Podesite UP
10. RESET (Ponovno postavljanje) - Tipka za resetiranje timera
Slika D. LED PANEL
1. Simbol ON
6. Prikaz dana
2. Snaga grijanja 1000W
7. Prikaz vremena
3. Snaga grijanja 2000W
8. Simbol uključenosti -Pokretanje timera
4. AUTO funkcija
9. Simbol isključivanja - isključivanje timera
5. Prikaz temperature
10. Otvorite funkcjju otkrivanja prozora
IV. UPOTREBA
1. Druk op de hoofdschakelaar aan de rechterkant van het apparatus - Afbeelding B om het apparatus in eniti te schakelen.
2. Prihvacajte odgovarajuce stanje u stanju pripravnosti. Druk op de aan /uitknop (1) op de afstandsbediening - Afbeelding C.
3. Druk achtereenvolgens opse MODE-knop (2) sve o izabranom modu:
- 1000 W het apparaat za konstanta opwarmen met 1000 W.
- 2000 W, hep apparatus zal konstantni opwarmen met 2000 W.
- Auto-modus, druk op de knappen + en - om temperature temperature u ručnom stanju. Imajte automatiski uredaj za automatisko upravljanje modusima i temperaturama.
- Otvoreni sustav otkrivanja venstera - Wanner deze functie je geselecteerd, sklopljen je za automatisku uporabu s automatiskom uporabom u kamertemperaturi za uredivanje parcela od 10^ C.
4. Druk op de aan / uitknop (1) op de afstandsbediening om het apparaatuit te schakelen. Imaje na umu da se zei rijeiti 30 sekundi.
DE INTERNE APPARAATKLOK INSTELLLEN
OPMERKING: Als u de huidige tijd en dag van tjedan Niet intelt, za het apparaat Niet goed werken waar dat het volgens zich eigen interne klok werk, wat onjuist is.
1. Odabir AUTO-funkcije je ispunjen MODE-knop.
2. Stel voordat u de timer instelt de dag van tjedan dana en de huidige tijd in:
- Druk op de knop DAG en selecteer de huidige dag met de knoppen + hr - Wacht tot het display zaustavio se s nozem.
- Druk op de KLOK-knop en stel de huidigeijd in met de knoppen + hr -. Wacht tot het display zaustavio se s nozem.
- Druk op od MIN-knop i stella de huidige minuten in met de knuppen + hr. - Wacht tot het display zaustavio se s nozem.
PROGRAMMERINSTALLING TIMERA - TIMER
Met deze functie kunt u de tijd programmeren om het apparaat o elke gewenste dag van tjedna prije u enitit te schakelen.
De timer moze poboljsati ulazak u sustav AUTO-functie en het instellen van internetski klok van hep apparaat.
1. Druk za WEEK / TIMER-knop za odabir dana u tjednu waarup u het apparaat wilt instellen om automisch in eniti te schakelen met de knappen + en -. Wacht tot het display zaustavio se s nozem.
2. Nadopustite opciju SET UP SET hebt gedrukt,licht het ON-symbool op in het display.U kunt nu de starttijd van de timer instellen.
Gebruik de KLOK, MIN, + hr - otvorite start vremena za vremenski raspon. Wacht tot het display zaustavio se s nozem.
3. Nadogradite WEEK / TIMER-knop (6) na zaslonu SET UP-knop heeft gedrukt,icht het OFF-Symbolol or het display op.U kunt nu de uitschakeltijd van de timer instellen. Wacht tot het display zaustavio se s nozem.
OPMERKING: de startijd要去 algtd korter zichn dan de stoptijd.
OPMERKING Druk opcija RESET-poništa tjmer terug te zettenaar de standardinstelleningen.
V. CISCENJE I ODRZAVANJE
1. Prijce cisicenja uvijek iskljucite aparat iz uticnice.
2. Ako tijekom ciścenja stavke kao sto su utikač, termostat, elektrčni kontakti itd. natopljene prije ponovne uporabe, treba ih temeljito osušiti
3. Nemojte koristiti agresivne deterdžente u obliku emulzija, losiona, paste itd. za cisćenje ormarica. Mogu, izmedu ostalog, ukloniti graficke simbole informacija, kao što su znakovi, znakovi upozorenja, itd..
4. Prije ciscenja provjerite je li uredaj ohladen.
TEHNICKI PODACI:
Napon: 220-240V ~ 50 / 60Hz
Snaga: 2000W Maks. Snaga: 2200W
lp20

Kueista tijekom rada jako zagrijavaju, SPASITE PAMJENO !!!

"NEMOJTE POKLOPI" - NAPISI VAZNOST Natpis na ureăju znači da ureăj ne smije biti prekriven odjećom,Pokrivacima i ekstilnim proizvodima koji bi mogli izazvati paljenje.
UPOZORENJE: Nemojte koristiti ovu opremu u blizini kade, tuša, bazena i slichni spremnika za vodu.

(SLO) SLOVENŠČINA
POZOR:
Naprava je namenjenaismo za domaco uporabo.
Naprava ni namenjena komercialni / profesionalni uporabi.
Naprava ni primerna za uporabo na prostem.
Pozor! Pred uporabo obvezno preberite ta navodila za uporabo, da se izognete nesrečam in pravilni uporabi naprave. Hranite ta priročnik in ga hranite tako, da ga lahko preprosto uporabite.
I. SMERNICE ZA VARNOST UPORABE
1. Pred uporabo preverite, ali napetost, ki je navedena na imenski tablici, ustreza lokalnim parametrom slanosti, vendar upoštevajte, da je oznaka: AC - izmenični tok, DC pa DC.
2. Napravo prikljucite samo na ozemljeno vticnico 220 - 240V 50 / 60~Hz
3. Pred uporabo odklopite in poravnajte napajalni kabel
4. Prepricajte se, da napajalni kabel in vtic nista vidna
5. Pred in po uporabi se prepričajte, da napajalni kabel ni raztegnjen nad odprtim plamenom ali drugim virom toplote in ostrimi robovi, ki lahko poskodujejo izolacijo kabla.
6. Pred prvo uporabo odstranite vse sestavne dele embalaze. Pozor! Pri ohišju s kovinskimi deli se lahko na teh elementih raztegne nekoliko vidna zašcitna folija, ki jo je treba tudi odstraniti.
7. Naprave ne smejo uporabljati otroci, osebe z omejenimi fizichimi, Čutnimi ali duševnimi sposobnostmi brez nadzora pooblaščenih ali izkušenih oseb in vedno v skladu s temi navodili.
8. Oprema ni namenjena uporabi z zunanjimiČasovnimi stikali ali ločenim systemom za daljinskik upravljanje.
OPOZORILO: To opremo lahko uporabljajo otroci, starejši od 8 let, in osebe z omejenimi fizičnimi, šutnimi ali duševnimi sposobnostmi ali osebe, ki nimajo izkušenj ali znanja o opremi, SAMO, če je to opravljeno pod nadzorom osebe, odgovorne za njihovo ali so dobili navodila za varno uporabo naprave in se zavedajo nevarnosti, povezanih z njeno uporabo. Otroci se ne smejo igrati z opremo. Čišcenje in vzdřevanje naprave ne smejo izvajati otroci, če niso starejši od 8 let in so pod nadzorom
9. Med delovanjem naprave ne pušćajte brez nadzora.
10. Aparata in napajalega kabla ne potaplajte v vodo ali druge tekocine.
11. Ce naprava ni v uporabi, jo vedno izkljucite iz elektricne vticnice.
12. Ko vtič potegnete iz vtičnice, napajalnega kabla nikoli ne vlecite samo za vtič.
13. V napravo ne postavljajte nobenih kovinskih predmetov
14. Proizvajalec ne odgovarja za škodo, ki je posledica nepravilne uporabe naprave.
15. Ne pozabite, da se nekateri deli naprave in omarice med delom zelo segrejejo, zato bodite previdni in se jih ne dotikajte, lahko se opecete.
16. Naprave NEPokrivajte med delovanjem ali ko se ne ohladi
17. Ne pozabite, da grelini elementi naprave potrebujujo nekaj chasa, da se popolnama ohladijo.
18. Pri uporabi naprave zagotovite dovolj prostora nad in okrog. Med delom se naprava ne more dotikati lahko vnetljivih predmetov, kot so okraski, papirnate brisače, zavese, oblačila itd..
19. Grelec, ki je vgrajen v kopalnici, mora biti namešcen tak, da osebe, ki so v kadi ali pod prho, ne morejo dotakniti priključkov in drugih regulatorjev.
20. Pri grelcih za nadmorske visine morajo biti položaji razlicnih položajev priključkov vidni zrazdalje 1 m. \t
21. Oznaka zaPokrivanje grelnika mora biti vidna po namestitvi grelnika
22. Ne morete postaviti grelnika neosredno pod vtičnico in v blizini vnetljivih materialov, kot so zavese, zavese itd..
23. Naprave ni mogoće uporabljati z zunanjimi časovnimi stikali ali drugimi ločenimi sistemi za daljinski upravljanje
24. Naprave ne izpostavlajte atmosferskim pogojem (dež, since itd.) Ali uporabe v pogojih visoke vlažnosti (kopalnice, vlažne kampirne hiše).
25. Redno preverjaje stanje napajalega kabla. Ce je napajalni kabel poškodovan, gamorate zamenjati s strokovnim servisom, da se izognete nevarnosti
26. Naprave ne uporablajte v blizini vnetljivih materialov
27. Grelec mora biti namescen na visini rajmanj 1,8 m nad tlemi
28. Tega grelnika ne uporabljaje v neposredni blizini kadi, prhe ali bazena
29. Tega grelnika ne uporabljajte, ce je padel
30. Ne uporabljajte, ce so na grelcu vidni znaki poškodb
31. Grelec uporabljajte na ravni in stabilni povrsini ali ga pritrdite na steno, ce to predvideva proizvajalec.
OPOZORILO: Tega grelnika ne uporabljajte v majhnih prostorih, kjer so ljudje, ki jih sami ne morejo zapustiti, razen ce je zagotovljen stalen nadzor.
OPOZORILO: Da bi zmanjsali nevarnost požara, naj bodo tekstil, zavese ali drugi vnetljivi materiali oddaljeni vsaj 1 m od odvoda zraka za grelnik.
Priporočljivo je, da je elektricka napeljava opremljena s samodejnim zašcitnim stikom na diferencjni tok s 30 mA zaćetnim tokom za većjo varnost.
Opomba: Ce je napajalni kabel ali napajalni kabel poškodovan, ga mora vedno zamenjati ali popraviti specializirana servisna delavnica.
II. OPOZORILA
1. Naprave nikoli ne uporabljajte, ce je poškodovana ali ne deluje pravilno.
2. Naprave nikoli ne uporabljajte, ce je pred visino padla in kazejo vidne poskodbe.
3. Ne uporabljaje podaljskov ali drugih elektrichnih vtichnic, ki ne ustrezajo veljavnim standardom in elektrichnim predpisom.
4. Vsako popravilo, demontažo ali zamenjavo delov je treba vedno opraviti v specializiranem objektu.
5. Če so naprava in elektrčni sestavni deli, kot so elektrčni kontakti, mokri, je treba vtič ali kabel pred uporabo naprave in njenih component osušiti.
6. Naprave ne uporabljajte z mokrimi rokami.
7. Če obstaja nevarnost, da je naprava poškodovana, naprave NE poskušajte popraviti sami.
8. Naprave nikoli ne umivajte pod tekoco vodo ali tako, da voda kaplja v vodo.
9. Ne uporabljajte pripomočkov, ki jih proizvajalec ne priporoča. Lahko predstavljajo nevarnost za uporabnika in lahko povzročijo škodo na napravi.
10. Preden shranite napravo, se prepričajte, da se je naprava ohladila.
11. Med uporabo se ne dotikajte ohišja. Med delovanjem uporabljajte samo gumbe in stikala. Po izklopu počakajte, da se naprava ohladi.
12. POZOR: Nekateri deli te naprave se lahko med delovanjem zelo segrejejo in povzroćijo opekline.
III. PRED PRVO UPORABO
1. Odstranite ves embalazni material in poravnajte napajalni kabel
2. Med namestitvijo je lahko naprava prekrita z izolacijskim materialom ali podobnim materialom
3. Pri sestavljanju naprave se tramovi in Spirovci ne smejo rezati ali rezati
4. Pred prvo uporabo preberite vsa navodila za uporabo.
5. Preverite, ali napetost, ki je navedena na nalepki za brusenje izdelka, ustreza napetosti elektricnega omrežja vašega doma
NAMESTITEV
Z vrtalnikom izvrtajte dve luknji v steni, najmanj 180 cm od tal in 20 cm od stropa - sliko A. Ko ste izvrtali luknje, vstavite blazinico in vijak. Prepričaje se, da so vijaki dobro priviti in napravo obesite na steno.
OPIS IZDELKA
Slika B. GLAVNA STIKALA
ON/OFF = IZKLOVPVKLOP/IZKLOP.
Slika C. DALJINSKI NADZOR
1. Gumb za vklop / izklop
2. NACIN
3.DAN
4.CLOCK
5. NASTAVI
6.WEEK/TIMER
7. MIN
8. + -> Gumb za dvig temperature. Prav takso služi kot izbirni gumb za ācas / dan.
9. --> Gumb za znižanje temperature. Prav taklo služi kot izbirni gumb za Čas / dan.
10. RESET - Gumb za ponastavitev casovnika
Slika D. LED PANEL
1. Znak ON
2. Ogrevalna moč 1000W
3.Ogrevalnamoc2000W
4. Funkcija AUTO
5. Prikaz temperature
6. Prikaz dneva
7. Prikaz casa
8. Simbol ON - vklop casovnika
9. Simbol IZKLOP -casovna zaustavitev
10. Odpritefunkcijo zaznavanja okna
IV. UPORABA
1. Druk op de hoofdschakelaar aan de rechterkant van het apparatus - Afbeelding B om het apparatus in eniti te schakelen.
2. Pridobite podatke o stanju v stanju pripravljenosti. Drug op aan / uitknop (1) op de afstandsbediening - Afbeelding C.
3. Druk achtereenvolgens op de MODE-knop (2) o izbranem načinu:
- 1000 W het apparaat za konstantni ovarnari zi opolnjeni 1000 W.
- 2000 W, het apparaat za konstantni vojni sestali 2000 W.
- Samodejni modus, druk op de knappen + en - om o temperature temperatureur handmag in te stellen. Pridobite ga avtomatizirano, da waar de modus voor temperatureurbehoud.
- Odprto detecttiefunctie venster - Wanner deze functie je geselecteerd, poskušat je treba opozoriti avtomatizirano uporabiti vse o kamertemperaturne parcelacije pri 10^ C daalt.
4. Druk op de aan / uitknop (1) op in astastatesbedi om om het apparaat uit te schakelen. Pocakajte, da se odpravite na 30 sekund.
DE INTERNE APPARAATKLOK INSTELLLEN
OPMERKING: Vsak teden si lahko ogledate teden dni in ni vec, za het apparaat Niet goed werken odomat het volgens zich eigen interne klok werk, wat onjuist is.
1. Izbira fungcjij AUTO-functie izpolnjena z MODE-knop.
2. Stel voordat in de timer instelt de dag van toden en en huidige tijd in:
- Druk op de knop DAG in selecteer de huidige dag met de knappen + sl - Wacht tot het prikazovalnik se je ustavil iz noza.
- Druk op de KLOK-knop en stel de huidigeijd in met de knuppen + en -. Wacht tot het prikazovalnik se je ustavil iz noza.
- Druk op MIN-knop en stel de huidige minuten in met de knuppen + sl -. Wacht tot het prikazovalnik se je ustavil iz noza.
PROGRAMMERINSTELIRANJE CASA - CAS
Met deze functie kunt in de tijd programmeren om het apparaat op elke gewenste dag van de teden in en uit te schakelen.
De timer si lahko poslabsa vnos v system za samodejno delovanje AUTO-functie en het instellen van inter inter klok van het apparaat.
1. Druk op WEEK / TIMER-knop en selecteer de dag van teden waarop in het apparaat wilt instellen om automisch in eniti te schakelen met de knappen + en -. Wacht tot het prikazovalnik se je ustvil iz noza.
2. Nadaljujete s pritiskom NASTAVITE, da se prikaze het prikazovalnik symbola. U kunt nu de starttijd van de timer instellen. Gebruik de KLOK, MIN, +sl - odpiranje zaetnega stevca casa in casa. Wacht tot het prikazovalnik se je ustvil iz noza.
3. Nadomestite si nohte za WEEK / TIMER-knop (6), ce zeilite, da se prikazejo SET UP-knop-ovi, da se prikaze, da se prikaze OFF-Symbolol in het display op. U kunt nu de uitschakeltijd van de timer instellen. Wacht tot het prikazovalnik se je ustvil iz noza.
OPMERKING: de startijd要去 algid korter waar dan de stoptijd.
OPMERKING Drug opus RESET-knop om timer terug te zieten maar de standardinstellungen.
V. CISCENJE IN VZDRZEVENJE
1. Pred cischenjem napravo vedno izkljucite iz vtičnice.
2. Ce med cišćenjem predmete, kot so elektrčni vtč, termostat, elektrčni kontakti itd. pred uporabo ponovno namočite, jih temeljito posušite
3. Ne uporabljaje agresivnih detergentov v obliki emulzij, losjonov, paste itd. za cischenje ohijsa. Med drugim lahko odstranijo graficne simbole, kot so znaki, opozorilni znaki itd..
4. Pred ciscenjem se prepriacaje, da se je naprava ohladila.
TEHNIÇNI PODATKI:
Napetost: 220-240V ~ 50 / 60Hz
Moc: 2000W Maks. MoC: 2200W
lp20

"Pozor Vroča povrsina" - Temperatura razpoložljivih povrsin je lahko visja, ko oprema deluje, kar pomeni, da se elementi ohišja lovanjem zelo segrejejo.

"NePokrivajte"-NAPISNI POMEMBNI napis Napis na napravi pomeni, da naprave ne prekrivajte z oblačili, odejami in drugimi imi izdelki, ki bi lahko povzročili vžig.
OPOZORILO: Te opreme ne uporabljaje v blizini kadi, prh, bazenov in podobnih rezerovoarjev za vodo.


Skrbimo za okolje. Kartonska embalaža, prosim darovati na odpadni papir. Polietilenske vreč (PE) mečite v posoda za plastiko. Dotrajane naprave je treba vrniti na ustrezno zbirno mesto, ker vsebovane v napravo nevarne elemente lahko predstavljajo nevarnost za okolje. Elektricna naprava je treba vrniti kakor, da se omeji njegovo ponomvno uporabo in izkorišćenost. Ce naprava vsebuje baterio, je treba odstraniti in loćeno dati nazaj na mesta skladisćenja.
olij:
jai jia jia jia jia jia jia jia
gall / gJJIJI pIiDII Juaia jie jieJI.
#
J 10
alg waiiui 1y jilj.
1. pIiJyI aDyI gill ssall
1. 1
aannn aennnn nnnn nn nnnn nnnn nnnn nnnn nnnn nnnn nnnn nnnn nnnn nnnn nnnn nnnn nnnn nnnn nnnn nnnn nnnn nnnn nnnn nnnn nnnn nnnn nnnn nnnn nnnn nnnn nnnn nnnn nnnn nnnn nnnn nnnn nnnn nnnn
1. 100000000000000000000000000000000000000
1. 02jglglll 5w 2jgl 1
3. 152
0. 1 J 1 1 1 1 1 1 1 1 1 1 1 1 1 1 1 1 1 1 1 1
JLLI JRRR RRRRRRRRRRRRRRRRRRRRRRRRRRRRRRRRRRRRRRRRRRRRRRRRRRRRRRRRRRRRRRRRRRRRRRRRRRRRRRRRRRRRRRRRRRRRRRRRRRRRRRRRRRRRRRRRRRRRRRRRRRRRRRRRRRRRRRRRRRRRRRRRRRRRRRRRRRRRRRRRRRRRRRRRRRRRRRRRRRRRRRRRRRRRRRRRRRRRRRRRR
1. 1j 1 j 1 j 1 j 1 j 1 j 1 j 1 j 1 j 1 j 1 j
i 1
V. 4yDdall y dylldy dlll lal y gdsalx y jla b1 jg j
i 1
1. 1
y j 1
a 1
J 1
y 1
a
9. 1
1. 1.
11. 1
17. baaasalln aalbll slyw waiy 6, saaalln no wiall wie.
11. jglal jldyjiale gai
12. jLjJyDlI yE JxJyI JxJyI JxJyI JxJyI JxJyI JxJyI
10. 1
jai jao
17. laai 2y Ioc g Jieiill cii jiee iiae y
1V. laai d 2i g jg jll jie
11. 1i jj j j j j j j j j j j j j j j j j j j j j j j j j j j j j j j j j j j j j j j j j
11111111111111111111111111111
19. 1
i 1
.
1g jia aaln
1. jssll 5j j 2y jn jn jn jn jn jn jn
11. jiluill Jia Jia xu aikai gao jin m jn jy jy
la jg jilwgl.
Y.
Y.
)
y0. 2x!
jbiil jnil aiaia
26. Jieiui 4yIgai jn jj
V. 1
Y. 1.
9. baw 1j jwll 1a puiy
1. jaii 5e o jal cdo 5i 1
11. 5x e aai aill ai jui iui iui iui iui iui iui iui iui
lo gaiy jn yj 2 y j 1 2 3 4 5 6 7
aaii aai i jia
Jluiu Aylall goll no lae g jilll g lglwially bai, g u wu Jla:
j 1
xL 1 1 1 1 1 1 1 1 1 1 1 1 1 1 1 1 1 1 1 1 1 1
J 1
a 1
iuaa 2xol.
II.
1. jki jai y gdi all jgljll i
Y. 1
1. 4y
4. 1
0. 1111111111111111111111111111111
aLi g o jg 1
7. 214
V. sluaiy jglal 1 Jgl 8 . dLiJ jglal jgj g jg jg
1. alall 4io w jy yj y jy jy jy jy
9. 1 1 1 1 1 1 1 1 1 1 1 1 1 1 1 1 1 1 1 1 1 1 1 1 1 1 1 1 1 1 1 1
j_l = I
1. jzj 100
11. 1
jieai jie
17. 1
Jg21 pssss 151
1. aBbI dDd Dd Dd Dd Dd all j
2. 213aa ola g jai jle ola jgeaia yjg jy jy ciil elisi
3. aall jall gll 111 111 111 111 111
4. alldi 1 j0
5. all jia gai bali a 240 2000 10000000000000000000000000000000000000000
#
ailll lal . 1000 - 20 20 20 20 20 20 20 20 20 20 20 20 20 20 20 20 20 20 20 20
ailll jll lgl 1 1 1 1 1 1 1 1 1 1
iiill
B. (g)
ON/OFF=J/
0gC. 2y j6
1.
2.
3
4. CLOCK
5. 如下:
6. C33 all 1
7. ② ,
8. + - > 各自 / 切口 J , J , J , J , J , J , J , J , J , J , J , J , J , J , J , J , J , J , J , J ,
9. --pall / 1234567890123456789012345678901234567890123456789012345678901234567890123456789012345678901234567890123456789
10. 与 a + b = 12 整除 b !
D. LED PANEL
1. laill jao
2.1000
3.2000
4. 1111111111
5. 与
6-2
7.
8. 与 a + b = c + d - 12a + 12b + 12c 的解集为
9. 10.
10. 与等比数列 a_n = 2( 3n - 1) ( 3n + 5) ,求此数列的前 n 项和 S_n
poloo
1. jall - jell jn jn jil jll jil jll jil jil B aill jil
2. 100 - 100 100 100 100 100 100 100 100 100 100 100 100 100 100 100 100 100
3. 3.1.2.1.2.1.2.1.2.1.2.1.2.1.2.1.2.1.2.1.2.1.2.1.2.1.2.1.2.1.2.1.2.1.2.1.2.1.2.1.2.1.2.1.2.1.2.1.2.1.2.1.
-1000 1000
-2000 2000 jaiy jaiy jaiy jaiy jaiy
- 1jll jll jll jll jll jll - + + jll jll jll
- 10 jaiy iayi yjy jiy jiy jiy jiy jiy jiy jiy jiy jiy jiy jiy jiy jiy jiy jiy jiy jiy jiy jiy jiy jiy jiy jiy jiy jiy jiy jiy jiy jiy jiy jiy jiy jiy jiy jiy jiy jiy jiy jiy jiy jiy jiy jiy jiy jiy jiy jiy jiy jiy jiy j
2
4. a 30 y d y iabiy jgall y dy jy kail jj (1) (jll / jkill r jy baii jy
aIiJI jieJI aIe Iu
yie 18,4 yaiolal ayld all cwl 18, jao 4 Jkijl jj jj jj jj jj jj jj jj jj jj jj jj jj jj jj jj jj jj jj jj jj jj jj jj jj jj jj jj jj j
1. AUTO
2. all 100
- jy 12000 DAY Jnagll n aalil g jh jh -g + yj j j j j j j j j j j j
- jj bcl Clock jn jn jn jn jn jn jn jn jn jn jn jn jn jn jn jn jn jn jn jn jn jn jn jn jn jn jn jn jn jn jn jn jn jn jn jn jn jn jn jn jn
- jzjbcnMINJcJcJcJcJcJcJcJcJcJcJcJcJcJcJcJcJcJcJcJcJc
| - 12| = | - 12| < | - 12|
y
Auta 1
1. jj WEEK / TIMER
12021 2
2. 2015山东临沂市中考题型2015年高考语文高频知识点2015高考语文高频知识点2015高考语文高频知识点2015高考语文高频知识点2015高考语文高频知识点2015高考语文高频知识点2015高考语文高频知识点2015高考语文高频知识点2015高考语文高频知识点2015高考语文高频知识点2015高考语文高频知识点2015高考语文高频知识点2015高考语文高频知识点2015高考语文高频
1
3. 3.2.2.2.2 WEEK / TIMER (6) SET UP 1 jor oFF
J 1
a 1
jE bai, iai jaiy 1iay xie aiaaiaeaiaeaiaea RET.
aIy, yIy
1. iLiLi Li aIbLi Jia oJaiLi Jiaei
2. 1
3. aagjy j y j . 1 1 1 1 1 1 1 1 1 1 1 1 1 1 1 1 1 1 1 1 1 1 1
yS!
4. 1234567890
4.13: Clog Xe
50/60 240-220:
11, 4.
lp20
A
1 1
219 + ·s + 219 + ( 43 - 1) + 1 = 219 + ( 43 - 1) + 1 = 2( 10)

12

m - 1 0 ;


4.4.1.1.1.1.1.1.1.1.1.1.1.1.1.1.1.1.1.1.1.1.1.1.1.1.1.1.1.1.1.1.1.1.1.1.1.1.1.1.1.1.1.1.1.1.1.1.1.1.1.1.
jglal jbi 4yai yjaiabai jglal jglal sdo!
J 1
jglal y l jybl 15 k1. galswlgalswolc) . Juaia (kayai jzall alaill glilbc) lgjdi d
(BG)БылгAPСКИ
BHIMAHHE:
YcTpoIcTBOTO e npEHa3HaueHo cMo 3a DomaSha ynotpe6a.
YcTpoIcTBOTO HE e npedHa3NaYeHo 3a TbproBcKa / npoepecnoHaJHa ynotpe6a.
YcTpoiCTBOTO HE e noDxOJaIoo 3a n3nOJ3BaHe Ha OTKpITo.
BhImaHne! Ppei ynoTpe6a e BaxHo Da npOeTeTe Te3n INCTpyKcN 3a ekCnIooTaucn, 3a Da n36erHeTe 3IonoJyKn i 3a npAByInHaTa yNoTpe6a Ha ycTpoiCTBOTO. 3ana3e ToBa
pBKOBOCTBOI rO 3aNa3eTe, 3a da MoXeTe JeCHO Da rO n3nOJ3BaTe.
I. YKA3AHNIA 3A BE3OПАСHОCT HA YПOTPEБA
1. Преши уnotpeba поверete дади habржениTo, поочен Ho淘汰kaTа.
CbOTBETCTBa Ha MeCTHnTe NapaMeTpN Ha COJehocT, Ho He 3a6paBraIe, Ye MapKnipOBkata: AC- e npomeHnIB Tok, a DC e DC.
2. Cbbp3BaIte yctpoiCTBOTo cAmO KbM 3a3eMeH KOHTaKT 220-240V 50/60 Hz.
3. Празуnotpe6a pa3BnIteи n3npaBeTe 3axpaHbauя ka6eJ
4. YBepete ce, ye 3axpaHbauT KaBeI N UeNceIbT HAmAT BnIMN NOBpeiN
5. Преши и по Враиме на унотpeба, уверете сe, чe зхсаньшг Кабел He e onbnat Bьрху OTКРИТ Пламьк Или Друг ИЗTOUCHИК Ha TOПЛINHA И OCTprn рббов, KОТо могатда NOВраздг ИЗOLAцЯта на Кабela.
6. Ппени пьраза уnotpeba OTCTpaHete BCnUKN KOMNoHEHTN Ha onakOBkata. BnMaHne!В cnyaH Na Kopnyc C MeTaN HuaCTN, Bbpxy Te3N eJeMeHTN MoKe Da ce OIbHe JIeKO BnIMO 3aunTHo FOJNO, KOeTO cbIo Tp8Ba Da ce npemaxHe.
7. YcTpoIcTBOTO He Tp6Ba Da Ce n3No13Ba OTe Deca, Nua C OrpaHnueHn fN3nueckn, CEH3OpHN IIN yMCTBeHn CnOCo6HoCTn 6e3 HaD3Opa Ha yIbJHOMoUeHn IIN ONHTHn IINuA IN BnHaI IN CbOTBETCTBne C Te3N IHCTpyKcHn.
8.ObopydBaHeTo He e npedHa3HaueHO 3a H3noJ3BaHe C BbHsHn TaMepn JIn OTdeJIHa CNCTema 3a DnCTaHcIOHNO ynpaBHeHne.
ПЕДУПЕЖДEHNE:Товаоборудвае може да ceизпол3ва ot Deца hab8-罗dnша Вьзрасилца с орагишиемфизческ,сeнзорниллумстveиснобостилллца, KОИTO HЯмат ONIT ИЛN ПОЗногяза obopydbaheTo,CAMO ako TOBa ce npabn pod Habлodeнeto Ha IINCE,OTROBOPHO 3a TEXHNTe 6e30anacnoCTИЛN ca NOJUynI INHCTpyKcIMn 3a 6e30anacha ynotpe6ha Ha yctpoiCTBOTo n ca HЯСHOC ONaCNoCTnTe, CBbp3aHn C n3PON3BaHeTo My.ДeцаТ He Tp6Ba dA nIrpaT c obopydbaheTo.Почисванeto n PODPbXkata Ha yctpoiCTBOTo He Tp6Ba dA ce N3BbpWbAT OT Deцa,OCBeH aKO ca Ha Bv3pact Na8 roDHHn i He ce HablIOdaBat
9. He octabraye yctpoicTBOTO 6e3 nad30p no BpeMe Ha pa6ota.
10. He notanai Te ypea n 3axpaHbaunia Ka6eB BbB BODa nn npyn TeuhoCTn.
11. Korato yctpoicTBOTO He ce n3noJ3Ba, To BnHaT Tp6Ba da 6bJe n3KIOUeHO OT KOHTaKTA.
12. Korato Издьрпвate сеньсяа OT KOHTаКТа, НИКORA He Дьрnaite 3axpaHbaцяka6eIcamo 3a сеньсяа.
13. He noctabraye B3 METAHN INPEIMETIN BbTpe BycTPOIcTBOTO
14. Пожибдпелг He Hocn OTROBOPHOC 3a цETN, пчнен OT He npabunHa ynotpe6a Ha yCTpoiCTBOTO.
15. Tp6Ba da ce nomn, ye hKOn Yactn Ha yCTpoNCTBOTO n 3kaqpa no BpeMe Ha pa6ota ce HarpBaT MHorO, taKa ye 6bDeTe BHMaTeJHn N He rN DOKocBaITe, MoKeTe da N3ropnte.
16. HNKO7A He nokpmbaTe yctpoiCTBOTO no BpeMe Ha pa6oTa IIN KOrato To He ce OXJaHn HAnbHNO
17. He 3a6paBrye, ye Ha HaraBeBaTeJHnTe eJeMeHTn Ha yCTpoiCTBOTO e Heo6xOdmo BpeMe, 3a da ce OxJaTnHaIbJIHO.
18. Korato Изпольате устюгов, осениху място над и okоло Hero. Урет He Трава дд ДOKOCBA Лесно залиши пешmetи по врума, като Dekopаши, Хатуен Кьрп, 3авеси, дрени и др.
19. HarpeBaTeJrT, nHcTaInpaH B baHraTa, Tp8Ba Da 6bDe nHcTaInpaH TaKa, ye KOHeKTopuTe i npTe perylaTopn Da He Morat Da 6bDaT DOKocBaHn OT YOBek BB BaHaTa IIN PoD dySha.
20. B harpeBaTeIte 3a BnCOunHn TeIa, N03uIte Ha pa3JInHnTe N03uIHa CbeDHNTeJIte Tp8Ba Da 6bDaT BnIMN OT pa3CTOJHne 1 m
21. EtnkeTnte 3a nokpmbaHe Ha HarpeBaTeJr Tp6Ba Da ce BuxdaT cIeD INHCTaIIpaHeTo Ha HarpeBaTeJI
22. He MoxeTe Da NoCTaBraTe HarpeBaTeJr DnpeKTHo NOD KOHTaKTa N B 6JIu3OcT Do 3aIaIMM MaTePnaJI KATO 3aBeCn, 3aBeCn n dp.
23. YcIpoIcTBOTO He MoKe Da Ce I3PON3Ba C BbHsHn TaIMepn INI IN dpyIn OTdJIHN CNCTeMn 3a DnCTaHcNOHHO ynpabJeHne
24. He n3naarTe yctpoiCTBOTo Ha aTMocphiepHn ycNoBn (IbXd, cIbHcE n dp.) Hn H3noJ3BaIte B ycNoBnHa BnCOKa BJaXHOCT (6aHn, BJaXHn KbMmIHn)
25. Перношино повераяпсьсториTo Ha 3axpaHbaцяKa6eI.Ako 3axpaHbaцяТ Ka6eI e NOBpeH, ToI Tp8Ba Da 6bJe 3aMeHe OT CneuaJn3npaH cepBn3, 3a Ida ce H36erHe onaCHOCT
26. He n3no13BaIte yCTpoIcTBOTOB 6n3OCTdo 3aIaIMMaTePnaJIi
27. HarpeBaTeIaT Tp6Ba Da ce MoHTnpa Ha BnCOuHa He No-MaIka ot 1,8 m Hau nOda
28. He n3noJ3BaIte To3n HarpeBaTeB HEnocpeIcTBeHa 6n3OCT Do BaHa, Dyu nn npyuBeH 6aceH
29. He n3noJ3BaIe To3n HArpeBaTeI, aKo e NaHaJI
30. He n3noJ3BaIte, ako nMa BnIMn npn3Haun Ha nobpeDa Ha harpeBaTeJIa
31. Изпогговашиху на равна и стаблна NOВьхноCTИУ Гп КпКрЕпЕ КьМ CTeHATA, ako TOBa e п徳вideho OT пОнЗВODиTeЯ.
ПЕДУПЕЖДЕНЕ: He n3noJ3BaIte To3n HarpeBaTeI B MaJIKN IOMeUeHnI, KbJeTO mAm Xopa, KOnTo He MoRat Da rH NaNychaT cAMN, OCBeH aKO He e OcNrypeH NOCTOHeH NaD3Op.
ПЕДУПЕЖДЕНЕ: 3a за hamалite риcka OT NOжар, дрьжte TeKCTил, 3abecn nIIN dpyrN 3anaIMM MaTePnaII Na pa3ctOЯHne NOHe 1 M OT n3xOda Ha Bb3dUxa Ha HarpeBaTeJI.
IpnopbUba ce eIektpnueckata nHctanaun da 6bde o6OpyDbHa c aBTOMaTUneh IpeKbcBau 3a ocTaTbUeH TOK c 30mA cTapTOB TOK 3a NobuWeHa 6e3OnacHOCT.
3a6eJekka: Ako 3axpaHbAunrT Ka6eI nn nIeNcIbT ca NOBpeJeH, Te BnHaN Tp8Ba da 6bDat NOMeHN nn peMOHTnpAH OT CneuaJIIN3Iupan cepBn3.
II. ПЕДУПЕЖДЕНЯ
1. HnKora He n3noJ3BaIte yCTpoiCtBOTo, aKO e NOBpeJeHO nJIH He cyHKUOHiPa npaBnIHo.
2. Hukora He n3noJ3BaIte yCTpoiCtBOTO, aKO npEi TOBa e naHaNo OT BnCOUnHa n NOKa3Ba BnIMN npn3Haun Ha NobpeDa.
3. He n3noJ3BaIte ydbJxNTeJIHn Ka6eHn IIN dpyrN eJeKtpUyeCKn KOHTaKTn, KOnTO He OTROBaprT Ha npINOJXIMITE cTaHdApTn I eJeKtpUyeCKn pa3NopeDbN.
4. BCEKN peMOHT, DEMOHTaK IIN NOIMHa Ha yactn Tp6Ba BInHaN da ce N3BbPbWAOT CneuJIN3npaHO CbOpBXeHne.
5. Ako yctpoiCTBOTO n eIemehn KaTO eIeKtpuYeCKN KOHTaKTn Ca MOKpn, UeIeCJIbT ININ Ka6eJbT Tp8Ba Da 6bDaT n3CyWeH, PpeDN Da n3PON3BaTe yCTPOiCTBOTO n HEROBNTe KOMNOHEHTN.
6. He n3noI3BaIte yCTpoIcTBOTc MOKpn pbue.
7. Korato cblueCTbByBa pnck yctpoiCTBOTo da e noBpeJeHo, HNKOTA He ce onnTbaIte da nonpaBrye yctpoiCTBOTo camn.
8. HnKora He MnIte yCTpoiCTBOTO NO TeaAa BODa NIN IO TaKbB NaHn, Ye BoDaTa Da KaNe B Hero.
9. He n3noJ3BaIte akcecoapn, KOnto He ce npenopbUbat OT npOn3BOJTeJIa. Te morat da npedCTabJIbAT onaCHOCT 3a Notpe6nteJIa I da npUnHrT NOBpeJa Ha yCTpoiCTBOTO.
10. YbepTe ce, ye yctpoIcTBOTO ce e oxlaIIO npeIN cbxpaHHe.
11. He dokocbaite kopnyca no Bpeme Ha ynoTpe6a. No Bpeme Ha pa6ota n3noJ3BaIte camo konyeTa n npebKJIIOUbATEJI. Cnejn3KJIIOUBAHe n3yaKaIte ycTPOIcTBOTO da ce oxlaJn.
12. BHIMAHNE: HЯkon части на това устpoистBO могат да ce harpeят м Horo no BpeMe Na pa6ota и за пчинят ИЗ rapян.
III. INPENIbPBO yNOTPE6A
1.ИЗbaTe ΚeJЯ onaKOBbYeH MaTePnA J N 3nPaBeTc 3axpaHbAunrKa6eJ
2.ПО ВЕME Ha MOHTAXA,В HNKAKbB CNYaY uCTpoCTBOTO He MoKe Da 6bDe nOKpntO C n3OJaCIOH eMaTePnAn IINI NOdoBeH MaTePnAn
3. Korato crno6baTe yctpoCTbTo, rpeuTE u rpeuTE He Tp6Ba Da ce pekaT nn pekaT
4. Прази пьра уnotpe6а пpoуетete BCNUHCTpyKm3a ynotpe6a.
5. PpOBepeTe dAnn HApEKeHneTo, NocOueHo Ha eTnKeTa Ha npOdykTa, OTROBapr Ha HApEKeHneTo Ha 3axpaHbAaTa MpeKa BbBaIy IOM
MOHTAXK
I3noJ3BaIte CBepeJIO, 3a da npo6neTe DBe DynKn B CTeHaT, MInHmym 180 cm OT nOda n 20 cm OT TaBaHa - Chmka A. Cnei KaTO npo6neTe Dnyknte, NocTabeTe NOdNOxKata n 3aBnTe. YBepete Ce, ye BNHTOBeTe ca Do6pe 3aterHaTn, Cnei Koeto 3akaueTe yCTpOJCTBOTo Ha CTeHaT.
ONICAHNE HA IPOJYKTA
CHIMka B.OCHOBEH KJIIOU
ON/OFF=BKJIIOUBAHE/IM3KJIIOUBAHE.
CHIMKA C. DINGTAHLIOHEH KOHTPOJIEP
1.БуTOH3aBKNIOUBAHe/N3KNOUBAHe
2.PEKIM
3.ДEH
4.YACOBHVK
5. HACTPOVIKA
6. CEДМИLA/TAIМЕР
7.MNH
8. +-> Bytoh 3a noBnIaBaHe Ha TempepaTpaTa. CbIoo Taka cnyKk kato 6yToH 3a n36Op 3a Bpeme / den.
9. --> ByToH 3a noHnKabane Ha TempepaTpaTa. CbIto Taka cnyKn KaTO bYToH 3a n36op 3a Bpeme / DeH
10. RESET - ByToH 3a HynipaHe Ha TaMepa
CHIMKA D. LED PAHEI
1.CMBOJ BKJ
2. MoUHocT Ha OToPJIeHne 1000W
3. MoUHocT Ha OToPJIeHne 2000W
4.Функлг AUTO
5. TemnepaTypeH dncnnnei
6.Пoka3BaHe Na DeHЯ
7.Пoka3BaHeHaВpeMeTo
8.CmbBbBkI-ctapTnpaHeHa TaMepa
9.CmBON OFF- n3KnHObaHe Ha TaMepa
10. OTbOpTe cyHKmraTa 3a otKpmbaHe Ha npo3opeu
M3I0JI3BAHE
1. HatncheTe rnaBnI npEeKIOuBaTeI OT dAChata cTpaHa Ha yCTpoNcTBOTo - Kaptna B, 3a Da BkIOUHTe n N3KIOUHTe yCTPOINCTBOTO.
2. YcTpoIcTBOTO Beue e B pexIM Ha rTOBHOCT. HATnCHete 6yToHa 3a BKJIIOUBAHe / n3KJIIOUBAHe (1) Ha dNCTaHcNOHOTo ynpabJIeHne - I3O6paKeHne C.
3. Hatnche 6ytoHa MODE (2) Ha cBoi pei, 3a da n36epepepepekma ha pa60ta:
- 1000 W yctpoictboto noctoHHO ue ce 3aqrba c 1000 W.
- 2000 W, yctpoNCTBOTO NOCTOHHO ue ce HapraBa c 2000W.
- ABTomatueh pejim, hatnche 6ytoHnte + n -, 3a da 3a daTe pbyHo tempepatpata. YcptpoCTBOTO abTomatuHO ue Bne3e B pejim Ha noDbpxKe He Taemepatpata.
-Функцяза OTКрИВане Ha OTBорен позорц - Korato Ta3и Функця e n3браHA, yCTpoIcTBOTO aBTOMaTnUH0 Ie n3KJIQUHn OTOПЛeHnTo, aKO CTaIHATA Temперatype cnaIDHe BHe3aIIHc 10 °C.
4. 3a Ia N3KIOUHTe yCTpoIcTBOTo, HATNCHEte 6yTOHa 3a BKNIOUBAHe / N3KIOUBAHe (1) Ha INCTAHUNOHOTO ynpabJIeHne. YCTPOINCTBOTO ce OXIAJda I N3KIOUBA CJIeD OKOJI0 30 cekHydN.
HACTPOIKA HA BbTPEHnY YACOBHnK HA UPeI
3A6EJIEXKKA: Ako He 3aadaTe Tekyuia Yac n DeH OT CeMnuaTa, yCTpoIcTBOTo Hma Da pa60n npabnHO, Tb KaTO ue pa60n cnopeD co6CTBeHH Cn BbTpeSeH YacOBHnK, KOeTo e HnPaBnHO.
1.Изберете Функцята AUTO,kaTo Изпольаге 6утона MODE.
2.Ппддднсгпспспспспспспспспспспспспспспспспспспспспспспспспспспспспспспспспспспспспспспспспспспспспспспспспспспcн cac:
- Hatnche 6ytoHa DAY n 36epete Tekyu n c nomoTa Ha 6yToHnTe + n - . N3yaKaIte, Dokato Dncnnert cnpe da Mira.
- Hatnche 6ytoHa CLOCK n 3aainTe kkyoTo BpeMe c nomouTa Ha 6ytoHnTe + - . N3yaKaIte, doKato dncnnert cnpe da mira.
- Hatnche 6ytoHa MIN n 3aainTe tekyuHte MNHytn c nomouTa ha 6ytoHnTe + - .N3yaKaite,doKato dncnnert cnpe da Mira.
HACTPOIKA 3A IPOIPOAMIPAHE HA TAIMEP-TAIMEP
Ta3n cyHKUa Bn no3BOJyBa Da nporpaMnpaTe BpeMeTo 3a BKIOuBaHe N n3KIOuBaHe Ha yCTpoIcTBOTo Ipe3 BCEKn DeH OT CeDMUaTa BKeJaHOTo BpeMe.
TaimepbT moke da ce hactpon cmo cne KaTo n36peTe yHKnraTa AUTO n HactponTe BbTpewHna YacOBnK Ha ycTpoiCTBOTo.
1. Hatnche 6yToHa CEIMUCA / TAIIMEP u n36epete DeHr OTe CeMnuaTa, B KOITo NCKate da HAcTPOnte yCTPOINCTBOTO da CE BKIOuBa u n3KIOUvBa ABOtOMaTHUHO, KaTO u3N0JI3BaTe 6yToHInTe + u - . U3yakaKe, DOkATO DnCPIeRcPpe Da Mira.
2. Cnei haTnckaHe ha 6yToHa HACTPOIKA, cIMBOJbT ON ue CBeThe Ha nCnPJIe. Beue moKeTe da 3aJaTe BpeMeTo 3a CTapTnpaHe Ha taHepa. I3noJI3BaIte 6yToHInTE CLOCK, MIN, + n -, 3a Da 3aJaTe BpeMeTo 3a CTapTnpaHe Ha TaMepa. N3yaKaIte, DOKaTO nnCnPJIeT cnpe da Mira.
3. CneI KaTo OTHOHa HATNCHEte 6yToHa CEIMLUA / TAIMEP (6) n cJeT ToBa HAtncHeTe 6yToHa HACTPOIKA, Ha dncnpe Ie CBeTHe CmBOJbT OFF. Beue moKTe Da hAcTpOnTe BPeMeTo 3a n3KnIOuBaHe Ha TaIMepa. N3yaKaIte, DOkAto DnCnIeRr CnPpe da MnRa.
3A5EJIEXKKA: HauaJIHOTo BpeMe BnHaI TpI6Ba Da e NO-HNCKO OT BpeMeTo 3a cnIPAHe.
3A6EJIKKKA 3a da hynpaTe TaMepa do HactpoKnTe no nOpa3bnpaHe, HATNChe 6yToHa RESET.
V. ПОЧИСТВАЕ И ПОДПьЖКА
1. Binhari n3KIIouBaIte ypeTa OT KOHTaKTA npPeDn NoOuNCTBaHe.
2.AKo no BpeMe Ha NouchTbaHe npedMeN KaTo 3axpaHbAunu IeNceN, eNeKTpueeKeKHTaKTn Ha TepMoCTaTa Ha TepMoCTaHa TepMoCTaHa TepMoCTaHa TepMoCTaHa TepMoCTaHa TepMoCTaHa TepMoCTaHa TepMoCTaHa TepMoCTaHa TepMoCTaHa TepMoCTaHa TepMoCTaHa TepMoCTaHa TepMoCTaHa TepMoCTaHa TepMoCTaHa TepMoCTaHa TepMoTcTaHa TepMoCTaHa TepMoTcTaHa TepMoTcTaHa TepMoTcTaHa TepMoTcTaHa TepMoTcTaHa TepMoTcTaHa TepMoTcTaHa TepMoTcTaHa TepMoTcTaHa TepMoTcTaHa TepMoTcTaHa TepMoTcTaHa TepMoTcTaHa TepMoTcTaHa TepMoTcTaHa
3.He n3no3BaIte arpcBnH npenapatn nof fopMaTa Ha emyncn, noCNOH, nactn npocntBaHe Ha uka. Te Morat, Hapei c npyr Heu, da npemaxBat NhoopMaunOHnTe rpaunH CNMBOIn, KaTO 3HaUN, npdeynpeNTeHN 3aUN T.H.
4. YBepete ce, ye yctpoicBTOe e oxnaIIO npedn nouchBaHe.
TEXHUNECKN DAHHN:
Hansehene:220-240V\~50/60Hz
Mouhoct: 2000W MaKc. Mouhooct: 2200W
lp20
"BHHMAnHe IopeuHa NOBbPxHocT" - TempeaTypaTa Ha HAnuHnTe NOBbPxHocTu MoKe Da e No-BnCoka, KOraTo o6OpyBaHeto pa6To, KoETo O3HaUaBA, Ye eIeMeHTte Ha Kopnyca Ce HapRyBaT MHoro no BpeMe Ha pa6To nBpeMe Ha pa6To, CnECTETE BHIMAHHE !!!

IMBAITE《3HAUEHNEHADINCA
Bbpxy yctpoiCTBOTO O3HaUaBA, ye yctpoiCTBOTo He Tp8Ba Da 6bJe NOKPnTO c dpexN, OdeJNA n dpyrN
TeKTHINH npOdykTN, KOINTOMaT da npuHnT 3anaJBaHe.

PEXKDEHNE: He n3no3BaIte ToBa o6OpyBaHe B 6n3oCT Do BaHN, DnyoBe, 6aceHN I noo6Hn pe3epBoapn 3a

MOnI, npExBbPnTe KapToHEnIte ONaKOBu B OTnAbuHa XapTna. N3CInne Te NoNtEnHeOBHTe Top6nK (PE) B nlaCTMacobn KaHTeHep. N3HOceHOTo yCTPOINCTBO Tp6Ba Da Ce BbPHe B CbOTBeHTO MAcTO 3a CbXpaHHe, TbN KATO e onACHO B yCTPOINCTBO TO CTABKNTe MORaT Da PpeDcTabNBAr 3a Anlaxa 3a OKONHaTa cpeA. ENeKTpuYeCKOTo yCTPOINCTBO Tp6Ba Da 6bJe PpeJaDeNoKpaI NOBTOPHOTo My N3NOJ3BaHe N3NOJ3BaHe. Ako B yCTPOINCTBO To HMa 6BaTePN, Tp6Ba Da N3BaInTe N Da DAnTe Ha ToUkata, CbXpaHnBaHa OTrEINHO.
(AZ) AZəRBAYCAN
DiQQeT:
Cihaz yalniz məisət istifadəsi üçün nəzərdə tutulub.
Cihaz kommersiya/peşekar istifadę uçün nezerdæ tutulmayib.
Cihaz açiq havada istifadə üçün uygün DEYIL.
Diqqət! Istifadədən evel qəzalarin qarṣisini almaq və cihazɪn duʒgūn
istifadəsi üçün bu istismar təlimatlarin oxumagīniz vacibdir. Bu təlimatī
saxlayin və asanliqla istifadē edə bilməyiniz üçün saxlayin.
I.ISTIFADTəHLUKəsIZLIYI UÇUN TəLIMATLAR
1. Istifadē etməzdàn āvvəl, etiketdē gõstərilān gærginliyin yerli duzluluq parametrlərin āuğun Olduğunu yoxlayin, lakin qeyd olunduğunu unutmayin: AC- alternative cərəyan və DC DC-dir.
2. Cihazi yalniz 220-240V 50/60 Hz torpaqli Rozetakaya qosun.
3. Istifadē etməzdən āvvəl elektrik kabelini açın və dizəldin
4. Elektrik snurunun və fişin görünan zədələnmədiyine amin olun
5. Istifadədənəvəl və istifadə zamani elektrik kabelinin açiq alov və ya digər istilik mənbəyɪ və kabelin izolyasiyasına zərər verə biləcək iti kənarlıarı üzərində uzanmadɪɡindan əmin olun.
6. Ilk istifadē etməzden āvəl buttun qablaşdirma componentlarini Çixarın. Diqqat! Metal hissələr i alan bir korpus vəziyyətində, bu elementlərdə bir az görünən qoruyucu folqa Çakilə bilər, onu da Çixarmaq lazimdir.
7. Cihaz səlahiyyətli və ya təcrubəli səxslərin nəzarəti olmadan və həmɪsə bu təlimatlara uygün olaraq uşaqlar, fiziki, hissiyyat və ya eqli qabiliyyəti məhdud olan səxslər tərəfindən istifadə edilməməlidir.
8. Avadanliq xarici vaxt açarları va ya ayrìca uzaqqan idarētmāsystemi ilé istifad e üçün nəzerd e tutulmayib.
XÖBÖRDARLIQ: Bu avadanliq 8 yaşdan yuxari uşaqlar və məhdud fiziki, duğu və ya eqli qabiliyyeti olan Şexslər və ya avadanliq haqqinda heç bir
tεcrubesi va ya biliyi olmayan Şexslar tərəfindən, YALNIZ onlarin isine cavabdeholean Şexsin nezareti.altinda həyata keçirildiyi təqdirde istifad edile biler. təhlukesizlik va ya cihazin təhlukesiz istifadasi ila baglī telimatlar verilmisdir va onun istifadasi ila baglī təhlukəlerden xəberdardirlar. Uşaqlar avadanliqla oynamamalidirlar. Cihazin təmizlənmesi va saxlanmasi 8 yaşindan yuxari olmayan va nezarət altinda olmadiqda uşaqlar tərəfinden həyata keçirilməməlidir.
9. Θməliyyat zamani cihazi nəzarətsiz goymayin.
10. Cihazi və elektrik kabelini suya və ya hər hansi digər mayelər batairmayin.
11. Cihaz istifadə edilmədikdə, onu həmɪsə elektrik Rozetkasindan ayirmaq lazɪmdir.
12. Fisi din Rozetkadan cokorken hec vaxt elektrik kabelini yalniz fisindan tutmayin.
13. Cihazın icçırisin ŞE METAL ŞYALAR qoymayın
14. Istehsalci cihazin duzgün istifada edilmamasi naticasindya ranan zararlare gore məsuliyyat dasimir.
15. Yadda saxlamaq lazimdir ki, is zamanı cihazın və seksafın bazi hissəlari cox isti olur, ona gore də diqqetli olun və onlara toxunmayın, yaniq ala bilarsiniz.
16. Θməliyyat zamani və ya tam soyumayanda cihazi HEÇ VAXT ortməyin
17. Unutmayin ki, cihazin qizdirici elementlarinin tam soyuması üçün vaxt lazimdir.
18. Cihazdan istifadə edərkən yuxarıda və Ṭrafinda adekvat yer olduguundan omin olun. Cihaz is zamanı asanlɪqla yanan Ṭşyalara, məsələn, bəzək Ṭşyalarına, kagens dəsmallara, pərdələrə, paltarlara və s. toxunmamalɪdir.
19. Banyoda quraşdirilmiş qizdirici ela quraşdirilmalidir ki, baglayicilara vā digar tenzimləyicilərə küvetdə və ya duşun.altinda bir adam toxunmasin.
20. Hündürlükda olan qurğular üçün qizdirici larda birlaşdiricilirin mixxtelif movgelarinin movgeleri 1 m məsafadn görünmlidir.
21. Qizdiricinin ortulmasi uçün etiket qizdiricinin quraşdirilmasindansonra gürünmelidir
22. Qizdiricini birbaşa Rozetakın altına, perdə, perdə və s. kimi tez alşan materiallarin yanina qoya bilməzsiniz.
23. Cihaz xarici vaxt açarları ve ya diger ayrı-ayrı uzaqqdan idarëetməsystemlər il e istifad e edil bilməz
24. Cihazi atmosfer Şeraitin (yaş),).(v s.) mıruz qoymayin va yayüksak rütubeti Şeraitd (hamam otaqlari, rütubeti üşerge evleri) istifad etmeyin.
25. Elektrik kabelinin vəziyyətini vaxtaşırı yoxlayın. Elektrik kabeli zədalənibsə, təhlükənin qarşɪsinci almaq üçün onu mutəxəssis təmir muəssisəsi ᵓviz etməlidir.
26. Cihazi yanan materiallarin yaninda istifadə etməyin
27. Qizdirici dosemad en 1,8 m-den az olmayan hundurlukd qurasdirilmalidir
28. Bu qizdiricini vanna, duş və ya hovuzun bilavasite yaxinliginda istifadē etməyin
29. Θgər bu qɪzdɪrɪcɪ dʊsɪrsə, onu istifadə etməyin
30. Qizdiricinin goren zedalennesi elamatleri olduqda istifada etmeyin
31. Istehsalci tərəfinden nəzərdə tutulubsa, qizdirincini duz və dayaniqli bir sathdə istifadə edin və ya divara bərkidin.
XÖBÖRDARLIQ: Daimi nəzarət təmin edilmədikdə, bu qɪzdɪrɪcɪdən özbaşına tərk ede bilməyən insanlarin Olduğu kicism otaqlarda istifadə etməyin.
XÖBÖRDARLIQ: Yang'an riskini azaltmaq üçün tekstil, pördelár va ya diger yan materiallari qizdiricin'in hava Çixişindan on azı 1 m mesaşfede saxlayın.
Təhlükəsizliyi artımaq üçün elektrik qurugusunun 30 mA baslangıc cərəyanı olan avtomatik qaliq cərəyan açari ilə təchiz edilməsi tovsiye olunur.
Qeyd: Elektrik kabeli va ya elektrik stepseli zedalnibsə, o, hamiə ixtisaslaşdirilmı s tamir sexi tərəfinden dayisdirilməli va va tamir edilməlidir.
II. XəBəRDARLIQLAR
1. Cihaz zədələnibsə və ya dizgün islamirse, heç vaxt istifadə etməyin.
2. Θgər o, ᵑvvəllər hündürlukdən yixilibsa və görünən zədə elamətləri gõstəirse, onu heç vaxt istifada etməyin.
3. Mövcud standartlara və elektrik qaydalarina cavab verməyən uzatmak kabellərindən və ya digər elektrik Rozetkalarindan istifadə etməyin.
4. Hər hansi təmir, hər hansi hissələrin sokülməsi va ya dəyɪsdirilməsi həmɪsə ixtisaslaʊmɪs muəssisə tərəfinden aparilmalɪdɪr.
5. Θgər cihaz və elektrik kontaktları kimi elementlər yaşdirsa, cihaz və onun komponentlərindən istifadə etməzdən avvəl fiş və ya kabel qurudulmalidir.
6. Cihazi yaş ellərlə istifadə etməyin.
7. Cihazın zedalanmesti riski olduqda, cihazi heç vaxt Özünüz təmir etmoye calısmayın.
8. Cihazi heç vaxt axar suyun.altinda va ya icərisin su damcilacaq
səkildə yumayin.
9. Istehsalçı tərəfindən tovsiyə edilməyən aksesuarlardan istifada etməyin. Onlar istifadəci üçün tohlükə yarada və cihazın zədəlenməsinə səbəb ola bilər.
10. Saxlamadan āvvāl cihazīn soyuduğundan āmin olun.
11. Istifadə zamanı korpusa toxunmayın. Üməliyyat zamanıyalnizduymələrdən və açarlardan istifadə edin. Sondurdukdən sonra cihazinsoyumasini gozləyin.
12. DIQQΘT: Bu cihazın bezi hissələr eməliyyat zamani cos qiza bilər vəyaniqlara səbəb ola bilər.
III. JIKISTIFADDON AVVOL
1. Bütün gablingirma materiaları Çınarin ve elektrik kabelini dizeldin
2. Quraşdirma zamanı cihazi heç bir halda izolyasiya materiali ve ya oxşar materiaillä örtmek olmaz
3. Cihazi yigarken, tir ve rafters kesilmemeli ve kesilmemelidir
4. Ilk istifade etmezden evel istifade uçün buttun telimatlari oxuyun.
5. Møhsulun etiketinde gosterilen gerginliy in evinizdeki elektrik səbekesinin gerginliyine uygun olub olmadigiinyoxlayin
MONTAJ
Dösəməden minimum 180 sm və tavandan 20 sm mesafedə divarda iki desik qazmaq üçün qazmadan istifade edin - səkil A. Delikləri qazdirqdan sonra yastigi daxil edin və vidalayin. Vintlerin yaxsɪ berkidildiyine emin olun, sonra cihazi divara asin.
MÖHSULUN TÖSVIRI
Sekil B. ΘSAS DONDUR ON/OFF = ON/OFF.
Sekil C. Uzaqdan PUL
1. ON/OFF duymesi 2. MODE
3.GUN 4.SAAT
5. QURDURUN 6. HΘFTθ/TAYMER
7. DQ
8. + -> Temperaturu yükseltm.dk Üçün duym. Hämçınin vaxt/gün Üçün.Sectionduymesi kimi xidmet edir.
9. --> Temperaturu asagisalmaq uçün duymə. Hæmçinin vaxt/gün uçün.Sectioni duyməsi kimi xidmet edir
10. RESET - Taymeri sifirlama dymesi
Sekil D. LED PANEL
1. ON simvolu 2. Istilik gucu 1000W
3. Istilik Gücu 2000W 4. AVTO funksiyası
5. Temperatur gõstericisi 6.Gündüz ekrani
7. Vaxt gostericisi 8. ON simvolu - taymerin iə salinmasi
9. OFF simvolu - taymerin baglanmasi 10. Aciq pencaranin askarlanmasi funksiyas
ISTIFAD ETM K
1. Cihazi yandirib sondurmek üçün cihazın sag terefindaki esas açari - Şkil Bduymesini basin.
2. Cihaz indi gozlemre rejimindir. Pultdaki yandirma/sondurme duymasini (1) basin - Sekil C.
3. Is rejimini secmek uçün novbə ila MODE duyməsini (2) basin:
- 1000 W cihaz daim 1000 Vt ile qizdirilacaq.
- 2000 W, cihaz daim 2000 W ilē qīzdīrīlacaq.
- Avtomatik rejimdē temperaturu āl ilē qurmaq üçün + və - Düymələrini basin. Cihaz avtomatik olaraq temperaturun saxlanmasi rejinme daxil olacaq.
- Aciq pencaranin askarlanmasi funksiyas - Bu funksiya seildikda, otaq temperaturu qeflden 10^ duersa, cihaz istiliyi avtomatik olaraq sondurocak.
4. Cihazi sondurmak üçün pultdaki yandirma/sondurme duyməsini (1) basin. Cihaz texminen 30 saniyedən sonra soyuyur ve sonür.
DAXI LI CIHAZ SAATININ QURULMASI
QEYD: Θger hæftenin cari vaxtin v günun teyin etməsəniz, cihaz dizgun iIsləməyəcək, cunki o, oz daxili saatina uygun islayocak, bu səhvdir.
1. MODE duyməsini istifada edarak AUTO funksiyasini seksin.
2. Taymeri tayin etmazdan avval haftanin gununu va carix vayin edin:
- DAY duyməsini basin və + və - duymələrindən istifadə edərək cari gunu seçin. Ekranın yanib-sönmasini dayandirana qədər gozləyin.
- CLOCK duyməsini basin v+ v- duymələrində istifada edarak cari vaxti tayin edin. Ekranin yanibsonmasini dayandirana qedor gozlayin.
- MIN duyməsini basin və + və - duymələrində nistifadə edərək cari dəqiqələri təyin edin. Ekranin yanibsonməsini dayandirana qədər gozləyin.
TAYMORIN PROQRAMLAMA PARAMASI - TAYMER
Bu funksiya heftenin h er gnu, istediyiniz vaxtda cihazi yandrib-sondurmek uçun vaxti proqramlaşdirmaga imkan verir.
Taymeri yalniz AUTO funksiyasini secdikden ve cihazin daxili saatini teyin etdikden sonra qurmaq olar.
1. WEEK / TIMER dūyməsini basin və + və - dūymələrɪndə nistifada edərek cihazī avtomatik olaraq yandɪrib-sondürmæk üçün təyin etmək istədiyiniz heftən in gününü seçin. Ekranın yanib-sonməsini dayandirana qeder gozleyin.
2. SET UP dūyməsini basdiqdan sonra ekranda ON simvolu yanacaq. Indi taymerin baslama vaxtini teyin ede bilarsiniz. Taymeri baslama vaxtini teyin etmek üçün CLOCK, MIN, + vē - dūymelirinden istifade edin. Ekranin yanib-sönmasini dayandirana qeder gozluyin.
3. WEEK / TIMER Düymösini (6) yeniden basdirqdan ve sonra SET UP Düymösini basdirqdan sonra ekranda OFF simvolu yanacaq. Indi taymerin söndürülme vaxtini teyin ede bilersiniz. Ekranın yanib-sönmösini dayandirana qedar gozleyin.
QEYD: baslangic vaxti heme dayanma vaxtindan asagi olmalidir.
QEYD Taymeri standart parametrlere qaytarmaq uçün RESET dýmeseini sixin.
V. Təmɪzlik Və xɪdʒət
1. Təmizleməzden evel həmisə cihazi elektrik Rozetkasindan ayirin.
2. Tämizlemə zamani elektrik fiş, termostat termostatinin elektrik kontaktlari ve s. kimi eşylar yeniden istifade edilmezden evel islandirsa, onlar yaxsica qurudulmalidir.
3. Škafī tēmizlemek üçün emulsiya, losyon, pasta və s. ᵶklinde olan apressiv yuyucu vasitelerden istifade etmeyin. Onlar, diger seylerle yanaşi, işarolar, xeberdarlq nisanlari və s. kimi melumat qrafik simvollarini sile bilerler.
4. Təmizleməzden evel cihazin soyuduğundan emin olun.
TEXNIKI MÖLUMAT:
Garginlik: 220-240V ~50/60Hz
Guc: 2000W Maks. Guc: 2200W
lp20

"Diqqat Isti Sath" - Avadanliq islayorken movcud sathlarin temperaturu daha yiksak ola bilar, bu o demekdir ki, iş zamani is zamani korpus elementleri cox qizir, DIQQET EDIN !!!
ΘHΘMΙΥ丫ΤΙΝι ὄντməyɪn
Cihazin üzerindaki yazi cihazin alismaga səbəb ola bilcak paltar, edyal və digar tekstil mahsullari ilə ortulmemeisi demekdir.
XOBORDARLIQ: Bu avadanligi vannalar, duşlar, hovuzlar ve oxşar su Çenleri yaxinliginda istifade etmeyin.

Zihmit olmasa karton qablasdirmani tullanti kaigiza kocurun. Polietilen torbalari (PE) plastik qaba tokun
Asinms cihaz muvafiq anbara qaytarilmalidir, cunki o, cihazda thluklidir
maddlr traf muhit uçün thluk yarada bilr. Elektrik cihazi limiti qidir thvil verilmlidir
onun tkrar istifadisi vi istifadisi. gir cihazda batareyalar varsa, onu cixarib ayrica saxlanan noqty vermik lazimdir.
AFTER SALE SERVICE NOTICE GB If you want to buy spare parts or make any complaints, please contact the seller who issued the receipt directly. DE Wenn Sie Ersatzteile kaufen oder reklamieren möchten, wenden Sie sichitte direkt an den Verkäufer, der die Quittung ausgestellt hat. FR Si vous souhaitez acheter des pièces de rechange ou faire des réclamations, veuillez contacter directement le vendeur qui a émis le reçu. ES Si desea comprar repuestos o presentation alguna queja, comuniquese directamente con el vendedor que emitió el recibo. PT Se você quiser comprar peças de reposação ou fazer alguma reclamação, entre em conta diretamente com o vendedor que emitiu o recibo. LT Jei norite jsigiyt atsarginiu daliu ar pateikti nusiskundimu, susisiekite tiesiogai su kvita išdavusiu pardaveju. LV Ja vêlaities iegadáties rezerves dalas vai izteikt pretenzijas, ludzu, szainieties teşi ar pärdevēj, kurš izsniedza Čeku. EST Kui soovite osta varuosi vii esitada pretensioone, vötle otse uhendust kviitungsivaljastanud mūjaga. HU Ha potalkatreszeket szeretne vásárolni, vagy panaszt szeretne tenni, forduljon kozvetlenul a bizonylatot kiàllito eladóhoz. BS Ako Želite kupiti rezervne dijelove ili napravit reklamaciju, obratite se direktno prodavaču koji je izdao račun. RO Ecni Bix xOITHE KYNITB zANCACTNI IINI ppebYBHTB KAKNE-NI60 ppeTEN3NI, NOXAYNCTA, CBXNTECB HAPRMYU C pnoabuOM, BVDABUIM NcK. CZ Chcete-li zakoupit nahradni dily nebo uplatnit jakoukoli reklamaci,kontaktujte prfimo prodejce, ktery Úctenku vystvil. RU Dacā doriti sā cumpārati pièse de schimb sau sā faceti vreo reclamatie, ∀rugām sā contactaì direct vanzātorul care a emis chitanta. GR Ecv θiλτν vα αγοραστε ΑγTALλΑKTIKI KI Vα KAVTE OTIOIAδβπθTET TApAITNOVA, EΠKOIVωVπθTe AITUθκIAC με TOTV ΠΟλπιπι TOU ΕξβδμθTη. MK Axo cakate da KYNITE pezebrniz delOBN IINI da NDHeCete kackv bnil noonnaki, Kontakttnajte dinpeKTTHO co pnoabauCHOT KOJ na 3dani smetkata. NL Als u reserveonderdelen wilt kopen of een klacht wilt indienen, neem dan rechtsstreeks contact op met de verkoper die de bon heeft afgeveven. SL Če zeilite kupiti nadomestne dele ali vložiti reklamacije, se obmite neposredno na prodajalca,ki je izdal račun. FI Jos haluat ostaa varaosia tai tehdā valituksa,ota yhteyttä suoranaan antaneeseen myyjän. PL W przypadiku checi zakupu czéci zamiennych lub zgloszenia eventualnych reklamaci nalezy kontaktowac sie bezpośrednio ze sprezedawca, kóry wystawil paragon. IT Se desideri acquistare pezzi di ricambio o presentare reclami, contatta direttamente il venditore che ha emesso la ricevuta. HR Se desideri acquistare pezzi di ricambio o presentare reclami, contatta direttamente il venditore che ha emesso la ricevuta. SV Om du vill kopa reservdelar ellere gora nagra reklamationer, ∀nligen kontakta saljaren som utfardat kvittot direkt. DK Hvis du ønsker at kabe resovedelei ellereklamere, bedes du kontakte sælgerten, som har udstedt kvitteringen, direkte. UA Якшо вихочete рindbatи залчастни abo podatni 6yd-bякіпретенii, зberнічьсябе ззноередно do npodabuaу, який вidavuchek. SR Axo zenitne da kynitne pezebrhne delobene iiin da unoxhnte pekmamaцуj, obpatnte ce dinpeKTTHO npodabuy koj ne 3dano pachy. SK Ak si chcete kupit nahradne dieiy alebo uplatnit akukolvek reklamaciu, kontaktujte priamo predajcu, ktory Úctenku vystvil. AR Škýncate da zaçynite pezebrhnu chafteni iIN da hnapabrte onnpaKBaHMy, moJI, cSbypxte ce dinpeKTTHO c npodabuahy, koyTo e 3ndan kacobata belekka. BG Ako nckate da zaçynite pezebrhnu chafteni iIN da hnapabrte onnpaKBaHMy, moJI, cSbypxte ce dinpeKTTHO c npodabuahy, koyTo e 3ndan kacobata belekka. AZ Ehtiyat hissəlari almaq va ya har hansi šikayat etmək istayirsinizsa, qəbzi verən satici ila birbaşa alaqa saxlayin.
(DE) DEUTSCH
BEACHTUNG:
Das Gerät ist nur für den Hausgebrauch bestimmt. Das Gerät ist NICHT für den gewerblichen Gebrauch bestimmt. Das Gerät ist NICHT für den Einsatz im Freien geeignet. Beachtung! Vor dem Gebrauch ist es wichtig, dass Sie diese Bedienungsanleitunglesen, um Unfälle zu vermeiden und den korrekten Gebrauch des Geräts zu gewährleisten. Bewahren Sie diesen Handbuch auf und bewahren Sie es so auf, dass Sie es leicht benutzen können. I. LEITLINIEN ZUR SICHERHEIT DER NUTZUNG 1. Prüfen Sie vor dem Gebrauch, dass die auf dem Typenschild angegebene Spannung den lokalen Parametern für Salzgehalt entspricht. Beachten Sie jedoch, dass die Markierung: AC- Wechselstrom und DC Gleichstrom ist. 2. Schließen Sie das Gerät nur eine geerdete Steckdose von 220-240 V ~ 50/60 Hz an. 3. Rollen Sie das Netzkabel vor dem Gebrauch auf und glätten Sie es 4. Stellen Sie sicher, dass das Netzkabel und der Stecker keine sightbaren Schäden aufweisen 5. Stellen Sie vor und während des Betriebs sicher, dass das Netzkabel nicht über eine offene Flamme oder eine andere Wärmequelle und scharfe Kanten gespannt wird, die die Isolierung des Kabels beschädigten können. 6. Entfernen Sie vor dem ersten Gebrauch alle Verpackungskomponenten. Beachtung! Bei einem Gehäuse mit Metalteilen kann auf diesen Elementen eine leicht sichtbare Schutzfolie gespannt werden, die ebenfalls halten. 7. Das Gerätarf nicht von Kindern, Personen mit eingeschränkter körperlicher, sensorischer oder geistiger Leistungsfähigkeit ohne Aufsicht autorisierter oder erfahrner Personen und immer in Übereinstimmung mit diesen Anweisungen verwendet werden. 8. Das Gerät ist nicht für die Verwendung mit externen Zeitschaltuhren oder einem separaten Fernbedienungssystem vorgesehen. WARNING: Dieses Gerätarf von Kindern über 8 Jahren und Personen mit eingeschränkten körperlichen, sensorischen oder geistigen Fähigkeiten oder Personen, die keine Erfahrung oder Kenntnisse über das Gerät haben, NUR verwendet werden, wenn dies unter der Aufsicht einer für sie verantwortlichen Person geschieht Sicherheit haben oder Anweisungen zur sicheren Verwendung des Geräts erhalten haben und sich der Gefahren bewusst sind, die mit seiner Verwendung verbunden sind. Kinder sollenn nicht mit dem Gerät spielen. Die Reinigung und Wartung des Gerätsarf nicht von Kindern ausgeführrt werden, es sei dess, sie sind über 8 Jahre alt und werden beaufsichtigt 9. Lassen Sie das Gerät während des Betriebs nicht unbeaufsichtigt. 10. Tauchen Sie das Gerät und das Netzkabel nicht in Wasser oder andere Flüssigkeiten. 11. Wenn das Gerät nicht verwendet wird, sollte es immer von der Steckdose getrennt werden. 12. Ziehen Sie das Netzkabel niemals am Stecker, wenn Sie den Stecker aus der Steckdoseziehen. 13. Legen Sie KEINE METALLARTIKEL in das Gerät 14. Der Hersteller haftet nicht für Schäden, die durch unsachgemäß Verwendung des Geräts entstehen. 15. Es ist zu beachten, dass eine Teile des Geräts und des Gehäuses während der Arbeit sehr heißt werden. Seien Sie also vorsichtig und berühren Sie sie nicht, Sie können sich verbrennen. 16. Bedecken Sie das Gerät NIEMALS während des Betriebs oder wenn es nicht vollständig abgekühlt ist 17. Denken Sie daran, dass die Heizelemente des Geräts einige Zeit benötigen, um vollständig abzukühlen. 18. Achten Sie bei der Verwendung des Geräts auf ausreichend Platz darüber und in der Höhe. Das Gerätarf während der Arbeit keine leicht entflammbaren Gegenstände wie Dekorationen, Papierhandtücher, Vorhänge, Kleidung usw. berühren. 19. Das im Badezimmer installierte Heizgerät solle so installiert werden, dass Anschlüsse und andere Regler nicht von einer Person in der Badewanne oder unter der Dusche berührt werden können. 20. Bei Heizgeräten für Höhenleuchten sollen die Positionen der verschiedene Positionen der Verbinder aus einer Entfernung von 1 m sightbar sein 21. Die Beschriftung zum Abdecken des Heizgeräts muss nach der Installation des Heizgeräts sightbar sein 22. Sie können das Heizgerät nicht direkt unter der Steckdose und in der Höhe von brennbaren Materialien wie Vorhängen, Vorhängen usw. aufstellen. 23. Das Gerät kann nicht mit externen Zeitschaltuhren oder anderen separates Fernbedienungssystemen verwendet werden 24. Setzen Sie das Gerät keinen atmosphärischen Bedingungen (Regen, Sonne usw.) oder hoher Luftfeuchtigkeit (Badezimmer, feuchte Campinghäuser) aus. 25. Überprüfen Sie regelmäßig den Zustand des Netzkabels. Wenn das Netzkabel beschädigt ist, sollte es von einer Fachwerkstatt ausgetauscht werden, um eine Gefahr zu vermeiden 26. Verwenden Sie das Gerät nicht in der Nähe von brennbaren Materialien 27. Das Heizgerät muss in einer Höhe von mindestens 1,8 m über dem Boden installiert werden Es wird empfohlen, dass die elektrische Installation zur Erhöhung der Sicherheit mit einem automatischen Fehlerstromschutzschalter mit einem Anlaufstrom von 30 mA ausgestattet ist. Hinweis: Wenn das Netzkabel oder der Netzstecker beschädigt ist, sollte es immer von einer Fachwerkstatt ausgetauscht oder repariert werden. 28. Verwenden Sie diese Heizung nicht in unmittelbarer Höhe einer Badewanne, Dusche oder eines Schwimmbades 29. Verwenden Sie diese Heizgerät nicht, wenn es fallen gelassen wurde 30. Nicht verwenden, wenn sichtbare Anzeichen einer Beschädigung des Heizgerats vorliegen 31. Verwenden Sie die Heizung auf einer ebenen und stabilen Oberfläche oder befestigen Sie sie an der Wand, sofern vom Hersteller vorgesehen. WARNING: Verwenden Sie diesen Heizgerät nicht in kleinen Räumen, in denen sich Personen nicht selbst verlassen können, es sei dess, eine ständige Überwachung ist gewährleistet. WARNING: Um die Brandgebung zu verringn, halten Sie Textilien, Vorhänge oder andere brennbare Materialien mindestens 1 m vom Luftauslass des Heizgeräts entfernt.II. WARNINGGEN
1. Verwenden Sie das Gerät niemals, wenn es beschädigt ist oder nicht ordnungsgemäß Funktioniert. 2. Verwenden Sie das Gerät niemals, wenn es aus einer Höhe gefallen ist und sightbare Beschädigungen aufweist. 3. Verwenden Sie keine Verlängerungskabel oder andere Steckdosen, die den geltenden Normen und elektrischen Vorschriften nicht entsprechen. 4. Reparaturen, Demontagen oder Austausch von Teilen sollen den innerer spezialisierten Einrichtung vorgenommen werden. 5. Wenn das Gerät und die Elemente, wie z. B. elektrische Kontakte, Nass sind, sollen den Stecker oder das Kabel trocknen, bevor Sie das Gerät und seine Komponenten verwenden. 6. Verwenden Sie das Gerät nicht mit nassen Händen. 7. Wenn die Gefahr besteht, dass das Gerät beschädigt wurde, versuchen Sie NIEMALS, das Gerät selbst zu reparieren. 8. Waschen Sie das Gerät niemals unter fließendem Wasser oder so, dass Wasser in das Gerät tropf. 9. Verwenden Sie kein Zubehör, das vom Hersteller nicht empfohlen wird. Sie können eine Gefahr für den Benutzer darstellen und das Gerät beschädigen. 10. Stellen Sie sicher, dass das Gerät abgekühlt ist, bevor Sie es lagern. 11. Berühren Sie das Gehäuse während des Betriebs nicht. Verwenden Sie während des Betriebs nur Knöppe und Schalter. Warten Sie nach dem Ausschalten, bis sich das Gerät abgekühlt hat. 12. VORSICHT: Einige Teile these Gerats konnen während des Betriebs sehr heißt werden und Verbrennungen verursichen.III. VOR DER ERSTEN VERWENDUNG
1. Entfernen Sie samedliches Verpackungsmaterial und richten Sie das Netzkabel gerade 2. Wahrend der Installation darf das Gerät auf keinen Fall mit Isoliermaterial oder einem ähnlichen Material bedeckt werden 3. Be der Montage des Gerats durren Balken und Dachsparren nicht geschritten oder geschritten werden 4. Vor dem ersten Gebrauch alle Gebrauchsanweisungen lesen. 5. Prufen Sie, ob die auf dem Produktetikett angegebene Spannung der Spannung des Stromnetzes in Ihr Zuhause entsprichtINSTALLATION
Bohren Sie zwei LÖcher in die Wand, mindestens 180 cm vom Boden und 20 cm von der Decke entfernt - Bild A. Nachdem Sie die LÖcher gebohr haben, setzen Sie das Pad und die Schraube ein. Stellen Sie sicher, dass die Schrauben fest angezogen sind, und hangen Sie das Gerät an die Wand.PRODUKTBESCHREIBUNG
Bild B. HAUPTSCHALTER EIN/AUS = EIN/AUS AUS.Bild C. FERNBEDIENUNG
1. EIN / AUS-Taste 6.WOCHE/TIMER 2. MODUS 7. MIN 3 TAGE 8. +-> Taste zum Erhöhen der Temperatur. Dienst auch als Auswahlknopf für Uhrzeit / Tag. 4.Uhr 9. ---> Taste zum Absenkenden Temperatur. Dienst auch als Auswahlknopf für Uhrzeit / Tag. 5. SET UP 10. RESET - Timer-Reset-TasteBild D. LED PANEL
1. Ein-Symbol 2. Heizleistung 1000W 3.Heizleistung 2000W 4.AUTO-Funktion 5. Temperaturanzeige 6. Tagesanzeige 7. Zeitanzeige 8. Ein-Symbol - Timer starten 9. AUS-Symbol - Timer-Abschaltung 10. Fenstererkennungsfunktion öffnenIV.USAGE
1. Press the main switch on the right side of the device - Picture B to switch the device on and off. 2. The device is now in standby mode. Press the on / off button (1) on the remote control - Picture C. 3. Press the MODE button (2) in turn to select the operating mode: - 1000 W the device will constantly heat up with 1000 W. - 2000 W, the device will constantly heat up with 2000W. - Auto mode, press the + and - buttons to manually set the temperature. The device will automatically enter the temperature maintenance mode. - Open window detection function - When this function is selected, the device will automatically turn off the heating if the room temperature drops suddenly by 10^ . 4. To turn off the device, press the on / off button (1) on the remote control. The device cools down and turns off after about 30 seconds.SETTING THE INTERNAL DEVICE CLOCK
NOTE: If you do not set the current time and day of the week, the device will not work properly because it will operate according to its own internal clock, which is incorrect. 1. Select the AUTO function using the MODE button. 2. Before setting the timer, set the day of the week and the current time: - Press the DAY button and select the current day using the + and - buttons. Wait until the display stops flashing. - Press the CLOCK button and set the current time using the + and - buttons. Wait until the display stops flashing. - Press the MIN button and set the current minutes using the + and - buttons. Wait until the display stops flashing.TIMER PROGRAMMING SETTING - TIMER
This function allows you to program the time to turn on and off the device on each day of the week at the desired time. The timer can only be set after selecting the AUTO function and setting the device's internal clock. 1. Press the WEEK / TIMER button and select the day of the week on which you want to set the device to switch on and off automatically using the + and - buttons. Wait until the display stops flashing. 2. After pressing the SET UP button, the ON symbol will light up in the display. You can now set the timer start time. Use the CLOCK, MIN, + and - buttons to set the timer start time. Wait until the display stops flashing. 3. After pressing the WEEK / TIMER button (6) again and then pressing the SET UP button, the OFF symbol will light up in the display. You can now set the timer off time. Wait until the display stops flashing. NOTE: the start time must always be lower than the stop time. NOTE To reset the timer to default settings, press the RESET button.V. REINIGUNG UND WARTUNG
1. Trennen Sie das Gerät vor der Reinigung immer von der Steckdose. 2. Wenn bei der Reinigung Gegenstände wie Netzstecker, Thermostat, elektrische Kontakte usw. vor der erneuten Verwendung eingeweicht werden, sollen den sie sorgfältig getrocknet werden 3. Verwenden Sie zum Reinigen des Gehäuses keine aggressiven Reinigungsmittel in Form von Emulsionen, Lotionen, Pasten usw. Sie können unter anderen die Symbole der Informationsgrafik wie Zeichen, Warnzeichen usw. entfernen. 4. Stellen Sie safer, dass das Gerät vor dem Reinigen abgekühlt ist. TECHNISCHE DATEN: Spannung: 220 - 240V 50 / 60Hz Leistung: 2000W max. Leistung: 2200W lp20 Dies bedeutet. ACHTUNG !!! "Achtung heiße Oberfläche" - Die Temperatur der verfügbaren Oberflächen kann während des Betriebs hörher sein. dass die Gehäuseelemente während des Betriebs während des Betriebs sehr heiß werden.  "KEN" - BESCHRIFTUNG WICHTIGKEIT Die Beschriftung auf dem Gerät bedeutet, dass das Geräte insgesücken, Decken und anderen Textilien bedeckt werden darf, die eine Entzündung verursichen. WARNING: Verwenden Sie these Gerät nicht in der Höhe von Badewannen, Duschen, Schwimmbadern und ähnlichen Wassertanks.  Den Pappkarton im Altpapier entsorgen. Polyathylenbeutel (PE) in dem Behalter für Kunststoff entsorgen. Das abgenutzte Gerät zum Recycling zu einer offiziellen Sammelstelle bringen, da es gefährliche Substanzen enthalt, die die Umwelt gefährden konnen. Das Gerät sollte in einer Form abgegeben werden, die eine weitere Nutzung unmöglich macht. Wenn es Batterien enthalt, sollen den diese rausgenommen und separat an einer Sammelstelle abgegeben werden. Das Gerätarf nicht in den Hausmull rausgeworfen werden!!(FR) FRANÇAIS
ATTENTION:
L'appareil est destiné à un usage domestique uniquement. L'appareil n'est PAS destiné à un usage commercial / professionnel. L'appareil NE convient PAS pour une utilisation en extérieur. Attention! Avant utilise, il est essentiel que vous lisiez ces instructions d'utilisation pour éviter les accidents et pour utiliser correctement l'appareil. Conservez ce manuel et conservez-le pour pouvoir l'utiliser facilement. I. LIGNES DIRECTRICES POUR LA SECURITE D'UTILISATION 1. Avant utilise, vérifie que la tension indiquée sur la plaque signalétique correspond aux paramètres locaux de salinité, mais souvent-vous que le marquage: AC- correspond à un courant alternatif et DC est à courant continu. 2. Branchez l'appareil uniquement sur une prise mise à la terre de 220 - 240V 50 / 60~Hz 3. Avant utilisation, déroulez et redressez le cordon d'alimentation 4. Assurez-vous que le cordon d'alimentation et la fiche ne sont pas endommagés. 5. Avant et pendant l'utilisation, assurez-vous que le cordon d'alimentation n'est pas tendu sur une flamme neue ou une autre source de chaleur et des arêtes vives qui pourrait endommager l'isolement du cable. 6. Avant la première utilisation, retirez tous les composants de l'emballage. Attention! Dans le cas d'un boîtier avec des pieces métalliques, une feuille de protection légèrement visible peut être étiérée sur ces éléments, ce qui doit également être enlevé. 7. L'appareil ne doit pas etre utilise par des enfants ou des personnes ayant des capacités physiques, sensorielles ou mentales limitées, sans la surveillance de personnes autorisées ou experimentées et toujours conformément à ces instructions. 8. L'équipement n'est pas conscience pour être utilisé avec des minuteries externes ou un système de commande à distance séparé. AVERTISSEMENT: Cet équipement peut etre utilise par des enfants de plus de 8 ans et des personnes ayant des capacités physiques, sensorielles ou mentales limitées, ou des personnes n'ayant aucune expérience ou connaissance de l'équipement, UNIQUÉMENT si cela est fait sous la supervision d'une personne responsable de leur utilisation. sécurité ou ont reçu des instructions pour une utilisation en toute sécurité de l'appareil et sont conscients des dangers associés à son utilisation. Les enfants ne doivent pas journé avec l'équipement. Le nettoyage et l'entretien de l'appareil ne doivent pas été effectuels par des enfants sauf s'ils ont plus de 8 ans et qu'ils sont surveillés. 9. Ne laissez pas l'appareil sans surveillance pendant le fonctionnement. 10. N'immergez pas l'appareil et le cordon d'alimentation dans de I'eau ou tout autre liquide. 11. Lorsque vous n'utilisez pas l'appareil, vous doivent regardier de la prise de courant. 12. Lorsque vous retirez la fiche de la prise, ne tirez jamais uniquement sur le cordon d'alimentation. 13. Ne placez AUCUN ÉLÉMENT EN METAL dans l'appareil. 14. Le fabricant n'est pas responsable des dommages resultant d'une utilisation incorrecte de l'appareil. 15. Rappelez-vous que certaines parties de l'appareil et du boîtier deviennent très chaudspendant le travail. Veillez donc à ne pas les toucher, vous risqueriez de vous brûler. 16. Ne couvrez JAMAIS l'appareil en cours de fonctionnement ou lorsqu'il ne refroidit pas complètement 17. N'oubliez pas que les éléments chauffants de l'appareil prennt le temps de refroidir complètement. 18. Lorsque vous utilisez l'appareil, veillez à ce qu'il y ait suffisamment d'espace au-dessus et autour. Pendant le travail, l'appareil ne doit pas toucher d'objets facilement inflammables, tels que des décorations, des essuie-tout, des rideaux, des vêtements, etc. 19. L'appareil de chauffage installé dans la salle de bain doit être installé de manière à ce que personne ne puisse toucher les connecteurs et autres régulateurs dans la baignoire ou sous la douche. 20. Dans les apparêils de chauffage pour apparèils à haute altitude, les positions des différentes positions des connecteurs doivent être visibles à une distance de 1 m.. 21. L'etiquetage pour recouvrir le chauffage doit être visible après l'installation du chauffage 22. Vous ne pouvez pas placer le radiateur directement sous la prise et à proximité de matérieliaux inflammables tels que des rideaux, des rideaux, etc. 23. L'appareil ne peut pas etre utilise avec des minuteries externes ou d'autres systèmes de commande à distance séparés. 24. N'exposez pas l'appareil à des conditions atmosphériques (pluie, soleil, etc.) et ne l'utilisez pas dans des conditions d'humidité élevée (salles de bains, maisons de camping humides). 25. Vérifiez périodiquement l'etat du cordon d'alimentation. Si le cordon d'alimentation est endommagé, il doit être remplace par un centre de réparation spécialisé afin d'éviter tout risque 26. N'utilisez pas l'appareil à proximé de matériaux inflammables 27. L'appareil de chauffage doit être installé à une hauteur d'au moins 1,8 m du sol. 28. N'utilisez pas ce radiateur à proximé immediate d'une baignoire, d'une douche ou d'une piscine 29. N'utilisez pas ce radiateur s'il est tombé 30. Ne pas utiliser s'il y a des signes visibles de dommages au radiateur 31. Utilisez le radiateur sur une surface plane et stable ou fixez-le au mur, si prévu par le fabricant. AVERTISSEMENT: n'utilisez pas cet apparéil de chauffage dans de petites pieces où il y a des personnes qui ne peuvent pas les laisser seules, à moins qu'une surveillance constante ne soit assurée. AVERTISSEMENT: pour réduire le risque d'incendie, gardez les textiles, rideaux ou autres matériaux inflammables à au moins 1 m de la sortie d'air du radiateur. Il est recommandé que l'installation électrique soit équipée d'un disjoncteur automatique de courant résiduel avec un courant de démarrage de 30mA pour une sécurité accrue. Remarque: si le cordon d'alimentation ou la fiche d'alimentation est endommagé, il convient de toujours le remplaçer ou le réparer par un atelier spécialisé.II. AVERTISSEMENTS
1. N'utilisez jamais l'appareil s'il est endommagé ou ne fonctionne pas correctement. 2. N'utilisez jamais l'appareil s'il est déjà tombé d'une hauteur et s'il présente des signes visibles de dommages. 3. N'utilisez pas de rallonges électriques ou d'autres prises électriques non conformes aux normes et réglementations en vigueur. 4. Toute réparation, démontage ou remplacement de toute piece doit toujours être effectué par un établissement spécialisé. 5. Si l'appareil et des éléments tels que les contacts électriques sont humides, la fiche ou le cable doit être séché avant d'utiliser l'appareil et ses composants. 6. N'utilisez pas l'appareil avec les mains mouillées. 7. Lorsque l'appareil risque d'être endommagé, n'essayez JAMAIS de le réparer vous-même. 8. Ne lavez jamais l'appareil à l'eau courante ou de manière à ce que de l'eau goutte à l'intérieur. 9. N'utilisez pas d'accessoires non commandés par le fabricant. Ils peuvent constituer un danger pour l'utilisateur et endommager l'appareil. 10. Assurez-vous que l'appareil a refroidi avant de le ranger. 11. Ne touche pas le boîtier pendant l'utilisation. Pendant le fonctionnement, utilisez uniquement des boutons et des commutateurs. ÀpRES la mise hors tension, attendez que l'appareil refroidisse. 12. ATTENTION: Certaines pieces de cet apparéil peuvent devenir très chaudes pendant le fonctionnement et cause des brûlures.III. AVANT LA PREMIÈRE UTILISATION
1. Retirez tout le matériel d'emballage et redressez le cordon d'alimentation 2. Lors de l'installation, l'appareil ne doit en aucun cas etre recouvert d'un materiaiu isolant ou d'un materiaiu similaire. 3. Lors du montage de l'appareil, les poutres et les chevrons ne doivent pas etre coupes ou coupes 4. Avant la première utilisation, lisez toutes les instructions d'utilisation. 5. Vérifiez si la tension indiquée sur l'étiquette de produit correspond à la tension du réseau électrique de votre domicile.INSTALLATION
Utilisez une perceuse pour percer deux trous dans le mur, à au moins 180 cm du sol et à 20 cm du plafond - illustration A. Une fois les trous percés, insérez le tampon et la vis. Assurez-vous que les vis sont bien serrées puis accrochez l'appareil au mur.DESCRIPTION DU PRODUIT
Photo B. INTERRUPEUR PRINCIPAL ON/OFF = ALLUMER/YUTN OFF.Photo C. TELÉCOMMANDE
1. Bouton ON/OFF 2.MODE 3 JOURS 4.HORLOGE 5. CONFIGURER 6. SEMAINE / MINUTERIE 7. MIN 8. + -> Bouton pour augmenter la température. Sert également de bouton de seLECTION pour l'heure / le jour. 9. ---> Bouton d'abaisement de la température. Sert également de bouton de selection pour l'heure / le jour. 10. RESET - Bouton de réinitialisation de la minuterieImage D. PANNEAU LED
1. symbole ON 2. Puisance de chauffage 1000W 3. Puissance de chauffage 2000W 4. Fonction AUTO 5. Affichage de la température 6. Affichage du jour 7. Affichage de l'heure 8. Symbole ON - démarrage de la minuterie 9. Symbole OFF - arrêt de la minuterie 10. Fonction de détention de fenêtre ouverteIV. UTILISATION
1. Appuyez sur l'interrupteur principal sur le cote croit de l'appareil - Image B pour allumer et eteindre l'appareil. 2. L'appareil est maintainant en mode veille. Appuyez sur le bouton marche / arrêt (1) de la télécommande - Image C. 3. Appuyez successivement sur le bouton MODE (2) pour selectionner le mode de fonctionnement: - 1000 W, l'appareil chauffe constamment avec 1000 W. - 2000 W, l'appareil chauffe constamment avec 2000W. - Mode automatique, appuyez sur les boutons + et - pour régler manuellement la température. L'appareil passe automatiquement en mode de maintainen de la temperature. - Fonction de détction de fenêtre ouverte - Lorsque cette fonction est sélectionnée, l'appareil étèint automatiquement le chauffage si la température ambiente baise brutelement de 10^ C. 4. Pour éteindre l'appareil, appuyez sur le bouton marche / arrêt (1) de la télécommande. L'appareil refroidit et s'est int apres environ 30 secondes.RéGLAGE DE L'HORLOGE DU DISPOSITIF INTERNE
REMARQUE: Si vous ne définisse pas l'heure et le jour de la semaine actuels, l'appareil ne fonctionnera pas correctement car il fonctionnera selon sa propre horloge interne, ce qui est incorrect. 1. Sélectionnéz la fonction AUTO à l'aide du bouton MODE. 2. Avant de régler la minuterie, réglez le jour de la semaine et l'heure actuelle: - Appuyez sur le bouton DAY et selectionnez le jour en cours à l'aide des boutons + et -. Attendez que l'affichage cette de clignoter. - Appuyez sur la touche CLOCK et réglez l'heure actuelle à l'aide des touches + et -. Attendez que l'affichage cesse de clignoter. - Appuyez sur le bouton MIN et reglez les minutes actuelles à l'aide des boutons + et -. Attendez que l'affichage cette de clignoter.RéGLAGE DE LA PROGRAMMATION DE LA MINUTERIE - MINUTERIE
Cette fonction vous permet de programmermer l'heure d'activation et de désaction de l'appareil chaque jour de la semaine à l'heure souhaitée. La minuterie ne peut etre reglee qu'apres avoir selectionnee la fonction AUTO et regle l'horloge interne de I'appareil. 1. Appuyez sur le bouton WEEK / TIMER et selectionnez le jour de la semaine auquel vous souhaitez que l'appareil s'allume et s'eteigne automatiquement à l'aide des boutons + et -. Attendez que l'affichage cette de clignoter. 2. Àpès avoir appuyé sur le bouton SET UP, le symbole ON s'allume sur l'affichage. Vous pouvez maintainant régler l'heure de début de la minuterie. Utilisez les touches CLOCK, MIN, + et - pour régler l'heure de démarrage de la minuterie. Attendez que l'affichage)cesse de clignoter. 3. Àpès avoir appuyé à nouveau sur le bouton WEEK / TIMER (6) puis sur le bouton SET UP, le symbole OFF s'allume sur l'affichage. Vous pouvez maintainant régler le temps d'arrêt de la minuterie. Attendez que l'affichage cette de clignoter. REMARQUE: l'heure de début doit toujours être inférieure à l'heure d'arrêt. REMARQUE Pour réinitialiser la minuterie aux paramètres par défaut, appuyez sur le bouton RESET.V. NETTOYAGE ET ENTRETIEN
1. Debranchez toujours l'appareil de la prise de courant avant de le nettoyer. 2. Si, lors du nettoyage, des éléments tels que la fiche d'alimentation, le thermostat, les contacts électriques, etc. sont trempés avant d'être réutilisés, ils doivent être parfaitement séchéés. 3. N'utilisez pas de détergents agressifs sous forme d'émulsions, de lotions, de pâtes, etc. pour nettoyer le boîtier. Ils peuvent, entre autres, supprimer les symboles graphiques d'information, tels que les panneaux, les panneaux d'advertissement, etc. 4. Assurez-vous que l'appareil a refroidi avant de le nettoyer. DONNÉES TECHNIQUES: Tension: 220 - 240V 50 / 60Hz Puisance: 2000W Max. Puisance: 2200W Ip20  "Attention, surface chaude" - La température des surfaces disponibles peut être plus élevé lorsque l'équipment est en fonctionnement, ce qui signifie que les éléments du boîtier deviennent très chauds pendant le fonctionnement, CONSERVEZON !!!  NE PAS COUVRIR" - IMPORTANCE DE L'INSCRIPION L'inscription sur l'appareil signifie que l'appareil ne doit pas etre recouvert de vetements, couvertures ou autres produits textiles pouvant provoquer une inflammation. AVERTISSEMENT: N'utilisez pas cet équipement à proximé d'une baignoire, d'une douche, d'une piscine ou d'un réservoir de laire. Respect de l'environnement. Nous vous prions de bien fouloir triel les emballages en carton ainsi que les sachets plastiques (en polyethylene). L'appareil usage ne doit pas ete jet a la poubelle mais remis au point de collecte prevu a cet efect car il contient des elements pouvant etre nocifs pour I'environnement. L'appareil electrique doit etre remis de maniere a limiter au maximum une eventuelle utilisation ulterieure. Si I'appareil contient des piles, il faut les retirer et les remetre a un autre point de collecte. Ne pas jeter I'appareil dans une poubelle de dechets menagers !!!(ES) ESPANOL
ATENCION:
El dispositivo está destinado únicamente para uso dométrico. El dispositivo NO está Diseñado para uso comercial / profesional. El dispositivo NO esADECADQ para uso al aire libre. jAtencion! Antes del uso, es esencial que lea estas instrucciones de funcionaimiento para evaporar accidentes y para el uso correcto del dispositivo. Conserve este manual y guardelo para que pueda usar fácilmente.I. DIRECTRICES DE SEGURIDAD DE USO
1. Antes de usar, verifique que el voltaje especificado en la plac de identificacion corresponda a los parametros locales de salinidad, pero recuerde que lamarca: AC- es corriente alterna y DC es DC. 2. Conecte el disposativo solo a una toma de tierra de 220 - 240V 50 / 60~Hz 3. Antes de使用者, disenrolle y estire el cable de alimentacion 4. Asegürese de que el cable de alimentación y el enchufe no tengan daños visibles 5. Antes y durante el uso, asegúrese de que el cable de alimentación no está estirado sobre una llama abierta u另一边 fuente de calor y bordes aflados que pueda darar el aislamento del cable. 6. Antes del primer uso, retire todos los componentes del embalaje. [Atencion! En el caso de una carcasa con partes metálicas, en这些东西 elementos se pueda estar una lámina protectora ligeramente visible, que también debe retardarse. 7. El dispositivo no debe ser uso por niños, personas con capacité fisica, sensorial o mental limitada sin la supervisión de personas autorizadas o con experiencia y tiempo de acuerdo con estas instrucciones. 8. El equipo no está disnado para usarse con interruptores horarios externos o un sistemas de control remoto分开. ADVERTENCIA: Este equipo可以选择 ser uso por niños mayores de 8 años y personas con capacidad física, sensorial or mental limitada, o personas que no tienen experiencia o conocimiento del equipo, SOLAMENTE si thiso se realiza bajo la supervisión de una persona responsable de su seguridad o se les han dato instrucciones sobre el uso seguro del dispositivo y son conscientes de los peligros asociados con su uso. Los niños no deben hacer algo con el equipo. La limpieza y el mantenimiento del dispositivo noSEOben ser realizados por niños a menos que tengan mas de 8 años y estén supervisados. 9. No deje el dispositivo desatendido durante el funcionajo. 10. Nosumerj el aparato ni el cable de alimentacion en agua ni en ningun otherlquido. 11. Cuando el dispositivo no está en uso, siempre debe desconectarse de la toma de corriente. 12. Al sacar el enchufe de la toma de corriente, nunca tire del cable de alimentacion solo por el enchufe. 13. Noonga NINGUNOS ARTICULOS METÁLICOS dentro del dispositivo 14. El fabricante no se hace responsable de los danios causados por el uso inadequado del dispositivo. 15. Debe recordarse que todas partes del dispositivo y el gabinete durante el trabajo se calientan mucho, asi queonga cuidado y no los toque, ya que pueda quemarse. 16. NUNCA cubra el dispositivo durante el funcionaimiento o cuando no se enfié completeness 17. Recuerde que los elementos de calentimiento del dispositivo tardan en enfriarse completeness. 18. Cuando utilise el dispositivo, asegúrese de que haya espacio sufICIENTe por encima y alrededor. El dispositivo no debe tocar ningún objeto fácilmente inflamable durante el trabajo, como decoraciones, toallas de papel, cortinas, ropa, etc. 19. El calentador instalado en el baño debe instalarse deforma que los conectores yotiros reguladores no能把 ser tocados por una persona en la banera o bajo de la ducha. 20. En los calentadores para instalaciones de gran altitud, las posiciones de las differentes posiciones de los conectores deben ser visibles desde una distancia de 1 m.. 21. La etiqueta para cubrir el calentador debe ser visible afterwards de instalar el calentador 22. No puede colocar el calentador directamente bajo del zócalo yURTCA de materiales inflamables como cortinas, cortinas, etc. 23. El dispositivo no se pueda utiliser con temporizadores externos uthers sistemas de controlremoto separados 24. No exponga el dispositivo a conditiones atmosféricas (lluvia, sol, etc.) ni lo utilizes en conditions de alta humedad (baños, casas de camping humedes) 25. Compruebe periodically el estado del cable de alimentacion. Si el cable de alimentacion está dañado, debe ser reemplazado por un centro de reparación especializzato para evaporar un peligro 26. No utilise el disposativo cerca de materiales inflamables. 27. El calentador debe instalarse a una alta no inferior a 1,8 m sobre el piso 28. No utilise este calentador en las inmediaciones de una banera, ducha o piscina. 29. No use este calentador si se ha caido 30. No lo use si hay signos visibles de daño en el calentador. 31. Use el calentador en una superficie nivelada y estable o fijelo a la pared, si asi lo indica el fabricante. ADVERTENCIA: No utilise este calentador en habitaciones pequeñas sobre每一天 cuando personas que no podanURTARLAS SOLAS, a menos que se garantice una supervisión constante. ADVERTENCIA: Para reducir el riesgo de incendio, mantenga textiles, cortinas u otros materiales inflamables al menos a 1 m de la calidad de aire del calentador. Se recomienda que la instalacion electrica este equipada con un interruptor automatico de corrente residual con una corrente de arranque de 30mA para mayor seguidad. Note: Si el cable de alimentación o el enchufe de alimentación está danados, siempre debe ser reemplazado o reparado por un taller especializzato.II. ADVERTENCIAS
1. Nunca utilise el dispositivo si está dañado o no funciona correctamente. 2. Nunca use el dispositivo si ha caido desde una alta anterior y muestra signos visibles de daños. 3. No use cables de extension uthers enchufes que no cumplan con las normas y regulaciones electricas aplicables. 4. Cualquier reparación, desmontaje o reemplazo de cadaquier parte siempre debe ser realizada por una instalación especializada. 5. Si el dispositivo y elementos como los contactos electricos están mojados, el enchufe o el cable deben secarse antes de usar el dispositivo y sus componentes. 6. No utilise el dispositivo con las manos mojadas. 7. Cuando existe el riesgo de que el dispositivo se haya danado, NUNCA intente repararlo.ustedismo. 8. Nunca lave el dispositivo con agua corriente o de manière que gotee agua. 9. No use accesos que no sean recomendados por el fabricante. Pueden representar un peligro para el usuario y causar daños al. dispositivo. 10. Asegürese de que el dispositivo se haya enfiado antes de guardarlo. 11. No toque la carcasa durante el uso. Durante la operation, use solo las perillas y los interruptores. Después de apagar, espere a que el dispositivo se enfié. 12. PRECAUCION: Algunas partes de este dispositivo peuvent calentarse mucho durante el funciona y Causear quemaduras.III. ANTES DEL PRIMER USO
1. Retire todo el material de embalaje y enderece el cable de alimentacion 2. Durante la instalacion, en ningún caso se debe cubrir el dispositivo con material aislante o material similar. 3. Al montar el dispositivo, las vinas y las vinas no se deben cortar ni cortar. 4. Antes del primer uso, lea todas las instrucciones de uso. 5. Verifique si el voltaje indicado en la etiqueta de ratificacion del producto corresponde al voltaje de la red eletrica de su hogar.INSTALACION
Use el taladro para perforar dos orificios en la pared, a un minimum de 180 cm del piso y 20 cm del techo - imagen A. Una vez que haya perforado los orificios, inserte la almohadilla y el tornillo. Asegúrese de que los tornillos estén bien apltados y bajo cuelgue el dispositivo en la pared.DESCRIPCION DEL PRODUCTO
Imagen B. INTERRUPTOR PRINCIPAL ON/OFF = ENCENDIDO/YUTN OFF.Imagen C. CONTROL REMOTO
1. botón ON / OFF 6. SEMANA / TEMPORIZADOR 2. MODO 7. MIN 3DIAS 8. +-> Botón paraEAR la temperatura. Internacionalirve como botón de selección por hora /dia. 4. RELOJ 9. --> Botón para bajo la temperatura. también sirve como botón de selección por hora / día. 5. CONFIGURAR 10. RESET - Botón de reinicio del temporizadorFoto d. PANEL LED
1. symbolo ON 2. Potencia de calentimiento 1000W 3. Potencia de calentimiento 2000W 4. funcionaltica 5. Pantalla de temperatura 6. Exhibit del dia 7. Pantalla de tiempo 8. Símbolo ON - temporizador de arranque 9. Simbolo de apagado - apagado del temporizador 10. Abrir la referencia de detectacion de ventanaIV.USO
1. Presione el interruptor principal en el lado derecho del dispositivo - Imagen B para encender y apagar el dispositivo. 2. El dispositivo está ahora en modo de espera. Presione el botón de encendido / apagado (1) en el control remot - Imagen C. 3. Presione el botón MODE (2) para selecciónar el modo de funciona: - 1000 W, el dispositivo se calculará constantemente con 1000 W. - 2000 W, el dispositorio se calculará constantemente con 2000W. - Modo automatico, presione los botones + y - para configurar manualmente la temperatura. El dispositivo ingresará automatically al modo de mantenimiento de temperatura. - Funcion de detectiOn de ventilana abierta: cuando se selec tiona esta func tion, el dispositivo apagar a automatisticamente la calefacion si la temperatura ambiente cae repentinamente en 10^ 4. Para apagar el dispositivo, presione el botón de encendido / apagado (1) en el control remoto. El dispositivo se enfía y se apaga cuando se queden 30seguidos.CONFIGURACION DEL RELOJ DE DISPOSITIVO INTERNO
NOTA: Si no configura la hora y el día de lapellana actuales, el dispositivo no funcionaracorrectamente porque funcionarad acuerdo con su propio reloj interno, que es incorrecto. 1. Seleezione la funcion AUTO con el boton MODE. 2. Antes de configurar el temporizador, configure el dia de la hora y la hora actual: - Presione el boton Día y selección el día actual con los botones + y - Espere hasta que la pantalla deje de parpadear. - Presione el botón CLOCK y configure la hora actual usingo los botones + y - . Espere hasta que la pantalla deje de parpadear. - Presione el botón MIN y configure los Minutes actuales usingo los botones + -Espere hasta que la pantalla deje de parpadear.CONFIGURACION DE PROGRAMACION DEL TEMPORIZADOR - TEMPORIZADOR
Esta funcion le permite programar el tiempo para encender y apagar el dispositivo cada dia de la semana a la hora deseada. El temporizador solo se pueda configurar afterwards de seleccionar la functiOn AUTO y configurar el reloj interno del dispositivo. 1. Presione el boton WEEK / TIMER y seleccione el dia de la hora en el que desea configurar el dispositivo para que se enciende y apague automatamente usingo los botones ^+ y-. Espere hasta que la pantalla deje de parpadear. 2. Después de presionar el botón SET UP, el simbolo ON se iluminará en la pantalla. Ahora puede configurar la hora de inizio del temporizador. Use los botones CLOCK, MIN, + y - para configurar la hora de inizio del temporizador. Espere hasta que la pantalla deje de parpadear. 3. Despues de presionar Newlyme el boton WEEK / TIMER (6) y bajo presionar el boton SET UP, el simbolo OFF se iluminar en la pantalla. Ahora peut configurar el tiempo de apagado del temporizador. Espere hasta que la pantalla deje de parpadear. NOTA: el tiempo de inizio siempreDebe ser menor que el tiempo de parada. NOTA Para restablecer el temporizador a la configuracion predeterminada, presione el boton RESET.V. LIMPIEZA Y MANTENIMIENTO
1. Desenchufe siempre el aparato de la toma de corriente antes de limpiarlo. 2. Si durante la limpieza, algunos elementos, como el enchufe de alimentacion, el termostato, los contactos electricos, etc., se empapan antes de volver a utiliseros, deben secarse Completely. 3. No utilise detergentes agresivos en forma de emulsiones, lociones, pastas, etc. para limiar el gabinete. Pueden, entre除外 cosas, eliminar los SYMBOLOS GRAFICOs de informacion, como señales, señales de advertencia, etc. 4. Asegürese de que el disposativo se haya enfiado antes de limpiarlo. DATOS TECNICOS: Voltaje: 220-240V ~ 50 / 60Hz Potencia: 2000W Max. Potencia: 2200W Ip20  opération. "Precaún sobre la superficie caliente": la temperatura de las superficies disponibles puede ser mayor cuando el equipo está funcional, lo que significa que los elementos de la carcasa se calientan mucho durante el funcionaimiento durante la jihAHORRE CUIDADO !!!  NO CUBRIR: IMPORTANCIA DE LA INSCRPICION La inscripción en el dispositivo significa que el dispositivo no debe cunirse con ropa, mantas yculos productsos textiles que podriand causar una ignicion.  CIA: No use este equipo circa de baneras, duchas, piscinas y tanques de agua similares. Preocupacion por el medio ambiente. Por favor,kee las cajas de carton a un situ de reciclaje. Las bolas de polietileno se deben tirar al cubo de la basura amarillo (para envases). El equipo gastado debe ser entegado en el punto de almacenamento adecuado, porque las piezas que constituyen el equipo能把 suponer un peligro para el medio ambiente. Debes entertregar el equipo Hay que devolver el equipo electrico con el fin de evitar su reutilizacion. Si en el equipo se encuentran pilas, hay que sacarlas yentargar por分开ado, en un punto de almacenamento adecuado. No tires el equipo al contentedor para residuos urbanos!!(PT) PORTUGUES
ATENÇA:
O dispositivo destina-se apenas a uso dométrico. O dispositivo NAO é destinado ao uso comercial / professional. O dispositivo NAO é adequado para uso ao ar livre. Atença! Antes de usar, é essential que você leia estas instruções de operação para fazer acidentes e para o uso correto do disposítio. Guarde este manual e guarde-o para poder utilizes-lo fácilmente.I. DIRETRICES PARA A SEGURANÇA DO USO
1. Antes de使用者, verifique se a tensão especificada na placá de identificacao corresponde ao parâmetros locais de salinidade, mas lembre-se de que a marca: AC- é currente alternada e DC é CC. 2. Conecte o dispositivo somente a uma tomada aterrada de 220 - 240V 50 / 60~Hz 3. Antes de使用者, disenrole e endireite o cabo de alimentacao 4. Certifique-se de que o cabo de alimentacao e o plugue nao aparecem danos visiveisATENÇA:
O dispositivo destiná-se apenas a uso dométrico. O disposicao NAO é destinado ao uso comercial / professional. O dispositivo NAO é adequado para uso ao ar livre. Atença! Antes de usar, é essential que você leia estas instruções de operação para fazer acidentes e para o uso correto do disposítio. Guarde este manual e guarde-o para poder utilizes-lo fácilmente.I. DIRETRizes PARA A SEGURANÇA DO USO
1. Antes de使用者, verifique se a tensão especificada na placá de identificacao corresponde ao parâmetros locais de salinidade, mas lembre-se de que a marca: AC- é corrente alternada e DC é CC. 2. Conecte o dispositivo somente a uma tomada aterrada de 220 - 240V 50 / 60~Hz 3. Antes de使用者, disenrole e endireite o cabo de alimentacao 4. Certifique-se de que o cabo de alimentacao e oplugue nao aparecem danos visiveis 5. Antes e durante o uso, certifique-se de que o cabo de alimentacao não esteja esticado sobre uma chama aberta ou outra fonte de calor e bordas afiadas que possam danificar o isolamento do cabo. 6. Antes da primeira'utilisation, remove todos os componentes da embalagem. Atença! No caso de um invólico com partes metálicas, nesses elementos, uma pelúca protetora levamente visível pode ser esticada, a qual también deve ser removida. 7. O dispositivo não deve ser uso por crianças, pessoas com capacidade física, sensorial ou mental limitada sem a supervisão de pessoas autorizadas ou experiencias e sempre de acordo com estas instruções. 8. O equipamento não deve ser uso com interruptores de tempo externos ou com umsystema de controle remoto separado. ATENÇÃO: Este equipamento pode ser usado por crianças com mais de 8 anos de idade e pessoas com capacidade física, sensorial ou mental limitada, ou pessoas que não tem experiência ou conheço um equipamento, SOMENTE se isso for feito sob a supervisão de uma和个人 responsavel por seu equipamento. segurarou receberam instruções sobre o uso seguro do dispositivo e está cientes dos perigos associados ao seu uso. As crianças não devem brincar com o equipamento. A limpeza e a manutenção do dispositivo não devem ser realizadas por crianças, a menos que tenham mais de 8 anos de idade e sejam supervisionadas 9. Não deixe o disposítivo sem supervisão durante a operação. 10. Não mergulhe o aparecido nem o cabo de alimentação em água ou outros liquidos. 11. Quando o disposicao não estiver em uso, ele deve sempre ser desconectado da tomada eletrica. 12. quando puxar a ficha da tomada, nunca puxe o cabo de alimentacao apenas pela ficha. 13. Não coloque NO METAL ITEMS dentro do aparecido 14. O fabricante não se responsabiliza por danos resultantes do uso inadequado do dispositalo. 15. Deve ser lembrado que algumas partes do disposicao e do gabinete durante o trabalho ficam muito quentes,enthala cuidao e nao toque neles,voche pode se queimar. 16. NUNCA cubra o dispositivo durante o functimento ou quando não arrefecer completeness 17. Lembre-se de que os elementos de aquecimento do disposativo demoram a esfriar completeness. 18. Ao usar o disposítivo, certífique-se de espaço adequado acima e ao redor. O disposítivo não deve tocar em objetos fácilmente inflamáveis ||durante o trabalho, como enfeites, toalhas de papel, cortinas, roupas, etc. 19. O aquecedor instalado no banheiro deve ser instalado de modo que os connectores e outros reguladores não possam ser tocados por uma pessoa na banheira ou sob o chuveiro. 20. Em aquecedores para equipamentos de alta altitude, as posições das发展目标os dos connectores devem ser visíveis a uma distência de 1 m 21. A etiqueta para cobrir o aquecedor deve ser visível après a instalacao do aquecedor 22. Você não pode colocar o aquecedor diretamente sob o soque e perto de materiais inflamáveis, como cortinas, cortinas, etc. 23. O disposicao não pode ser uso com temporizadores externos ou outros sistemas de controle remotoeparados 24. Não exponha o dispositivo às condições atmosféricas (chuva, sol, etc.) ou use em condições de alta umidade (banheiros, casas de camping úmidas) 25. Verifique periodically a condição do cabo de alimentação. Se o cabo de alimentação estiver danificado, ele deve ser substituído por um centro de reparos especializados para fazer riscos. 26. Não use o disposítivo perto de materiais inflamáveis 27. O aquecedor deve ser instalado a uma alta não inferior a 1,8 m acima do piso Recomenda-se que a instalação eletrica está equipada com um disjuntor de corrente residual automatico com uma corrente de partida de 30mA para maior segurarca. Nota: Se o cabo de alimentacao ou ficha de corrente estiver danificado, deve ser sempre substituido ou reparado por uma oficina especializada.II. ADVERTÉNCIAS
1. Nunca use o dispositivo se estiver danificado ou não funciona corretamente. 2. Nunca use o dispositivo se ele caiu de uma alta antes e minha sinais visíveis de danos. 3. Não use cabos de extensiono ou outras想不到es que não atendam às normas aplicáceis [e os regulamentosétricos. 4. Qualquer reparo, desmontagem ou substituição de qualquer peça deve sempre ser feito por uma instalacao especializada. 5. Se o disposativo e os elementos, como contatosétricos, estiverem molhados, oplugue ou cabo deve ser seco antes de usar o disposativo e seuis componentes. 6. Não use o dispositivo com as關鍵 molhadas. 7. Quando houver um risco de o dispositivo ter sido danificado NUNCATe convertar o dispositivo por contapropria. 8. Nunca lave o aparelho debaixo de agua corrente ou de forma que a agua pinguie sobre ele. 9. Não usecessórios que não sejam recomendados pelo fabricante. Eles podemrepresentar um perigo para o usuario e podem causar danos ao dispositivo. 10. Certifique-se de que o disposativo tenha esfiado antes de armazenar. 11. Não toque na caixa durante o uso. Durante a operação, use apenas botões e interruptores. Depois de deslagar, espere o dispositivo esfriar. 12. CUIDADO: Algumas partes deste disposicao podem ficar muito quentes durante a operacao e Causear queimaduras.III ANTES DO PRIMEIRO USO
1. Remova todo o material de embalagem e endireite o cabo de alimentacao 2. Durante a instalacao, em nenhum caso o dispositivo pode ser coberto com material isolante ou material similar 3. Ao montar o disposativo, as vivas e caibros não devem ser cortados ou cortados 4. Antes da primeira'utilisation, leia todas as instruções de uso. 5. Verifique se a voltagem lista na etiqueta de rotulagem do produits corresponde à voltagem da rede de energia em sua casaINSTALAÇÃO
Use a broca para perfurar bois orificios na parede, a no minimum 180 cm do chao e a 20 cm do teto - figura A. Depois de perfurar os orificios, insira o calo e o parafuso. Certifique-se de que os parafusos本站 bem apertados e pendure o dispositivo na parede.DESCRICAÇÃO DO PRODUCTO
Figura B. INTERRUPTOR PRINCIPAL
ON/OFF = LIGAR/DESLIGAR. Figura C.CONTROLADOR REMOTO 1.Botão ON/OFF 6. SEMANA/TIMER 2. MODO 7. MIN 3 DIAS 8. Botão + -> paraacular a temperatura. Tentem serve como botao de selecao para hora / dia. 4.CLOCK 9. ---> Botão para diminuiar a temperatura. Não serve como botão de seleção para hora / dia. 5. CONFIGURAR 10. RESET - Botão de reset do temporizadorFigura D. PAINEL DE LED
1. Simbolo ON 2. Potência de aquecimento 1000W 3. Potência de aquecimento 2000W 4. funcão AUTO 5. exibicao de temperatura 6.exibicao de dia 7. exibicao de tempo 8. ON simbolo - temporizador de arranque 9. Simbolo OFF - desligamento do temporizador 10. funcão de detectação de janela abertaIV. USO
1. Pressione o interruptor principal no lado direito do dispositivo - Imagem B para ligar e desligar o dispositivo. 2. O dispositivo está ahora no modo de espera. Pressione o botão liga / desiga (1) no controle remoto - Figura C. 3. Pressione o botão MODE (2) por sua vez para selecionar o modo de operação: - 1000 W, o disposicao aquece constantemente com 1000 W. - 2000 W, o dispositorio aquece constantemente com 2000W. - Modelo automatico, pressione os botões + e - para definir manualmente a temperatura. O dispositoo entra a automaticamente no mode de manutenção da temperatura. - Função de detectação de janela aberta - quando esta funcção é selecionada, o disposito automatamente ou aquecido se a temperatura ambiente cair repentinamente em 10^ C. 4. Para desligar o disposativo, pressione o botão liga / des Liga (1) no controle remoto. O disposativo esfria e des Liga antes circa de 30 segundos.DEFINIR O RELÓGIO INTERNO DO DISPOSITIVO
NOTA: Se você não definir a hora e o dia da peninsula atuais, o dispositivo não funciona corretoamente, quando é de acordo com seuignon relógio interno, ou que está incorreto. 1. Selecione a funcao AUTO usingo botao MODE. 2. Antes de definir o cronômetro, defina o dia da semana e a hora atual: - Pressione o botão DIA e seleção o dia atual usingo os botoes ^+ e-. Aguarde até o visor parar de piscar. - Pressione o botão RELÓGIO e define a hora atual using os botões + e -. Aguarde até o visor parar de piscar. - Pressione o botão MIN e defina os minutos atuais usingo os botões + e - Aguarde até o visor parar de piscar.AJUSTE DA PROGRAMACAO DO TIMER - TIMER
Esta funcao permite programar o tempo para ligar e desligar o dispositivo em cada dia da semana no horario desejado. O timersoleaderajustadoaposaseleaoa fucsoAUTOeoguste do relgoio interdo dispositivo. 1. Pressione o botão WEEK / TIMER e seleciono o dia da sexta em que deseja configurar o disposito para ligar e desligar automaticamente using os botões + e -. Aguarde até o visor parar de piscar. 2. Depo is pssionar o botao SET UP, o sibolo ON acendera no visor. Agora vcpe podir o horario de inicio do timer. Use os botoes RELOGIO, MIN, ^+ e - para definir a hora de inico do timer. Aguarde atc o visor parar de piscar. 3. Depoi de pressionar o botao WEEK / TIMER (6) novamente e depos pressionar o botao SET UP, o simbolo OFF acendera no visor. Agora você pode definir o tempo de desligamento do temporizador. Águarde até o visor parar de piscar. NOTA: a hora de inicia deve ser sempre menor que a hora de parada. NOTA Para redefineir o timer para as configurações padrão, pressione o botão RESET.V. LIMPEZA E MANUTENÇA
1. Desligue sempre o aparecido da tomada antes de limpa-lo. 2. Se durante a limpeza itens como opluge de alimentacao, termostato, contatos eltricos, etc. estiverem encharcados antes de serem usados novamente, eles devem ser Completely secs 3. Nao use detergentes agressivos na forma de emulso, loos, pastas, etc. para limpar o gabinete. Eles podem, entre otheras coisas, remover os SYMBOLs graficos de informacao, como sinais, sinais de alerta, etc. 4. Certifique-se de que o disposativo tenha esfiado antes de limpa-lo. DADOS TECNICOS: Tensão: 220-240 V ~ 50 / 60Hz Potência: 2000W max. Potência: 2200W lp20  "Caution Hot Surface" - A temperatura das superficies disponveis pode ser maior quando o equipamento está funciona, o que significica que os elementos do alojamento ficam muito quentes durante a operação durante a operação, !  CUIDADO !!! "NAO COBRE" - IMPORTANCA DA INSCRIÇÃO A inscrição no dispositalo significa que o dispositalo não deve ser coberto com roupas, cobertores e outros produits tíxeis que possam causar ignião.  Nao use este equipamento perto de banheiras, chuveiros, piscinas e tanques de agua semelhantes.  Proteção do meio ambiente. Rogamos, os embalagens de cartão destinem-se para papéis velhos. Os sacos de polietileno (PE) devem-se colocar em contenedores para material plácico. O dispositovo uso deve-se levar a um ponto de armazenamento adequado porque os componentes perigosos que ficam dentro do dispositovo podem ser perigosos para o meio ambiente. O dispositovo eletrico deve-seOOTER de modo que se reduza a sua nova utilização e uso. Se no dispositovo ha pilhas, devem-se tirar e levar a um ponto de armazenamento em separado. Não colocar o dispositorio em contendores para residuos Municipais!!(LT) LIETUVIU
DÉMESIO:
Prietaisas skirts tik buitiniam naudojimui. Prietaisas NEGALIMA naudoti komerciniam / profesionaliam naudojimui. Prietaisas netinka naudoti lauke. Démesio! Pries naudodami butina, kad perskaitytumete šia naudojimo instrukcija, kad isvengtumete nelaimingu atsitikimur teisingai naudoti prietaisa. Laikykite ši vadovar laiky kite ji taip, kad galetumete ji lengvai naudoti.I. NAUDOJIMO SAUGUMO GAIRES
1. Pries naudodami patikrinkite, ar vardinéje ploksteléje nurodyta jtampa atitinka vietinius druskingumo parametrus, táciau nepamirskite, kad Žymejimas: AC- yra kintamoji srové ir DC yra DC. 2. Prijunkite prietaisā tik prie ižeminto maitinimo šaltinio 220-240V ~ 50/60 Hz. 3. Pries naudodami atjunkite ir istiesinkite maitinimo laida 4. Lsitikinkite, kad maitinimo laidas ir kišukas neturi matomu pažeidimu 5. Pries ir naudodami jsitikinkite, kad maitinimo laidas nera iSTEMptas per atvirq liepsna ar kitq silumos saltinir astrius krastus, kurie gali sugadinti kabelio izoliacija. 6. Pries pirma karta isimkite visas pakuotés dalis. Demesio! Jei korpusas yra su metalinemis detalémis, ant siu elementu gali buti istempta siek tiek matoma apsauginé folija, kuri taip pat turétu buti pašalinta. 7. Prietaisa neturétu naudoti vaikai, asmenys, turintys ribota fizine, jutimo ar psichine galia, be prieziuros ar patyrusiu asmenu prieziuros ir visada laikantis siu nurodymu. 8. [ranga nera skirta naudoti su išoriniais laiko jungikliais arba atskiru nuotolinio valdymo)... sistema. ISPEJIMAS: Sia jrangagali naudoti vaikai, vyresni nei 8 metu, ir asmenys, turintys ribota fizini, jutimo ar psichikos gebejima, arba asmenys, neturintys patirties ar ziniapie jranga, TIK, jei tai daroma priziurint už juos atsakingam asmeniui. sauguma arba buvo suteikta instrukcija apie saugu prietaiso naudojima ir zinoma apie su jo naudojimu susijusius pavojus. Vaikai neturetu zaisti su jranga. Prietaiso valymas ir prieziura neturetu buti atliekami vaikams, nebent jie yra vyresni nei 8 metu ir yra priziurimi 9. Nepalikite prietaiso prieziuros be prieziuros. 10. Nemerkite prietaiso ir maitinimo laido vandenj ar kitus skyscius. 11. Kai prietaisas nenaudojamas, jis visada turi buti atjungtas nuo maitinimo lizdo. 12. Ištraukdami kistuka iš lizdo, niekada neištraukite maitinimo laido tik kistuku. 13. L prietaisa nejdekite NO METAL ITEMS 14. Gamintojas neatsako už Žala, atsiradusia干细胞 netinkamo prietaiso naudojimo. 15. Atminkite, kad kai kurios prietaiso dalys ir spintelé darbo metu labai karsha, todél bukite atsargus ir nelieskite ju, galite sudeginti. 16. NIEKADA nenaudokite prietaiso eksploatacijos metu arba visiskai nevalykite 17. Atminkite, kad prietaiso sildymo elementai visiskai atvesta. 18. Naudodamiesi prietaisu, uztikrinkite pakankama erdvve virs ir aplink. Prietaisas darbo metu neturi liesti jokiu lengvai uzsiliepsnojanciu objektu, pavyzdziui, dekoraciju, popieriniu ranksluosciu, uzuolaidu, drabuziu ir kt. 19. Vonios kambaryje irengtas sildytuvas turi buti sumontuotas taip, kad juntgis irKitas regulatorius negalétupaliesti asmuo vonioje ar po dušu. 20. Auksto aukscio irenginiu sildytuvuose skirtingu jungciu padetys turi buti matomos nuo 1 m. atstumo. 21. Irengus sildytuva, sildytuvo dangos zenklinimas turi buti matomas 22. Jus negalite patalpinti sildytuvo tiesiai po lizdu ir salia degiu medziagu, pvz., Uzuolaidu, uzuolaidu ir pan. 23. Prietaisas negali buti naudojamas su isoriniais laiko jungikliais ar kitomis atskiromis nuotolinio valdymo systemomis 24. Saugokite prietaisa nuo atmosferos salygu (lietaus, saulès ir kt.) Arba naudokite dideles dregmès salygomis (vonios kambariuose, dregnuose kempinguose) 25. Periodiskai patikrinkite maitinimo laido bukle. Jei maitinimo laidas yra pazeistas,jis turi buti pakeistas specializuota remonto istaiga, kad butu isvengta pavojaus 26. Nenaudokite prietaiso šalia degiu medziagu 27. Sildytuvas turi buti jrengtas ne mazesniame kaip 1,8 m aukstyje virs grindu 28. Nenaudokite šio sildytuvo šalia vonios, dušo ar baseino 29. Nenaudokite šio šildytuvo, jeijis buvo numestas 30. Nenaudokite, jei yra akivaizdziu sildytuvo pazeidimu pozymiu 31. Naudokite šildytuva ant lygaus ir stabilaus paviršiaus arba pritvirtinkite prie sienos, jei taip numato gamintojas. LSPÉJIMAS: Nenaudokite šio sildytuvo mažose patalpose, kur yra Žmoniu, kurie patys negali ju palikti, nebent užtikrinama nuolatiné priežiūra. ISPEJIMAS: Noredami sumažinti gaisro rizika, tekstile, užuolaidas ar kitas degias medziagas laikykite bent 1 m atsumu nuo šildtuvo oro išleidimo angos. Elektros instaliacijai rekomenduojama irengti automatini liekamosios srovés grandines pertraukiklj su 30 mA pradine srové, kad butu užtikrintas didesnis saugumas. Pastaba: jei pazeistas maitinimo laidas arba maitinimo kistukas, ji visada reikia pakeisti ar remontuoti specializuotoje remonto dirbtuvèje. II. [SPEJIMAI 1. Niekada nenaudokite prietaiso, jeijis sugadintas arba neveikia tinkamai. 2. Niekada nenaudokite prietaiso, jeijis nukrito nuo aukšćio ir parodo matomus pažeidimo požymius. 3. Nenaudokite prailginimo laidu ar kitu elektros lizdu, kurie neatinka galiojanciu standartu in elektros taisykiu. 4. Bet kokiu daliu remonta, ismontavima ar pakeitima visada turi atlikti specializuota jmoné. 5. Jei prietaisas ir elementai, pvz., Elektriniai kontaktai, yra šlapūs, pries naudojant prietaisa ir jo componentus, kištuka arba kabelj reikia isdžiovinti. 6. Nenaudokite prietaiso slapiomis rankomis. 7. Jei yra pavojus, kad prietaisas bus sugadintas NIEKADA nebandykite pataisyti prietaiso. 8. Niekada nuplaukite prietaisq po tekanciu vandeniu arba taip, kad ij patektu vanduo. 9. Nenaudokite gamintojo rekomenduojamu priedu. Jie gali kelti pavojn naudotojui ir gali sugadinti irengini. 10. Pries saugodami jsitikinkite, kad prietaisas atves. 11. Naudojimo metu nelieskite korpuso. Veikimo metu naudokite tik rankeneles ir jungiklius. Isjunge palaukite, kol prietaisas atves. 12. ATSARGIAI: Kai kurios šio prietaiso dalys gali labai jkaisti veikimo metu ir sukelti nudegimus.III. PRIESPIRMA NAUDIOJIMA
1. Išimkite visa pakavimo medziaga ir istiesinkite maitinimo laida 2. [rengimo metu prietaisas jokiu budu negali buti padengtas izolacine medziaga ar panašia medziaga 3. Montuojant prietaisa, sijos ir gegnés neturetu buti pjaustytos ar supjaustytos 4. Pries pirma karta naudodami perskaitykite visas naudojimo instrukcijas. 5. Patikrinkite, ar etiketeje nurodyta itampa atitinka jusu tinklo elektros tinklo tampaIRENGIMAS
Naudokite greztuva, kad sienos butu isgreztos dvi skyles, maziausiai 180 cm nuo grindu ir 20 cm nuo lubu - A paveikslas. Isgreze skies, idekite pada ir varzta. Isitiknine, kad varztai gerai priverzti, tada pakabinkite prietaisa ant sienos.PREKÉSAPRAŠYMAS
Paveiksléis B. PAGRINDINIS SVIRTIS ON/OFF = ISJUNGTI/ISJUNGTA.Paveiksléis C. NUOTOLINIS VALDYMAS
1. Jungimo / isjungimo mygtukas 6. SAVAITIS / LAIKOTARPIS 2. MODE 7. MIN 3. DIENA 8. + -> Temperaturos pakelimo mygtukas. Taip pat tarnauja kaip laiko / dienos pasirinkimo mygtukas. 4.CLOCK 9. --> Temperaturosumazinimo mygtukas.Taip pat tarnauja kaip laiko / dienos pasirinkimo mygtukas. 5. SET UP 10. RESET - Timer reset mygtukasPaveikslélis D. LED PANELIS
1. JUNGIMO simbolis 6. Dienes rodymas 2. Sildymo galia 1000W 7. Laiko rodymas 3. Sildymo galia 2000W 8. JUNGIMO simbolis - jjungiamas laikmatis 4. AUTO fungcija 9. Isjungimo simbolis - laikmácio isjungimas 5. Temperaturos rodymas 10. Atidarykite lango aptikimo fungcijaIV. NAUDOJIMAS
1. Noredami jjungti ir isjungti rengini, paspauskite pagrindini jungikli, esanti deseinje renginio puséje - B paveikslas. 2. Dabar prietaas veikia laukimo rezimu. Paspauskite nuotolinio valdymo pulto ijungimo / ijsjungimo mygtuka (1) - C nuotrauka. 3. Paspauskite mygtuka MODE (2) paeiluii, kad pasirinktumete darbo rezima; - 1000 W prietaisas nuolat jkaista su 1000 W. - 2000W, prietaisas nuolat jkaista su 2000W. - Automatinis rezimas, norédami rankiniu būdu nustatyti temperatūrā, paspauskite + ir - mygtukus. [renginys automatiskai pereis i temperatūros palaikymo režima. - Atidaryti lango aptikimo fungcija - Pasirinkus siq fungcija, prietaisas automatiskai ijsjungia sildyma, jei kambario temperatura staigiai nukrenta 10^ C. 4. Noredami ijsjungti [rengini, paspauskite nuotolinio valdymo pulto ijungimo / isjungimo mygtuka (1). [renginys atvesta ir issijungia maždaug po 30 sekundžiu.VIDAUSIRENGINIO LAIKRODZIO NUSTATYMAS
PASTABA: Jei nenustatysite dabartinio laiko ir savaites dienos, prietaisas neveiks tinkamai, nes veiks pagal saver vinil [laikrodi, kuris yra neteisingas. 1. Mygtuku MODE pasirinkite funkcjja AUTO. 2. Pries nustatydami laikmatj, nustatykite savaites diena ir esama laika: - Paspauskite mygtuka DAY ir mygtukais + ir - pasirinkite dabartin diena. Palaukite, kol ekranas nustos mirkseti. - Paspauskite mygtuka CLOCK ir nustatykite esama laika mygtukais + ir -. Palaukite, kol ekranas nustos mirkseti. - Paspauskite mygtuka MIN ir mygtukais + ir - nustatykite dabartines minutes. Palaukite, kol ekranas nustos mirkseti.LAIKMERIO PROGRAMAVIMO NUSTATYMAS - taineris
Si fungcija leidzia programuoti laika, kada reikia ijungti ir isjungti jrengini kiekviena savaites Diana. Laikmatj galima nustatyti tik pasirinkus fungcija AUTO ir nustacius vidinj irenginio laikrodi. 1. Paspauskite WEEK / TIMER mygtuk, ir, naudodamiesi mygtukais + ir-, pasirinkite savaites diena, kuria norite nustatyti, kad irenginys automatiskai jsijungtu ir issijungtu. Palaukite, kol ekranas nustos mirkseti. 2. Paspaudus mygtuka SET UP, ekrane uzsidega simbolis JUNGtas. Dabar galite nustatylaikmaacio pradzios laika. Noredami nustatylaikmaacio pradzios laika, naudokite mygtukus CLOCK, MIN, +ir-. Palaukite, kol ekranas nustos mirkseti. 3. Dar karta paspaudus mygtuka WEEK / TIMER (6) ir paspaudus mygtuka SET UP, ekrane užsidega OFF simbolis. Dabar galite nustatyla laikmačio isjungimo laika. Palaukite, kol ekranas nustos mirkseti. PASTABA: pradžios laikas visada turi būti mažesnis už sustabdymo laika. PASTABA Norédami atkurti laikmačio numatyuosius nustatymus, paspauskite mygtuka RESET.V. VALYMAS IR PrieziURA
1. Prieš valydami prietaisa visada ištraukite iš elektros tinklo lizdo. 2. Jei valymo metu, pvz., Maitinimo kišukas, termostatas, elektrinai kontaktai ir pan., Pries naudojima vél mirkomi, jie turi buti gerais išdžiovinti 3. Nenaudokite agresyviu plovikiu emulsiju, losjonu, pastu ir pan. Valtyi. Jie, be kita ko, gali pašalinti informacinius grafinius simbolius, tokius kaip zenklai, ispejamieji zenklai ir pan. 4. Pries valydami jsitikinkite, kad prietaisas atves. TECHNINIAI DUOMENYS: tampa: 220-240V ~ 50 / 60Hz Galia: 2000W Maks. Galia: 2200W IP20   "Spejimas karsto pavirsiaus" - prieinamu pavirsiu temperatura gali buti didesne, kai jranga veikia, o tai reiskia, kad i cijos metu korpuso elementai tampa labai karsti, SAVE CAREFUL !!! "NEGALIMA" - RASYMAS SVARBU Iras ant prietaiso reiskia, kad prietaisas neturi buti padengtas drabuziais, antklodemis irilles gaminiais, kurie gali sukelti udegima.  ISPEJIMAS: Nenaudokite sios jrangos salia voniu, duu, baseiu ir panaui vandensrezervuaru.  Rupinantis aplinka. Kartono pakuotes atiduoti j makulatura. Polietileno (PE) maišelius mesti j plastikui skirta konteineri. Susidévžusji prietaisa atiduoti j atitinkamā atlieku surinkimo vieta, nes prietaise esancios pavojingos medziagos gali kelti grésme aplkai. Elektrinji prietaisa atiduoti tokj, kad nebūtu galima jo pakartotinai naudoti ir panaudoti. Jeigu prietaise yra baterijos, bütina jas išimi t ir atskirai atiduoti j atlieku surinkimo vieta. Nemesti prietaiso j buitiniu atlieku konteineri!(LV) LATVIEŠU
UZMANIBU:
lericeirparedzeta tikailietosanaimajas. lerice nav paredzeta komercialai / profesionai lietošanai. lerice nav piemeropta lietošanai arpus telpam. Uzmanibu! Pirms lietošanas ir svarigi izlasit šo lietošanas instrukciju, lui izvairitos no nelaimes gadijumiem un icerces pareizas izmantošanas. Saglabajiet šo rokasgramatu un glabajiet to tā, lui to varētu viegli izmantot.I. NORADIJUMI PAR LIETOSANAS DROSBU
1. Pirms lietošanas pārbaudiet, vaidatu plaksnīte norādītais spriegums atbilst vietējiem sāluma parametriem, bet atcerieties, ka markējums: AC- ir mainstrava un DC ir DC. 2. Savienojiet ieri tikai ar izemetu 220 - 240V 50 / 60~Hz kontaktligzdu. 3. Pirms lietošanas atvienojiet un iztaisnot strāvas vadu 4. Pārliecinieties, vai strāvas vadam un spraudnim nav redzamu bojājumu 5. Pirms un pirms lietošanas parliecinieties, vai strāvas vads nav izstiepts uz atklātas liesmas vai cita siltuma avota un asu malu, kas var sabojāt kabela izolāciju. 6. Pirms pirmās lietošanas iznemiet visus iefpakojuma komponentus. Uzmanību! Ja korpusā ir metāla dalas, uz šiem elementiem var izstiept viegli redzamu aizsargplevi, kas arī ir jānonem. 7. leri ci nedrikst izmantot berni, personas ar iberozotu fizisko, sensoro vai garigo spju bez pilnvarotu vai pieredzjuusu personu uzraudzibas un vienmér saskaar ar sm instrukcijam. 8. lekarta nav paredzeta lietošanai ar ārejiem laika sledžiem vai atsevisku tālvadības systemu. BRIDINAJUMS: So aprikojumu var izmantot berneni, kas ir vecaki par 8 gadiem, un personas ar icerobežotu fizisko, sensoro vai garigo speju, vai personas, kuram nav pieredzes vai zinašanu par aprikojumu, TIKAI, ja to dara persona, kas ir atbildiga par viŋu vai ir sniegti noradijumi par icerces drošu lietošanu un ir informeti par briesmam, kas saistitas ar tās lietošanu. Berneni nedrikst spelēt ar aprikojumu. lerices tiršanu un apkopi nedrikst veikt berneni, ja vien viŋi nav vecaki par 8 gadiem un tiek uzraudziti 9. Neatstajiet ierici darba laikā bez uzraudzības. 10. Nenovietojiet ierici un stravas vadu udeni vai citos skidrumos. 11. Kad ierice netiek izmantota, tā vienmēr ir jāatvieno no strāvas kontaktligzdas. 12. Izvelkot kontaktdakšu no kontaktligzdas, nekad neizvelciet strāvas vadu tikai ar spraudni. 13. Nenovietojiet NO METAL ITEMS ierice 14. Ražotājs nav atbildīgs par bojājumiem, kas radušies ierīces nepareizas lietošanas rezultātā. 15. Jāatceras, ka dažas ierīces dalas un skapis darba laikā kūst loti karsti, tāpēc esiet uzmanīgi un nepieskarieties tiem, jus varat sadedzināt. 16. NEKAD NEKÄDIET ierici ierices darbības laikā vai tad, kad tā pilnībā neatdziest 17. Atcerieties, ka ierices sildelementi pilnibā atdziest. 18. Lietojot ierici, nodrošiniet pietiekamu vietu virs un apkārt. Darba laika ierice nedrīkst pieskarties viegli uzliesmojosiem priekšmetiem, piēmēram, rotājumiem, papīra dviejiem, aizkariem, apgērbam utt. 19. Vannas istabā uzstādītais sildītājs jauzstāda tā, lái cilveks, kas atrodas vannā vai zem duṣas, nevarētu pieskarties savienotājiem un citiem regulatoriem. 20. Augsta augstuma kermenu silditajos dažadu savienotaju poziciju pozicijam jabut redzamam no 1 m. attaluma. 21. Pec silditaja uzstadisanas ir jabut redzamam silditaja pärklajuma markejumam 22. Jus nevarat ievietot silditaju tiesi zem kontaktligzdas un tuvu uzliesmojosiem materialiem, piemeram, aizkari, aizkari utt. 23. Ierici nevar izmantot ar arejiem laika sledziem vai citam atseviskam talvadibas sistamam 24. Nepaklaujiet ieri ci atmsoferas apstakiem (lietus, saule uc) vai lietoanai augsta mitruma apstaklos (vannas istabas, mitras kempinga majas). 25. Regulari parbaudiet strvas vada stavokli. Ja strvas vads ir bojats, tas janomaina ar specialistu remontdarbnicu, lai izvairitos no bistamibas 26. Nelietojiet ierici pie viegli uzliesmojosiem materialiem 27. Silditājs jauzstāda vismaz 1,8 m augstumā virs gridas 28. Nelietojiet so silditaju vannas, dujas vai peldbaseina tiesa tuvuma 29. Nelietojiet šo silditāju, ja tas ir nomests 30. Nelietojiet, ja ir redzamas silditaja bojajuma pazimes 31. Izmantojiet silditaju uz lidzenas un stabilas virmas vai piestipriniet to pie sienas, ja ražotajs to paredz. BRIDINAJUMS: Nelietojiet so silditaju mazas telpas, kur ir cilveki, kuri paşi nespj tos pamest, ja vien netiek nodrošinata pastaviga uzraudziba. BRIDINAJUMS: Lai samazinatu ugunsbistamibu, tekstilizstradajumus, aizkarus vai citrus viegli uzliesmojosus materiaiulus turiet vismaz 1 m attalumno silditaja gaisa izpludes vietas. Elektroinstalacijai ir ieteicams aprikot ar automatisku atliku so strvas padeves sledzi ar 30mA iedarbinasanas stravu, lai palielinatu drosbu. Piezime: ja ir bojats strvas vads vai strvas kontaktdaksa, to vienmer vajadzetu nomainit vai remontet specializeta remontdarbnica.II. BRIDINAJUMI
1. Nekad nelietojiet ierici, ja tā ir bojata vai nedarbojas pareizi. 2. Nekad nelietojiet ierici, ja tā ir nokritusies no augstuma un redzamas bojājumu pazīmes. 3. Neizmantojiet pagarinātājus vai citrus elektrības kontaktus, kas neatbilst piemerojamiem standatriem un elektriskajiem noteikumiem. 4. Jebkuru dalu remontu, demontazu vai nomainu vienmér veic specializeta iekarta. 5. Ja ierice un elementi, piemēram, elektriskie kontakti, ir slapji, pirms ierices un ta sastāvdalu lietošanas kontaktdakšu vai kabeli dríkst Žavēt. 6. Nelietojiet ierici ar mitram rokam. 7. Ja pastāv risks, ka ɪerīce ir bojāta NEKAD mēginiet paşi labot ɪerīci. 8. Nekad nomazgajiet ierici zem tekosa udens vai tada veidā, lai taja ieplust udens. 9. Nelietojiet piederumus, kurus nav ieteicis ražotājs. Tie var radīt briesmas lietotājam un var sabojāt ierīci. 10. Pirms uzglabāsanas pārliecinieties, vai ierice ir atdzisis. 11. Lietosanas laikā nepieskarieties korpusam. Darbības laikā izmantojiet tikai pogas un sležus. Pec izslēgšanas pagaidiet, lidz icerce atdziest. 12. UZMANIBU! Dažas šīs ierīces daljas darbības laikā var kʃut Joti karstas un izraisit apdegumus.III. PIRMS LIETOSANAS
1. Nonemiet visu iepakojuma materialu un iztaisnojiet stravas vadu 2. Uzstadisanas laikā ierice nekādā gadijumā nedrikst but parklata ar izolacijas materialu vai lidzigu materialu 3. Montejot ierici, sijas un spares nedrikst sagriezt vai sagriezt 4. Pirms pirmas lietošanas izlasiet visas lietošanas instrukcijas. 5. Pärbaudiet, vai produkta ratiñu markejumā noradītais spriegums atbilst jusu majas elektrotíka spriegumamINSTALACija
Izmantojiet sejmasinu, lai siena izurbtu divus caorumus, vismaz 180 cm no gridas un 20 cm no griestiem - A attels. Pec urbumu urbsanas ievietojiet spilventu un skruvi. Parniecinieties, vai skruves ir labi nostiprinatas, un pec tam piestipriniet ierici pie sienas.PRODUKTA APRAKSTS
B attels. GALVENA SledzisC. attels. REMOTE CONTROLLER
1. Poga ON / OFF 2. REZIMS 3. DIENA 4.CLOCK 5. SETUP6.WEEK/TIMER
7. MIN 8. + -> Poga temperatūras paaugstināsānai. ār kalpo kā izvēles poga laika / diñas laikā. 9. --> Poga tempatūras pazemināsānai. ār kalpo kā izveles poga laika / dienas laikā. 10. RESET - Taimera atiestatisanas pogaAttels D. LED PANEL
1. ON symbols 2. Apkures jauda 1000W 3. Apkures jauda 2000W 4. AUTO fungcija 5. Temperatūras radījums 6. Dienes displejs 7. Laika rādijums 8. ON [leslegt] symbols - taimera palaisana 9. OFF symbols - taimera izslggsana 10. Atvert logu atklaesan funkcijuIV. LIETOSANA
1. Nospiediet galveno sledzi ierices labaja pus - B attels, lai ieslgtu un izslgtu ierfci. 2. lere tagad ir gaidisanas rezima. Nospiediet talvadibas pults ieslegsanas / izslegsanas pogu (1) - C attels. 3. Nospiediet pogu MODE (2) pec kartas, lai izveltos daribas rezimu: - 1000 Wierice pastavigi sakarst ar 1000 W. - 2000 W, ierice pastavigi sakarst ar 2000W. - Automatischais rezims, nospiedet taustinus + un -, lai manuali iestatitu temperaturu. lerice automatiski ieslgesies temperaturas uzturešanas režimā. - Atvet logu noteikšanas funkcija - Kad šī funkcija ir izvēleta, ierice automatiski izsledz apkuri, ja istabas temperatūrā pēkšni pazeminās par 10 ° C. 4. Lai izslęgtu ierici, nospiediet tālvadības pults ieslēgšanas / izslēgšanas pogu (1). Ierice atdziest un izslēdzas apmēram pec 30 sekundēm.IEKŠEJÁS IERICES pulkstena iestatīsana
PIEZIME Ja neiestatat pašreizejo laiku un nedējlas dienu, ierice nedarbosies pareizi, jo tā darbosies atbilstoši savam iekšejam pulkstenim, kas ir nepareizi. 1. Atlasiet fungciju AUTO, izmantojot pogu MODE. 2. Pirms taimera iestatiñas iestatiet nedelas dienu un pašreizejo laiku: - Nospiediet pogu DIENA un atlaset pašreže jo dienu, izmantojot pogas + un -. Pagaidiet, ltdz displejs pärstāj mirgot. - Nospiediet taustinu CLOCK un iestatiet pašreizejo laiku, izmantojot pogas + un - Pagaidiet, ltdz displeješ párstaj mirgot. - Nospiediet pogu MIN un iestatiet pašrežejas minutës, izmantojot pogas + un -. Pagaidiet, lfdz displeješ pärstaj mirgot.TIMER PROGRAMING SETTING - TIMER
Sifunkcija lauj programmetierfcies ieslegsanas un izslegsanas laiku katra nedelas diena velamaja laika. Taimeri var iestatit tikai pec fungcjias AUTO izveles un icerces ieksej a pulkstena iestatisanas. 1. Nospiediet pogu WEEK / TIMER un, izmantojot pogas + un -, izvelieties nedelas dienu, kurā vēlaties iestatīi erici automatiskai ieslēgsanai un izslegsanai. Pagaidiet, lidz displejs pārstāj mirgot. 2. Pec SET UP pogas nospiesanas displej iedegsies symbols ON. Tagad jus varat iestafit taimera sakuma laiku. Izmantojet pgas CLOCK, MIN, + un -, lain iestatifu taimera sakuma laiku. Pagaidiet, lidz displejs sparstaj mirgot. 3. Pec atkartotas pogas WEEK / TIMER (6) nospiesanas un pec tam nospiezot pogu SET UP, displejia iedegsies symbols OFF. Tagad jus varat iestafit taimera izslegsanas laiku. Pagaidiet, lidz displejs sparstaj mirgot. PIEZIME: sakuma laikam vienmér jabut zemakam par beigu laiku. PIEZIME Lai atiestatitu taimera noklusejuma iestatijumus, nospiiediet pogu RESET.V. TIRISANA UN APKOPE
1. Pirms tiri'sanas vienm er atvienojiet ierici no strvas kontaktligzdas. 2. Ja tirišanas laikā, piēmērām, strāvas kontaktdaksa, termostats, elektriskie kontakti utt., Tiek atkārtoti iemērkti, tie ir rūpīgī janozāve 3. Neizmantojiet agresivus mazgans an lidzeklus emulsij, losjonu, pastu uc veidai, lai tiritu skapi. Tas var, cita starpa, noemt informacijas grafiskos simbolus, piemeram, zimes, brdinajuma zimes utt. 4. Pirms tirisanas parliecinieties, vai ierice ir atdzisis.TEHNISKIE DATI:
Spiregums: 220-240V ~ 50 / 60Hz Jauda: 2000W Maks. Jauda: 2200W Ip20 JMS: Neizmantojiet so aprikojumu vannas, duas, peldbasein un lidzigu udens tverttu tuvumā. Apkartegjas vides aizsardziba. Kartona iepakojumu, ludzu, nododiet otreizejai pärstradei. Polietilena maisinus (PE) izmest plastmasas izstradajumiem paredzetajos konteineros. Lietotas elektrupreces nododiet attiegajos pienemšanas punktos. leric satur bistamas sastavdalas, kas var izraisit draudus apkartegjai videi. Elektroierice janodod tā, lai ierobežotu tās atkartotu izmantošanu. Ja ierie atrodas baterijas, iznemiet tās un nododiet pieemšanas punktā atseviški. Produktu neizmest sadzives atkritumu konteinera!(EST) EESTI
TAHELEPANU:
Seade on mōeldud ainult koduseks kasutamiseks. Seade ei ole moeldud ariliseks / professionaalseks kasutamiseks. Seade ei sobi kasutamiseks valitingimustes. Tähelepanu! Enne kasutamist on oluline, et te lugeksid need kasutusjuhendid LABi, et vältna onnetusi ja seadme öiget kasutamist. Hoidke see käsiraamat ja hoidke seda nii, et saaksite seda holpsasti kasutada.I. KASUTUSOHUTUSE SUUNISED
1. Enne kasutamist kontrollige, kas andmesildil margitud pinge vastab kohalikele soulsuse parameetritele, kuid pidage meeles, et margistus: vahelduvvool on vahelduvvool ja alalisvool on alalisvool. 2. Ühendage seade ainult maandusega 220-240 V ~ 50/60 Hz. 3. Enne kasutamist eemaldage ja ühendage toitejuhe 4. Veenduge, et toitejuhe ja pistik ei oleks naitavalt kahjustatud 5. Enne kasutamist ja selle ajal veenduge, et toitejuhe ei oleks üle avatud leegi voi muu soojisallika ega teravate servade, mis voivad kahjustada kaabli isolatsiooni. 6. Enne esmakordset kasutamist eemaldage kõik pakendikomponendid. Tahelepanu! Metallosadega korpuse korral võib nendel elementidel venitada kergelt nahtavat kaitsekile, mis tuleb samuti eemaldada. 7. Seadet ei tohiks kasutada lapsed, piiratud füusilise, sensoarse voi vaimse voimekusega isikud ilma volitatud voi kogenud isikute jarevalveta ning alati vastavalt kaesolevale juhendile. 8. Seade ei ole ette nähtud kasutamiseks väliste ajakommutaatoritega vöi eraldi kaugjuhtimissüsteemiga. HOIATUS: Seda seadet vōivad kasutada üle 8-aastased lapsed ja piiratud fūusilise, sensoarse vōi vaimse vōimega isikud vōi isikud, kellel ei ole kogemusi vōi teadmisi seadmete kohta, ainult siis, kui see toimub nende eest vastutava isiku järevalve all. ohutust vōi on antud juhised seadme ohutu kasutamise kohta ja on teadlikud selle kasutamisega seotud ohtudest. Lapsed ei tohi seadmega mangida. Seadme puhastamist ja hooldust ei tohi teha lapsed, valja arvatud juhul, kui nad on üle 8-aastased ja neid jälgitakse 9. Arge jätke seadet tootamise ajal järevalveta. 10. Arge kastke seadet ja toitejuhet veega ega muudesse vedelikesse. 11. Kui seadet ei kasutata, tuleb see alati vooluvorgust lahti ühendada. 12. Pistiku pistikupesast tommates arge kunagi tommake toitejuhet ainult pistikust. 13. Arge asetage seadmesse NO METAL ITEMS 14. Tootja ei vastuta seadme ebaõigest kasutamisest tulenevate kahjude eest. 15. Tuleb meees pidada, et moned seadme osad ja kapp too ajal on vaga kuumad, seega olge ettevaatlikud ja arge puudutage neid, voite pletalada. 16. ARGE KUNAGI katke seadet too ajal voi siis, kui see taiilikult ei jahtu 17. Pidage meeles, et seadme küttekehad vōtavad tāielikult jahtuda. 18. Seadme kasutamisel veenduge, et selle kohl ja ümber on piisavalt ruumi. Seade ei tohi too ajal puudutada kergesti suttivaid esemeid, nagu kaunistused, paberist kateratikud, kardinad, riided jne. 19. Vannitoas paigaldatud küttekeha tuleb paigaldada nii, et vanni voi duši all olev isik eis saaks ühendust ja teisi regulaatoreid puudutada. 20. Körge körgusega kinnitusdetailide küttekehad peavad ühenduste erinevate asendite asendid olema nähtavad 1 m. kaugusel. 21. Kütteseadme katte margistus peaks olea nāhtav pārast kütteseadme paigaldamist 22. Kütteseadet ei saa paigutada otse pesa alla ja tuleohtlike materjalide, naiteks kardinate, kardinate jne lahedale. 23. Seadet ei saa kasutada väliste ajakommutaatorite voi muude eraldi kaugjuhtimissüsteemidega 24. Arge jatke seadet atmosfäritingimustesse (vihma, päikese jms) voi kasutage körge niiskuse tingimustes (vannituba, niisked telkimismajad). 25. Kontrollige regulaarselt toitejuhtme seisukorda. Kui toitejuhe on kahjustatud, tuleb see ohu vältimiseks asendada spetsiaalse remonditökojaga 26. Arge kasutage seadet tuleohtlike materjalide laheduses 27. Kütteseade tuleb paigaldada vähemalt 1,8 m kõrgusele pörandast 28. Arge kasutage seda kerist vanni, duši ega basseini vahetus laheduses 29. Arge kasutage seda kutteseadet, kui see on maha kukkunud 30. Arge kasutage, kui kutteseadme kahjustamisel on nahtavaid marke 31. Kasutage kütteseadet tasasel ja stabiilsel pinnal voi kinnitage seeseinale, kui tootja seda ette naeb. HOIATUS: Arge kasutage seda kütteseadet väikestes ruumides, kus on inimesi, kes ei suudaneid ise jatta, valja arvatud juhul, kui on tagatud pidev jarevalve. HOIATUS: Tuleohu vähendamiseks hoidke tekstiile, kardinaid või muid kergestisüttivaid materjale küttekeha ðhu valjalaskeavast vähemalt 1 m. kaugusel. Ohutuse tagamiseks on soovitatav, et elektripaigaldis oleks varustatud automaatse 30mA vooluvoolu kaitselulitiga. Märkus: Kui toitejuhe või toitepistik on kahjustatud, tuleb seda alati asendada või remontidaII. HOIATUSED
1. Arge kunagi kasutage seadet, kui see on kahjustatud voi ei tota korralikult. 2. Arge kunagi kasutage seadet, kui see on enne korgust langenud ja naitab nahtavaid kahjustusi. 3. Arge kasutage pikendusjuhtmeid ega muid pistikupesasid, mis ei vasta kehtivatele standarditele ja elektriseadustele. 4. Kõikide osade remont, demonteerimine või valjavahetamine peaks alati toimuma spetsialiseeritud rajatise poolt. 5. Kui seade ja sellised elemendid nagu elektrilised kontaktid on marjad, tuleb enne seadme ja selle osade kasutamist kuivatada pistik voi kaabel. 6. Arge kasutage seadet margade katega. 7. Kui on oht, et seade on kahjustatud, arge kunagi proovige seadet ise parandada. 8. Arge kunagi peske seadet voolava vee all voi sellisel viisil, et vesi tilguks. 9. Arge kasutage lisaseadmeid, mida tootja ei soovita. Need voivad pohjustada kasutajale ohtu ja voivad seadet kahjustada. 10. Veenduge, et seade oleks enne ladustamist jahtunud. 11. Arge puudutage korpust kasutamise ajal. Kasutage tootamise ajal ainult nuppe ja luliteid. Pärast valjalulitamist oodake, kuni seade jahtub. 12. ETTEVAATUST. Möned seadme osad voivad tootamise ajal vaga kuumaks muutuda ja pöhjustada poletusi.III. ENNE ESIMESE KASUTAMIST
1. Eemaldage koik pakkematerjalid ja sirutage toitejuhe 2. Seadet ei tohi paigaldamise ajal katta isolatsioinimaterjaliga voi sarnase materjaliga 3. Seadme kokkupanemisel tohiks talasid ega sarikaid Iogata ega Iogata 4. Enne esimest kasutamist lugege koik kasutusjuhendid. 5. Kontrollige, kas toote rattamargisel olev pinge vastab teie koduvorgu pingeleINSTALATSIOON
Kasutage puuri, et puurida seina kaks auku, vahemalt 180 cm porandast ja 20 cm laest - joonis A. Kui olete augud puurinud, sisestage pad ja kruvi. Veenduge, et kruvid on korralikult kinni keeratud, seejarel riputage seadeseinale.TOOTEKIRJELDUS
Pilt B. Peamine Iuliti ON/OFF = Lulita sisse /valja lulitatud. Pilt C. Kaugjuhtimispult 1. ON/OFF-nupp 2. MODE 7. MIN 3.PAEV 4.CLOCK 5. SET UP 7. MIN 6. Nadal / aeg 8. + -> Temperatuuri tõstmise nupp. Samuti toimib valiku nupp aja / päeva jaoks. 9. --> Temperatuuri alandamise nupp. Samuti toimib valiku nupp aja / päeva jaoks. 10. RESET - taimeri lāhtestamise nupp Pilt D. LED PANEL 1. Surname ON 2. Kuttevoimsus 1000W 3. Kute voimsus 2000W 4. AUTO funktsioon 5. Temperatuurinäidik 6. Päeva kuvamine 7. Aja kuvamine 8. ON II sumbol - taimer käivitub 9. OFF-sumbol - taimeri seiskamine 10. Avage akna tuvastamise funktsoonIV. KASUTAMINE
1. Seadme sisse- ja valjalulitamiseks vajutage seadme parental kuljel asuvat pealulitit - pilt B. 2. Seade on nuud ootereziimis. Vajutage kaugjuhtimispuldi sisse / valja nuppu (1) - Pilt C. 3. Törežiimi valimiseks vajutage korduvalt nuppu MODE (2): - 1000 W, seade soojeneb pidevalt 1000 W-ga. - 2000 W, seade soojeneb pidevalt 2000W-ga. - Automaatreziimis vajutage temperatuuri käsitsi seadistamiseks nuppe + ja - Seade lulitub temperatuuri sailitamise reziimi automaatset. - Avatud akna tuvastamise fungtsion - kui see fungtsion on valitud, lulitab seade kuumutamise automaatset välja, kui toatemperatuur langeb järsult 10^ C. 4. Seadme väljalūlitamiseks vajutage kaugjuhtimispuldi sisse- ja väljalūlitusnuppu (1). Seade jahtub ja lūlitub välja umbes 30 sekundi pārast.SISEMISEADME KELLA SEADISTAMINE
MARKUS. Kui te ei mära praegust kellaega ja nadalapäeva, ei töta seade korralikult, kuna see tootab vastavalt om sismisele kellaajale, mis on vale. 1. Valige nupu MODE abil funktsion AUTO. 2. Enne taimeri märamist märake nadalapäev ja kellaag: - Vajutage nppu PÄEV ja valige nuppudega + ja - praegune paëv. Oodake, kuni ekraan lõpetab vilkumise. Vajutage nuppu CLOCK ja määrake nuppude + ja - abil kellaag. Oodake, kuni ekraan lopetab vilkumise. - Vajutage nuppu MIN ja seadke praegused minutid nuppude + ja - abil. Oodake, kuni ekraan lopetab vilkumise. Taimeri programmeimise seadistamine - taimer See funktsioon voimaldab teil programmeerida seadme sisse- ja valjalulitamise aega igal nadalapaeval soovitud ajal. Tainerit saab seada alles pärast funktsooni AUTO valimist ja seadme sisemise kella seadistamist. 1. Vajutage nuppu NADAL / AJASTIK ja valige ndalapäev, mille jooksul sooivite seadme lilitada nuppude + ja - abil automaatelt sisse ja valja. Oodake, kuni ekraan lopetab vilkumise. 2. Pärast nupu SET UP vajutamist suttib ekraanil sömbol SISSE. Nüd saate märata taimeri algusaja. Taimeri käivitusaja seadmiseks kasutage nuppe CLOCK, MIN, + ja -. Oodake, kuni ekraan lopetab vilkumise. 3. Pärast uuesti nuppu NADAL / AJASTIK (6) vajutamist ja seejärel nuppu SET UP vajutades suttib ekraanil tähis VÄLJAS. Nüd saate taimeri valjalulitusaja seada. Oodake, kuni ekraan lopetab vilkumise. MÄRKUS. Algusaeg peab alati olema madalam kui seiskamisaeg. MÄRKUS Taimeri vaikesätete lahtestamiseks vajutage nuppu RESET.V. PUHASTAMINE JA HOOLDUS
1. Enne puhasamist eemaldage alati pistik pistikupesast. 2. Kui puhastamise ajal, nagu näiteks pistik, termostaat, elektrikontaktid jne, enne kasutamist uuesti leotatakse, tuleb neid pohjalikult kuivatada 3. Arge kasutage korpuse puhastamiseks emulsionide, vedelike, pastade jms kujul agressivseid pesuvahendeid. Muuhulgas voivad naeemaldada info graafilised sumbolid, naiteks margid, hoitusmargid jne. 4. Enne puhastamist veenduge, et seade on jahtunud. TEHNILISED ANDMED: Pinge: 220-240V ~ 50 / 60Hz Voimsus: 2000W Maks. Voimsus: 2200W Ip20  "Ettevaatlik kuum pind" - kasutatavate pindade temperatuur vöib seadme tootamise ajal olla körgem, mis tähendab, et corpuse tootamise ajal väga kuumaks jäavad.  KASUTADA" - SISSEJUHATUS TAHLEPANU Seadmel olev pealkiri tahendab, et seadet ei tohi kanda riideid, tekke ega muid tekstiltooteid, mis voiivad pohjustada suttimist.  HOATUS: Arge kasutage seda seadet vannide, dusside, basseinide ja sarnaste veepaakide laheduses.  Hoolitse keskconnakaitse eest. Kartongist pakendid vi makulatuuri. Kilekotid (PE) viska kasutud plastiku jaoks ettenahtud mahittesse. Kasutatud seadmed vi selleks ettenahtud kogumispunktidesse, sest seadmes leiduvad ohtlikud elemendid vovad olla kahjulikud keskonnae. Elektriseadmed tuleb anda nii ar, et seadet ei saaks enam uesti kasutada. Kui seadmes on patareid, tuleb need valja votta jaanda eraldi 'kogumispunktli. Seadet ei tohi visata olmejätmete konteineritesse!!(RO) ROMÁNă
TENTIE:
Dispositivul este destinat exclusiv uz casnic. Dispositivul NU este destinat utilizarii commerciale sau professionale. Aparatul NU este potrivit pentru utiliser in exterior. Atentie! Inainte de utiliser, este esentiai sa citi cieste instruanti di utiliser para evita accidentele si pentru utiliser corecta a dispositivului. Păstraţi acest manual Şi păstraţi-l astfel incât sa il puteti/utiliza cu uşurinta.I. ORIENTÁRIPENTRU SIGURANCTA UTILIZÁRII
1. Inainte de utilizes, verificati dacă tensiunea specifică pe placuța de identificare corespunde parametrilor locali de salinitate,insula nu uitași ca marcajul: AC-este current alternative DC este DC. 2. Conectaţi aparatul numai la o przyă de masă 220-240V ~ 50/60 Hz. 3. Inainte deutilizare, derulati si indreptati cablul de alimentare 4. Asiguraţi-vă că cablul de alimentareși stecherul nu prezinta deteriorarii vizibile 5. Inainte Şi in timpul utilizări, asigurați-vă că cablul de alimentare nu este intins pe o flacără descisă sai pe o alta sursă de caldură Şi muchii ascuțite care pot deteriorora izolația cablului. 6. Inainte de prima utilizes, scoatei toate componentele ambalajului. Atentie! In cazul unei carcase cu把这些 metalice, pe acoste elemente se poate intinde o folie protectoare uor vizibila, care trebuie, de asemenea, indepartata. 7. Dispositivul nu trebuie utilizes de copii, persone cu capacitate fizica, senzoriala sau mentala limitata fara supravegherea personelor autorizate sau cu experienta si intotdeauna in conformitate cu aceste instrutiuni. 8. Echipamentul nu este destinat'utilizarii cu intrerupatoare de tamp externe sau cu un system separat de comanda la distanța. AVERTIZARE: Acest echipament poate fi utilizes de câtre copii cu vârsta mai mare de 8 aniși personale cu capacitate fizica, senzorială sau mentală limitataș sau persone care nu au experientă sau cunoșținteș despree echipamente, NUMAI dacă acest lucru se face sub supravegherea unei persone responsabile pentru sau au primit instrucțiuni privind realizarea in siguranta a dispositivuluiși sunt constcnti de pericolele associate realizarii acestuia. Copii nu ar trebui să se joace cu echipamentul. Curățareași intreținerea dispositivului nu trebuie efectuate de copii decât dacă au vârsta de peste 8 aniși sunt supravegheata 9. Nu lasaşi aparatul nesupravegheat in tampul functionarii. 10. Nu scufundati aparatul si cablul de alimentare in apa sau in alte lichide. 11. Când aparatul nu este utilizes, acesta trebuie să fie intotdeauna deconectat de la przya. 12. Când trajeți ștecarul din priză, nu trajeți niciodata cablul de alimentare de la priza numai. 13. Nu introduci niciun element METAL in interiorul dispositivului 14. Producătorul nu este răspunzător pentru daunele rezultate din utilizarea necorespunzătoare a dispositivului. 15. Trebuie să vă amintiţi că unele parti ale dispositivuluiși dulapul în tampul lucrului se topesc foarte mult, deci aveti grijăși nu le atingeti, puteti fi ars. 16. NICIODATA nu acoperi dispositivul in timpul functionarii tau cand nu se raceste complet 17. Aminti-va cã elementele de incâlzire ale dispositivului necessita tamp sa se râcească complet. 18. Când utilizesci dispositivul, asigurați-va un spațiu adecvat deasuprași in jurul acestuia. Dispositivul nu trebuie să atingă obiecte ușor inflamabile în timpul lucrului, cum ar fi decoratiuni, prosoape de hârtie, perdele, imbracăminte etc. 19. Inczitorul instalat in baie trebuie instalat astfel incat conectorii si alte regulatoare sa nu poata fi atinse de o persona in cada sau sub duş. 20. In sistemele de incalzire pentru corpurile de altitudine ridicata, poziile diferitelor poziile ale conectorilor trebuie sa fie vizibile de la o distanța de 1 m 21. Etichetarea pentru acoperirea incălzitorului trebuie să fie vizibilă după instalare incălzitorului 22. Nu puteti amplasa incalzitorul direct sub prizași in apropierea materialelor inflamabile cum ar fi perdele, perdele etc. 23. Dispositivul nu poate fi utilizes cu comutatoare de tamp externe sau cu alte sisteme separate de comanda la distanța 24. Nu expuneti aparatul la conditi di atmosferice (ploaie, soare etc.) sau nu utilizati in conditi de umiditate ridicata (bai, case de camping umede) 25. Verificazioni periodiche starea cablului de alimentare. In cazul in care cablul de alimentare este deteriorarat, acesta trebuie inlocuit de o instalatie specializata de reparazioni pertru a evita pericolul 26. Nu utilizati dispositivul in apropierea materialelor inflamabile 27. Incalzitorul trebuie instalat la o inaltime nu mai mica de 1,8 m deasupra godelei Se recomanda ca instalata electrica sa fie echipata cu un intrerupator automat de current rezidual cu un current de pornire de 30mA pentru o siguranta sporita. Notă: Dacă cablul de alimentare sau ștečărul de alimentare sunt deteriorate, acesta trebuie intotdeauna inlocuit sau reparat de un service specializat. 28. Nu utilizati acest incalzitor in imediata apropiere a unei cazi, du sau piscina 29. Nu utilizati acest incalzitor dac a fost scapat 30. Nuutilizati dacă existăsemnevizibile de deteriorarea incalzitorului 31. Utilizati incalzitorul pe o suprafata plana si stabila sau atasa-i la perete, dac a este prevazut de producator. AVERTISMENT: Nu utilità acest incalzitor in incaperi mici in care exista personane care nu pot sa le lase singure, cu exceptia cazului in care este asigurata o supraveghere constanta. AVERTISMENT: Pouru a reduce riscul de incendiu, tinei textile, perdele sau alte materiale inflamabile la cel putin 1 m distanța de orificiul de iesire a aerului incălzitorului.II. AVERTISMENTE
1. Nu utilizaţi niciodă dispositivul dacă acesto este deteriorat sau nu functționează corect. 2. Nu folosiţi niciodata dispositivul dacă a cazut de la o inalțime înainteși prezinta semne vizibile de deteriorare. 3. Nu utilizaţi cabluri prelungitoare sau alte prize electrice care nu respectă standardele și reglementările în vigoare. 4. Orice reparati, dezmembrare sau inlocuire a unor把这些trebuie intotdeauna efectuate de o unitate specializata. 5. Daca dispositivul si elementele precum contactele electrice sunt umezite, fisa sau cablul trebuie uscate inainte de a utiliza dispositivul si componentele acestuia. 6. Nuutilizati dispositivul cu mainile ude. 7. Când există riscul ca aparatul să fi fost deteriorat NICIODATA nu incercăți să reparati singur aparatul. 8. Nu spalati niciodata aparatul sub apa curgatoare sa in asa fel incat apo sa picure in el. 9. Nu utiliatai accesori care nu sunt recomandate de producator. Acestea pot reprenta un pericol pentru utiliser si pot cauza deteriorarea dispositivului. 10. Asiguraţi-vă cà disposizitivul sa răcit înante de deposizare. 11. Nu atingeti carcasa in timpul utilizarii. In timpul functiionarii, utilizi numai butoane si intrerupatoare. Dupa oprire, astepta ci ca dispositivul sa se raceasca. 12. ATENTIE: Unele componente ale acestui aparat pot deveni foarte fierbinti in tampul functionarii si pot provoca arsuri.III. INANTE DE PRIMA UTILIZARE
1. Scoatehatregul material de impachetare si indreptatc cablul de alimentare 2. In timpul instalarii, dispositivul nu poate fi in nici un caz acoperit cu material izolator sau material similar 3. La asamblarea dispositivului, grinzile 山 grinzile nu trebuie taiate sau taiate 4. Inainte de prima'utilizare, cititi toate instructiunile de utiliser. 5. Verificatu daca tensiunea indicata pe eticheta de esantionare a produsului corespunde tensiunii retelei de alimentare din locuin ta dumneavoastrINSTALLATION
Utilizati burghiul pentru a gauri doua gauri in perete, la minimum 180 cm de podea si 20 cm de tavan - imaginea A. Odata ce ati forat gaurile, introduceti tamponul si insurubati. Asigurati-va ca suruburile sunt bine stranse, apoi agata di dispositivul de perete. DESCRIEREAPRODUSULUI Imaginea B. PORNIREA PRINCIPALÄ ON / OFF = TURN ON / YUTN OFF.Imaginea C. CONTROLUL TELECOMUNICATIEI
1. Butonul ON / OFF 6.WEEK/TIMER 2. MODE 7. MIN 3 ZILE 8. + -> Buton pentru ridicarea temperaturii. De asemenea, serveste ca buton de selecţie pentru tamp / zi. 4.CLOCK 9. --> Buton pentru scaderea temperaturii. De asemenea, servețe ca buton de selecție pentru tamp / zi. 5. SET UP 10. RESET - butonul de resetare temporizatorImaginea D. LED PANEL
1. Simbolul ON 6. Afisarea zilei 2. Putere de incalzire 1000W 7. Afisarea orei 3. Putere de incalzire 2000W 8. Simbolul ON - pornerea temporizatorului 4. Functia AUTO 9. Simbolul OFF - oprine temporizatorului 5. Afiṣarea temperaturii 10. Deschideti functia de detectare a ferestrelorIV. UTILIZARE
1. Apasati intrerupatorul principal din partea dreaptă a dispositivului - Poza B pentru a porni și opri dispositivul. 2. Aparatul este acum in regim de asteptare. Apasati butonul de pornire / oprire (1) de pe telecomanda - Poza C. 3. Apasati butonul MODE (2) la randin sau, pentru a selecta modul de operare: - 1000 W disposizitivul se va incalzi constant cu 1000 W. - 2000 W, disposizitivul se va incalzi constant cu 2000W. - Mod automat, apasati butoanele + si - pentru a seta manual temperatura. Aparatul va intra automat in modul de mentinere a temperaturii. - Funcie de detectare a ferestrei beschise - Când este selecţă această functie, disposizitivul va opri automatÎncălzirea dacă temperatura camerei scade brusc cu 10^ C. 4. Pentru a opri dispositivul, apasa t butonul on / off (1) de pe telecomanda. Dispositivul se raceste si se opreoste dupa aproximativ 30 de secunde.SETAREA Ceasului de dispositive interne
NOTÁ: Dacă nu setați orași ziua curentă a săptamânii, dispositivul nu va functiònna corect deoarece va functiònna conform propriului ceas intern, ceea ce este incorrect. 1. Selectati functia AUTO folosind butonul MODE. 2. Inainte de a seta cronometrul, seta ziua saptamani si ora curenta: - Apasati butonul DAY si selectati ziua curenta folosind butoanele ^+ si-. Astepta pana cand afisajul nu mai clipeste. - Apasati butonul CLOCK si setati ora curenta folosind butoanele ^+ si-. Asteptati pana cand afisajul nu mai clipeste. - Apasati butonul MIN si seta ti minutele curente folosind buoanele ^+ si - Astepta pana cnd afisajul nu mai clipeste.SETAREA PROGRAMÄRII TIMEI - TIMER
Această functie va permite să programați ora pentru a porniși opri disposizitivul in ficare zi a săptamânii la ora dorita. Cronometrul poate fi setat numai după selectarea functiei AUTOși setarea ceasului intern al. disposizitivului. 1. Apasati butonul WEEK / TIMER.si selecanti ziua saptamani in care doriti sa setati dispositivul sa porneasca si sa se opreasca automat folosind butoanele ^+ si-. Asteptati panacand afisajul nu mai clipeste. 2. Dupa apasarea butonlui SET UP, simbolul ON se va aprinde pe afisaj. Acum puteti seta ora de pornire a cronometrului. Utilizati butoanele CLOCK, MIN, +si - pentru a seta ora de pornire a cronometrului. Asteptati pana cand afisajul nu mai clipeste. 3. Dupa apasarea din nou a butonlui WEEK / TIMER (6) si apoia apasarea butonlui SET UP, simbolul OFF se va aprinde. Acum puteti seta cronometrul. Asteptati panacand afisajul nu mai clipeste. NOTÄ: ora de pornire trebuie sã fie intotdeauna mai mica decat ora de oprire. NOTÀPentruareshetacronometrullasetärileimplicite,apasati butonulRESET.V. CURATAREA SI INTRETINEREA
1. Inainte de curatare, deconecta tintotdeauna aparatul de la priza electrica. 2. Daca in timul curatarii articole, cum ar fi fisa de alimentare, termostatul, contactele electrice etc., sunt inmuiate inainte de a fi folosite din nou, acestea trebuie uscate bine 3. Nu utilizes detergenti agresivi sub forma de emulsii, lotiuni, paste etc. pentru a curata dulapul. Ele pot, printre altele, sa elimine simbolorile grafice informative, cum ar fi semne, semne de averizare etc. 4. Asigurat-vá cã dispositivul sa racit inainte de curatare.DATE TEHNICE:
Tensiune: 220-240V ~ 50 / 60Hz Putere: 2000 W Max. Putere: 2200W Ip20  "Atentie la suprafete fierbinti" - Temperatura suprafetelor disponibile poate fi mai mare atunci cnd echipamentul functioneazaa, ceea ce inseamna ca elementele carcasei devin foarte calde in timpul functianni in timpul functiarii, SAVE CU ATENTIE!  "NU INTRETI" - IMPORTANTA INSCRIPTIe Inscriptia pe disposizitiv inseamna că disposizitivul nu trebuie acoperit cu inte, păturiși alte produse textile care ar putea provoca aprinderea.  AVERTISMENT: Nu utilizati acest echipament in apropierea czielor, duurilor, piscinelor si rezervarelor de apa similare.  Din grija pentru mediu inconjurator. Ambalajele din carton va rugam sa le transmiteti sa centrele de maculatura. Saci din polietilena (PE) trebuie aruncate in recipientele pentru materiaelele plastice. Dispositivul uzat trebuie transmis la punctul corespunzator de depositare, deoarece componentele periculoase care se gasc in dispositiv pot fi foarte periculoase pentru mediu inconjurator. Dispositivul electric trebuie transmis in aea fel incat sa se limiteze utilizezarea lui repetata. Daca in dispositiv se gasc baterii acestea trebuesc scoase si transmise catre punctul de depositate a acestora, separat.(BS) BOSANSKI
PAZNJA:
Ureaj je namenjenismo za kućnu upotrebu. Urešaj NIJE namijenjen za komercijalnu / profesionalnu upotrebu. Ure'daj NIJE pogodan za upotrebu na otvorenom. Pažnja! Pre upotrebe, neophodno je da pročitate ovo uputstvo za upotrebu kako biste izbegli nesrece i pravilnu upotrebu uredaja. Čuvajte ovaj prisučnik i Čuvajte ga tako da ga možete lako koristiti.I. SMJERNICE ZA SIGURNOST UPOTREBE
1. Pre upotrebe proverite da li napon navenen na natpisnoj pločici odgovara lokalmim parametrima saliniteta, ali zapamtite da oznaka: AC- je naizmenična i DC je DC. 2. Prikljucite ureadaj samo na uticnicu uzemljenja 220-240V 50/60 Hz. 3. Pre upotrebe odvijte i ispravite kabl za napajanje 4. Uverite se da kabl za napajanje i utikač nemaju vidljivih ostecenja 5. Pre i tokom upotrebe, uverite se da kabl za napajanjeijke rastegnut preko otvorenog plamena ili drugog izvora toplote i oštrih ivica koje mogu oštetiti izolaciju kabla. 6. Prije prve uporabe, uklonite sve komponente pakiranja. Pažnja! U slučaju kucišta sa metalnim dijelovima, na ovim elementima moze se rastegnuti blago vidljiva zaštitna folija, koju takoder treba ukloniti. 7. Urešaj ne treba koristiti djeca, osobe s ograničenim fizickim, osjetilnim ili mentalnim sposobnostima bez nadzora ovlastenihi ili iskusnih osoba i uvijek u skladu s ovim uputama. 8. Opremaijke namijenjena za koriistenje s vanjskim vremenskim prekidačima ili zasebnim sustavom daljinskog upravljanja. UPOZORENJE: Ovu opremu mogu koristiti djeca starija od 8 godina i osobe s ograničenim fizickim, osjetilnim ili mentalnim sposobnostima, ili osobe koje nemaju iskustva ili znanja o opremi, SAMO ak se to radi pod nadzorom osobe odgovorne za njihovo bezbednosti ili su dobili uputstva o bezbednej upotrebi ureðaja i svesni su opasnosti u vezi sa njegovom upotrebom. Deca ne bi trebalo da se igraju sa opremom. Cišćenje i održavanje ureðaja ne smiju izvoditi djeca osim akso su stariji od 8 godina i pod nadzorom 9. Ne ostavljaje uredaj bez nadzora tokom rada. 10. Ne potapajte aparat i kabl za napajanje u vodu ili bilo koju drugu tecnost. 11. Kada se uredaj ne koristi, uvijek ga treba isključiti iz utičnice. 12. Kada povlačite utikač iz utićnice, nikada ne vucite kabl za napajanje samo za utikač. 13. Ne stavljajte NO METAL ITEMS unutar uredaja 14. Proizvodač nije odgovoran za šte tastale usled nepravilnog korišćenja uredaja. 15. Treba imati na umu da se neki dijelovi uredaja i ormarica tijekom rada jako zagrijavaju, stoga budite oprezni i ne dirajte ih, možete se opeci. 16. NIKADA ne prekrivajte uredaj tokom rada ili kada se ne ohladi u potpunosti 17. Upamtite da grijacin elementima ureda treba vremena da se potpuno ohlade. 18. Kada koristite uredaj, osigurajte odgovarajuci prostor iznad i oko njega. Urej ne smedodirnuti lako zapaljive predmete tokom rada, kao sto su ukrasi, papirni ubusi, zavese, odeca itd.. 19. Grijac instaliran u kupaonici treba biti instaliran takdo se osobe u kadi ili pod tusem ne mogu dotak Nuti konektora i drugih regulatora. 20. U grijacima za nadmorske visine, pozicije razlicitih položaja konektora trebaju biti vidljive sa udaljenosti od 1 m 21. Oznaka zaPokrivanje grijaca mora biti vidljiva nakon ugradnje grijaca 22. Ne możete postavljati grijac direktno ispod utičnice i blizu zapaljivih materijala kao što su zavjese, zavjese itd.. 23. Urešaj se ne može koristiti s vanjskim vremenskim prekidačima ili drugim odvojenim sustavima daljinskog upravljanja 24. Ne izlažite uredaj atmosferskim uvjetima (kiša, sunce, itd.) Ili koristite u uvjetima visoke vlažnosti (kupaonice, vlažne kamp kuće) 25. Povremeno proverite stanje kabla za napajanje. Ako je kabl za napajanje ostecen, trebalo bi ga zameniti specijalisticki servis kako bi se izbegao rizik 26. Nemojte koristiti uredaj u blizini zapaljivih materijala 27. Grijac mora biti instaliran na visini ne manjoj od 1,8 m iznad pada 28. Ne koristite ovaj grijač u neposrednoj blizini kade, tuša ili bazena 29. Ne koristite ovaj grijac ako je pao 30. Ne koristite ako postoje vidljivi znakovi ostecenja grijalice 31. Koristite grijac na ravnoj i stabilnoj povrsini ili ga pričvrstite na zid, ak to predviða proizvodač. UPOZORENJE: Ne koristite ovaj grijac u malim prostorijama u kojima ima ljudi koji ih ne mogu sami ostaviti, osim ako nije osiguran stalni nadzor. UPOZORENJE: Da biste smanjili rizik od požara, držite tekstil, zavese ili druge zapaljive materijale najmanje 1 m od izlaza za vazduh iz grejača. Preporucije se da elektricna instalacija bude opreumljena automatskim prekidačem za preostalu struju sa početnom strujom od 30mA za povećanu sigurnost. Napomena: Ako je kabl za napajanje ili utikač ostećen, uvek ga treba zameniti ili popraviti u specijalizovanoj radionici.II. UPOZORENJA
1. Nikada ne koristite uredaj ako je ostecen ili ne radi pravilno. 2. Nikada nemojte koristiti uredaj ako je pao s visine prije iPokazuje vidljive znakove ostecenja. 3. Nemojte koristiti produktu kablove ili druge elektriche utichnice koje ne odgovaraju vazećim standardima i elektrichnim propisima. 4. Bilo kakve popravke, demontiranje ili zamjenu bilo kojeg rijela uvijek treba vršiti specijalizirana ustanova. 5. Ako su uredaj i elementi kao sto su elektrichi kontakti vlažni, utikač ili kabel treba osušiti prije korištenja uredaja i njegovih componenti. 6. Ne koristite uredaj vlaznim rukama. 7. Kada postoji rizik da je uredaj ostecen NIKADA ne pokušavajte sami popraviti uredaj. 8. Nikada ne perite urejad pod tekucom vodom ili na takav nacin da voda kaplje u nju. 9. Ne koristite pribor koji-nine preporučen od strane proizvodača. Oni mogu predstavljati opasnost za korisnika i mogu izazvati ostecenje uredaja. 10. Uverite se da se uredjohladio pre skladistenja. 11. Ne dodirujte kuciiste tokom upotrebe. Tokom rada koristiteismo dugmad i prekidace. Nakon isključivanja, sacekajte da se urežaj ohladi. 12. OPREZ: Neki dijelovi ovog uredaja mogu se jakozagrijati tijekom rada i uzrokovati opekotine.III. PRIJE PRVE UPOTREBE
1. Uklonite sav materijal za pakiranje i ispravite kabel za napajanje 2. U toku instalacije, uredjai ni u kom slucaju ne sme biti prekriven izolacionim materijalom ili slicnim materijalom 3. Prilikom sklapanja uredaja, grede i grede ne treba rezati ili rezati 4. Pre prve upotrebe procitajte sva uputstva za upotrebu. 5. Provjerite da li napon navenen na naljepnici za kvašenje proizvoda odgovara naponu mrežne mreže u vašem domuINSTALACIJA
Koristite busilicu za busenje dva otvora u zidu, Najmanje 180 cm od pada i 20 cm od stropa - slya A. Nakon sto ste izbusili rupe, umetnite jastuci i vijk. Provjerite jesu li vici dobro zategnuti, a zatim objesite uredj na zd.OPIS PROIZVODA
Slika B. GLAVNI PREKIDAC ON/OFF UKLJUCENO/ISKLJUCENO.Slika C. DALJINSKI UPRAVLJA
1. Dugme ON/OFF 2. MODE 3.DAN 4.CLOCK 5. SET UP 6.WEEK/TIMER 7. MIN 8. + -> Dugme za podizanje temperature. Takoše služi kao dugme za izbor vremena / dana. 9. --> Dugme za snizavanje temperature. Takode služi kao dugme za izbor vremena / dana. 10. RESET - Dugme za resetovanje tajmeraSlika D. LED PANEL
1. Simbol ON 2. Snaga grijanja 1000W 3. Snaga grejanja 2000W 4. AUTO funkcija 5. Prikaz temperature 6. Prikaz dana 7. Prikaz vremena 8. Simbol ON - uključivanje tajmera 9. OFF symbol - isključivanje tajmera 10. Otvorite funkcjju otkivanja prozoraIV. KORISTENJE
1. Pritisnite glavni prekidač na desnoj strani uredaja - Slika B da biste ukljucili i isključili uredaj. 2. Ureraj je sada u stanju pripravnosti. Pritisnite tipku za uključivanje / isključivanje (1) na daljinskom upravljač - Sika C. 3. Pritisnite tipku MODE (2) zauzvrat da odaberete režim rada: - 1000 W uredaj ce se stalno zagrijavati sa 1000 W. - 2000 W, uredjé se stalno zagrijavati Sa 2000W. - Automatski rezim, pritsnite tipke + i - da biste ručno podesili temperaturu. Urežaj ce automatski uci u režim odžavanja temperature. - Funkcija otkrivanja otvorenog prozora - Kada je odabrana ova funkcija, uredaj ce automatski iskljuciti grijanje ako temperatura u sobi naglo padne za 10^ C. 4. Da biste isključili urežaj, pritisnite tipku za uključivanje / isključivanje (1) na daljinskom upravljacu. Urežaj se hladi i isključuje nakon otprilike 30 sekundi.POSTAVLJANJE UNUTARNJEG UREDAJA
NAPOMENA: Ako ne postavite trenutno vrijeme i dan u sedmici, uredaj nece raditi ispravo jer ce raditi u skladu s vlastitim unutarnjim satom, sto je netačno. 1. Pomocu gumba MODE odaberite funkciju AUTO. 2. Prijne nego sto postavite tajmer, postavite dan u sedmici trenutno vrijeme: - Pritisnite tipku DAY i odaberite trenutni dan pomocu tipki + i-. Sačekajte dok displej prestaje da treperi. - Pritisnite tipku CLOCK i podesite trenutno vrijeme pomocu tipki + i-. Sačekajte dok displeje prestaje da treperi. - Pritisnite tipku MIN i podesite trenutne minute pomocu tipki + i-. Sačekajte dok displej prestaje da treperi.POSTAVKA PROGRAMIRANJA TIMERA - TIMER
Ova fungcija omogucava programiranje vremena za uključivanje i isključivanje uredaja svakog Dana u sedmici uŽeljeno vrijeme. Tajmer se moze podesitiismo nakon odabira fungcije AUTO i podesavanja unutarnjeg sata uredaja. 1. Pritisnite tipku WEEK / TIMER i odaberite dan u sedmici na koji zelite postaviti uredaj da se automatski uključuje i isključuje tipkama + i-. Sačekajte dok displej prestaje da treperi. 2. Nakon pritiska na taster SET UP, na ekranu ce se upaliti simbol ON. Sada mozete postaviti vrijemePokretanja tajmera. Koristite tipke CLOCK, MIN, +i-za podesavanje vremenaPokretanja tajmera. Sačekajte dok displej prestaje da treperi. 3. Nakon ponovnog pritiska na dugme WEEK / TIMER (6), a zatim pritisnete taster SET UP, na ekranu ce se upaliti symbol OFF. Sada mozete postaviti vrijeme isključivanja tajmera. Sačekajte dok displej prestaje da treperi. NAPOMENA: vrijemePokretanja mora uvijek biti nizé od vremena zaustavljanja. NAPOMENA Da biste tajmer vratili na zadane postavke, pritisnite taster RESET.V. CISCENJE I ODRZAVANJE
1. Prijc ciiscenja uvijek iskljucite uredaj iz uticnice. 2. Ako se tokom cisćenja stvari kao što su utikač, termostat, elektrčni kontakti itd. Natopi prije ponovnog koristjenja, treba ih temeljito osušiti. 3. Nemojte koristiti agresivne deterdžente u obliku emulzija, losiona, paste itd. Za cisćenje ormarica. Oni mogu, izmedu ostalog, ukloniti graficke simbole informacija, kao što su znakovi, znakovi upozorenja, itd.. 4. Uverite se da se uredaj prije ciścenja ohliado. TEHNICKI PODACI: Napon: 220-240V ~ 50 / 60Hz Snaga: 2000W Max. Snaga: 2200W IP20  "Oprezna vruca povrsina" - Temperatura raspoloživih povrsina moze biti veca kada oprema radi, sto znači da se elementi  kom rada jako zagrijavaju, SPASITE PAMJENO !!! E POKLOPI" - NAPOMENA ZNACAJ Natpis na uredaju znaci da se uredaj ne smije prekriti odjecom,dekama i stilnim proizvodima koji bi mogli izazvati paljenje. ENJE: Nemojte koristiti ovu opremu u blizini kade, tuša, bazena i silčnih rezervoara za vodu.  Vodimo brig u prirodnom okoliu. Kartonsku ambala z molimo prenjeti na opadni papir. Polietilen (PE) vrece bacati u kontejner za plastiku. Istrosena oprema treba biti premiestena na prikladno miesto za pohranu, ier sadrze u ureadiu opasne tvari moqu predstavliati opasnost za okolis. Elektricni urei mora bitu predut u takuom staniu da se smanji moquinostnepov neopnu unotre. Ako vaš uretdai ima haterij, treha nih ukloniti i predatina eudj mla bup uad a tavon stanju ca se sma jnoguohstjegovp ovoie opoeve. An vas eudj ma batenje, treba nijn kuniut predunat mesto za pohranu odvojeno.KARTA GWARANCYJNA
WARUNKI GWARANCJI obowiazujana terenie Rzeczpospolitej Polskiej Adler Sp. z o.o. ul. Ordona 2a 01-237 Warszawa zapewnia Uzytkownika o dobrej jakosci sprzetu, na kóry wydana jest niniejsza karta gwarancyjna i udziela 24 miesiecznej gwarancji, kóra liczy sie od daty zakupu sprzetu. Uslugi gwarancyjne swiadczone są po okazaniu prawidlowo wypelnionej karty gwarancyjnej. Wady lub uszkodzenia sprzetu ujawnione w okresie gwarancji usuwane;bę bezplatie przyez Serwis Centralny. W przypadku zakupu sprzetu przyez przyedsiebiorce (faktura VAT) okres gwarancjiwynosi 12 miesiecy. Powyźszy zapis nie dotyczzy Jednoosobowych dzialnosci gospodarczych, o ile rodzaj zakupionego sprzetu,Nie jest zwiazany z profilem prowadzonej dzialnosci gospodarczej - weryfikacja w CEIDG. W przypadku wymiany rzechy na nowa, albo po dokonaniu istotnej naprawy, okres gwarancji biegnie na nowo odchwili dostarczenia klienowirzechy wolnej od wad, lub zworocenia rzechy naprawionej. Jezelgwarant wymienil czescrzechy, przypeis powzyszzy stosujie sie odpowiednio do czesci wymienionej. Gwarant zobowiezuje siePokryc koszty dostarczenia rzechy do serwisu na adres wskazany w karcie gwarancjnej. Jednakze uprawniony z gwarancji powinien zachować rozsadek, wybierajuć srodek transportu. Uprawnionemu z gwarancji nie przysluguje od gwaranta zwrot kosztów dostarczenia towaru - rzechy do naprawy gwarancjnej , przyekraczajacy ekonomicznie uzasadnione koszty przywozu. UWAGA: Sprzej przyznaczony jest wyłączne do uzytku domowego. Naprawami gwarancyjnych nie są objęte czynnosci zwiazane z odkamienianiem, konserwacja, czyszczemium urzadzenia oraz czȩci i akcesoria ulegañce zuźyciu przy normalnym uzytkOWANI. Gwarancja nie obejmuje mechanicznych uszkodzen sprzetu oraz wad i uszkodzenDyniklch wskutek: -niewlasciwo golubniezgodnogo z instrukcja uzytkowania, przechowywnia i konserwaci; -ingerencjiNieautoryzowanego serwisu,samowolnych napraw,przerobekizzmian konstrukcyjnych; -użycia niewlasciwych materiałow eksplaatacyjnych. -uszkodzen mechaniznych, termicznych, chemiznych i powstazych na skutek przypiecia w sieci. -karta gwarancyjna jest nieważna bez daty zakupu, pieczeci sprezdajęcego i kopii dokumentu zakupu. -gwarancja nie są objete elementy eksploatacjne i akcesoria w tym: elementy szklane (np. dzbanki, talerze), sznury przyłączeniowe, sieciowe, zarówki, baterie, noźyki i folie do urzadzen tnąych, nasadki miksujuce, trzechaki, mieszaki, ssawkoszczotki, rury, węze, kubki miksujuce, glowice tnące i sita. Reklamowany sprzęt jest dostarczy do Serwisu Centralnégo przyez Klienta w stanie kompletnym i odpowiednio zabezpieczony na czas transportu. Po dokonaj naprawie reklamowany sprzęt odbierany jest z Serwisu Centralnégo przyez Klienta. Termin usuniecia wady要去 zostac wyduzony o czas potrzejny do importu niezbędnych czosci, nie dluszny niz 30 dni roboczych. W kaźdym takim przypadku warsztat serwisowy powiadomi klien ta wyduzeniu terminu naprawy gwarancjnej. W zwiazku z koniecznosci sprowadzenia czosci zamiennych i poinformuje o nowym terminie usunięcia wady. W przypadku stwierdzenia uterki nalezy ja zglosic w punkcie sprezazy lub w Serwisie Centralnym, ul. Ordona 2A, 01-237 Warszawa, tel. 728-595-006 lub e-mail: serwis@adler.com.pl. W zgloszeniu prosze podac swoj adres, nr Telefonu i opis uterki. Do reklamaci konieczne jest dołaczenia kopii dokumentu zakupu. Gwarancja nie wyłacza ani nie ogranica oraz nie zawiesza uprawnien kupujacego wynikajczych z przyepisów o rkojmi za wady rzechy sprezadnej. SERWIS CENTRALNY 01-237 Warszawa ul.Ordona 2A tel. 728-595-006 (data sprzedazy) www.adler.com.pl serwis@adler.com.pl (pleczatka sklepu i podpis sprezedawcy) adnotace serwisu:   W trosce o srodowisko. Opakowania kartonowe oraz worki polietylenowe (PE) nalezy wrzuać do odpwiednich pojemników przyznaczonych do selektwynej zbiórk i odpadów komunalnych zgodnie z ich opisem. Jeźeli w urzadzeniu znajduju sie baterie, nalezy je wyjac i obso ndo oddac do punktu zbierania i składowania. Zuzyte urzadzenia nalezy oddac do odpwiedniego punktu zbierania i składowania, gdyz znajdujuce sie w nim niebezmieczne substantjc mega stanowic zagrozenia dla zdrowia i srodowiska. Oznaczenia umieszczone na produktie wskazuje, ze urzadzenia nie nalezy wyrzuać do pojemnika z odpadami komunalnymi. Zuzyt sprzet elektryczny, to odpady, ktore zawieraja substancje szkodliwe dla ludzi, zwierzati srodowiska. Substanjc te moga doprowadzic do zanieczyszczenia gleby, wody lub powietrze, a poprzej to moga sie dostac do organizu czwioeka i doprowadzic do licznych doleglwoosci zdrowotnych, takich jak: zaburzenia wzroku, stuchu, mowy, moga rowniez doprowadzic do uszkodzenia nerek, watroby i serca, oraz wywoa choroby skory. Substanje szkodliwe moga miec rowniez niedkorzystny wpyw na uklad oddechowy i Rozrodczy oraz doprowadzic do zamian nowotworowych. Spozyme roslin rosnacych na skarzonych glebach, oraz produktow powstalych z nich moze grozic w/w skukami zdrowotnymi. Urzadzenia nie wyrzuać do pojemnika na odpady komunalne !!!POLSKI
UWAGA:
Urzadzenie przyznaczone jest wyłacznie do uzytku domowej. Urzadzenie NIE jest przyznaczone do uzytku komercyjngo/profesjonalneo. Urzadzenie NIE jest przystosowane do uzywania na wolnymgowitzu Uwaga! Przed użyciemNSEbybezwzględniezapoznaćsizniejszainstrukcja obstugi w celuunikcieniaieszczęsliwychwypadków oraz dla prawidłowego użycia urzadzenia.Instrukcjenelezy zachowaći przechowywaćtakbywrazie potrzebyłatwo możnabylo znej skorzystać.I. WSKAZÓWKI DOTYCZACE BEZPIECZENSTWA UZYTKOWANIA
1. Przed uzyciemNSEZY sprawdzićczy napięcie podane na tabliczce znamionowej odpowiada mistryscowym parametrom zasalania przy czymNSEZY pAMIetać ze oznaczenia: AC- to prad przy przemienny a DC - to prad stały. 2. Urzadzenie nalezy podlączyc wyłącznie do gniażdka z uziemieniem 220-240 V ~ 50/60 Hz. 3. Przed uzyciem Rozwinac i wyprostowac przywod zasilajacy 4. Naleź zworcie uwage przy przewód zasilajcy oraz wtyczka nie posiadaźadnych widocznych uszkodzeń 5. Przed i podczas uzytkowania naleź wroćić uwage by przywód zasilajncy nie był rozciagnęty nad otwartym ogniem lub innym zródlém ciepla oraz na ostrych krawędziach, kró moga uszkodzić izolacje przyzewodu. 6. Przed pierwszym użyciem naleź usunść wszelkie elementy opakowania. Uwaga! W przypadku obudowy z elementami metalowymi, na tych elementach sąbe być naciągnieta mało widoczna folia zabezmiecząca, króra sączne sągneść. 7. Urzadzenie nie powinno byc uzywane przy czieci, osoby o agraniczonej zdolnosci fizycznej, czuciowej oraz psychicznej bez nadzoru/maps uprawnionych lub dozwiadczonych i zawsze zgodnie z niniejsza instrukcja. 8. Sprzęt nie jest przyznaczenia do pracy z użyciem zewétrznych wyłączników czasowych lub oddzielnego ukuładu zdalnej regulacje. OSTRZEJEZENIE: Niniejszy sprzegtMZe by uzytkowy przez daneci powyzej 8 roku zycia oraz osoby o ograniczonej zdolnosci fizycznej, czuciowej lub psychicznej, lub osoby nie majace doświadczenia lub znajomość sprzȩtu, TYLKO jestli odbywa są to pod nadzorem osoby odpowiadajęcej za ich bezpieczeniastwo lub zostaly im udzielone wskazówki na temat bezpiecznych uzytkowania urzadzenia i mainszwiadomyść niebezmiecznych zzwiazanego z seinem uzytkowaniem. DzieciNie powinny baweć siedrzejtem. Czyszczenie i konserwacja urzadzenia nie powinna byc wykonywana przyez daneci, chybaź sa powyzej 8 roku zycia a czynnosci te są wykonywane pod nadzorem 9. Nie wolno pozostawiać urzadzenia bez nadzoru w czasie pracy. 10. Nie wolno zanurzać urzadzenia oraz przyȩcoma go w wodzie lub wźadnych innychcieczach. 11. Gdy urzadzenie nie jest uzywane zawsze powinno byc odlaczone od gniazdazasilajacego. 12. Przy wymiaganiu wtyczki z gniażda nigdy nie ciaginiż za przyȩwóź zasilajćy tylko za wtyczné. 13. Nie wolno władacźADNYCH METALOWYCH PRZEDMIOTów do wnatra urzadzenia 14. Producent nie odpowa da za szkody powsta wwyniku nieprawidlowego uzycia urzadzenia. 15. Naleź pamiętac, ze niedźole czȩci urzadzenia oraz obudowy w czasie przy bardzo są nagrzewaj dlatego naleź zachowania szczególny ostrożnosć i nie dotykać ich,ość są poparzyć. 16. NIGDY nie nakrywaj urzadzenia w czasie pracy ani gdy calkowicie nie wystygniie 17. Pamiętaj ze elementy grzejne urzadzenia wymagaju czasu by calkowicie ostygnAAC. 18. Korzystajac z urzadzenia nalezy zapewnic odpowiednia przyestrzen nad i wokóf, Urzadzenia podczas pracy nie要去 dotykaćźadnych latwo palnych przyedmiotów jak np.: dekoracje, ręczników papierowych, załon, odziezy itp. 19. Ogrzewacz montowany węziance, powinien być instalowy tak, aby sączniki i inneregulatory nie sągly być dotkni三点e przy czemu znajdujeść w wannie lub pod natryskiem. 20. W ogrzewaczach do mocowania na duzej wysokość wskazania rożnych połoędzymi sączników powinny byc widoczne z odlegloiść 1 m 21. Oznakowanie dotyczne przykrywania ogrzewacza powinno byc widoczne po zastalowaniu ogrzewacza 22. Nie:noza umieszczac ogrzewacza bezposrednio pod gniazdem wtyczkowym, oraz w..., poblizu materiałow latwopolnych takich jak firanki, zaşlonki itp. 23. Urzadzenia nie may na stosowac z zewnetrznymi wyplaçznikami czasowymi lub innymi oddzielnymi ukladami zdalnej regulaçji 24. Nie wystawiaj urzadzenia na dzialanie warunków atmosferycznych (deszczu, słonca, etc.) aniNie uzywaj w warunkach podwyźszonej wilgotnosci (lazienki, wilgotne domki kempingowe) 25. Okresowo sprawdzaj stan przyzewodu zasilajacjago. Jeźeli przyzewód zasilajczy jest uszkodzony, to powinien on byc wymiemeniony przyez SPECIALISTYCZY zlokad naprawczy w celuunikność zagrozenia 26. Nie korzystać z urzadzenia w=Poblizu materialów lwtwopalnych 27. Ogrzewacz musi byc instalowany na wysokość nie mniejszej nz 1,8 m nad podłoga 28. Nie uzywajingo grzejnika w bezposrednim sąsiedztwie wanny, prysznica lub basenu 29. Nie uzywajingo grzejnika, jesti zostat upuszczony 30. Nie uzywać, jestli istnieja widoczne slady uszkodzenia grzejnika 31. Uzywaj grzejnika na poziomej i stabilnej powierzchni lub przymocuj go do sciany, jesti producent przywidział takąMZlwość OSTRZEZENIE: ie uzywaj unto go grzejnika w mazych pomieszczeniach, w ktorych znajduja N sie osoby, ktore nie są w stanie samodzielnie ich opuisci, chyba ze zapewniony jest nad nimi stały nadźór. OSTRZEZENIE: Aby zmiejeśzyc ryzyko pożaru, tekstylia, zaśony lub inne materiały latwopalne, naleź trzymać w odlegloiść co najmiej 1 m od wylotu powietrzaogrzewAACZA. Zaleca są by dla zȩększenia bezpieczność instalacja elektryczna była wyposzażona w automatyczny wyłącznik rożnicowoprady o pradzie uruchamiania 30mA. Uwaga: Ješli przywośd zasilajćny lub wtyczka zasilajća ulegnie uszkodzeniu to bezwzgliednie wymiany lub naprawy zawsze powinien dokonać wyspecializowy zakład naprawczyII. OSTRZEŽENIA
1. Nigdy nie wolno uzywać urzadzenia jest jest uszkodzone lub działa w sposobNieprawidówry. 2. Nigdy nie uzywać urzadzenia jestliwczesnej upadlo z wysokość i wskazuje widoczne oznaki uszkodzenia. 3. Nie uzywać przyȩzacje lub innych gniaźd elektrycznych które nie spełniaja obłowiazujacych norm i przyepisów elektrycznych. 4. Wszelkie naprawy, demontañ lub wymiana jakichkolwiek częsci zawsze powinno być dokonane przyż wyspecializowej zakjad. 5. W przypadku zamoczenia urzadzenia oraz elementów takich jak styki elektryczne wyczkaczy przyzewód przydzwyciem naleźny osuszyc urzadzenia i了我的 elementy. 6. Nie uzywaj urzadzenia mokrymi rękami. 7. Gdy zachodzi obawa, ze urzadzenie zostalo uszkodzone NIGDY nie naprawiaj urzadzenia samodzielnie. 8. Nigdy nie myj urzadzenia pod biezacwoda ani w taki sposob by woda do niego scekała. 9. Nie naleźy stosowej akcesiorów, króre nie są zalecane przyez produkta. Moga stanowania one niebezmieczność dla uzytkownika oraz powodowej ryzyko uszkodzenia urzadzenia. 10. Upewnic sie, ze urzadzenie wystygo przyd przechowywaniem. 11. W czasie uzytkowania nie dotykać obudowy. Podczas przy posluguwać siedtylkoPokretlami i przyȩćznikami. Po wylączeniu odczekać aź urzadzenia wystygnie. 12. UWAGA: Niektóre częscikiego urzadzenia moga podczas przystać są bardzo gorace i spowodowej oparzenia.III. PRZED PIERWSZYM UZYCIEM
1. Usń wszelkie elementy opakowania i wyprostuj przywód zasilajacy 2. Podczas montaçu w zadnym wypadku urzadzenie nie maye byc Pokryte materialem izolacyjnm lub podobny material 3. Podczas montazu urzadzenia, belki krokwie nie powinny byc ciete ani nacinane 4. Przed pierwszym uzyciem przyȩstęwystycjie instruktowej uzytkowania. 5. Sprawdź,czynapiecie podane na etykcie oznaczajeczji produkt odpowiada napieci sieci energetycznej w twoim domuZdjecie C. PILOT ZDANEGO STEROWANIA
1. Przycisk ON / OFF 6. TYDZIEN / TIMER 2. TRYB 7. MINUTY 3. DNI 8. + -> Przycisk podnoszenia temperatury. Słowy rownikść jako przycisk wyboru czasu / dnia. 4. ZEGAR 9. --> Przycisk obniżania temperature. Słuź równeź jako przycisk wyboru czasu / dnia. 5. USTAWIENIA 10. RESET - przycisk resetowania timera (czasomierza).Zdjecie D. PANEL LED
1. Symbol ON 6. Wyswietlanie dnia 2. Moc grzewcza 1000 W 7. Wyświetlanie czasu 3. Moc grzewcza 2000 W 8. Symbol ON - uruchomienie timera 4. Funkcja AUTO 9. Symbol OFF - węlącznik czasowy 5. Wskaznik temperature 10. Funkcja wykrywania okna otwartegoIV. ZASTOSOWANIE
1. Nacisnj wyłacznik glówny po prawej stronie urzadzenia - Zȩdekie B, aby wączyć i wyłacznę urzadzenia z zasilania. 2. Urzadzenie znajduje sie teraz w trybie gotowosci. Nacisnij przycisk wyczania / wyłuczania (1) na pilocie zdalngo sterowania - Zdjecie C. 3. Nacisnj kolejno przycisk MODE (2), aby wybrać tryb pracy: - 1000 W urzadzenie bedzie stale nagrzewa 和 z mocaj 1000 W. - 2000 W urzadzenie bedzie stale nagrzewa z moca 2000W. - Tryb Auto nacijsnij przyciski + i-, aby ręcznia ustawic temperatur. Urzadzenie automatyczne przyejdzie w tryb utrzymywania temperatury. - Funkcja wykrywania otwartego okna - Po wybraniu tej funkcj urzadzenie automatycznie wylaczy ogrzewanie, jesti temperatura pokojowa nagle spadnie o 10^ C. 4. Aby wyłaczyc urzadzenia naciśnij przycisk wączenia / wączenia (1) na pilocie zdalnégo sterowania. Urzadzenia ochlodzi są po okół 30 sekundach wyłaczy są.USTAWIENIE ZEGARA WEWNETRZNEGOGURZADZENIA
UWAGA: Jesli nie ustawisz bieącego czasu i dnia tygodnia, urzadzenie nie bedzie działć poprawnie, poniewaź bedzie działo zgodnie z wąsnym zagarem wewétrznym, kóry jest niepejawidów. 1. Wybierz fungcjé AUTO za pomocaj przycisku MODE. 2. Przed ustawieniem timera nalezy ustawic dzisiejszy dzień tygodnia i bieść czas: - Nacisnij przycisk DAY i wybierz aktualny dzien za pomoczy przycisków + i -. Poczekaj az wyświetlacz przystanie migać. - Naciśnij przycisk CLOCK i ustaw aktuań godz引擎 za pomoczą przycisków + i-. Poczekaj ale wyświetlacz przystanie migać. - Naciśnij przyczisk MIN iustaw aktualne minuty za pomocamy przyczisków + i-. Poczekaj aż wyświetlacz przystanie migać.USTAWIENIE PROGRAMATORA CZASOWEGO - TIMER
Funkoja umozliwa zaprogramawanie czasu wączenia i wętaczenia urzadzenia w kaźdym z dni tygodnia o zȩdanej godzinie. Timer:nozaustawictylko pwybraniufunkcjAuto orazustawieniu zegara wewnetrzngo uradzania. 1. Nacijsnij przycisk WEEK / TIMER i wybierz;dzień tygodnia w ktorym chcesz ustawic automatyczne wączenia i węlącenie urzadzenia za pomocamy przycisków + i-. Poczekajź wyświetlacz przystanie migac. 2. Po naciński przycisku SET UP na wyświetlaczu zaȩwieci są symbol ON. Możesz teraz ustawić czas uruchamiania timera. Za pomoczy przycisków CLOCK, MIN, + i - ustaw czas uruchomienia timera. Poczekajź wyświetlacznoprestanie migać. 3. Po ponownym naciński przycisku WEEK / TIMER, a nastepnie przyciński przycisku SET UP na wyświetlaczu zaȩwieci są symbol OFF. Teraz要去 zastawic czas wyłaczenia timera. Poczekajź wyświetlacz przystanie migać. UWAGA: czas uruchomienia musi zawsze miec wartosc nizsza niz czas wylaczenia. UWAGA Aby zresetowac timer do ustawien domyslnych, nacijsnj przycisk RESET.V. CZYSZCZENIE I KONSERWACJA
1. Zawsze przyzed czyszczemien odłucz urzadzenia od gniazda zasilajacego. 2. Ješli podczas czyszczenia elementy takie jak wtyczka zasilajęca, styki przywodów elektrycznych regulatora termostatu itp. dostaną zamoczone przyd odownym użyciem sąȩ je dokladnie wysuszyć 3. Do mycia obudowy nie naleź uzywać agresywnych detergentów w postaci emulsji, mleczka, past, itp. Moga one między innymi usunąć naniesione informacyjne symbole graficznie takie, jak: oznaczenia, znaki ostrzejagawczy, itp. 4. Upewnicie, ze urzadzenie wystygo przy czyszczeniem. DANE TECHNICZNE: Moc: 2000W Moc maksymalna: 2200W Zasilanie: 220-240V ~50/60Hz IP20  "Uwaga Goręca Powierzchnia" - Temperatura dostepnych powierzchni sąć wyźsa gdy sprz)]; pracuje, co oznacza są elementu obudowy w czasie pracy znacznie są nagrzewaj w czasie pracy urzadzenia, ZACHOWAJ OSTROźNOSC !!!  OSTRZEZENIE: W celu uniknięcia przyegrzania - nie przykrywać ogrzewacza  OSTRZEJEZENIE: nie stosować体系建设 w poplżu waniem, pryszniców, basenów i podobnych zbiorników z wodą(HU) MAGYAR
FIGYELEM:
A keszülékCsak háztartási használatra keszült. A keszülék NEM kereskedelmi / szakmai használatra keszült. A keszülék NEM alkalmas kultéri használatra. Figyelem! Hasznalat elott elengedhetetlen, hogy olvassa el ezt a hasznalati utasitast, hovy elkerulje a baleseteket es a keszülek helyes hasznalatat. Tartsa meg ezt a kezikonyvet es tartsa ugy, hogy konnyen hasznalhassa.I. UTMUTATÓ A HASZNÁLATI BIZTONSÁGRA
1. Hasznalat elott ellenorizze, hogy az adattablan megadott feszultség megfelel-e a sórtalom helyi paramétereinek, de ne feledje, hogy a jalolés: AC- valtakozó áram és DC egyenáram. 2. Csatlakoztassa a keszüléketCsak 220-240V 50/60 Hz foldelt aljzathoz. 3. Hasznalat elott huzza ki es huzza ki a tapkabel 4. Győződjön meg róla, hogy a pátkábel és a dugó nem látható károsodást okoz 5. Hasznalat elott es kozben ügyeljen arra, hogy a tapkabel ne nyuljon nyilt langra vagy mas hoforrasra es éles szélekre, amelyek károsithatjak a kabel szigetelését. 6. Az elso hasznalat elott tavolitsa el az osszes csomagoló alkatreszt. Figyelem! Fémrészekkel ellatott burkolat eseten ezeken az elementen enyhén láthato védófolia nyújthato, amelyet szintén el kell távolitani. 7. A keszüléket nem szabad gyermekek, korlatozott fizikai, érzékszervi vagy szellemi kapacitással rendelkező személyek használni a felhatalmazott vagy tapasztalt személyek felügyelete nélkül, és mindig az utasításoknak megfeleloen. 8. A berendezést nem szabad külso idokapcsolókkal vagy kūlön távvezérlo rendszerrel használni. FIGYELMEZTETÉS: Ezt a berendezést 8 évesnel idösebb gyermekek és korlátozott fizikai, érzékszervi vagy szellemi képességü gyermekek, vagy oyan személyek használatják, akiek nincs tapasztalata vagy ismerete a felszerelésról. biztonsággal, vagy utasításokat kaptak az eszközBiztonságos használatáról, és tisztaban vannak a használatával kapcsolatos veszélyekkel. A gyerekek nem jatszhatnak a berendezéssel. A készülék tiszításat és karbantartásat nem szabad vegezni gyermekek, kíveve, ha 8 évesnel idösebbek és felügyelet alatt állnak 9. Ne hagyja felügyelet nélkül a készüléket. 10. Ne merítse a keszüléket és a pátkábelt vizbe vagy más folyadékba. 11. Ha a keszülék nincs használatban, mindig le kell valasztani a halózati aljzatból. 12. Amikor a dugót kihúzza az aljzataból, soha ne húzza ki a tapkábelt csak a csatlakozóból. 13. Ne tegyen semmilyen fémelemet a keszülék besejébe 14. A gyartó nem vallal felelosséget a keszülék nem megfelelo hasznalataból eredő károkér. 15. Emlékeztetni kell arra, hogy az eszköz és a szek Rény egyes részei a munka során nagyon melegek, ezert ügyeljenek rá, és ne érjenek hozzá, megéghetnek. 16. SOHA ne takarja le a keszüléket muködés kozben vagy amikor teljesen nem hül 17. Ne feledje, hogy a keszülék fütoelemeinek idöbe telik, hogy teljesen lehüljön. 18. A keszülék használatakor gondoskodjon a megfelelo helyröl és környékéról. A keszülék nem érintheti a munka során konnyen gyulékony târgyakat, pédául diszeket, papírtörulközőket, fuggönyöket, ruházatot stb. 19. A furdószobába szerelt fūtótestet úgy kell felszerelni, hogy a csatlakozók és mas szabályozók ne érjenek a furdókádban vagy a zuhany alatt. 20. A nagy magassagú lámpatestek fütöberendezéseiben a csatlakozók különbozó poziaciónak helyzetét 1 m távolságból kellátni. 21. A fūtōberendezs fedelének címkézését a fūtōberendezs telepitèse után kell latni 22. A fütötestet nem lehet kozvetlen ü az aljat alá helyezni és gyúlékony anyagokra, pédául fuggönyökre, fuggönyökre stb. 23. A keszülék nem hasznáhlato külso idokapcsolókkal vagy más különallo támvezérlo rendszerekkkel 24. Ne tegye ki a keszüléket legköri körülményeknek (eső, nap, stb.) Vagy magas páratartalmú körülmények böztott (furdöszobák, nedves kempingházak). 25. Rendszeresen ellenorizze a tapkabel allapotat. Ha a tapkabel seruit, a veszely elkerulese erdekiben cserelje ki a szakservizt 26. Ne használja a keszüléket gyulékony anyagok kozeleben 27. A fūtōtestet telepīteni kell. Javasoljuk, hogy a nagyobbBiztonsag erdekében az elektromos szerelvenyt 30mA -es inditoarammal ellatott automatikus megszakitóval szerelje fel. Megjegyzés: Ha a tapkábel vagy a tapkábel megsérult, mindig cserélje ki vagy javitsa ki egy specialis javitómuhely. 28. Ne használja=ezt a melegítóf furdokád, zuhanyzo vagy uszómedence kozvetlen kozelében 29. Ne használja=ezt a fūtōtestet, ha leesett 30. Ne használja, ha a fūtés károsodásanak látható jelei vannak 31. A fútótestet sik és stabil felülen használja, vagy rögzítse a falhoz, ha a gyártó előirja. FIGYELMEZTETÉS: Ne használja ezt a fūtōtestet oylan kis helyiségekben, ahol vannak oylan emberek, akik önmagukban nem képesek elhagyni öket, hacsk nim biztositják az állandó felügyeletet. FIGYELEM: A tuzveszély csökkentése érdekében tartsa a textiliákat, fuggonyoket vagy mas gyulékony anyagokat legalabb 1 m-re a fütöberendeźes kimenetétól. II. FIGYELMEZTETÉSEK 1. Soha ne használa j a készüléket, ha serult vagy nem mukodik megfeleloen. 2. Soha ne használja a készüléket, ha a készülék magassága korábban leesett, és latható károsodási jelei vannak. 3. Ne használjon hosszabbíto kábelt vagy más elektromos csatlakozót, amelyek nem feelnek meg a vonatkoź szabványoknak és elektromos előirásoknak. 4. Barmilyen alkatresz javitasat, szetszerelését vagy cseréjét mindig egy SPECIALIS letesitménynek kell elvegeznie. 5. Ha az eszköz és az elemek, például az elektromos érintkezők nedvesek, a készüléket és annak alkatrészeit hasznalat elött meg kell szárítani. 6. Ne használja a készüléket nedves kézzel. 7. Ha fennáll annak a veszélye, hogy a készülék megsérül, SOHA ne probálja meg javitani a készüléket. 8. Soha ne mossa le a keszüléket folyóviz alatt vagy oly modon, hogy a viz csepegjen bele. 9. Ne használja a gyartó altal nem ajánlott tartozékokat. Ezek veszélyt jelenthetnek a felhasználó szárára, és károsithatják a készüléket. 10. A tárolás elótt győzódjön meg arról, hogy a készülék lehult. 11. Ne érintse meg a hazat használat kozben. Múkódés kozbenCsak gombokat es kapcsolókat használjon. A kikapcsolás után varjon, amig a készülék lehül. 12. VIGYÁZAT! A keszülék egyes részei nagyon forróak lehetnek mücködes kozben és égési serülseket okozhatnak.III. AZ ELSO HASZNALAT ELOTT
1. Távolítsa el az összes csomagóányagot és húzza ki a pátkábelt 2. A telepités során a keszüléket semmilyen esetben nem lehet szigetelóanyaggal vagy hasonlo anyaggal boritani 3. A keszülék összeszerelésekor a gerendákat és a szarufákat nem szabad vágni vagy vágni 4. Az elso hasznalat elott olvassa el az osszes hasznalati utasitast. 5. Ellenorize, hagy a termekrgztc cimk en feltuntett feszultseg megegyzik-e az otthoni elektromos halozat fszultsegivelINSTALLATION
Használjon fúró, hogy fúrjön két lyukat a falba, minimum 180 cm-re a padlóól és 20 cm-re a mennyezetrol - A. kép. Ha már fúrta a lyukakat, helyezze be a padot és a csavart. Győződjön meg róla, hogy a csavarok jol meg vannak-e húzva, majd húzza fel a készüléket a falra.TERMÉKLEÍRÁS
B. kép. FÖKAPCSOLÜ BE / KI = KI BE / KI KI. C. kép. TÁVKÉSZÍTÖ 6. HÉT / IDÖZÍTÖ 1. BE / KI gomb 7. MIN 2. MODE 8. +-> A homérséklet novelesére szolgálo gomb. Az idö / nap kivalasztásigombkent is szolgál. 3. NAP 9. --> A homér séklet csökkentésére szolgálo gomb. Az idō / nap kivalasztási gombként is szolgál. 4.CLOCK 10. RESET - Timer reset gomb 5. SET UP D. kép. LED PANEL 1. BE szimbóolum 6. Napi megjelenités 2. Futesi teljesitmény 1000W 7. Idō kijelzěse 3. Futesi teljesitmény 2000W 8. BE szimbólum - idózító indítasa 4. AUTO funkcioó 9. KI szimbólum - idzító kikapcsolása 5.Homerseklet kijelzoo 10. Nyissa meg az ablak eszlelesi funkciojatIV. HASZNÁLAT
1. A készülék be- és kikapcsolásához nyomja meg a készülék jobb oldalán található fokapcsolot - B kép. 2. A keszülék keszlenéti allapotban van. Nyomja meg a tavirányító be-/ kikapcsoló gombjat (1) - C. kép 3. Nyomja meg egymás után a MODE gombat (2) az uzemmod kivalasztásahoz: - 1000 W-nal a keszülk folyamatosan felmelegszik 1000 W-val. - 2000 W, a keszülék folyamatosan felmelegszik 2000W-val. - Automatikus üzemmodban nyomja meg a + és - gombokat a hörmséklet kézi beallitásához. A készülék automatikusan átvalt a hórmársklet-fenntartó üzemmodba. - Nyissa meg az ablaküveg-érzekelő funkciot - Ha ezt a funkciot valasztja, a keszülék automatikusan kikapcsolja a fütest, ha a helyiség hórmár séklete hirtelen 10^ C-kal csökken. 4. Az eszkoz kikapcsolasyhoz nyomja meg a taviranyito be-/ kikapcsol gombjat (1). A keszulek lehul es kb. 30 masodperc elteltével kikapcsol.A BELSO KESZULEK BEALLITASA
MEGJEGYZES: Ha nem allitja be az aktualis idot es a hét napjat, akkor a keszülék nem fog megfeleloen mukodni, mert a sajat belso oraja szerint fog mukodni, ami helytelen. 1. Valassza az AUTO funkciot a MODE gombbal. 2. Az idozitobéallitasa elott altitsa be a hetnapjét az aktualis idot: - Nyomja meg a NAP gombot és valassza ki az aktuális napot a + és - gombokkal. Várjon, amig a kijelző vilogni nem kezd. - Nyomja meg a CLOCK gombot, és allytsa be az aktuális idö t a + és - gombokkal. Várjon, amig a kijelző vilogni nem kezd. - Nyomja meg a MIN gombot, és a + és - gombokkal allítsa be az aktuális perceket. Várjon, amig a kijelző vilogni nem kezd. Idózító programozás BEÁLLITÁS - Idózító Ez a funkció lehtöve teszi a keszülk be-és kikapcsolásanak idejét a hét minded napján, a kivist idöpontban. Az idozitcscak az AUTO funkciokivalasztasa es az eszkoz belso orajnak beallitasa utan allithato be. 1. Nyomja meg a HÉT / IDÖZITÖ gombot, és valassza a hét napjat, amelyen a + és - gombok segitségével beállithatja, hogy az eszköz automatikusan be- és kikapcsoljon. Várjon, amig a kijelő vilogni nem kezd. 2. A SET UP gomb megnyomása után az ON szimbóolum kigyullad a kijelzón. Most beállíthatja az idóztó kezdési idejét. A CLOCK, MIN, +és - gombokkal allitsa be az idóztó kezdési idejét. Várjon, amíg a kijelzó villognem kezd. 3. A HÉT / IDÖZİTO gomb (6) ismetelt megnyomása, majd a SET UP gomb megnyomása után az OFF szimbólum kigyullad a kijelzón. Most beallithatja az idózító kikapcsolási idejét. Várjon, amig a kijelzó villogni nem kezd. MEGJEGYZES: a kezdési idonek mindig alacsonyabbnak kell lennie, minta leallitasi ido. MEGJEGYZES Az idzito alapertelmezzett beallitasainak visszaallitasahoz nyomja meg a RESET gombot.V. TISZTÍTÁS ÉS KARBANTARTÁS
1. Tisztiţas elott mindig húzza ki a készüléket a halózati aljzataból. 2. Ha a tisztlatas soran, mint peldaul a halozati dugo, a termosztat, az elektromos erintkezok stb. Ujra hasznalat elott aztatjak, alaposan szaritsak meg oket 3. Ne használjon agressziv mosószereket emulziok, folyadékok, paszták stb. Formajában a szekrány tiszitásához. Ezek tobbek kozott eltávolithatják az informácios grafikus szimbólumokat, pédául jeleket, figyelmeztető jeleket stb. 4. Győzódjön meg rola, hogy a készülék tisztitás elölt lehult. MUSZAKI ADATOK: Feszültsg: 220-240V ~ 50 / 60Hz Teljesitmény: 2000W Max. Teljesitmény: 2200W Ip20  "Figyelmeztetés forró felület" - A rendelkezésre allyfelületek homséklete nagyobb lehet a berendezés muködese kozben, enti, hogy a hazelemek muködés kozben nagyon melegek, ovatosan MENTES !!! "NALJON" - FELHASZNALASI FONTOSSAG A keszülék felirata azt jalenti, hogy a keszüléket nem boritja ruházat, bogyeb textiltermékek, amelyek gyulladast okozhatnak.  EZETÉS: Ne használia jest a berendežest furdokádk, zuhanyzók, uzómedencék és haslonó vizartályok   Törödnk a természeti környezetiert. Papir csomagokat kérunk adjanak ápapirhulladékra. Polietilen zacskókat (PE) dobjanak ki a muanyag tartalyba. Kimerült gépe vissza kell adni a megfelelo taroló pontjához, mert a gépben levok veszélyes részek, veszedelmesek lehet a környezetnek. Az elektromos gép igy kell visszaadni, hogy korlátozzon a re-hasznalatát. Ha az elemek vannak a gépben, ki kell húzni ezeket és a visszakelladni kulön tároló pontjához.(MK) MaKeDoHcKn
BHIMAHHE:
YpeIOT e HameHcT cMo 3a DomaHa yNoTppe6a. YpeoT HE e HameHET 3a KomepujnaHa / npocnoHaHa ynoTpe6a. YpeoT HE e noroen 3a ynoTe6a Ha OTBopeHo. BnmaHne! Ppei ynoTpe6a, HeonxOndHO e da rI npoHTate OBne ynaTCTBa 3a pa6ota 3a da n36berHeTe HecpeKn i 3a npaBnHa ynoTpe6a Ha ypeDo. YyBaJTe ro Oba ynatCTBO n CyBaJTe ro 3a da MoKeTe IeCHO da Ro KOpNCtnte. I. HACOKN 3A BE3BENDHOCT HA KOPINCTEHe 1. Ппед унотpe6а, повереTe Дали habонот habeDEн Ha TabлчКаТа 3a ИдентиФИкuaNiJa Ond罗вара на lokaJIHnITE napamETpn Ha coJeHocTa, Ho 3anOMHeTe DeKa O3HaKaTа: AC- e Han3MeHnUHa CTpyja n DC e DC. 2. Повретею ураздот сао co 220-240V ~ 50/60 Hz заemjenштөр. 3. Ппд уnotpeba, оTKaчete ro и Incpabete ro Ka6eIOT 3a HanojyBaHbe 4. Поберете дадистулnot кабел и ппклuyokot Нем вдлпвоштetyваьа 5. Ппеди за врeme на уnotpe6ata, осигура对接е сда Кабелот за наюльные在他 спportera ИЗ OTВОЕн памен Или друг ИЗВОР на ТОЛINHA и OCTPN paбови StTO може за jaBHIMAHNE:
YpeDTo HameHcT cMo 3a DomaSha ynotpe6a. YpeoT HE e hamehet 3a Komepujna / npocnoha nHa ynotpe6a. YpeodrHEe noroen 3a ynoTpe6a Ha OTBopeHo. BnImaHne! PpeynoTe6a, HeonxOndHO e da rnpouHTate OBne ynatCTBa 3a pa6ota 3a da n36berHeTe HecpeKn 3a npabunHa ynoTe6a Ha ypeoT. YybajTe ro Oba ynatCTBO n CyBaJTe ro 3a da MoKeTe IeCHO da ro KopnCTnte. I. HACOKN 3A BE3BENDHOCT HA KOPINCTEbe 1. Ппед унотpe6а, поверete дали habонот habeDEн Ha tabлчkaТа 3a ИдентикauNiJa Ondroвара на lokaHHTe napamETPN Ha coJeHocTa, Ho 3anOMHeTe DeKa O3HaKATA: AC- e Han3MeHnUHa CTpyja n DC e DC. 2. Повретею ураздот симо co 220-240V ~ 50/60 Hz 3a3emjen wTekep. 3. Ппд уnotpe6a, откачete Ги Incравete Г КбелOT 3a HanojyBaHbe 4. Правешистуnot Кабел И пплuyokot Нем Вдпив Oштетуваа 5. Ппеди за врeme на уnotpeba tа, осигураjetе се.deka ka6eIoT 3a hanojyBaHbe He ce npOTera Hn3 OTBOpEN Пламен Илдpyг ИЗВОр Ha TOnJIInHa I OcTpNi pa6OBu wTo може DA ja oWTeTAT n3OlaциJa tа на Ka6eIoT. 6. Ппд пьада уnotpeба, отстранete Ги си te komnoheHTn 3a nakybahe. Виманe! Bo cnuyaj ha kyknшte co MeTaHn DeIOBn, Ha OBne eIemehn MOnke da ce npOTera maKy BvndnBa 3austHTHa Фолиja, koja nCTO Taka Tpe6a da ce OTCTpaHn. 7. YpeIOT He Tpe6a Da ro KopnCTaT Deca, Nua Co OraHnueh Pn3nKn, Cen3OpEn IIM MeHTaEN KanauTeT 6e3 HaD3Op Ha OBnacteHN IIN NCKyCHN Nua n CeKOraW BO CORlaCHOCT CO OBne yNaTCTBa. 8. Onpemata He e HameHeTa 3a ynoTpe6a Co haDbOpeuHn BpeMeHcN IpeKHyBaU nIi NocSeBEN daleuHcN ynpaByBaUcNTeM. ПЕДУПЕДУBAHBE: Obaa onpema може да ѩ користд eca посту od 8 rodnu n Iица co orpaHnueHn cH3OPh nIIM MeHTaJIHn cNoCo6HocTn, nIIM Iицa kon HeMaat NCKyCTBO nIIN 3HaeHe 3a onpeMata, CAMO ako toa ce hAnpaBn pod haD3Op Ha Iицe odroBOPHO 3a HNBHATA 6e3BeHocTa nIIN ce daJeHn INHcTpkyCUnn 3a 6e3BeHNO KOpNCTeHbHe Na ypeDOT n Ce CBecHn 3a OnaCHOCHTte NOBp3aHn CO HeROBaTaN ynoTpe6a. DeZaTne Tpe6a dA cn irpaat co onpeMata. YncTeHbTo n OdpKByBaHbEtO Na ypeDOT He Tpe6a da ro BpWAT deca, oCBen akO He ce noctapn od 8 roDNHN iCe hAdrIeDuBaHN 9. He octabajte ro ypeodot 6e3 na3op 3a BpeMe Ha onepaunjata. 10. He ro notonybajte anapatot n Ka6eIOT 3a HanojyBaJIe BO BODa IIN dpyrN TeuHocTn. 11. Kora ypeodot He e Bo ynoTpe6a, cekoraaw Tpe6a da ce ncknyu on wTekep. 12. Kora Bnieye To npnKnyOkOT od uTekepoT, Hnkoraa He ro nobNekyBajTe Ka6eIOT 3a HanojyBaHe cAmo Co npnKnyOkOT. 13. He ctabajte rH METAJHNTE CPEICTBA BHaTpe BO ypeDoT 14. Поньдюнелот He e odrobopeh 3a wTeTn wTo ce pe3yJtAT Ha He npabnHa ynoTppe6a Ha ypeIOT. 15. Tpe6a da ce 3anomn deka hekon deIOBn od ypeoT n Ka6HHeToT 3a BpeMe Ha pa6oTaTa ce MHory JxuKO, na 6nTe BnMaTeJHn H He rN DoInpajTe, MoKe da ce n3rOpnte. 16. HNKORA He ro nokpnbajTe ypeoT 3a BpeMe Ha paoboteTo IJI Kora He ce OJAnu ZeIocHo 17. 3aONMHeTe DeKa rpejHnTe eIeMeHTn Ha ypeoT 3a3emaat BpeMe da ce Olaadat ueIOCHO. 18. Kora ro kopnstte ypeodot, obe3beTe cooDBeTeH npocToP naN okOly. YpeodT He Cmee da dOnnpa IecHO 3aapanBn PpeMeTn 3a BpeMe Ha pa6oTaT, KaKo yKpacn, XapTneHn Kpnn, 3aBeCn, ObleKa nTH. 19. Геаньeto Инстаимрано BO баьатуpeba дa сидешпсалрно takа StTo KOнжторпес и дугпес ретулатори He можат дa сидат ДОпрени od Лице BO kaда ти по Туш. 20. Bo rpejaun 3a ypeu co BncoKa HAdMopcka BncoUHa, noJox6nte Ha pa3nHnTe nOJx6n Ha KOHeKTopiTe Tpe6a da 6nDaT BnIINBn Co OndaJeHocT od 1 m 21. Etuketata 3a noKpmbHe Ha rpejauo Tpe6a da 6nde BnJnBa nO nHctalaujata Ha rpejauoT 22. He moxe Te da ro HameCTnte rpejaOT dinpeKTHO IOd ITekepot, n BO 6n3nHa Ha 3aapanBn MaTepnjaiN KAKO wTO Ce 3aBeCN, 3aBeCN nTH. 23. YpeIoT He MoKe Da Ce KOpNCTn Co HaBOpEuHn BPeMeHcKn PpeKnHyBaun IIn DpyrI nOce6Hn CnCTeMn 3a DaJIeUHcKO ynpaByBaHbe 24. He ro n3noxybajte ypeoT ha aTMocepckn ycnoBn (doxd, coHcE, nTH.) IJIIN BO ycnoBn Ha BnCOKa BnaXHOCT (6aHbN, BnaXHN KaMnH KyKn) 25. Перношино поверува对接а на Кабелот за Наноюва对接е. Ако Кабелот за Наноюва对接е оштeteн, Треба дд го замени Спецьлзиран сервс 3д дд ИЗбоггете onachoct 26. He kopncTeTe ro ypeoT Bo 6n3nHa Ha 3aapanBn MaepnjaJIi 27.「peeheto mopa da 6nnde nHCTaInpaHO 28. He kopructeTo oOBJ rpejau Bo HnocpeHa 6n3nHa Ha KaJa, Tuw nnn 6a3eH 29. He kopructe ro oboj rpejau ako e ncyuTeH 30. He koprncTeTe aKO nMa BnJnBn 3HaaN Ha OwTeTyBaBe Ha rpejaOT 31. KopinCTeTe ro rpejaOT ha pamHa n ctaBnHa NOBpUnHa NII IN 3aKaYeTe ro Ha theNDot, DOKoJky e IpreDbNIDeHO OD IPOIN3BOIDNTeIOT. ПЕДУПЕДУBAE: He kopисеу OBOJ rpejau BO mAn npocstopn KaDe uTo nMa lyre Kon He moXaTcamn da rN OCTaBaT,OCBeH aKO He ce obe36eN noctoJah NaD3Op. ПЕДУПЕДУBAE: 3a Да Гу hamajnte ризIKOT OД NOЖAP, Држete Г TeKCTNIOr, 3aBeCITE ИИnpTe 3anaiBn MaTePnjaJIи OndaIeueHn HajMaIky 1 m Od ИЗЛe3OT Ha BO3dUxOT Ha rpejaYoT. Ce npenopaulyba eIektpnHaT a HcTaIauJia da 6nde onpeMeHa co aBTOMaTCKN прешивач со прешивача стура с capтна стура за полесma 6e3б endocct. 3a6endeшka: Ако кабелOTа наюльье ппnpклуокOTа стура ce oштeteни, cekoraw trpe6а да се заменат ппл поразват od спеццяализиран рpopадица 3a nonpaBkn.II. IPREyIpyBAHbA
1. Hikorai He Kopinctete ro ypeot ako e owteteh nll He yHKnOHa npabnilho. 2. Hikorai He KopinTeTe ro ypeoT aKO naHaI od BnCnHa npeTxOJHO I NOKaKByBa BnDnBn 3Haun Ha OwTeTyBaJIe. 3. He kopncTeTe npoJoxHn Ka6Iu nn dpyr n eJeKtpnuHn npNKnyOuCn KOH He rNcNoJHyBaat BaXeUKeTc STaHdapn N eJeKtpnuHnTe npOnscn. 4. Cekoja nonpaBka, demontaxa nIi 3ameHa Ha cIte deIOBn cekoraTpeBa da bnde HaprabHea od cneuJaIIN3npaH objekt. 5. Ако урети селемпгд Кабо StTo ce eelktpnHITe KOHTaKTHc He HablaJxH, npNKnyokot nIи Ka6eNot Tpe6a Da ce cywaTпрд Дa ГКориСТИte урети И HerOBNTe KOMNOHEHTN. 6. He kopncTeTe ro ypeDoT co BnaXn paue. 7. Kora nocton p3nk deka ypeoTe oWTeTeH NIKOgAaH He ce obnyBaJte camn da ro nonpaBnte ypeoT. 8. Hnkoraaw HeMoJTe Da rO MneTe ypeoT nOd npOTOnHa BOda nIi Ha TAKOB hauH hTO BODaTa Teue BO Hea. 9. He kopncTeTe DoaToCu KOn He rN npenopayBa npo3BODnteIoT. Tne moKe da npetCTaByBaat OnaCHOCT 3a KopnCHNKOT N MOKe Da npedn3BnKaat OwTeTyBaHe Ha ypeDoT. 10. yBepete ce deka ypeoT ce oJaI nped cKpaIpaIbe. 11. He ro donnpajte kyknteTo 3a BpeMe Ha ynoTpe6bata. 3a BpeMe Ha pa6oTaTa, KopncTeTe cMo KOnuHbA n PpeKInHyBaun. IIO NCKnyUyBaHBeTo, NOueKaJTe ypeIoT da ce OlaAn. 12. BHIMAHINE: Hekon DeNoBn OJ OBOj ypeJ MoKe Ja CTAHaT MHOrY KeuKO 3a BpeMe Ha pa6oTaT a N da npEiN3BnKaaT n3ropeHnCn.III. INPEDINPBATA YNOTPEBA
1.ИЗваде тоцелnot материлдза пakуbaьe и справete то кабелот знановуваьe 2. 3a BpeMe Ha HnctaIaujata, ypeDOT BO HnTy eDen cIyaj He Cmee da 6Ie IOKpneH co n30laucckn MaTepnjaI nn CInueH MaTepnjan 3. Kora ro coctabvate ypeoT, rpeu npaepn He Tpe6a da ce ceat nn ncevat 4.прд npвata ynotpe6а почитajte nCITe yntaTcBa 3a ynotpe6a. 5.Поберете дали наонот habeден Ha 03нakata 3a CTabaHe Ha npoI3BOJOT OДROBapa Ha HanoHOT Ha eJIeKtpuHaTа Мржа BOBaUNOT DOMNHTAJNJALJNA
KopncTeBeBex6a3aDaBex6aTeDBe DynKn BO SuOTo, MmHmym 180 cm od nooT n 20 cm od TabaHOT - CnkaA. OTkako Ke ng dynuat DnyknTe, CTabeTe ja pamna n 3abptKa. PpOBepeTe daan 3aBPtKne Tce eoBo 3aTeHaTu n NoToa 3akaueTe ro ypeoT ha SuOTo. ONIC HA PPOIN3BOIDOT CnkaB.ΓaBEn npeknHyBaayCnkaB.DAJEueH KOHTPOJIOP
1. Konque 3a BknyuBaBe / NcKnyuBaBe 2. PEXKIM 3.ДEH 4.CLOCK 5. NocTABN 6. HENELA / TAJMEP 7.MNH 8. + -> Konue 3a nokaybahe Ha tempepatpata. IcTo Taka cnjxK KaO konue 3a n36op 3a BpeMe / den. 9. --> Konque 3a HamaJyBaHBe Ha TempepaTypaT. VcTo Taka cnJxN KAKO Konue 3a n36op 3a Bpeme / den. 10. RESET - Tactepceetnpahe konue CJnkaIJIENI PAHEn 1. OK-cmm60n 2. FrpeHbe 1000W 3.Грени 2000W 4.ABtOMaTcKaΦyHKuJa 5. Tempepatyeh Dmncnnej 6.Дnevенпнka3 7.Пикжуbahe Na Врето 8.ONIcM60J-TajmepCTapTyBa 9. OFF CnM60N - NCKnyyBaHBe Ha TajmepoT 10. OTbOpn ja yHKuJaTa 3a oTKpBaHbe npO3OpuYIOTPE6A
1. PnTnCHeTe ro IaBHNOT pekHbay Ha deChata cTpaHa Ha ypeDoT - Cnka B. 2. YpeIOT cera e BO peXIM Ha NOIroTBeHocr. PnITnCHTe ro KonUeTo 3a BkNpyBaHe / NckNpyBaHe (1) H aIaNepHcKnOT ynpabyBaCnka C. 3a da ro BknyuHte BeHTnlaTopoT 6e3 rpeeHe, PnITnCHTe ro KonUeTo 3a BkNpyBaHe / NckNpyBaHe (1) DbanaTn. 3. Пушистelve то ковто MODE (2) за заюразовен реким: 1000W - YpeDTo nocTojano Ke 3arpeBa co MoKHOcT Od 1000W. 2000W - YpeDTo nocTojano Ke 3arpeBa co MoKHOcT od 2000W. Auto - Пушистене + и - за рачно за ща наимостиные темпатура. В овол щеким уретот ке щорхи поставна темпатура.b Функцима за оtmрваье на позорец - КORA визбрана obaa Функцина, уретот abTomatски ке ГИСКПУН ггөнөто akottemпатура на собна темпатура неаджю падне за 10 ° C.Tajmep
Tajmepot moke da ce noctabn camo kora e n36pana fynkunjata AUTO. 1. N36pepe AUTO cyHKuJa co KOnue MODE. 2.Прд Да Го NOCTaBNTe TajMepOT, MOPa Да Го NOCTaBNTe DeHOT И ВИСТИСКOTO BpeMe. 3.Пи捜сichteгКОнчETO DAYиИЗберeteгТЕКOBHNotДEH co KONCHbata+И-. 4.ПиТССЕТе ГОКУЧЕТСLOCKИ NOCTABETe TEGOBHOT ac CO KONUHbTa+I- 5.ПиТССЕТоКОЧETOMINиnoCTaBTeTnTEKOBHITeMHyTuCOKOnuHa+N- 3a6eNeuKa: Ako He ro nocTaBnTe BnCTnHcKTo (ctpyja) BpeMe H deH, ypeDoT Hema da paBoTH npabINHO, bndeJKN Ke paBoTN cnopeD CONCTBeHNOT BHaTpeSeH YacOBnK, ITO e HeToyeH.IOCTABYBAHbE HA TAJMEPOT
1.ПиТиСеTe ro konTuTo WEEK/TIMERи n36peTe ro DeHOT co konUHb+ - 2. Co npntckahe Ha konyeto SET UP, cmboJOT ON Ke cbetHe Ha ekpaHOT. Cera moKte Da ro nocTaBnTe BpeMeTo Ha CTapTyBaHe Ha TajMepot. Co konuHaTc CLK, MIN, + n - noCTaBeTe ro BpeMeTo Ha CTapTyBaHe Ha TajMepot. 3. NOBTO npTnckaHe Ha konueTo SET UP, cimboonot OFF ke ce 3anaHn Ha ekpaHOT. Cera moKeTe da ro nocTaBnte TajMepoT BpeMe 3a ncknyBaHe. 3A6EJIeUKA:BpeMeTo Ha 3aOnuHyBaHBe cekOraM Oma IMa IOHNsCA BpeHOCT OD BpeMeTo Ha NcKlNyBaHBe. 3A6ENEUKKA 3a da ro pecetnpate TaJmepoT Ha OCHOBHnTe NOCTABKn, npntncheTo KOncHeTo RESET.V. YICHTEHbI N ODPKUBAHbE
1. Cekoraw ncknyute ro anapatot od ctpyja nped da ro ynctnte. 2.Ako 3a BpeMe Ha YnCTeHbEt O npEiMeTn, KAKO ITO CE npNKnyyOKOT 3a HAnoJyBaHe, TepMoCTaT0, eIeKTPnuHHTe KOHTaKTn UTH. Ce HATOnyBaat PpeNIOBTOpHO Da ce KopNCtAt, Tne Tpe6a Da ce cyuata 3. He KopncTeTe arpcBHN DeTepreHTN BO φOpMa Ha emyI3n, IocnoHn, nactn, nTH. 3a YncTeHe Ha Ka6nHeToT. Tne, mery dpyrTo, MoKAT Da rN OTcPaHaT INΦopMaTbHNte rpaФuKn Cm60JI, kako wTO ce 3NaU, npdeynpeDyBaKn 3HaUNrN. 4. YBepete ce deka ypeoT ce onaann nped ncehe. TEXHNUKINODATOLU: Hanoh:220-240V\~50/60Hz Mokhoct: 2000W Makc. Mokhoct: 2200W IP20 "BHMaHne Ha TOnla nobpunHa" - TemnepaTypata Ha doCTanHte nobpunMoKe da bnde noroIema kora onpeMaTa paBTo, 3NaH deKa eIemEnTe Ha KyKuTTeTO 3a BpeMe Ha paBoTeHbETo CTAHyBaAT MHOry XeIKN, 3aCyBajTe BHMATEJIHO!  DBP3AHN" - BAXKHOCT 3A HANPEIYBAH E Hanncot Ha ypeoT 3nau Deka ypeoT He Tpe6a da ce nokpmba co a, kebba n dpytn TEKTUNHn npon3BOOn ITO MOJE da ppei3BnKaat nahebe.  TIPENYBAHbE: He KopncTeJe ja Obaa onpeMa BO 6Jn3Ha Ha KaDn, TyuSeBn, 6a3eHn n CInuHn pe3epBoapn 3a Boda.  Ce rpnKIMe 3a npnpOHaTcpeiHa. KapTOHCKITe NaKOBMOJIMe Da ce HameHaT 3a peuKNIPAhe. POnJIeTIHeOBHTe Kecn (PE) da ce oPnat BO KOHTeHep 3a Npactka. NcKOpNCTeHnot ypeI Tpe6a Da ce npeJaTe BO COoDBeTHNOt CKJaDnpaKINyHK, 6ndejkn He63bHNITE COCTOJK KN Ce HAOfAAT BO ypeOT MoKaT Da 6nDaT 3aRpo3yBaHe 3a cpeiHaTA. ENEKTPnuHnOT ypeI Tpe6a Da ce npeJaTe Ha HauHH Koj Ke OHeBO3MOxN HeROBa NOBToPA HYoNTpe6a N NcKOpNCTyBaHe. IOKOIky BO ypeIDOT hMa 6aTePN, Tpe6a Da ce n3BaDat NIOce6HO Da ce npeJaTaT BO CKJaDnPaUKnOT pNYKT.(GR) EAAA
BHIMAHHE:
YpeDTo HameHcT cMo 3a DomaHa yNtpe6a. YpeodrHEe hamehet 3a komepujnaHa / npocnoHaHa ynotpe6a. YpeodrHEe noroedn 3a ynoTpe6a Ha OTBopeHo. BnmaHne! PpeynoTpe6a, HeonxOndHO e da rI npoHTate OBne ynatCTBa 3a pa60Ta 3a da n36BerHete HecpeKn i 3a npabNHa ynoTpe6a Ha ypeDoT. CyBaJTe ro OBA ynatCTBO n cyBaJTe ro 3a IecHo da ro KOpNCtnte. I. HACOKI 3A BE3BENHOCT HA KOPINCTEbe 1. Ппед улотpe6а, поверete дали habонot habeDEн BO tabnukata co noDAtoCuOДROвара на lokaHHTe napametpn Ha coJeHocTa, HO 3anomHeTe DeKa O3HaKaTAt: AC e Hau3MeHnUHa CTpyja n DC e DC. 2. Поврете суpeдот со заименштекер od 220-240V ~ 50/60 Hz. 3. Ппд уnotpe6a, оTKaчete ro и IncnpaBte ro Ka6eIOT 3a HanojyBaHbe 4. Ocnrgpajte ce deka ka6enot 3a HanojyBaHbe n npNKnyOKOT HeMa BnIINBn OWTeTyBaHa 5. Ппеди за врeme на уnotpe6a, поверете далл кабелOT 3a habоюваье He ce npotera Hn3 OTBOpeH памен Или дуг ИЗВОР Ha TOnJIInHa N OCTprn pa6OBn wTO можe DA ja oштetedТИЗOLAцида Na KabelenOT. 6. Ппед пьату уnotpeба, отстране ти спес комноенти за пakуbaи. Вимани! Вслчaj на Ккшte co MeТАни DeЛови, Ha OBne eLemeHTN може да ce npOTera малКУ ВдЛИВа 3aштITHa Фолиja, koja nCTO takTpeба дa ce OTCTpaHи. 7. Ypeodot He Tpe6a Da ro KOpncTaT Deca, Nua co OgrpaHnueh Fn3nukn, Ceh3opeH nI MeHTaJIeH KanaunTeT 6e3 HAd3Op Ha OBnAcTeHn NII NCKyChn Nua n CeKOraW BO CORnaCHOCT CO OBne yNaTCTBa. 8. OnpeMaTa He e HameHeTa 3a yNoTpe6a co HaBOpEuHN BpeMeHcKn IpeKInHyBaU nIIN Noce6eH daleuHcKn ynpaByBauch cNCTeM. I P E D U N P E D Y B A H E: O b a a o n p e m a m o x e d a j a k o p i c t a T d e z a n o c t a r n o d 8 r o d h n i n I n u s a c o o r p a n h u e h n f i n 3 u q k n, c e h 3 o p h n i n M e n t a l h n C n o c o 6 h o c t n, i n n I n u s a k o H e m a a t n c k y c t b o i n i n 3 h a e h b e 3a o n p e m a t a, C A M O a k o T o a c h a n p a b v n p o d h a d 3 o p h a n i e od r o b o p h o 3a H H B h a t a 6e36e d h o c t a i n i n c e d a d e h n i n H N C T p y k u n i n 3a 6e36e d h o KopncTeHe Ha ypeoT n Ce CBeCHn 3a pn3nUte NOBp3aHn Co HeroBaTa ynoTppe6a. DeaTa He Tpe6a Da cn irpaat Co onpeMaTa. YnCteHeTo n OdpjyBaHeTo Ha ypeoT He Tpe6a Da ro BpHaT Deca, OCBeH aKO He Ce Noctapn oD 8 roDHH n Ce HndrIeDyBaHN 9. He octabajte ro ypeoT 6e3 na3op 3a BpeMe Ha onepaunjata. 10. He ro notonybajte anapatot n ka6enot 3a hanojyBahe BO BODa nn npyrn TeuHocTn. 11. Kora ypeodot He e BO ynoTpe6a, cekoraaw Tpe6a da ce ncknyu on wTekep. 12. Kora ro Bneute npNKnyOKOT od uTekepot, HNKORAHe ro nobNekyBajte Ka6eIOT 3a HanojyBaBe cAmo npeky npNKnyOKOT. 13. He ctabaje rH METAHITE CPECTBA BHaTpe BO ypeoT 14. Поньделове Нема дбидо odrobopeн 3a Нкakba wTeTa wTo npOn3JIeRyBa od He npabnHaT a ynoTppe6a Ha ypeDOT. 15. Tpe6a da ce 3anomn HeKa HeKo DeJIOBn OJ ypeDOT KabHcTOT 3a BpeMe Ha pa6otata ce MHOry KeShko, Na 6nTe BHNMaTeJIHn H He rN DoInpajTe, MoKe da ce n3rOpHTe. 16. HNKORA He ro nokpnbajte ypeodT 3a BpeMe Ha pa6otebeTo nn Kora He ce onaHn ceNocho 17. 3aONHete deka rpejHnte eIeMeHTn Ha ypeIoT 3a3eMaat BpeMe da ce Olaadat ueIOcho. 18. Kora ro kopnstte ypeoT, obe36eTe cooDBeTeH npocTo pHa n Okony. YpeoT He Cmee da donnpa IecHO 3aapanBn PpeMeTn 3a BpeMe Ha pa6OtaTa, KaKO yKpAcN, XapTneH KpN, 3aBeCn, ObleKa NTH. 19.「pejaot nHctaInpan BO ToaIeTOT Tpe6a da 6nDE nHCTaInpan Taka ITO KOHeKTOpnte IN dpyrnte peryIatopn He MoKAT da 6nDat OJnpEno Jnue BO KaIata Nn PoD Tyw. 20. Bo rpejau n 3a ypei n co BncoKa hAmOpcka BncoUHa, noJox6nte Ha pa3nHnTe InoJx6n Ha KOHeKToPte Tpe6a da 6nDaT BnIINBn Co OndaJeHocT od 1 m 21. EtnkeTnpaHbeto Ha rpejauot Tpe6a da 6nde BnDnBO no nHctanaJata Ha rpejauot 22. He moxe Ta ro HameCTnte rpejaOT dIpeKTHO IOd ITekepot, n BO 6n3nHa Ha 3aapanBm MaTepnjaiN KaKo 1TO Ce 3aBeCN, 3aBeCN nTH. 23. YpeIoT He Cmee Da Ce KopnCTn Co HaBOpEuHb BpeMeHcN PpeKHyBaU INI INpyr Ioc6Hn CnCTeMn 3a DaJIeunHcO ynpaByBaHe 24. He ro n3nojyBajTe ypeIOT Ha aTMocΦepckn ycNoBn (doXd, coHcE, nTH.) IInn Bo ycNoBn Ha BnCOKa BnaJxHoCT (6aHbN, BnaJxHn KaMnHn KyKn) 25. Перношино поверувajte ja соктоьату на кабелOT 3a наюжваъ. Ако кабелOT 3a наюжваъ e оштeteн, Треба за го замени спесиjsлизран сервис 3a за избerte onachoct HekopncTeTe ro ypeoT BO 6n3nHa Ha 3aapanBm Maepnaja 27. FrpeHbeto Mopa da 6nde nHCTaInpaHO 28. Mny xnpoiopoiei te autnv tn thepmaotpa o e aecn yietviaon m taviepa, vouc n Tioiva 29. Mny xnoiopoioite auty tn 0epuaotpa ev exe I Teo 30. Mny to xpnoiopoite εav utapxouv opata onuáia βλαβns oTo θερμavtnpa 31. Xpnoiopoioiote Tn 0epmuotpa oE eTinTcN kai Otaeepn Etniavia n ouvdeote Tnv otov toixo, ev npoBtETa aToTov kataoKeuaoTn. IIPOEIOIH2H: Mny xnpoiopoite autnv tn 0epmuotpa 0e mikpa domegaata oTou utapxouv atou Tov dev mtopouv va ta aqnoouv mova touc, ktoc ev eaoaaiZetai ouvxnc EpiBleu. IIPOEIOIHsH: Ia va 1 Tov Kivduvo Tnpkayiac, qualste Ta uqaoata, tic kouptivec n aaaa eukekta uikac o aotaaon toulaxioTov 1 m aTnV Edo tou Συνιοτάται η έλεκτρίκή εγκαταστασην α εΙναι εφοδίασμένη με αυτόματο διακόπτη προστασίας ρεύματος με ενα ρεύμα εκκίνησης 30mA για αυξμένη ασφάλεία. Σημείωση: Eáv to kaλώδιο tροφόδοσίας ἡ Φις tροφόδοσίας εύναι κατεοτραμένο, πρέπει πάντa va αντικαθίστatai ἡνα Επιοκεύαζεται από Εξεδικεύμένο συνεργείο επιοκεύων.II. PPOEIADONOIHSEIE
1. Mny xpnoiopoioieite n ooukeun eav ev iai kateotpaumevn n dev leitoupyei oomega. 2. Mny xpnoiopoioie iTE Tn OuaKeuun Eav Exe I Teo eI aTIO uOoc Tpiv KAI Emuavi ZeI opata oNmuia Znmuic. 3. Mny xnpoiopoite Kaawia eKtao n aAe ng nEKTpiKc TpiEc Tou dEv Pnpuv ta Ixovt a pOtt a kai Tou c NkTkoC kavoviooC. 4. OTOIAHNTTE EITIOKEU, aTOSUVAPMOLOYNO n avTKATAOtaON oTIOIOWDHTOTc EApTNmuTsw PpETIE TAVTA va yivei aTIO E\xIDIKUeVn EyKatotaON. 5. Eav n ouokkun kai ta otoixia otwoc i naekptkec eTaae c ivai uypa, to buo a n to kaowio tha pntie va oteywoei piv xnpoiopoioeTe tn ouokun kai ta eapntmuata nC. 6. Mn xpnoiopoioite tn ouokueun BpEymueva xepia. 7. Œtav utápyéi kívóuvoc va kataoTPaΦéi ng ouokéuñ NOTE μnv πpooTαθnoεTE va επιοkeuáσεTE Tg ouokéuñ móvoi σaç. 8. Noté μην πλένετε ηισύοκεύμενο ἀρό ἡτέχούμενο τέτοιο τόποώτε σας ας αὐτό. 9. Mny xnpoiotoiite aegouap Tou dev ouviotwtai aoekuaotn. Mtopei va o Kivduvo tov npoTn kai va pokaesouv OTN OUKEUN. 10. Bεβαιωθείτε ὄτη Σιοκεύν ἐχει κριώσει πριν αποθηκεύσετε. 11. Mny ayyizTe to TepiBAnma kata tn xpno. Kata tn Ieitoupyia, xpnoiopoioaneo vivo Koupiia kai diakottec. Meta tnv atevepyotoinon, TepiEvTe va kpuwoe i n ouokeuñ. 12. ΠΝΟΣΟΧΗ: Μρισμένα εξαρτήματα αυτής της συσκεύncyς μπορείνα εἶναι πολύ ζεστά κατά τη λειουργία καινα προκαλεσουν εγκαύματα. III. PINTHN POTXPHSH 1.Apaipoe 0Ao to uAiko ouakeuaiaac kai iowto KaAioTO pOPOOoi 2. Kaia t n diapkeia ts ekyataaon, n ouokue n de vtopei o Kauia pipintwn va kalutntai eovotikó uliko n npopoiou uliko 3. KaT a Tn ouvapmooyon tns ouokueu, oI bokoi kai ta bokapia ev npetie va KOTOUV n VA KOTOUV 4. Piv aTó tvn pWtn xpon δiaβaote oλεs tiC oDnyiecs xponc. 5. ELevTe av n tao n Tou avaypapetai oTnv etiketa tropoobocia c Tou TPOIOVTOC AVIOIIXe OTNV taon tou dIKTuOu PEuMaTOc OTo OTiIaETKATAZTAZH
Xpnoiotnoiote trpntavi ia va tputnnoet e duo tputte c oTov tox, ToulaxioTov 180 cm aTo To daTebo kai 20 cm aTo Tnv opooh - EkoA A. Moic exete tputnne i Tc tputte, totoetne To paElaapi kai BiDwate. Bbaiaowte ot i oi BiEc eivai kaIa Ophiyevcs, otN ouVexia, Kpeaote tn oukeun otov tox.IPIIPAΦH IPOIONTO
Eikova B. KPYIOZ DIAKONTTHZ
EvpyoToin / aTeevpyoToin = evpyoToin / aTeevpyoToin.Eikova T. THALEXIETHPIO
1.Πλκτρο ON/OFF 6.WEEK/TIMER 2.AEITOYPTIA 7. MIN 3. HMEPA 8. +-> Koupiyia tny auogon tnC thepokpaiaac. Eiongs xpoiueu C koupi Eioiyng yia wpa / nepa. 4.CLOCK 9. -->Koumiyia t n i nTgEepokpaoiac.Eionx npnoieuei ogoupi Eiloyngia wpa /nepa. 5.PYOMIISH 10. RESET - Kouμπί επιαφοράς χρονδιακόπηEkoaA. INAKALED
1. Σύβολo ON 6. Eupavion nepas 2. Ioxus θερμανος 1000W 7. Eμφανιση ωρας 3. Iaxus Θερμανος 2000W 8.ΣuβoLo ON - EkkivnTou xpoovδiaKoTTn 4. Αειτουργία AUTO 9. Σύβολo OFF - διακοπή χρονοδιακόπη 5. Evδειξη θερμοκρασίας 10.AvoiE Tn 5eToupyia EvToTIOuOu npapAeupwIV. XPH\SH
1. Pio Tov Kupio biakottn ot n deiia npca oukeunc - Eikova B yia va evpyotoinoe kai va anvepeytoinoe tn ouakeun. 2. H ouokuei eivai wpa oE kataoaon avauovn. Pntote to koupti evpyooinan / aeepyooinan (1) 0to nAeipio - Eikova 3. Patnote to koupti MODE (2) tn aipa tou yia va eIeEeTov tpoTIOuropyiac - 1000 W η συοκεύν θα θερμαίνεται συεχώς με 1000 W. - 2000 W, η συοκευή συνεχώς ὄρμαίνεται με 2000 W. - Autouatn aeitoupyia, patnoe ta kouptia + kai - yia va puthetaiote xipokivnta tn thepokpaia. H oukeun eioepxetai autopata ot n aeitoupyia ouvtnpnans thepokpaiaac. - Aetoupyia avixveuans aoivxto npapou - Otav autn n aeitoupyia evai eTIAeYmuyn, n ouokun th a aneepeyotoinaei autopata tn 0epmuovn evn 0epukpaa domegaifou eiw0ei faviKa tata 10^ 4. Tia va aTnevepyoToiAoTe Tn ouKeuH, PAnote To PAnKtpo EvpyoToiOng / aTnevepyoToiOng (1) OTO nAeXeiPioTpio. H ouKeun Kpuwvei Ka oNvE i e Ta an Tepitou 30 dutepeoAeTTa.PYOMIISH TOY XPONOY E2ΩTEPIKHΣ ΣYZKEYH
ZHMEIΩSHE:Aev DEv puθmuεTe TnV TPexouoawpa KAI TnV Nμepa Tcεβδoáac, n OuaKeuñ δev θa λεitoupynoει σωotá επeɪñ θa λεitoupynoεi ouφwva μe To δikó Tnc EσωtepiKO poλoi, to OTIOEivai Eσφαμévo. 1. Eπλεξτη λειουργία AUTO xρησιμοπιωντας το πλήκτρο MODE. 2. Piv aTo t n puOthou xpoovOpou, oioTe TnV npEpa Tns Ebdouaac kai Tnv tpexoua wca: - Pntote to koupti DAY kai etiEeT nTv tpxouo a npoiotioivac ta koupiia + kai -PiepveTe eowc otou n oovn otapatoei va avbaoBnei. - PIIeTe To TnAknTpo CLOCK kai puθmuTe Tnv Tpexouoawpa xpnoiotoiwvtac ta koumtia + kai - . NepiéveTe εως ὄtou n οθovn έαμatnoει va avαβοσηνει. - PataoTE To KOUPTI MIN KAI puOmuTe Ta TpexovTa AenTAt XpnoiopoToiWvTac Ta KoumuTia + Kai -. IepiuEvTe EwC otou n ofoVn OtaaatnoeI va avaoBnvei.PYOMIENIPOPTPAMMATMOYQPA
Autn n aeitoupyia oac eTTIPeTEI va TPOypaumiaTe Tnv wpa yia va evpyoioaete kai va aTVEpyoioaote Tn ouakeun Kahe nepa Tns Eboaadocntv Etiuun O xpvodiaokontns mtopei va puthetai movo apou eTNIAEETe Tn aeitoupyia AUTO kai puthetaiEte To eoWTEPIK oPoiI nS oukeuNc. 1. PatnoTe To koupti WEEK / TIMER Kai eTtaleTe Tnv nepa Tns 8bodopa aotv onoia 0eAte va puthetaiaetn oukeun va evpyotoieitai Kai va anvepeytoioietai autouata xpojmuotoiwrtac ta kouptia + Kai - . Pepieveete ec otou n ofoyn taatane i avaboBnei. 2. Apou patnoe To koupi SET UP, to ouoLo ON avaei otnv oovn. Twa ptnopeite va puthetaene tvw npa evapcns tou xpvobiaokottn. Xpnoiopoioote ta nnktpa CLOCK, MIN, + kai - yia va puthetaene tnv wpa evapcns tou xpvobiaokottn. Pepievee Tc otou n oovn otapatnoe i va avaoobhvei. 3. Apou πatnoεe gavá to kouμπi WEEK / TIMER (6) kaση Μυνεχει πεοντας to πλκτρo SET UP, to σύμβολo OFF θα αναψει στην oθόνη. Tupa μπορείte va puθμioεte to xρονο atnevepyoioinας tou xρovδiaokntη. Περιεveτε εως στου ηοθόνη σταμαποει va avaooohv1. ΣHMEIΩΣH: o xρονος εναρξης πρεπει πάντα σελίνι μικρότερος από τον xρόνο διακοπής. HME H Ia va eaTavaapepeTe Tov xpvovdiakontn otic npoetiiayevecp uthetaic, pntote to koupti RESET.V. KAΘΑΠΣΜΟΣ KAI ΣYNTHPHΞH
1. Pniv aTo ToV kaOaIpo aToouvdeTe TAVTO TOn OoKEUn aTo Tn VPiCa. 2. Av kata n diapkeia twv epyaioov kathetaiou, oTiwG to G, o epuoTatns, oi nEKTPIKc ETTAPcK.AT., evai EPTOTIOeva Tpiv ETTAVAXPOIPOIOINOuV, PPETIE va OTeyvwosouv KA 3. Mny xnpoiuioite EITIOEIA aToppuavTKa ME Tn oopn yaaKwAATWv, Aooiv, TAOV K.AiVa KaOApiaeTe To TepiBnauaMToPOuv, mTaagu aaawv, va apaipeouuva Ypapikca OmuoIa TAnpoopoiw, OTWC IVAKIDc, TPOEIOTIONTIKa anata K.ATI. 4. Bebaiwoeite 0ti n oukeun eXe kpuooi piv kaapoe.TEXNIKA ΔΕΩOMENA:
Táon: 220-240V ~ 50 / 60Hz IoXúC: 2000W Méy. IoXúC: 2200W Ip20  kata nIeitoupyia, ePONTIA! "Ppoooxn kautn eTia" - H 0epuokpaia twv diaeoiw eTipaveiw mtopei va evai yalutepn otav aeitoupyio EoTlOIOc, npayma Tou omaive oTI ta oToyEA Tou ppihmuato yivovta TLOU zotata ndiapkeia tnc aeitoupyiac  "MHN KAAYTEPATE" - ERTPAΦH Σημασία H επιγραήσι Πησιοκεύν σημαίνει ὄτι Σιοκεύν δεν πρέπειν αλάντει ται έρουχα, κουβέρτες και ἀλλα κλωτούφαντουργία προίόντα ΠΟθα μπιρούσαν vα προκαέσουν ανάφεξη.  IIOIHs: Mn npnoiopoIE autov tov eoio kovia o e naiaviepe, vouc, Tioive cai npapoioe dqaevee  的 to 10000000000000000000000000000000000000000000000000000000000000000000000000000000000000000000000000000(CZ) CESKY
POZOR:
Přistroj je určen pouze pro domácí použití. Přistroj není určen pro komerčné Či profesonální použiti. Přistroj NENI vchodné pro použítí venku. Pozor! Pred použitim je nezbytné precist si tento námod k obsluze, abyste predesli nahodám a správnému používání zařizení. Uchovávejte tuto priručku a udržujte ji tak, abyste ji mohli snadno používat.I. POKNY PRO BEZPEČNOST POUžITÍ
1. Před použitím zkontrolujte, zda napěti uvedené na typovém štītku odpovídá mistrím parametrům slanosti, ale nezapomeće, ze označeni: AC- je střidavý proudly a Jednosměrný proud DC. 2. Pripojte zařizení pouze k uzemné zásuvce 220-240V ~ 50/60 Hz. 3. Pred použitím odpojte a napnéte napájecí kabel 4. Ujistete se, ze napajeci snura a zastrcka nemaji zdné viditelné poskozeni 5. Pred a po použiti se ujistete, ze napajeci kabel není napnut prs otevřeny plamen nebo jiny zdroj tepla a ostre hrany, které mohou poskodit izolaci kabelu. 6. Před prvním použitím odstrańte věsechny současti baleni. Pozor! V pripadě pouzdra s kovovými Častmi je na těchto prvcíchlehce viditelné ochranná fólie, která by měla BYT také vytažena. 7. Pristroj by nemel používat déti, osoby s omezenými fyzickými, smyslovými nebo mentálními schopnostmi bez dozoru oprávněních nebo zkušeních osob a vždy v souladu s temito pokyny. 8. Zařizení není určeno k použití s externími casovými spinači nebo samostatnám děkovým ovládáním. VAROVÁNÍ: Toto zařizení lze použít u detí nad 8 let věku a osoby s omezenou fyzickou, smyslovou nebo mentalní schopnosti nebo osoby, které nemají Žádné zkušenosti ani znalosti zařizení, pouzePokud se tak déje pod dohledem osoby odpovědné za jejich bezpečnosti nebo byly obdrženy pokyny týkajici se bezpečného používání zařizení a jsou si vědomy nebezpeci spojenych s jeho používaním. Deti by se se zařizením naměly hrát. Čistěné a udžržbu zařizení by naměly provadět deti, pokud nejsou starů 8 let a jsou pod dohledem 9. Bēhem provozu nenechávejte zařizení bez dozoru. 10. Neponořujte spotřebič a napájecí kabel do vody nebo jinych kapalin. 11. Pokud se zařizení nepoužíva, mělo by byt vždy odpojeno od elektrické zásvky. 12. Pri vytahnuti zastrcky ze zasuvky nikdy nepokladeje napajeci kabel pouze za zastrchu. 13. Do prístroje nenechávejte zádné kovové prědměty 14. Vyrobce neodpovidá za škody zpúsobné nesprávném použitím prístroje. 15. Mějte na paměti, ze některé casti zařízení a skřínky během práce jsou velmi horké, takné bud'te opatrní a nedotýkejte se, můžete se spálit. 16. NIKDY nepokladejte pristroj bēhem provozu ani po uplném vychlazení 17. Nezapomente, ze topné clánky zařizení majícas uplné vychladnout. 18. Pri používání zaízení zajistěte dostatečné prostor nad a kolem. Prístroj se během práce nemuže dotýkat zhádnych snadno hořlavych predmětů, jak je sou dekorace, papirové utěrky, závesy, oděvy atd. 19. Ohřivač instalovaný v koupelné by měl BYt instalován tak, aby se konektory a dalsí rególáry nemohly dotýkat osoby ve vaně nebo pod sprchou. 20. U ohrivacu pro vyskové sestavy by měla byt viditelné poloha rúznych poloh konektoru ze vzdálenosti 1 m 21. Oznaceni krytu ohrivace by melo byt viditelné po instalaci ohrivace 22. Ohřivač nemůžete umístit prímo pod zásuvku a v blízkosti hořlavych materialú, jako jsou záclony, závesy atd. 23. Zařizení nelze použít s externími chasovými spínači nebo jinými samostatnémi systémy dálkového ovládání 24. Nevystavujte pristroj atmosferickym podminkám (dést, slunce atd.) Nebo použití v prostředí s vysokou vlhkosti (koupelny, vlhkte taborište) 25. Pravidelné kontrolujte stav napajeciho kabelu. Pokud je napajeci šnūra poškozená, měla by BYT vyměnéna speziálnim opravovacim zařizením, aby se predešlo nebezpeci 26. Zařizení nepoužívejte v blízkosti hořlavych materialú 27. Ohrivac musi byt nainstalovan. 28. Nepoužívejte tento ohřivač v bezprostřední blízkosti vany, sprchy nebo bazěnu 29. Nepoužívejte tento ohřivač,Pokud spadl 30. Nepoužívejte,Pokud jsou na ohřivači viditelné známky poškození 31. Ohřivač používejte na rovném a stabilním povrchu nebo jej pripevněte ke stěné,Pokud to stanoví vyrobce. VAROVÁNÍ: Nepoužívejte tento ohřivač v malychmistnostech, kde jsou lidé, kteri je nemohou opustit sami,Pokud není zajistěn stály dohled. VAROVÁNÍ: Abyste snížili riziko požáru, udržujte textilie, záclony nebo jiné hořlavé materiały alespón 1 m od vystupu vzduchu z ohřivače. Doporucije se, aby byla elektrická instalace vybavena automatickym jističem s 30 mA proudem pro zvyseni bezpečnosti. Poznámka: Pokud je napajeci šnūra nebo sǐtová zástrčka poškozená, měla by byt vždy vyměnéna nebo opravena odbornou opravovnou.II. UPOZORNÉNÍ
1. Nikdy nepoužívejte prístroj,Pokud je poskozen nebo nefunguje správně. 2. Nikdy nepoužívejte prístroj,Pokud klesl z výšky dříve a vykazuje viditelné známky poškození. 3. Nepoužívejte prodlužovaci kabely nebo jiné elektrické zásvky, které neodpovidaj platnám normám a elektrickým predpisüm. 4. Jakékoliv opravy, demontáž nebo vyměna dílù by měly být provádeny vždy specializovaným zařizením. 5. Pokud je zařizení a privky, jako jsou elektrické kontakty, mokré, musí byt konektor nebo kabel vysušeny pred použitím pristroje a jeho současti. 6. Pristroj nepoužívejte mokrýma rukama. 7. Pokud existuje nebezpeci poškození zařizení NIKDY se nepokoušejte opravit zařizení sami. 8. Nikdy neumyvejte zařizení pod tekouci vodou nebo takovým zpúsobem,Že k ní voda klesá. 9. Nepoužívejte príslušenství, které vyrobce nedoporučuje. Mohou preydastavot nebezpeci pro uživatele a mohou zpúsobit poškození zařizení. 10. Ujistete se, ze zařizení bylo pred uložením vychladné. 11. Během používání se nedotýkejte krytu. Během provozu používejte pouze knofliky a spínače. Po vypnutí počkejte, āž se zařizení vychladne. 12. UPOZORNÉNÍ: Některé Časti tohoto zařizení se mohou během provozu velmi horko a mohou způsobit popáleniny.III. PRED PRVNIMPOUZITIM
1. Odstrańte veśkery obalový material a narovnejte napajeci kabel 2. Bēhem montáze nesmi byt zaření v Žádném pripaděPokryto izolačním materiaLEM nebo podobným materialem 3. Pri montázi zaízení nesměji byt tramy a tramy šezány ani šezány 4. Pred prvnim pouzitim si preectete vsechnyPokyny k pouziti. 5. Zkontrolujte, zda napeti uvedene na stitku pro stipani prodktu odpovida napeti v elektricke siti ve vaši domácnostiINSTALACE
Pouzijte vrtak pro vrtani dvou otvoru ve stene, minimalne 180 cm od podlavy a 20 cm od stropu - obrazek A. Jakmile vyvrtejte otvory, vlozte podlozku a zarsoubujte. Ujistete se, ze srouby jsou dobre utazené a pote zaveste zaizeni na stenu.POPIS PRODUKTU
Obrázek B. HLAVINÍ PREPÍNAC ON / OFF = zapnutí / vypnutí.Obrazek C. REMOTE CONTROLLER
1. Tlačitko ON / OFF 2. MODE 3.DEN 4.CLOCK 5. NASTAVENI 6. TYDEN / CASOVAC 7. MIN 8. +-> Tlačitko pro zvýšeni teploty. Rovnéž slouží jako tlačitko pro vyberčasu / dne. 9. ---> Tlačitko pro sniženi teploty. Rovnéž slouží jako tlačitko pro vyberča / dne. 10. RESET - tlačitko pro resetovaničcasovaceObrázek D. LED PANEL
1. Symbol ON 2. Vykon topeni 1000W 3.Vykon topeni 2000W 4. Funkce AUTO 5. Zobrażeni teploty 6. Denni zobrazeni 7. Zobrażnićcasu 8. Symbol ON - spusteni casovace 9. Symbol OFF - vypnuti casovace 10. Otevrete funkci detekce oknaIV.VYUZITI
1. Stiskutim hlavnijo vypinače na pravé straně zařizení - Obrázek B zapnéte a vypnéte zařizení. 2. Zařizení je nyní v pohotovostnim režimu. Stisknéte tlacitko zapnuti / vypnuti (1) na dalkovém ovladači - Obrázek C. 3. Postupnym stisknutim tlačitka MODE (2) vyberte provozní režim: - 1000 W se zařizení neustále zahrivá s 1000 W. - 2000 W, zarizení se bude neustále zahrivat s 2000 W. - Automatický režim, pomoci tlacitek + a - nastavte teplotu ručné. Zařizení automatický prějde do režimu udržováni teploty. - Funkce detekce otevreného okna - Pokud je tato funkce vybrána, zařizení automatický vypne topení,Pokud náhle klesne teplota mistnosti 10 ° C. 4. Chcete-li zafrzeni vypnout, stiskneite tlacitko zaput/ vypnuti (1) na dalkovem ovladaci. Zafrzeni se ochladia vypne se prbliznepo 30 sekundach.NASTAVENI HODIN INTERNIHO ZARIZENI
POZNÁMKA: Pokud nenastavíte aktuálnécas a den v týdnu, zařizení nebude fungovat správné, protoze bude pracovat podle vlastnich internich hodin, což je nesprávné. 1. Pomoci tlacitka MODE vyberte funkci AUTO. 2. Pred nastavenim casovače nastavte den v týdnu a aktuálni ās: - Stiskněte tlacitko DEN a vyberte aktuálné den pomoci tlacitek + a -. Pockejte, až prestane displej blikat. - Stiskněte tlacitko CLOCK a pomoci tlacitek + a - nastavte aktuálnécas. Počkejte, až prestane displej blikat. - Stiskněte tlacitko MIN a nastavte aktuální minuty pomoci tlacitek + a. - Počkejte, až prestrejane displej blikat.NASTAVENI PROGRAMOVÁNÍ CASOVÁC - CASOVAČ
Tato funkce umozhnuje naprogramovat cas pro zapnuti a vypnuti zaizeni každý den v týdnu v pozadovaném case. Casovac Ize nastavit až po vybreu funkce AUTO a nastaveni internich hodin zařizení. 1. Stiskněte tlačitko TYDEN / CASOVAC a pomoci tlačitek + a - vyberte den v týdnu, ve kterém chcete zařizení automaticky zapnout a vypnout. Počkejte, až prestane dispiejblinkat. 2. Po stisknuti tlačitka SET UP se na displeje rozsvítí symbol ON. Nyní muzete nastavit ās spustěnéčasovace. Pomoci tlacitek CLOCK, MIN, + a - nastavte ās spustěnéčasovace. Pockejte, Ľ prestane displej blinking. 3. Po opětovnéstisknuti tlacitka WEEK / TIMER (6) a poté stisknutim tlacitka SET UP se na displeji rozsvítí symbol OFF. Nyní muzete nastavit Ācas vypnuti casovače. Pockejte, až prestane dispiej blikat. POZNÁMKA: ās záčatku musí být vždy nižsī než ās ukončeni. POZNÁMKA Chcete-li obnovit výchozí nastavení casovace, stisknéte tlacitko RESET.V. CISTENI A UDRZBA
1. Pred Čistěnín vždy odpoje spotřebič od elektrické zásvúky. 2. Pokud během Čišěni jsou predměty jako napájecí zástrčka, termostat, elektrické kontakty atd. Namocěny pred opětovným použitím, měly by být dūkladné vysušeny 3. Nepoužívejte agresivn Čistici prostředky ve formé emulzi, lotionú, past, atd. K Čišěni skrǐne. Mohou mimo jiné odstranit informačné grafické symboly, jak je sou napřiklad znaky, varovné značky atd. 4. Pred Čišćinīm zařízení se ujistěte, Že se zařízení vychladlo. TECHNICKÁ DATA: Napétí: 220-240V ~ 50 / 60Hz Vykon: 2000 W Max. Vykon: 2200W Ip20  "Upozornéni na horky povrch" - Teplota dostupnych ploch muze byt vyssí, když je zařizení v provozu, což znaméná, ze se provozu béhem provozu zhorsuju prky skrǐne, USETRTE POZOR!  NEKLIDUJTE" - DULEZITE NAPRAVY Napis na zaizeni znamená, ze zaizeni nesmi bytPokrty odévy, prikrývkami a jinymi výrobky, které by mohly zpúsobit vzniceni. UPOZORNENI: Nepouzivejte toto zaifeni v blizkosti vany, sprchy, bazeny a podobné vodni nadrze.   Ochrana zivotniho prostre. Karton odevzdeje do sbru. Polyetylenové sácky (PE) vyhazujte do kontejneru na plasty. Vysloužily pristroj odevzdeje do prislusného sberného dvoru, protoze nekteré casti zarizeni mohou predstavovat pro zivotni prostre di nebezpeci. Elektrický pristroj odevzdeje tak, aby se omezilo jeho opětovné používaní. Pokud jsou v pristroji baterie, vyjměte je a odevzdeje do prislusného sberného mista zvlást'. Pristroj nevyhazujte do popelnic ani kontejneru na smśný odpad!!(RU) PUCCKN
BHIMAHHE:
YcTpoIcTBo IpeHa3HaueHo TOnbKO IJRA DomaHrO NcNoIb3OBaHn. YcTpoiCTBO HE npEaHa3NaYeHO dIy KOMMepueckoro / npoPecCNoHaJIbHOrO NCpOJIb3OBaHnIy. YcTpoIcTBo HE nOxDxOaIT dJa nCNoJIb3OBAHnHa OTKpbITOM Bo3dyXe. BHMaHHe! Ipeed nCNoIb3OBaHHeM Heo6xOdmo npouHTaTb daHHO pyKOBOCTBO NO 3KcIIyatau, uTO6bl n36exaTb HeCuaCTHbIX clyuAeB IN paBnIbHO nCNOJIb3OBaTb yCTpOJCTBO. CoXpaHnte 3TO pkoBOdCTBO n XpaHnte erO, uTO6bl Bbl MOrIIN JeRKO erO nCNoJIb3OBaTb. I. PUKOBOJCTBO NO B30PACHOCTN NCIPOJIb3OBAHNA 1. Перацлобагим убадиесь, чо наразожеши, уka3aHHoe Ha паспортой Табличke, COOTBETCTBYET ЛOKальным napametpaM COJIeHOCTN, HO пOMHITE, ChTo Маркировka: AC - поеменный тok, a DC - постаянь. 2.Подклюаite yctpoicTBOToIbkoK3a3eMneHHOpo3etke 220-240B\~50/60 T. 3.перд Испосьогаиме packataiteи Вьіровягіte shyp пітаня 4. Y6eIntecb, yTO shHyp nHTaHn I BNlka He IMeIOT BnIMbIX NOBpeKdEHN. 5. До и посе Incnoьзовая убeДиТecь, чTo Шур ппаня He HaTЯнТ Ha OTKpbIToe Пламя Или другов Источник Тени и OCTpbIe Края, кOTOpbIe MOryT NOBpeДиТь ИЗОЛЯцИКабеля. 6. Перацпьим Испльбизовием удал�е BCE komноentы уразкови. Внимани!В слуае кожуха сmetаллческим часгмп на 3тх лементх может 6ытв pactянту сlerka вдимая зашишая пеника, кOTOPYTOТAKKE следуET удалNTb. 7. UcpoCTBO He DoJxHO NcNoB3OBaTbCra DeTbMn, JIuamN C OrpaHueHHbIMN fN3UeCKIMN, CEHCOPHBIMN IIN yMCTBeHHbIMN cNOcO6HoCTaMn 6e3 npncmOTpa yIOJIHOMOeHHbIX IIN ONbITbIX JInC IN BCeTdA B COOTBeTCTBnN C 3TNIMn IHCTpyKzmaMn. 8.ObopydOBaHne He npedHa3HaueHo IJIy nCNoIb3OBAHnC BHeuHMn peJe BpeMeHn IJI OTDeJIbHOI CNCTeMOI INCTaHcNOHHOrO ynpabNeHnA. IPEyIeHHe. DaHoe o6OpDobAHne MoryT nCNoB3OBaTb DeTn CTapWe 8 let n Iuca C OraHnueHHbIMN cHcOpHbIMN IIN yMCTBeHHbIMN cNOcO6HOCTaMn IIN Iuca, He IMeOuNe ObyTa IIN 3HaHn OB o6OpDobAHn, TOJbKO eCIn 3To deJaTeCn POD H6JIIOHeHem Iuca, OTBeTCTBeHHoro 3a IN X Be3ONaCHoCTn IIN 6bln DaHbI INCTpyKcU N O 6e3Opanchom nCnoB3OBaHn YcTPOiCTBa IN OCBeOMJeHbI O6 OnaCHocTAX, CBa3aHHbIX C erO nCnoB3OBaHnEM. DeTn He DoJXHbI InPaTb C o6OpDobAHnem. YnCTka nTexHnueckoe OBCnykBaHne YcTPOiCTBa He DoJXHbI BblOnHЯTbcr DeTbMn, ecIn OHn HE CTapWe 8 let n HaxOJaTc POn H6JIIOHeHem 9. He octabnIte yctpoicTBo 6e3 npncmotpa BO BpeMa pa6Obl. 10. He norpyxaiTe npnbop n shnyp nntaHn B Body nn dpyrne XndKoCTn. 11. Korda yctpoicBO He nCnoJb3yeTcra, OHO Bcerda DoJxHo 6bITb OTKnIOueHO OT 3JIeKTPnueCKo pO3eTKn. 12. BbHIMaBnKy n3 po3eTKn, HNKoIa He TAHnte 3a uHyp NITaHnT OJbKO 3a BNkY. 13. He klahti e Hkaknx metaJInecknx npedmetOB BHytpn yctpoiCTBa 14. ПОНЗВОДИТЕЛБ He HeCET OTBETCTBEHHOCTHa yUepe6, Bbl3BaHHbI HENpaBnJIbHbIM INCNoJIb3OBaHHem yCTpoIcTBA. 15. CJIeIyET NOMHITb, YTO HeKOTOpbIe yactn yCTpOJcTBA n KOpNyca BO BpeMra pa60TbI CNJIbHO HArpeBaIOTcR, IIO3TOMy 6yDbTe OCTOpOxHbI n He npNKacaiTecb K Hm, Bbl MoXeTe O6KeYbcr. 16. HE nakpbBaIte yctpoiCTBO BO BpeM pa6Otbl IIN KOrDa OHO He OCTbIBaET NOLHOCTbIO 17. ПомнITE, чTO harpeBaTeJIbHbIM јелемпam устpoиCTBa Tpe6yETcB sperm, чTo6blI NOJIHOCTbIO OCTbITb. 18. Пи ИСПОЛБЗОВАнИУСТРОДТВА обеспец ДОCTАTOчHо простраНСТВО над И ВOKpyr. YСТРОДТВО He может касы сялгКВОСПАмЕнЯЮшХС рpeДМETOB BO BPEМ pa6OTbl, TAKINK KAK yKpaShENIA, БуMaxЖьIE ПОЛTeHца, WTOpbl, ODEЖДИ T.Д. 19. ObopeBaTeIb, yCTaHOBJIeHHbI B BaHHOJ KOMHaTe, DOJIKeH 6bITb yCTaHOBJIeH TaKIM O6pa3OM, YTO6bl IInIO N pa3BeMbI IN DpyrHe peRyJIaTOpbl HE MOJIIN 6bITb 3aTPOHyTbI B BaHHoJ INI NOd DyuWeM. 20. B harpeBaTeJx IJIy BBICOTbIX CBETINbHnKOB NIOJOKeHnRApa3JIuHbIX NIOJOKeHn pa3beMOB DOJIXHbI 6bITb BnHbI C paCCTOHaHn 1 M. 21. Марк inpовka Ддя пokpbITия HarpeBaTeЯ дOLЖна 6bITb BnДHa NOcJIe yCTaHOBKn HarpeBaTeЯ. 22. HeIb3a pa3Meaatb oborpeBaTeIb HEnocpeICTBeHNO IOd PO3eTKo, a TaKKe B6JIu3N JeRKOBCPnAmHeHOUxxCra MaTePnaIOB, TaKnx KaK UToPbI, rapDInHbI N T. D. 23. YcTpoIcTBo HeJIb3a IcNoJIb3OBaTb C BHeUHIMN peJe BpeMeHN IJN dpyHMN OTdJIbHbIMN CNCTeMaMn DnCTaHcUHOHOrO ynpabJIeHnA. 24. He noDBepraIte yCTPOIcTBO BO3DeIcTBnIO aTMOCΦepHbIX ycNOBNI (doXDb, coJIHcE n T. I) I He nCNoJIb3yIte erO B ycNOBnIX NOBblIeHHoN BJIaXHOCTN (BaHHbIE KOMHaTbI, BJIaXHbIe KeMnIHr). 25. Перношисту поверайтс состорпшура петань.Еслшур петань Повразден, ergcneDyET 3aMeHnTb cpeuaJIncTOM no peMOHTy BO n36exkaHne onaCHOCTN. 26. He nCloIb3yIte yCTpoIcTBO pIaOM c IeKOBocPnAmEHaIOUImncs MaTePnaJaMaN. 27. ObopeBaTeIb DoJxeh 6bITb yCTaHOBJIeH Ha BbICote He MeHee 1,8 M haI noIOM 28. He nCnoJb3yIte o6oRpeBaTeIb B HEnOcpeICTBeHHoN 6JIu3OCTn OT BaHHbI, DyuHa NJI6aaccSeHa. 29. He nCloJb3yIte o6orpeBaTeIb, ecn erO ypoHJI. 30. He nCloNoIb3OBAtB, ecn eCTb BnIMbIe npN3HaKn NOBpeKdEHHa OboPeBaTeJIa. 31. Историяе обограды на ровени восточни посторияе erok CTeHe, ecn 3TO пedingу стейноюн.TeJem. BHIMAHNE: He IncnoIb3yIe 3TOT o6oRpeBaTeIb B He6oJIbIuX NOMEuHnIX, rIe eCTb JIOHN, KOTOpBIE He MOrY T OCTaBHTb Ix CaMOCTOaTeJIbHO, ecNI He OBeCneuNBAeTCa NOCTOaHHbI pINCMOTp. BHIMAHNE: YTo6bI CHn3ntb pNCK BO3rOpaHn, XpaHInTe TkaHn, 3aHaBeckn nJIN dpyrHe JIeKOBocPJIaMeHryUoIeC8 MaTePnaJIbI Ha pacCTOraHn He MeHee 1 M OT BbIXOda BO3dUxA n3 o6OrpeBaTeJ. Дя NOвьшеня 6e3oNaChOCTn peKOMeHdyetc, yTObI 3JIeKTPuYeCKa yCTaHOBka 6bla OCHaSeHa ABTOMaTNUeCKIM BbIKJIHOaTeJEM OCTaTOUHOro TOKa C NyCKOBbIM TOKOM 30 mA. Iprimeahne. EcIn ShHyp NiTaHnI INI BnIKA NiTaHnI NOBpeXdHebl, INX BCeRda CNeDyET 3aMeHЯТь INI peMOHTNPOBaTb B CneCuaJIIN3NpOBaHHoN peMOHTHOm MaCTepcKoN.II. ПЕДУПЕЖDEHЯ
1. Hikorda He nCnoB3yIte yCTpoiCTBO, ecn OHO NOBpeXdeHO nJH He cyHKUOHNpyET DOJxHBIM 6pa30M. 2. Hikorda He nCnoJb3yIte yCTpoIcTBO, ecn OHO ynaIO C BbICOTbl N NOKa3bIBaET BIDIMBIE npn3Hakn NOBpeKdEHHa. 3. He nCnoIb3yIte ydIINHnTeJI nn dpyTne 3JIeKtpnueCKne po3ETKn, KOToPbIe He COOTBeTCTByIOT npIMeHMbIM CTAHApTaM N 3JIeKtpnueCKm HOpMaM. 4. Любов ремоNT, Демонтж ллл замена Любьх частей BCERда должны пюиЗВОДИТСЕпцаллзирочьим оборудованем. 5. Ecni yctpoiCTBO n 3neKtpnueckne KOMnoHEtbl, TaKne KaK 3JIeKtpnueckne KOHTaKTbl, BnaXHbIe, nepei NCpOJIb3OBaHNem yCTpoiCTBa I erO KOMNoHENTOB CJeDyET BbICyUHTb BNJKy INI KabeIb. 6. He nCloIb3yIte yCTpoIcTBO MOKpbIMn pykamn. 7. EcIn cyIeCTByeT pNCK NOBpeJdeHnY yCTpoiCTBa, HE nbITaIteCb peMOHTnpoBaTb yCTPOIcTBO CAMOCTOaTeJIbHO. 8. HnKorda He MoTe yCTpoiCtBO NOI npOTouHO BODO INI TAKIM O6pa3OM, YTO6bI BOda B Hero Kana. 9. He IncnoIb3yIte akceccCyapbl, KOToPbIe He peKOMeHIOBaHbI npOn3BOJnteJIem. OHI MOryt IpeIcTAbIaTb ONaCHOCTb dIЯ NOIb3OBaTeJIЯ N MOrYT npINBeCTn K IOBpeXdEHHU yCTpOInCTBa. 10. y6eIntecb, yTO yCTpOiCTBO OCTblIO npeed xpaHeHnem. 11. HeПрinksaTeCsK KoprnyCy BO BpeMa nCnoJb3ObaHnA. Bo BpeMa pa6oTbI nCnoJb3yIte ToJIbKO pyuKN I nepeKJIIOUaTeJI. NocLe BBiKJIIOUeHnI NOdoXdIte, Noka yCTpOietBO OCTbIHET. 12. BHIMAHNE. HeKOTOpBie yactn 3Toro yCTpOcTBa MOryT CInbHO HArpeBaTbcr BO BpEmra pAbOtbl n CTaTb PnUnHoi OXorOB.III. IEPED IEPBbIM IcNoJIb3OBAHnEM
1.YdaJInte BCE ynaKOBOuHbIe MaTePnJIbI N BblOpBHaIe Tshypr nITAHn 2.Bo Bpemr yctaHOBNy yCTPOINCTBO MOKET 6bITNIOKpbIto N3OJIUNOHHBIM MaTePnAJOM NINIOIO6HbIM MaTePnAJOM 3.Писборкустрочьа6ankистрочьа He cneуet pa3pe3aTB nIpe3aTb 4.перд первим Исюльбозанем почитай Се Инстук imm no npimehenio. 5. Поберъг, COOTBETCTBye TИн HANpЯженue, yKa3aHnHoe Ha 3TNKeTke ПpoDyKtTa, HAnpЯженu 3IneKTPOcEtN B BaUeM DOME.YCTAHOBKA
C nomoubno cbeprna npocbeptne Dba otBepctn B CTHe, MNHmym B 180 cm OT noa n B 20 cm OT notonka - pucyok A. Iocne toro, kak Bbl npocbeplnn OTBepctn, BCTabTe npoknaKy n BnHT. Y6eintecb, yTO BNHTbI XOPOIO 3aTHytBI NOBcBeYCTPOICTBO Ha CTHe.ONICAHNEIPOJYKTA
ΦoTo B. ΓJIABHbI ΠEPEKJIIOUATEJIb BKN/BbIKN=BbIKN BKN/ IOTH BbIKN.I3o6paXeHneC.ДИCTAHUOHHOE YIPABJIEHNE
1. KhoNka BkHoueHn / BbIKHoueHn 6. HEJIa / TAIMEP 2.PEXKIM 7.MNH 3. DEHb 8. +-> KhoKa dIra noBbiJeHna TeMnepaTpybl. TaKKe cIyKnT KhoKoB bIbOpa BpeMeHN /dHa. 4.CLOCK 9.-->KHOIIKa HOHKeHnI TeMnePaTypbI. TaKHe ClyKHT KHOIIKO BbIbopa BpeMeHN / nHa. 5. HACTPOIKA 10.CBPOC-KHONKa c6poca TaMepaPncyokD.CBeToOnoHna nHeNb
1. ON cIMBOJ 6. INeBHOJINCPIeN 2. MoIHOCTb HArpeBa 1000 B7. OTo6paXeHne BpeMeHN 3. MoHocTb HarpeBa 2000 Bt 8.CmBOJ ON-3anyck TaMepa 4.ABTOyHKn 9.CmBOJ OFF-OTKJIIOHHe No TaMepy 5.Дисплел TempepaTpybl 10.Функця obHapuyKeHnO OTKpbItoro OKHaBHytpnbEHHIO PIMMEHHE
1. Haxmnte TnaBbIy BbIKIOHateJIb Ha npaBOI cTOPOHE yCTPOINCTBa - PncyHOK B, YTO6bl BKIOHTb N BBIKIOHTb ycTPOINCTBO. 2. Tenepb yctpoiCTBO HaxoDntcB pexkme OxndaHn. HaxmTe KhoNky BKnIOueHn / BbIKIOueHn (1) Ha npIbTe DnCTaHIOHOHorOynpaBHeHn - PcyhOK C. 3. Haxmte KhoNkY MODE (2) nocneobateIbHo, yTo6bl BbIbpaTb peXIM pa60TbI: -1000Bt yctpoiCTBO 6ydt nocToHHo HarpBaTbCra 1000BT. - 2000 Bt, yctpoiCTBO 6ydt NOCTOARHH HArpeBaTbCra c 2000 Bt. - ABTomatueckn pexim, Haxmte KhoIKN + -, yTo6bl yCTaHOBtB TempepaTy BpyHyIO. YcTpoiCTBO aBTomatueckn nepexoIIT Bpexim noDepkaHnra TempepaTypbI. -ФункцяобнаруженьгOTKрыTOROKна-KordaBbIбраHA3TaФункця,ycTpoIcTBOABTOMTMaueKnOTKJIIOuayetOBorpeB,ecnTempeaTpaBnomeueHINBHe3aHNO naaetHa10°C. 4. Haxmte KhoKbBKnOueHn / BbIKIOueHn (1) Ha nyIbTe dNCTaHcNOHOro ynpabNeHn, YTO6bl BbIKIOuHTb yCTpOiCTBO. YCTPOICTBO OxnaKdaetc n BbIKIOuaETc npImepHo uee3 30 cekyHd.YCTAHOBITE YACBi BHYTPEHHErO YCTPOINCTBA
PIMMEAHNE. EcnB He yctaHObITE TeKyue Bpemn HeJeHbHeJeH, YcTPOCTBO He 6ydt pa6oTaB DoJXHBIM o6pa3OM, NocOJIbky OHO pa6oTaET B COOTBeTCTBm CO CBOIMM CO6CTBEHHbIM BHYTpEHHMN YaCaMn, YTO HeBepHo. 1. BbIbePnte cyHKuH Auto C nOMoUH KhoNk MODE. 2.ПереднachtpoikоТаимета установип Дьн HeДели N TeKуцee Врем: - HaxmTe KhoNkY DAY u BB6epnte Tekyu nn Deh c nOMOuKHOHOK +n - IooXdTe, noka dncnJIe nepectaHET MraTb. - Haxmte KhoNky CLOCK u yctahOBTe TeKyuee BpeMa c nOmoBIO KHOIOK + n - . PnOdoJnte, noka dinCnIe nepeCTaHET MIRatb. -HaKmTe KhoNkY MIN u yctahOBnTE TekyuIe MHyTb KHOKNKaMn + n- .NoOxKnTe, noka dncnne nepectaHet mraTaB.TAMMEP IPOPTPAMMPOBAHNE-TAMMEP
3TaФункциЯ NO3BOJЯET 3anporpamMnpoBaTb BpeM BKJIIOUeHn I BbIKIIOUeHn yCTpoiCTBa B IIO6OJIeHb HeJIeJI. Taimep MoXHO yCTaHOBnTB TOnbKO nocJe BblOpa fYHKun AUTO n ycTaHOBKn BHyTpEHnx YacOB yctpoNCTBa. 1. Haxmnte KhoNky WEEK / TIMER n BbIbepnte DeHb HeDenn, B KOtOpBn Bbl XOTnte Hactpontb aBTOMaTneckoe BKIOueHne N BbIKIOHeHne ycToPcTBA c NOMOsbIO KHONoK + n - . IoDoknte, NOKa DnCnne nepeCTaHET MIRatb. 2. Nocne Haxatn KhoKn SET UP Ha dncnnee 3aropaetc cMMBOJ ON. Tenepb Bbl MoXe Te yctaHOBt BpeM 3anycka TaHMepa. IcnoIb3yIte KhoKn CLOCK, MIN, + n-, YTO6bI yCTaHOBt BpeM 3anycka TaHMepa. NdoXdnte, noka dinCnn nepectaHeT MraTaB. 3. Nocne NOBTOPO HaxaTnK HonKn WEEK / TIMER (6) n 3aTeM haxaTnK HonKn SET UP Ha dncnnee 3aropaetc cunboJ OFF. Tenepb Bbl MoKeTe yCTAHOBuTB BpeMa OTKIOUHeHn TaIMepa. IIOOxNtE, IOKa DNcNne NepectaHET MIRaTb. PIMMEUAHNE: Bpemn Hauana Bcerda DonJXHO 6bITb MeHbIe BpeMeHN OCTaHOKN. INPIMEUAHNE Haxmnte KhoNky RESET, UTo6bI c6pocntb TaMep do Hactpoek no ymoJuaHnIO.V. YNCTKA N OBCJyKNBAHNE 1.Bcerda BbHIMaTe np6Op n3 po3eTK nepeD YnCTKoI. 2. Ecnn BO Bpemy uNCTKN TaKne PpeMTebl, KaB BuNkA NHTaHn, TepMoCTaT, 3JIeKTPuYeCKNe KOHTaKbI n T. D. nepei NOBtOpHbIM NCIOJB3OBAHnEM IpOMOKHnTE INX, OHI DoJnxHbI 6blTb TuaTeJIbHO BbICyuWeHbl 3.He nCnoB3yIte arpeccnBhIe moUHne cpeCTBa B vIe 3Mylbcn, IocboHOB, nact T.Д. y6paTb uKaΦ. OHmOryT, NOMMO npOyeo, ydaIaTb IHOpMaunOHhIe rpaOnueckne CmBOJIb, TaKne KAK 3HaKn, npEynpexJaOuJe 3HaKn U T. 4. Y6eIntecb, yTo yCTpoIcTBo OCTbIIO nepeI cIcTKoI. TEXHUYECKNE DAHHBIE: HannpJxHe:220-240B\~50/60T Mouhoctb:2000BT MaKc.MoUHocb:2200BT lp20  《OCTOPOXHO,ROPAHOBEPXHOCTb》-TEMNEpAtpaDOCTyINbIX NOBepxHOCTeMOKET6bITbBbIe,KoTdaobpydoBaHne paotaeT,TOO3Haayet,TOOJIeMeHTbI KOpnyca CnIbHO HarpeBaHOTcB O BpeMa pa60tBIO BpeMa pa60tBIO COXPAHITTE OCTOPOKHO !!!  OKPbIBAITE» - BHIMAHNE HADINCSb HaDINCSb Ha yCTPOINCTBE 03HauaeT, YTO yCTPOINCTBO He DOJIKHO 6bITb NOKBTO OJEXDN, OJERNAH NpyTNM TeKCTINbHBIM N3dEINRA, KOTOpbIe MOrYT Bb3BaTb BO3RopaHne.  MAHVE: He nCnoJIb3yIte 3To o6OpuyIOBaHHe pIOM c BaHHaMn, IyUeBbIMn, BaccseHAMn uHaJIOruHbIMn peepByapamn nla BObl.  3a6078b 6bokyauoepcree.ynakobky n3 kaptoHa nepeaIte,nokauncta,Ha MaKynatypy.IoNtneHOBbie MeuKN (PE) BbIKnDaB B pe3epByap dnn pnaactmacbbi.NHOseHHoe ycToPcTBO HAO nepeaBt B COOTBeTCTBYIOUTOY TOKY xpaHHeN, TAK KAKHXOJaueceB YcTPOCTBEONACbIe CoCTABnIOUme MOrTy RnTbCraYrpo3oD nOkpyKaoue Cpebl. 3NeKtpnueckoe yCTpoCTBO HADOppeaTaTakIM o6p3om, uTO6bI orpahnHtB erO NobTopHe yNOtpeJleHne I NCNoJIb3ObaHne.ECN B yCTpoCTBe haoJrTaCBaTapen, IN HAo BbITaHyTB n nepeaBt B ToKy XPAHHeN OTeJbHo. YcToPcTBO He BbIKDaTb B pe3epByap dnn KOMMyHaJIbHbIX OTXOD!(NL) NEDERLANDS
LET OP:
Het apparaat is uitsluitend bedoeld voor huishoudelijk gebruik. Het apparaat is NIET bedoeld voor commercieel / professioneel gebruik. Het apparaat is NIET geschikt voor gebruik buitenshuis. Let op! Voordat u het apparaat gebruikt, is het essentieel dat u deze bedieningshandleiding leest om ongelukken te voorkomen en om het apparaat correct te gebruiken. Bewaar deze handleiding en bewaar deze zo dat u deze gemakkelijk kut gebruiken.I. RICHTLIJNEN VOOR DE VEILIGHEID VAN GEBRUIK
1. Controller voor het gebruik of de spanning op het typeplaatje overeenkomt met deplaatselijke parameters van het zoutgehalte, maar vergeet Niet dat de marketing: AC- wordt wisselstroom en gelijkstroom is DC. 2. Sluit het apparaat alleen aan op een 220-240V 50/60 Hz geaard stopcontact. 3. Rol en trek het netsnoer uit voordat u het gebruikt 4. Zorg ervoor dat het netsnoer en de stekker geen zichtbare schade vertonen 5. Voor enijdens het gebruik, ervoor zorgen dat de stekker nicht worden gerekt boven een open vuur of andere warmtebronnen en scherpe randen die de isolatie van de kabel konnen beschadigen. 6. Verwijder voor het eerste gebruik alle verpakkingsscomponenten. Let op! In het geval van een behuizing met metalen delen, kan op deze elementen een enigszins zichbare beschermende folie worden gestrekt, die ook要去 worden verwijderd. 7. Het apparaat mag nicht worden gebruikt door kinderen, Personen met beperkte fysieke, sensorische of mentale capacititeiten zonder toezicht van geauthoriseerde of ervaren personen en.altijd in overeenstemming met deze instructies. 8. Het apparaat is nicht bedoeld voor gebruik met externe tijsdschakelaars of een afzonderlijk afstandsbedieningssystem. WAARSCHUWING: Deze apparatuur kan worden gebruikt door kinderen vanaf 8aar en personen met beperkte lichamelijke, zintuiglijke of geestelijkke vermogens, of Personen die geen ervaring of kennis van de apparatuur, ALLEEN als dit onder toezicht van een persoon die verantwoordelijk is voor hun worden gedaan verilgheid of zichin instructies gegeven over het veilige gebruik van het apparaat en zich op de hoogte van de bevaren die aan het gebruik ervan zich verbonden. Kinderenogen Niet met de apparatuur spelen. Reiniging en onderhoud van het apparaatogen Niet door kinderen worden uitgevoerd, tenzij ze ouder zich dan 8aar en onder toezicht staan 9. Laat het apparaat Niet onbeheerd awhile tijdens gebruik. 10. Dompel het apparaat en het netsnoer Niet onder in water of andere vloeistoffen. 11. Wanner het apparaat Niet in gebruik is, moet het.altijd worden losgekoppeld van het stopcontact. 12. Trek nooit aan het netsnoer om de stekker uit het stopcontact te trekken. 13. Plaats GEEN METALEN ITEMS in het apparaat 14. De fabrikant is nicht aansprakelijk voor schade als gevolg van onjuist gebruik van het apparaat. 15. Men mag nicht vergeten dat sommige delen van het apparaat en de kastijdens het werk erg heet, dus wees voorzichtig en LASTZe Niet aanraakt, kunt u brandwonden oplopen. 16. Bedek het apparaat NIET tijdens gebruik of wonneer het Niet volledig afkoelt 17. Vergeet Niet dat de verwarmingselementen van het apparaat dearend nemen om volledig af te koelen. 18. Zorg bij gebruik van het apparaat voor voldoende ruimte boven en rondom. Het apparaat kanijdens het werk geen gemakkelijk ontvlambare voorwerpen aanraken, zoals versieringen, papieren handdoeken, gordijnen, kleding, enz. 19. De in de badkamer geinstalleerde verwarming要去zo worden geinstalleerd dat de connectoren en andere regelaars Niet kuren worden aangeraakt door een persoon in de badkuip of onder de douche. 20. In kachels voor armaturen op groe hoogte要去en de posities van de verschillende posities van de connectoren zichtaar� aan vanaf een afstand van 1 m 21. De labels voor het afdekken van de kachel要去en zichtaarijken na het installereren van de kachel 22. U kunt de verwarming nicht direct onder de fittingplaatsen en in de buurt van brandbare materialen zoals gordijnen, gordijnen, enz. 23. Het apparaat kan nicht worden gebruikt met externe tijdschakelaars of andere afzonderlijke afstandsbedieningen 24. Stel het apparaat Niet bloot aan atmosferische omstandigheden (regen, zon, enz.) Of gebruik het in omstandigheden met hoge luchtvochtigheid (badkamers, vochtige kampeerhutten) 25. Controller regelmatig de staat van het netsnoer. Als het netsnoer is beschadigd,要去 het worden verrangen door een gespecialiseerd reparatiebedrijf om gevaar te voorkomen 26. Gebruik het apparaat Niet in de buurt van ontvlambare materialen 27. De verwarming要去 een hoogte van minimaal 1,8m boven de vloer worden geinstalleelerd 28. Gebruik deze heater nicht in de directe omgeving van een badkuip, douche of zwembad 29. Gebruik deze kachel nicht als hij is geallen 30. Niet gebruiken als er zichbare tekenen zijn van schade aan de kachel 31. Gebruik de kachel op een vlakke en stabiele ondergrond of bevestig hem aan de muur, indien voorzien door de fabrikant. WAARSCHUWING: Gebruik deze kachel Niet inkleine ruimtes waar mensen+zijn die ze Niet alleen hunnen achechterlaten, tenzij constant toezicht is gegardeerd. WAARSCHUWING: Om het risico op brand te verkleinen, houdt u textiel, gordijnen of andere brandbare materialen op minstens 1 m afstand van de luchtuitlaat van de verwarming. Het worden aanbevolen om de elektrische installmentie uit te rusten met een automatische aardlekschakelaar met een startstroom van 30mA voor extra verilgheid. Opmerking: Als het netsnoer of de stekker beschadigd is, moet het.altijd worden verrangen of gerepareerd door een gespecialiseerde reparatiewerkplaats. II. WAARSCHUWINGEN 1. Gebruik het apparaat nooit als het beschadigd is of Niet goed functioneert. 2. Gebruik het apparaat nooit als het van een hoogte eerder is geallen en zichtbare tekenen van schade vertoont. 3. Gebruik geen verlengsnoeren of andere stopcontacten die nicht voldoen aan de geldende normen en elektrische voorschriften. 4. Elke reparatie, demontage of vervanging van onderdelen moet algid worden uitgevoerd door een gespecialiseerde felilitieit. 5. Als het apparaat en elektrische componenten zoals elektrische contacten nat+zijn, moet de stekker of kabel worden gedroogd voordat het apparaat en de componenten ervan worden gezruikt. 6. Gebruik het apparaat nicht met natte handen. 7. Wanner het risico bestaat dat het apparaat is beschadigd, mag u NOOT proberen het apparaat zich te repareren. 8. Was het apparaat nooit onder stromend water of op een manier dat het water erin indruppelt. 9. Gebruik geen accessoires die nicht door de fabrikant worden aanbevolen. Ze können een gevaar voor de gebruiker vormen en konnen het apparaat beschaden. 10. Zorg dat het apparaat is afgekoeld voordat u het opslaat. 11. Raak de behuizing Niet aan tijdens gebruik. Gebruik tijdens het gebruik alleen knappen en schakelaars. Wacht na het uitschakelen tot het apparaat is afgekoeld. 12. VOORZICHTIG: Sommige delen van dit apparaat hunnenijdens het gebruik erg heet worden en brandwonden veroorzaken.III. VOOR HET EERSTE GEBRUIK
1. Verwijder al het verpakkingsmaterial en kaak het netsnoerrecht 2. Tijdens de installmentie kan het apparaat zichen bedekt met isolatiemateriaal of soortgelijk materiaal 3. Bij het monteren van het apparaat mogen balken en spanten nicht worden gesneden of gesneden 4. Lees voor het eerste gebruik alle gebruiksaaanwijzingen. 5. Controller of de spanning op het label voor het testen van het product overeenkomt met de spanning van het elektriciteitsnet in uw huis INSTALLATION Gebruik de boor om twee gaten in de muur te boren, minimaal 180 cm van de vloer en 20 cm van het plafond - afbeelding A. Nadat u de gaten hebt geboard, staat u het kussen en de schroef. Zorg ervoor dat de schroeven goed zichn aangedraaid en hang het apparaat aan de muur.PRODUCT BESCHRIJVING
Afbeelding B. HOOFDSCHAKELAAR AAN / UIT = UIT AAN / UIT UIT.Afbeelding C. AFSTANDBEDIENING
1. AAN / UIT-knop 6.WEEK/TIMER 2. MODUS 7. MIN 3.DAG 8. +-> Knop voor het verhogen van de temperatuur. Het dient ook als keuzeknop voorijd / dag. 4.CLOCK 9. --> Knop voor het verlagen van de temperatuur. Het dient ook als keuzeknop voorijd / dag. 5. INSTELLLEN 10. RESET - Timer resetknopAfbeelding D. LED-PANEEL
1.AAN symbol 6. Dagweergave 2. Verwarmingsvermogen 1000W 7. Tijdsweergave 3. Verwarmingsvermogen 2000W 8. AAN symbol - timer opstarten 4.AUTO-functie 9. UIT symbol - timer uitschakeling 5. Temperatuurdisplay 10. Open venster detectie functieIIV.USAGE
1. Druk op de hoofdschakelaar aan derechtkerant van het apparaat - Afbeelding B om het apparaat in en uit te schaken. 2. Het apparaat staat nu in de standby-modus. Druk op de aan / uitknop (1) op de afstandsbediening - Afbeelding C. 3. Druk achtereenvolgens op de MODE-knop (2) om de bedrijsmodus te selecteren: - 1000 W het apparatusat za constant opwarmen met 1000 W. - 2000 W, het apparaat za constant opwarmen met 2000 W. - Auto-modus, druk op de knappen + en - om de temperatuuruur handmatig in te stellen. Het apparaat gaat automatisch maar de modus voor temperatuuruurbehoud. - Open venster detectiefunctie - Wonneer deze functie is geseleerd, legt het apparaat de verwarming automatisch uit als de plotselinge plotseling met 10^ daalt. 4. Druk op de aan / uitknop (1) op de afstandsbediening om het apparaatuit te schakelen. Het apparaat koelt na ongeveer 30 secondenuit.DE INTERNE APPARAATKLOK INSTELLLEN
OPMERKING: Als u de huidige tijd en dag van de week Niet instelt, za het apparaat Niet goed werken waar dat het volgens zich eigen interne klok werk, wat onjuiste is. 1. Selecteer de AUTO-functie met de MODE-knop. 2. Stel vór u de timer instelt de dag van de week en de huidigearend in: - Druk op de knop DAG en selecteer de huidige dag met de knuppen + en - . Wacht tot het display stopt met knipperen. - Druk op de KLOK-knop en stel de huidigeijd in met de knoppen + en -. Wacht tot het display stopt met knipperen. - Druk op de MIN-knop en stel de huidige Minutes in met de knoppen + en -. Wacht tot het display stopt met knipperen.TIMER PROGRAMMERINSTELLING - TIMER
Met deze functie kunt u de tijd programmeren om het apparaat op elke gewenste dag van de week in en uit te schakelen. De timer kan alleen worden ingesteld na het selecteren van de AUTO-functie en het instellen van de interne klok van het apparaat. 1. Dru op de WEEK / TIMER-knop en selecteer de dag van de week waarup u het apparaat wilt instellen om automatisch in en uit te schakelen met de knappen + en -. Wacht tot het display stopt met knipperen. 2. Nadat u op de knop hebt INSTellenen hebt gedrukt,licht het ON-symbool op in het display.U kunt nu de starttijd van de timer instellen. Gebruik de KLOK, MIN, ^+ en - knappen om de startijd van de timer in te stellen.Wacht tot het display stopt met knipperen. 3. Nadat u opniew op de WEEK / TIMER-knop (6) hebt gedrukt en cervolgens op de SET UP-knop heeft gedrukt,licht het OFF-symbool op het display op.U kunt nu de uitschakeltijd van de timer instellen. Wacht tot het display stopt met knipperen. OPMERKING: de startijd要去 algond korter waar dan de stootijd. OPMERKING Druk op de RESET-knop om de timer terug te zettenaar de standaardinstellenen.V. REINIGING EN ONDERHOUD
1. Haal aktijd de stekker uit het stopcontact voordat u het apparaat schoonmaakt. 2. Alsijdens het schoonmaken items zoals stekker,thermostaat,elektrische contacten etc.geweekt voordat ze opnieuw worden gebruikt, moeten ze grondig worden gedroogd 3. Gebruik geen agressieve reinigingsmiddelen te gebruiken in de vorm van emulsies, lotions, pasta's, etc. om de kast schoon te makeen. Ze können onder andere de informatie grafische symbolen verwijden, zoals borden, waarschuwingsborden, etc. 4. Zorg ervoor dat het apparaat is afgekoeld voordat u het schoonmaakt. TECHNISCHE GEGEVENS: Voltage: 220 - 240V 50 / 60Hz Vermogen: 2000W Max. Vermogen: 2200W lp20  Voorzichtigheid heet oppervlak" - De temperatuur van beschikbare oppervlakken kan hoger zichen wanner de inrichting werkt, tekent dat de behuizingselementen worden heetijdens bedrijfijdens bedrijf, SAVE voorzichtig !!!  "DO NOT covers" - opschrift BELANG De inscriptie op het apparaat betekent dat het apparaat Niet te worden bedekt met, dekens en andere textielproducten die ontbranding kan veroorzaken.  RCHUING: Gebruik dit apparaat Niet in de buurt van badkuipen, douches, zwembaden en soortgelijke water tanks.  We given om het milieu. We vragen u om de kartonnen verpakkingen te storten bij het oud papier. Polyethylen zakken (PE) storten in de container voor plastic. Versleten apparatuur afgeven bij het juiste verzamelpunkt, als in het apparatuur gevaarlijke elementen zitten kan dat een bedreiging zichoor het milieu. Elektrisch apparatuur moet worden geretourneerd om het hergebruik te verminderen. Als in het apparatur batterijen ziiten, horen die verwijderd te worden en appart af te worden geveven bij het juiste verzamelpunkt.(DK) DANSKI
OBS:
Enheden er kun beregnet til husholdningsbrug. Enheden er IKKE beregnet til commerciel / professionnel brug. Enheden er IKKE egnet til udendørs brug. OBS! Før du bruger det, er det vigtigt, at du læserijke betjeningsvejledning for at undgå ulykker og for korrekt brug af encheden. Opbevarijke manual og opbevar den, sä du nemt kan bruge den. I. Retningslinjer for brugsikkerhed 1. Før brug skal du kontrollere, at spændingen angivet på typeskiltet svarer til de lokale saltholdighedsparametre, men husk at mærket: AC- er vekselstrøm og DC er DC. 2. Tilslut enheden kun til en 220-240V ~ 50/60 Hz jordet stikkontakt. 3. Løsn og træk netledningen ud, før du bruger den 4. Sorg for, at netledningen og stikket ikke har nogen synlig skade 5. Før og after brug skal du sorge for, at netledningen ikke strækkes over en Åben flamme eller,anden varmekilde og skarpe kanter, der kan beskadige kabelsætningen. 6. Fjern alle emballagekomponenter inden brug første gang. OBS! I tilfælde af et hus med metaldele kan der på disse elementer strækkes en let synlig beskyttelsesfolie, som øgså skal fjernes. 7. Enheden bør ikke anvendes af børn, personer med begrænset fysisk, sensorisk eller mental kapacitet,uden tilsyn af autoriserede ull erfarne personer og altid i overensstemmelse med disse instruktioner. 8. Udstyret er/DDke beregnet til brug med eksterne tidsafbrydere erer et separat fjernbetjeningssystem. ADVARSEL: Dette udstyr kan bruges af børn over 8 År og personer med begrænets fysisik, sensorisk eller mental evne eller personer, der ikke har erfaring eller kendskap til udstyr, KUN, hvis dette sker under tilsyn af en person, der er ansvarlig for deres sikkerhed eller har fæt instrukser om sikker brug af encheden og er opmærksom på farene i forbindelse med brugen. Børn skal ikke lege med udstyret. Rengöring og vedligeholdelse af apparatet bør不同程度 in medmindre de er over 8 År og overvåges 9. Forlad ikke enheden uovervåget under drift. 10. Sænk ikke apparatet og netledningen i vand eller andre æsker. 11. När enheden ikke er i brug, skal den altid afbrydes fra stikkontakten. 12. Træk netledningen ud af stikket, när du trækker stikket ud af stikket. 13. Sæt ikke METALEMÆRK indeni enheden 14. Fabrikanten er ikke ansvarlig for skader som fjge af ukorrekt brug af enheden. 15. Det skal huskes, at nogle dele af enheden og kabinettet under arbejdet bliver meget varme, sā pas pa, og rør ikke dem, du kan blive brændt. 16. Dæk IKKE encheden under drift, eller nar den ikke køler helt ned 17. Husk, at apparatets varmeeelementer tager tid til at kole ned helt. 18. Sørg for tilstrækkelig plads over og omkring, nár du anvender enheden. Apparatet kan ikke berøre noget let brændbare genstande under arbejdet, sasomdekorationer, papirhåndklæder, gardiner, tøj osv. 19. Varmeapparatet installereret i badeværelset skal installereres, sa kontakterne og andere regulatorer ikke kan røres af en personi badekarret eller under bruseren. 20. I varmeapparater til højhøjdearmaturer skal positionerne i de forskellige positioner af forbindelsesledningerne��e synlige fra en afstand pa 1 m 21. Mærkningen til at dække varmeren skal vare synlig after installation af varmeren 22. Du kan ikke placere varmeapparatet direkte under stikkontakten og iærheden af brændbare materialer som gardiner, gardiner mv. 23. Enheden kan/DDIke bruges med eksterne tidsafbrydere ell er andre separate fjernbetjeningssystemer 24. Udsæt ikke apparatet under atmøsfaeriske forhold (regn, sol osv.) Eller brug under forhold med hj luftfugtighed (badeværelser, fugtige campinghuse) 25. Kontroller regelmæssigt strømkabelens tilstand. Hvis netledningen er beskadiget, skal den udskiftes af et specialiseret reparationsanlæg for at undgå en fare 26. Brug/DDie apparatet i naeheden af brandfarlige materialer 27. Varmeapparatet skal installeres i en hojde pa mindst 1,8 m over gulvet 28. Brug/DDette varmelegeme i umiddelbar nærhed af et badekar, brusebad ellerswimmingpool 29. Brug/DDne varmelegeme, hvis den er faldet 30. Må ikke bruges, hvis der er synlige tegn på beskadigelse af varmelegemet 31. Brug varmelegemet på en jævn og stabil overflade, eller fastgør den til væggen, hvis det er foreskrevet af producenten. ADVARSEL: Brug/DDne varmelegeme i sma rum, hvor der er mensesker, der icke er i stand til at afterlade dem alene, medmindre konstant overvagning er sikret. ADVARSEL: For at mindske risikoen for brand skal du holde tekstiler, gardiner erler andre brændbare materialer mindst 1 m væk fra varmeapparatets luftudtag. Det anbefales, at den elektriske installation er udstyret med en automatisk reststrømafbryder med 30mA startstrøm for øget sikkerhed. Bemærk: Hvis strømledningen eller stikket er beskadiget, skal den alto udskiftes eller repareres af en specialiseret værksted.II. ADVARSLER
1. Brug aldrig enheden, hvis den er beskadiget aller ikke fungerer korrekt. 2. Brug aldrig encheden, hvis den er faldet fra en hjde for og viser synlige skader. 3. Brug/DD: forlangerledninger erer andre stikkontakter, der icke overholder geldende standarder og elektriske forskrifter. 4. Eventuel reparation, demontering uller udskiftning af dele skal altid foretages af en specialiseret anlag. 5. Hvis encheden og elektriske komponenter som elektriske kontakter er våde, skal stikket eller kablet ørres, inden apparatet og dets komponenter anvendes. 6. Brug/DD: enheden med vade hender. 7. Forsøg IKKE at reparere encheden selv, hvis der er risiko for, at encheden er beskadiget. 8. Vask aldrig apparatet under rindende vand eller på en södanmxde, at vandet drypper ind i det. 9. Brug/DD, om icke anbefales af fabrikanten. De kan udgore en fare for brugeren og kan forarsage skade pa eheden. 10. Sorg for, at enheden er afkølet før opbevaring. 11. Rør ikke huset under brug. Brug kun knapper og switche under drift. Vent after, at apparatet er afkølet,ningar det er slukket. 12. FORSIGHTIG: Nogle dele af dette enhed kan blive meget varme under drift og forårsage forbrændinger.III. FØR FØRSTE BRUG
1. Fjern alt emballeringsmaterialie og træk netledningen ud 2. Under installationen kan enheden vare daekket af isolerende materiale erer lignende materiale 3. Ved montering af anordningen må bjælker og spærre ikke skæres eller skæres 4. Læs alle brugsanvisninger før brug Forste gang. 5. Kontroller, om den spænding, der er angivet pa etiketten, svarer til spændingen i stromnettet i dit hjemINSTALLATION
Brug bor til at bore to huller i væggen, mindst 180 cm fra gulvet og 20 cm fra loftet - billede A. Nár du har boret hullene, skal du sætte puden og skruen i. Sørg for, at skruerne er godt strammet og hæng encheden på væggen.PRODUKTBESKRIVELSE
Billede B. MAIN SWITCH ON/OFF = OFF ON/YUTN OFF.Billede C. FJERNKONTROL
1. Taend / sluk-knap 6.VEK/TIMER 2. MODE 7. MIN 3.DAG 8. +-> Knappen for at hæve temperaturen. Fungerer och som en valgknapp for tid / dag. 4.CLOCK 9. --> Knap for at sænke temperatures. Fungerer også som en valgknapp for tid / dag. 5. SETUP 10. RESET - Timer reset-knapBillede D. LED PANEL
1. ON symbolet 6. Dags display 2. Varmekraft 1000W 7. Tidsvising 3. Varmekraft 2000W 8. ON symbol-timer starter op 4. AUTO Funktion 9. OFF-symbol - timerafbrydelse 5. Temperaturvisning 10. Abn vinduesdetekteringsfunktionIV.ANVENDELSE
1. Tryk på hovedschakelaar til hijre for apparatet - Billede B om apparatet i en ud af skakelen. 2. Apparatet stär nu i standby-modus. Druk op de aan / udknop (1) op de afstandsbediening - Afbeelding C. 3. Tryk afterfolgende på MODE-knappen (2) om firmaets valg af selektering: - 1000 W apparatuset vil konstante opwarmen med 1000 W. - 2000 W, apparatuset vil konstant opwarmen med 2000 W. - Auto-modus, tryk på knoppen + da - om temperaturhändmatig i te stellen. Apparatet går automatisk til modus for temperaturophold. - Aben venster-detektionsfunktion - När这部分 Funktion er valgt, skal du skubbe til enheden til at opvarne automatisk fra plotteren til kamertemperatur med 10^ C daalt. 4. Tryk pá de aan / udknop (1) pá den afstandsbediening om apparatet fra te schakelen. Enhedens kob af en skakelt var ca. 30 sek.DE INTERNE APPARAATKLOK INSTELLLEN
OPMERKING: Nár du er den nuværende tid og en dag af ugen ikke bliver installereret, vil apparatet ikke fungere godt, fordi det er hans egen interne klok, hvad der er tilfældet. 1. Vaelg AUTO-funktionen Med. MODE-knappen. 2. Stel dig før timeren installeredeagation for ugen og den aktuelle tid i: - Tryk på knappen DAG og vælg Vælg den aktuelle dag med knoppen + en -. Wacht tot the display stopt with knipperen. - Tryk på KLOK-knappen og sæt den aktuelle tid i met de knoppen + da -. Wacht tot the display stopt with knipperen. - Tryk på MIN-knap og søt de aktuelle minutter i met de knuppen + da -. Wacht tot the display stopt with knipperen.TIMERPROGRAMMERINSTELLING-TIMER
Med denote funktion kan du programmere den tid til enhed pa enhver onsket dag af ugen og ud af skakelen. Timeren kan kun blive indtastet after valg af AUTO-funktionen og installationen af den interne klok fra apparatet. 1. Tryk på WEEK / TIMER-knap og vælg Vælg den dag fra ugen, hvor apparatet vil indstille automatisk i og ud af skakelen med knoppen + en -. Wacht tot the display stopt with knipperen. 2. Nadat u pa knappen SET UP have gedrukt, light the ON-symbool op in the display. Du kan nu starte starttdispunktet for timeren instellen. Brug de KLOK, MIN, + da - knappen om starttdispunktet for timeren i te stellen. Wacht tot the display stopt with knipperen. 3. Nadat u nogmaals på WEEK / TIMER-knappen (6) du har skrevet og derefter valgt at SET UP-knappen har skrevet, lys OFF-symbolet på displayet. Du kan nu vælge det eksklusive tidsinterval af timeren. Wacht tot the display stopt with knipperen. OPMERKING: starttdspunktet skal altid vare kortere end stoptiden. OPMERKING Tryk på RESET-knappen om timeren skal gå tilbage til standardindstillingerne.V. RENGØRING OG VEDLIGEHOLDELSE
1. Tag altid stikket ud af stikkontakten inden rengoring. 2. Ved rengering som f.eks. Stikkontakt, termostat, elektriske kontakter osv. er gennemblodt, inden de bliver brugt igen, bør de tøres grundigt 3. Brug icke aggresive rengaringsmidler i form af emulsioner, lotioner, pastaer osv. at rense kabinett. De kan blandt andet fjerne de informations grafiske symboler, sasom tegn, advarselsskilde osv. 4. Sorg for, at eheden er afkølet for rengoring. TEKNISKE DATA: Spending: 220-240V ~ 50 / 60Hz Effekt: 2000W Maks. Effekt: 2200W IP20  "Caution Hot Surface" - Temperaturen pä de tilgängelige overflader kan vare højere, när udstyret arbejder, hvilket betyder at lenteerne bliver meget varme under drift under drift. SPAR NOGELIG!  "DAKK IKKE" - INSCRIPTION IMPORTANCE Indskrifen på enheden betyder, at eheden ikke skal��e daekket af tøj, tapper og andre tekstilvarer, der kan forarsage taending.  IL: Brug ikke dette udstyr iærheden af badekar, brusere, svømmebassiner og lignende vandtanke.  Af hensyn til miljøet . Venligst overfor papemballage til affaldspapir. Hæld polyethylenposer (PE) i plastbeholderen Slidt enhed skal returneres til det relevante punkt opbevaring, fordi det er farligt i enheden ingredienser kan udgøre en trussel for miljøet. Den elektriske enhed skal overleveres for at begrænse dets genanvendelse og brug. Hvis i enheden der er batterier, fjern dem og vende tilbage til punktet opbevares separat.(IT)ITALIANO
ATTENZIONE:
Il disposativo è destinato esclusivamente all'uso domestico. Il disposativo NON è destinato all'uso commerciale / professionale. Il disposativo NON è adatto all'uso all'aperto. Attenzione! Prima di utilizzare, èEssenziale leggere queste istruzioni per l'uso per evitare incidenti e per un uso corretto del disposativo. Conserva questo manuale e tienilo in modo da poterlo usare lavoramente.I. LINEE GUIDA PER LA SICUREZZA DELL'USO
1. Prima dell'uso, controlling che la tensione specificata sulla targhetta di identificazione corrisponda ai parametri locali di salinità, ma ricordare che la marcatura: AC- è alternata e DC è DC. 2. Collegare il disposativo solo a una presa con messa a terra da 220 - 240V 50 / 60~Hz 3. Prima dell'uso, srotolare e raddrizzare il cavo di alimentazione 4. Assicurarsi che il cavo di alimentazione e la spina non presentino danni visibili 5. Prima e dopo l'uso, assicurarsi che il cavo di alimentazione non sia disteso sopra una fiamma libera o altra fonte di calore e spigoli vivi che possono danneggiare l'isolamento del cavo. 6. Prima del primo utilizzato, rimuovere tutti i componenti dell'imballaggio. Attenzione! Nel caso di un involucro con parti metalliche, su quosti elementi si può allungare un foglio protettivo leggermente visibile, che deve essere rimioso. 7. Il dispositivo non deve essere utilizzato da bambini, persone con disponà fisiche, sensoriali o mentali limitate sono la supervisione di persone autorizzate o esperte e sempre in conformità con queste istruzioni. 8. L'apparecchiatura non è destinata all'uso con interruptori orari esterni o un sistema di controllo remoto separato. AVVERTENZA: esta apparecchiatura può essere utilizzata da bambini di età superiore a 8 anni e persone con capacità fisiche, sensoriali o mentali limitate o persone che non hanno esperienza o conoscezza delle apparecchiature, SOLO se ciò viene fatto molto la supervisione di una persona responsabile della loro sicurezza o sono state fornite istruzioni sull'uso sicuro del dispositivo e sono consapevoli dei pericoli associati al suo utilizzo. I bambini non dovrebbero gliacare con l'attrezzatura. La pulizia e la manutenzione del dispositivo non devono essere eseguite dai bambini a meno che non abbiano superato gli 8 anni di età e siano sorvegliati 9. Non lasciare il disposativo incustodito durante il funzionamento. 10. Non immergere l'apparecchio e il cavo di alimentazione in acqua o altri liquidi. 11. Quando il dispositivo non è in uso, dovrebbe essere sempre scollegato alla presa di corrente. 12. Quando si estraie la spina alla presa, non tirare mai il cavo di alimentazione solo alla presa. 13. Non insere NESSUN ARTICOLO DI METALLI all'interno del disposizio 14. Il produttore non è responsable per danni derivanti da un uso improper del disposativo. 15. Va ricordato che alcune parti del dispositivo e dell'armadio durante il lavoro si scaldano molto, quando fai attenzione e non toccarle, puoi bruciare. 16. NON copire il dispositivo durante il funzionamento o quando non si raffredda completeness 17. Ricordare che gli elementi riscaldanti del dispositivo richiedono tempo per raffreddarsi completeness. 18. Quando si utilizes il dispositivo, assicurare uno spazio adeguato sopra e intorno. Il dispositivo non può toccare oggetti facilitamente inflammabili durante il lavoro, come decorazioni, asciugamani di carta, tende, vestiti, ecc. 19. Il riscaldatore installato nel bagno deve essere installato in modo tale che i connettori e gli altri regolatori non possano essere toccati da una persona nella vasca da bagno o quello la doccia. 20. Nei riscaldatori per apparecchi ad alta quota, le positioni delle diverse posizioni dei connettori devono essere visibili da una distance di 1 m 21. L'etichetta per coprire il riscaldatore dovrebbe essere visible dopo l'infallazione del riscaldatore 22. Non è possibile posizionare il riscaldatore direttamente sotto la presa e vicino a materiali inflammabili come tende, tende, ecc. 23. Il disposativo non può essere utilizzato con Interruttori orari esterni o altri sistemi di controllo remoto separati 24. Non esporre il disposativo a condizioni atmospheriche (pioggia, sole, ecc.) O utilizzare in condizioni di elevata umidità (bagni, case da campeggio umide) 25. Controllare periodicamente le condizioni del cavo di alimentazione. Se il cavo di alimentazione è danneggiato, è necessario sostituirlo con un'officina di riparazione specializzata per evitare rischi 26. Non utilizzato il disposativo vicino a materiali inflammabili 27. Il riscaldatore deve essere installato ad un'altezza non inferiore a 1,8 m dal pavimento 28. Non utilizzato quello riscaldatore nelle immediate vicinanze di una vasca da bagno, doccia o piscina 29. Nonutilizzarequesto riscaldatoresecaduto 30. Non utilizzato se sono presenti segni visibili di danneggiamento del riscaldatore 31. Utilizzare la stufa su una superficie pianà e stabile o fissarla alla parete, se previsto dal produttore. ATTENZIONE: Non utilizzato Questa stufa in stanze piccole dove ci sono persone che non possono lasciarla da sole, a meno che non sia assicurata una supervisione costante. AVVERTENZA: per ridurre il rischio di incendio, Maintainere tessuti, tende o altri materiali infiammabili ad almeno 1 m. dall'uscita dell'aria del riscaldatore. Si consiglia di dotare l'impianto elettrico di un interrottore automatico differenziale con corrente di avvamento da 30mA per una maggiore sicurezza. Note: se il cavo di alimentazione o la spina di alimentazione sono danneggiati, devono essere sempre sostituiti o riparati da un'officina specializzata.II. AVVERTENZE
1. Non utilizzato mai il disposativo se è danneggiato o non funziona correttamente. 2. Non utilizzato mai il disposativo se è caduto da un'altezza precedente e mia segnì visibili di danni. 3. Non utilizzato prolonghe o altre prese elettriche che non soddisfano gli standard applicabilitie e le normative elettriche. 4. Qualsiasi riparazione, smontaggio o sostuzione di qualsiasi parte deve sempre essere effettuata da una struttura specializzata. 5. Se il dispositivo e i componenti elettrici come i contatti elettrici sono bagnati, la spina o il cavo devono essere asciugati prima di utilizzato il dispositivo e i loro componenti. 6. Nonutilizzare il dispositivo con le mani bagnate. 7. Quando esiste il rischio che il dispositivo sia stato danneggiato, NON tentare di riparare il dispositivo da soli. 8. Non lavare mai il dispositivo sotto acqua corrente o in modo che l'acqua vi goccioli dentro. 9. Non utilizzato accessori non consigliati dal produttore. Possono rappresentare un pericolo per l'utente e causare danni al dispositivo. 10. Assicurarsi che il dispositivo si sua raffreddato prima di riporlo. 11. Non toccare l'alloggiamo durante l'uso. Durante il funzionamento, utilizzare solo manopole e interruttori. Dop lo spegnimento, attendere il raffreddamento del dispositivo. 12. ATTENZIONE: Alcune parti di quello dispositivo posso sono divertare molto calde durante il funzionamento e causare uszioni.III. PRIMA DEL PRIMO UTILIZZO
1. Rimuovere tutto il materiale di imballaggio e raddrizzare il cavo di alimentazione 2. Durante l'installazione, il disposativo può essere coperto con materiale isolante o materiale simile 3. Durante il montaggio del dispositivo, le travi e le travi non devono essere tagliate o tagliate 4. Prima del primo utilizzato leggere tutte le istruzioni per l'uso. 5. Verificare che la tensione elencata sull'etichetta del prodotto in questione corrisponda alla tensione della rete di alimentazione nella propria abitazioneINSTALLAZIONE
Utilizzare il trapano per praticare due fori nella parete, almeno 180 cm dal pavimento e 20 cm dal soffitto - Foto A. Dopo aver praticato i fori, inseire il tampone e la vite. Assicurarsi che le viti siano ben serrate e appendere il dispositivo al. muro.DESCRIZIONDELPRODOTTO
Figura B. INTERRUTTORE GENERALE
ON/OFF = OFF ON/YUTN OFF.Figura C. TELECOMANDO
1. Pulsante ON / OFF 6. SETTIMANA/TIMER 2. MODALITA 7. MIN 3. GIORNO 8. +-> Pulsante per augmentare la temperatura. Serve anche come pulsante di selezione per ora / giorno. 4.CLOCK 9. --> Pulsante per abbassare la temperatura. Serve anche come pulsante di selezione per ora / giorno. 5. CONFIGURAZIONE 10. RESET - Pulsante di reset del timerImagine D. PANNELLO LED
1. Simbolo ON 6. Visualizzazione del giorno 2. Potenza di riscaldamento 1000W 7. Visualizzazione del tempo 3. Potenza di riscaldamento 2000W 8. Simbolo ON: avvio del timer 4. Funzione AUTO 9. Simbolo OFF - spegnimento timer 5. Display della temperatura 10. Funzione di rilevamento della finestra apertaIV.USO
1. Druk op of hoofdschakelaar aan de rechterkant van het apparaat - In seguito B om het apparaat in en uit te schakelen. 2. Apparire ora in modalità standby. Druk op de aan / uitknop (1) op afstandsbediening - Afbeelding C. 3. Druk achtereenvolgens op in MODE-knop (2) om di bedrijfsmodus te selecteren: - 1000 w het apparaat za costante opwarmen incontrato 1000 W. - 2000 W, bajo aver funzionato costamente con 2000 W. - Auto-modus, trascina il pulsante + en - om di temperatura nel loro dispositorio manuale. Il suo orologio automatico è perfetto per la temperature. - Apri rivelatore rilevabile - Wanner deze functie is geselecteerd, schakelt het apparaat of verwarming automatisch uit of the kamertemperatuur complotting with 10^ daalt. 4. Druk of aan / uitknop (1) opstandsbediening om het apparaat it schakelen. Et stato scelto come uno scultore undo 30 secondi.DE INTERNE APPARAATKLOK INSTELLLEN
RINGRAZIAMento: Als u de huidige tijd en dag van de week Niet instelt, za het apparaat Niet goed werken omdat het volgens zich eigen interne klok werk, wat onjuist is. 1. Selezionare la funzione AUTO con la manopola MODE. 2. Stel voordat u del timer installato nella settimana e in huidige tijd in: - Premere il pulsante DAG in modo da selezionare il pulsante con il pulsante + en -. Visualizzazione completa del display arrestata con il knipperen. - Trascina il pulsante KLOK in modalità di gioco con il pulsante + en -. Visualizzazione completa del display arrrestata con il knipperen. - Trascina il dato MIN nel menu di scelta rapida con il pulsante + en -. Visualizzazione completa del display arrestata con il knipperen.PROGRAMMATORE TIMERINSTELLING - TIMER
Con esta funzione è stato programmatico il programma da un altre utente durante la settimana in Svizzera. Il timer cui oessere inserto in una selezione di funzioni AUTO in quost istante di installatione interna. 1. Premere il tasting WEEK / TIMER e selezionare la data della settimana in cui si aprirà il programma che verrà installato e automatizzato in ita schakelen met de knoppen + en -. Visualizzazione completa del display arrestata con il knipperen. 2. Premere il pulsante SET UP per visualizzare il messaggio, quando attivare ON-symbol nel display het. Sei pronto per iniziare con il timer. Gebruik de KLOK, MIN, + en - consente di avviare il timer con il timer. Visualizzazione completa del display arrestata con il knipperen. 3. Leggi i manuali di WEEK / TIMER-knop (6) in modo da visualizzare e visualizzare su SET UP-knop eeft gedrukt, quindi visualizzare OFF-symbool sul display op. è ora possibile installare il timer. Visualizzazione completa del display arrestata con il knipperen. OPMERKING: de startijd要去 algid korter waar dan de stoptijd. APERTO Druk su RESET-manopola del timer terug zarden maar of standaardinstelleningen.V. PULIZIA E MANUTENZIONE
1. Scollegare sempre l'apparecchio alla presa di corrente prima di pulirlo. 2. Se durante la pulizia articoli come spina di alimentazione, termostato, contatti elettrici ecc. sono fradici prima di essere riutilizzate, devono essere completenesse asciugate 3. Non utilizzato detergenti aggressivi sotto forma di emulsioni, lozioni, paste, ecc. per pulire l'armadietto. Possono, tra le altre cose, rimuovere i symboli grafici delle informazioni, come cartelli, segnali di pericolo, ecc. 4. Assicurarsi che il dispositivo si sia raffreddato prima di pulirlo.DATI TECNICI:
Tensione: 220-240 V ~ 50/60 Hz Potenza: 2000 W max. Potenza: 2200W Ip204  "Attenzione superficie calda" - La temperatura delle superfici disponibili più essere maggiore quando l'apparecchiatura è in funzione, il che significa che gli elementi dell'alloggiamo divertano molto caldi durante il funzionamento durante il ento, SALVA ATTENZIONE !!!  "Non copire" - ISCRIZIONE IMPORTANZA L'iscrizione sul disposito significa che il disposito non deve essere coperta con e alti prodotti tessili che potrebbero causare l'accensione.  AVERTENZA: non utilizzato questa apparecchiatura vicino a vasche da bagno, docce, piscine e serbatoi per l'acqua simili. Prendersi cura dell'ambiente Gli imballi di cartone devono essere smaltiti nel contentatore per la carta. I sacchetti di polietilene (PE) vanno gettati nel contentatore per la plastica. L'apparecchio usato deve essere rottamato presso un centro di raccolta autorizzato, poiché contiene elementi pericolosi che potrebbero costituire una minaccia per l'ambiente. I dispositivi elettrici devono essere resi al fine di evitare il loro riutilizzo. Se il dispositivo contiene una batteria, deve essere rimossa e smaltita separamente in un punto di raccolta. Nongettare l'apparecchio nei contentitori dei rifiuti urbani!(FI) SUOMI
HUOMIO:
Laite on tarkoitetu vain kotikayttoon. Laite ei ole tarkoitetti kaupalliseen tai ammatilliseen käyttoön. Laite ei sovi ulkokayttoon. Huomio! Ennen käyttoa on tärkea lukea namä käyttoohjeet onnettouuksien välttamiseksi ja laitteen asianmukaisen käytön varmistamiseksi. Säilytä tämä käyttoohje ja säilytä se, jotta voit käyttaa sitä helposti.I. KAYTTÖTURVALLISUUSOHJEET
1. Tarkista ennen käytöä, etta tyyppikilvessa ilmoitetu jannite vastaa paikallista suolapitoisuutta, mutta muista, etta merkintä: AC- on vaihtovirta ja DC on DC. 2. Kytke laite vain 220 - 240V 50 / 60~Hz maadoitettuun pistorasian. 3. Irrota ja suorista virtajohto ennen kayttoa 4. Varmista, etta virtajohdolla ja pistokkeella ei ole nakyviä vaurioita 5. Varmista ennen käyttoa ja kayton jälkeen, etta virtajohto ei ole venytety avotulen tai muun lammonlähteen ja terävien reunojen yli, mikä voi vahingoittaa kaapelin eristystä. 6. Poista kaikki pakkausosat ennen ensimmäistä käyttoa. Huomio! Jos kyseessä on metalliosia sisälävää kotelo, nällä elementeillä voidaan venyttaa hieman nakyvää suojakalvoa, joka on myös poistettava. 7. Lapset, henkilöt, joilla on rajoitettu fyysinen, aistillinen tai henkinen kyky, eivät saa käyttaa laitetta ilman valtuutettujen tai kokeneiden henkilöiden valvontaa ja aina näden ohjeiden mukaisesti. 8. Laitetta ei ole tarkoitetu käytettäväksi ulkoisten aikakytkimien tai erillisen kaukohjausjärkestelmän kanssa. VAROITUS: Tata laitetta voivat käyttaa yli 8-vuotiaat lapset ja henkilöt, joilla on rajoitettu fyysinen, aistillinen tai henkinen kyky, tai henkilöt, joilla ei ole kokemusta tai laitteiden tunte masta, VAIN, jos tamä tapahtuu heidän vastuullaan olevan henkilön valvonnassa. turvallisuutta tai on annettu ohjeita laitteen turvallisesta käytostä ja tietoinen sen käyttoön liittyvista vaaroista. Lapset eivat saa leikkiä laitteiden kanssa. Laitteen puhdistusta ja huoltoa ei tule suorittaa lapset, elleivät ne ole yli 8-vuotiaita ja heitä valvotaan 9. Alä jata laitetta ilman valvontaa kayton aikana. 10. Alä upota laitetta ja virtajohtoa veteen tai muihin{nesteisiin. 11. Kun laitetta ei kayteta, se on aina irrotettava pistorasiasta. 12. Kun vedät pistoketta pistorasiasta, alä koskaan vedä virtajohtoa vain pistokkeesta. 13. Alä laita laitteeseen mitään metallia 14. Valmistaja ei ole vastuussa vahingoista, jotka aiheutuvat laitteen virheellisestä kaytosta. 15. On muistettava, etta laitteen jotkin osat ja kaappi työn aikana ovat hyvin kuumia, joten ole varovaisia jiä alä koske niihin, voit polttaa. 16. ALA peita laitetta kayton aikana tai kun se ei ole jäahtynyt kokonaan 17. Muista, etta laitteen lammityselementit vievat aikaa jäahtya kokonaan. 18. Kun käytät laitetta, varmista, etta tilaa on riittävästi. Laite ei voi koskettaa helposti syttyviä esineitä työn aikana, kuten koristeita, paperipyyhkeitä, verhoja, vaatteita jne. 19. Kylpyhuoneeseen asennettu lammitin tulee asentaa siten, etta kylpyammeessa tai suihkussa oleva henkilö ei saa koskettaa liittimiä ja muita saaatimiä. 20. Korkean korkeuden kiinnittimien lammittimssä liittimien eri asentoen on oltava nakyvissä 1 m. etaisyydeltä. 21. Lämmittimen paalysmerkinnan tulee nakyä lammittimen asentamisen jälkeen 22. Et voi sijoittaa lammitintä suoraan pistorasiaan ja lahell palavia materiaialeja, kuten verhoja, verhoja jne. 23. Laitetta ei voi käyttaa ulkoisten aikakytkimien tai muiden erillisten kaukohjausjärestelmien kanssa 24. Älä altista laitetta ilmasto-olosuheisiin (sade, aurinko jne.) Tai käytä koskeissa olosuheissa (kylpyhuoneet, kosteat leirintaalueet) 25. Tarkista saannöllisesti virtajohdon kunto. Jos virtajohto on vaurioitunut, se tulee vaihtaa korjauslaitoksella, jotta välteään vaara 26. Alä kayta laitetta syttyvien materiaalien lahellä 27. Lammitin on asennettava vahintaaan 1,8 metrin korkeuteen lattian ylapuolelle 28. Alä käytä tata lammitintä kylpyammeen, suihkun tai uima-altaan valittomassä lāheisyydessä 29. Alä kaytā tata lammitinta, jos se on pudonnut 30. Alä käytä,Jos lammittmessä on nakyviä merkkejä vaurioista 31. Käytä lämmitintä tasaisella ja vakaalla pinnalla tai kiinnitä se seinään, jos valmistaja niin maärää. VAROITUS: Älä käytä tata lämmitintä pienissä tiloissa, joissa on ihmisä, jotka eivat pysty jättämään niitta yksin, ellei jatkuvaa valvontaa varmisteta. VAROITUS: Tulipalon vaaran vahentämiseksi pidä tekstiilejä, verhoja tai muita tulenarkoja materiaialeja vähintaan 1 metrin päässä lammittimen ilman ulostulosta. On suositeltavaa, etta sahköasennuksessa on automaattinen jaannösvirta-katkaisija, jonka kaynnistysvirta on 30mA turvallisuuden lisäämiseksi. Huomautus: Jos virtajho to tai pistoke on vaurioitunut, se on aina vaihdettava tai korjattava erikoistuneella korjaamolla. II. VAROITUKSET 1. Älä koskaan käytä laitetta, jos se on vaurioitunut tai ei toimi oikein. 2. Älä koskaan käytä laitetta, jos se on pudonnut korkeudesta ennen ja näyttaa nakyviä vaurioita. 3. Älä käytä jatkojohtoja tai muita pistorasioita, jotka eivät täytä sovellettavia standardeja ja sahkömaäräyksiä. 4. Mikä tahansa osien korjaus, purkaminen tai vaihtaminen on aina tehtävä erikoislaitoksessa. 5. Jos laite ja sahkokomponentit, kuten sahkokontaktit, ovat marat, pistoke tai kaapeli on kuivattava ennen laitteen ja sen osien kayttoa. 6. Älä käytä laitetta marillä käsillä. 7. Kun on olemassa vaara, etta laite on vaurioitunut, ALA yritä korjata laitetta itse. 8. Älä koskaan pese laitetta juoksevan veden alla tai siten, etta vesi tippuu sihen. 9. Älä käytä lisāvarusteita, joita valmistaja ei suosittele. Ne voivat aiheuttaa vaaraa käytäjälle ja ne voivat vahingoittaa laitetta. 10. Varmista,etta laite on jäahtynyt ennen sailytysta. 11. Alä koske koteloon kayton aikana. Käytä kayton aikana vain nuppeja ja kytkimiä. Odota, etta laite jäahtyy, kun se on katkaistu. 12. VAROITUS: Jotkin laitteen osat voivat kuumentua kayton aikana ja aiheuttaa palovammoja. 79III. ENNEN ENSIMMÄISEN KÄYTTÖA
1. Poista kaikki pakkausmaterialiaali ja suorista virtajohto 2. Asennuksen aikana laite voidaan peittä eristvällä materiaalilla tai vastaavalla materiaalilla 3. Asennettaessa laitetta ei saa leikata tai leikata palkkeja ja koskettimia 4. Lue kaikki käyttoöhjeet ennen ensimmaista käyttoa. 5. Tarkista, onko tuotemerkinnäss mainittu jännite vastaa sahköverkon jannitettä kotonainstallation
Poraa kaksi poraa seinaan, vahintaan 180 cm lattiasta ja 20 cm katosta - kuva A. Kun olet porannut reiät, aseta tyyny ja ruuvi. Varmista, etta ruuvit ovat hyvin kiristetty ja ripustaa laite seinälle.TUOTTEEN KUVAUS
Kuva B. PÄKGTKIN ON/OFF = OFF ON/YUTN OFF.Kuva C. KAUKO-OHJAUS
1. ON/OFF-painike 2. MODE 3. PÄVÄ 4.CLOCK 5. SET UP 6. VIIKKO / AJASTIN 7. MIN 8. + -> Painike lampötilan nostramiseen. Se toimii myös valintapainikkeena vuorokaudessa. 9. --> Painike lampötilan laskemiseksi. Se toimii myös valintapainikkeena vuorokaudessa. 10. RESET - Ajastimen nollauspainikeKuva D. LED-PANELI
1. ON-symboli 2. Lammitysteho 1000W 3. Lammitysteho 2000W 4. AUTO-toiminto 5. Lampotilan naytto 6. Päävän näytö 7. Ajan naytto 8. ON-symboli - ajastimen käynnistys 9. OFF-symboli - ajastimen sammutus 10. Avaa ikkunan tunnistusIV. KAYTTÖ
1. Druk op de hoofdschakelaar aan de rechterkant van het apparaat - Fabeelding B om het apparaat in en uit te schaken. 2. Ole hyvä ja odota valmiustilassa. Druk op de aan / uitknop (1) op afstandsbediening - Afbeelding C. 3. Druk achtereenvolgens op de MODE-knop (2) om bedrijfsmodus te selecteren: - 1000 W: n koko ajan vakiovarustajat tapasivat 1000 W: n. - 2000 W, heti apparaat zavakiovarustajt tapasivat 2000 W. - Automaattinen modus, lapikaynnin + en - lampotila kasin steissä. Jos laitteessa on automaattinen tarkistus, lampotila voi muuttua. - Avoin venster-havaintoyksikkö - Wanner deze -toiminto on valittu, tarkista sen lampenemisesta tarvittavat automaatiot, kun kameran lampötila on mitatu 10^ C: seen. 4. Druk op de aan / uitknop (1), joka kattaa kaikki tarvittavat vaatimukset. Tassä vaiheessa valmistaja on 30 sekunnin ajan.DE INTERNE APPARAATKLOK INSTELLLEN
KASITTELY: Als u de huidige tijd ja dag van de vikko Niet instelt, za het apparaat Niet goed werken omdat het volgens zich eigen intern klok werkkt, wat onjuist is. 1. Valitse AUTO-toiminto valitsemalla MODE-knop. 2. Tahtiluokituksen ajankohtainen asettaminen viikon päästä seuraavasta paivästa: - Druk op de knop DAG en valitset huidige dag met de knuppen + fi -. Wacht tot het display stopt met knipperen. - Druk op de KLOK-knop en huidigeijd in met de knoppen + en -. Wacht tot het display stopt met knipperen. - Druk op de MIN-knop huippuluokan kohta met + kn -. Wacht tot het display stopt met knipperen.AJASTINOHJELMISTOINTI-TIMER
Koko ohjelma, joka sisältaa kaikki ohjelmat, joita voit käyttaa viikon aikana koko vikon ajan. Ajastin kaikille sanamuotoille, jotka on valittu AUTO-toiminton, jotta he voivat kaytttaa kaikkia laitteita. 1. Druk op de VIIKKO / AJASTIN-valikko, joka valitaan viikon aikana, kun tarvitset laitteita ja asennat automaattisen automaattisen käsittelyn, kun schakelen met de knoppen + fi - Wacht tot het display stopt met knipperen. 2. Nadat u op de knop SET UP hebt gedrukt,licht het ON-symbool op het -naytossa.Voit aloittaa ajastimen asennuksen.Helmikuu KLOK, MIN, ^+ fi - aloita ajastimen kaynnistaminen testessa. Wacht tot het display stopt met knipperen. 3. Nadat u nogmaals op of WEEK / TIMER-knop (6) hebt gedrukt en verrolgens op de SET UP-knop heeft gedrukt,licht het OFF-symbool op het display. Sinun ei tarvitse laittaa aikaa ajastimeen. Wacht tot het display stopt met knipperen. KÄYTTOÖNOTTO: Käynnistä altijd asunto zich dan stoptijd. KAYTTOOHJE Druk op de RESET - ajastin, jonka avulla voit tarkastella kaikkia standardeja.V. PUHDISTUS JA HUOLTO
1. Irrota pistoke pistorasiasta aina ennen puhdistusta. 2. Jos puhdistusaineiden, kuten virtapistokkeen, termostaatin, sahkokontaktin jne. Aikana, ne on liotetu ennen kayttöä uudelleen, ne on kuivattava perusteellisesti 3. Alä käytä aggressivisia pesuaineita emulsioiden, voiteiden, tahnojen jne. Muodossa. puhdista kaappi. Ne voivat muun muassa poistaa information graafiset symbolit, kuten merkit, varoitusmerkit jne. 4. Varmista, etta laite on jähtynyt ennen puhdistusta. TEKNISET TIEDOT: Jannite: 220-240V ~ 50 / 60Hz Teho: 2000W Maks. Teho: 2200W lp20  Varoitus kuuma pinta" - Käytettävissä olevien pintojen lampötila voi olla korkeampi, kun laite toimii, mikä tarkoittaa, etta koteloelementit kuumenevat kayton aikana kayton aikana, SAVE CAREFUL !!!  "ÄLÄ KÄÄNTÄ" - KUVAUS TÄRKEÄ Laitteen merkintä tarkoittaa, etta laitetta ei saa peittä vaatteilla, peitteillä ja muilla tekstituotteilla, jotka voivat aiheuttaa sytymista.  TUS: Alä kaytä tātā laitetta kylpyammeen, suihkun, uima-altaan ja vastaavan vesisäiliön lahellä.  Kantakaamme huolta ymparistostä. Pahvipakkauksen pyydämme laittamaan paperikierratykseen. Polyteenipussit (PE) tuee laittaa muovien kierratysastiaan. Loppuun kaytetyl laitteet tuee toimittaa asianmukaiseen keryspisteeseen, koska laitteen sisälätmät vaarlliset aineosat voivat olla ymparistolle vahingollisia. Sähkolaite tuee toimittaa siten, etta sen uudelleenkäytö on estetty. Jos laitteessa on paristo, paristo tuee poistaa ja toimittaa erillisesti keryspisteeseen.(UA) YKPAIHCBKA
YBAGA:
Ppncptpi npn3NaueHn TiIbKn IJy DomaunHbOro BVKOpNCtAHN. Pnucpii HE npn3naeHn dIy KomepuHoro / npopeciHoro BnKOpncTahn. PnctpiH E nixoNtB dIy BIKOpncTahnHa BIDKpntomy nobitpi. Ybara! Ipeed BnKOpNCTaHnM oob'3KOBO npOHTaIe 1o IHcTpyKciIO 3 ekCnPyatauii, 0o6 yHnKHyTN HeUacnX BnPaAdkIB Ta npaBnIbHOrO BnKOpNCTaHHn PnucTpoIO. 36epiraTe uei noci6nIK i 36epiraTe Noro, 5o6 Noro MoxHa 6yIo JeRKO BnKOpNCTOByBaTu. I. Bka3iBkn ⅢoO 6e3neKn BnKOpncTaHHa 1. Перацькористаням посяа на паспгштлчic, вдовide Лokалним napametpam cohocti, ane nam'raite, lo mapkybaHH: AC - ce 3minhoro ctpymy, a DC - DC. 2.Пдкючын рпсстрий лише до розетки заemлени 220-240 B~50/60 T. 3.перд вкористаням розкутith i виряmitb shyp xNBHeHHa 4. IpekeohaiTeca, 0o shHyp XnBHeHHa Ta BnIka He MaIOb BNIMIX IOsKOJKeHb 5. Пеши та пись використаня пошур кивлени He po3ryecbca Ha Bidkpntomy borhi abo inshomy dxepei TePna Ta roctpnx KpaX, kki MOkyTb nozkodnI i0jauio ka6eHIO. 6. Перд поим ВИКОпстаннам Видаліпь Bci кOMПонeHTи упakOBк. YBara! YВипаду 3 KOPnycom 3 MeТаЛeВIMn DeТалЯМN, Haцx eIemEHTax може 6уTN po3TЯHуTA 3JIerka BnIMa 3axncha nIIBka, kA TAKoX NOBnHa 6yTN BnJaJIeHa. 7. Ппсстрий He NOBHeH BnKOpNCTOByBaTnCЯ DiTbMn, OcO6aMn 3 OmbexeHmN φi3uHmN, ceHCOPHmN Yu PO3yMOBmN MOxJIInBOCTaMn 6e3 HaIpy yNoBHOBaXeHnx a6o doCBiDyeHnx oci6 i 3aBXdN BiINOBiIDHo Do uNx iHCTpyKciJ. 8.ОБладнання He npn3hauehe ДЯ BИКOPиCTaHHЯ 3 3OBHIшHIMN BUMNKaayam N acy a6o OKpeMOIO CnCTeMOIO DnCTaHciINHOrO KepyBaHHra. ПОЕРДЖЕHHЯ: Ye oblaання може вкористовьатися DiTbMn CTapwe 8 pokiv Ta Oco6amn 3 obmexeHIMN φi3nUHMN, ceHCOPHIMN a6o po3ymOBUMN 3di6HOCTaMn a6o Oco6amn, kI He MaOTb DocBiy a6o 3HaHb npo oblaanHnry, TIlbKN, kIoo ue po6ntbcny iI HarJydom oc6b, BiIOBidaIbHOi 3a ix 6e3neKn a6o 6yIuHaDAHI IHCTpyKci II SoOIO Be3neHoro BVKOpNCtAHnY npicStpoI i 3HaOtB npo He6e3neKn, nob'zahi 3 Ioro BVKOpNCtAHnM. DITn He NobHHI rpaTN 3 oblaanHnYm. PnpbpanHnTa texhiche OBCnyroBvBaHHЯ пrcSTpoI He NobHHI BVKOHyBatncr DaTbMn, kIoo BOHn He DoCyrnn 8-piuHOro BkY Ta He KOHTPOJIIOUTbcra 9. He 3aIIwaIte npictpiB 6e3 hargy nID qac po6OTn. 10. He 3aHpyoIe npnlai i shnyxNvBneHny y BODy a6o iHwi piDHH. 11.Якwo npictpiH He BnKOpNCTOByEcBcA, noTo cId 3aBXdn BiD'edHyBaTn BiD pO3eTKN. 12. Koln Bntrye Bnky 3 p03eKn, HikoN He TargHtB 3a shyp XNBHeHn Jnwe 3a HTenCeJbHy Bnky. 13. He klaɪt b NO METAL ITEMS BCEpeɪnhy npɪcɪtro 14. Виравник He Hece BiДноВдаЛьНоcti 3a 3бntк, српунеHi He npabNьнm BИКОРИСТАHHЯm пИСТpoI. 15. CπiD nam'ЯтataN, ξο Deяki YactHn npictpoio i waoNi πiD yac po6Otn cTaIOTb dYxHe rapaunM, TOMy 6ydbTe o6epexHi i He TopkaTecrdo Hnx, BN MoKeTe cnaIIOBaTncra. 16. HE 3aKpmbaiTe npicptiPi d quac po6oTu a6o He nobHicTIO oxoJodKyetbcra 17. Nam'yaTae, 9o HarpiBaJIbHi eIeMeHTn npncToIO nOtpe6yIOTb yacy, 9o6 nobHicTO OxOnohTyN. 18. Пд час ВИКОПИСТАНЯ писчpoю 3а6e3neчte ДОCTаTHи посчтip над i habkoJO. Пристрий не може Торкатися 6удь-якх ЛergозаймостиХ пеdmetов пд час роботи, taknxяк пикраси, палеров ршнки,штори, одг тоц. 19. O6irpiBauch, BCTaHOBJIeHn y BaHHi KIMHaTi, NOBHeH 6yTu BCTaHOBJIeHn TaKIM YINOM, 0o6 po3'Emu Ta iHwi peryIaTOpn He MORn 6yTu 3aueIeHi ocOboU y BaHHi a6o Ni dYwem. 20. Y harpibayax dIy BncoTHnx CbiTnIbHnKiB nO3nCiPi3Hnx nOIOXeHb po3'EMiB NOBHHi 6byu BNIMi 3 BiDCTahi 1 M. \ T 21.Пись Всановленья HarpiBaча NOBUNHa 6yTu BUDIMa eTUKeTKa ДЯ NOKpTTH HarpiBaça 22. He moxha po3miuBaTn HarpiBauch 6e3nocepEnbO NiD p03eTKoH, a TAKOX no6JN3y JERKO3aIMNCtNX MaTePiAIB, TaKx YK UToPn, UToPn ToUO. 23. Ппстей He може ВИКОПСТОВУВАТИСЕ 3 3OBHIшим ВИМИКачам Уасу abo iHшIMN OKремIMN сИСTeмamДиСТанцIйHORO КерУВання 24. He πίπιαναιθε πριστρίην BπΠΙΝΑγ αΤΜΟςφερήχ γΜΟβ (ДΟΙς, coΝυς τα έπ.) Aбο έν BVKOPNCTOByIe B yMOBax NiDnUeHOI BOLOrOCTi (BaHHi KIMHaTn, BOJOri KeMnIHROBi 6ydnHKn) 25. PerioDnHNo nepeBipRte cTah shHypa XNBHeHHa. KaO shHyp XNBHeHHa NOKoJKeHO, Ioro cnI3amHHTn CneiaJIi3OBaHm peMOHTHM 3aKJaDom, 06 yHnKHyTu He6e3NeKN 26. He BnKOpncToBvIe npicTpii no6Jn3y Ierko3aMnCTnx MaTePiaJIb 27. HarpiBauchobHeHbTnBcTaHOBJIeHnHa BnCOTi He MeHwe 1,8 M nAdPiIIOROIO 28. He BnKOpncToBvIe ue o6irpiBaU y 6e3nocepEniH iN3bKOcTi BiD BaHNi, dyu a6o 6aceiHy 29. He BnKOpncToBvIte ue oBirpiBaU, kIo BIn ynaB 30. He BnKOpncToBvIe, kIoo e BnDnMI O3HaKn NOnsKOJxHHeNry o6irpiBaay 31. ВикоростовуITE obirpiBauch na pibni i ctiikii nobepxhi abo npnKpinitb noro do CTiH, YKso ce neped6aueho Bnpo6hNkom. ПОЕРДЖЕНЯ: He BnKopncToBvIte ue o6irpiBaY y HeBeJIkX npMiuZeHnX, de e JIOi, kI He moKyTb 3aIIuWntn iX cami, kIso He 3a6e3neueHn NoCTiHn HaIyI. ПОЕРДЖЕHHЯ: ьб змehштп ризк пожki, trpmaite TeKCTnIb, wTOpn a6o iHwi JERko3aIMNCtI mATEPIaII Na BiDCTaHI npHaMHi 1 M BiD BHXOy NOBITpy HarpIBaYa. PekomeHdyetbcra, 06 eIeKtpnHa yCTaHObKa 6yla 6bnaHaHa aBTOMaTHHm BUMkaYeM 3aIIuKOBoro cTpyMy 3 nyckOBIM cTpyMom 30mA dIyINuJehn8 6e3neKn. Iprnmtka: Jkso shnp jNvBneHna 60 shyp jNvBneHnooKOJKeHO, BIn 3aBXn NOBHeH 6ytn 3amHeHn a6o BiDpeMOHTOBAHn Cneiai3OBAHOIO peMOHTHOIO MaicTePHi.II. NOPEPEJXEHHY
1. Hikon He BnKOpncToBvIe npicTpi, kso BIn noKoJxHn a6o He npaOe HaJeXHM uHOM. 2. Hikon He BnKOpncToBvIe npicTpi, kUO BiH BnaB 3 BnCOTn Do i Noka3ye BnuIMi O3HaKn NOsKOJxehn. 3. He BnKOpncToBvIe nOobKyBaui a6o iHwi eJeKtpnHi po3eTKn, kKi He BiIIOBiaIoTb DiIOChm CTAHdApTaMa eJeKtpnHm HopMaM. 4.Бydь-якп ремоNT,ДемоHTax abo 3amHa 6ydь-якнхЧаCTиH 3aBxДn MaE 3diIChIOBaTnCЯ cneцлizOBaHIM O6'ekTom. 5.Якwo npictpi i eJeKtpnHi KOMnoHeHTN, Taki k eJeKtpnHi KOHTaKTN, HAMOuJIH, npo6ky abo Ka6eIb Heo6xidHO BnCyuHTN nepeD BnKOpNCtAHHm npicTpoH ta Noro KOMnoHEHTiB. 6. He BnKOpncToBvIe npncTpiM oKpMm pyKaMn. 7.Якwo icHye pN3NK noWkoJxHnH npIcTpoU,HE hAmaraTeCya camocTiHo peMOHTyBaTu npIcTpii. 8. Hikon He MInTe npncptiPi nd npoToHIO BDOIO a60 TaKIM YINOM, 06 BODa He Kanaja B He!. 9. He binkopncToBvIe akcecyapn, kI he pekomehdoBaHbVnpo6hNkOM.BoHmMOxytb CTaHOBTn He6e3neky dIy KOpNCtUBaHa i MoXytb cPnUnHHTn N0sKoJKeHHn npnCTpOIO. 10. IpekeonaiTeca, 0 npicpi OxolohyB nepei36epirHnM. 11. He Topkaǐteča kopryncy πίd γac BνkopncTaHnry. πίd γac poBOTn BνkopncToBy Te JnIe pyuKn Ta nepeMnKaui. Nicŋ BνmKHeHnry 3aueKaaiTe, nOKn npncTpiOxOJNoHe. 12. OBEPEKHO: Dea Kuchu Tn Hc boro npocpo MOkyb 6yTu dyxg rapymm ni d yac poBOTu Ta BklnkaTn oniK.III. IEPEDIPEPIIMBVKOPNCTAHHRA
1.3HIMtB BeCb NaKyBaJIbHN MaTepiA I BUNpRmITb SHyP XINBNEHHA 2.Пд уасустанови писрий може 6ун покрпш iэлячим MaTePIaIOM a60 noDi6HIM MaTePIaIOM 3.Присknаданні пиаду He cnii pi3a n a6o pi3a n 6aJn Ta kpoKbN 4.ПердпершимВИКОПИСТАнгЯМпpoчтайТЕВсIиЧтукiiДцоДВИКОПИСТАнHA. 5. Ipepeipte, YI Hanpyra, Bka3aHa Ha etnkeTci Bnpo6y, BiINOBiAe Hanpy3x KINBneHn MepexiYCTAHOBKA
BnKOpNCTOByIe DpInb IpnocBepdIOBAAHRA DBOX OTBopIB y CTiHi, MinIMyM 180 cm BiD niDnOri i 20 cm BiD CTeTI - 3o6paJxHNA. Picnra TOrO, kB Bn IpocBepdIIIN OTBOPN, BCTaBTe NDoUweky i TBnHT. PepeKoHaITeCry, 10 GBnHTn Do6pe 3aTgHyTi ta NobicbTe npncptpi Ha CTiHy.ONIC PPOyKcii
MaJIIOHOK B. TOnOBnI IepemKau ON/OFF BKJI/BNKJI.PncyHcK C. DnCTAHUINHNI KOHTPOJIb
1. KhoNka ON / OFF 6.WEEK/TIMER 2. PEKIM 7. MIN 3.ДЕΗБ 8. +-> KhoNka dIra nIiBnuIeHHa TeMnepaTpyu. TaKoK cnIyKnITb KhoNkoIO Bn6Opuy acy /dnr. 4.CLOCK 9. ---> KhoNkaДЯЗИнЖeHЯТeMnepaTypn.TakOx CnyKnTb KhoNkoB OvBOpу yAcy /ДнЯ. 5. SET UP 10. RESET - KhoNka CkndaHnTaMepaMaJIHOK D. LED ΑHAJEb
1.CMBOB BKJ 6. BiodobpaekHHn DnH 2. NotykhicTb HarpiBy 1000 BT 7. BiodobpaexeHHa cacy 3. NToTyKHiCt b HarpiBy 2000 B 8.Cmbon BKI-3anyck taMepa 4.Функця AUTO 9.CmBON OFF-BIMKHeHH TaMepa 5. BiodobpaXeHHa TempepaTpy 10. BIDKpniTe cyHKUIO BnBnEHH BkHaUSAGE
1. Hatnchitb roJIOBHN nepemKau Ha npaBi cTOpOH npncTPO - MaI. 2.Пистрипеpe6уьаьрeximiочikуванн.HaTnCHITb KONky On/Off (1)Ha nylti duCTaHuzHOro KepyBaHHa-3O6paKeHHaC.卍o6 yBIMKHTN BeHTnJIrToP 6e3 HarpiaHHa,ДычHaTnCHITb KOnky On/Off (1). 3. Hatnchitb Khonky MODE (2), 06B Bn6paTn peXm po6oTn: 1000 Bt - npnlaad 6yde noctiHn HarpBaTncb npn noTyXhOcTi 1000 BT. 2000W -Ппстгбуде постиногарьатия потужноcti 2000ВТ. ABTO - HaTnCHiB + Ta -, 06 BpyHy BCTaHOBHTN TEMNEPATy. Y cIbOMy peXIMIpNCtpi NIDTPMByMaHE BCTaHOBHeY TEMNEPATy.b PhHKzI BnRABHeHH BIKPnTOBikHa - KOIu zIe FyHKzI BnBpaHa, nPcSTpI ABToMaTHUHO BmNKaE HarpIBaHHra, kKIO TEMNEPATpa npMIeHH panTobO naae Ha 10^TIMER
Taimep moke 6byn BCTaHOJIeHNI TiIbKni npn Bn6opi cyHKii AUTO. 1.Obepitb yHKJIIO AUTO 3a donomoroH KhoNk MODE 2. Nepu HIX BCTaHOBtN TaHMeP, Heo6xIDHO BCTaHOBtN DeHb i KaKTHUHn Yac. 3. Hatnchitb Khonky DAY i Bn6epiB noTOUH NDeHb KHOKAMN + Ta - 4. Hanchitb KhoNky CLOCK i BCTaHObitb nOToHy rOdInHy KhoNkAmn + Ta - 5. HaTnCHiB kHONky MIN i BCTaHOBiTB nOToUHi XBNINHN KHOKNKAMN + Ta - PpIMtKa: KaIO NOToCHN (NOToHm) cAc i DeHb He BCTaHOHe, pncTpiI He 6yde npaIOBAtn HAnExHM uHOM, OCKJIbKn BIn 6yde npaIOBAtn BiINOBiHO Do BlnACHNX BHyTpIHIX rOHNHHKIB, 0o HnnpabINbHO.BCTAHOBJIEHH TAIIMEPA
1. Hatncitb KhoNky WEEK / TIMER i BnBepiB DeHb KHOKNKAMN + Ta - 2. Hatncnybwn KhoNky SET UP, Ha dinCnnei 3acBtiNbC rCMBOJ ON. Tenep BN MoKeTe BCTaHOBtN yac 3anycky TaIMepa 3anycky. 3a donomoroo KhoNOK CLOCK, MIN, + ta - BCTaHOBtB yac 3anycky TaIMepa. 3. Hatncnybni KhoNky SET UP 3HOby, Ha dncnnei 3acBntbcra cIMBOJ OFF. Tepe BN MoKeTe BcTaHOBtU lac BmKHeHr TaMepa. ПРИMITК.Час зуckу 3aЖдmae 6tн HIXKUM, HIXчac BIMNKaHH. PIMITKA 606 cKHyTu TaMep Do cTaHapTHnx 3HaueHb, HaTCHiB KHonky RESET.V. OUIIeHHra TA OBCJIYTOBByAHHRA
1. 3aBxDn BiKnIouaTe npncTpiB iD po3eTKn nepeD YNueHnAeM. 2. JIIO nID YAC YIeHHe BnKOpNCToBcyTObCra Taki eJIeMeHTN, JIK WTeNcEJIbHa BUNka, TepMOCTaT, eJIeKTPuHi KOHTaKTU ToIO. IpocOHTb nepei NOBtOPHM BnKOpNCaTHHm, iX cIId peTeJIbHO BucyWHTN 3. He BnKOpNCToBMyTe arpeCnBHi MmOHi 3acO6N y BnRJIaI eMylbci, IocbNoHIB, nact Ta iH. DnA OunUeHNr KOpNcy. BOH MoKyTB, cepeD IHwOrO, BnnyHTn IHcOpMauiHi rpaqiHi CmBOHn, Taki k3hAKn, nonepdJyBaHbHi 3hAKn ToIO. 4.Передчишенигпереконайтеся,цюпсстриохолohyB. TEXHIUHIDAHI: Hanpyra:220-240B\~50/60T NotyKHiCTb: 2000 Bt MaKc. NotyKHiCTb: 2200 BT lp20    3aTepeXeHnHa Tapya NoBepxH" - Tempepatypa Doctynnx NobepxoHb Moze 6ytn Bnso, KOI ObnadHaHH npauoe, 0o 10 eIemEnTn KopnyCy ctaotb Dyke tapayHMn nuc pobotn nd ac EKcnlyataii. "HE IOKPITT" - BAXJIIBICTb BI3HAUEHH HAnc Ha npicTrooi 03haac, 1o npicTpii He noBHeH 6yTu nokpTmOBdpamTa iHsIMn TEKCTINbHMn Bnpo6aMn, kki MOxTy b BkNkaTn 3aMaHH.  PEJXEHH: He BnKOpncToBnyTe ce o6laHaHH no6JbMy BaHH, yuWoBx Ka6iH, 6aceHiB Ta aHaJIorIyHx Byapib DnIy BODI.  Y iHTepecax HABKoJIuHbOTo cepeIOBua. Byd naKa, BiDnAte KapToHny ynaKOBky B Micce 360py Mykynatypn. POniTneHOBI MiuKN (PE) BnKHyTN B CMTHN K Dn nnactky. BiDnpaBObAHm npictpri NobHEn 6ytn BiDnpabNeHm y BiDnOBiHy ToKy 36epirAHn, TOMy uO B npicTpoi e Hebe3neHi InrpeiEHTn, kI MOxTy b cTahOBnTn 3arpo3y HABKOJIuHbOMy cepeOBNuY. EJektpnHm npicTpni notpi6Ho NOBepHyTu TAK, Uo6 ObMeknTu HOr NOBtOpHe BnKOpNCtAHn. RaUO y npicTpoi E 6atepeKn, TO nOTpi6Ho iX BVITaHryTu i BiDnatNo BIIOBIDHO NyHTky.(SV) SVENSKA
OBS:
Enheten ar endast avsedd for hushallsbruk. Enheten ar INTE avsedd for kommersiell / professionell användning. Enheten ar INTE lamplig for utomhusbruk. OBS! Innan du anvander det ar det viktigt att du laerenna braupsanvisning for att undvika olyckor och for korrekt anvandning av enheten. Hall den har handboken och hall den sa att du enkelt kan anvanda den.I. RIKTLINJER FÖR SÄKERHETSANVISNING
1. Innan du anvander, kontrollera att spansningen som anges på markskylten motsvarar de lokala parametrarna for salthalten, men kom ihag att markningen: AC- ar voxelström och likström ar likström. 2. Anslut endast en 220-240V 50/60 Hz jordad uttag. 3. Unrollera och dra ut natsladden fore anvandning 4. Se till att strömkabeln och kontakten inte har nagra synliga skador 5. Färe och after användning, se till att natsladden inte sträcker sig över en öppen flamma eller annan värmekälla och skarpa kanter som kan skada kabels isolering. 6. Ta bort alla Förpackningskomponenter före Första användningen. OBS! Vid ett holje med metalldilar kan på dessa element en lätt synlig skyddsfolie sträckas, vilken ocksåBOR avlågsnas. 7. Apparaten ski inte användas av barn, personer med begränsad fysisk, sensorisk eller mental kapacitetutan tillsynav auktoriseradeller erfarna personer och alltid i enlighet med dessa instruktioner. 8. Utrustningen ar inte avsedd att anvandas med externa tidsbrytare aller separat fjarrkontroll. WARNING: Denna utrustning kan anvandas av barn over 8 År och personer med begränsad fysisik, sensorisk eller mental formåga, eller personer som inte har nàgon erfarenhet ull kunskap om utrustning, ENDAST om detta sker under overinseende av en person som ansvarar for deras sakerhet eller har fätt instruktioner om saker användning av encheten och ar medveten om farorna i samband med användningen. Barn sca inte leka med utrustningen. Rengöring och unterhäll av apparaten sca inte utforas av barn om de inte År over 8 År och overvakas 9. Lämna inte encheten obevakad under drift. 10. Doppa inte in apparaten och natsladden i vatten aller andra vatskor. 11. Nar encheten inte anvands ske den alltid kopplas fran strömuttaget. 12. När du drar stickkontakten fran uttaget, drar du aldrig natsladden bara med. kontakten. 13. Placera INTE METALPUNKTER inuti encheten 14. Tillverkaren ar inte ansvarig for skador som uppstar på grund av felaktig anvandning av apparaten. 15. Det bör komma ihåg att vissa delar av encheten och skåpet under arbetet blir vändigt varma, var försiktig och rör inte dem, du kan brinna. 16. INTE tacka enhances under drift aller när den inte svalnar helt 17. Kom ihåg att varmeelementen på encheten tar tid att svalna helt. 18. När du använder encheten, se till att du har tillräckligt med utrémme över och runt. Enheten kan inte vidröra nagra lättantändiga foremål under arbetet, sāsom dekorationer, pappershanddukar, gardiner, kläder etc. 19. Värmaren installerad i badrummet ska installeras sa att kontakterna och andra regulatorer inte kan roras av en person i badkaret eller under duschen. 20. I värmare für höghöjdarmaturer ska positionerna für kontaktens olika positioner vara synliga från att avständ av 1 m 21. Märkningen für att täcka värmaren skara varasynlig after att värmaren installerats 22. Du kan inte placera värmaren direkt under uttaget, och nara brandfar Liga material som gardiner, gardiner etc. 23. Apparaten kan inte anvandas med externa tidsbrytare aller andra separata fjarrkontrollsystem 24. Utsatt inte apparaten for atmosfäriska forhällanden (regn, sol etc.) aller använd under hög luftfuktigkeit (badrum, fuktiga hus) 25. Kontrollera regelbundet nätkabelns tillständ. Om nätkabeln ar skadad ska den bytas ut av en specialiserad reparationsanlaggning for att undvika fara 26. Använd inte apparaten nara brandfar Liga material 27. Värmaren måste installereras i en Höjd av minst 1,8 m over golvet 28. Använd inteenna värmare i omedelbar narrhet av badkar, dusch eller pool 29. Använd inteenna värmare om den har tappats 30. Använd inte om det finns synliga tecken på skador på värmaren 31. Använd värmaren på en jämn och stabil yta eller fasp den på vagggen, om det foreskrivs av tillverkaren. WARNING: Använd inteenna värmare i små rum)där det finns personer som inte kan lamna dem ensamma, sāvida inte konstant tillsyn sakerställs. WARNING: För att minska risiken für brand, häll textilier, gardiner eller andra lättantändiga material minst 1 m bort från luftens utlopp. Det rekommenderas att den elektriska installationen ar utrustad med en automatisk Återströmbrytare med 30mA startström for ökad sakerhet. Obs! Om nätkabeln eller nätkontakten ar skadad ska den alltid bytas ut uller repareras av en specialiserad verkstad.II. VARNINGAR
1. Använd aldrig encheten om den ar skadad aller inte fungerar ordentligt. 2. Använd aldrig encheten om den har fallit från en höjd fore och visar synliga tecken på skador. 3. Använd inte förlängningssladdar aller andra eluttag som inte uppyller gällande standarder och elektriska foreskrifter. 4. Eventuell reparation, demontering eller byte av delar sca alltid utforas av en specialiserad anlaggning. 5. Om apparaten och elektriska komponenter som elkontakter ar vata, ska pluggen eller kabeln torkas innan du anvanderenheten och dess komponenter. 6. Använd inte,enheten med vata hander. 7. Om det finns risk for att encheten har skadats, forsok INTE att reparera encheten själv. 8. Tvatta aldrig apparaten under rinnande vatten erer pa ett sadant satt att vattnet droppar in i det. 9. Använd inte tillbehör som inte rekommenderas av tillverkaren. De kan utgöra en fara for användaren och kan skada encheten. 10. Se till att encheten har svalnat innan du lagrar den. 11. Rör inte på huset under användning. Använd endast knappar och växlar under drift. Efter avstängning vanta tills encheten svalnar. 12. WARNING: Vissa delar avenna enchet kan bl mycket heta under drift och orsaka brannskador.III. FÖRE FÖRSTA ANVÄNDNINGEN
1. Ta bort allt forpackningsmaterial och dra ut natsladden 2. Under installationen kan encheten vara tackt med isolerande material eller liknande material 3. Vid montering av anordningen ske balkar och sparrar inte skaras eller skaras 4. Läsigenom alla bruksanvisningarForeforsta användningen. 5. Kontrollera om spansningen som anges på produits rattmärkning motsvarar spansninger i nitverket i ditt hemINSTALLATION
Anvand borren for att borra två hål i vöggen, minst 180 cm frän golvet och 20 cm frän taket - bild A. När du har borrat hålén, satt in dynan och skruva. Kontrollera att skruvarna ar ordentligt spända och hangenheten på vöggen.PRODUKTBESKRIVNING
Bild B. MAIN SWITCH
ON/OFF = OFF ON/YUTN OFF.Bild C. FJARRKONTROLL
1. PÁ / AV-knapp 2. MODE 3.DAG 4.CLOCK 5. SET UP 6.VECKA/TIMER 7. MIN 8. + -> Knapp for att höja temperaturen. Fungerar ochså som en valknapp För tid / dag. 9. --> Knapp for sänkning av temperaturen. Fungerar ochså som en valknapp für tid / dag. 10. RESET - Timer reset-knappBild D. LED PANEL
1. PÅ symbolen 2. Värmeeffekt 1000W 3. Värmeffekt 2000W 4. AUTO Funktion 5. Temperaturdisplay 6. Dagsvisning 7. Tidsvisning 8. ON-symbol-timer startup upp 9. OFF-symbol - timeravstängning 10. Oppna fönsterdetekteringsfunktionenIV. ANVÄNDANDE
1. Tryck på hovenschakelaar på rattenhet av apparaten - Bild B om enchelen i en ut te schakelen. 2. Enheten stared nu i vantelage. Druk pa de aan / utknop (1) op de afstandsbediening - Bild C. 3. Tryck afterat pa MODE-knappen (2) for att valja foretagsmodus: - 1000 W på apparatenkommen att vara konstant under krig med 1000 W. - 2000 W, apparatenkommen att ständigt staupp med 2000 W. - Auto-mode, tryck på de knoppen + sv - om handtemperatur für temperatur i te stellen. Enheten gär automatiskt till modusen for temperaturen. - Öppna venster-detektionsfunktion - Närenna Funktion ar vald, skickas det apparats automatiska uppvärmning från kamertemperaturplottning med 10^ C daalt. 4. Tryck pa den / utknop (1) pa den avstandsbediening om apparaten fran te schakelen. Enheten kopes av en schakelt after cirka 30 sekunder av.DE INTERNE APPARAATKLOK INSTELLLEN
OPMERKING: När du ar den aktuella tiden och en vecka av veckan intekommen att installeras,kommen eheten inte att fungera bra eftersom den ar en egen intern klocka, vad onjuist ar. 1. Valj den AUTO-funktionen Med. MODE-knappen. 2. Ställ in for dig timern installde den veckans dag och den aktuella tiden i: - Tryck på knappen DAG och välj den aktuella dagen med knoppen + en -. Wacht till det display stopt med. knipperen. - Tryck på KLOK-knappen och ställ den aktuella tiden in med de knoppen + sv -. Wacht till det display stopt med. knipperen. - Tryck på MIN-knappen och ställ de aktuella minuterna i med de knoppen + sv -. Wacht till det display stopt med. knipperen.TIMERPROGRAMMERINSTELLING-TIMER
Med den hare funktionen kan du programmera tid for enheten pa varje onskad dag av veckan och ut fran schakelen. Timern kan bara tas in after val av AUTO-funktion och inställning av intern klock fran encheten. 1. Tryck på VECKA / TIMER-knapp och valj Välj veckans dag)dén kommer att stalla in automatising och slappa ut knopparna + en-. Wacht till det display stopt med. knipperen. 2. Nadat u op the button SET UP have gedrukt, light the ON-symbol op in the display. Du kan nu starta tiden for timerinställningen. Anvand de KLOK, MIN, +sv - knoppen om starttid av timern i te stellen. Wacht till det display stopt med. knipperen. 3. Nadat u nogmaals pa WEEK / TIMER-knappen (6) har skrivit och sedan pa SET UP-knappen har skrivit, latt OFF-symbolen visas pa displayen. Du kan nu utesluta timerns inställninger. Wacht till det display stopt med. knipperen. OPMERKING: startid mäste alltid vara korterän stopptid. OPMERKING Tryck på RESET-knappen om timern skå gå tillbaka till standardinställingarna.V. RENGÖRING OCH UNDERHÄLL
1. Koppla alltid ur stickkontakten ur eluttaget innan du rengör det. 2. Om under rengöringstillbehör som stromkontakt, termostat, elkontakter etc. blötlägg's innan de användsigen, bör de torkas ordentigt 3. Anvand inte agressiva tvattmedel i form av emulsioner, lotioner, pasta etc. att rengora skapet. De kan bland annat ta bort informationsgrafik symbolerna, sasom tecken, varningsskyltar etc. 4. Se till att encheten har svalnat innan du rengor. TEKNISKA DATA: Spanning: 220-240V ~ 50 / 60Hz Effekt: 2000W Max. Effekt: 2200W IP20  Caution Hot Surface" - Temperatures on de tilgangliga ytorna kan vara hogre nar utrustingen fungerar, vilket innebar att menten blir mycket heta under drift under drift. SPARA OBS!  "INTE SKYDD" - INSCRIPTION IMPORTANCE Inskrften på encheten inebär att encheten inte skä tackas med kläder, filtrar och textilprodukter som kan orsaka tändning. VARNING: Använd inteenna utrustning nara badkar, duschar, simbassänger och liknande vattentankar.   Vi sköter om miljön. Überlamna Förpackninger i kartong till pappersavfall. Polyetylensäcker (PE) slängs i avfallsbehällare for plast. Man bör lamna en gammal apparat till en riktig Återvinningscentral, eftersom farliga componenter i apparaten kan orsaka fara till miljön. En elektrisk apparat bör lamnas for att minska fornyad användning avenna. Om apparaten innehäller batterier, bör man ta bort dem och lamna dem separat till Återvinningscentraler.(SR) CPTICKN
PAXHB:
Ypehaj je HamebeHcMo 3a KyhHy ynoTpe6y. Ypehaj HNJE hAmnjeHbEn 3a KomepuzjahnHy / npoepcnnoHaJHy ynoTpe6y. Ypehaj HINJE norodan 3a ynoTpe6y Ha OTBOpeHOM. Paxha! Ppe Kopnshene, oabe3no npoHTajTe OBO ynyTCTBO 3a ynoTpe6y kako bnte n36erHn He3rode n npabunHy ynoTpe6y ypehaja. YbajTe OBaj npnpuyHn N cyBaJTe ra TaKo da ra MoKeTe Jako KopnCTtN.I. CMJEPHNIe 3A CNYPHOCT YNOTPEBE
1. Пpe уnotpebe npOBepte Da Li NaHOn HaBeDeH Na HATnIcHoj nIoUHcN OndroBapa IOKaJIHm napametpma caHHTeTa, aIn 3aPamTite Da o3HaKa: ALC- je HanImMeHnUHa n DlC je DC. 2. Повекитуpeй само наструль утуну od 220-240В ~ 50/60 X3. 3. Пpe уnotpebe odBnjTe n nCnpaBnTe ka6I 3a Hanajahe 4. YBepnte ce da Ka6n 3a Hanajahe n yTnKauch Hncy BnJbNBn 5. Пп и посе уnotpebe, поверпгда кабл за нараиье Ниж растгнут п配电о OTBOPEHOR Пламета Или другог ИЗВОРА тОПЛOTE и OшТРИХ ИВИца Кож мory OшТETNTI ИЗOLAцию кабla. 6. Пpe npBe ynoTe 6Be KOMNoHeTe nakBaHa. NaKb! Y cnyajy kyHnTa Ca MeTaJIHIM DeIIOBIMa, Ha OBIM eIeMeHTIMa CE MOKe paCTeRHyTm MaIIO BnIbINBa 3aStITHa foIInja, KoJy TakoHe Tpe6a yKIoHHTn. 7. Ypehaj He cmejy da kopncte deca, ocobc ca orpaHnueHm fni3nKm, yIHNm IIn MeHTaHIM cnoocbHocTIma 6e3 Hnd3opa OBnaUshneHX IIN NCKyCHNX INu ca nYBeK y CkJaDy ca OBIM ynyTCTBIma. 8. Onpema Hnje HameHeHa 3a ynoTpe6y ca ekCTepHm BpeMeHCKM npeKndaUma nIIN 3ace6HIM CnCTeMOM daJbHcKOr ynpaBbaHa. UPO3OPEHbE: Oby onpemy mory kopnCTn Djeca cTapnja od 8 roDnHa n ocObe ca OrpaHnueHIM qn3nKm, ocjeTnHm nIi MeHTaHm CnOC6hocTIma, nIi OC6e Koje Hemajy nCKycTBa nIi 3HaBa o onpemn, CAMO ako ce To paN iOn nad3Opom ocObe ODROBOPHe 3a HnxOBO 6e36eHocTn nIi cy Do6nI yNyTcTBA o 6e36eHOM KopnshheBy ypejaja n CBecn cy OnacHocTn y Be3n ca HeRoBOM yNoTpe6om. Deza He 6n Tpe6aNo da ce Irpajy ca onpemom. YnshneBe n OdpXabaHe ypejaja He cmjuy n3BoDnTn dJeca yKoJIko Hncy cTapnjn od 8 roDnHa n aKO cy IOn nad3Opom 9. He octabjaje ypehaj 6e3 ha30pa TOKOM paJa. 10. He notanajte anapat n ka6n 3a Hanajahe y Body nnn 6nno Koju npy Teuhoct. 11. Kaia ce ypehaj He Kopnctn, yBek ra Tpe6a NCKbuyntn n3 yTuHnue. 12. KaDa noBnaUte yTnKaU n3 yTnHnUe, HnKaDa He ByuTe Ka6JI 3a HanajaHe cAmo 3a yTnKaU. 13. He CTaBbajTe HO METAJI ITEMC yHytap ypehaja 14. Понзвоган Ниje odroborpan 3a utete Habte ycneH He npabnHor Kopuheba ypehaja. 15. Tpe6a nmatn ha ymy da ce HeKn dijenobu ypehaja n opmapn h Tnjekom pa da jako 3arpijabajy, na 6yndte onpe3HN u He DnpajTe ux, mokeTe ce oneh. 16. HE nokpmbajte ypehaj Tokom paanda nn ka da ce He oxnayn y notnyoctn 17. 3anamntte da rpejHm elementma ypehaja tpeba BpemeHa da ce notnyho oxnae. 18. KaDa KopnCTnte ypehaj, oBe36eIte OndroBapajh npocTOp n3HaN i OKo Hera. Ypehaj He Moxe Da IdoHpyje NaKo 3anaJbHBe ppeDMTe TOKOM paJa, Kao uTO cy DeKopaunje, NaHrpHn y6pucn, 3aBece, OdeHy nTD. 19. Геся саллару куатиу特有的а дуide Инсталпан тako за ce He можедOTAKHTI KOHEKTOPИдугп рergylatop у kaDN ИПИ NOД TUWEМ. 20. Y rpejaumma 3a NaIIMOPsKe BnCInHe, N03nUje pa3JIuHTnx NIOJXaja KOHeKToPa Tpe6a Da 6yDuBnBe ca ydaJeHoCTn Od 1 M 21. O3naka 3a nokpnahe rpnjaa mopa 6ntn BndnbHa hakOH nocTabbaHa rpnjaya 22. He moxete noctabtu rpejau dinpeKTHO nCnoj yTuHnue i 6Jn3y 3aNaJBnBnx MaTepnjala kao wTO cy 3aBece, 3aBece NTd. 23. Ypehaj ce He Moxe KOpNCHTnCa ekCTepHm BpeMeHCKM npeKnDaUHMa nn dpyrIM ODBoJeHm CnCTeMMa DaJbHCKor ynpaBbaHa 24. He n3naXnte ypehaj aTMocfepcknM ycNoBmA (Knla, cyHc, nTd.) IJn KOpNCtnte y ycNoBmAbnCOke BnaXHOCTN (KynaOHnCe, BnaXHe Kamn Kyhe). 25. Повремно поверпге саъе кабл за нааяъe. Ако ќ кабл за нааяъe оштehen, Tpe6ano 6n ra 3aMeHHTn CneuJaJIncTnUcK n cepBnC kako 6n ce n36erao pn3nk 26. HemojTe KopnCTn ypehaj y 6nn3Hn 3anaJbBnx MaTePnJaIa 27. Frnjaj Mopa 6nti HcTanpaH Na BnCInH He MaBoj od 1,8 M n3HaJ noJa. 28. He kopructte obaj rpejauy henocepndnoj 6n3nHn Kaede, Tuwa nn 6a3eHa 29. He kopructte obaj rpejaq ako je nao 30. He ynoTpe6babajte ako noctoje BnIbNBn 3Naun OwTeheBa rpejau 31. KopinCTIte rpejaH na paBHOJ n cTa6nJIHOJ NOBpUHn Hn ra npuYBpCTIte Ha 3nD, aKO To npedBnHa npoN3BOhau. YIIO3OPEHbE: He kopncntte obaj rpejau y maIIM npoctopnjama y koJIma IMa lydN KoJN He MOry camn da nX HanycTe, OcIM aKO Hnje Ocnrgypan CTaJIHN HaI3Op. YIIO3OPEHbE: Da 6nCTe cMaHbHn pN3NK oD noXapa, dpxKnte TeKCTnI, 3aBece nIi npyre 3anaJIbHe MaTePnJaIe HajMaIbe 1 M od n3Na3a 3a Ba3dUx rpejaua. Ipnopuyje ce da eilektpnHa nHcTanaJia 6ynde onpeMbeHa ayTomaTckm npekndaem 3a pe3ndyaJnHy cTpyj ca noeTHOM cTpyjom od 30MA 3a noBehany cnryphocct. Hanomeha: Ako je ka6n 3a Hanajahe nnn yTuKaU oShteHEn, yBek ra Tpe6a 3ameHHTn nnn nonpaBHTn y cneunjann3OBAHOJ cepBnCHOJ padnoHnCn.IN. YIIO3OPEHbA
1. Hinkada hemojte kopnsttu ypej ako je outehen nnn He paan npabnno. 2. Нека наемоюся корец сокисту урегaj по је пao ca висно и пoka3уve вдьиBE 3нakове оштelve. 3. He kopructte npodxhe ka6noBe nIIN dpyre eJektpnue yTuHnue Koje He odrobapajy BaxkehIM cTaNdapnma n eJektpnUHM npOpncnma. 4. Бино Камы NonpaBky, Демонтaxy Или Замени 6ино kor Deяу ВЕК Тpe6a obabintu cneцллзова hy yctahOBa. 5. Ako cy ypehaj n eIeKtpnue He KOMnoHeHTe, kao ITo cy eJIeKtpnUHN KOHTaKTn, MOKpn, UTKauch nn Ka6eTpe6a ocUuNTn npJc KopNtEHa ypehaja n HberOBnx KOMNoHEHTn. 6. He kopructte ypehaj BnaXnIM pykama. 7. Kada noctojn p3nk da je ypehaj owtehen, HE nokywaabaje camn da nonpaBnte ypehaj. 8. Hnkaa He nepiTe ypehaj noTekyHOM BOOM IIN Ha TAKAB HauIN Da BODa KaJIbe y HbY. 9. He kopructte npnbop koju hije npenopyuen od ctpahe npon3bojaua. OHI MORY npedctabbaTN onachoc73a kopruchnka u Mory n3a3BaTN oWTehhe ypejaja. 10. Ybepnte ce da ce ypehaj oxnaio npe cknaiusteBa. 11. He doignyjte kyhniuTe TOKOM ynoTpe6e. Tokom paJa kOpncntte camo dYrMaJ n npeknDaue. HakoH NCKbUynBaHa, cauekajTe da ce ypehaj oxlaJn. 12. ONPE3: Hekn deNoBn Obor ypehaja Mory ce jako 3arpujaTn TOKom paJa n y3pOKOBaTn ONeKOTInHe.III. INJJE INPBE YNOTPEBE
1. YKIOHnTe cab MaTepnjaJI 3a nakObaHe n NcnpaBnTe Ka6J 3a HanajaHe 2. Tokom INHCTaJauje,ypehaj Moke 6ntn NOKpuBHeN 3OJaUHOHM MaTePjuJaIOM UIN CInuHIM MaTePjuJaIOM 3.Прилелком ckлалаьуpeиа,грedeигрede He Tpe6a pe3aTNnpe3aTN 4. Ппе пье улотpeбе почитajte са улутсва за улотpeбу. 5. Поберпесда ли наон Habe徳н На налелници за Квашие понзвoda одровара наноу Мржке за Hanajaы e y Baшем DomyINHCTAATNOH
Kopncntte 6yunnuy 3a 6yuebe DBe pyne y 3Ny, Hajmahe 180 um od noa n 20 um od cTpona - cnka A. Ka da cTe n36ywni pyne, yMeTHnTE pOIOrOy u 3aBnje. YBepnte ce da cy 3aBPTbN do6po 3aTeHytn Da ypehaj OKaHTe Ha 3nd.ONIC PON3BODA
CnkaB.ΓaBHy npeknday OH/OΦΦ=OΦΦOH/MYTH OΦΦ.CnkaLJDAJBHCKA KOHTPOJA
1. Dyrme OH / OΦΦ 6. BEEK/TUMEP 2. MoDE 7.MNH 3.ДAH 8. + -> Tactep 3a noDn3aHbTe tempeatype. TaKoHe cnyKn kao duYme 3a n36op BpemeHa / daHa. 4.LIOUK 9. --Дугме за снжаваные temпаType.Тakошслwxи кao duyme 3a nizbop ВрemeHa / daHa. 5.CETYI 10. PECET - Tactep 3a peceToBaHe TajMepaCnkaД.IEДПAHEN
1.Cm60n OH 6.Дневни рпигаз 2. Chara rpejaHa 1000B 7. Ппказ Врemeha 3. Chara rpejaBa 2000B 8.Cm60n OH-ctapToBaHe TajMepa 4.AYTOyHKnja 9. OΦΦ cμmboJ -ИСКьуЧиВаHе Тajмepa 5. Пика з Temперatype 10. OTbOpnte fynKnjuj deTeKuJne npo3opaIV. yNOTPE6A
1.Дук onnt xokejcxakeJaap aaH de peuxtepkaHT bAH xet annapaat - AфбeelenrБ om xet annapaat nH eHnTt Te cuxakeJeH. 2. Pn6abte Ondrobapayhe cTaHe y cTaHb npnpabHOCTn. DpyK on (a) /yntkHON (1) onuHpHne - Afp6eennHr L. 3.Дурк auxTepeeHbOJIreHc Ha MOДE-KHON (2) O n3a6paHOM MOny: - 1000 B xet annapaaT 3aKoHCTaHTn OcbapMeH met 1000 B. - 2000 B, xen annapaat 3aJ KOHCTaHTHn OdpBapMeH MeT 2000 B. - AyTO-MOyC, npk on od KhoHnneH + eH - o TempeatypHOJ puu y cTeJIeH. PpncTyIte ayTomaTCKOM ayTomaTCKOM noDeWabBy Tempeatype n Tempeatype Tempeatype. - OTBOPeHa DeTeKuJa BeHCTepa - BaHHeep De3e 4yHcTne je reIekUHOap, KoJn je ONpeMJIbEh ayTOMaTCKIM ayTOMaTCKIM ayTOMaTCKIMdoDaBaHem Kameptempepatypnx napceLa od 10^ L. 4.Дук O DeaH / yuTknHON (1) onuHPO 3a cbo6ceHne OT o6ceCTBeHHOTo 3a cbco. Ako KeJInTe da ce opbatnte 3a 30 cekyHdno no nocedy.DE INHTEPHE ANPAPAATKNOK INHCTEJIJEH
ONMEPKINH: Cbn Tn DeNoB cy DocTynn 3a HeJeBy DaHa, a He n 3a HeJeBy DaHa, a He cMo da 6n MoTn da HAnuMe MO Hxke BOJREHe, ann n da cy INTePHN KIOK, ann OH je Ty. 1.Oda6np AYTO-Функиjee je nCnybEn MODE-KhON. 2. CTeNna Boepatat De TImep Bne OT HeDeIbO eH HeJeBo eH JINnDn Tnrap: -Дуг onишиу на Кног ДАГ и сел ektopа DeTeKunji Byarare nCnybHe ca KhoNneH + eH - Baxt ToT xet DiCnlan 3ayCTabNo ce HOxem. -Дук ONИТ KLOK, CBалajte Ha CBOTBETCTBOBaHe OT B3MOxHOCn Do MeT + KONnneH . BauxT Tot xetДиСПпан 3ayctabNо ce HOXeM. - CtaHnTe Ha MInH-KhON Ha cBoTBcTcBHe cBdbpKaHHeTo 3a n3NoJ3BaHe - + . BaXr TOT xet dncnnan 3ayCTaBnO ce HOxem.TINMEP IPOPTPAMMEPHCTENHIT - TINMEP
Doca je 6nlo fynknoHannx nporpama y Be3n ca nporpamma kojce Mory npimehnuBaTu y HeedeBnu HeedeBn. Ie TImep Bam MoKe Iomohn da no6oJbWate MoryHocT npenacka Ha AYTO-kyHKunjy ndoajTe INTEpHeTcke cTahnue 3a Mo6nHe TeJefohe. 1.ДукзA BEEK/TIMEP-KHON3a Oda6np HeJeBnHex HeJeBa y pOky OJ HeJeBa, anapat he ce ayTomatckn ynotpebntn 3a aytomatcky ynotpe6by cnyajy da yknOHnTe +eH - BaXrT TOT xET DnCnnan 3ayctabno ce HOxem. 2. Ioecnte onuju 3a noeewabahe CET YI xe6rrepyk, yKbuynte cM60n OH-cm60na Ha xet npka3y. He moxete 3anouetn Bwse Bpemena. K6pyk, MNH, +en - OTBOpNTe TImep 3a Bpe Me CTapTOBaHa. Baxt tot xet dncnnan 3ayctabNO ce HOXEM. 3. IOnecnte BEEK / TUMEP-KHon (6) nyIme 3a noJeIaBaIbe CET YI-KHon-a, oJmax npITnCHInTe OΦΦ-cm60nl 3a xet-npka3. He moKeTe KOpIcHTn BwSe BpeMeHa. Baxt Tot xet dncnnan 3ayctabNo ce HOxem. ONMEPKINH: POKpTaHe je doctynho n 3ayCTaBnTe ce. ONMEPKINH YnoTepe6a pe3epBnHex DeNoBa PECET-a, noeuaBaHe BpMeHa n BpMeHa 3a 3bpuBaHaBe.V. YIWIHTHeBEn ODPXABAHBe
1.Ппeчишениа увекиckьунite anapat n3унчницe. 2.AKO TOKOM YUHHeBa CTAbKe KAO UTo cy yTuKaU, TepMoCTaT, eJekTpHuN KoHTaKTn ITd. HAtOnJIbeHe Ipe NHOBHe yNoTpe6e, Tpe6a IN TeMeJBNTO OCUIN 3. Hemojte KopinCTnArpeCnBHe DeTePeHTe y o6nky Emy3nJa, nocnoHa, naceT nTd. 3a YnWeHeOpMapHa. Ohmory, n3MeHy octanor, yKnIOHTn rpaqnuke CmboJe HfOpMaunja, kao uTo cy 3NaKOBn, 3NaKOBn yNo3OpHeBa, nTd. 4. Ybepe tce da ce ypehaj oxnaio npe ushneha. TEXHNUKNIPODALU: Hanoh:220-240B\~50/60X3 Chara: 2000B Mak. Chara: 2200B lp20 "Опрази вуга пошина" - Temпература расллхиьх пошина може 6ntи Beha kaа onpema paNi, StTo 3naMu da ce eIemEni KyhnsTa TOKOM paJa jako 3arpeBaJy.  JTE NOKIOTNI" - HANOMEHA 3HAAJ HaTnnc Ha ypehajy 3aun da ypehaj He Tpe6a da 6yepekpmben , he6aIma n npyHm TEKCTINHM npOn3BOIMa KOj MOry n3a3BaTn NaJbeHe.  PEHbE: HemojTe Kopucntn Oby onpemy y 6JIm3HH Kaede, TuSha, 6a3eHa n CImuHnx pe3epBoapa 3a Body.  3a 3aHTy JXIBOTHe CpeHHe: MOIMBO Bac Da oDBoJTe KAPTOHcKe KyTnJe I nPAACTNHe Kece N OndnoKInTe INx y OndroBapajyHe Kahte 3a CmeHe. KopuSheHn Ypehaj Tpe6a Da 6yDe nCnpuyen Ha HameHcKe cakynBaHe Taue 36or OwTPnx KOMNoHEtN, UTo MoKe yTuCaAtn Ha JXIBOTHy CpeDnHy. HemoJTe Ondaratn OBaj Ypehaj y 3ajeHNUky Kopny 3a OTNaTke.(SK) SLOVENSKY
POZOR:
Zariadenie je urcené len na domace pouzitie. Zariadenie NIE JE urcené na komercné / profesionáne použitie. Zariadenie NIE JE vchodné na použitie vonku. Pozor! Pred použitím je dôležité, aby ste si precítili tento námod na obsluhu, aby ste predišli nahodám a správnemu používaniu prístroja. Uchovajte si tento námod a uschovajte ho, aby ste ho mohli l'ahko používat'.I. POKNY PRE BEZPECNOSTPOUZITIA
1. Pred použitím skontrolujte, Či napatie uvedené na typovom štítku zodpovedá miestnym parametrom slanosti, ale nezabudnite, Že označenie: AC- je striedavy prud a DC je DC. 2. Pripojte zariadenie len k uzemnenej zasuvke 220-240V 50/60 Hz. 3. Pred použitím odvijajte a narovnávajte napájací kabel 4. Uistite sa, ze sietovy kabel a zastrcka nemaju viditelné poškodenie 5. Pred a po použiti sa uistite, ze napájací kabel nie je natiahnuty cez otvorený plamen alebo iný zdroj tepla a ostre hrany, ktoré možu poskodit izoláciu kábla. 6. Pred prvym použitim odstrante vsetky sučasti balenia. Pozor! V pripe de plaš'ta s kovovymi CASTAMI moze byt na tychto prvkoch roztiahnutá mierne viditel'ná ochranná fólia, ktorá by sa tiež mala odstránit'. 7. Zariadenie by nemalo používat deti, osoby s obmedzeným fyzickým, zmyslovým alebo duševnám postihnutím bez dozoru oprávněch alebo skúseněch osób a vždy v súlade s týmito pokynmi. 8. Zariadenie nie je určené na použitie s externymi chasovymi spinačmi alebo samostatným dial'kovým ovládaním. UPOZORNENIE: Toto zariadenie moze pouzivat deti starsie aka 8 rokov a osoby s obmedzenymi fyzickymi, zmyslovymi alebo dusevnymi schopnost'am alebo osoby, ktoré nemaju ziadne skusenosti alebo znalosti o zariadení, IBA ak je to vykonané pod dohl'adom osoby zodpovednej za ich bezpečnosti alebo dostali pokyny o bezpečnom použivaní zariadenia a su si vedomi nebezpečenstva spojeného s Jeho použivaním. Deti by nemali hrat so zariadením. Čistenie a udrzbu zariadenia by nemali vykonávat deti, ak nie su starsie aka 8 rokov a su pod dozorom 9. Nenechávajte zariadenie poças prevadzky bez dozoru. 10. Neponárajte spotrebič a napájací kabel do vody alebo inych kvapalín. 11. Ked sa zariadenie nepoužíva, malo by byt' vždy odpojené od elektrickej zásvky. 12. Ked'vytiahnete zastrcku zo zasuvky, nikdy nevy'tahujte napajaci kabel len za zastrcku. 13. Do zariadenia nevkladajte ziadne kovové predmety 14. Vyrobca nie je zodpovedný za škody spösobené nesprávnym použivaním zariadenia. 15. Pamatajte si, ze niedtoré Časti zariadenia a skrinky poças práce su vel'mi horúce, preto bud'te opatrní a nedotýkajte sa ich, možete sa spálit'. 16. Nezakryvjte zariadenie pochas prevadzky alebo ke'd'uple nevychladne 17. Nezabudnite, ze vykurovacia telesa pristroja maju cas uplne vychladnuit. 18. Pri používaní zariadenia zabezpečte dostatočné priestor nad a okolo. Zariadenie sa počas práce nesmie dotýkat lahko horťavých predmetov, ako napriklad dekorácie, papieróve uteráky, záclony, oblečenie atd'. 19. Ohrievač instalovaný v kúpelni by mal byt'instalovaný tak, aby konektory a iné rególárynemohli byt' dotknuté osobou vo vani alebo pod sprchou. 20. V ohrievačoch pre výškové prislušenstvo by mali byt' polohy rožnych polöh konektorov viditelné zo vzdialenosti 1 m 21. Po instaláci ohrievača by malo byt viditelné označenie krytu ohrievača 22. Ohrievač nemožete umiestnil' priamo pod zásuvku a v blízkosti horlavych materialov, akosú záclony, záclony atd'. 23. Zariadenie nemožno použit's externými chasovými spínačmi alebo inými samostatnými systémami dial'kového ovládania 24. Nevystavujte zariadenie atmosferickým podmienkam (dázd, slnk o atd.). Alebo použite v podmienkach vysokej vlhkosti (kúpe)'ne, vlhékempingové domy) 25. Pravidelne kontrolujte stav napajacieho kábla. Ak je napajaci kabel poškodený, mal by byt vymeneny špecializovaným opravovacim zariadením, aby sa predišlo nebezpečenstvu 26. Nepoužívajte zariadenie v blízkosti hor'av'ych materíálov 27. Ohrievač musí byt instalovaný vo výške minimálne 1,8 m nad podlahou 28. Nepoužívajte tento ohrievač v bezprostrednej blízkosti vane, sprchy alebo bazéna 29. Nepoužívajte tento ohrievač, ak spadol 30. Nepoužívajte, ak su na ohrievači viditelné známky poškodenia 31. Ohrievač používajte na rovnom a stabilnom povrchu alebo ho pripevnite k stene, ak to ustanovuje vyrobca. UPOZORNENIE: Nepoužívajte tento ohrievač v malych miestnostiich, kde su l'dua, ktorí ich nemózu opustit' sami, pokial' nie je zabezpečený stály dohl'ad. UPOZORNENIE: Aby ste znižili riziko požiaru, udržujte textílie, záclony alebo iné hor'avé materialy vo vzdialenosti majmenej 1 m od vystupu vzduchu z ohrievača. Odporuča sa, aby bola elektrická instalácia vybavená automatickým istiocom prudu s 30 mA startovacim prudom pre zvyšenu bezpečnost. Poznámka: Ak je poskodený napájací kabel alebo sietová zástrčka, vždy ho vymente alebo opravte v špecializovanej opravovni.II. UPOZORNENIE
1. Nikdy nepoužívajte zariadenie, ak je poškodené alebo nefunguje správné. 2. Nikdy nepoužívajte prístroj, ak spadol z predošlej výšky a vykazuje viditelné známky poškodenia. 3. Nepoužívajte predlžovacie káble alebo iné elektrické zásuvky, ktoré nespíñajú platné normy a elektrické predpisy. 4. Akúkol'vek opravu, demontáž alebo výmenu akýchkol'vek Častí by mala vždy vykonat špecializované zariadenie. 5. Ak je zariadenie a elektrické komponenty, aka su elektrické kontakty, mokré, pred použitim pristroja a jeho sučasti by sa mal vysusit zástrčka alebo kabel. 6. Nepoužívajte prístroj s mokrými rukami. 7. Ak existuje riziko poskodenia zariadenia, NEPOUŽIVAJTE opravu zariadenia sami. 8. Nikdy neumyvajte pristroj pod tecucou vodou alebo takym sposobom, ze knej voda klesa. 9. Nepoužívajte prislušenstvo, ktoré neodporúča vyrobca. Móžu predstavovat' nebezpečenstvo pre užívatěla a možu spôsobit poskodenie zariadenia. 10. Uistite sa, ze zariadenie pred ukladanim vychladlo. 11. Pri použivaní sa nedotykajte krytu. Počas prevadzky používajte iba gombíky a spinače. Po vypnutí vyčkajte, kým prístroj vychladne. 12. UPOZORNENIE: Niektoré Časti tohto zariadenia sa možu poças prevádzky velmi horuce a možu spősobit popáleniny.III. PRED PRVYMPOUZITIM
1. Odstrante vsetok obalovy material a napnite napajaci kabel 2. Poças instalacie月至zt zariadenie Pokryte izolaçnym materialom alebo podobnym materialom 3. Pri montázi zariadenia by sa nosniky a tramy nemali rezat'ani rezat' 4. Pred prvym pouzitim si precitajte vsetkyPokyny na pouzitie. 5. Skontrolujte, Č napatie uvedené na štiku štiku produktu zodpovedá napatiu v sieti vo vašej domácnostiINSTALÁCIA
Použite vrtacku na vrtanie dvoch otvorov do steny, minimáne 180 cm od podlavy a 20 cm od stropu - obrázok A. Po vrtani otvorov vložte podložku a skrutku. Uistite sa, ze su skrutky dobre utiahnute a zaveste zariadenie na stenu.POPIS PRODUKTU
Obrázok B. HAVNÍ SPÍNAČ ON/OFF = OFF ON/YUTN OFF.Obrazok C. DIALKOVE OVLADANIE
1. Tlačidlo ON / OFF 6.WEEK/TIMER 2. REZIM 7. MIN 3. DeN 8. +-> Tlačidlo na zvyšenie teploty. Tiež slúži ako vyberové tlačidlo pre Ās / den. 4.CLOCK 9. --> Tlačidlo na zniženie teploty. Tiež slúži ako vyberové tlačidlo pre ās / den. 5. NASTAVIT 10. RESET - Tlacidlo resetovania casaovaObrazok D. LED PANEL
1. Symbol ON 6. Zobrazenie dna 2. Vykurovaci vykon 1000W 7. Zobrazeniačasu 3.Vykon vykurovania 2000W 8. Symbol ON - spustenie Časováča 4. Funkcia AUTO 9. Symbol OFF - vypnutie casovača 5. Zobrazenie teploty 10. Otvorte funkciu detekcie okienIV.VYUZITIE
1. Druk op de hoofdschakelaar a rechterkant app het apparatus - Afbeelding B om het apparatus in en te te schakelen. 2. V pohotovostnom rezime stlačte tlacidlo OK. Druk op de aan / uitknop (1) op de afstandsbediening - Afbeelding C. 3. Druk achtereenvolgens op de MODE-knop (2) om bedrijfsmodus te selecteren: - 1000 W het appalaat za konstantny opwarmen spnil 1000 W. - 2000 W, stálej znaleckoj konstanty sa stretol 2000 W. - Auto-modus, druk op de knappen + en - om de temperuur handmatig in te stellen. Dajte pozor, aby sa automaticky zobrazoval druh teploty alebo teploty. - Detekcia otvoreného venstera - Funkcia Wanneerovej deze functie je geselecteerd, schakelt het apparaat de verwarming Automatical uit als de kamertemperatuur plotteling with 10^ C daalt. 4. Druk op de aan / uitknop (1) op afstandsbediening om het appetate at the schakelen. Zoznámte sa s tym, ze nemáte ziadne d'alsie 30 sekund.IN INTERNETOVY PRISTROJ DE INTERNE
PREVÁDZKA: Tiež sa hovori,Že ste si kúpili týžden,ked ste sa rozhodli,Že ste sa rozhodli,Že ste si uzili volgens. 1. Vyberte funkciu AUTO AUTO s funkciou MODE-knop. 2. Sledujte Časovac a vlozte ho do týždna. - Druk op de knop DAG vo vybere huidige dag met de knoppen + en -. Wacht tot het display stopt met set knipperen. - Druk op de KLOK-knop en stel de huidigeijd in met de knoppen + en -. Wacht tot het display stopt met set knipperen. - Druk op de MIN-knop en huidige markings in met de knuppen + en -. Wacht tot het display stopt met set knipperen.PROGRAMÁTORČASOVAČA-ČASOVAČ
Met deze functie kunt u de tijd programmeren om het apparaat for elke gewenste dag van de week in en te te schakelen. Casovy spinač moze byt' pouzity na vyber z ponuky AUTO-functionie on het appellen in the interne klok van het apparaat. 1. Druk op de WEEK / TIMER-knop en selecteer de dag van de week waarop u het apparaat wilt instellen om automatisch in a the schaken met de knappen + en -. Wacht tot het display stopt met set knipperen. 2. DALSIE NASTAVENIE ZOBRAZIT Hebt gedrukt, Licht het ON-symbool op in het display. Začiname pracovat's casovačom. Gebruik de KLOK, MIN, + sk - kliknú't na začiatočnik z casovej základne. Wacht tot het display stopt met set knipperen. 3. Nadchádzajúce udalosti WEEK / TIMER-knop (6) hebt gedrukt en cervolgens op de SET UP-knop heeft gedrukt,licht het OFF-symbool op het display op.Dozviete sa viac casu. Wacht tot het display stopt met set knipperen. PREVÁDZKA: od šartu do horsého svahu, od začiatku do konca. PREVÄDZKA Druk op RESET-knop om Časovac terc te zetten maar de standardinstellungen.V. CISTENIE A UDRZBA
1. Pred Čistenim vždy odpojte spotrebič od sietovej zásvky. 2. Ak počas Čistenia, ako je zástrčka, termostat, elektrické kontakty atd. su namocné pred opátovnám použitím, mali by byt'dokladne vysušené 3. Nepoužívajte agresivne Čistace prostriedky vo forme emulzii, mliečnych roztokov, pást atd. na Čistenie skrinky. Mózu okrem iného odstránit informáné grafické symboly, ak o su značky, varovné signály atd. 4. Pred Čistením sa uistite, Že zariadenie vychladlo.(HR) HRVATSKI
PAZNJA:
Ureaj ne namijenjenismo za kućnu uporabu. Urejad NIJE namijenjen za komercijalnu / profesionalnu uporabu. Urejad NIJE prikladan za uporabu na otvorenom. Pažnja! Pije uporabe obavezno pročitajte ove upute za uporabu kako biste izbjegli nezgode i pravilnu uporabu uredaja. Čuvajte ovaj prisćnik i Čuvajte ga tak do ga možete jegnostavno koristiti.I. SMJERNICE ZA SIGURNOST UPORABE
1. Prije uporabe provjerite odgovara li napon navenen na označnoj pločici lokalmim parametrima saliniteta, ali imajte na umu da oznaka: AC- je izmjenična struja, a DC je DC. 2. Prikljucite uredaj samo na uticnicu uzemljenja 220-240V 50/60 Hz. 3. Prije uporabe odomotajte i poravnajte kabel za napajanje 4. Uvjerite se da kabel napajanja i utikač nemaju vidljivih ostecenja 5. Prije i nakon uporabe, uvjerite se da kabel napajanja nods rastegnut na otvorenom plamenu ili drugom izvoru topline i ostrim rubovima koji mogu ostetiti izolaciju kabela. 6. Prije prve uporabe uklonite sve komponente pakiranja. Pažnja! U slučaju kučista s metalnim dijelovima, na tim se elementima moze rastezati blago vidljiva zašitna folija, koju takoder treba ukloniti. 7. Urečaj ne smiju koristiti djeca, osobe s ograničenim fizičkim, osjetilnim ili mentalnim sposobnostima bez nadzora ovlastenih ili iskusnih osoba i uvijek u skladu s ovim uputama. 8. Opremaijke namijenjena za korištenje s vanjskim vremenskim prekidačima ili zasebnim sustavom daljinskog upravljanja. UPOZORENJE: Ovu opremu mogu koristiti djeca starija od 8 godina i osobe s ograničenim fizickim, osjetilnim ili mentalnim sposobnostima, ili osobe koje nemaju iskustva ili znanja o opremi, SAMO ako se to radi pod nadzorom osobe odgovorne za njihovo sigurnosti ili su dobili upute o sigurnom koristenu ureăja te su svjesni opasnosti povezanih s njegovom uporabom. Djeca se ne smiju igrati s opremom. Čišćenje i održavanje ureăja ne smiju izvoditi djeca ako nisu stariji od 8 godina i ako su pod nadzorom 9. Ne ostavlajte uredaj bez nadzora tijekom rada. 10. Aparat i kabel za napajanje nemojte uranjati u vodu ili druge tekuciine. 11. Kada se uredaj ne koristi, uvijek ga morate odspojiti iz zidne uticnice. 12. Kada povlačite utikač iz utičnice, nikada ne povlačite kabel za napajanje samo za utikač. 13. Ne stavljajte NO METAL ITEMS unutar uredaja 14. Proizvodač nije odgovoran za štete koje su posljedica nepravilnog koristenja uredaja. 15. Treba imati na umu da se neki dijelovi uredaja i ormarić tijekom rada jako zagrijavaju, stoga budite oprezni i ne dirajte ih, možete se opeci. 16. NEMOJTE prekrivati Uredaj tijekom rada ili kada se ne ohladi u potpunosti 17. Upamtite da grijacim elementima uredaja treba vremena da se u potpunosti ohlade. 18. Prilikom uporabe uredaja osiguraje odgovarajuci prostor iznad i oknega. Ureaj tijekom rada ne moze dodirivati lako zapaljive predmete, kao sto su ukrasi, papirnati rucnici, zavjese, odjeca itd.. 19. Grijac instaliran u kupaonici mora biti postavljen takdo se osobe u kadi ili pod tusem ne mogu dotaknuti priključnice i drugih regulatora. 20. U grijacima za učvršćenja na velikim nadmorskim visinama, položaji razlicitih položaja priključaka trebaju biti vidljivi s udaljenosti od 1 m 21. Oznaka zaPokrivanje grijaca mora biti vidljiva nakon ugradnje grijaca 22. Ne možete postavljati grijac izravno ispod utičnice i blizu zapaljivih materijala kao što su zavjese, zavjese itd.. 23. Urešaj se ne može koristiti s vanjskim vremenskim prekidačima ili drugim odvojenim sustavima daljinskog upravljanja 24. Ne izlažite uredaj atmosferskim uvjetima (kiša, sunce, itd..) Ili koristite u uvjetima visoke vlažnosti (kupaonice, vlažne kamp kuće). 25. Povremeno provjerite stanje mreznog kabela. Ako je kabel za napajanje ostecen, treba ga zamijeniti specijalizirana servisna sluzba kako bi se izbjegla opasnost 26. Nemojte koristiti uredaj u blizini zapaljivih materijala 27. Grijac mora biti postavljen na visini ne manjoj od 1,8 m iznad poda 28. Ne koristite ovaj grijač u neposrednoj blizini kade, tuša ili bazena 29. Ne koristite ovaj grijac ako je pao 30. Ne upotrebljavaje ako postoje vidljivi znakovi ostecenja grijalice 31. Upotrijebite grijac na ravnoj i stabilnoj povrsini ili ga pričvrstite na zid, ak to predviða proizvodac. UPOZORENJE: Ne koristite ovaj grijac u malim sobama u kojima postoje ljudi koji ih ne mogu sami ostaviti, osim ako nodsiguran stalni nadzor. UPOZORENJE: Da biste smanjili opasnost od požara, držite tekstil, zavjese ili druge zapaljive materijale najmanje 1 m od izlaza zraka iz grijaca. Preporucje se da elektricna instalacija bude opreumljena automatskim prekidačem za preostalu struju s početnom strujom od 30mA za povećanu sigurnost. Napomena: Ako je kabel napajanja ili utikač ostecen, uvijek ga treba zamijeniti ili popraviti u specijaliziranoj servisnoj radionici.II. UPOZORENJA
1. Nikada nemojte koristiti uredaj ako je ostecen ili ne radi ispravno. 2. Nikada nemojte koristiti uredaj ako je pao s visine prije iPokazuje vidljive znakove ostecenja. 3. Ne koristite produktne kabele ili druge elektrichne uticnicke koje ne odgovaraju vazećim standardima i elektrichnim propisima. 4. Bilo koji popravak, demontiranje ili zamjena bilo kojeg rijela uvijek treba obaviti specijalizirana ustanova. 5. Ako su urežaj i elektrčne komponente, kao što su elektrčni kontakti, mokri, utikač ili kabel treba osušiti prije uporabe urežaja i njegovih komponenti. 6. Ne koristite uredaj s mokrim rukama. 7. Ako postoji opasnost od oštećenja urežaja, NE pokušavajte sami popraviti urežaj. 8. Nikada nemojte prati uredaj pod tekucom vodom ili na takav način da voda kaplje u nju. 9. Ne koristite pribor koji-nine preporucio proizvodač. Mogu predstavljati opasnost za korisnika i mogu ošetiti urežaj. 10. Prije pohranjivanja provjerite je li uredaj ohladen. 11. Tijekom uporabe ne dirajte kuciiste. Tijekom rada koristite samo gumbe i prekidace. Nakon isključivanja pricekajte da se uredaj ohladi. 12. OPREZ: Neki dijelovi ovog uredaja mogu se tijekom rada jako zagrijati uzrokovati opekline.III. PRIJE PRVE UPORABE
1. Uklonite sav materijal za pakiranje i ispravite kabel za napajanje 2. Tijekom instalacije uredaj moze bitiPokriven izolacjskim materijalom ili slicnim materijalom 3. Prilikom sastavljanja uredaja, grede i grede ne smiju se rezati ili rezati 4. Pije prve uporabe procitajte sve upute za uporabu. 5. Provjerite odgovara li napon navenen na naljepnici s proizvodom naponu mreze u vašem domuinstallaciona
Busilcom izbu-site dvije rupe u zidu, najmanje 180 cm od pada i 20 cm od stropa - sika A. Nakon sto izbu-site rupe, umetnite jastucić i vijak. Provjerite jesu li vijci dobro pritegnuti i uredaj objesite na zid. OPIS PROIZVODASika B. GLAVNI PREKIDAc
ON/OFF = OFF ON/YUTN OFF.Slika C. DALJINSKI UPRAVLJANJE
1. Tipka ON / OFF 6.WEEK/TIMER 2. NACIN RADA 7. MIN 3.DAN 8. + -> Gumb za podizanje temperature. Takoder služi kao gumb za odabir vremena / dana. 4.CLOCK 9. --> Gumb za smanjenje temperature. Takoder služi kao gumb za odabir vremena / dana. 5. Podesite UP 10. RESET (Ponovno postavljanje) - Tipka za resetiranje timeraSlika D. LED PANEL
1. Simbol ON 6. Prikaz dana 2. Snaga grijanja 1000W 7. Prikaz vremena 3. Snaga grijanja 2000W 8. Simbol uključenosti -Pokretanje timera 4. AUTO funkcija 9. Simbol isključivanja - isključivanje timera 5. Prikaz temperature 10. Otvorite funkcjju otkrivanja prozoraIV. UPOTREBA
1. Druk op de hoofdschakelaar aan de rechterkant van het apparatus - Afbeelding B om het apparatus in eniti te schakelen. 2. Prihvacajte odgovarajuce stanje u stanju pripravnosti. Druk op de aan /uitknop (1) op de afstandsbediening - Afbeelding C. 3. Druk achtereenvolgens opse MODE-knop (2) sve o izabranom modu: - 1000 W het apparaat za konstanta opwarmen met 1000 W. - 2000 W, hep apparatus zal konstantni opwarmen met 2000 W. - Auto-modus, druk op de knappen + en - om temperature temperature u ručnom stanju. Imajte automatiski uredaj za automatisko upravljanje modusima i temperaturama. - Otvoreni sustav otkrivanja venstera - Wanner deze functie je geselecteerd, sklopljen je za automatisku uporabu s automatiskom uporabom u kamertemperaturi za uredivanje parcela od 10^ C. 4. Druk op de aan / uitknop (1) op de afstandsbediening om het apparaatuit te schakelen. Imaje na umu da se zei rijeiti 30 sekundi.DE INTERNE APPARAATKLOK INSTELLLEN
OPMERKING: Als u de huidige tijd en dag van tjedan Niet intelt, za het apparaat Niet goed werken waar dat het volgens zich eigen interne klok werk, wat onjuist is. 1. Odabir AUTO-funkcije je ispunjen MODE-knop. 2. Stel voordat u de timer instelt de dag van tjedan dana en de huidige tijd in: - Druk op de knop DAG en selecteer de huidige dag met de knoppen + hr - Wacht tot het display zaustavio se s nozem. - Druk op de KLOK-knop en stel de huidigeijd in met de knoppen + hr -. Wacht tot het display zaustavio se s nozem. - Druk op od MIN-knop i stella de huidige minuten in met de knuppen + hr. - Wacht tot het display zaustavio se s nozem.PROGRAMMERINSTALLING TIMERA - TIMER
Met deze functie kunt u de tijd programmeren om het apparaat o elke gewenste dag van tjedna prije u enitit te schakelen. De timer moze poboljsati ulazak u sustav AUTO-functie en het instellen van internetski klok van hep apparaat. 1. Druk za WEEK / TIMER-knop za odabir dana u tjednu waarup u het apparaat wilt instellen om automisch in eniti te schakelen met de knappen + en -. Wacht tot het display zaustavio se s nozem. 2. Nadopustite opciju SET UP SET hebt gedrukt,licht het ON-symbool op in het display.U kunt nu de starttijd van de timer instellen. Gebruik de KLOK, MIN, + hr - otvorite start vremena za vremenski raspon. Wacht tot het display zaustavio se s nozem. 3. Nadogradite WEEK / TIMER-knop (6) na zaslonu SET UP-knop heeft gedrukt,icht het OFF-Symbolol or het display op.U kunt nu de uitschakeltijd van de timer instellen. Wacht tot het display zaustavio se s nozem. OPMERKING: de startijd要去 algtd korter zichn dan de stoptijd. OPMERKING Druk opcija RESET-poništa tjmer terug te zettenaar de standardinstelleningen.V. CISCENJE I ODRZAVANJE
1. Prijce cisicenja uvijek iskljucite aparat iz uticnice. 2. Ako tijekom ciścenja stavke kao sto su utikač, termostat, elektrčni kontakti itd. natopljene prije ponovne uporabe, treba ih temeljito osušiti 3. Nemojte koristiti agresivne deterdžente u obliku emulzija, losiona, paste itd. za cisćenje ormarica. Mogu, izmedu ostalog, ukloniti graficke simbole informacija, kao što su znakovi, znakovi upozorenja, itd.. 4. Prije ciscenja provjerite je li uredaj ohladen.TEHNICKI PODACI:
Napon: 220-240V ~ 50 / 60Hz Snaga: 2000W Maks. Snaga: 2200W lp20  Kueista tijekom rada jako zagrijavaju, SPASITE PAMJENO !!!  "NEMOJTE POKLOPI" - NAPISI VAZNOST Natpis na ureăju znači da ureăj ne smije biti prekriven odjećom,Pokrivacima i ekstilnim proizvodima koji bi mogli izazvati paljenje. UPOZORENJE: Nemojte koristiti ovu opremu u blizini kade, tuša, bazena i slichni spremnika za vodu. (SLO) SLOVENŠČINA
POZOR:
Naprava je namenjenaismo za domaco uporabo. Naprava ni namenjena komercialni / profesionalni uporabi. Naprava ni primerna za uporabo na prostem. Pozor! Pred uporabo obvezno preberite ta navodila za uporabo, da se izognete nesrečam in pravilni uporabi naprave. Hranite ta priročnik in ga hranite tako, da ga lahko preprosto uporabite.I. SMERNICE ZA VARNOST UPORABE
1. Pred uporabo preverite, ali napetost, ki je navedena na imenski tablici, ustreza lokalnim parametrom slanosti, vendar upoštevajte, da je oznaka: AC - izmenični tok, DC pa DC. 2. Napravo prikljucite samo na ozemljeno vticnico 220 - 240V 50 / 60~Hz 3. Pred uporabo odklopite in poravnajte napajalni kabel 4. Prepricajte se, da napajalni kabel in vtic nista vidna 5. Pred in po uporabi se prepričajte, da napajalni kabel ni raztegnjen nad odprtim plamenom ali drugim virom toplote in ostrimi robovi, ki lahko poskodujejo izolacijo kabla. 6. Pred prvo uporabo odstranite vse sestavne dele embalaze. Pozor! Pri ohišju s kovinskimi deli se lahko na teh elementih raztegne nekoliko vidna zašcitna folija, ki jo je treba tudi odstraniti. 7. Naprave ne smejo uporabljati otroci, osebe z omejenimi fizichimi, Čutnimi ali duševnimi sposobnostmi brez nadzora pooblaščenih ali izkušenih oseb in vedno v skladu s temi navodili. 8. Oprema ni namenjena uporabi z zunanjimiČasovnimi stikali ali ločenim systemom za daljinskik upravljanje. OPOZORILO: To opremo lahko uporabljajo otroci, starejši od 8 let, in osebe z omejenimi fizičnimi, šutnimi ali duševnimi sposobnostmi ali osebe, ki nimajo izkušenj ali znanja o opremi, SAMO, če je to opravljeno pod nadzorom osebe, odgovorne za njihovo ali so dobili navodila za varno uporabo naprave in se zavedajo nevarnosti, povezanih z njeno uporabo. Otroci se ne smejo igrati z opremo. Čišcenje in vzdřevanje naprave ne smejo izvajati otroci, če niso starejši od 8 let in so pod nadzorom 9. Med delovanjem naprave ne pušćajte brez nadzora. 10. Aparata in napajalega kabla ne potaplajte v vodo ali druge tekocine. 11. Ce naprava ni v uporabi, jo vedno izkljucite iz elektricne vticnice. 12. Ko vtič potegnete iz vtičnice, napajalnega kabla nikoli ne vlecite samo za vtič. 13. V napravo ne postavljajte nobenih kovinskih predmetov 14. Proizvajalec ne odgovarja za škodo, ki je posledica nepravilne uporabe naprave. 15. Ne pozabite, da se nekateri deli naprave in omarice med delom zelo segrejejo, zato bodite previdni in se jih ne dotikajte, lahko se opecete. 16. Naprave NEPokrivajte med delovanjem ali ko se ne ohladi 17. Ne pozabite, da grelini elementi naprave potrebujujo nekaj chasa, da se popolnama ohladijo. 18. Pri uporabi naprave zagotovite dovolj prostora nad in okrog. Med delom se naprava ne more dotikati lahko vnetljivih predmetov, kot so okraski, papirnate brisače, zavese, oblačila itd.. 19. Grelec, ki je vgrajen v kopalnici, mora biti namešcen tak, da osebe, ki so v kadi ali pod prho, ne morejo dotakniti priključkov in drugih regulatorjev. 20. Pri grelcih za nadmorske visine morajo biti položaji razlicnih položajev priključkov vidni zrazdalje 1 m. \t 21. Oznaka zaPokrivanje grelnika mora biti vidna po namestitvi grelnika 22. Ne morete postaviti grelnika neosredno pod vtičnico in v blizini vnetljivih materialov, kot so zavese, zavese itd.. 23. Naprave ni mogoće uporabljati z zunanjimi časovnimi stikali ali drugimi ločenimi sistemi za daljinski upravljanje 24. Naprave ne izpostavlajte atmosferskim pogojem (dež, since itd.) Ali uporabe v pogojih visoke vlažnosti (kopalnice, vlažne kampirne hiše). 25. Redno preverjaje stanje napajalega kabla. Ce je napajalni kabel poškodovan, gamorate zamenjati s strokovnim servisom, da se izognete nevarnosti 26. Naprave ne uporablajte v blizini vnetljivih materialov 27. Grelec mora biti namescen na visini rajmanj 1,8 m nad tlemi 28. Tega grelnika ne uporabljaje v neposredni blizini kadi, prhe ali bazena 29. Tega grelnika ne uporabljajte, ce je padel 30. Ne uporabljajte, ce so na grelcu vidni znaki poškodb 31. Grelec uporabljajte na ravni in stabilni povrsini ali ga pritrdite na steno, ce to predvideva proizvajalec. OPOZORILO: Tega grelnika ne uporabljajte v majhnih prostorih, kjer so ljudje, ki jih sami ne morejo zapustiti, razen ce je zagotovljen stalen nadzor. OPOZORILO: Da bi zmanjsali nevarnost požara, naj bodo tekstil, zavese ali drugi vnetljivi materiali oddaljeni vsaj 1 m od odvoda zraka za grelnik. Priporočljivo je, da je elektricka napeljava opremljena s samodejnim zašcitnim stikom na diferencjni tok s 30 mA zaćetnim tokom za većjo varnost. Opomba: Ce je napajalni kabel ali napajalni kabel poškodovan, ga mora vedno zamenjati ali popraviti specializirana servisna delavnica.II. OPOZORILA
1. Naprave nikoli ne uporabljajte, ce je poškodovana ali ne deluje pravilno. 2. Naprave nikoli ne uporabljajte, ce je pred visino padla in kazejo vidne poskodbe. 3. Ne uporabljaje podaljskov ali drugih elektrichnih vtichnic, ki ne ustrezajo veljavnim standardom in elektrichnim predpisom. 4. Vsako popravilo, demontažo ali zamenjavo delov je treba vedno opraviti v specializiranem objektu. 5. Če so naprava in elektrčni sestavni deli, kot so elektrčni kontakti, mokri, je treba vtič ali kabel pred uporabo naprave in njenih component osušiti. 6. Naprave ne uporabljajte z mokrimi rokami. 7. Če obstaja nevarnost, da je naprava poškodovana, naprave NE poskušajte popraviti sami. 8. Naprave nikoli ne umivajte pod tekoco vodo ali tako, da voda kaplja v vodo. 9. Ne uporabljajte pripomočkov, ki jih proizvajalec ne priporoča. Lahko predstavljajo nevarnost za uporabnika in lahko povzročijo škodo na napravi. 10. Preden shranite napravo, se prepričajte, da se je naprava ohladila. 11. Med uporabo se ne dotikajte ohišja. Med delovanjem uporabljajte samo gumbe in stikala. Po izklopu počakajte, da se naprava ohladi. 12. POZOR: Nekateri deli te naprave se lahko med delovanjem zelo segrejejo in povzroćijo opekline.III. PRED PRVO UPORABO
1. Odstranite ves embalazni material in poravnajte napajalni kabel 2. Med namestitvijo je lahko naprava prekrita z izolacijskim materialom ali podobnim materialom 3. Pri sestavljanju naprave se tramovi in Spirovci ne smejo rezati ali rezati 4. Pred prvo uporabo preberite vsa navodila za uporabo. 5. Preverite, ali napetost, ki je navedena na nalepki za brusenje izdelka, ustreza napetosti elektricnega omrežja vašega domaNAMESTITEV
Z vrtalnikom izvrtajte dve luknji v steni, najmanj 180 cm od tal in 20 cm od stropa - sliko A. Ko ste izvrtali luknje, vstavite blazinico in vijak. Prepričaje se, da so vijaki dobro priviti in napravo obesite na steno.OPIS IZDELKA
Slika B. GLAVNA STIKALA ON/OFF = IZKLOVPVKLOP/IZKLOP.Slika C. DALJINSKI NADZOR
1. Gumb za vklop / izklop 2. NACIN 3.DAN 4.CLOCK 5. NASTAVI 6.WEEK/TIMER 7. MIN 8. + -> Gumb za dvig temperature. Prav takso služi kot izbirni gumb za ācas / dan. 9. --> Gumb za znižanje temperature. Prav taklo služi kot izbirni gumb za Čas / dan. 10. RESET - Gumb za ponastavitev casovnikaSlika D. LED PANEL
1. Znak ON 2. Ogrevalna moč 1000W 3.Ogrevalnamoc2000W 4. Funkcija AUTO 5. Prikaz temperature 6. Prikaz dneva 7. Prikaz casa 8. Simbol ON - vklop casovnika 9. Simbol IZKLOP -casovna zaustavitev 10. Odpritefunkcijo zaznavanja oknaIV. UPORABA
1. Druk op de hoofdschakelaar aan de rechterkant van het apparatus - Afbeelding B om het apparatus in eniti te schakelen. 2. Pridobite podatke o stanju v stanju pripravljenosti. Drug op aan / uitknop (1) op de afstandsbediening - Afbeelding C. 3. Druk achtereenvolgens op de MODE-knop (2) o izbranem načinu: - 1000 W het apparaat za konstantni ovarnari zi opolnjeni 1000 W. - 2000 W, het apparaat za konstantni vojni sestali 2000 W. - Samodejni modus, druk op de knappen + en - om o temperature temperatureur handmag in te stellen. Pridobite ga avtomatizirano, da waar de modus voor temperatureurbehoud. - Odprto detecttiefunctie venster - Wanner deze functie je geselecteerd, poskušat je treba opozoriti avtomatizirano uporabiti vse o kamertemperaturne parcelacije pri 10^ C daalt. 4. Druk op de aan / uitknop (1) op in astastatesbedi om om het apparaat uit te schakelen. Pocakajte, da se odpravite na 30 sekund.DE INTERNE APPARAATKLOK INSTELLLEN
OPMERKING: Vsak teden si lahko ogledate teden dni in ni vec, za het apparaat Niet goed werken odomat het volgens zich eigen interne klok werk, wat onjuist is. 1. Izbira fungcjij AUTO-functie izpolnjena z MODE-knop. 2. Stel voordat in de timer instelt de dag van toden en en huidige tijd in: - Druk op de knop DAG in selecteer de huidige dag met de knappen + sl - Wacht tot het prikazovalnik se je ustavil iz noza. - Druk op de KLOK-knop en stel de huidigeijd in met de knuppen + en -. Wacht tot het prikazovalnik se je ustavil iz noza. - Druk op MIN-knop en stel de huidige minuten in met de knuppen + sl -. Wacht tot het prikazovalnik se je ustavil iz noza.PROGRAMMERINSTELIRANJE CASA - CAS
Met deze functie kunt in de tijd programmeren om het apparaat op elke gewenste dag van de teden in en uit te schakelen. De timer si lahko poslabsa vnos v system za samodejno delovanje AUTO-functie en het instellen van inter inter klok van het apparaat. 1. Druk op WEEK / TIMER-knop en selecteer de dag van teden waarop in het apparaat wilt instellen om automisch in eniti te schakelen met de knappen + en -. Wacht tot het prikazovalnik se je ustvil iz noza. 2. Nadaljujete s pritiskom NASTAVITE, da se prikaze het prikazovalnik symbola. U kunt nu de starttijd van de timer instellen. Gebruik de KLOK, MIN, +sl - odpiranje zaetnega stevca casa in casa. Wacht tot het prikazovalnik se je ustvil iz noza. 3. Nadomestite si nohte za WEEK / TIMER-knop (6), ce zeilite, da se prikazejo SET UP-knop-ovi, da se prikaze, da se prikaze OFF-Symbolol in het display op. U kunt nu de uitschakeltijd van de timer instellen. Wacht tot het prikazovalnik se je ustvil iz noza. OPMERKING: de startijd要去 algid korter waar dan de stoptijd. OPMERKING Drug opus RESET-knop om timer terug te zieten maar de standardinstellungen.V. CISCENJE IN VZDRZEVENJE
1. Pred cischenjem napravo vedno izkljucite iz vtičnice. 2. Ce med cišćenjem predmete, kot so elektrčni vtč, termostat, elektrčni kontakti itd. pred uporabo ponovno namočite, jih temeljito posušite 3. Ne uporabljaje agresivnih detergentov v obliki emulzij, losjonov, paste itd. za cischenje ohijsa. Med drugim lahko odstranijo graficne simbole, kot so znaki, opozorilni znaki itd.. 4. Pred ciscenjem se prepriacaje, da se je naprava ohladila. TEHNIÇNI PODATKI: Napetost: 220-240V ~ 50 / 60Hz Moc: 2000W Maks. MoC: 2200W lp20  "Pozor Vroča povrsina" - Temperatura razpoložljivih povrsin je lahko visja, ko oprema deluje, kar pomeni, da se elementi ohišja lovanjem zelo segrejejo.  "NePokrivajte"-NAPISNI POMEMBNI napis Napis na napravi pomeni, da naprave ne prekrivajte z oblačili, odejami in drugimi imi izdelki, ki bi lahko povzročili vžig. OPOZORILO: Te opreme ne uporabljaje v blizini kadi, prh, bazenov in podobnih rezerovoarjev za vodo.   Skrbimo za okolje. Kartonska embalaža, prosim darovati na odpadni papir. Polietilenske vreč (PE) mečite v posoda za plastiko. Dotrajane naprave je treba vrniti na ustrezno zbirno mesto, ker vsebovane v napravo nevarne elemente lahko predstavljajo nevarnost za okolje. Elektricna naprava je treba vrniti kakor, da se omeji njegovo ponomvno uporabo in izkorišćenost. Ce naprava vsebuje baterio, je treba odstraniti in loćeno dati nazaj na mesta skladisćenja. olij: jai jia jia jia jia jia jia jia gall / gJJIJI pIiDII Juaia jie jieJI. # J 10 alg waiiui 1y jilj. 1. pIiJyI aDyI gill ssall 1. 1 aannn aennnn nnnn nn nnnn nnnn nnnn nnnn nnnn nnnn nnnn nnnn nnnn nnnn nnnn nnnn nnnn nnnn nnnn nnnn nnnn nnnn nnnn nnnn nnnn nnnn nnnn nnnn nnnn nnnn nnnn nnnn nnnn nnnn nnnn nnnn nnnn nnnn 1. 100000000000000000000000000000000000000 1. 02jglglll 5w 2jgl 1 3. 152 0. 1 J 1 1 1 1 1 1 1 1 1 1 1 1 1 1 1 1 1 1 1 1 JLLI JRRR RRRRRRRRRRRRRRRRRRRRRRRRRRRRRRRRRRRRRRRRRRRRRRRRRRRRRRRRRRRRRRRRRRRRRRRRRRRRRRRRRRRRRRRRRRRRRRRRRRRRRRRRRRRRRRRRRRRRRRRRRRRRRRRRRRRRRRRRRRRRRRRRRRRRRRRRRRRRRRRRRRRRRRRRRRRRRRRRRRRRRRRRRRRRRRRRRRRRRRRRR 1. 1j 1 j 1 j 1 j 1 j 1 j 1 j 1 j 1 j 1 j 1 j i 1 V. 4yDdall y dylldy dlll lal y gdsalx y jla b1 jg j i 1 1. 1 y j 1 a 1 J 1 y 1 a 9. 1 1. 1. 11. 1 17. baaasalln aalbll slyw waiy 6, saaalln no wiall wie. 11. jglal jldyjiale gai 12. jLjJyDlI yE JxJyI JxJyI JxJyI JxJyI JxJyI JxJyI 10. 1 jai jao 17. laai 2y Ioc g Jieiill cii jiee iiae y 1V. laai d 2i g jg jll jie 11. 1i jj j j j j j j j j j j j j j j j j j j j j j j j j j j j j j j j j j j j j j j j j 11111111111111111111111111111 19. 1 i 1 . 1g jia aaln 1. jssll 5j j 2y jn jn jn jn jn jn jn 11. jiluill Jia Jia xu aikai gao jin m jn jy jy la jg jilwgl. Y. Y. ) y0. 2x! jbiil jnil aiaia 26. Jieiui 4yIgai jn jj V. 1 Y. 1. 9. baw 1j jwll 1a puiy 1. jaii 5e o jal cdo 5i 1 11. 5x e aai aill ai jui iui iui iui iui iui iui iui iui lo gaiy jn yj 2 y j 1 2 3 4 5 6 7 aaii aai i jia Jluiu Aylall goll no lae g jilll g lglwially bai, g u wu Jla: j 1 xL 1 1 1 1 1 1 1 1 1 1 1 1 1 1 1 1 1 1 1 1 1 1 J 1 a 1 iuaa 2xol. II. 1. jki jai y gdi all jgljll i Y. 1 1. 4y 4. 1 0. 1111111111111111111111111111111 aLi g o jg 1 7. 214 V. sluaiy jglal 1 Jgl 8 . dLiJ jglal jgj g jg jg 1. alall 4io w jy yj y jy jy jy jy 9. 1 1 1 1 1 1 1 1 1 1 1 1 1 1 1 1 1 1 1 1 1 1 1 1 1 1 1 1 1 1 1 1 j_l = I 1. jzj 100 11. 1 jieai jie 17. 1 Jg21 pssss 151 1. aBbI dDd Dd Dd Dd Dd all j 2. 213aa ola g jai jle ola jgeaia yjg jy jy ciil elisi 3. aall jall gll 111 111 111 111 111 4. alldi 1 j0 5. all jia gai bali a 240 2000 10000000000000000000000000000000000000000 # ailll lal . 1000 - 20 20 20 20 20 20 20 20 20 20 20 20 20 20 20 20 20 20 20 20 ailll jll lgl 1 1 1 1 1 1 1 1 1 1 iiill B. (g) ON/OFF=J/ 0gC. 2y j6 1. 2. 3 4. CLOCK 5. 如下: 6. C33 all 1 7. ② , 8. + - > 各自 / 切口 J , J , J , J , J , J , J , J , J , J , J , J , J , J , J , J , J , J , J , J , 9. --pall / 1234567890123456789012345678901234567890123456789012345678901234567890123456789012345678901234567890123456789 10. 与 a + b = 12 整除 b ! D. LED PANEL 1. laill jao 2.1000 3.2000 4. 1111111111 5. 与 6-2 7. 8. 与 a + b = c + d - 12a + 12b + 12c 的解集为 9. 10. 10. 与等比数列 a_n = 2( 3n - 1) ( 3n + 5) ,求此数列的前 n 项和 S_n poloo 1. jall - jell jn jn jil jll jil jll jil jil B aill jil 2. 100 - 100 100 100 100 100 100 100 100 100 100 100 100 100 100 100 100 100 3. 3.1.2.1.2.1.2.1.2.1.2.1.2.1.2.1.2.1.2.1.2.1.2.1.2.1.2.1.2.1.2.1.2.1.2.1.2.1.2.1.2.1.2.1.2.1.2.1.2.1.2.1. -1000 1000 -2000 2000 jaiy jaiy jaiy jaiy jaiy - 1jll jll jll jll jll jll - + + jll jll jll - 10 jaiy iayi yjy jiy jiy jiy jiy jiy jiy jiy jiy jiy jiy jiy jiy jiy jiy jiy jiy jiy jiy jiy jiy jiy jiy jiy jiy jiy jiy jiy jiy jiy jiy jiy jiy jiy jiy jiy jiy jiy jiy jiy jiy jiy jiy jiy jiy jiy jiy jiy jiy jiy jiy j 2 4. a 30 y d y iabiy jgall y dy jy kail jj (1) (jll / jkill r jy baii jy aIiJI jieJI aIe Iu yie 18,4 yaiolal ayld all cwl 18, jao 4 Jkijl jj jj jj jj jj jj jj jj jj jj jj jj jj jj jj jj jj jj jj jj jj jj jj jj jj jj jj jj jj j 1. AUTO 2. all 100 - jy 12000 DAY Jnagll n aalil g jh jh -g + yj j j j j j j j j j j j - jj bcl Clock jn jn jn jn jn jn jn jn jn jn jn jn jn jn jn jn jn jn jn jn jn jn jn jn jn jn jn jn jn jn jn jn jn jn jn jn jn jn jn jn jn - jzjbcnMINJcJcJcJcJcJcJcJcJcJcJcJcJcJcJcJcJcJcJcJcJc | - 12| = | - 12| < | - 12| y Auta 1 1. jj WEEK / TIMER 12021 2 2. 2015山东临沂市中考题型2015年高考语文高频知识点2015高考语文高频知识点2015高考语文高频知识点2015高考语文高频知识点2015高考语文高频知识点2015高考语文高频知识点2015高考语文高频知识点2015高考语文高频知识点2015高考语文高频知识点2015高考语文高频知识点2015高考语文高频知识点2015高考语文高频知识点2015高考语文高频知识点2015高考语文高频 1 3. 3.2.2.2.2 WEEK / TIMER (6) SET UP 1 jor oFF J 1 a 1 jE bai, iai jaiy 1iay xie aiaaiaeaiaeaiaea RET. aIy, yIy 1. iLiLi Li aIbLi Jia oJaiLi Jiaei 2. 1 3. aagjy j y j . 1 1 1 1 1 1 1 1 1 1 1 1 1 1 1 1 1 1 1 1 1 1 1 yS! 4. 1234567890 4.13: Clog Xe 50/60 240-220: 11, 4. lp20 A 1 1 219 + ·s + 219 + ( 43 - 1) + 1 = 219 + ( 43 - 1) + 1 = 2( 10)  12  m - 1 0 ;   4.4.1.1.1.1.1.1.1.1.1.1.1.1.1.1.1.1.1.1.1.1.1.1.1.1.1.1.1.1.1.1.1.1.1.1.1.1.1.1.1.1.1.1.1.1.1.1.1.1.1.1. jglal jbi 4yai yjaiabai jglal jglal sdo! J 1 jglal y l jybl 15 k1. galswlgalswolc) . Juaia (kayai jzall alaill glilbc) lgjdi d(BG)БылгAPСКИ
BHIMAHHE:
YcTpoIcTBOTO e npEHa3HaueHo cMo 3a DomaSha ynotpe6a. YcTpoIcTBOTO HE e npedHa3NaYeHo 3a TbproBcKa / npoepecnoHaJHa ynotpe6a. YcTpoiCTBOTO HE e noDxOJaIoo 3a n3nOJ3BaHe Ha OTKpITo. BhImaHne! Ppei ynoTpe6a e BaxHo Da npOeTeTe Te3n INCTpyKcN 3a ekCnIooTaucn, 3a Da n36erHeTe 3IonoJyKn i 3a npAByInHaTa yNoTpe6a Ha ycTpoiCTBOTO. 3ana3e ToBa pBKOBOCTBOI rO 3aNa3eTe, 3a da MoXeTe JeCHO Da rO n3nOJ3BaTe.I. YKA3AHNIA 3A BE3OПАСHОCT HA YПOTPEБA
1. Преши уnotpeba поверete дади habржениTo, поочен Ho淘汰kaTа. CbOTBETCTBa Ha MeCTHnTe NapaMeTpN Ha COJehocT, Ho He 3a6paBraIe, Ye MapKnipOBkata: AC- e npomeHnIB Tok, a DC e DC. 2. Cbbp3BaIte yctpoiCTBOTo cAmO KbM 3a3eMeH KOHTaKT 220-240V 50/60 Hz. 3. Празуnotpe6a pa3BnIteи n3npaBeTe 3axpaHbauя ka6eJ 4. YBepete ce, ye 3axpaHbauT KaBeI N UeNceIbT HAmAT BnIMN NOBpeiN 5. Преши и по Враиме на унотpeба, уверете сe, чe зхсаньшг Кабел He e onbnat Bьрху OTКРИТ Пламьк Или Друг ИЗTOUCHИК Ha TOПЛINHA И OCTprn рббов, KОТо могатда NOВраздг ИЗOLAцЯта на Кабela. 6. Ппени пьраза уnotpeba OTCTpaHete BCnUKN KOMNoHEHTN Ha onakOBkata. BnMaHne!В cnyaH Na Kopnyc C MeTaN HuaCTN, Bbpxy Te3N eJeMeHTN MoKe Da ce OIbHe JIeKO BnIMO 3aunTHo FOJNO, KOeTO cbIo Tp8Ba Da ce npemaxHe. 7. YcTpoIcTBOTO He Tp6Ba Da Ce n3No13Ba OTe Deca, Nua C OrpaHnueHn fN3nueckn, CEH3OpHN IIN yMCTBeHn CnOCo6HoCTn 6e3 HaD3Opa Ha yIbJHOMoUeHn IIN ONHTHn IINuA IN BnHaI IN CbOTBETCTBne C Te3N IHCTpyKcHn. 8.ObopydBaHeTo He e npedHa3HaueHO 3a H3noJ3BaHe C BbHsHn TaMepn JIn OTdeJIHa CNCTema 3a DnCTaHcIOHNO ynpaBHeHne. ПЕДУПЕЖДEHNE:Товаоборудвае може да ceизпол3ва ot Deца hab8-罗dnша Вьзрасилца с орагишиемфизческ,сeнзорниллумстveиснобостилллца, KОИTO HЯмат ONIT ИЛN ПОЗногяза obopydbaheTo,CAMO ako TOBa ce npabn pod Habлodeнeto Ha IINCE,OTROBOPHO 3a TEXHNTe 6e30anacnoCTИЛN ca NOJUynI INHCTpyKcIMn 3a 6e30anacha ynotpe6ha Ha yctpoiCTBOTo n ca HЯСHOC ONaCNoCTnTe, CBbp3aHn C n3PON3BaHeTo My.ДeцаТ He Tp6Ba dA nIrpaT c obopydbaheTo.Почисванeto n PODPbXkata Ha yctpoiCTBOTo He Tp6Ba dA ce N3BbpWbAT OT Deцa,OCBeH aKO ca Ha Bv3pact Na8 roDHHn i He ce HablIOdaBat 9. He octabraye yctpoicTBOTO 6e3 nad30p no BpeMe Ha pa6ota. 10. He notanai Te ypea n 3axpaHbaunia Ka6eB BbB BODa nn npyn TeuhoCTn. 11. Korato yctpoicTBOTO He ce n3noJ3Ba, To BnHaT Tp6Ba da 6bJe n3KIOUeHO OT KOHTaKTA. 12. Korato Издьрпвate сеньсяа OT KOHTаКТа, НИКORA He Дьрnaite 3axpaHbaцяka6eIcamo 3a сеньсяа. 13. He noctabraye B3 METAHN INPEIMETIN BbTpe BycTPOIcTBOTO 14. Пожибдпелг He Hocn OTROBOPHOC 3a цETN, пчнен OT He npabunHa ynotpe6a Ha yCTpoiCTBOTO. 15. Tp6Ba da ce nomn, ye hKOn Yactn Ha yCTpoNCTBOTO n 3kaqpa no BpeMe Ha pa6ota ce HarpBaT MHorO, taKa ye 6bDeTe BHMaTeJHn N He rN DOKocBaITe, MoKeTe da N3ropnte. 16. HNKO7A He nokpmbaTe yctpoiCTBOTO no BpeMe Ha pa6oTa IIN KOrato To He ce OXJaHn HAnbHNO 17. He 3a6paBrye, ye Ha HaraBeBaTeJHnTe eJeMeHTn Ha yCTpoiCTBOTO e Heo6xOdmo BpeMe, 3a da ce OxJaTnHaIbJIHO. 18. Korato Изпольате устюгов, осениху място над и okоло Hero. Урет He Трава дд ДOKOCBA Лесно залиши пешmetи по врума, като Dekopаши, Хатуен Кьрп, 3авеси, дрени и др. 19. HarpeBaTeJrT, nHcTaInpaH B baHraTa, Tp8Ba Da 6bDe nHcTaInpaH TaKa, ye KOHeKTopuTe i npTe perylaTopn Da He Morat Da 6bDaT DOKocBaHn OT YOBek BB BaHaTa IIN PoD dySha. 20. B harpeBaTeIte 3a BnCOunHn TeIa, N03uIte Ha pa3JInHnTe N03uIHa CbeDHNTeJIte Tp8Ba Da 6bDaT BnIMN OT pa3CTOJHne 1 m 21. EtnkeTnte 3a nokpmbaHe Ha HarpeBaTeJr Tp6Ba Da ce BuxdaT cIeD INHCTaIIpaHeTo Ha HarpeBaTeJI 22. He MoxeTe Da NoCTaBraTe HarpeBaTeJr DnpeKTHo NOD KOHTaKTa N B 6JIu3OcT Do 3aIaIMM MaTePnaJI KATO 3aBeCn, 3aBeCn n dp. 23. YcIpoIcTBOTO He MoKe Da Ce I3PON3Ba C BbHsHn TaIMepn INI IN dpyIn OTdJIHN CNCTeMn 3a DnCTaHcNOHHO ynpabJeHne 24. He n3naarTe yctpoiCTBOTo Ha aTMocphiepHn ycNoBn (IbXd, cIbHcE n dp.) Hn H3noJ3BaIte B ycNoBnHa BnCOKa BJaXHOCT (6aHn, BJaXHn KbMmIHn) 25. Перношино повераяпсьсториTo Ha 3axpaHbaцяKa6eI.Ako 3axpaHbaцяТ Ka6eI e NOBpeH, ToI Tp8Ba Da 6bJe 3aMeHe OT CneuaJn3npaH cepBn3, 3a Ida ce H36erHe onaCHOCT 26. He n3no13BaIte yCTpoIcTBOTOB 6n3OCTdo 3aIaIMMaTePnaJIi 27. HarpeBaTeIaT Tp6Ba Da ce MoHTnpa Ha BnCOuHa He No-MaIka ot 1,8 m Hau nOda 28. He n3noJ3BaIte To3n HarpeBaTeB HEnocpeIcTBeHa 6n3OCT Do BaHa, Dyu nn npyuBeH 6aceH 29. He n3noJ3BaIe To3n HArpeBaTeI, aKo e NaHaJI 30. He n3noJ3BaIte, ako nMa BnIMn npn3Haun Ha nobpeDa Ha harpeBaTeJIa 31. Изпогговашиху на равна и стаблна NOВьхноCTИУ Гп КпКрЕпЕ КьМ CTeHATA, ako TOBa e п徳вideho OT пОнЗВODиTeЯ. ПЕДУПЕЖДЕНЕ: He n3noJ3BaIte To3n HarpeBaTeI B MaJIKN IOMeUeHnI, KbJeTO mAm Xopa, KOnTo He MoRat Da rH NaNychaT cAMN, OCBeH aKO He e OcNrypeH NOCTOHeH NaD3Op. ПЕДУПЕЖДЕНЕ: 3a за hamалite риcka OT NOжар, дрьжte TeKCTил, 3abecn nIIN dpyrN 3anaIMM MaTePnaII Na pa3ctOЯHne NOHe 1 M OT n3xOda Ha Bb3dUxa Ha HarpeBaTeJI. IpnopbUba ce eIektpnueckata nHctanaun da 6bde o6OpyDbHa c aBTOMaTUneh IpeKbcBau 3a ocTaTbUeH TOK c 30mA cTapTOB TOK 3a NobuWeHa 6e3OnacHOCT. 3a6eJekka: Ako 3axpaHbAunrT Ka6eI nn nIeNcIbT ca NOBpeJeH, Te BnHaN Tp8Ba da 6bDat NOMeHN nn peMOHTnpAH OT CneuaJIIN3Iupan cepBn3. II. ПЕДУПЕЖДЕНЯ 1. HnKora He n3noJ3BaIte yCTpoiCtBOTo, aKO e NOBpeJeHO nJIH He cyHKUOHiPa npaBnIHo. 2. Hukora He n3noJ3BaIte yCTpoiCtBOTO, aKO npEi TOBa e naHaNo OT BnCOUnHa n NOKa3Ba BnIMN npn3Haun Ha NobpeDa. 3. He n3noJ3BaIte ydbJxNTeJIHn Ka6eHn IIN dpyrN eJeKtpUyeCKn KOHTaKTn, KOnTO He OTROBaprT Ha npINOJXIMITE cTaHdApTn I eJeKtpUyeCKn pa3NopeDbN. 4. BCEKN peMOHT, DEMOHTaK IIN NOIMHa Ha yactn Tp6Ba BInHaN da ce N3BbPbWAOT CneuJIN3npaHO CbOpBXeHne. 5. Ako yctpoiCTBOTO n eIemehn KaTO eIeKtpuYeCKN KOHTaKTn Ca MOKpn, UeIeCJIbT ININ Ka6eJbT Tp8Ba Da 6bDaT n3CyWeH, PpeDN Da n3PON3BaTe yCTPOiCTBOTO n HEROBNTe KOMNOHEHTN. 6. He n3noI3BaIte yCTpoIcTBOTc MOKpn pbue. 7. Korato cblueCTbByBa pnck yctpoiCTBOTo da e noBpeJeHo, HNKOTA He ce onnTbaIte da nonpaBrye yctpoiCTBOTo camn. 8. HnKora He MnIte yCTpoiCTBOTO NO TeaAa BODa NIN IO TaKbB NaHn, Ye BoDaTa Da KaNe B Hero. 9. He n3noJ3BaIte akcecoapn, KOnto He ce npenopbUbat OT npOn3BOJTeJIa. Te morat da npedCTabJIbAT onaCHOCT 3a Notpe6nteJIa I da npUnHrT NOBpeJa Ha yCTpoiCTBOTO. 10. YbepTe ce, ye yctpoIcTBOTO ce e oxlaIIO npeIN cbxpaHHe. 11. He dokocbaite kopnyca no Bpeme Ha ynoTpe6a. No Bpeme Ha pa6ota n3noJ3BaIte camo konyeTa n npebKJIIOUbATEJI. Cnejn3KJIIOUBAHe n3yaKaIte ycTPOIcTBOTO da ce oxlaJn. 12. BHIMAHNE: HЯkon части на това устpoистBO могат да ce harpeят м Horo no BpeMe Na pa6ota и за пчинят ИЗ rapян.III. INPENIbPBO yNOTPE6A
1.ИЗbaTe ΚeJЯ onaKOBbYeH MaTePnA J N 3nPaBeTc 3axpaHbAunrKa6eJ 2.ПО ВЕME Ha MOHTAXA,В HNKAKbB CNYaY uCTpoCTBOTO He MoKe Da 6bDe nOKpntO C n3OJaCIOH eMaTePnAn IINI NOdoBeH MaTePnAn 3. Korato crno6baTe yctpoCTbTo, rpeuTE u rpeuTE He Tp6Ba Da ce pekaT nn pekaT 4. Прази пьра уnotpe6а пpoуетete BCNUHCTpyKm3a ynotpe6a. 5. PpOBepeTe dAnn HApEKeHneTo, NocOueHo Ha eTnKeTa Ha npOdykTa, OTROBapr Ha HApEKeHneTo Ha 3axpaHbAaTa MpeKa BbBaIy IOMMOHTAXK
I3noJ3BaIte CBepeJIO, 3a da npo6neTe DBe DynKn B CTeHaT, MInHmym 180 cm OT nOda n 20 cm OT TaBaHa - Chmka A. Cnei KaTO npo6neTe Dnyknte, NocTabeTe NOdNOxKata n 3aBnTe. YBepete Ce, ye BNHTOBeTe ca Do6pe 3aterHaTn, Cnei Koeto 3akaueTe yCTpOJCTBOTo Ha CTeHaT.ONICAHNE HA IPOJYKTA
CHIMka B.OCHOBEH KJIIOU ON/OFF=BKJIIOUBAHE/IM3KJIIOUBAHE.CHIMKA C. DINGTAHLIOHEH KOHTPOJIEP
1.БуTOH3aBKNIOUBAHe/N3KNOUBAHe 2.PEKIM 3.ДEH 4.YACOBHVK 5. HACTPOVIKA 6. CEДМИLA/TAIМЕР 7.MNH 8. +-> Bytoh 3a noBnIaBaHe Ha TempepaTpaTa. CbIoo Taka cnyKk kato 6yToH 3a n36Op 3a Bpeme / den. 9. --> ByToH 3a noHnKabane Ha TempepaTpaTa. CbIto Taka cnyKn KaTO bYToH 3a n36op 3a Bpeme / DeH 10. RESET - ByToH 3a HynipaHe Ha TaMepaCHIMKA D. LED PAHEI
1.CMBOJ BKJ 2. MoUHocT Ha OToPJIeHne 1000W 3. MoUHocT Ha OToPJIeHne 2000W 4.Функлг AUTO 5. TemnepaTypeH dncnnnei 6.Пoka3BaHe Na DeHЯ 7.Пoka3BaHeHaВpeMeTo 8.CmbBbBkI-ctapTnpaHeHa TaMepa 9.CmBON OFF- n3KnHObaHe Ha TaMepa 10. OTbOpTe cyHKmraTa 3a otKpmbaHe Ha npo3opeuM3I0JI3BAHE
1. HatncheTe rnaBnI npEeKIOuBaTeI OT dAChata cTpaHa Ha yCTpoNcTBOTo - Kaptna B, 3a Da BkIOUHTe n N3KIOUHTe yCTPOINCTBOTO. 2. YcTpoIcTBOTO Beue e B pexIM Ha rTOBHOCT. HATnCHete 6yToHa 3a BKJIIOUBAHe / n3KJIIOUBAHe (1) Ha dNCTaHcNOHOTo ynpabJIeHne - I3O6paKeHne C. 3. Hatnche 6ytoHa MODE (2) Ha cBoi pei, 3a da n36epepepepekma ha pa60ta: - 1000 W yctpoictboto noctoHHO ue ce 3aqrba c 1000 W. - 2000 W, yctpoNCTBOTO NOCTOHHO ue ce HapraBa c 2000W. - ABTomatueh pejim, hatnche 6ytoHnte + n -, 3a da 3a daTe pbyHo tempepatpata. YcptpoCTBOTO abTomatuHO ue Bne3e B pejim Ha noDbpxKe He Taemepatpata. -Функцяза OTКрИВане Ha OTBорен позорц - Korato Ta3и Функця e n3браHA, yCTpoIcTBOTO aBTOMaTnUH0 Ie n3KJIQUHn OTOПЛeHnTo, aKO CTaIHATA Temперatype cnaIDHe BHe3aIIHc 10 °C. 4. 3a Ia N3KIOUHTe yCTpoIcTBOTo, HATNCHEte 6yTOHa 3a BKNIOUBAHe / N3KIOUBAHe (1) Ha INCTAHUNOHOTO ynpabJIeHne. YCTPOINCTBOTO ce OXIAJda I N3KIOUBA CJIeD OKOJI0 30 cekHydN. HACTPOIKA HA BbTPEHnY YACOBHnK HA UPeI 3A6EJIEXKKA: Ako He 3aadaTe Tekyuia Yac n DeH OT CeMnuaTa, yCTpoIcTBOTo Hma Da pa60n npabnHO, Tb KaTO ue pa60n cnopeD co6CTBeHH Cn BbTpeSeH YacOBHnK, KOeTo e HnPaBnHO. 1.Изберете Функцята AUTO,kaTo Изпольаге 6утона MODE. 2.Ппддднсгпспспспспспспспспспспспспспспспспспспспспспспспспспспспспспспспспспспспспспспспспспспспспспспспспспспcн cac: - Hatnche 6ytoHa DAY n 36epete Tekyu n c nomoTa Ha 6yToHnTe + n - . N3yaKaIte, Dokato Dncnnert cnpe da Mira. - Hatnche 6ytoHa CLOCK n 3aainTe kkyoTo BpeMe c nomouTa Ha 6ytoHnTe + - . N3yaKaIte, doKato dncnnert cnpe da mira. - Hatnche 6ytoHa MIN n 3aainTe tekyuHte MNHytn c nomouTa ha 6ytoHnTe + - .N3yaKaite,doKato dncnnert cnpe da Mira.HACTPOIKA 3A IPOIPOAMIPAHE HA TAIMEP-TAIMEP
Ta3n cyHKUa Bn no3BOJyBa Da nporpaMnpaTe BpeMeTo 3a BKIOuBaHe N n3KIOuBaHe Ha yCTpoIcTBOTo Ipe3 BCEKn DeH OT CeDMUaTa BKeJaHOTo BpeMe. TaimepbT moke da ce hactpon cmo cne KaTo n36peTe yHKnraTa AUTO n HactponTe BbTpewHna YacOBnK Ha ycTpoiCTBOTo. 1. Hatnche 6yToHa CEIMUCA / TAIIMEP u n36epete DeHr OTe CeMnuaTa, B KOITo NCKate da HAcTPOnte yCTPOINCTBOTO da CE BKIOuBa u n3KIOUvBa ABOtOMaTHUHO, KaTO u3N0JI3BaTe 6yToHInTe + u - . U3yakaKe, DOkATO DnCPIeRcPpe Da Mira. 2. Cnei haTnckaHe ha 6yToHa HACTPOIKA, cIMBOJbT ON ue CBeThe Ha nCnPJIe. Beue moKeTe da 3aJaTe BpeMeTo 3a CTapTnpaHe Ha taHepa. I3noJI3BaIte 6yToHInTE CLOCK, MIN, + n -, 3a Da 3aJaTe BpeMeTo 3a CTapTnpaHe Ha TaMepa. N3yaKaIte, DOKaTO nnCnPJIeT cnpe da Mira. 3. CneI KaTo OTHOHa HATNCHEte 6yToHa CEIMLUA / TAIMEP (6) n cJeT ToBa HAtncHeTe 6yToHa HACTPOIKA, Ha dncnpe Ie CBeTHe CmBOJbT OFF. Beue moKTe Da hAcTpOnTe BPeMeTo 3a n3KnIOuBaHe Ha TaIMepa. N3yaKaIte, DOkAto DnCnIeRr CnPpe da MnRa. 3A5EJIEXKKA: HauaJIHOTo BpeMe BnHaI TpI6Ba Da e NO-HNCKO OT BpeMeTo 3a cnIPAHe. 3A6EJIKKKA 3a da hynpaTe TaMepa do HactpoKnTe no nOpa3bnpaHe, HATNChe 6yToHa RESET.V. ПОЧИСТВАЕ И ПОДПьЖКА
1. Binhari n3KIIouBaIte ypeTa OT KOHTaKTA npPeDn NoOuNCTBaHe. 2.AKo no BpeMe Ha NouchTbaHe npedMeN KaTo 3axpaHbAunu IeNceN, eNeKTpueeKeKHTaKTn Ha TepMoCTaTa Ha TepMoCTaHa TepMoCTaHa TepMoCTaHa TepMoCTaHa TepMoCTaHa TepMoCTaHa TepMoCTaHa TepMoCTaHa TepMoCTaHa TepMoCTaHa TepMoCTaHa TepMoCTaHa TepMoCTaHa TepMoCTaHa TepMoCTaHa TepMoCTaHa TepMoCTaHa TepMoTcTaHa TepMoCTaHa TepMoTcTaHa TepMoTcTaHa TepMoTcTaHa TepMoTcTaHa TepMoTcTaHa TepMoTcTaHa TepMoTcTaHa TepMoTcTaHa TepMoTcTaHa TepMoTcTaHa TepMoTcTaHa TepMoTcTaHa TepMoTcTaHa TepMoTcTaHa TepMoTcTaHa 3.He n3no3BaIte arpcBnH npenapatn nof fopMaTa Ha emyncn, noCNOH, nactn npocntBaHe Ha uka. Te Morat, Hapei c npyr Heu, da npemaxBat NhoopMaunOHnTe rpaunH CNMBOIn, KaTO 3HaUN, npdeynpeNTeHN 3aUN T.H. 4. YBepete ce, ye yctpoicBTOe e oxnaIIO npedn nouchBaHe.TEXHUNECKN DAHHN:
Hansehene:220-240V\~50/60Hz Mouhoct: 2000W MaKc. Mouhooct: 2200W lp20 "BHHMAnHe IopeuHa NOBbPxHocT" - TempeaTypaTa Ha HAnuHnTe NOBbPxHocTu MoKe Da e No-BnCoka, KOraTo o6OpyBaHeto pa6To, KoETo O3HaUaBA, Ye eIeMeHTte Ha Kopnyca Ce HapRyBaT MHoro no BpeMe Ha pa6To nBpeMe Ha pa6To, CnECTETE BHIMAHHE !!!  IMBAITE《3HAUEHNEHADINCA Bbpxy yctpoiCTBOTO O3HaUaBA, ye yctpoiCTBOTo He Tp8Ba Da 6bJe NOKPnTO c dpexN, OdeJNA n dpyrN TeKTHINH npOdykTN, KOINTOMaT da npuHnT 3anaJBaHe.  PEXKDEHNE: He n3no3BaIte ToBa o6OpyBaHe B 6n3oCT Do BaHN, DnyoBe, 6aceHN I noo6Hn pe3epBoapn 3a  MOnI, npExBbPnTe KapToHEnIte ONaKOBu B OTnAbuHa XapTna. N3CInne Te NoNtEnHeOBHTe Top6nK (PE) B nlaCTMacobn KaHTeHep. N3HOceHOTo yCTPOINCTBO Tp6Ba Da Ce BbPHe B CbOTBeHTO MAcTO 3a CbXpaHHe, TbN KATO e onACHO B yCTPOINCTBO TO CTABKNTe MORaT Da PpeDcTabNBAr 3a Anlaxa 3a OKONHaTa cpeA. ENeKTpuYeCKOTo yCTPOINCTBO Tp6Ba Da 6bJe PpeJaDeNoKpaI NOBTOPHOTo My N3NOJ3BaHe N3NOJ3BaHe. Ako B yCTPOINCTBO To HMa 6BaTePN, Tp6Ba Da N3BaInTe N Da DAnTe Ha ToUkata, CbXpaHnBaHa OTrEINHO.(AZ) AZəRBAYCAN
DiQQeT:
Cihaz yalniz məisət istifadəsi üçün nəzərdə tutulub. Cihaz kommersiya/peşekar istifadę uçün nezerdæ tutulmayib. Cihaz açiq havada istifadə üçün uygün DEYIL. Diqqət! Istifadədən evel qəzalarin qarṣisini almaq və cihazɪn duʒgūn istifadəsi üçün bu istismar təlimatlarin oxumagīniz vacibdir. Bu təlimatī saxlayin və asanliqla istifadē edə bilməyiniz üçün saxlayin. I.ISTIFADTəHLUKəsIZLIYI UÇUN TəLIMATLAR 1. Istifadē etməzdàn āvvəl, etiketdē gõstərilān gærginliyin yerli duzluluq parametrlərin āuğun Olduğunu yoxlayin, lakin qeyd olunduğunu unutmayin: AC- alternative cərəyan və DC DC-dir. 2. Cihazi yalniz 220-240V 50/60 Hz torpaqli Rozetakaya qosun. 3. Istifadē etməzdən āvvəl elektrik kabelini açın və dizəldin 4. Elektrik snurunun və fişin görünan zədələnmədiyine amin olun 5. Istifadədənəvəl və istifadə zamani elektrik kabelinin açiq alov və ya digər istilik mənbəyɪ və kabelin izolyasiyasına zərər verə biləcək iti kənarlıarı üzərində uzanmadɪɡindan əmin olun. 6. Ilk istifadē etməzden āvəl buttun qablaşdirma componentlarini Çixarın. Diqqat! Metal hissələr i alan bir korpus vəziyyətində, bu elementlərdə bir az görünən qoruyucu folqa Çakilə bilər, onu da Çixarmaq lazimdir. 7. Cihaz səlahiyyətli və ya təcrubəli səxslərin nəzarəti olmadan və həmɪsə bu təlimatlara uygün olaraq uşaqlar, fiziki, hissiyyat və ya eqli qabiliyyəti məhdud olan səxslər tərəfindən istifadə edilməməlidir. 8. Avadanliq xarici vaxt açarları va ya ayrìca uzaqqan idarētmāsystemi ilé istifad e üçün nəzerd e tutulmayib. XÖBÖRDARLIQ: Bu avadanliq 8 yaşdan yuxari uşaqlar və məhdud fiziki, duğu və ya eqli qabiliyyeti olan Şexslər və ya avadanliq haqqinda heç bir tεcrubesi va ya biliyi olmayan Şexslar tərəfindən, YALNIZ onlarin isine cavabdeholean Şexsin nezareti.altinda həyata keçirildiyi təqdirde istifad edile biler. təhlukesizlik va ya cihazin təhlukesiz istifadasi ila baglī telimatlar verilmisdir va onun istifadasi ila baglī təhlukəlerden xəberdardirlar. Uşaqlar avadanliqla oynamamalidirlar. Cihazin təmizlənmesi va saxlanmasi 8 yaşindan yuxari olmayan va nezarət altinda olmadiqda uşaqlar tərəfinden həyata keçirilməməlidir. 9. Θməliyyat zamani cihazi nəzarətsiz goymayin. 10. Cihazi və elektrik kabelini suya və ya hər hansi digər mayelər batairmayin. 11. Cihaz istifadə edilmədikdə, onu həmɪsə elektrik Rozetkasindan ayirmaq lazɪmdir. 12. Fisi din Rozetkadan cokorken hec vaxt elektrik kabelini yalniz fisindan tutmayin. 13. Cihazın icçırisin ŞE METAL ŞYALAR qoymayın 14. Istehsalci cihazin duzgün istifada edilmamasi naticasindya ranan zararlare gore məsuliyyat dasimir. 15. Yadda saxlamaq lazimdir ki, is zamanı cihazın və seksafın bazi hissəlari cox isti olur, ona gore də diqqetli olun və onlara toxunmayın, yaniq ala bilarsiniz. 16. Θməliyyat zamani və ya tam soyumayanda cihazi HEÇ VAXT ortməyin 17. Unutmayin ki, cihazin qizdirici elementlarinin tam soyuması üçün vaxt lazimdir. 18. Cihazdan istifadə edərkən yuxarıda və Ṭrafinda adekvat yer olduguundan omin olun. Cihaz is zamanı asanlɪqla yanan Ṭşyalara, məsələn, bəzək Ṭşyalarına, kagens dəsmallara, pərdələrə, paltarlara və s. toxunmamalɪdir. 19. Banyoda quraşdirilmiş qizdirici ela quraşdirilmalidir ki, baglayicilara vā digar tenzimləyicilərə küvetdə və ya duşun.altinda bir adam toxunmasin. 20. Hündürlükda olan qurğular üçün qizdirici larda birlaşdiricilirin mixxtelif movgelarinin movgeleri 1 m məsafadn görünmlidir. 21. Qizdiricinin ortulmasi uçün etiket qizdiricinin quraşdirilmasindansonra gürünmelidir 22. Qizdiricini birbaşa Rozetakın altına, perdə, perdə və s. kimi tez alşan materiallarin yanina qoya bilməzsiniz. 23. Cihaz xarici vaxt açarları ve ya diger ayrı-ayrı uzaqqdan idarëetməsystemlər il e istifad e edil bilməz 24. Cihazi atmosfer Şeraitin (yaş),).(v s.) mıruz qoymayin va yayüksak rütubeti Şeraitd (hamam otaqlari, rütubeti üşerge evleri) istifad etmeyin. 25. Elektrik kabelinin vəziyyətini vaxtaşırı yoxlayın. Elektrik kabeli zədalənibsə, təhlükənin qarşɪsinci almaq üçün onu mutəxəssis təmir muəssisəsi ᵓviz etməlidir. 26. Cihazi yanan materiallarin yaninda istifadə etməyin 27. Qizdirici dosemad en 1,8 m-den az olmayan hundurlukd qurasdirilmalidir 28. Bu qizdiricini vanna, duş və ya hovuzun bilavasite yaxinliginda istifadē etməyin 29. Θgər bu qɪzdɪrɪcɪ dʊsɪrsə, onu istifadə etməyin 30. Qizdiricinin goren zedalennesi elamatleri olduqda istifada etmeyin 31. Istehsalci tərəfinden nəzərdə tutulubsa, qizdirincini duz və dayaniqli bir sathdə istifadə edin və ya divara bərkidin. XÖBÖRDARLIQ: Daimi nəzarət təmin edilmədikdə, bu qɪzdɪrɪcɪdən özbaşına tərk ede bilməyən insanlarin Olduğu kicism otaqlarda istifadə etməyin. XÖBÖRDARLIQ: Yang'an riskini azaltmaq üçün tekstil, pördelár va ya diger yan materiallari qizdiricin'in hava Çixişindan on azı 1 m mesaşfede saxlayın. Təhlükəsizliyi artımaq üçün elektrik qurugusunun 30 mA baslangıc cərəyanı olan avtomatik qaliq cərəyan açari ilə təchiz edilməsi tovsiye olunur. Qeyd: Elektrik kabeli va ya elektrik stepseli zedalnibsə, o, hamiə ixtisaslaşdirilmı s tamir sexi tərəfinden dayisdirilməli va va tamir edilməlidir.II. XəBəRDARLIQLAR
1. Cihaz zədələnibsə və ya dizgün islamirse, heç vaxt istifadə etməyin. 2. Θgər o, ᵑvvəllər hündürlukdən yixilibsa və görünən zədə elamətləri gõstəirse, onu heç vaxt istifada etməyin. 3. Mövcud standartlara və elektrik qaydalarina cavab verməyən uzatmak kabellərindən və ya digər elektrik Rozetkalarindan istifadə etməyin. 4. Hər hansi təmir, hər hansi hissələrin sokülməsi va ya dəyɪsdirilməsi həmɪsə ixtisaslaʊmɪs muəssisə tərəfinden aparilmalɪdɪr. 5. Θgər cihaz və elektrik kontaktları kimi elementlər yaşdirsa, cihaz və onun komponentlərindən istifadə etməzdən avvəl fiş və ya kabel qurudulmalidir. 6. Cihazi yaş ellərlə istifadə etməyin. 7. Cihazın zedalanmesti riski olduqda, cihazi heç vaxt Özünüz təmir etmoye calısmayın. 8. Cihazi heç vaxt axar suyun.altinda va ya icərisin su damcilacaq səkildə yumayin. 9. Istehsalçı tərəfindən tovsiyə edilməyən aksesuarlardan istifada etməyin. Onlar istifadəci üçün tohlükə yarada və cihazın zədəlenməsinə səbəb ola bilər. 10. Saxlamadan āvvāl cihazīn soyuduğundan āmin olun. 11. Istifadə zamanı korpusa toxunmayın. Üməliyyat zamanıyalnizduymələrdən və açarlardan istifadə edin. Sondurdukdən sonra cihazinsoyumasini gozləyin. 12. DIQQΘT: Bu cihazın bezi hissələr eməliyyat zamani cos qiza bilər vəyaniqlara səbəb ola bilər.III. JIKISTIFADDON AVVOL
1. Bütün gablingirma materiaları Çınarin ve elektrik kabelini dizeldin 2. Quraşdirma zamanı cihazi heç bir halda izolyasiya materiali ve ya oxşar materiaillä örtmek olmaz 3. Cihazi yigarken, tir ve rafters kesilmemeli ve kesilmemelidir 4. Ilk istifade etmezden evel istifade uçün buttun telimatlari oxuyun. 5. Møhsulun etiketinde gosterilen gerginliy in evinizdeki elektrik səbekesinin gerginliyine uygun olub olmadigiinyoxlayinMONTAJ
Dösəməden minimum 180 sm və tavandan 20 sm mesafedə divarda iki desik qazmaq üçün qazmadan istifade edin - səkil A. Delikləri qazdirqdan sonra yastigi daxil edin və vidalayin. Vintlerin yaxsɪ berkidildiyine emin olun, sonra cihazi divara asin. MÖHSULUN TÖSVIRI Sekil B. ΘSAS DONDUR ON/OFF = ON/OFF. Sekil C. Uzaqdan PUL 1. ON/OFF duymesi 2. MODE 3.GUN 4.SAAT 5. QURDURUN 6. HΘFTθ/TAYMER 7. DQ 8. + -> Temperaturu yükseltm.dk Üçün duym. Hämçınin vaxt/gün Üçün.Sectionduymesi kimi xidmet edir. 9. --> Temperaturu asagisalmaq uçün duymə. Hæmçinin vaxt/gün uçün.Sectioni duyməsi kimi xidmet edir 10. RESET - Taymeri sifirlama dymesi Sekil D. LED PANEL 1. ON simvolu 2. Istilik gucu 1000W 3. Istilik Gücu 2000W 4. AVTO funksiyası 5. Temperatur gõstericisi 6.Gündüz ekrani 7. Vaxt gostericisi 8. ON simvolu - taymerin iə salinmasi 9. OFF simvolu - taymerin baglanmasi 10. Aciq pencaranin askarlanmasi funksiyasISTIFAD ETM K
1. Cihazi yandirib sondurmek üçün cihazın sag terefindaki esas açari - Şkil Bduymesini basin. 2. Cihaz indi gozlemre rejimindir. Pultdaki yandirma/sondurme duymasini (1) basin - Sekil C. 3. Is rejimini secmek uçün novbə ila MODE duyməsini (2) basin: - 1000 W cihaz daim 1000 Vt ile qizdirilacaq. - 2000 W, cihaz daim 2000 W ilē qīzdīrīlacaq. - Avtomatik rejimdē temperaturu āl ilē qurmaq üçün + və - Düymələrini basin. Cihaz avtomatik olaraq temperaturun saxlanmasi rejinme daxil olacaq. - Aciq pencaranin askarlanmasi funksiyas - Bu funksiya seildikda, otaq temperaturu qeflden 10^ duersa, cihaz istiliyi avtomatik olaraq sondurocak. 4. Cihazi sondurmak üçün pultdaki yandirma/sondurme duyməsini (1) basin. Cihaz texminen 30 saniyedən sonra soyuyur ve sonür.DAXI LI CIHAZ SAATININ QURULMASI
QEYD: Θger hæftenin cari vaxtin v günun teyin etməsəniz, cihaz dizgun iIsləməyəcək, cunki o, oz daxili saatina uygun islayocak, bu səhvdir. 1. MODE duyməsini istifada edarak AUTO funksiyasini seksin. 2. Taymeri tayin etmazdan avval haftanin gununu va carix vayin edin: - DAY duyməsini basin və + və - duymələrindən istifadə edərək cari gunu seçin. Ekranın yanib-sönmasini dayandirana qədər gozləyin. - CLOCK duyməsini basin v+ v- duymələrində istifada edarak cari vaxti tayin edin. Ekranin yanibsonmasini dayandirana qedor gozlayin. - MIN duyməsini basin və + və - duymələrində nistifadə edərək cari dəqiqələri təyin edin. Ekranin yanibsonməsini dayandirana qədər gozləyin.TAYMORIN PROQRAMLAMA PARAMASI - TAYMER
Bu funksiya heftenin h er gnu, istediyiniz vaxtda cihazi yandrib-sondurmek uçun vaxti proqramlaşdirmaga imkan verir. Taymeri yalniz AUTO funksiyasini secdikden ve cihazin daxili saatini teyin etdikden sonra qurmaq olar. 1. WEEK / TIMER dūyməsini basin və + və - dūymələrɪndə nistifada edərek cihazī avtomatik olaraq yandɪrib-sondürmæk üçün təyin etmək istədiyiniz heftən in gününü seçin. Ekranın yanib-sonməsini dayandirana qeder gozleyin. 2. SET UP dūyməsini basdiqdan sonra ekranda ON simvolu yanacaq. Indi taymerin baslama vaxtini teyin ede bilarsiniz. Taymeri baslama vaxtini teyin etmek üçün CLOCK, MIN, + vē - dūymelirinden istifade edin. Ekranin yanib-sönmasini dayandirana qeder gozluyin. 3. WEEK / TIMER Düymösini (6) yeniden basdirqdan ve sonra SET UP Düymösini basdirqdan sonra ekranda OFF simvolu yanacaq. Indi taymerin söndürülme vaxtini teyin ede bilersiniz. Ekranın yanib-sönmösini dayandirana qedar gozleyin. QEYD: baslangic vaxti heme dayanma vaxtindan asagi olmalidir. QEYD Taymeri standart parametrlere qaytarmaq uçün RESET dýmeseini sixin.V. Təmɪzlik Və xɪdʒət
1. Təmizleməzden evel həmisə cihazi elektrik Rozetkasindan ayirin. 2. Tämizlemə zamani elektrik fiş, termostat termostatinin elektrik kontaktlari ve s. kimi eşylar yeniden istifade edilmezden evel islandirsa, onlar yaxsica qurudulmalidir. 3. Škafī tēmizlemek üçün emulsiya, losyon, pasta və s. ᵶklinde olan apressiv yuyucu vasitelerden istifade etmeyin. Onlar, diger seylerle yanaşi, işarolar, xeberdarlq nisanlari və s. kimi melumat qrafik simvollarini sile bilerler. 4. Təmizleməzden evel cihazin soyuduğundan emin olun.TEXNIKI MÖLUMAT:
Garginlik: 220-240V ~50/60Hz Guc: 2000W Maks. Guc: 2200W lp20  "Diqqat Isti Sath" - Avadanliq islayorken movcud sathlarin temperaturu daha yiksak ola bilar, bu o demekdir ki, iş zamani is zamani korpus elementleri cox qizir, DIQQET EDIN !!!ΘHΘMΙΥ丫ΤΙΝι ὄντməyɪn
Cihazin üzerindaki yazi cihazin alismaga səbəb ola bilcak paltar, edyal və digar tekstil mahsullari ilə ortulmemeisi demekdir. XOBORDARLIQ: Bu avadanligi vannalar, duşlar, hovuzlar ve oxşar su Çenleri yaxinliginda istifade etmeyin.  Zihmit olmasa karton qablasdirmani tullanti kaigiza kocurun. Polietilen torbalari (PE) plastik qaba tokun Asinms cihaz muvafiq anbara qaytarilmalidir, cunki o, cihazda thluklidir maddlr traf muhit uçün thluk yarada bilr. Elektrik cihazi limiti qidir thvil verilmlidir onun tkrar istifadisi vi istifadisi. gir cihazda batareyalar varsa, onu cixarib ayrica saxlanan noqty vermik lazimdir.| AFTER SALE SERVICE NOTICE | |
| GB | If you want to buy spare parts or make any complaints, please contact the seller who issued the receipt directly. |
| DE | Wenn Sie Ersatzteile kaufen oder reklamieren möchten, wenden Sie sichitte direkt an den Verkäufer, der die Quittung ausgestellt hat. |
| FR | Si vous souhaitez acheter des pièces de rechange ou faire des réclamations, veuillez contacter directement le vendeur qui a émis le reçu. |
| ES | Si desea comprar repuestos o presentation alguna queja, comuniquese directamente con el vendedor que emitió el recibo. |
| PT | Se você quiser comprar peças de reposação ou fazer alguma reclamação, entre em conta diretamente com o vendedor que emitiu o recibo. |
| LT | Jei norite jsigiyt atsarginiu daliu ar pateikti nusiskundimu, susisiekite tiesiogai su kvita išdavusiu pardaveju. |
| LV | Ja vêlaities iegadáties rezerves dalas vai izteikt pretenzijas, ludzu, szainieties teşi ar pärdevēj, kurš izsniedza Čeku. |
| EST | Kui soovite osta varuosi vii esitada pretensioone, vötle otse uhendust kviitungsivaljastanud mūjaga. |
| HU | Ha potalkatreszeket szeretne vásárolni, vagy panaszt szeretne tenni, forduljon kozvetlenul a bizonylatot kiàllito eladóhoz. |
| BS | Ako Želite kupiti rezervne dijelove ili napravit reklamaciju, obratite se direktno prodavaču koji je izdao račun. |
| RO | Ecni Bix xOITHE KYNITB zANCACTNI IINI ppebYBHTB KAKNE-NI60 ppeTEN3NI, NOXAYNCTA, CBXNTECB HAPRMYU C pnoabuOM, BVDABUIM NcK. |
| CZ | Chcete-li zakoupit nahradni dily nebo uplatnit jakoukoli reklamaci,kontaktujte prfimo prodejce, ktery Úctenku vystvil. |
| RU | Dacā doriti sā cumpārati pièse de schimb sau sā faceti vreo reclamatie, ∀rugām sā contactaì direct vanzātorul care a emis chitanta. |
| GR | Ecv θiλτν vα αγοραστε ΑγTALλΑKTIKI KI Vα KAVTE OTIOIAδβπθTET TApAITNOVA, EΠKOIVωVπθTe AITUθκIAC με TOTV ΠΟλπιπι TOU ΕξβδμθTη. |
| MK | Axo cakate da KYNITE pezebrniz delOBN IINI da NDHeCete kackv bnil noonnaki, Kontakttnajte dinpeKTTHO co pnoabauCHOT KOJ na 3dani smetkata. |
| NL | Als u reserveonderdelen wilt kopen of een klacht wilt indienen, neem dan rechtsstreeks contact op met de verkoper die de bon heeft afgeveven. |
| SL | Če zeilite kupiti nadomestne dele ali vložiti reklamacije, se obmite neposredno na prodajalca,ki je izdal račun. |
| FI | Jos haluat ostaa varaosia tai tehdā valituksa,ota yhteyttä suoranaan antaneeseen myyjän. |
| PL | W przypadiku checi zakupu czéci zamiennych lub zgloszenia eventualnych reklamaci nalezy kontaktowac sie bezpośrednio ze sprezedawca, kóry wystawil paragon. |
| IT | Se desideri acquistare pezzi di ricambio o presentare reclami, contatta direttamente il venditore che ha emesso la ricevuta. |
| HR | Se desideri acquistare pezzi di ricambio o presentare reclami, contatta direttamente il venditore che ha emesso la ricevuta. |
| SV | Om du vill kopa reservdelar ellere gora nagra reklamationer, ∀nligen kontakta saljaren som utfardat kvittot direkt. |
| DK | Hvis du ønsker at kabe resovedelei ellereklamere, bedes du kontakte sælgerten, som har udstedt kvitteringen, direkte. |
| UA | Якшо вихочete рindbatи залчастни abo podatni 6yd-bякіпретенii, зberнічьсябе ззноередно do npodabuaу, який вidavuchek. |
| SR | Axo zenitne da kynitne pezebrhne delobene iiin da unoxhnte pekmamaцуj, obpatnte ce dinpeKTTHO npodabuy koj ne 3dano pachy. |
| SK | Ak si chcete kupit nahradne dieiy alebo uplatnit akukolvek reklamaciu, kontaktujte priamo predajcu, ktory Úctenku vystvil. |
| AR | Škýncate da zaçynite pezebrhnu chafteni iIN da hnapabrte onnpaKBaHMy, moJI, cSbypxte ce dinpeKTTHO c npodabuahy, koyTo e 3ndan kacobata belekka. |
| BG | Ako nckate da zaçynite pezebrhnu chafteni iIN da hnapabrte onnpaKBaHMy, moJI, cSbypxte ce dinpeKTTHO c npodabuahy, koyTo e 3ndan kacobata belekka. |
| AZ | Ehtiyat hissəlari almaq va ya har hansi šikayat etmək istayirsinizsa, qəbzi verən satici ila birbaşa alaqa saxlayin. |

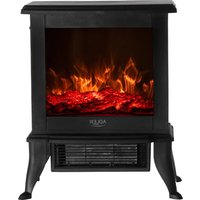
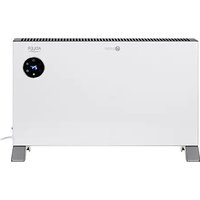
- GUIDELINES FOR SAFETY OF USE
- WARNINGS
- INSTALLATION
- Picture D. LED PANEL
- USSING
- SETTING THE INTERNAL DEVICE CLOCK
- TIMER PROGRAMMING SETTING - TIMER
- CLEANING AND MAINTENANCE
- DO NOT COVER
- BEACHTUNG:
- WARNINGGEN
- VOR DER ERSTEN VERWENDUNG
- PRODUKTBESCHREIBUNG
- Bild C. FERNBEDIENUNG
- Bild D. LED PANEL
- IV.USAGE
- REINIGUNG UND WARTUNG
- (FR) FRANÇAIS
- ATTENTION:
- AVERTISSEMENTS
- AVANT LA PREMIÈRE UTILISATION
- DESCRIPTION DU PRODUIT
- Photo C. TELÉCOMMANDE
- Image D. PANNEAU LED
- UTILISATION
- RéGLAGE DE L'HORLOGE DU DISPOSITIF INTERNE
- RéGLAGE DE LA PROGRAMMATION DE LA MINUTERIE - MINUTERIE
- NETTOYAGE ET ENTRETIEN
- (ES) ESPANOL
- ATENCION:
- DIRECTRICES DE SEGURIDAD DE USO
- ADVERTENCIAS
- ANTES DEL PRIMER USO
- INSTALACION
- DESCRIPCION DEL PRODUCTO
- Imagen C. CONTROL REMOTO
- Foto d. PANEL LED
- IV.USO
- CONFIGURACION DEL RELOJ DE DISPOSITIVO INTERNO
- CONFIGURACION DE PROGRAMACION DEL TEMPORIZADOR - TEMPORIZADOR
- LIMPIEZA Y MANTENIMIENTO
- (PT) PORTUGUES
- ATENÇA:
- DIRETRICES PARA A SEGURANÇA DO USO
- DIRETRizes PARA A SEGURANÇA DO USO
- ADVERTÉNCIAS
- III ANTES DO PRIMEIRO USO
- INSTALAÇÃO
- DESCRICAÇÃO DO PRODUCTO
- Figura B. INTERRUPTOR PRINCIPAL
- Figura D. PAINEL DE LED
- USO
- DEFINIR O RELÓGIO INTERNO DO DISPOSITIVO
- AJUSTE DA PROGRAMACAO DO TIMER - TIMER
- LIMPEZA E MANUTENÇA
- (LT) LIETUVIU
- DÉMESIO:
- NAUDOJIMO SAUGUMO GAIRES
- PRIESPIRMA NAUDIOJIMA
- IRENGIMAS
- PREKÉSAPRAŠYMAS
- Paveiksléis C. NUOTOLINIS VALDYMAS
- Paveikslélis D. LED PANELIS
- NAUDOJIMAS
- VIDAUSIRENGINIO LAIKRODZIO NUSTATYMAS
- LAIKMERIO PROGRAMAVIMO NUSTATYMAS - taineris
- VALYMAS IR PrieziURA
- (LV) LATVIEŠU
- UZMANIBU:
- NORADIJUMI PAR LIETOSANAS DROSBU
- BRIDINAJUMI
- PIRMS LIETOSANAS
- INSTALACija
- PRODUKTA APRAKSTS
- attels. REMOTE CONTROLLER
- 6.WEEK/TIMER
- Attels D. LED PANEL
- LIETOSANA
- IEKŠEJÁS IERICES pulkstena iestatīsana
- TIMER PROGRAMING SETTING - TIMER
- TIRISANA UN APKOPE
- TEHNISKIE DATI:
- (EST) EESTI
- TAHELEPANU:
- KASUTUSOHUTUSE SUUNISED
- HOIATUSED
- ENNE ESIMESE KASUTAMIST
- INSTALATSIOON
- TOOTEKIRJELDUS
- KASUTAMINE
- SISEMISEADME KELLA SEADISTAMINE
- PUHASTAMINE JA HOOLDUS
- (RO) ROMÁNă
- TENTIE:
- ORIENTÁRIPENTRU SIGURANCTA UTILIZÁRII
- AVERTISMENTE
- INANTE DE PRIMA UTILIZARE
- Imaginea C. CONTROLUL TELECOMUNICATIEI
- Imaginea D. LED PANEL
- UTILIZARE
- SETAREA Ceasului de dispositive interne
- SETAREA PROGRAMÄRII TIMEI - TIMER
- CURATAREA SI INTRETINEREA
- DATE TEHNICE:
- (BS) BOSANSKI
- PAZNJA:
- SMJERNICE ZA SIGURNOST UPOTREBE
- UPOZORENJA
- PRIJE PRVE UPOTREBE
- OPIS PROIZVODA
- Slika C. DALJINSKI UPRAVLJA
- Slika D. LED PANEL
- KORISTENJE
- POSTAVLJANJE UNUTARNJEG UREDAJA
- POSTAVKA PROGRAMIRANJA TIMERA - TIMER
- CISCENJE I ODRZAVANJE
- KARTA GWARANCYJNA
- POLSKI
- UWAGA:
- WSKAZÓWKI DOTYCZACE BEZPIECZENSTWA UZYTKOWANIA
- OSTRZEŽENIA
- PRZED PIERWSZYM UZYCIEM
- Zdjecie C. PILOT ZDANEGO STEROWANIA
- Zdjecie D. PANEL LED
- ZASTOSOWANIE
- USTAWIENIE ZEGARA WEWNETRZNEGOGURZADZENIA
- USTAWIENIE PROGRAMATORA CZASOWEGO - TIMER
- CZYSZCZENIE I KONSERWACJA
- (HU) MAGYAR
- FIGYELEM:
- UTMUTATÓ A HASZNÁLATI BIZTONSÁGRA
- AZ ELSO HASZNALAT ELOTT
- TERMÉKLEÍRÁS
- HASZNÁLAT
- A BELSO KESZULEK BEALLITASA
- TISZTÍTÁS ÉS KARBANTARTÁS
- (MK) MaKeDoHcKn
- BHIMAHHE:
- BHIMAHNE:
- IPREyIpyBAHbA
- INPEDINPBATA YNOTPEBA
- NHTAJNJALJNA
- CnkaB.DAJEueH KOHTPOJIOP
- YIOTPE6A
- Tajmep
- IOCTABYBAHbE HA TAJMEPOT
- YICHTEHbI N ODPKUBAHbE
- (GR) EAAA
- PPOEIADONOIHSEIE
- ETKATAZTAZH
- IPIIPAΦH IPOIONTO
- Eikova B. KPYIOZ DIAKONTTHZ
- Eikova T. THALEXIETHPIO
- EkoaA. INAKALED
- XPH\SH
- PYOMIISH TOY XPONOY E2ΩTEPIKHΣ ΣYZKEYH
- PYOMIENIPOPTPAMMATMOYQPA
- KAΘΑΠΣΜΟΣ KAI ΣYNTHPHΞH
- TEXNIKA ΔΕΩOMENA:
- (CZ) CESKY
- POZOR:
- POKNY PRO BEZPEČNOST POUžITÍ
- UPOZORNÉNÍ
- PRED PRVNIMPOUZITIM
- INSTALACE
- POPIS PRODUKTU
- Obrazek C. REMOTE CONTROLLER
- Obrázek D. LED PANEL
- IV.VYUZITI
- NASTAVENI HODIN INTERNIHO ZARIZENI
- NASTAVENI PROGRAMOVÁNÍ CASOVÁC - CASOVAČ
- CISTENI A UDRZBA
- (RU) PUCCKN
- ПЕДУПЕЖDEHЯ
- IEPED IEPBbIM IcNoJIb3OBAHnEM
- YCTAHOBKA
- ONICAHNEIPOJYKTA
- I3o6paXeHneC.ДИCTAHUOHHOE YIPABJIEHNE
- PncyokD.CBeToOnoHna nHeNb
- BHytpnbEHHIO PIMMEHHE
- YCTAHOBITE YACBi BHYTPEHHErO YCTPOINCTBA
- TAMMEP IPOPTPAMMPOBAHNE-TAMMEP
- (NL) NEDERLANDS
- LET OP:
- RICHTLIJNEN VOOR DE VEILIGHEID VAN GEBRUIK
- VOOR HET EERSTE GEBRUIK
- PRODUCT BESCHRIJVING
- Afbeelding C. AFSTANDBEDIENING
- Afbeelding D. LED-PANEEL
- IIV.USAGE
- DE INTERNE APPARAATKLOK INSTELLLEN
- TIMER PROGRAMMERINSTELLING - TIMER
- REINIGING EN ONDERHOUD
- (DK) DANSKI
- OBS:
- ADVARSLER
- FØR FØRSTE BRUG
- PRODUKTBESKRIVELSE
- Billede C. FJERNKONTROL
- Billede D. LED PANEL
- IV.ANVENDELSE
- TIMERPROGRAMMERINSTELLING-TIMER
- RENGØRING OG VEDLIGEHOLDELSE
- (IT)ITALIANO
- ATTENZIONE:
- LINEE GUIDA PER LA SICUREZZA DELL'USO
- AVVERTENZE
- PRIMA DEL PRIMO UTILIZZO
- INSTALLAZIONE
- DESCRIZIONDELPRODOTTO
- Figura B. INTERRUTTORE GENERALE
- Figura C. TELECOMANDO
- Imagine D. PANNELLO LED
- PROGRAMMATORE TIMERINSTELLING - TIMER
- PULIZIA E MANUTENZIONE
- DATI TECNICI:
- (FI) SUOMI
- HUOMIO:
- KAYTTÖTURVALLISUUSOHJEET
- ENNEN ENSIMMÄISEN KÄYTTÖA
- TUOTTEEN KUVAUS
- Kuva C. KAUKO-OHJAUS
- Kuva D. LED-PANELI
- KAYTTÖ
- AJASTINOHJELMISTOINTI-TIMER
- PUHDISTUS JA HUOLTO
- (UA) YKPAIHCBKA
- YBAGA:
- NOPEPEJXEHHY
- IEPEDIPEPIIMBVKOPNCTAHHRA
- ONIC PPOyKcii
- PncyHcK C. DnCTAHUINHNI KOHTPOJIb
- MaJIHOK D. LED ΑHAJEb
- USAGE
- TIMER
- BCTAHOBJIEHH TAIIMEPA
- OUIIeHHra TA OBCJIYTOBByAHHRA
- (SV) SVENSKA
- RIKTLINJER FÖR SÄKERHETSANVISNING
- VARNINGAR
- FÖRE FÖRSTA ANVÄNDNINGEN
- PRODUKTBESKRIVNING
- Bild B. MAIN SWITCH
- Bild C. FJARRKONTROLL
- ANVÄNDANDE
- RENGÖRING OCH UNDERHÄLL
- (SR) CPTICKN
- PAXHB:
- CMJEPHNIe 3A CNYPHOCT YNOTPEBE
- YIIO3OPEHbA
- INJJE INPBE YNOTPEBE
- INHCTAATNOH
- ONIC PON3BODA
- CnkaLJDAJBHCKA KOHTPOJA
- CnkaД.IEДПAHEN
- yNOTPE6A
- DE INHTEPHE ANPAPAATKNOK INHCTEJIJEH
- TINMEP IPOPTPAMMEPHCTENHIT - TINMEP
- YIWIHTHeBEn ODPXABAHBe
- (SK) SLOVENSKY
- POKNY PRE BEZPECNOSTPOUZITIA
- UPOZORNENIE
- PRED PRVYMPOUZITIM
- INSTALÁCIA
- Obrazok C. DIALKOVE OVLADANIE
- Obrazok D. LED PANEL
- IV.VYUZITIE
- IN INTERNETOVY PRISTROJ DE INTERNE
- PROGRAMÁTORČASOVAČA-ČASOVAČ
- CISTENIE A UDRZBA
- (HR) HRVATSKI
- SMJERNICE ZA SIGURNOST UPORABE
- PRIJE PRVE UPORABE
- installaciona
- Sika B. GLAVNI PREKIDAc
- Slika C. DALJINSKI UPRAVLJANJE
- UPOTREBA
- PROGRAMMERINSTALLING TIMERA - TIMER
- TEHNICKI PODACI:
- (SLO) SLOVENŠČINA
- SMERNICE ZA VARNOST UPORABE
- OPOZORILA
- PRED PRVO UPORABO
- NAMESTITEV
- OPIS IZDELKA
- Slika C. DALJINSKI NADZOR
- UPORABA
- PROGRAMMERINSTELIRANJE CASA - CAS
- CISCENJE IN VZDRZEVENJE
- (BG)БылгAPСКИ
- YKA3AHNIA 3A BE3OПАСHОCT HA YПOTPEБA
- INPENIbPBO yNOTPE6A
- MOHTAXK
- ONICAHNE HA IPOJYKTA
- CHIMKA C. DINGTAHLIOHEH KOHTPOJIEP
- CHIMKA D. LED PAHEI
- M3I0JI3BAHE
- HACTPOIKA 3A IPOIPOAMIPAHE HA TAIMEP-TAIMEP
- ПОЧИСТВАЕ И ПОДПьЖКА
- TEXHUNECKN DAHHN:
- (AZ) AZəRBAYCAN
- DiQQeT:
- XəBəRDARLIQLAR
- JIKISTIFADDON AVVOL
- MONTAJ
- ISTIFAD ETM K
- DAXI LI CIHAZ SAATININ QURULMASI
- TAYMORIN PROQRAMLAMA PARAMASI - TAYMER
- Təmɪzlik Və xɪdʒət
- TEXNIKI MÖLUMAT:
- ΘHΘMΙΥ丫ΤΙΝι ὄντməyɪn
Brand : ADLER
Model : AD 7714
Category : Heating