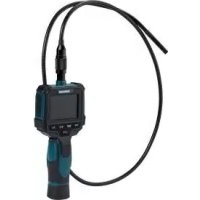
PEK 2.7 C2 - Inspection camera PARKSIDE - Free user manual and instructions
Find the device manual for free PEK 2.7 C2 PARKSIDE in PDF.


| Product type | Inspection camera with screen |
| Brand and model | Parkside PEK 2.7 C2 |
| Dimensions (L × W × H) | 235 × 90 × 42 mm |
| Weight | 480 g (with batteries) |
| Power supply | 6 V DC, 4 AA/LR6 batteries (1.5 V each) |
| Battery life | Approx. 350 minutes (new batteries) |
| Display | 2.7 inches, resolution 960 × 240 pixels |
| Camera head diameter | 8 mm |
| Flexible length (gooseneck) | Approx. 120 cm |
| Minimum bend radius | 45 mm |
| Protection rating (head and gooseneck) | IP67 (dust-tight and temporary immersion up to 1 m) |
| Image resolution | 640 × 480 pixels, JPG format |
| Memory capacity | 120 images |
| Integrated LED lighting | 10 adjustable brightness levels |
| Image rotation | 4 positions (normal, 180°, inverted, mirrored) |
| Digital zoom | 3 levels (×2, ×3, ×4) |
| Color modes | Color and black & white |
| Connectivity | Micro USB port (transfer to computer) |
| Included accessories | Magnet, single hook, double hook, mirror, carrying case, USB cable |
| Operating temperature | 5 to 35 °C |
| Storage temperature | 0 to 45 °C |
| Permissible air humidity | 10 to 70 % RH |
| Warranty | 3 years |
Frequently Asked Questions - PEK 2.7 C2 PARKSIDE
User questions about PEK 2.7 C2 PARKSIDE
0 question about this device. Answer the ones you know or ask your own.
Ask a new question about this device
Download the instructions for your Inspection camera in PDF format for free! Find your manual PEK 2.7 C2 - PARKSIDE and take your electronic device back in hand. On this page are published all the documents necessary for the use of your device. PEK 2.7 C2 by PARKSIDE.
USER MANUAL PEK 2.7 C2 PARKSIDE
INSPEKTIONSKAMERA MIT DISPLAY / INSPECTION CAMERA WITH DISPLAY / CAMÉRA D'INSPECTION AVEC ÉCRAN PEK 2.7 C2
DE AT CH
INSPEKTIONSKAMERA MIT DISPLAY
Assembly, operating and safety instructions
FR BE CAMERA D'INSPECTION AVEC ECRAN
GB/IE Assembly, operating and safety instructions Page 23
Internal memory is full
Warnings and symbols used. Page 25
Safety instructions.. Page 26
Safety instructions for batteries . Page 29
Scope of delivery. Page 30
Description of parts.. 30
Technical data. Page 31
Setup 32
Operation. 33
Storage when not in use. Page 36
Cleaning 37
Troubleshooting. Page 37
Disposal. Page 38
Warranty 39
INSPECTION CAMERA WITH DISPLAY
Introduction
We congratulate you on the purchase of your new product. You have chosen a high quality product. The instructions for use are part of the product. They contain important information concerning safety, use and disposal. Before using the product, please familiarise yourself with all of the safety information and instructions for use. Only use the product as described and for the specified applications. If you pass the product on to anyone else, please ensure that you also pass on all the documentation with it.
Intended use
This product is under IT related category and intended for optical examination, inspection. The product contains a built-in camera for image recording.
The integrated light is a special purpose light. The light only serves to illuminate the work area. The light is not intended for household lighting.
This product may only be used privately and not for industrial or commercial purposes.
This product may not be used in tropical climates. Any other use is considered improper.
Any claims resulting from improper use or due to unauthorized modification of the product will be considered unwarranted. Any such use is at your own risk.
Trademark notices
The Parkside trademark and trade name is the property of their respective owners.
USSa registered trademark of USB Implementers Forum, Inc.
Any other names and products may be trademarks or registered trademarks of their respective owners.
| Warnings and symbols used The following warnings are used in this user manual and on the packaging: | |
| ! | DANGER! This symbol with the signal word “DANGER” indicates a hazard with a high level of risk which, if not avoided, will result in serious injury or death. |
| ! | WARNING! This symbol with the signal word “WARNING” indicates a hazard with a medium level of risk which, if not avoided, could result in serious injury. |
| ! | CAUTION! This symbol with the signal word “CAUTION” indicates a hazard with a low level of risk which, if not avoided, could result in minor or moderate injury. |
| ! | ATTENTION! This symbol with the signal word “ATTENTION” indicates a possible property damage. |
| i | NOTE: This symbol with the signal word “Note” provides additional useful information. |
| --- | Direct current |
| Warning against optical radiation | |
| This symbol means that the operating instructions must be observed when using the product. | |

Safety instructions
Before using the product, please familiarize yourself with all of the safety instructions and instructions for use! When passing this product on to others, please also include all the documents!

DANGER! DANGER TO LIFE AND RISK OF ACCIDENT FOR INFANTS AND CHILDREN!
DANGER! RISK OF SUFFOCATION
- Never leave children unsupervised with the packaging material. The packaging material poses a suffocation hazard. Children frequently underestimate the dangers. The packaging material is not a toy.
This product may be used by children age 8 years and up, as well as by persons with reduced physical, sensory or mental capacities or lacking experience and / or knowledge, so long as they are supervised or instructed in the safe use of the product and understand the associated risks. Do not allow children to play with the product. Cleaning and user maintenance should not be performed by children without supervision. The product is not a toy.
DANGER! Some of the provided parts can be swallowed. If a part is swallowed, seek immediate medical attention.

WARNING! RISK OF INJURY
Handling the product improperly may results in injury.
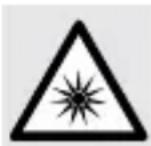
Avoid injury to eyes and skin when in the vicinity of optical radiation.
Do not look directly into the light source or with optical devices!
- Do not use the gooseneck near live parts. Keep this in mind as well when inspecting the inside of machines.
- Do not use the gooseneck near moving parts. Keep this in mind as well when inspecting the inside of machines.
- Secure switched-off cables and devices against accidental restart.
- Do not operate the product in potentially explosive environments in which substances such as flammable liquids, fumes are present.
The product is not a medical device. Do not use the product on persons or animals.

WARNING! HEALTH HAZARD
Drains and waste pipes may contain matter or chemicals which may be poisonous, infectious or corrosive.
Always take precautions appropriate to the area you wish to inspect.
Wear appropriate personal protective equipment such as protective gloves, safety goggles and a mask, respirator or face shield.
After use, rinse the product's gooseneck thoroughly under running water.

ATTENTION! RISK OF PROPERTY DAMAGE
Check the product before every use! Discontinue use if any damage to the product is detected!
The product shall never be subjected to extreme temperature fluctuations as this could result in condensation and electrical short circuits. If the product is subjected to extreme temperature fluctuations, however, wait (approx. 2 hours) until the product has reached ambient temperature before use.
- Do not operate the product near heat sources, e.g. radiators or other devices emitting heat!
The product shall not be subjected to excessive shocks and vibrations.
- Do not use the product in the immediate vicinity of magnetic fields (such as speakers).
Do not expose the product to strong artificial light.
- Do not bend the gooseneck excessively - observe the minimum bending radius of 45~mm .
Only the camera head and the gooseneck may be immersed in liquids. Do not immerse these parts deeper than 100~cm . The fluid must not conduct electricity. The parts may only be immersed in neutral liquids. Use in acids, alkalis or solvents can destroy the product.
Keep the main unit dry.
The OWIM GmbH & Co KG is not responsible for unauthorized modifications of this product.
The user of the product is fully responsible for unauthorized modifications of the product, as well as replacement of such products.
It is necessary to repair the product if it has been damaged in any way, for example, if the housing is damaged, if liquid or objects have penetrated the product or if the product has been exposed to rain or moisture.
Repair work is also required if the product is not working properly or has been dropped.
If smoke is produced, or there are any unusual sounds or smells, turn the product off immediately. In such cases, the product should not be used until they have been inspected by authorized service personnel. Only have the product repaired by qualified personnel.
Never open the housing of the product.

Safety instructions for batteries

DANGER TO LIFE! Keep batteries out of reach of children. If accidentally swallowed seek immediate medical attention.
DANGER OF EXPLOSION! Never recharge non-rechargeable batteries. Do not short-circuit batteries and / or open them.
Overheating, fire or bursting can be the result.
Never throw batteries into fire or water.
Do not exert mechanical loads to batteries.
Risk of leakage of batteries
- Avoid extreme environmental conditions and temperatures, which could affect batteries, e.g. radiators / direct sunlight.
If batteries have leaked, avoid contact with skin, eyes and mucous membranes with the chemicals! Flush immediately the affected areas with fresh water and seek medical attention!
In the event of a leakage of batteries, immediately remove them from the product to prevent damage.
Only use the same type of batteries. Do not mix used and new batteries.
Remove batteries if the product will not be used for a longer period.
Risk of damage of the product
Only use the specified type of battery!
Insert batteries according to polarity marks (+) and (-) on the battery and the product.
Clean the contacts on the battery and in the battery compartment before inserting!
Remove exhausted batteries from the product immediately.
Scope of delivery
After unpacking the product, check if the delivery is complete and if all parts are in good condition. Remove all packing materials before use.
Please contact customer service if parts are missing or damaged.
1x Main unit
1x Flexible gooseneck with camera head and LED light
1x Adaptor - Single hook
1x Adaptor - Double hook
1x Adaptor - Mirror
1x Adaptor - Magnet
1x Carry case
1x USB cable (USB type A to Micro-USB)
1x User manual
4x Battery (AA / LR6)
Description of parts
Before reading, unfold the page containing the illustrations and familiarize yourself with all functions of the product.
1 Camera
2 Micro USB port (with cover)
3 Handle
4 USB cable (USB type A to Micro-USB)
5 Battery (AA / LR6) (4x)
Adaptor - Magnets
7 Adaptor - Mirror
Adaptor - Single hook
Adaptor - Double hook
10 Carry case
11 Display
12 Connection port
13 Camera head with LED
14 Flexible gooseneck
15 button (LED brightness)
16 Button(Display brightness/Delete image button)
17 button (ON/OFF / Snap shot button)
18 button (Rotate image / Zoom button)
19 button (Playback/Monochrome button)
20 Display illumination level indicator
21 LED brightness level indicator
22 Battery compartment cover
23 Battery compartment
24 User manual
Technical data
Model: HG04801
Supply voltage: 6 V
(Battery: 4 × 1.5 ~V AA / LR 6 )
Operation time: approx. 350 minutes
(with new batteries)
Protection class: IP67 (Protection against dust and short
time immersion in water - only for camera head and gooseneck)
Minimum bending radius: 45mm
Camera diameter: 8 mm
Display (diagonal, resolution): 2.7^ , 960 × 240 pixel
Flexible gooseneck length: approx. 120~cm
Picture file (resolution, format): 640 x 480 pixel, jpg
Storage capacity: 120 pictures
Operating temperature: 5 to 35^
Storage temperature: 0 to 45^
Humidity: 10 to 70% RH
Dimension (L× W× H) :approx. 235× 90× 42mm
Weight: approx. 480 g
- Setup
Follow the instructions below to configure the product for initial use:
Step Fig.
- Open the battery compartment 23, located at the back of the main unit 1.
Insert the 4 batteries 5 (1.5 V = type AA / LR6) into the battery compartment 23. Insert the batteries with correct polarity (observe the markings in the battery compartment and on the batteries). - Close the battery compartment 23 with the battery compartment 22
Connect the flexible gooseneck [14] with the connection port [12].
Screw the outer thread of the connection port 12 onto the flexible gooseneck 14
Operation
Switching on and off
Press the button for approx. 2 seconds.
The disp by switches on.
The camera head's lights up.
① NOTE: The product will be automatically switch off if no button is pressed for approx. 20 minutes.
Setting the LED's brightness
Shortly press the button 15
The brightness of the camera head's can be set to 10 different brightness levels.
The LED brightness can be increased only.
When the highest brightness level has been reached, the goes off.
The brightness setting is indicated on the display by the LED brightness level indicator [21].
Setting the display brightness
Shortly press the *0 button 16.
The disp by can be set to 10 different brightness levels.
The monitor brightness can be increased only.
When the highest brightness level has been reached, the lowest brightness is used.
The display brightness setting is indicated on the display by the display illumination level indicator 20.
Image rotation
Shortly press the button 18.
At some inspection locations (e.g. curved pipes) it is hard to obtain a clear view. In such situations, change the display's [1] picture orientation:
18
Function
Press 1 × Picture is rotated by 180^ (reversed)
Press 2 × Picture is reversed and mirrored.
Press 3 × Picture is mirrored.
Press 4x Original position.
① NOTE: After the product has been shut down and turned on again, the picture will be shown in its original position.
Zooming
Press the _a button 18 for approx. 2 seconds.
The product features a 3-level zoom function:
18
Function
Press 1x Picture is magnified 2 times
Press 2 × Picture is magnified 3 times.
Press 3 × Picture is magnified 4 times.
Press 4 × Picture is displayed in its original size.
① NOTE: After the camera has been shut down and turned on again, the picture will be shown in its original size again.
Changing the colour mode
Press the button for approx. 2 seconds.
The display's colour mode toggles between colour and black-white mode.
① NOTE: The colour mode can only be changed during live display.
Image recording and playback function
Shortly press the button 17
The product is equipped with built-in memory that can store up to 120 pictures.
Memory full: The following symbol is displayed:
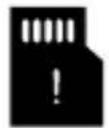
Internal memory is full
Freeing up memory: Delete pictures that are not needed anymore.
Picture playback
Button Function

Previous picture.

Next picture.

Toggle between current camera picture and picture playback.
Deleting pictures
Delete current picture/all pictures: During picture playback, press the 串 button 16
A dialogue is shown. Press one of the following buttons:
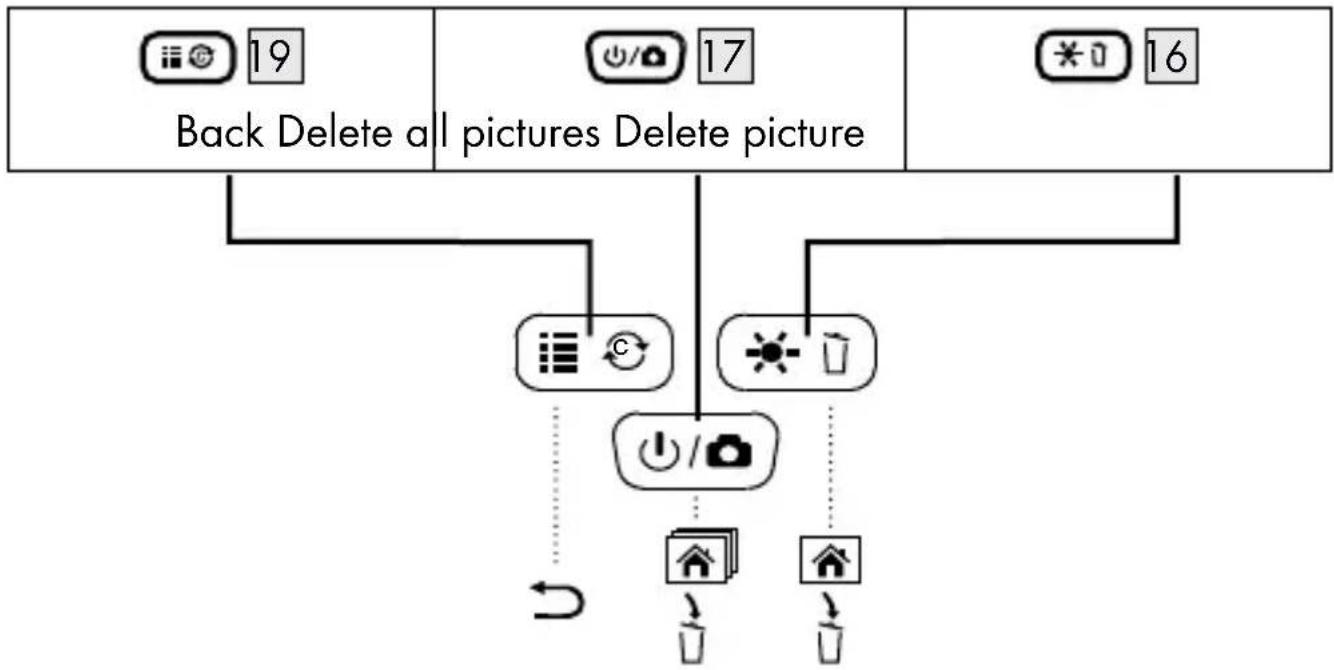
USB output for data transfer
This product is equipped with USB port 2 (at its side) so that you can display or save images to a computer:
Turn the product off.
Lift up the cover of the USB part
Connect the Micro-USB plug of the USB cable to the USB port 2
Connect the other end of the USB cable to a computer.
Switch on the computer.
The product turns on automatically when the computer is on.
NOTE: To save power, the display switches off, when the USB cable is connected to a computer.
Accessories (Fig. B)
The product includes 4 accessories that can be attached to the camera head [13]:
Adaptor Use
Magnets 6 Retrieving objects (e.g. rings).
Single hook 8
Double hook 9
Mirror 7 Examining inaccessible areas.
-
Attaching accessories:
-
Select the needed accessory.
Put the accessory onto the camera head 3 - Lock the selected accessories' bracket firmly onto the camera head [13].
Storage when not in use
Before storage: Remove batteries from the product.
Store the product in a dry indoor location protected from direct sunlight, preferably in its original packaging.
- Cleaning
Before cleaning: Switch the product off. Remove all plugs.
No acid, chafing or solvent cleaning agents should be used or the product can be damaged.
Clean the housing of the product using a soft, dry cloth only!
At persistent soiling, a mild cleaning agent can be used.
Troubleshooting
Problem Possible causes Solution
The product does not work.
The batteries are not properly inserted.
Remove the batteries. Re-insert the batteries with correct polarities.
The product displays no picture or the picture is displayed weak.
The batteries' voltage may be low.
Insert new batteries. Re-start the product.
The picture transmission to the computer does not function correctly.
The LED brightness level is too low.
Increase the LED brightness level.
Connection incorrect. Check the connection between the product and the computer.
Disposal
Packaging:
The packaging is made of environmentally friendly materials, which may be disposed of through your local recycling facilities.
Product:
Contact your municipality for information on how to dispose of your worn-out product.
The adjacent symbol of a crossed out dustbin on wheels
indicates this product is subject to directive 2012/19/EU.
This directive states at the end of the life this product must not be disposed of through regular household refuse but must be returned to special collection sites, recycling depots or waste management companies.
This disposal is free of charge to you.
Protect the environment and dispose of properly.
Batteries:
Think about the environment and your personal health. Dispose empty batteries in separate collecting boxes. These can be found in many public buildings or in shops where batteries are sold.
Improper disposal of batteries can harm the environment!
Never dispose of batteries in your household waste. They may contain toxic heavy metals and are subject to hazardous waste regulations. The chemical symbols of the heavy metals are: Cd = cadmium, Hg = mercury, Pb = lead. Therefore dispose of used batteries through your local collection site.
Warranty
The product has been manufactured to strict quality guidelines and meticulously examined before delivery. In the event of product defects you have legal rights against the retailer of this product. Your legal rights are not limited in any way by our warranty detailed below.
The warranty for this product is 3 years from the date of purchase. Should this product show any fault in materials or manufacture within 3 years from the date of purchase, we will repair or replace it - at our choice - free of charge to you.
The warranty period begins on the date of purchase. Please keep the original sales receipt in a safe location. This document is required as your proof of purchase. This warranty becomes void if the product has been damaged, or used or maintained improperly.
The warranty applies to defects in material or manufacture. This warranty does not cover product parts subject to normal wear, thus possibly considered consumables (e.g. batteries) or for damage to fragile parts, e.g. switches, rechargeable batteries or glass parts.
Warranty claim procedure
To ensure quick processing of your case, please observe the following instructions:
Please have the till receipt and the item number (e.g. IAN 123456) available as proof of purchase.
You will find the item number on the type plate, an engraving on the front page of the instructions (bottom left), or as a sticker on the rear or bottom of the appliance.
If functional or other defects occur, please contact the service department listed either by telephone or by e-mail.
You can return a defective product to us free of charge to the service address that will be provided to you. Ensure that you enclose the proof of purchase (till receipt) and information about what the defect is and when it occurred.
Service

Service Great Britain
Tel.: 0800 404 7657
E-Mail: owim@lidl.co.uk

Service Ireland
Tel.: 1890 930 034
(0,08 EUR/Min., (peak)) (0,06 EUR/Min., (off peak))
E-Mail: owim@lidl.ie
IAN 312150

Introduction . Page 42
Utilisation conforme aux prescriptions. Page 42
Internal memory is full
WAARSCHUWING! GEZONDHEIDSGEVAAR
Internal memory is full
Internal memory is full
Internal memory is full
Internal memory is full

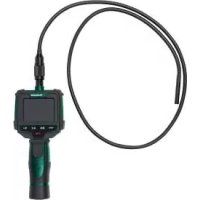
- INSPEKTIONSKAMERA MIT DISPLAY / INSPECTION CAMERA WITH DISPLAY / CAMÉRA D'INSPECTION AVEC ÉCRAN PEK 2.7 C2
- INSPEKTIONSKAMERA MIT DISPLAY
- FR BE CAMERA D'INSPECTION AVEC ECRAN
- Warnings and symbols used. Page 25
- Safety instructions.. Page 26
- Description of parts.. 30
- Technical data. Page 31
- Setup 32
- Operation. 33
- Storage when not in use. Page 36
- Cleaning 37
- Troubleshooting. Page 37
- Disposal. Page 38
- Warranty 39
- INSPECTION CAMERA WITH DISPLAY
- Introduction
- Intended use
- Trademark notices
- Safety instructions
- DANGER! DANGER TO LIFE AND RISK OF ACCIDENT FOR INFANTS AND CHILDREN!
- DANGER! RISK OF SUFFOCATION
- WARNING! RISK OF INJURY
- WARNING! HEALTH HAZARD
- ATTENTION! RISK OF PROPERTY DAMAGE
- Safety instructions for batteries
- Risk of leakage of batteries
- Risk of damage of the product
- Scope of delivery
- Description of parts
- Technical data
- - Setup
- Step Fig.
- Operation
- Switching on and off
- Setting the LED's brightness
- Setting the display brightness
- Image rotation
- Function
- Zooming
- Changing the colour mode
- Image recording and playback function
- Picture playback
- Button Function
- Deleting pictures
- USB output for data transfer
- Accessories (Fig. B)
- Adaptor Use
- Storage when not in use
- - Cleaning
- Troubleshooting
- Problem Possible causes Solution
- Disposal
- Packaging:
- Product:
- This disposal is free of charge to you.
- Batteries:
- Improper disposal of batteries can harm the environment!
- Warranty
- Warranty claim procedure
- Service
- Service Great Britain
- Service Ireland
- Introduction . Page 42
- WAARSCHUWING! GEZONDHEIDSGEVAAR
Brand : PARKSIDE
Model : PEK 2.7 C2
Category : Inspection camera