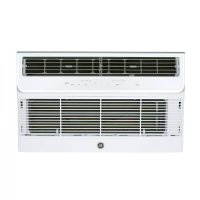
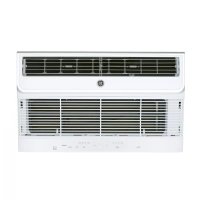
AEE08AM - Air Conditioning GE - Free user manual and instructions
Find the device manual for free AEE08AM GE in PDF.
Questions des utilisateurs sur AEE08AM GE
0 question sur cet appareil. Repondez a celles que vous connaissez ou posez la votre.
Poser une nouvelle question sur cet appareil
Download the instructions for your Air Conditioning in PDF format for free! Find your manual AEE08AM - GE and take your electronic device back in hand. On this page are published all the documents necessary for the use of your device. AEE08AM by GE.
USER MANUAL AEE08AM GE
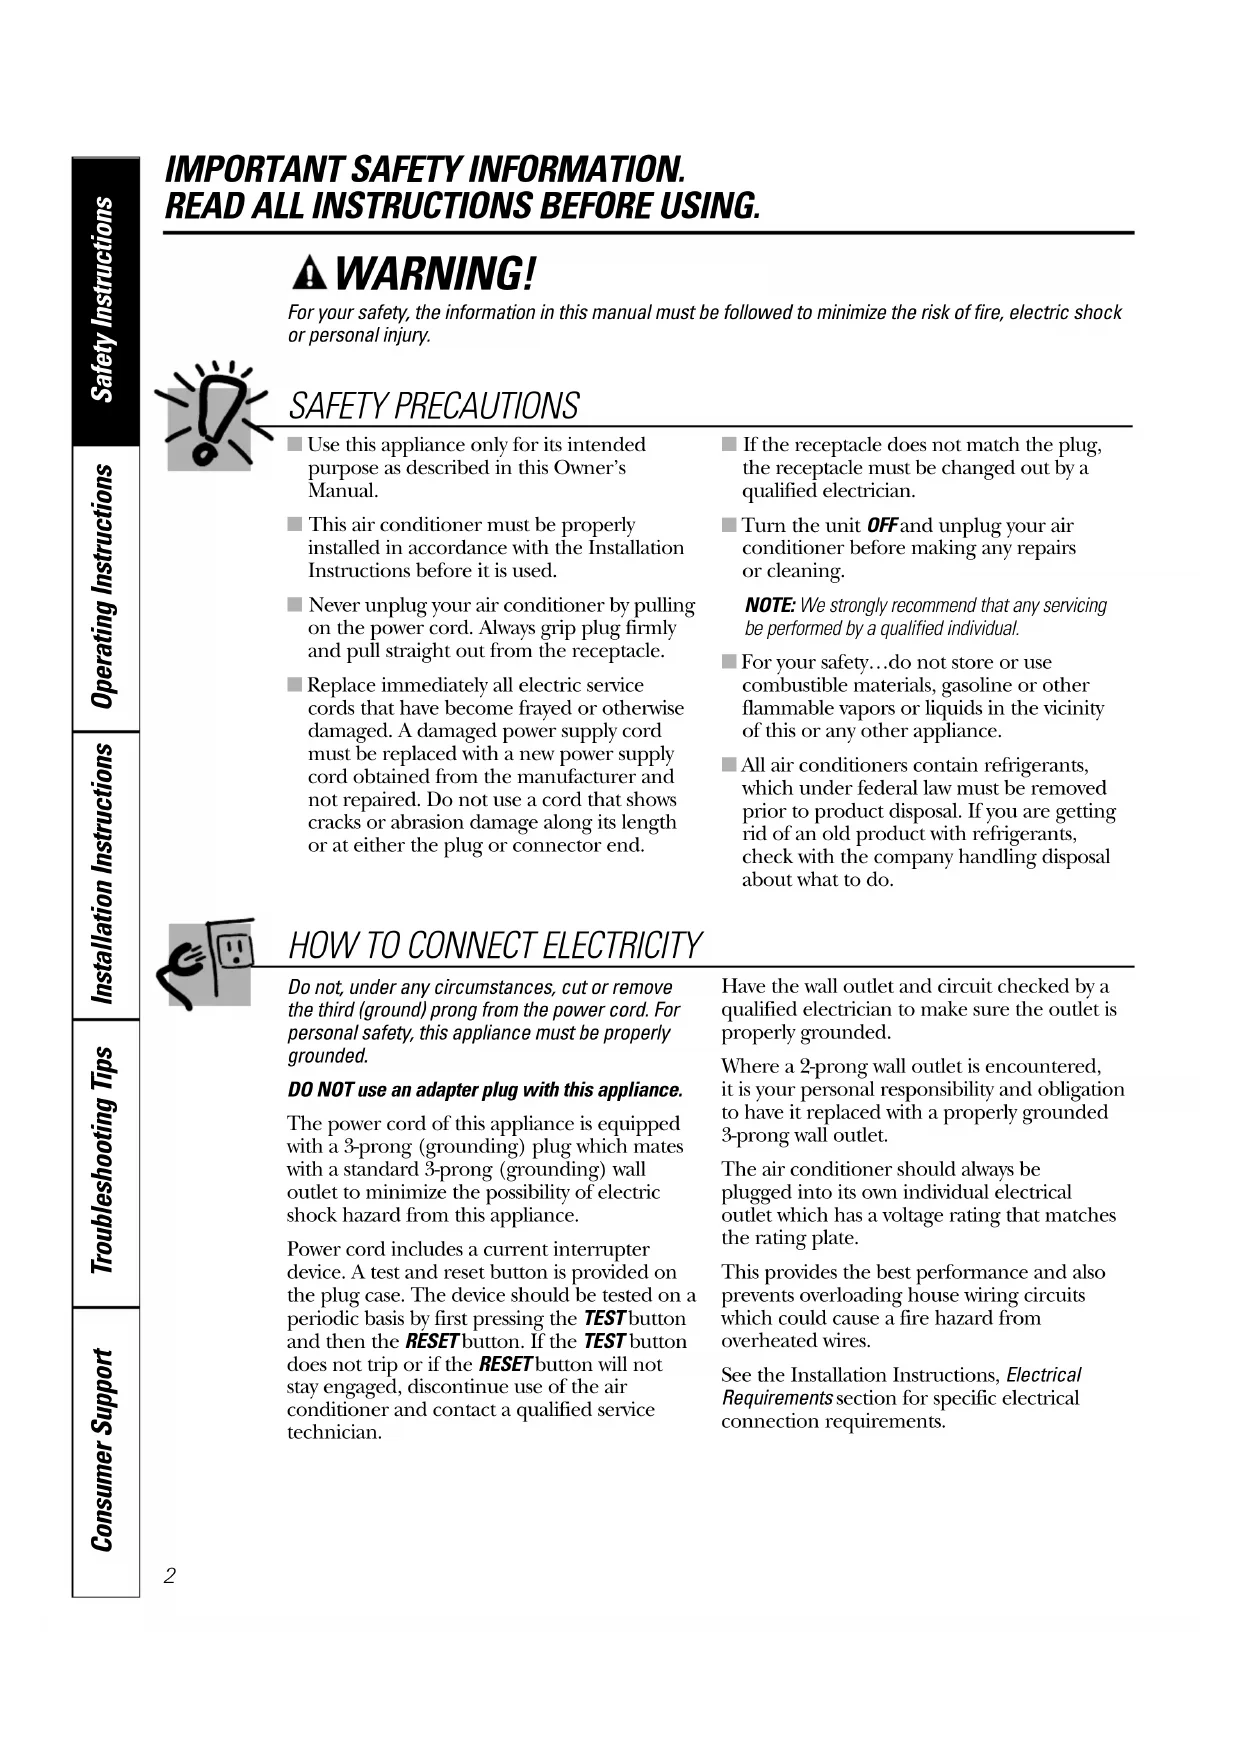
IMPORTANT SAFETY INFORMATION. READ ALL INSTRUCTIONS BEFORE USING. WARNING! For your safety, the information in this manual must be followed to minimize the risk of fire, electric shock or personal injury. ■ Use this appliance only for its intended purpose as described in this Owner’s Manual. ■ This air conditioner must be properly installed in accordance with the Installation Instructions before it is used. ■ Never unplug your air conditioner by pulling on the power cord. Always grip plug firmly and pull straight out from the receptacle. ■ Replace immediately all electric service cords that have become frayed or otherwise damaged. A damaged power supply cord must be replaced with a new power supply cord obtained from the manufacturer and not repaired. Do not use a cord that shows cracks or abrasion damage along its length or at either the plug or connector end. ■ If the receptacle does not match the plug, the receptacle must be changed out by a qualified electrician. ■ Turn the unit OFF and unplug your air conditioner before making any repairs or cleaning. NOTE: We strongly recommend that any servicing be performed by a qualified individual. ■ For your safety…do not store or use combustible materials, gasoline or other flammable vapors or liquids in the vicinity of this or any other appliance. ■ All air conditioners contain refrigerants, which under federal law must be removed prior to product disposal. If you are getting rid of an old product with refrigerants, check with the company handling disposal about what to do. SAFETY PRECAUTIONS Do not, under any circumstances, cut or remove the third (ground) prong from the power cord. For personal safety, this appliance must be properly grounded. DO NOT use an adapter plug with this appliance. The power cord of this appliance is equipped with a 3-prong (grounding) plug which mates with a standard 3-prong (grounding) wall outlet to minimize the possibility of electric shock hazard from this appliance. Power cord includes a current interrupter device. A test and reset button is provided on the plug case. The device should be tested on a periodic basis by first pressing the TEST button and then the RESET button. If the TEST button does not trip or if the RESET button will not stay engaged, discontinue use of the air conditioner and contact a qualified service technician. Have the wall outlet and circuit checked by a qualified electrician to make sure the outlet is properly grounded. Where a 2-prong wall outlet is encountered, it is your personal responsibility and obligation to have it replaced with a properly grounded 3-prong wall outlet. The air conditioner should always be plugged into its own individual electrical outlet which has a voltage rating that matches the rating plate. This provides the best performance and also prevents overloading house wiring circuits which could cause a fire hazard from overheated wires. See the Installation Instructions, Electrical Requirements section for specific electrical connection requirements.
HOW TO CONNECT ELECTRICITY3
Consumer Support Troubleshooting Tips Operating Instructions Safety Instructions Installation Instructions WARNING! Because of potential safety hazards under certainconditions, we strongly recommend against theuse of an extension cord. However, if you must use an extension cord, it is absolutely necessary that it be a UL-listed,14 gauge, 3-wire grounding type applianceextension cord having a grounding type plugand outlet and that the electrical rating of thecord be 15 amperes (minimum) and 125 volts. CAUTION: DO NOT use an extension cord with any of the230/208 volt models. EXTENSION CORDS—115-Volt models only READ AND FOLLOW THIS SAFETY INFORMATION CAREFULLY.
SAVE THESE INSTRUCTIONS
ge.com4 Consumer Support Troubleshooting Tips Operating Instructions Safety InstructionsInstallation Instructions About the controls on the air conditioner. Features and appearance will vary.
MODE CONTROLTEMP CONTROL
Temp Control The temp control is used to maintain theroom temperature. The compressor willcycle on and off to keep the room at thesame level of comfort. Turn the knobclockwise to Cooler (blue) and the indoorair will become cooler. Turn the knobcounterclockwise to Warmer (red) and the indoor air will become warmer. Mode Control Hi Cool and Low Cool provide cooling withdifferent fan speeds.Hi Heat and Low Heat provide heating withdifferent fan speeds.Fan Only setting provides air circulationand filtering without cooling or heating.NOTE: If you move the mode control from a cool setting to Off, a fan setting or a heat setting, wait at least 3 minutes before switchingback to a cool setting. Cooling Descriptions For Normal Cooling—Select Hi Coolor Low Cool with the temp control atmidpoint.For Maximum Cooling—Select Hi Cool withthe temp control turned clockwise as faras possible.For Quieter and Nighttime Cooling—SelectLow Cool with the temp control atmidpoint. Heating Descriptions For Normal Heating—Select Hi Heator Low Heat with the temp control atmidpoint.For Maximum Heating—Select Hi Heat withthe temp control turned counterclockwiseas far as possible.For Quieter & Nighttime Heating—Select LowHeat with the temp control at midpoint. Controls5 Consumer Support Troubleshooting Tips Operating Instructions Safety Instructions Installation Instructions Air Direction Use the lever to adjust the air direction left and right only. Fingertip pressure on the horizontal louvers adjusts the air direction up or down. ge.com Additional important information. Air Filter The air filter behind the front grille should be checked and cleaned at least every 30 days or more often if necessary. To remove: Push on one side of the filter edge and pull it out the other side. Clean the filter with warm, soapy water. Rinse and let the filter dry before replacing it. Do not clean the filter in a dishwasher. CAUTION:DO NOT operate the air conditioner without a filter because dirt and lint will clog it and reduce performance. Outdoor Coils The coils on the outdoor side of the air conditioner should be checked regularly. If they are clogged with dirt or soot, they may be professionally cleaned. Turn the air conditioner off and remove the plug from the wall outlet before cleaning. To clean, use water and a mild detergent. Do not use bleach or abrasives. Grille and Case Care and cleaning of the air conditioner.BEFORE YOU BEGIN Read these instructions completely and carefully.
IMPORTANT — Observe all governing codes and ordinances.
- Note to Installer – Be sure to leave these instructions with the Consumer.
- Note to Consumer – Keep these instructions for future reference.
- Skill level – Installation of this appliance requires basic mechanical skills.
- Completion time – Approximately 1 hour
- We recommend that two people install this product.
- Proper installation is the responsibility of the installer.
- Product failure due to improper installation is not covered under the Warranty.
- You MUST use all supplied parts and use proper installation procedures as described in these instructions, and any separate kit instructions, when installing this air conditioner. Installation Air Conditioner Instructions Some models require a 115/120-volt a.c., 60 Hz grounded outlet protected with a 15-amp time delay fuse or circuit breaker. The 3-prong grounding plug minimizes the possibility of electric shock hazard. If the wall outlet you plan to use is only a 2-prong outlet, it is your responsibility to have it replaced with a properly grounded 3-prong wall outlet. Some models require 230/208-volt a.c., protected with a time delay fuse or circuit breaker. These models should be installed on their own single branch circuit for best performance and to prevent overloading house or apartment wiring circuits, which could cause a possible fire hazard from overheating wires. ELECTRICAL REQUIREMENTS CAUTION: Do not, under any circumstances, cut or remove the third (ground) prong from the power cord. Do not change the plug on the power cord of this air conditioner. Aluminum house wiring may present special problems—consult a qualified electrician. If the sill support bolts do not contact the window sill, or if you have a window without a sill, you must order accessory kit RAK87 to properly install this air conditioner. Call 800.626.2002 or visit ge.com.
Phillips-head screwdriverAdjustable wrenchRuler or tape measurePencilLevelScissors or knifeFlat-blade screwdriver Power cord includes a current interrupter device. A test and reset button is provided on the plug case. The device should be tested on a periodic basis by first pressing the TEST button and then the RESET button. If the TEST button does not trip or if the RESET button will not stay engaged, discontinue use of the air conditioner and contact a qualified service technician.
Questions? Call 800.GE.CARES (800.432.2737) or visit our Website at: ge.com In Canada, call 1.800.561.3344 or visit www.GEAppliances.ca7 Type A (6) Right accordion panel Foam top window gasket Left accordion panel Type B (7) Top mounting rail Window locking bracket (2) Window Installation Instructions PARTS INCLUDED (appearance may vary) Type C (6) Type D (3) Case bottom seal (thin, adhesive-backed) Sill support (2) Nut (2) Bolt (2)Window Installation Instructions WINDOW REQUIREMENTS
- These instructions are for a standard double-hung window. You will need to modify them for other types of windows. CAUTION: If the sill support bolts do not contact the window sill or if you have a window without a sill, you must order accessory kit RAK87 to properly install this air conditioner. Call 800.626.2002 or visit ge.com.
- All supporting parts must be secured to firm wood, masonry or metal.
- The electrical outlet must be within reach of the power cord.
Remove and save the 2 screws from the lower sides of the front grille. Remove the two control knobs. Grasp the lower corners of the grille while pressing in on the case sides with your finger tips. Pull out to release and lift it up. NOTE: Do not pull the bottom edge toward you more than 3″ or you may damage the tabs of the grille. Remove the screw from each side of the case. Keep them in a safe location.
A storm window frame will not allow the air conditioner to tilt toward the outside, and will keep it from draining properly. To adjust for this, attach a piece of wood to the stool. WOOD PIECES– WIDTH: 2″ LENGTH: Long enough to fit inside the window frame. THICKNESS: To determine the thickness, place a piece of wood on the stool to make it 1/2″ higher than the top of the storm window frame or the vinyl frame. Attach securely with nails or screws provided by the installer.
1/2″ higherthan stormwindowframeStorm windowframe Wood Stool1/2″ higherthan vinyl frame (on some windows)Vinyl frame
- Peel the backing from the bottom case seal and attach it along the bottom of the case in front of the bottom mounting rail. Window Installation Instructions
Attach the top mounting rail onto the top of the case with 3 Type B screws. Press firmly to drive the screws into the gasket and through the top mounting rail.
Type B screws Top mounting rail INSTALL THE
SIDE ACCORDION PANELS
Slide the left and right accordion panels into the top and bottom mounting rails. Attach the accordion panels to the case using 3 Type A screws on each side.
Type A screws Top mounting rail Bottom mounting rail Accordion panel
FROM THE CASE (CONT.) Remove and save the ground wire screw. Slide the air conditioner from the case by gripping the base pan handle and pulling forward while bracing the case. Do not pull or lift on the styrofoam discharge area.
FRONT FRONT Do not pull or lift in this area— damage to the unit may result
Ground wire Ground screw Bottom mounting rail 9Window Installation Instructions
INSTALL THE CASE IN THE
WINDOW Open the window and mark the centerline ofthe window stool.Carefully place the case on the window stooland align the center mark on the bottom frontwith the centerline of the stool.Pull the window down behind the topmounting rail.NOTE: Do not shut the window so tightly thatmovement of the accordion panels isrestricted.Select the position that will place the sillsupports near the outermost point on the sill.Place the short side of the sill supports, on thecase bottom, toward the window. Attach thesill supports to the case track hole in relationto the selected position using 2 Type B screwsin each support. CAUTION: Do not install this air conditioner in a window if the bolts do notcontact the window sill. Adjust the bolt and the nut ineach support so that the case is installed with a slight tilt to the outside. Use a level; no morethan 1/2 bubble will be the correct case slantto the outside. CAUTION: If the sill support bolts do not contact the window sill or if you have awindow without a sill you must order accessorykit RAK87 to properly install this air conditioner.Call 800.626.2002 or visit ge.com.
WINDOW (CONT.) Secure the case tothe window stoolby using 3 Type D screws.Pull the accordionpanels to eachwindow sash track.Attach them on eachside to the windowsash and the windowstool using 4 Type C screws.
Long sideof sillsupportsOUTSIDE
Attach the window locking brackets (one on each side) with Type C screws.Cut the foam top window gasket to thewindow width.Stuff the foambetween the glassand the window toprevent air andinsects fromgetting into theroom.NOTE: If the gasket supplied does not fit yourwindow, obtain appropriate material locally toprovide a proper installation seal.
CAUTION: To prevent broken glass or damage to windows, on vinyl or other similarly constructed windows, attach the support bracket to the window side jam.
IN THE CASE (CONT.) Attach the front grille to the case by inserting the tabs on the grille into the slots on the front top of the case. Push the grille in. Secure the front grille to the case by replacing the 2 screws removed earlier. Press on the top of the grille to help with side screw installation. Replace the two control knobs. Connect power.
Slide the air conditioner into the case by the base pan. Do not push on the controls, styrofoam air discharge housing or the finned coils. Make sure the air conditioner is firmly seated. Replace the 2 screws removed earlier, one on each side of the case. Reattach the ground wire to the unit using the ground wire screw.
Do not press onthese areas—damage to theunit may resultBase Pan
Ground wire GroundscrewThrough-the-Wall Installation Instructions—Optional The case may be installed through-the-wall in both existing and new construction. Read completely, then follow step-by-step. NOTE: Obtain all materials locally for mounting the air conditioner through- the-wall. IMPORTANT Through-the-wall installation is not appropriate if any of the side or top louvers in the case will be obstructed by the wall. All side and top louvers in the case must project on the outdoor side of the wall. The room side of the case must project into the room far enough to maximize the balance of the unit. The case must be installed level from side- to-side and with a slight tilt from front to rear. Use a level; no more than a 1/2 bubble will be the correct case slant to the outside. Lintel angle is required to support bricks or blocks above opening. Flashing is required and should extend the length of the opening to ensure no inside cavity leakage occurs. Remove the air conditioner from the case. For specific instruction, refer to the Window Installation Instructions. Make certain that a wall receptacle is available close to the hole location or make arrangements to install a receptacle. Place the case in the wall opening and place wood support strips between the case bottom and the flashing on both sides of the bottom rail. They should be the same height as the bottom rail and the same length as the wall opening.
Caulk all four sides on the outdoor side of the case to prevent moisture from getting through to the interior wall. Use of flashing (drip rail) will further prevent water from dripping inside the wall and down the outside of the building. Place the air conditioner into the case. For specific instruction, refer to the Window Installation Instructions.
IMPORTANT (cont.) Secure with 14 wood screws anchored at least an inch into the wall support structure. NOTE: Drill pilot holes, if necessary, for proper installation. If the frame is oversized, use shims to prevent case distortion.
Lintel angle Plaster line Trim molding (if desired) INSIDE Bottom rail Wood filler and caulking (above and below the flashing) Air louvers (top and sides must project on the outdoor side of the wall) OUTSIDE Flashing (Drip rail) Case bottom Bottom rail Flashing (Drip rail) Wood support strips Caulking C13 Before you call for service… ge.com Problem Possible Causes What To Do Air conditioner The air conditioner • Make sure the air conditioner plug is pushed completely does not start is unplugged into the outlet. The fuse is blown/circuit • Check the house fuse/circuit breaker box and replace breaker is tripped the fuse or reset the breaker. Power failure • The unit will automatically re-start in the settings last used after the power is restored.
- There is a protective time delay (approximately 3 minutes) to prevent tripping of the compressor overload. For this reason, the unit may not start normal cooling or heating for 3 minutes after it is turned back on. The current interrupter • Press the RESET button located on the power cord plug. device is tripped
- If the RESET button will not stay engaged, discontinue use of the air conditioner and contact a qualified service technician. Air conditioner Ice blocks the air flow • Set the mode control at Fan Only or Hi Cool with the freezing up and stops the air conditioner temp control at a warmer setting. from cooling the room Air conditioner does not Airflow is restricted • Make sure there are no curtains, blinds or furniture cool as it should blocking the front of the air conditioner. The temp control may • Turn the temperature knob clockwise as far as possible. not be set correctly The air filter is dirty • Clean the filter at least every 30 days. See the Operating Instructions section. The room may have been hot • When the air conditioner is first turned on you need to allow time for the room to cool down. Cold air is escaping • Check for open furnace floor registers and cold air returns.
- Set the air conditioner’s vent to the closed position. Cooling coils have iced up • See “Air conditioner freezing up” above. Air conditioner does not Airflow is restricted • Make sure there are no curtains, blinds or furniture warm as it should blocking the front of the air conditioner. The temp control may • Turn the knob counterclockwise as far as possible. not be set low enough The lowest setting provides maximum warming. The air filter is dirty • Clean the filter at least every 30 days. See the Operating Instructions section. The room may have been cold • When the air conditioner is first turned on, you need to allow time for the room to warm up. Warm air is escaping • Check for open furnace floor registers and cold air returns. Troubleshooting Tips Save time and money! Review the chart below first and you may not need to call for service. Consumer Support Troubleshooting Tips Operating Instructions Safety Instructions Installation InstructionsConsumer Support Troubleshooting Tips Operating Instructions Safety InstructionsInstallation Instructions
Problem Possible Causes What To Do Water drips outside Excessively hot and • This is normal. humid weather Water drips indoors The air conditioner is not • For proper water disposal, make sure the air conditioner tilted to the outside slants slightly from the case front to the rear. Water collects in Moisture is removed from • This is normal for a short period in areas with base pan indoor air and drains into little humidity; normal for a longer period in very rear of a cabinet where a fan humid areas. blows it against the outdoor condenser coil Troubleshooting Tips Before you call for service…15 OWNERSHIP REGISTRATION
- MISSISSAUGA, ONTARIO L4Y 4G1 (FOR CANADIAN CONSUMERS ONLY) Please place in envelope and mail to: Veuillez mettre dans une enveloppe et envoyez à :1617 Consumer Support Troubleshooting Tips Installation Instructions Care and Cleaning Operating Instructions Safety Instructions Staple your receipt here. Proof of the original purchasedate is needed to obtain serviceunder the warranty. GE Air Conditioner—One-Year Limited Warranty. (For customers in the U.S.A.) For The Period Of: GE Will Replace: One Year Any part of the air conditioner which fails due to a defect in materials or workmanship. From the date of the During this limited one-year warranty, GE will also provide, free of charge, all labor and related original purchase service to replace the defective part.■ Service trips to your home to teach you how to use the product.■ Improper installation, delivery or maintenance. If youhave an installation problem, or if the air conditioner is of improper cooling capacity for the intended use,contact your dealer or installer. You are responsible for providing adequate electrical connecting facilities.■ Failure of the product resulting from modifications to the product or due to unreasonable use including failureto provide reasonable and necessary maintenance.■ In commercial locations, labor necessary to move the unit to a location where it is accessible for service by an individual technician.■ Replacement of house fuses or resetting of circuitbreakers.■ Failure due to corrosion on models not corrosion-protected.■ Damage to the product caused by improper power supplyvoltage, accident, fire, floods or acts of God.■ Incidental or consequential damage caused by possibledefects with this air conditioner.■ Damage caused after delivery. What Is Not Covered: This warranty is extended to the original purchaser and any succeeding owner for products purchased for homeuse within the USA. If the product is located in an area where service by a GE Authorized Servicer is not available, you may be responsible for a trip charge or you may be required to bring the product to an Authorized GE Service location for service. In Alaska, the warranty excludes the cost of shipping or service calls to your home.Some states do not allow the exclusion or limitation of incidental or consequential damages. This warranty givesyou specific legal rights, and you may also have other rights which vary from state to state. To know what yourlegal rights are, consult your local or state consumer affairs office or your state’s Attorney General.Warrantor: General Electric Company. Louisville, KY 40225All warranty service provided by our Factory Service Centers, or an authorized Customer Care technician. To schedule service,visit us on-line at ge.com, or call 800.GE.CARES (800.432.2737).Have serial number and model number available when calling for service.EXCLUSION OF IMPLIED WARRANTIES—Your sole and exclusive remedy is product repair as provided in thisLimited Warranty. Any implied warranties, including the implied warranties of merchantability or fitness for aparticular purpose, are limited to one year or the shortest period allowed by law.18 Staple your receipt here. Proof of the original purchasedate is needed to obtain serviceunder the warranty. GE Air Conditioner—One-Year Limited Warranty. (For customers in the Canada) For The Period Of: Mabe Will Replace: One Year Any part of the air conditioner which fails due to a defect in materials or workmanship. From the date of the During this limited one-year warranty, Mabe will also provide, free of charge, all labor and original purchase related service to replace the defective part.■ Service trips to your home to teach you how to use the product.■ Improper installation, delivery or maintenance. If youhave an installation problem, or if the air conditioner is of improper cooling capacity for the intended use,contact your dealer or installer. You are responsible for providing adequate electrical connecting facilities.■ Failure of the product resulting from modifications to the product or due to unreasonable use including failureto provide reasonable and necessary maintenance.■ In commercial locations, labor necessary to move the unit to a location where it is accessible for service by an individual technician.■ Replacement of house fuses or resetting of circuitbreakers.■ Failure due to corrosion on models not corrosion-protected.■ Damage to the product caused by improper power supplyvoltage, accident, fire, floods or acts of God.■ Incidental or consequential damage caused by possibledefects with this air conditioner.■ Damage caused after delivery. What Is Not Covered: This warranty is extended to the original purchaser and any succeeding owner for products purchased in Canada for home use within Canada. In-home warranty service will be provided in areas where it is available and deemed reasonable by Mabe to provide. Some provinces do not allow the exclusion or limitation of incidental or consequential damages, so the above exclusion may not apply to you. This warranty gives you specific legal rights, and you may also have other rights which vary from province to province. To know what your legal rights are in your province, consult your local or provincial consumer affairs office. Warrantor: Mabe Canada Inc., Burlington, Ontario All warranty service provided by our Factory Service Centers, or an authorized Customer Care technician. For service, call1.800.561.3344. Please have serial number and model numberavailable when calling for service.EXCLUSION OF IMPLIED WARRANTIES—Your sole and exclusive remedy is product repair as provided in thisLimited Warranty. Any implied warranties, including the implied warranties of merchantability or fitness for aparticular purpose, are limited to one year or the shortest period allowed by law. Safety Instructions Operating Instructions Care and Cleaning Installation Instructions Troubleshooting Tips Consumer SupportConsignes de sécurité p. 20
- , 21 Consignes d’utilisation p. 22
- , 23 Entretien et nettoyage Filtre à air p. 23
- Retrait du cadre de la grille p. 23
- Serpentins extérieurs p. 23
- Instructions de montage Instructions de montage pour une installation à travers un mur—En option p. 30
- Instructions de montage dans une fenêtre p. 25
- –29 Conseils de dépannage p. 33
- Service à la clientèle Service à la clientèle p. 36
- Garantie p. 35
- Enregistrement du titre de propriété , 32 Inscrivez ici les numéros de modèle et de série : Numéro de modèle : ____________________ Numéro de Série : ______________________ Vous trouverez ces numéros sur l’étiquette apposée sur le côté du climatiseur. p. 31
800.626.2002 during normal business hours.
Instructions contained in this manual cover procedures to be performed by any user. Other servicing generally should be referred to qualified service personnel. Caution must be exercised, since improper servicing may cause unsafe operation. Customers in Canada should consult the yellow pages for the nearest Mabe service center, or call 1.800.561.3344. Contact Us In the U.S.A. ge.com If you are not satisfied with the service you receive from GE, contact us on our Website with all the details including your phone number, or write to: General Manager, Customer Relations GE Appliances, Appliance Park Louisville, KY 40225 In Canada: www.GEAppliances.ca, or write to: Director, Consumer Relations, Mabe Canada Inc. Suite 310, 1 Factory Lane Moncton, N.B. E1C 9M3 Register Your Appliance In the U.S.A. ge.com Register your new appliance on-line—at your convenience! Timely product registration will allow for enhanced communication and prompt service under the terms of your warranty, should the need arise. You may also mail in the pre-printed registration card included in the packing material. In Canada: www.GEAppliances.ca Printed in China