0247070010000 - Bread maker Starfrit - Free user manual and instructions
Find the device manual for free 0247070010000 Starfrit in PDF.
User questions about 0247070010000 Starfrit
0 question about this device. Answer the ones you know or ask your own.
Ask a new question about this device
Download the instructions for your Bread maker in PDF format for free! Find your manual 0247070010000 - Starfrit and take your electronic device back in hand. On this page are published all the documents necessary for the use of your device. 0247070010000 by Starfrit.
USER MANUAL 0247070010000 Starfrit
natural_image
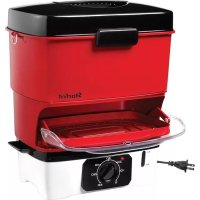
Starfruit brand bread maker with baked slices and a digital display, no visible text or symbols on the main objects.BREAD MAKER
MACHINE À PAIN
MÁQUINA DE PAN
INSTRUCTIONS FOR USE AND CARE P.2
OPERATING AND SAFETY INSTRUCTIONS
| Item no. Voltage (V) Wattage (W) Frequency (Hz) | |
| 024707 120 550 60 |
IMPORTANT SAFEGUARDS READ THE INSTRUCTIONS BEFORE USE
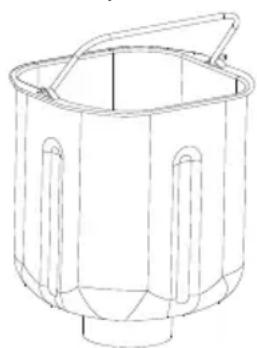
WARNING: To reduce the risk of fire, electrical shock, serious personal injury and/or property damage:
A. To protect against electric shock, DO NOT immerse, power cord, plug or motor base, power cord or plug in water or any other liquid. Always wipe the motor base with a damp cloth. Wash all accessories after each use.
B. Keep the appliance out of the reach of children and person with reduced physical, sensory, or mental capabilities. Close adult supervision is necessary when any appliance is used near children.
C. Do not operate the product if it has a damaged power cord or plug, or after the appliance malfunctions or has been damaged in any manner. Do not attempt to examine or repair this product yourself. Please contact the customer service to the email provided in this user manual.
D. Always unplug the appliance from the electrical outlet when not in use, before putting on or taking off parts, and before cleaning. Pull directly on the plug – do not pull on the power cord.
E. Do not plug or unplug the product into/from the electrical outlet with a wet hand.
F. Do not use accessory attachments not recommended or not sold by the product manufacturer.
G. Connect the power plug to an easily accessible outlet so that the appliance can be unplugged immediately in the event of an emergency.
H. Do not allow the power cord to hang (e.g., over the edge of a table or counter) or touch hot surfaces.
I. This product is intended for indoor, non-commercial use. Do not use outdoors or for any other purpose.
J. Do not place the product on or near a hot gas or electric burner, or in heated oven or microwave oven. Always use the appliance on a flat, level, stable surface.
K. Do not use the appliance for anything other than its intended use.
L. The appliance will not operate unless properly assembled. Make sure the baking pan and kneading blade are in place before operating the appliance.
M. Do not attempt to insert metal foils or baking sheets inside the baking pan as this represent a risk of fire and short circuit.
N. Always use the provided parts and accessories to avoid injuries. Avoid contact with moving parts to prevent personal injury or damage to the appliance.
O. Ensure appliance has completely stopped operating before disassembling, cleaning or storing.
P. Let the appliance cool off for a period of 30 minutes between each cycle. Do not operate the appliance for 2 consecutive cycles as it may cause the appliance to overheat and shut down.
Q. Do not leave the bread maker unattended while it is operating. Do not move the bread maker while in operation. DO NOT attempt to move or relocate the appliance while it is in use.
R. Do not put your fingers or other objects into the bread maker while it is in operation. Avoid contact with moving parts.
S. Do not block or obstruct appliance air vents. While in use, provide adequate space above and around the appliance for air circulation.
T. Do not place anything on the appliance while operating.
U. Never insert food with hands. Always use the provided measuring cup and spoon.
V. Always wash and thoroughly dry all parts between each bread making cycle. Unclean parts may affect the consistency of the dough and will produce poor results.
DO NOT OPERATE THE APPLIANCE FOR MORE THAN ONE CYCLE AT A TIME. ALLOW THE APPLIANCE TO COOL OFF FOR A PERIOD OF 30 MINUTES BETWEEN EACH CYCLE. DO NOT OPERATE THE APPLIANCE FOR TWO CONSECUTIVE CYCLE.
SAVE THESE INSTRUCTIONS FOR FUTURE REFERENCE
GROUNDED PLUG: As a safety feature, this appliance is equipped with a grounded plug, which will only fit into a three-prong outlet. Do not attempt to defeat this safety feature. Improper connection of the grounding conductor may result in the risk of electric shock. Consult a qualified electrician if you are in doubt as to whether the outlet is properly grounded.
SPECIAL INSTRUCTIONS: A short power supply cord used to reduce the risk resulting from it being grabbed by children, becoming entangled in, or tripping over a longer cord.
AN EXTENSION CORD MAY BE USED IF CARE IS EXERCISED IN THEIR USE:
- Minimize the risk of overheating by using the shortest UL or ETL listed cord possible.
-
The marked electrical rating must be at least as great as that of the product.
-
Never use a single extension cord to operate more than one appliance.
- If the product is of the grounding type, the extension cord must be a grounding-type 3-wire cord.
- Arrange the longer cord so that it will not drape over a countertop or tabletop where it can be tripped over, snagged, or pulled on unintentionally (especially by children). DO NOT alter the plug. DO NOT attempt to defeat the safety purpose of the polarized plug.
BEFORE FIRST USE
(Read the instructions before first use)
NOTE: During first use of the appliance, smoke and/or a slight odour may occur from the appliance. This is normal and will quickly disappear. It will not recur after appliance has been used a few more times.
- Remove all parts and accessories. Dispose of packaging.
- To remove the nut and fruit dispenser, slide the release button to the right and lift upward.
NOTE: To replace the dispenser, slide the release button to the right and insert the dispenser at an angle to insert the left side first and press downward to lock it into place.
- Turn the baking pan counterclockwise until a click is heard to remove it.
NOTE: Insert the baking pan into the appliance and turn it clockwise to securely lock it into place. - Wipe motor body with a damp cloth and dry thoroughly.
NOTE: Do not use abrasive cleaners or scouring pads or any other object that could scratch the surface. DO NOT immerse motor body, power cord, or plug in any liquids or place in the dishwasher. - Wash all other parts and accessories in hot soapy water or place in the dishwasher. Wash after each use. Rinse and dry thoroughly.
NOTE: Do not use abrasive cleaners or scouring pads or any other object that could scratch the surface. - Reassemble the bread maker.
- Press on the BAKE then START/STOP button and let the appliance operate for about 10 minutes.
- Press on the START/STOP button to turn off the appliance and unplug from the electrical outlet. Let the appliance cool down completely and wash all the parts once again.

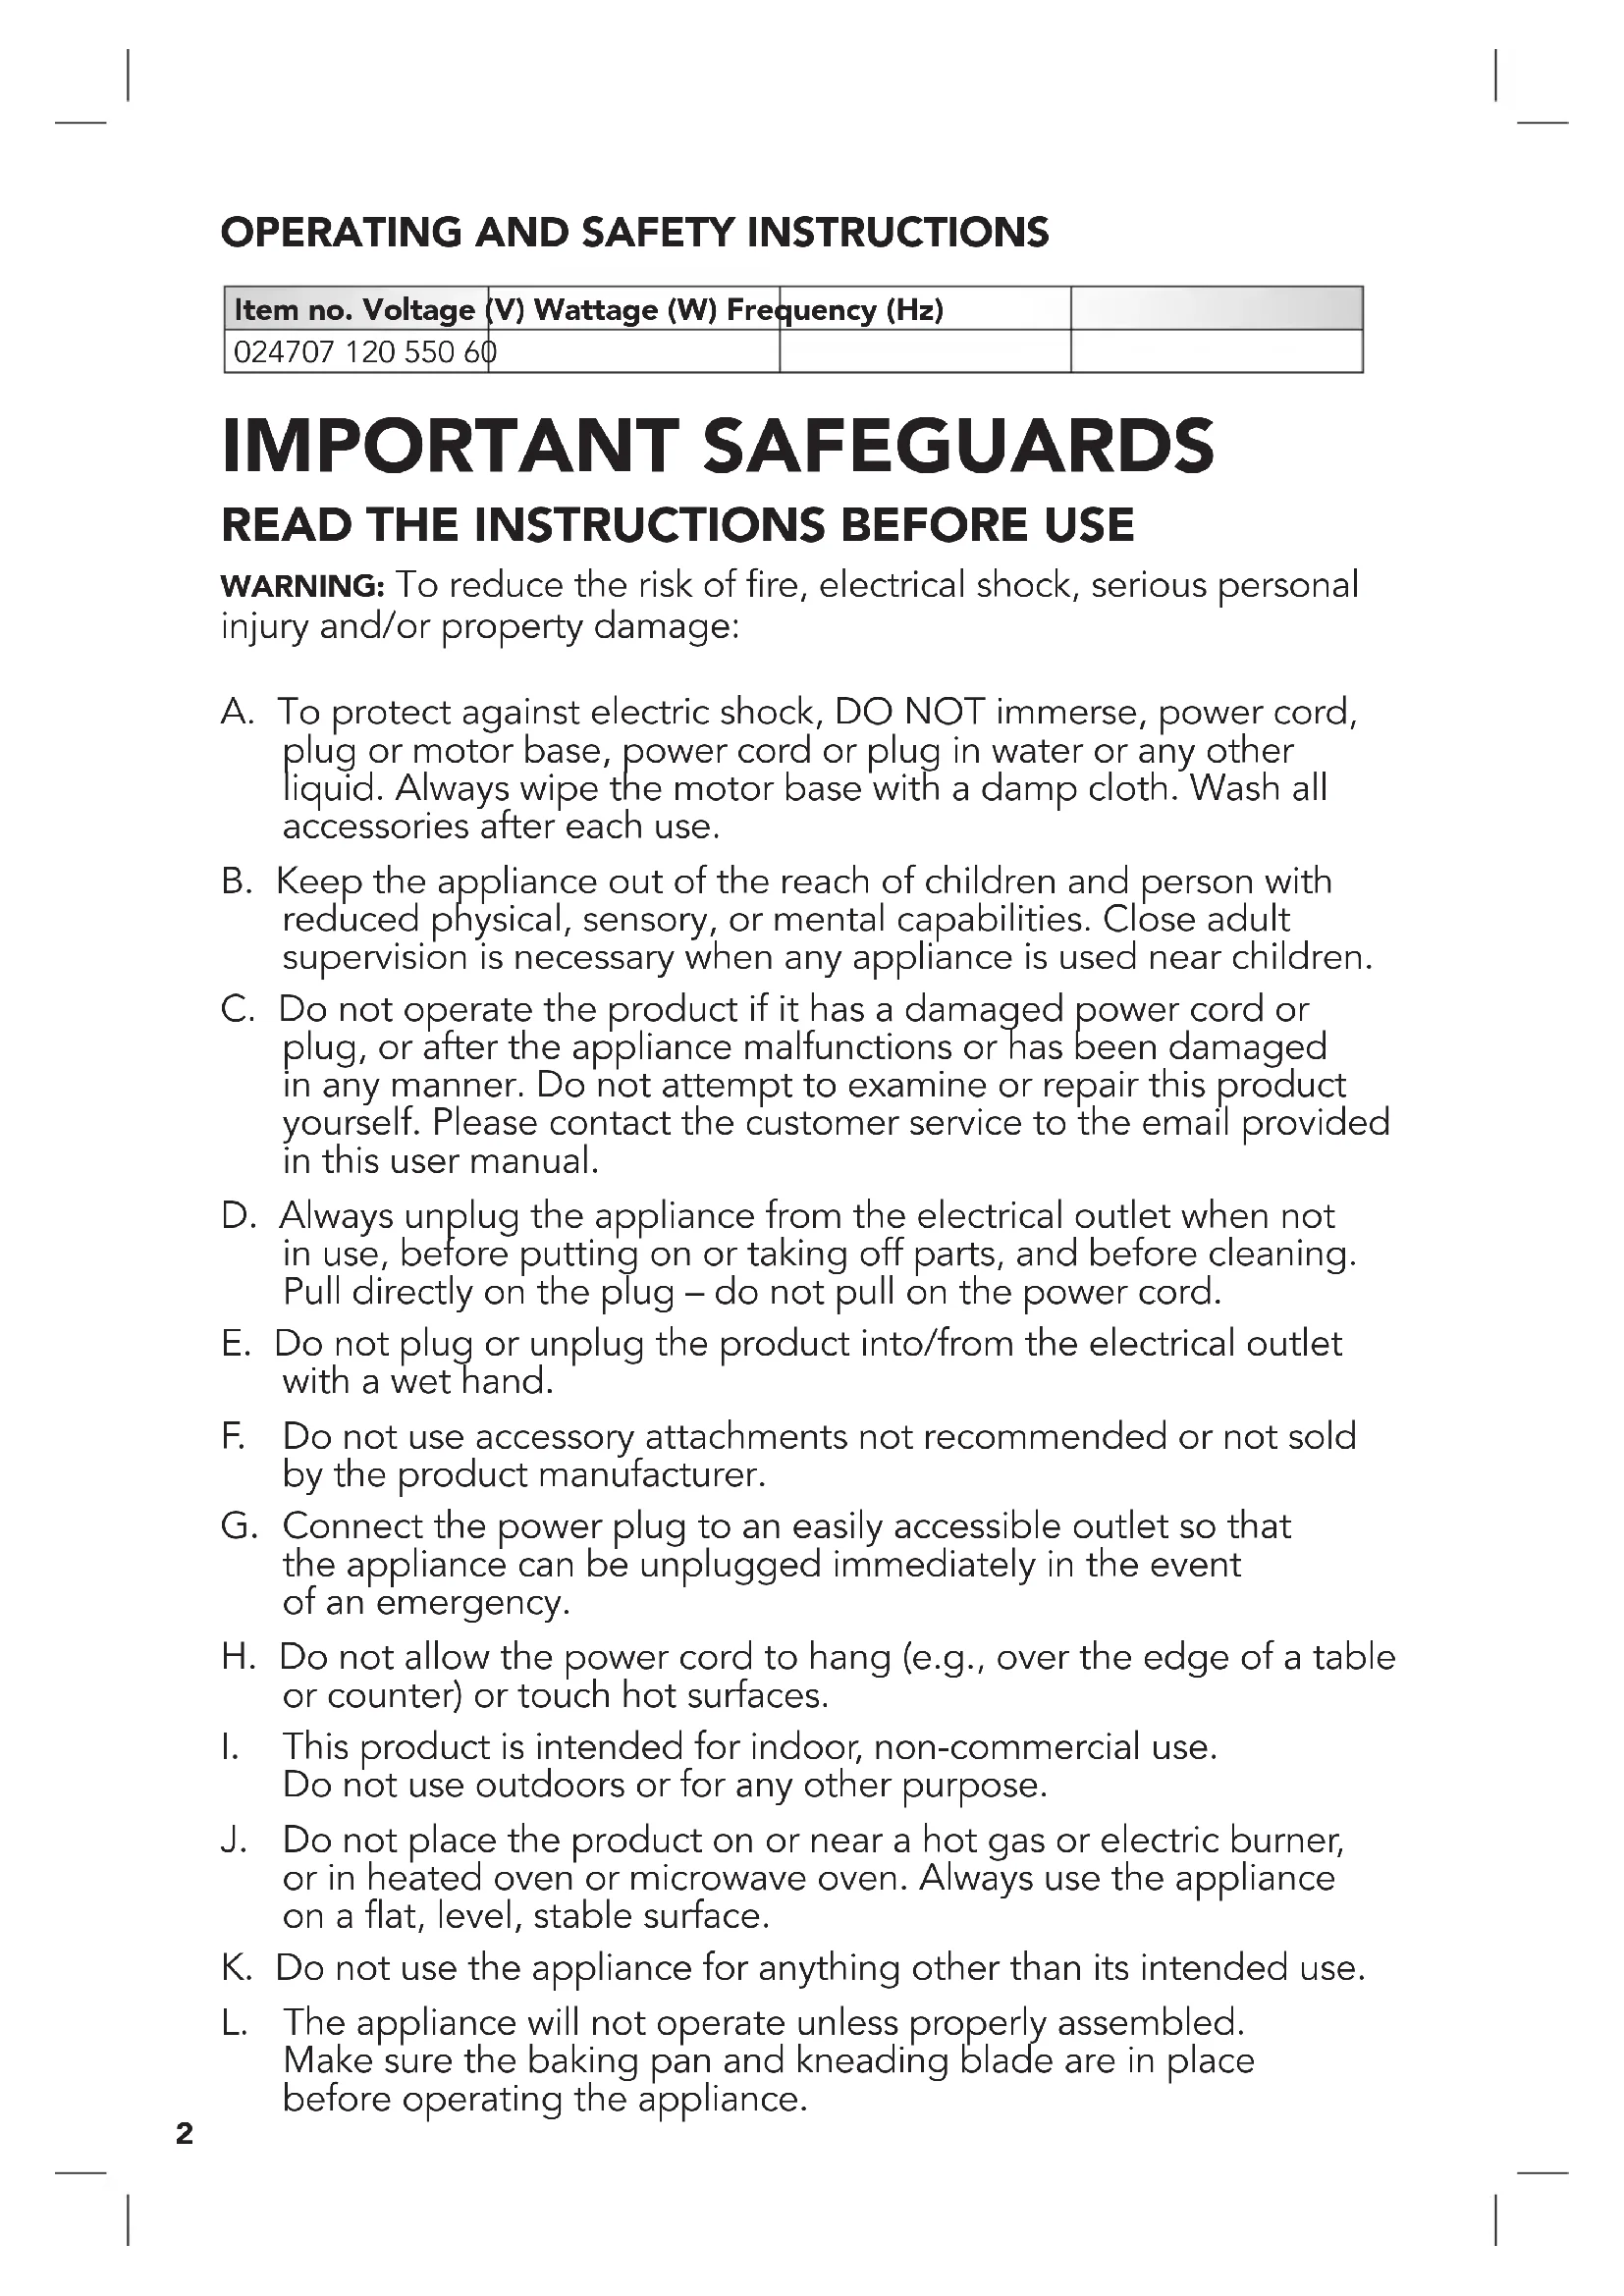
Single kneading blade
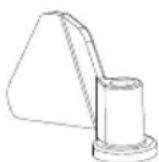
Baking pan handle
natural_image
Line drawing of a cylindrical container with handles and a handle (no text or symbols)
Measuring spoon (1 teaspoon & tablespoon)

Measuring cup
Stainless steel baking pan
text_image
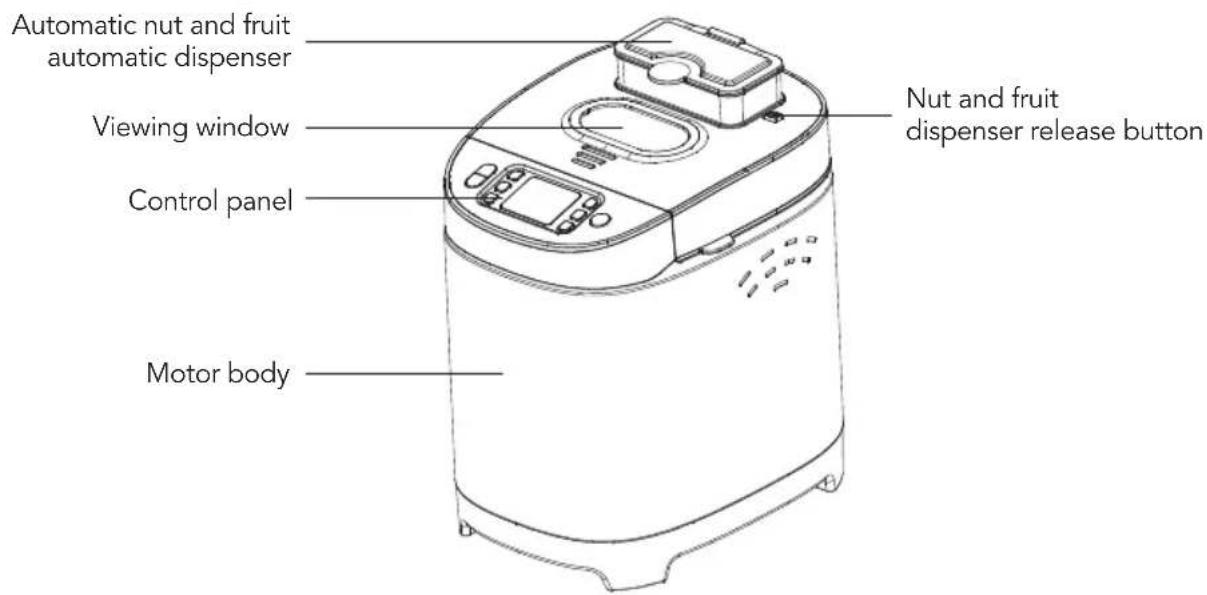
Automatic nut and fruit automatic dispenser Viewing window Control panel Motor body Nut and fruit dispenser release buttonCONTROL PANEL & MENU
text_image
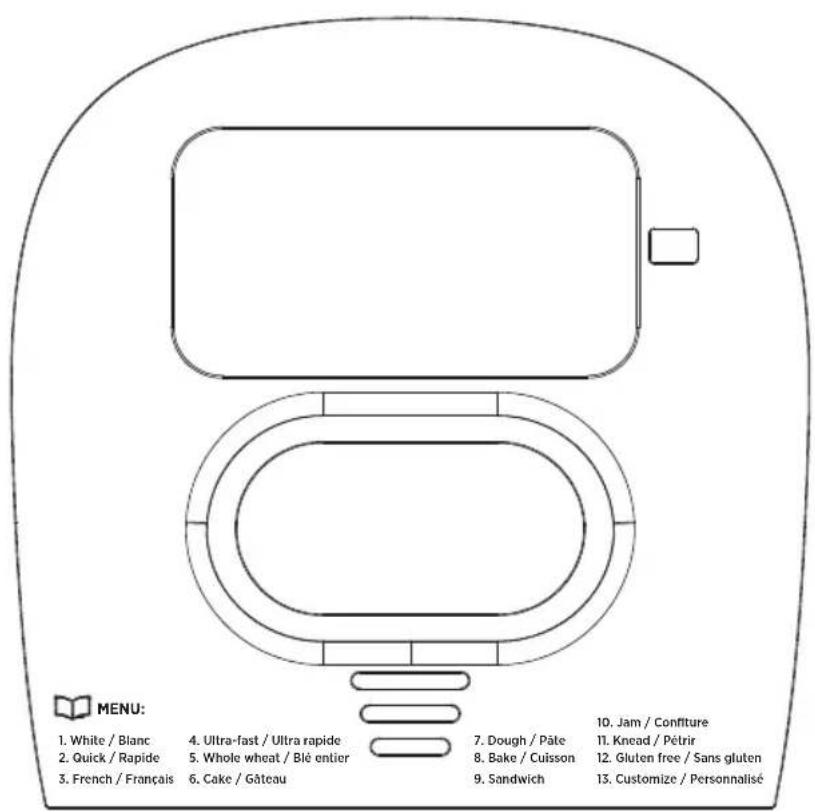
MENU: 1. White / Blanc 2. Quick / Rapide 3. French / Français 4. Ultra-fast / Ultra rapide 5. Whole wheat / Blé entier 6. Cake / Gâteau 7. Dough / Pâte 8. Bake / Cuisson 9. Sandwich 10. Jam / Confiture 11. Knead / Pétrir 12. Gluten free / Sans gluten 13. Customize / Personnalisé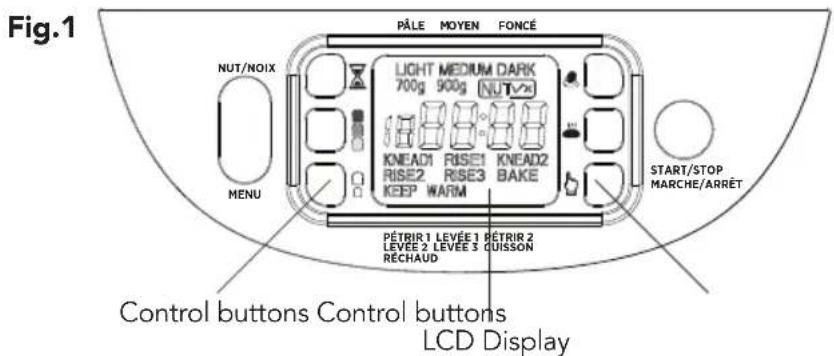
text_image
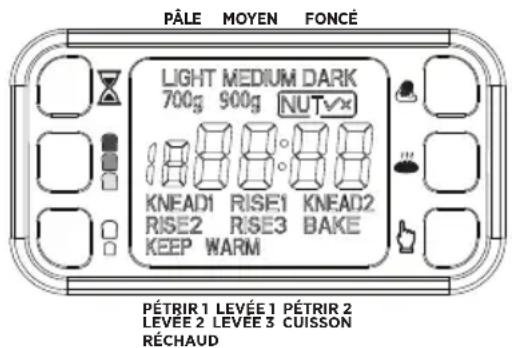
Fig.1 PÂLE MOYEN FONcé NUT/NOIX LIGHT MEDIUM DARK 700g 900g NUTV KNEAD1 RISE1 KNEAD2 RISE2 RISE3 BAKE KEEP WARM MENU START/STOP MARCHE/ARRÊT PÉTRIR 1 LEVÉE 1 RÉTRIR 2 LEVÉE 2 LEVÉE 3 QUISSON RÉCHAUD Control buttons Control buttons LCD DisplayTO USE
(Read the instructions before first use)
NOTE: During first use of the appliance, smoke and/or a slight odour may occur from the appliance. This is normal and will quickly disappear. It will not recur after appliance has been used a few more times.
NOTE: Do not operate the appliance directly under kitchen cabinets.
Provide adequate space above and around the appliance for air circulation.
NOTE: DO NOT open the lid once baking has started as it may have an impact on the rising process. NEVER exceed the maximum flour and yeast quantity of 590 g and 6 g.
- Open the lid.
-
Make sure the kneading blade is attached to the baking pan. Make sure it is secure.
NOTE: It is recommended to add butter or oil to the kneading blade to avoid the dough from sticking. -
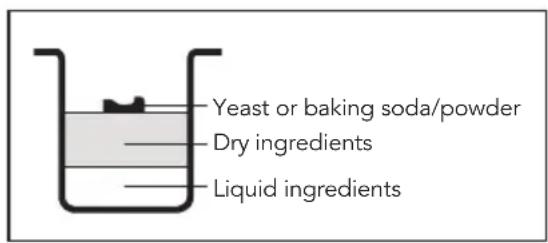
Add all the ingredients into the baking pan in the following order: liquid ingredients, dry ingredients and yeast or baking soda/powder. (Fig. 2)
NOTE: The maximum quantity of flour and yeast/ baking soda should not exceed 590 g and 6 g. Use your finger to form a well (hole) in the flour then add yeast. Make sure yeast is not in contact with the liquid ingredients or salt. This is important especially when using the DELAY function.
Fig.2
text_image
Yeast or baking soda/powder Dry ingredients Liquid ingredients-
Close the lid. Add nut and fruit in the automatic dispenser (if required). Refer to the NUT & FRUIT DISPENSER section for more details.
-
Plug the power cord into a 120 V AC wall outlet. The appliance will beep once and the LCD display will light up.
NOTE: Default setting will be displayed on the screen 900 g – MEDIUM – WHITE time 3:00. The display will turn off if no baking function is selected within 20 seconds.
-
Press on the MENU button until the desired baking function is selected. Total baking time will be displayed. Refer to the BAKING FUNCTIONS section for more details.
-
Press on the 📄 button to select the desired crust color. Refer to the CRUST SETTINGS section for more details.
-
Press on the ☐ button to select the desired loaf size (700 g or 900 g). Refer to the BREAD SIZE section for more details.
-
Press on the START/STOP button to start the appliance immediately or press on the ☒ button to delay the baking. Refer to the DELAY START section for more details.
NOTE: The appliance will beep once and kneading cycle will start immediately. All the cycles will be displayed on the screen.
- Once baking is complete, the appliance will beep 10 times and automatically switch to KEEP WARM mode.
NOTE: Warm mode can be used for a maximum of 60 minutes after the appliance will automatically shut off.
-
Turn off the appliance by pressing the START/STOP button until a beep is heard and unplug from electrical outlet.
-
Open the lid and carefully lift the baking pan by the handle. Turn the baking pan counterclockwise and upward.
WARNING: Use extreme caution when opening the lid as hot steam will escape and may cause scalding. Use protective oven mitts or gloves to avoid burns or serious personal injury.
- Turn the baking pan upside down onto a cooling rack and gently shake until the bread comes out.
NOTE: Allow the bread to cool for about 20 minutes before slicing.
- Use the provided hook to remove the kneading blade from the bottom of the bread before slicing.
NOTE: The machine may work well in a wide range of temperature, but there could be a difference in loaf size between a very warm room and a very cold room. The suggested room temperature should be between 15^ C and 34^ C.
DO NOT OPERATE THE APPLIANCE FOR MORE THAN ONE CYCLE AT A TIME. ALLOW THE APPLIANCE TO COOL OFF FOR A PERIOD OF 30 MINUTES BETWEEN EACH CYCLE. DO NOT OPERATE THE APPLIANCE FOR TWO CONSECUTIVE CYCLE.
MENU - BAKING FUNCTIONS
Press on the MENU button to navigate through the 13 baking functions. Each time you press on the button you will hear a beep, and the number of the bread setting will appear on the display. Repeatedly press the button to select the desired baking function.
- WHITE: This function is programmed to bake traditional white bread and will go through kneading, rising, and baking.
- QUICK: This function is programmed to bake a smaller bread loaf with a dense texture. This function will go through kneading, rising, and baking. It is usually recommended for recipes that contains baking powder or baking soda.
- FRENCH: This function is programmed to bake French style breads with a crispier crust and a lighter texture. This function will go through kneading, rising, and baking. French breads require longer rising time.
- ULTRA FAST: This function is programmed to bake bread in about 2 hours. The bread is smaller and is a little dense in texture. Always use a fast-rising yeast. This function will go through kneading, rising, and baking. The default time setting is 2:05 and cannot be changed.
- WHOLE WHEAT: This function is programmed to bake whole wheat which requires a longer preheating time to allow the flour to soak up the water and expand. This function will go through kneading, rising, and baking. It is not recommended to use the DELAY function.
-
CAKE: This function is programmed to bake cakes. It is recommended to use with recipes containing baking soda or baking powder. This function will go through kneading, rising, and baking.
-
DOUGH: This function is programmed for kneading and rising ONLY. It is programmed to prepare the dough for rolls, pizza, specialty breads, etc., to be shaped by hand and baked in a conventional oven.
- BAKE: This function is programmed for baking pre-made dough or store-bought ONLY. To avoid going through the MENU, press on the 🎨 button to immediately select the baking function. The default time setting is 0:10. Press on the ⏻ button to set the timer. Timer can be adjusted by increment of 1 minute for a maximum of 1:00 hour.
- SANDWICH: This function is programmed to bake sandwich style breads with thinner crust and lighter texture. This function will go through kneading, rising, and baking.
- JAM: This function is programmed to make jam from fresh fruits and vegetables. For best results, fruits and vegetables should be mashed before baking. The default time setting is 1:20 and cannot be adjusted.
- KNEAD: This function is programmed to knead the dough ONLY. To avoid going through the MENU, press on the 🎨 button to immediately select the kneading function. The default time setting is 0:25 and cannot be adjusted.
- GLUTEN FREE: This function is programmed to bake gluten free bread using gluten free flour. The dough is generally wetter and more like a batter. It is also important not to over-mix or over-knead gluten-free dough. Baking time is generally longer due to the high moist dough.
- CUSTOMIZE: This function is programmed for experienced users. You can personalize the kneading (KNEAD 1 & KNEAD 2), rising (RISE 1 - RISE 2 - RISE 3), baking and keep warm time. Press on the button to navigate through the cyles. Press on the button to set the timer for each cycle. Once all the cycles are set, press on the START/STOP button to confirm your selection. Crust setting and nuts can be selected afterward.
CONTROL PANEL PROGRAMS
13-HOUR DELAY TIMER
NOTE: Do not use recipes with ingredients that can spoil like eggs, milk, yogurt, or any other dairy products.
- Follow step 1-8 in the TO USE section.
- Press on the ☒ button to adjust the timer. Time will be displayed on the screen.
NOTE: Timer can be adjusted by increment of 10 minutes for a maximum of 13 hours. Holding down on the button will increase the timer faster.
For example, it is 8:00 AM and you would like your bread to be ready at 2:00 PM, press on the ☒ button until the display reads 6:00. Bread will be baked in 6 hours (Baking time is included).
- Press on the START/STOP button to set the timer. Flashing dots will appear on the display and the timer will start counting down.
NOTE: Delay timer cannot be set for JAM, ULTRA FAST, BAKE and KNEAD functions.
NOTE: To cancel the delay timer, press on the START/STOP button for about 2 seconds until a long beep is heard. The display will show the pre-set baking time for the selected function.
CRUST SETTINGS
There are 3 different crust setting: LIGHT, MEDIUM or DARK. Press on the 📄 button to select the desired crust color. The display will read; LIGHT, MEDIUM, DARK. The crust setting cannot be adjusted for DOUGH, JAM AND KNEAD functions.
BREAD SIZE 📄
There are 2 loaf sizes; 700 g and 900 g. Press on the ☐ button to select the desired bread size. The bread size cannot be adjusted for QUICK, ULTRA-FAST, CAKE, DOUGH, BAKE, JAM, KNEAD and CUSTOMIZE functions.
KNEAD
This function is programmed to knead the dough ONLY. Rising and baking can be done in a traditional oven. Add all the ingredients in the baking pan and press the 🔊 button to select the kneading function. The default time setting is 0:25 and cannot be adjusted. Press START/STOP button to start kneading. KNEAD 1 will be displayed on the screen to indicate the appliance has started kneading.
BAKE
This function is programmed to bake the dough ONLY. This function is suitable for pre-made dough or store-bought. Add the dough into the baking pan and press the 🎨 button to select the baking function. The default time setting is 0:10. Press on the 📋 button to set the timer. Timer can be adjusted by increment of 1 minute for a maximum of 1:00 hour. Press on the START/STOP button to start baking. BAKE will be displayed on the screen to indicate the appliance has started baking.
CUSTOMIZE
This function is programmed for experienced users. You can personalize the kneading (KNEAD 1 & KNEAD 2), rising (RISE 1- RISE 2 - RISE 3), baking and keep warm time. First, add all the ingredients into the baking pan. Select the customize function by navigating through the MENU then press on the button to navigate through the cycles. Press on the button to set the timer for each cycle. Timer can be adjusted by increment of 1 minute (refer to the chart below for adjustable timer). Once all the cycles are set, press on the START/STOP button to confirm your selection. Crust and nut settings can be selected afterward. Press on the START/STOP button to start baking.
| CYCLES ADJUSTABLE TIME (MIN) | |
| KNEAD 1 6-14 | |
| RISE 1 20-60 | |
| KNEAD 2 5-20 | |
| RISE 2 5-40 | |
| RISE 3 0-60 | |
| BAKE 0-80 | |
| KEEP WARM 0-60 | |
text_image
PÂLE MOYEN FONCÉ LIGHT MEDIUM DARK 700g 900g NUT KNEAD1 RISE1 KNEAD2 RISE2 RISE3 BAKE KEEP WARM PÉTRIR 1 LEVÉE 1 PÉTRIR 2 LEVEE 2 LEVEE 3 CUISSON RÉCHAUDNUT & FRUIT DISPENSER
The appliance is designed with a nut and fruit dispenser that will automatically add ingredients to your recipe. NUT is a default setting. Display will read NUT √ if this option is activated. To deactivate, press on the NUT button until the display reads NUT X. This function cannot be selected for DOUGH, BAKE, JAM and KNEAD functions.
START/STOP
Press on the START/STOP button to pause the appliance at any time during the baking cycle. The setting will be memorized and the remaining baking time will start flashing on the display, indicating that the appliance is paused. The baking cycle will automatically resume after 10 minutes if no other function is selected. To cancel the selected function, press on the START/STOP button for about 2 seconds until a long beep is heard. Default setting will be displayed on the screen 900 g – MEDIUM – WHITE time 3:00.
If you experience a power outage for less than 10 minutes while using the bread maker, the appliance will resume its cycle when power is restored. If power outage exceeds this period, the baking cycle must be restarted all over again.
PREPARING THE INGREDIENTS
NOTE: ALWAYS use the provided measuring spoon and cup to measure the ingredients. The provided measuring cup and spoon with this bread maker are not standard and should not be used as such.
- Measure liquid ingredients such as water, milk, oil using the provided measuring cup. Always make sure the cup is clean before adding ingredients. The provided measuring cup can hold up to 200 ml of liquid.
- To measure dry ingredients, always use a spoon to fill the provided measuring cup then level off with a knife. Do not use the cup to scoop the dry ingredients directly. The provided measuring cup can hold up to 140 g of dry ingredients.
- Use the provided measuring spoon to measure small quantities of dry ingredients such as yeast, baking soda, baking powder. The provided measuring spoon can hold 1 teaspoon (7 g) and 1 tablespoon (12 g).
NOTE: Always add ingredients in the following order liquid ingredients, dry ingredients and yeast or baking soda/powder (Fig.2). Yeast should not be in contact with liquid ingredients or salt.
TIPS
• Make sure all ingredients are at room temperature. Temperatures too cool or too hot can affect the way the bread rises and bakes.
- For best results, water temperature should be between 20 °C and 25°C.
• Always use the provided measuring spoon and cup to measure the ingredients.
- Always use the provided hook to remove the kneading blade from the bottom of the bread. Never remove by hand.
- For best results, always use the exact measurement provided in the recipe.
- Always use fresh ingredients. Flour and yeast are the most important ingredient in making bread. If yeast is not fresh, the bread will not rise.
• Always add the ingredients in the following order: liquid ingredients, dry ingredients and yeast or baking soda/powder. (Fig.2) Yeast should never be in contact with liquid ingredients or salt. Especially when using the DELAY function.
- Ambient temperature may have an impact on baking bread. The bread size may vary depending on the room temperature. For best results, room temperature should always be between 15^ and 34^ when using the appliance.
BREAD CONSERVATION
Fresh bread is at its best when consumed immediately. Bread can be stored in a sealed plastic bag, at room temperature for about 3 days (this will depend on the type of bread). Bread can be stored in a sealed container and in the freezer for up to 1 month. Homemade bread has no preservatives and tends to dry out and become stale faster.
CLEANING AND CARE
WARNING: Ensure the appliance is unplugged from the electrical outlet and allow it to cool down completely before handling or cleaning it.
WARNING: Never put cold water into a hot baking pan. Sudden changes of temperature may cause metal to warp, resulting in an uneven bottom.
- Remove the baking pan from the bread maker by the handle and remove the kneading blade.
NOTE: Turn the baking pan counterclockwise until a click is heard to remove it.
NOTE: Insert the baking pan into the applause and turn it clockwise to securely lock it into place.
- Remove the nut and fruit dispenser (if necessary).
NOTE: To remove the nut and fruit dispenser, slide the release button to the right and lift upward. To put the dispenser back, slide the release button to the right and insert the dispenser at an angle to insert the left side first and press downward to lock it into place.
- Wipe motor body with a damp cloth and dry thoroughly.
NOTE: Do not use abrasive cleaners or scouring pads or any other object that could scratch the surface. DO NOT immerse motor body, power cord, or plug in the any liquids or place in the dishwasher.
- Wash all the parts and accessories in hot soapy water or place in the dishwasher. Rinse and dry thoroughly.
NOTE: Do not use abrasive cleaners or scouring pads or any other object that could scratch the surface. Wash after each cycle.
TIP: If the kneading blade is hard to remove, fill the baking pan with lukewarm water and add a little bit of dish soap and let it soak for about 30 minutes.
- Reassemble the appliance to store away.
INTRODUCTION OF BREAD INGREDIENTS
Water and other liquid ingredients
Water is an essential ingredient for baking bread. Water temperature should always be between 20^ C and 25^ C. In any recipe, water can be replaced with fresh milk to enhance flavor and improve the browning of the crust. Vegetable or fruit juices may be used for flavor.
Fats (butter & oils)
Butter and oils add a lot of flavor to breads, but it prevents gluten formation which will result in smaller bread. Butter should be melted or cut into small pieces before adding to the baking pan.
Egg
Eggs help bind the ingredients together and act as a leavening agent. It also helps the browning of the crust. Usually the breads rise very high and are larger in size. Always mix the eggs before adding to the baking pan. Always incorporate the egg mixture with the liquid ingredients.
Yeast
Yeast is essential for making bread. It is used to make the dough rise by producing carbon dioxide. This is referred to as the fermentation process. The dough expands as it warms and bakes. Always use fresh yeast, if not bread will not rise properly. Yeast should always be added last. Use your finger to form a well (hole) in the flour then add yeast. It is important that yeast is not in contact with any liquid ingredients or salt. This is important especially when using the DELAY function.
DRY YEAST AND INSTANT YEAST EQUIVALENCE
| DRY YEAST INSTANT YEAST | |
| 1 tsp. 3/4 tsp. | |
| 1.5 tsp. 1 tsp. | |
| 2 tsp. 1.5 tsp. | |
Baking powder / Baking soda
Baking powder and baking soda are a quick leavening agent that require less time to rise than yeast. It is recommended when using the ULTRA FAST and CAKE functions. Baking powder and baking soda can be combined. Use your finger to form a well (hole) in the flour then add baking powder/soda.
TROUBLE SHOOTING
| Smoke coming out from the ventilation hole during baking | Due to the initial heating of the materials used in the manufacturing of the product, some light smoke/ vapors may be released when used initially. This is normal. |
| Bottom crust is too thick Bread | was left in the bread maker for too long on warm mode after baking is over. Remove bread from baking pan once baking is over and let it cool down on a cooling rack. |
| Kneading blade is stuck to the baking pan | Fill the baking pan with warm water and a little bit of dish soap and let it soak for about 30 minutes. |
| Ingredients are not mixed properly and bread is not evenly baked | The wrong baking function was selected. Make sure to select the baking function according to the type of flour and ingredients used. |
| Bread crust is not colored Do not open the lid during the last rising stage. | |
| Display reads HHH after pressing START/STOP button | The inner temperature of the bread maker is too high. Turn off the appliance and unplug power cord from electrical outlet. Open the lid and let the appliance cool down completely. |
| Display reads LLL and the appliance beeps continuously | The inner temperature of the bread maker is too low. Press START/STOP to pause the appliance then press BAKE to make the temperature inside the bread maker rise rapidly. |
| Display reads Err after pressing START/STOP button | Contact the customer service to the email provided in this instruction manual. |
| Appliance is working but the dough is not kneading | Baking pan is not properly inserted into the bread maker or the dough is too large to be kneaded. Make sure the baking pan is well inserted and the dough is made according to the recipe. |
| Bread size is too small or dough has not risen | Check the recipe and make sure yeast is fresh. Water and liquid ingredients should be at room temperature. Yeast should not be in contact with liquid ingredients or salt when added to the baking pan. |
| Bread has collapsed in the middle | The amount of yeast or baking powder/soda used is insufficient. Check the recipe and make sure to use the recommended quantity. |
| The dough is too wet or too dry | Add 1-2 tbsp. of flour if the dough is too wet. Add 1-2 tbsp. of liquid if the dough is too dry. |
| Bread is very large and dense T | Too much flour and/or not enough water was added. Make sure to properly measure the ingredients using the provided measuring cup and spoon. |
| Large holes/bubbles in the bread | Too much yeast was added and caused extra air bubbles to form creating holes in the bread. Make sure to properly measure the yeast. The ambient temperature may be too high causing the dough to rise too fast. Ambient temperature should be between 15°C and 34°C. |
WARRANTY
1-YEAR LIMITED WARRANTY.
This warranty covers any defects in materials and workmanship for a period of one (1) year from the date of the original purchase. Please retain your original receipt as a proof of the purchase date. Any complaints must be registered within the warranty period. The product will be repaired, replaced (parts including blades or entire appliance) or refunded at our sole discretion. Shipping charges may apply.
This warranty does not cover normal wear of parts or damage resulting from any of the following:
Negligent use or misuse of the product including failure to clean the product regularly, use for commercial purposes, accident, use on improper voltage or current, use contrary to the operating instructions, disassembly, repair or altercation by anyone other than a STARFRIT authorized service agent.
Decisions as to the cause of damage are the responsibility of Starfrit. All decisions will be final.
RECIPES
NOTE: Ingredients should ALWAYS be added in the following order: liquid ingredients, dry ingredients and yeast or baking soda/powder (Fig.2). Yeast should never be in contact with liquid ingredients or salt. Refer to the BREAD SIZE ☐☐ section to select the right bread size. Bread size refers to the size of the bread once baked.
For recipes calling for eggs, always incorporate the egg mixture with the liquid ingredients.
The measuring cup and spoon included with the bread maker are not standard and should not be used as such. The measuring cup can hold approximately 200 ml of liquid and 140 g of flour. The measuring spoon can hold approximately 1 teaspoon (7 g) and 1 tablespoon (12 g). The bread recipes provided in this instruction manual have been tested for success. The ratios will need to be adjusted if you are using other bread recipes.
WHITE BREAD
Bread size: 700 g
Cooking time: 2:41
INGREDIENTS:
- 270 ml Water
- 2 tbsp. Oil
- 1 tsp. Salt
- 2 tbsp. Sugar
• 3 cups Bread flour - 1 tsp. Yeast
Bread size: 900 g
Cooking time: 2:47
INGREDIENTS:
- 330 ml Water
- 3 tbsp. Oil
• 1.5 tsp. Salt - 3 tbsp. Sugar
• 4 cups Bread flour - 1 tsp. Yeast
QUICK
Bread size: 700 g
Cooking time: 2:22
INGREDIENTS:
- 250 ml Water
- 2 tbsp. Oil
- 1 tsp. Salt
• 1.5 tbsp. Sugar
• 3 cups All-purpose flour - 2 tsp. Yeast
FRENCH BREAD
Bread size: 700 g
Cooking time: 3:28
INGREDIENTS:
- 250 ml Water
• 2 tbsp. Oil - 1 tsp. Salt
• 1.5 tbsp. Sugar
• 3 cups Bread flour - 1 tsp. Yeast
Bread size: 900 g
Cooking time: 3:35
INGREDIENTS:
- 330 ml Water
• 3 tbsp. Oil
• 1.5 tsp. Salt - 2 tbsp. Sugar
- 4 cups Bread flour
- 1 tsp. Yeast
ULTRA FAST BREAD
Bread size: 900 g
Cooking time: 2:05
INGREDIENTS:
- 300 ml Water
- 3 tbsp. Oil
- 1 tsp. Salt
- 4 tbsp. Sugar
• 3 1/2 cups Bread flour - 2 tsp. Yeast
WHOLE WHEAT BREAD
Bread size: 700 g
Cooking time: 3:21
INGREDIENTS:
- 260 ml Water
- 2 tbsp. Oil
- 1 tsp. Salt
• 1 cup Whole wheat flour
• 2 cups Bread flour - 2 tbsp. Brown sugar
- 2 tbsp. Milk powder
- 1tsp. Yeast
Bread size: 900 g
Cooking time: 3:27
INGREDIENTS:
- 330 ml Water
• 3 tbsp. Oil - 2 tsp. Salt
• 2 cups Whole wheat flour - 2 cups Bread flour
• 2.5 tbsp. Brown sugar
• 3 tbsp. Milk powder - 1tsp. Yeast
CAKE
Bread size: 700 g
Cooking time: 1:40
INGREDIENTS:
- 2 tbsp. Oil
- 8 tbsp. Sugar
- 6 Eggs
• 1 2/3 cup Self-rising flour - 1tsp. Vanilla
- 1tsp. Lemon juice
- 1tsp. Yeast
DOUGH
NOTE: This function is programmed for kneading and rising ONLY. It is programmed to prepare dough for rolls, pizza, specialty breads, etc., to be shaped by hand and baked in a conventional oven.
Bread size: 700 g
Cooking time: 1:30
INGREDIENTS:
- 360 ml Water
- 2 tbsp. Oil
• 1.5 tsp. Salt - 4 tbsp. Sugar
- 4 cups Bread flour
- 1 tsp. Yeast
SANDWICH BREAD
Bread size: 700 g
Cooking time: 2:52
INGREDIENTS:
- 270 ml Water
• 1.5 tbsp. Butter
• 1.5 tsp. Salt
• 1.5 tbsp. Sugar
• 1.5 tbsp. Milk powder
• 3 cups Bread flour - 1 tsp. Yeast
Bread size: 900 g
Cooking time: 2:57
INGREDIENTS:
- 360 ml Water
- 2 tbsp. Butter
- 2 tsp. Salt
- 2 tbsp. Sugar
• 2 tbsp. Milk powder
• 4 cups Bread flour - 1 tsp. Yeast
JAM
NOTE: The recipe can be adjusted to your personal preference. The ratio of fruits/vegetables, sugar and water can be adjusted depending if you like a thicker or more liquid consistency.
Cooking time: 1:20
INGREDIENTS:
• 4 cups Strawberry (slightly crushed)
- 1 cup Sugar
- 1 cup Water
• 1 cup Pudding powder (optional)
GLUTEN FREE
Bread size: 700 g
Cooking time: 2:42
INGREDIENTS:
- 100 ml Water
- 3 tbsp. Oil
- 1/4 cup Honey
- 1 tsp. Vinegar
- 2 Eggs
- 2 cups Oat flour
- 3 cup Corn flour
- 3 tbsp. Sugar
- 1/2 tsp. Salt
- 3/4 tsp. Yeast
Bread size: 900 g Cooking time: 2:42
INGREDIENTS:
- 133 ml Water
• 4 tbsp. Oil - 1/3 cup Honey
- 1 tsp. Vinegar
- 2 Eggs
- 2 cups Oat flour
• 4 cups Corn flour - 4 tbsp. Sugar
- 1/2 tsp. Salt
- 1 tsp. Yeast
MODE D'EMPLOI ET CONSIGNES DE SÉCURITÉ
natural_image
Line drawing of a cylindrical container with handle and side supports (no text or symbols)natural_image
Line drawing of a cylindrical container with handle and side supports (no text or symbols)SUBSCRIBE TO THE NEWSLETTER TO LEARN MORE ABOUT OUR PROMOTIONS!
www. Starfrit.com
INSCRIVEZ-VOUS À L'INFOLETTRE POUR CONNAÎTRE NOS PROMOTIONS !

www.facebook.com/starfrit
FOR HOUSEHOLD USE ONLY POUR UN USAGE DOMESTIQUE SEULEMENT