0244250020000 - Other kitchen appliances Starfrit - Free user manual and instructions
Find the device manual for free 0244250020000 Starfrit in PDF.
User questions about 0244250020000 Starfrit
0 question about this device. Answer the ones you know or ask your own.
Ask a new question about this device
Download the instructions for your Other kitchen appliances in PDF format for free! Find your manual 0244250020000 - Starfrit and take your electronic device back in hand. On this page are published all the documents necessary for the use of your device. 0244250020000 by Starfrit.
USER MANUAL 0244250020000 Starfrit
natural_image
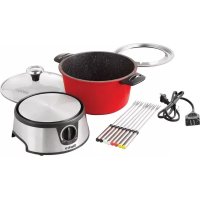
Top-down view of a red circular dish containing soup with visible ingredients like mushrooms, green onions, and red chili peppers (no text or symbols)ELECTRIC DUAL-SIDED HOT POT COOKWARE
MARMITE ÉLECTRIQUE HOT POT AVEC DIVISEUR
MARMITA ELÉCTRICA PARA FONDUE CON DIVISOR
INSTRUCTIONS FOR USE AND CARE P.2
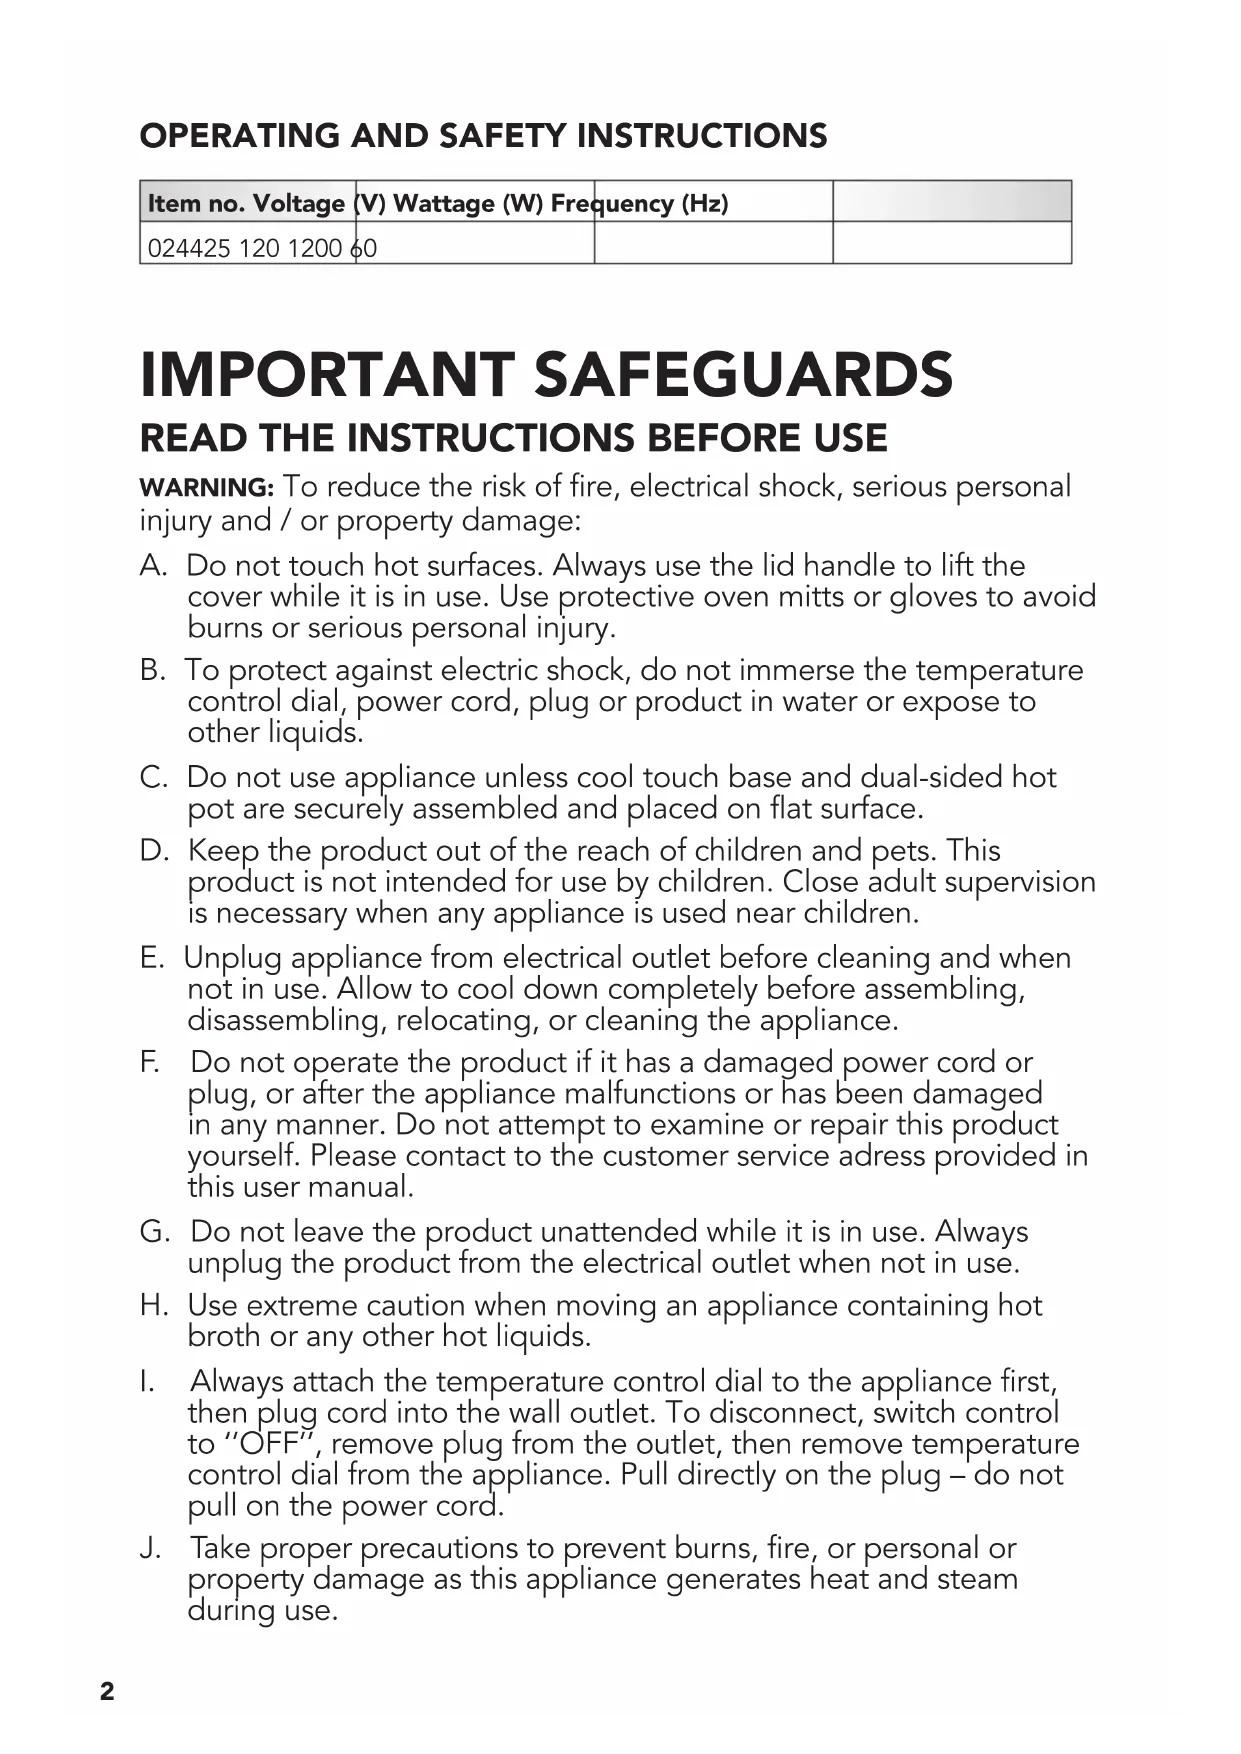
OPERATING AND SAFETY INSTRUCTIONS
| Item no. Voltage (V) Wattage (W) Frequency (Hz) | |||
| 024425 120 1200 60 | |||
IMPORTANT SAFEGUARDS
READ THE INSTRUCTIONS BEFORE USE
WARNING: To reduce the risk of fire, electrical shock, serious personal injury and / or property damage:
A. Do not touch hot surfaces. Always use the lid handle to lift the cover while it is in use. Use protective oven mitts or gloves to avoid burns or serious personal injury.
B. To protect against electric shock, do not immerse the temperature control dial, power cord, plug or product in water or expose to other liquids.
C. Do not use appliance unless cool touch base and dual-sided hot pot are securely assembled and placed on flat surface.
D. Keep the product out of the reach of children and pets. This product is not intended for use by children. Close adult supervision is necessary when any appliance is used near children.
E. Unplug appliance from electrical outlet before cleaning and when not in use. Allow to cool down completely before assembling, disassembling, relocating, or cleaning the appliance.
F. Do not operate the product if it has a damaged power cord or plug, or after the appliance malfunctions or has been damaged in any manner. Do not attempt to examine or repair this product yourself. Please contact to the customer service adress provided in this user manual.
G. Do not leave the product unattended while it is in use. Always unplug the product from the electrical outlet when not in use.
H. Use extreme caution when moving an appliance containing hot broth or any other hot liquids.
I. Always attach the temperature control dial to the appliance first, then plug cord into the wall outlet. To disconnect, switch control to "OFF", remove plug from the outlet, then remove temperature control dial from the appliance. Pull directly on the plug – do not pull on the power cord.
J. Take proper precautions to prevent burns, fire, or personal or property damage as this appliance generates heat and steam during use.
K. Do not plug or unplug the product into/from the electrical outlet with a wet hand.
L. Use the product in a well-ventilated area.
M. Keep the product away from curtains, wall coverings, clothing, dish towels, or other flammable materials.
N. Do not use attachments not recommended or sold by the product manufacturer.
O. This product is intended for indoor, non-commercial use in cooking or heating food items for human consumption. Do not use outdoors or for any other purpose.
P. Do not allow the power cord to hang (e.g., over the edge of a table or counter) or touch hot surfaces.
Q. Do not place the product on or near a hot gas or electric burner, or in heated oven or microwave oven.
R. Always place the product on a flat, level, stable surface – it is not recommended to use the appliance on temperature sensitive surfaces.
S. Use the provided temperature control dial only.
T. Connect the power plug to an easily accessible outlet so that the dual-sided hot pot can be unplugged immediately in the event of an emergency.
U. Do not use the appliance with a programmer or timing device that switches it on automatically. The use of such devices is dangerous and can cause a fire risk.
V. Do not use appliance for anything other than its intended use.
W. The appliance is not designed to deep fry.
SAVE THESE INSTRUCTIONS FOR FUTURE REFERENCE
GROUNDED PLUG: As a safety feature, this appliance is equipped with a grounded plug, which will only fit into a three-prong outlet. Do not attempt to defeat this safety feature. Improper connection of the grounding conductor may result in the risk of electric shock. Consult a qualified electrician if you are in doubt as to whether the outlet is properly grounded.
SPECIAL INSTRUCTIONS: A short power supply cord is provided to reduce the risk of becoming entangled in or tripping over a longer cord.
AN EXTENSION CORD MAY BE USED IF CARE IS EXERCISED IN THEIR USE:
- Minimize the risk of overheating by using the shortest UL or ETL listed cord possible.
- The marked electrical rating must be at least as great as that of the product.
-
Never use a single extension cord to operate more than one appliance.
-
If the product is of the grounding type, the extension cord must be a grounding-type 3-wire cord.
- Arrange the longer cord so that it will not drape over a countertop or tabletop where it can be tripped over, snagged, or pulled on unintentionally (especially by children).
DO NOT alter the plug. DO NOT attempt to defeat the safety purpose of the polarized plug.
BEFORE FIRST USE
Read the instructions before first use
WARNING: Do not touch hot surfaces. Always use the lid handle to lift the cover while it is in use. Use protective oven mitts or gloves to avoid burns or serious personal injury.
- When using for the first time, remove all packaging materials and unwind the power cord from the appliance.
- Thoroughly clean the dual-sided hot pot and tempered glass lid with a hot, soapy cloth/sponge, ensuring that water or soap does not enter the socket. The cord plug and temperature control dial are not dishwasher safe and cannot be immersed in water at any time.
- Rinse with hot water and thoroughly dry.
- Ensure the socket and electrical pins are completely dry before using.
TO ASSEMBLE
CAUTION: Ensure the temperature control dial is set to "OFF", the power cord is unplugged from the electrical outlet, and the product has thoroughly cooled before attaching or detaching the temperature control dial. Do not use appliance without the cool touch base well placed and attached.
- Locate the lid handle bag. To assemble the lid handle used a Philips-head screwdriver.
- Attach the lid handle to the tempered glass lid by aligning the hole in the lid handle with the hole in the tempered glass lid, and then secure with bolt the silicone washer and the metal washer together. NOTE: Do not over-tighten the bolt.
- Place the dual-sided hot pot inside the cool touch base. NOTE: Make sure the dual-sided hot pot and the cool touch base are well secure and properly placed.
- Plug the temperature control dial probe into the dual-sided hot pot.
WARNING: Ensure the electric dual-sided hot pot is unplugged from the electrical outlet and allow it to cool before handling or cleaning it.
text_image
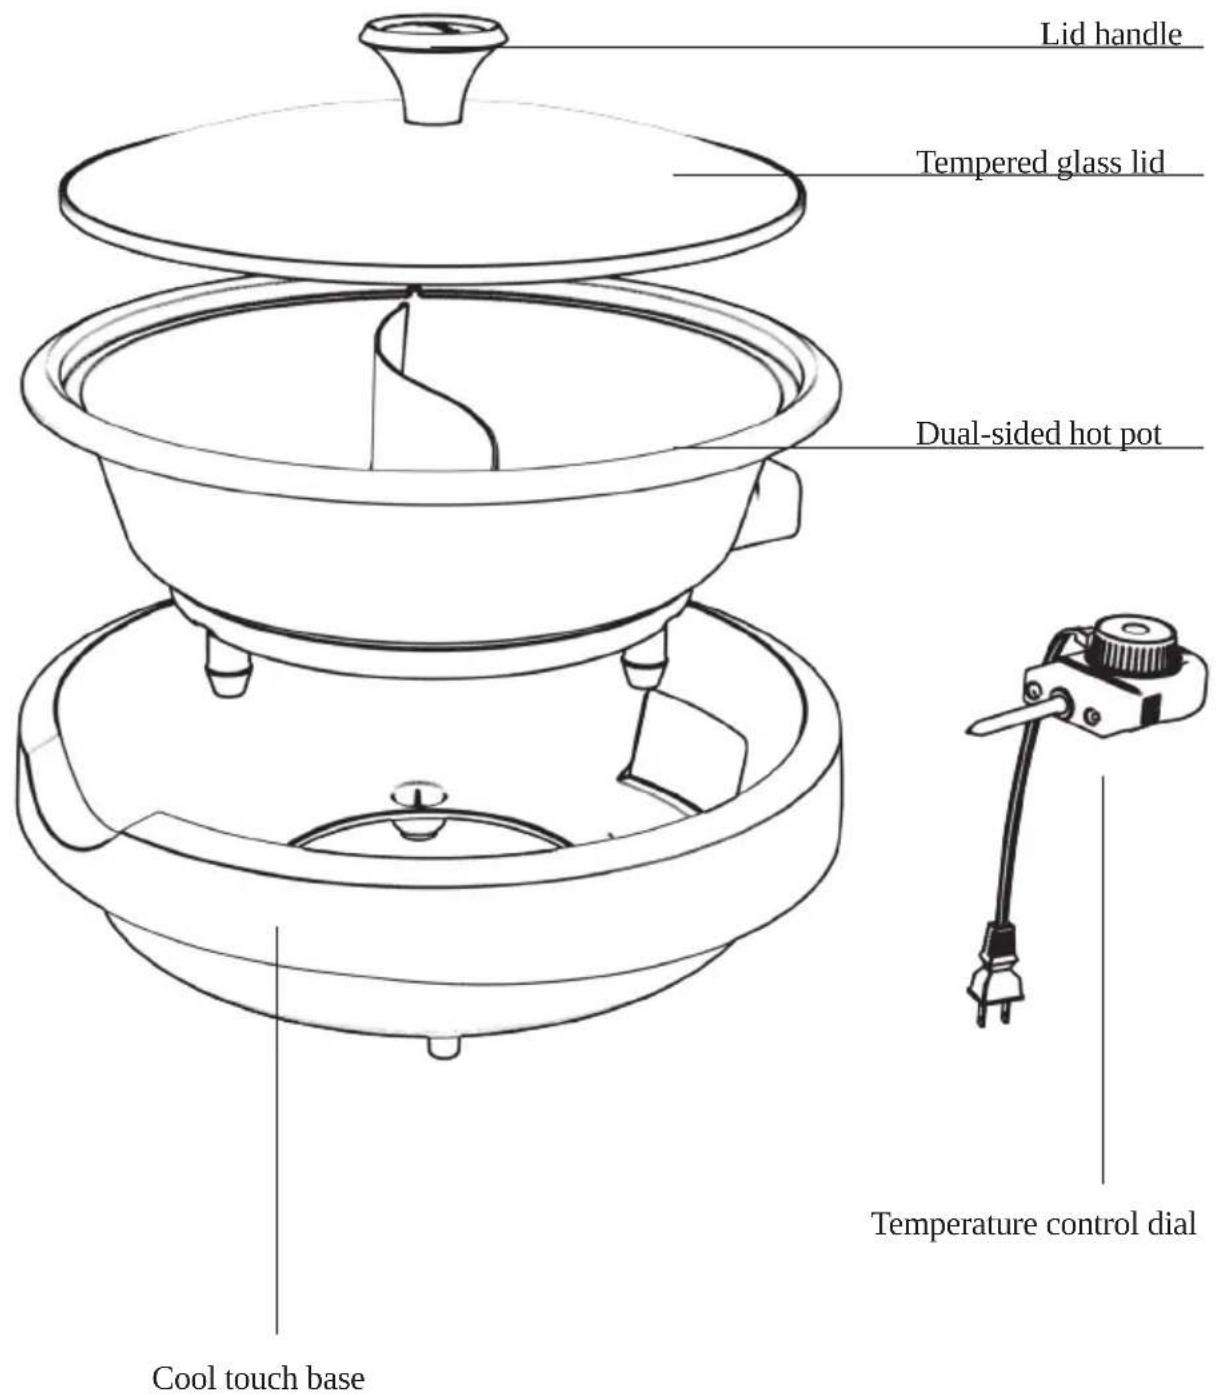
Lid handle Tempered glass lid Dual-sided hot pot Cool touch base Temperature control dialTO USE
NOTE: Never use metal utensils such as forks, knives, mashers, beaters, or food choppers with this product, as they will scratch the non-stick surface. Only use plastic, rubber, wooden, or silicone cooking utensils.
-
Place the cool touch base on a heat-resistant countertop or table in a well-ventilated area.
-
Place the dual-sided hot pot inside the cool touch base.
NOTE: Make sure the dual-sided hot pot and the cool touch base are well secure and properly placed.
-
Attach the temperature control dial to the socket by aligning the electrical pins in the socket with the electrical pinholes in the temperature control dial, and then slide the dial into position on the base.
-
Poor the broth inside the dual-sided hot pot. Place the tempered glass lid on top of the dual-sided hot pot.
CAUTION: To avoid any spillage or damage, never overfill the dual-sided hot pot.
NOTE: The broth may evaporate during the meal, add broth as needed.
-
Plug the power cord into a standard 120-volt AC electrical outlet.
-
Adjust the temperature control dial to the desired cooking temperature. The LED indicator will illuminate, indicating the product is heating.
NOTE: The LED indicator light may go out and back on during the cooking, it is normal. This is to control the temperature fluctuation and keep it stable.
- When the required temperature has been reached, spear the ingredient and gently dip in the broth of your choice.
NOTE: Cooking time may vary from type of food that you cook. Allow enough time to cook food in each broth.
-
Once cooking is complete, set the temperature control dial to the "OFF" position and then unplug the power cord from the electrical outlet.
-
To detach the temperature control dial, firmly pull away from the base.
NOTICE: Do not cook foods at a higher temperature than necessary, as cooking at high temperatures may cause discoloration or shorten the life of the non-stick surface.
NOTE: Due to the initial heating of the materials used in the manufacturing of the product, some light smoke/vapors may be released when used initially. This is normal.
WARNING: Always unplug the product when not in use or when it will be left unattended.
CAUTION: Use extreme caution when moving/handling the product when it is hot.
CLEANING & CARE
WARNING: Ensure that the appliance is completely cooled before cleaning. Remove the temperature control dial from the socket before cleaning the product.
- Drain excess liquid or wipe the interior of the dual-sided hot pot surface of the base with a paper towel.
- Thoroughly wipe the tempered glass lid and dual-sided hot pot of the product with a hot, soapy cloth/sponge, ensuring that water or soap does not enter the socket.
CAUTION: After use, do not pour cold water onto the product, as the sudden temperature change may damage the product or create a burn hazard.
NOTE: Do not place the dual-sided hot pot, cool touch base or temperature control dial in a dishwasher.
NOTE: Do not use bleach or abrasive cleansers/scouring pads to clean the product, as they may damage the non-stick finish.
-
Rinse with hot water and thoroughly dry.
-
Ensure the socket and electrical pins are completely dry before storing or resuming use.
-
If cleaning the temperature control dial is necessary, wipe with a soft, damp cloth sponge and dry thoroughly. NOTE: Do not immerse in water or place temperature control dial in a dishwasher.
-
Store the product in a cool, dry place.
| PROBLEM POTENTIAL CAUSES SOLUTIONS | ||
| The electric dual-sided hot pot will not turn on and begin heating. | The temperature control dial probe is not securely connected to dual-sided hot pot. | Make sure the temperature control dial probe is pushed firmly into the port on the cool touch base. If the problem persists, please contact Starfrit customerStarfrit.com/en/contact-us |
ASIAN RED CURRY BROTH
Ingredients
2 tsp vegetable oil
1 large sweet onion thinly sliced
8 cups Beef Stock (2 containers)
14 cup Thai Red Curry Paste
1 tbsp soy sauce
1 tbsp brown sugar
1 tbsp Garlic Powder
1 tbsp grounded Ginger
2 tbsp lime juice
In a large 6- quart stockpot
For the broth, heat vegetable oil in 6-quart stockpot over medium-high heat. Add onion, cook and stir until tender. Stir in stock, curry paste, soy sauce, brown sugar, garlic powder and ginger. Bring to boil. Reduce heat to low; cover and simmer 20 minutes. Stir lime juice into broth just before serving.

natural_image
Close-up of red liquid with scattered bright particles, possibly biological or chemical samples (no text or symbols visible)Using dual-sided electric hot pot
To serve; pour 3 cups (750ml) of broth into one half of dual-sided hot pot. Allow guests to cook in broth about 2 to 3 minutes or until desired doneness.
NOTE: do not overfill
ASIAN THAI CURRY BROTH
Ingredients
1 tbsp olive oil
5 cloves garlic, minced
1 inch fresh ginger, cut into thick slices
8 cups Vegetable Stock
3 (15 oz) cans coconut milk
4–6 tbsp Red Curry Paste, to taste
1 tsp grounded Ginger
2 tbsp lime juice
In a large 6- quart stockpot
For the broth, heat vegetable oil in 6-quart stockpot over medium-high heat. Add garlic, ginger and sauté for 1-2 minutes, stirring occasionally, until tender. Add in the vegetable stock and coconut milk, stir to combine. Continue cooking until the broth nearly reaches a simmer. Add in 3 or 4 tablespoons of the curry paste, whisk until it has dissolved. Taste, and you can add more curry pasta or coconut milk if you'd like. Before serving remove the thick ginger slices.

natural_image
Close-up of a bowl containing a sliced meat dish with white radish slices, garnished with green vegetables (no text or symbols visible)Using dual-sided electric hot pot
To serve; pour 3 cups (750ml) of broth into one half of dual-sided hot pot. Allow guests to cook in broth about 2 to 3 minutes or until desired doneness.
NOTE: do not overfill
SICHUAN BROTH
Ingredients
2 tbsp olive oil
8 cups beef/chicken/vegetable stock
4 cloves garlic
3 slices ginger
1 onion thinly sliced
14 cup Chinese Shaoxing wine (or dry sherry)
4 bay leaves
1 star anise
2 tbsp soy sauce
1 tsp salt
3 tbsp dried chili peppers flakes
Handful of whole dried chili peppers
1-2 tsp cayenne powder (optional)

natural_image
Close-up of a golden-brown fried food item with green leaf garnish (no text or symbols visible)In a large 6- quart stockpot
For the broth, heat vegetable oil in 6-quart stockpot over medium-high heat. Add garlic, ginger, onion and sauté for 1-2 minutes. Add in the chosen stock (beef/chicken/vegetable), stir to combine. Add the Chinese Shaoxing wine (or dry sherry), bay leaves and the whole star anise.
Continue cooking until the broth nearly reaches a simmer. Add in soy sauce and 3 tablespoons of dried chili pepper flakes, handful of whole dried chili peppers and whisk. Taste; you can add more dried chili or cayenne powder if you'd desired. Before serving remove the spices, garlic and slices
ginger.
Using dual-sided electric hot pot
To serve; pour 3 cups (750ml) of broth into one half of dual-sided hot pot. Allow guests to cook in broth about 2 to 3 minutes or until desired doneness.
NOTE: do not overfill
SUGGESTED INGREDIENTS
Thin shaved beef or lamb
Sliced chicken
Shrimps
Assorted fish balls (available at most Asian grocery stores)
Thin sliced fish fillets (tender white fish like tilapia or sea bass work well for this)
Tofu sheets
Firm tofu (sliced)
Soy puffs (fried tofu puffs)
Straw mushrooms
Shiitake mushrooms
Wood ear mushrooms
Fresh noodles
Glass noodles (mung bean vermicelli)
Prepared frozen dumplings or wontons
Chinese rice cakes
Bok choy (or choy sum)
Green leaf lettuce
Napa cabbage
WARRANTY
1-YEAR LIMITED WARRANTY.
This warranty covers any defects in materials and workmanship for a period of one (1) year from the date of the original purchase. Please retain your original receipt as a proof of the purchase date. Any complaints must be registered within the warranty period. The product will be repaired, replaced (parts including blades or entire appliance) or refunded at our sole discretion. Shipping charges may apply.
This warranty does not cover normal wear of parts or damage resulting from any of the following:
Negligent use or misuse of the product including failure to clean the product regularly, use for commercial purposes, accident, use on improper voltage or current, use contrary to the operating instructions, disassembly, repair or altercation by anyone other than a STARFRIT authorized service agent.
Decisions as to the cause of damage are the responsibility of Starfrit. All decisions will be final.
MODE D'EMPLOI ET CONSIGNES DE SÉCURITÉ
| No. article Tension (V) Puissance (W) Fréquence (Hz) | |
| 024425 120 1200 60 |
DIRECTIVES IMPORTANTES (LIRE LES INSTRUCTIONS AVANT D'UTILISER L'APPAREIL)
natural_image
Close-up of a red sauce with visible vapor droplets and dark sauce in a container (no text or symbols)natural_image
Close-up of a bowl of soup with sliced meat and garnish, no visible text or symbolsnatural_image
Close-up of a fluffy yellow food item with green leafy garnish (no text or symbols visible)natural_image
Close-up of red liquid with scattered bright spots, possibly food or biological samples (no text or symbols visible)natural_image
Close-up of a bowl of soup with sliced meat and garnish, no visible text or symbolsnatural_image
Close-up of a yellow, fluffy food item with green leafy garnish (no text or symbols visible)SUBSCRIBE TO THE NEWSLETTER TO LEARN MORE ABOUT OUR PROMOTIONS!
www. Starfrit.com
INSCRIVEZ-VOUS À L'INFOLETTRE POUR CONNAÎTRE NOS PROMOTIONS !

www.facebook.com/starfrit