
Moto 360 Camera - Camera MOTOROLA - Free user manual and instructions
Find the device manual for free Moto 360 Camera MOTOROLA in PDF.
| Product Type | 360° Camera (Moto Mod) |
| Brand | Motorola |
| Model | Moto 360 Camera (MD100S) |
| Category | Camera |
| Power | Powered by phone via Moto Mod connectors |
| Main Functions | Taking 360° photos and videos, live streaming, wide-angle mode, professional mode, cropping, filters, manual adjustments |
| Video Resolution | Adjustable (not specified) |
| Storage | Choice between phone memory and memory card (microSD) |
| Care and Cleaning | Clean the lenses with a soft, clean cloth to avoid dust and stains |
| Safety | Do not remove the 360 Camera by gripping the lens; always keep the lens cap on when the device is not in use to avoid scratches |
| Spare Parts and Repairability | Not mentioned; module not designed for user repair |
| Compatibility | Motorola phones compatible with Moto Mods |
| Required App | Motorola Camera app (built-in) |
| Physical Control | Back button for capture and power |
| Quick Gesture | Twist your wrist twice to turn on or switch between cameras |
| Viewfinder Modes | Immersive, split screen, mini-map |
| General Information | Trademark of Motorola; manufactured by Motorola Mobility LLC |
Frequently Asked Questions - Moto 360 Camera MOTOROLA
User questions about Moto 360 Camera MOTOROLA
0 question about this device. Answer the ones you know or ask your own.
Ask a new question about this device
Download the instructions for your Camera in PDF format for free! Find your manual Moto 360 Camera - MOTOROLA and take your electronic device back in hand. On this page are published all the documents necessary for the use of your device. Moto 360 Camera by MOTOROLA.
USER MANUAL Moto 360 Camera MOTOROLA
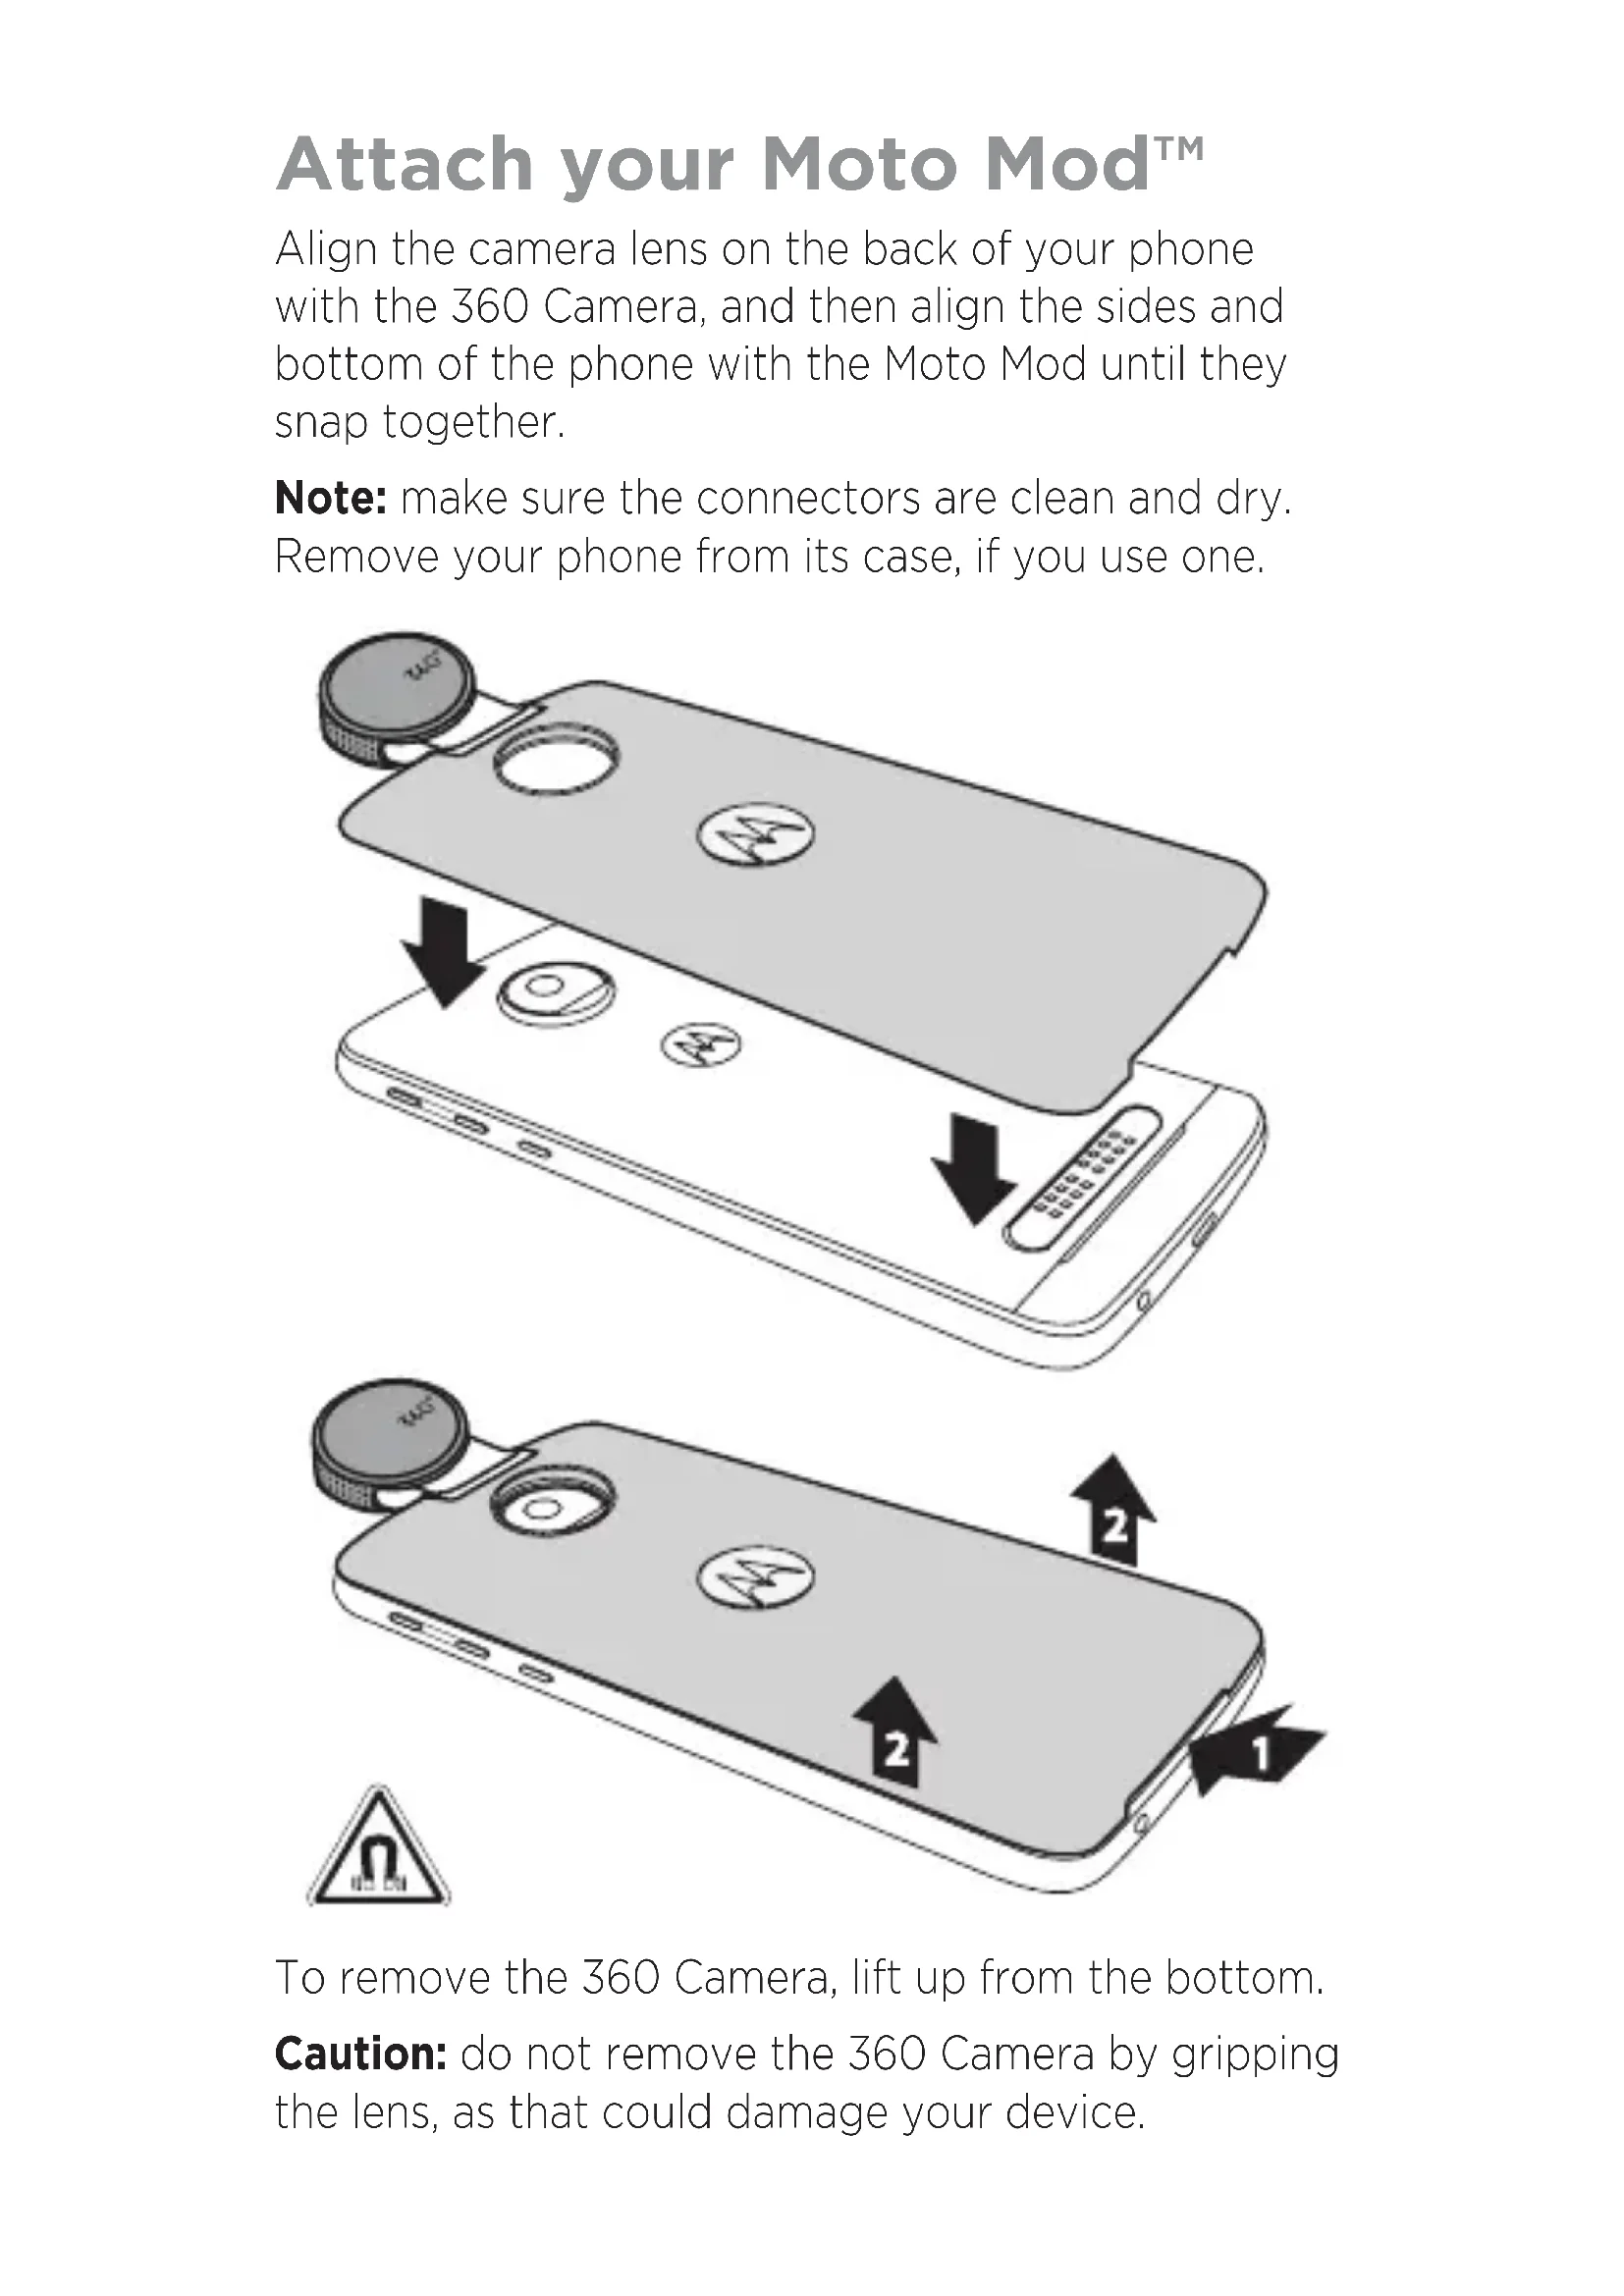
Attach your Moto Mod™
Align the camera lens on the back of your phone with the 360 Camera, and then align the sides and bottom of the phone with the Moto Mod until they snap together.
Note: make sure the connectors are clean and dry. Remove your phone from its case, if you use one.
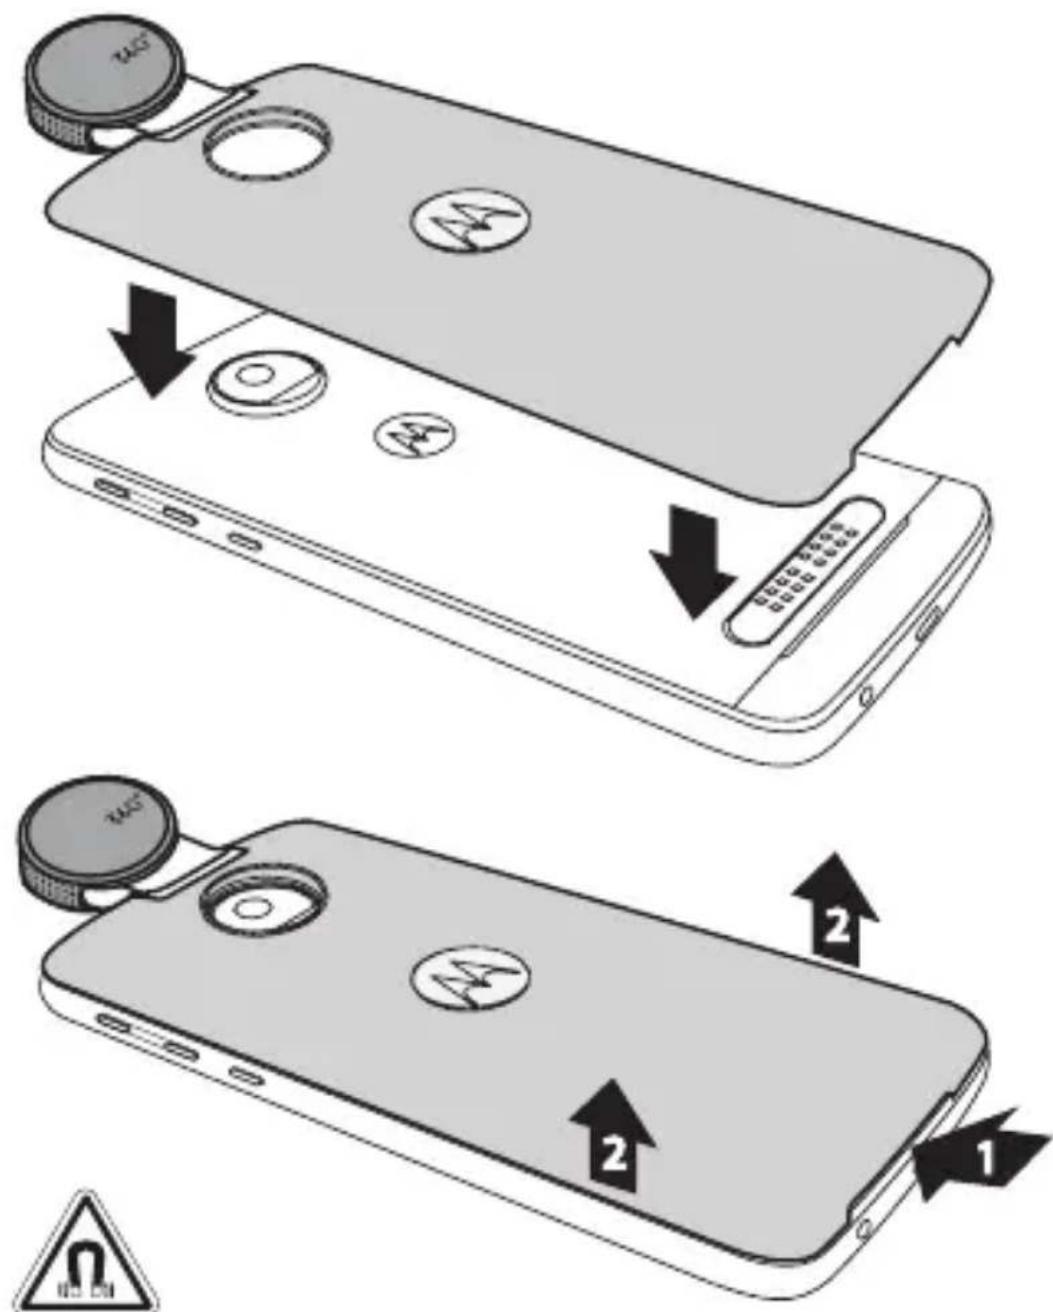
To remove the 360 Camera, lift up from the bottom.
Caution: do not remove the 360 Camera by gripping the lens, as that could damage your device.
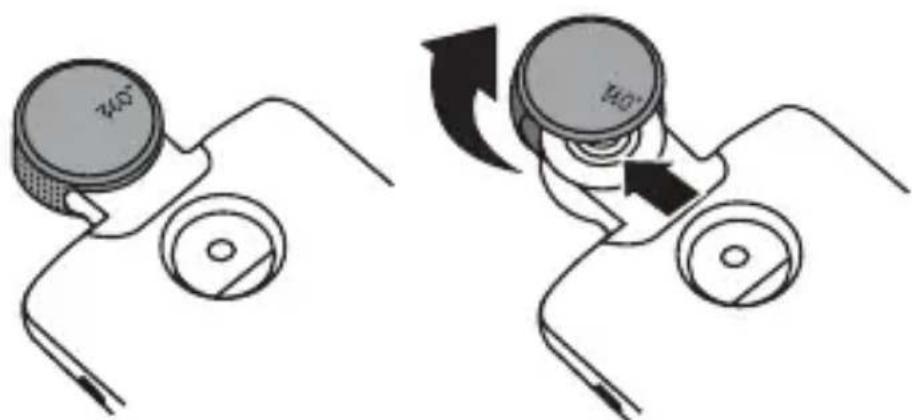
Remove the lens cover
To remove the lens cover, lift up and twist off.
natural_image
Diagram showing two mechanical components with rotating parts and directional arrows indicating motion (no text or symbols)Caution: to prevent lens scratches, always keep the lens cover on when you are not using your camera and do not lay your camera on a table or flat surface unless the lens cover is on.
Turn on the camera
There are several ways to turn the camera on:
- Two twists of your wrist open the 360 Camera. (Two more twists toggle through your regular phone cameras.)
- Press and hold the button on the back of the 360 Camera.
- Tap Camera on your home screen.
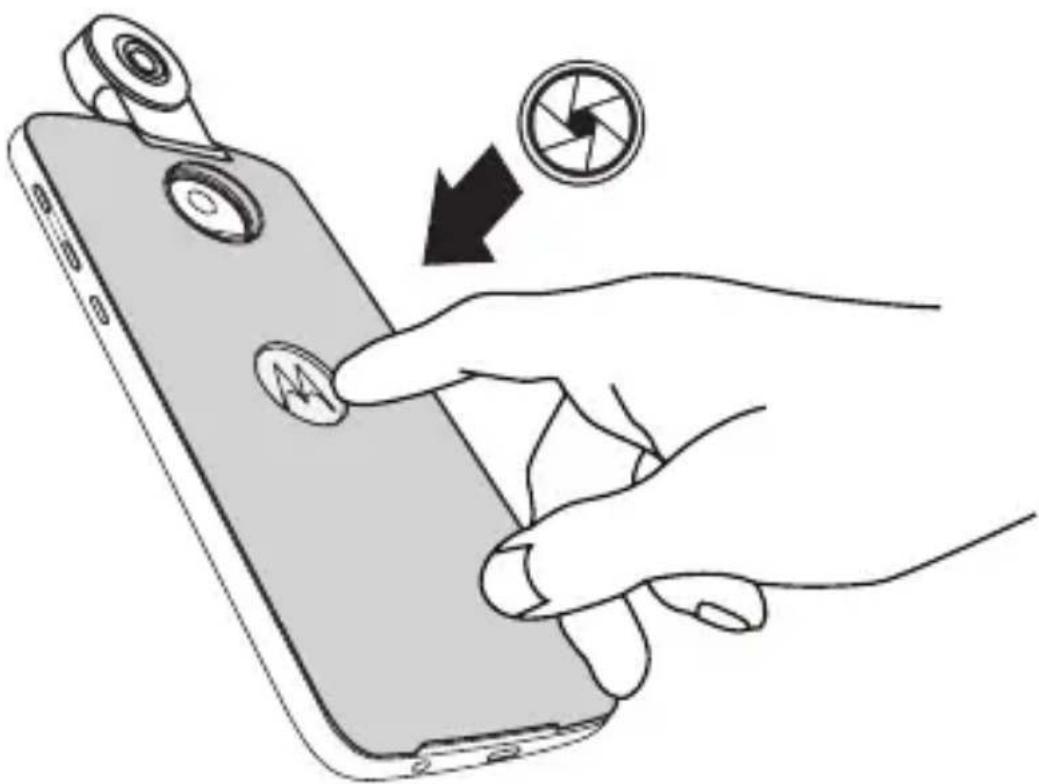
Take photos
To take a photo, tap the capture button on your camera screen or press the button on the back of your 360 Camera.
Note: for the best quality images, use a soft, clean cloth to keep the lenses free from dust and smudges.
Button options
| Short press • When the 360 Camera is on, a short press takes a photo. | |
| Press and hold | • Press and hold to turn on the 360 Camera.• When the 360 Camera is on, press and hold switches between video and photo modes. |
Choose settings
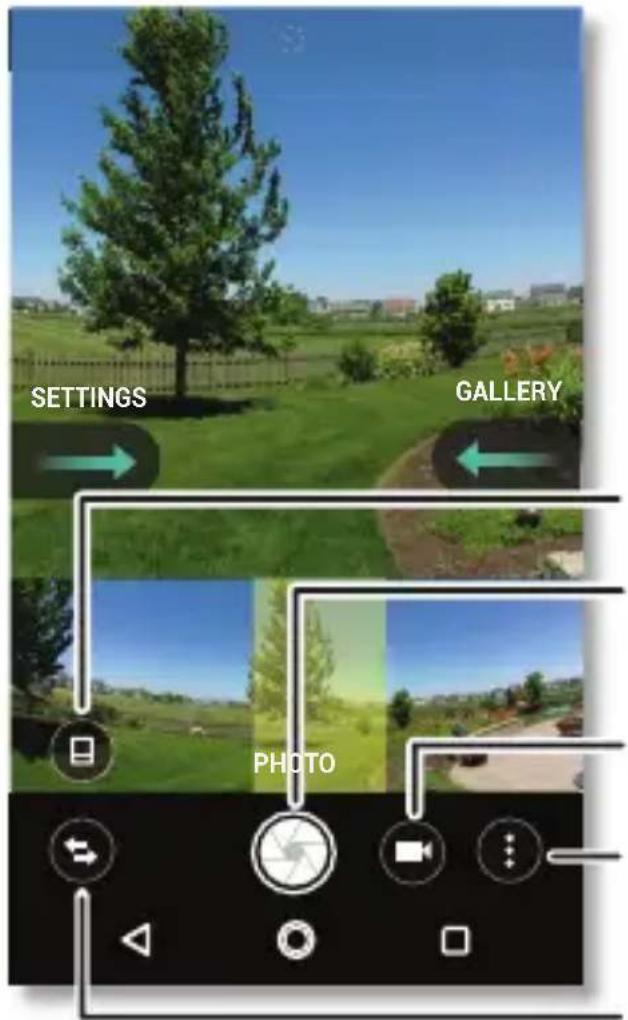
Change the viewfinder.
Take a photo.
Change to video.
Try other modes or go live on social media.
Switch to main phone cameras.
Viewfinder layout options
Choose a viewfinder layout. (This won't change your 360° photo or video.)
 Immersive Immersive | Get a fish-eye view of your subject. |
 Split screen Split screen | See front and back at the same time. |
 Mini map Mini map | A panorama across the bottom shows 360° with a focused view on top. The yellow highlight box marks where you are. |
 Switch camera Switch camera | Switch between rear and front ultra-wide angle modes. |
Photo & video options
To find these options, tap Menu: in the camera screen:
 Professional mode Professional mode | Control all camera photo settings manually. |
 Ultra-wide angle Ultra-wide angle | Take a wide-angle photo (not 360°). |
 Video Video | Take a 360° video. |
 Photo Photo | Take a 360° photo. |
 Go live Go live | Broadcast a live video to one of your social media accounts. |
Camera options
To find these options, swipe right on the screen:
| Shutter sound Turn the shutter sound on or off. | |
| Storage Choose a storage location for your photos and videos (Phone or Memory card). | |
| Quick capture Twist your wrist twice to open or switch between cameras. | |
| Save location Turn on to tag photos with a location. | |
| Video size Set the video resolution. | |
| Replay tutorial Learn more about your camera. |
Edit photos & videos
After you take a photo or video, swipe left to edit it. Or from your home screen, swipe up ↗ Photos.
- View or play: tap on a photo to open the 360° photo or tap on a video to play it.
Tip: when you view a 360^ photo or play a 360^ video, drag the screen around to see other parts of the video.
- Share or delete: tap to share, to delete, or Menu for more options.
Note: you can share a 360° photo or video via a platform that supports the 360° format such as Create link or Shared album (through Google Photos), Facebook or YouTube. If you share it as an attachment, the recipient may not be able to view the file correctly.
- Zoom: open a photo in your gallery, then double tap or drag two fingers apart or together on the screen.
Tip: turn your phone sideways for a landscape view.
- Edit: open a picture and tap, or open a video and tap. Editing options are at the bottom.
360° photo editing options
To find these options, tap

 | Crop a 360° photo into a standard-sized flat photo.Choose from standard sizes or custom dimensions, including a tiny planet view. |
 | Crop a 360° photo into an immersive 360° photo of the area you select. |
 | Choose from a variety of filters. |
 | Manually adjust the exposure, contrast, saturation and hue. |
360° video editing options
To find these options, tap

 | Crop the length of your video. |
 | Compile multiple 360° videos into a single video. |
 | Choose the most impressive parts of a 360° video and edit them together into a normal, non-interactive, 16:9 video viewable by anyone. |
 | Capture a frame of the video as a photo, either 360° or flat. |
Want more?
Go to www.motorola.com/mymotomods for tutorials, videos and more.
Copyright & trademarks
Motorola Mobility LLC 222 W. Merchandise Mart Plaza Chicago, IL 60654 www.motorola.com
Certain features, services and applications are network-dependent and may not be available in all areas; additional terms, conditions and/or charges may apply. Contact your service provider for details.
All features, functionality and other product specifications, as well as the information contained in this guide, are based upon the latest available information and believed to be accurate at the time of printing. Motorola reserves the right to change or modify any information or specifications without notice or obligation.
Note: the images in this guide are examples only.
MOTOROLA, the stylised M logo, MOTO and the MOTO family of marks are trademarks or registered trademarks of Motorola Trademark Holdings, LLC. LENOVO is a trademark of Lenovo. Google, Android, Google Play and other marks are trademarks of Google Inc. microSD Logo is a trademark of SD-3C, LLC. All other product or service names are the property of their respective owners. © 2017 Motorola Mobility LLC. All rights reserved.
Product IDs: Moto Mods 360 Camera (MD100S) Manual Number: SSC8C19882-A

motorola
360 CAMERA
Options de bouton
Tastenoptionen
natural_image
Two diagrams showing a device with circular components and directional arrows indicating motion (no text or symbols)Opzioni del tasto
natural_image
Two diagrams showing a device with two circular components and directional arrows indicating motion (no text or symbols)Opciones del botón
natural_image
Diagram showing two mechanical components with rotating parts and directional arrows indicating motion (no text or symbols)Opciones del botón
natural_image
Two diagrams showing a device with circular components and directional arrows indicating motion (no text or symbols)Knappalternativ
natural_image
Diagram showing two mechanical components with rotating parts and directional arrows indicating motion (no text or symbols)Painikevalinnat
natural_image
Two diagrams showing a device with circular components and directional arrows indicating motion (no text or symbols)Knappalternativer
natural_image
Two diagrams showing a device with two circular components and directional arrows indicating motion (no text or symbols)Düğme seçenekleri
natural_image
Two diagrams showing a device with circular components and directional arrows indicating motion (no text or symbols)Knapindstillinger
Chemistry Integrations (360)
خيرات الأزرار