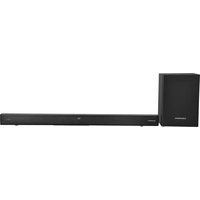
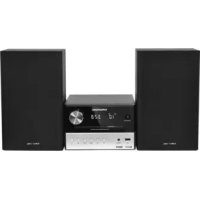
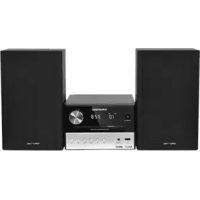
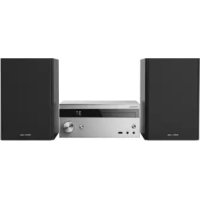
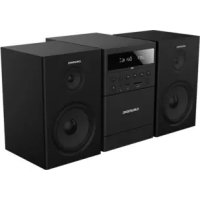
MF 2000 BT - Hi-Fi System GRUNDIG - Free user manual and instructions
Find the device manual for free MF 2000 BT GRUNDIG in PDF.
| Product Type | Hi-Fi System |
| Brand | Grundig |
| Model | MF 2000 BT |
| Dimensions (W × H × D) | 450 × 228 × 124 mm |
| Weight | 2.61 kg |
| Power Supply | 100-240 V ~, 50/60 Hz |
| Rated Power Consumption | 25 W |
| Standby Power Consumption (ECO) | ≤ 0.5 W |
| Output Power (RMS) | 2 × 20 W |
| Speaker Impedance | 6 Ω |
| Signal-to-Noise Ratio (Amplifier) | ≥ 55 dBA |
| FM Tuner | 87.5 - 108.0 MHz |
| Bluetooth | Version 5.0 (2402-2480 MHz, max power 13 dBm) |
| CD Player | CD-DA, CD-R, CD-RW (MP3/WMA) |
| USB Port | USB 2.0 (FAT 32/16, up to 1 A) |
| Auxiliary Input | LINE IN (3.5 mm jack) |
| Main Functions | FM Radio (RDS), CD, USB, Bluetooth, MP3/WMA player, equalizer, timer, clock, sleep timer |
| Laser Classification | Class 1 |
| Maintenance and Cleaning | Unplug before cleaning; use a dry cloth; do not use abrasive products |
| Safety | Do not open the casing; keep out of reach of children (batteries); do not expose to moisture or excessive heat |
Frequently Asked Questions - MF 2000 BT GRUNDIG
User questions about MF 2000 BT GRUNDIG
0 question about this device. Answer the ones you know or ask your own.
Ask a new question about this device
Download the instructions for your Hi-Fi System in PDF format for free! Find your manual MF 2000 BT - GRUNDIG and take your electronic device back in hand. On this page are published all the documents necessary for the use of your device. MF 2000 BT by GRUNDIG.
USER MANUAL MF 2000 BT GRUNDIG
natural_image
Exterior view of a black electronic device labeled 'GRUNDIG' (no additional text or symbols visible)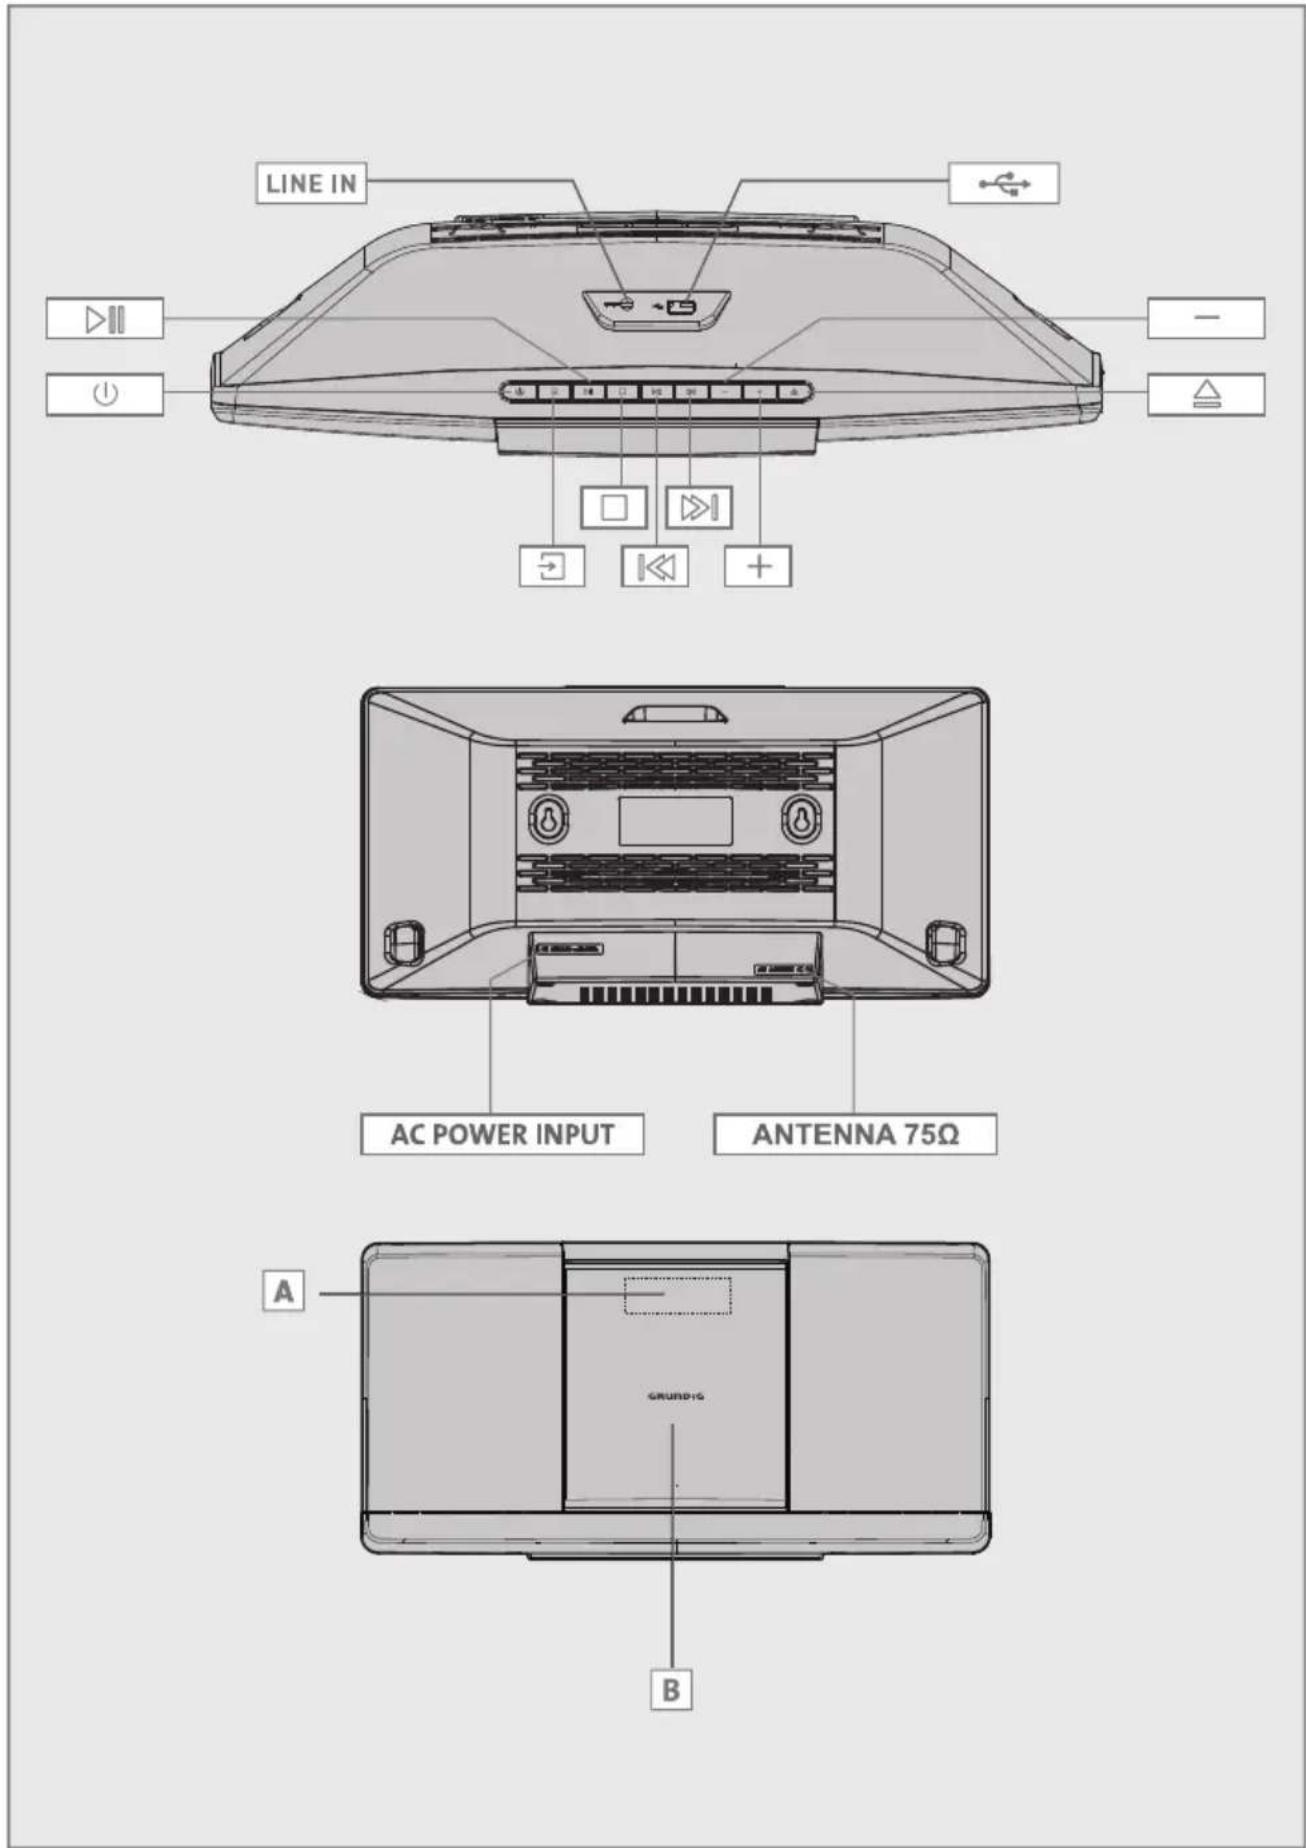
text_image
LINE IN AC POWER INPUT ANTENNA 75Ω GRUND-1G A B
text_image
STanDBY CLOCK SLEEP SOURCE SleeP/TIMeR DIMMER MEMORY REPEAT PRG INFO RePeaT/InFO MeMORY/PROG FaST ReWinD/ PReVIOUS FaST FORWaRD/ neXT PlaY/ PaUSe FOLD-FOLD+ RANDOM RanDOM FOID- FOID+ TUNE-TUNE-AUTO STOP/aUTO TUne-/10- 10- 10+ TUne+/10+ VOIUMe - VOL + eQ EQ MUTe GRUNDIG Micro HiFi SystemenGlish 06-18
eSPaÑOI 19-33
POISKI 34-47
FRanÇaIS 48-61
Please note the following instructions:
■ The hi-fi system is designed for the playback of audio signals. All other uses are expressly prohibited.
If you want to set up the hi-fi system on wall shelves or in cupboards, please ensure that it is adequately ventilated. There must be at least 10 cm of space at the side, above and behind the hi-fi system.
- Do not cover the hi-fi system with newspapers, table cloths, curtains, etc.
- When setting up the hi-fi system, remember that furniture is often coated with various types of varnish and plastic, which often contain chemical additives. These additives may cause corrosion to the feet of the unit. This may leave stains on the surface of the furniture which can be difficult or impossible to remove.
If the hi-fi system is exposed to sudden changes in temperature, for example when taken from the cold into a warm room, wait at least two hours before using it.
■ The hi-fi system is designed for use in dry rooms. If you do use it outdoors, make sure it is protected from moisture such as dripping or splashing water.
■ Only use the hi-fi system in a moderate climate.
- Do not place the hi-fi system close to heating units or in direct sunlight, as this will impair cooling.
- Do not place any vessels containing liquids, such as vases, on the hi-fi system.
- Do not insert any foreign objects in the CD compartment.
- Do not place any objects such as burning candles on the hi-fi system.
If malfunctions occur due to brief mains overloads or static electricity charges, reset the device. To do this, pull out the power plug and connect it again after a few seconds.
- Do not open the hi-fi system casing under any circumstances. Warranty claims are excluded for damage resulting from improper handling.
■ Attention should be drawn to the environmental aspects of battery disposal.
DO NOT INGEST THE BATTERY, CHEMICAL BURN HAZARD.
■ Thunderstorms are a danger to all electrical devices. Even if the hi-fi system is switched off, it can be damaged by a lightning strike to the mains. Always remove the power plug during a thunder storm.
- Do not expose the battery to extreme heat, such as for example sunlight, radiators, fire, etc.
■ The remote control contains a battery (AAA,1.5V). Please always keep the remote control and the battery (AAA,1.5V) out of reach of children.
If the battery (AAA,1.5V) is accidentally swallowed, it can lead to burns and even death within two hours. You should therefore see a doctor immediately.
- Keep new and used batteries out of reach of children. If the battery compartment cannot be closed safely, do not continue to use the device and keep out of reach of children..
■ CAUTION: Danger of explosion if battery is incorrectly replaced. Replace only with the same or equivalent type.
Prolonged listening with the headphones at loud volumes can damage your hearing.
■ The MAINS plug or an appliance coupler is used as the disconnect device, the disconnect device shall remain readily operable.

CAUTION
RISK OF ELECTRIC SHOCK DO NOT OPEN


This lightning flash with arrowhead symbol within an equilateral triangle is intended to alert the user to the presence of non-insulated "dangerous voltage" within the product's enclosure that may be of sufficient magnitude to constitute a risk of electric shock.
WARNING: To reduce the risk of electric shock, do not remove cover (or back) as there are no user-serviceable parts inside. Refer servicing to qualified personnel.

The exclamation point within an equilateral triangle is intended to alert the user to the presence of important operating and maintenance instructions in the literature accompanying the appliance.
WARNING: Please refer the information on exterior bottom enclosure for electrical and safety information before installing or operating the apparatus.
Note:
- Do not connect any other equipment while the device is switched on. Also switch off the other equipment before connecting it.
■ Only plug the device into the mains socket after you have connected the external devices. Make sure the mains plug is freely accessible.
Caution: high-frequency radiation
The device must be registered and operated in accordance with this operating manual. The device has an integrated antenna; it must be operated with other antennas or transmitters.
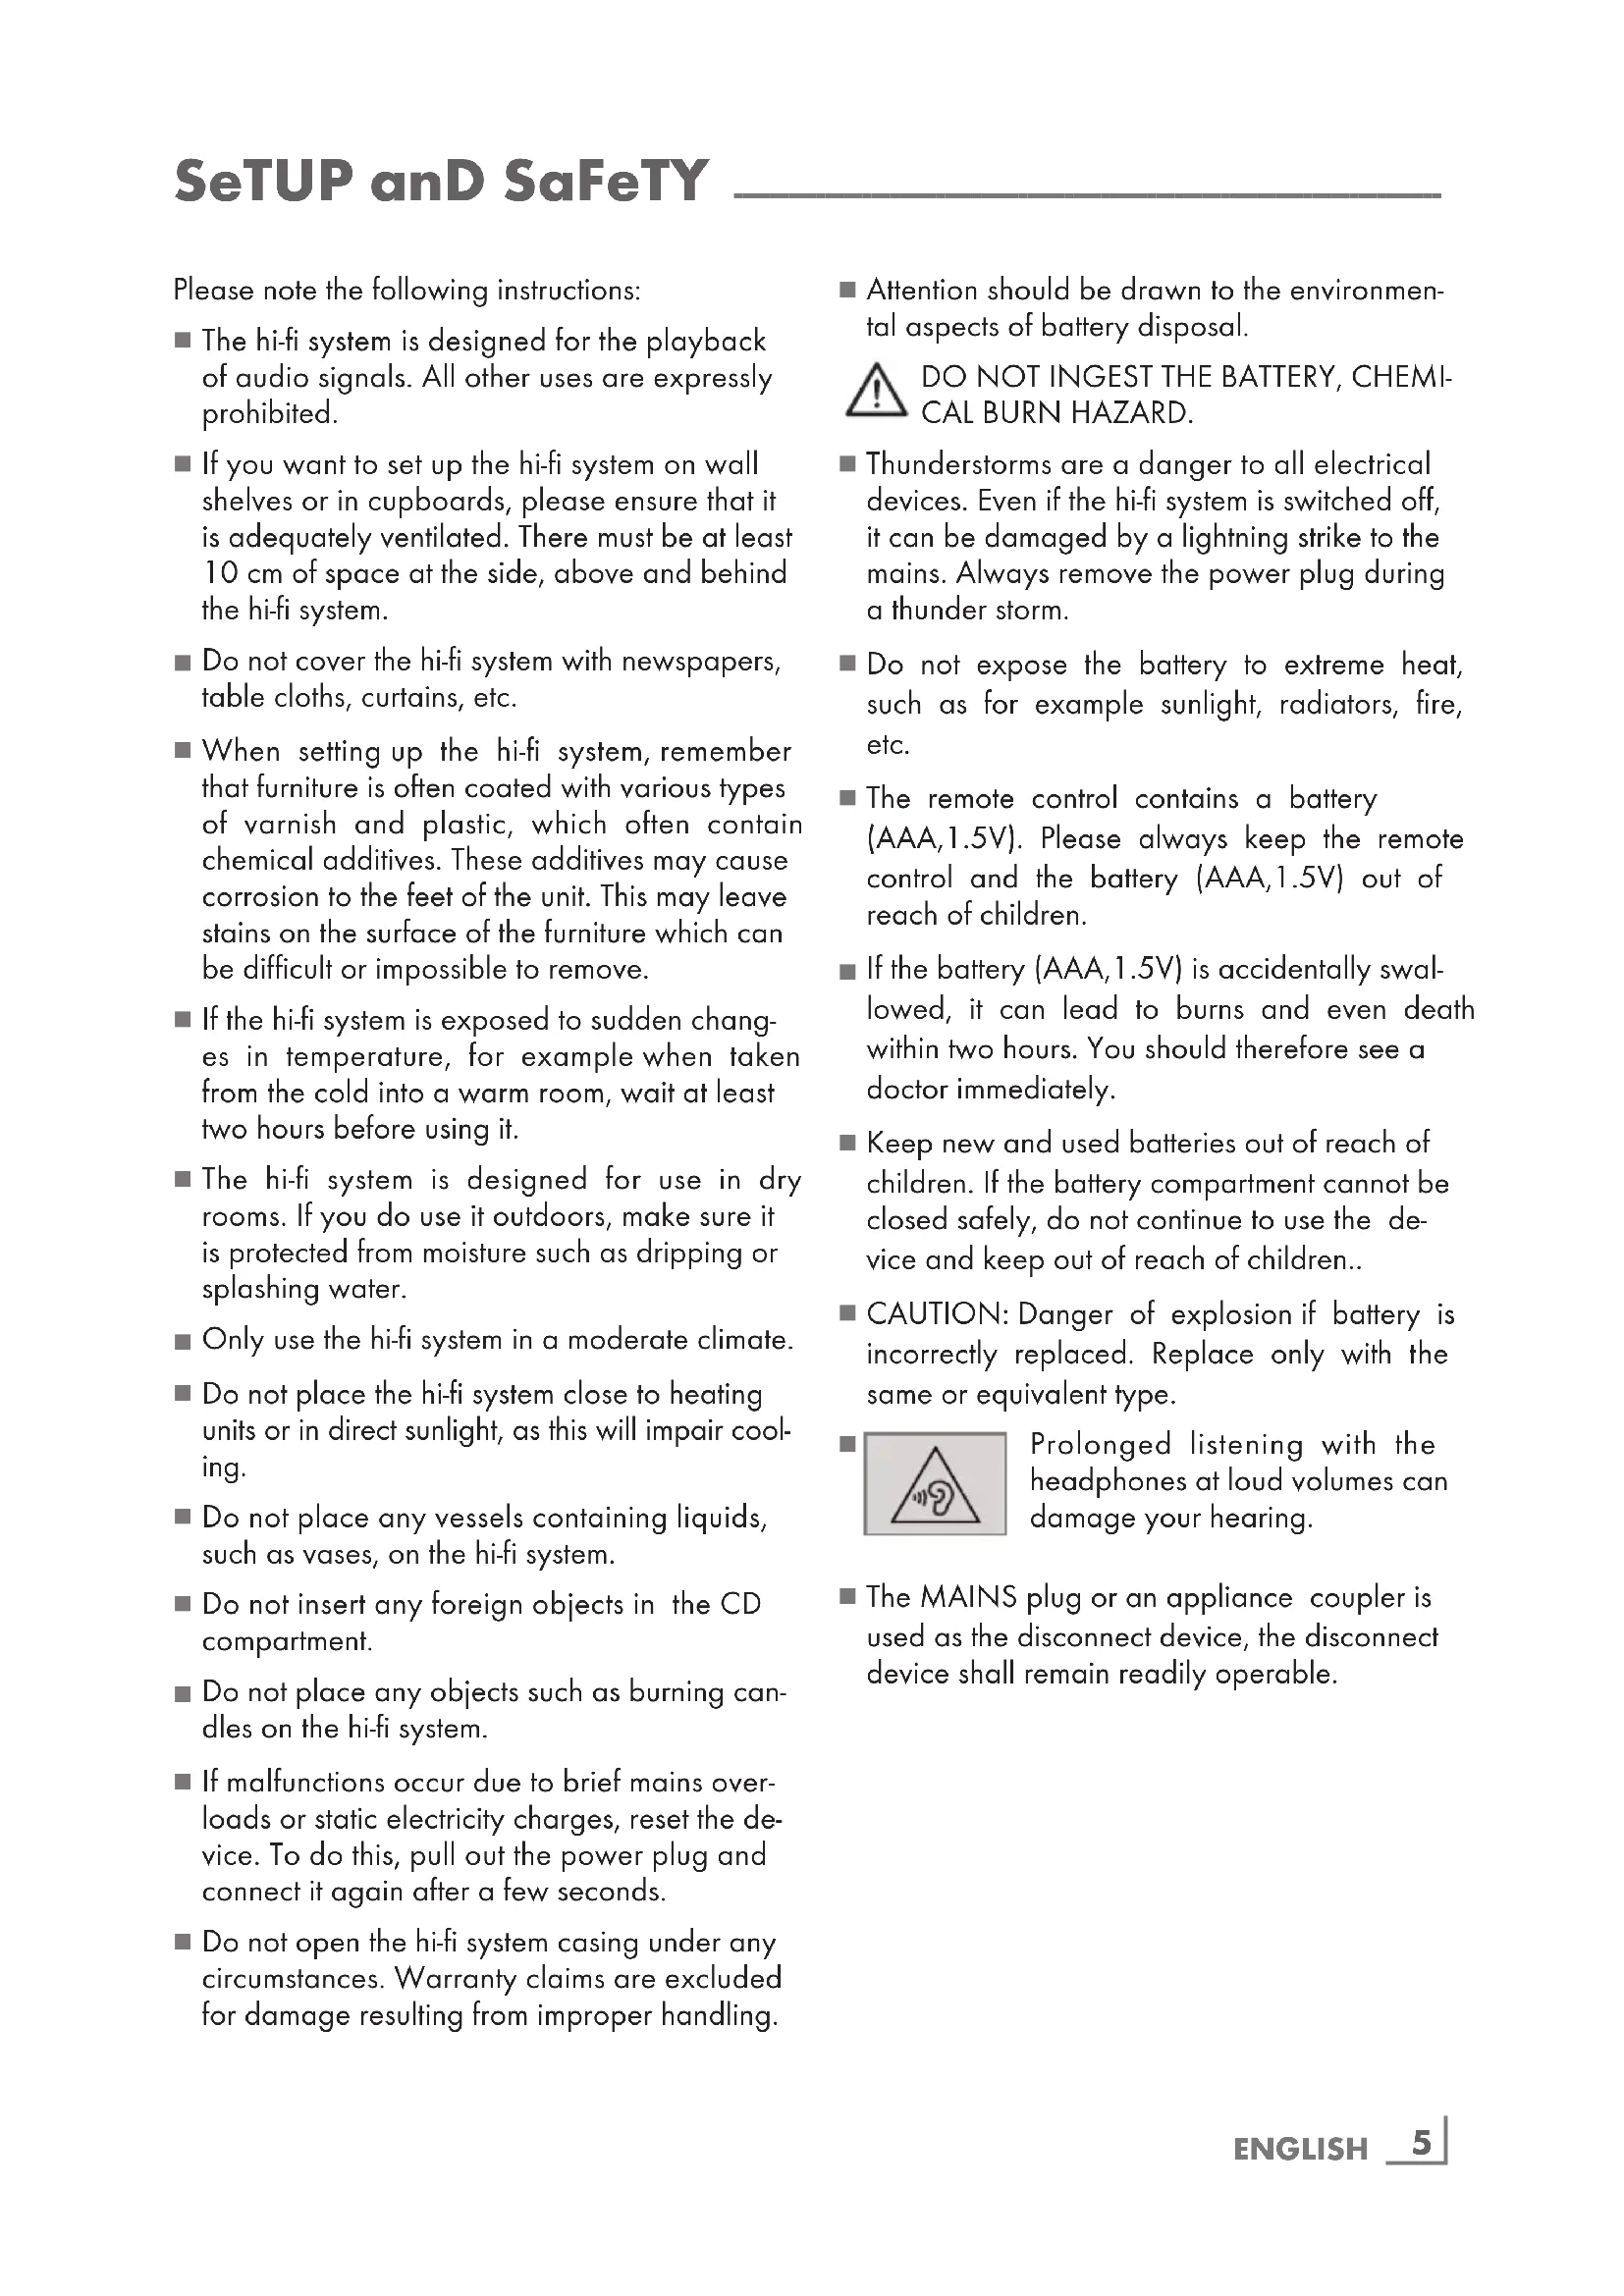
The hi-fi system controls
See the figure on page 3.
The front of the device

Display screen.

Opens and closes the CD compartment.

Press briefly to switch the device in and out of standby mode.

CD compartment.

Adjusts the audio volume.

Adjusts the audio volume.


In tuner mode: select preset channels.
In external data media mode: forward or reverse track selection.
In standby and timer mode: to set hours/minutes.

In external data media mode:
starts and pauses playback.

In external data media mode: ends playback.

Press repeatedly to switch among in FM, LINE IN, BT, DISC, USB mode.
LINE IN
Audio signal input for connecting an external device.


USB port type A for connecting a USB memory stick or an MP3 player.
The back of the device
AC POWER INPUT
ANTENNA
75 Ω
Antenna socket for the auxiliary antenna or the roof antenna supplied.
The remote control

Switches the hi-fi system to standby mode and from standby mode to the last input source selected.

Opens and closes the CD compartment.
SOURCE
Switches between FM, LINE IN, BT, DISC, USB mode.
TUNE +/-
Increases / decreases the frequency.
In tuner mode: press and hold down to start the reverse or forwards frequency search; press briefly to change the frequency backwards or forwards in steps.
STOP/AUTO
In external data media mode: stop a playback.
In tuner mode: long press to do auto scanning for the broadcasting radio channels, press it again to stop auto scanning.
MEMORY/PROG
In external data media mode: activates the Create playlist function; stores the track when creating a playlist.
SLEEP/TIMER
Activates sleep timer mode, sets the time for the sleep timer.
In standby and timer mode: press and hold to enter into alarm timer setting mode.
RANDOM
Play tracks in random order.
DIMMER
Adjust the display brightness of the display screen.
REPEAT/ INFO
In external data media mode: to repeat a track, the CD, the album or the playlist; In external data mode: to long Press "INFO" to turn off ID3 information or turn on ID3 tag.
CLOCK
Setting the time.

In external data media mode: select tracks forwards or backwards.
In standby and timer mode: for setting the hours/ minutes.

In external data media mode: search for a certain passage forwards or backwards.

In external data media mode an
in Bluetooth mode: starts play-back; pauses playback.
In Bluetooth mode: Press and hold down to disconnect the connection to the Bluetooth auxiliary device.

Switches the hi-fi system speakers to and from mute mode.

Adjust the volume.
10 + / - Increases / decreases by each press ten tracks.

Skips to next or returns to previous folder.

Switches to equalizer mode.
Connecting the antenna
1 Plug the roof antenna cable into the antenna socket »FM ANTENNA« on the hi-fi system.
Note:
If no roof antenna is available, use the auxiliary antenna supplied. When suitably positioned and with adequate signal, this antenna provides adequate reception of FM channels. Do not shorten the auxiliary antenna.
Connecting an MP3 player or a USB memory stick
Caution:
■ The hi-fi system must be switched off while the USB connection is being made. If it is not switched off, data can be lost.
1 Connect the USB interface of the MP3 player to the » ↩ ↕ « socket of the hi-fi system with a standard USB cable;
or
insert the USB plug of the USB memory stick into the USB interface » ◆ « of the hi-fi system.
Connecting external devices
Note:
■ Switch the hi-fi system off before you connect external devices.
1 Use standard audio cables to connect the audio outputs of the external device to the »LINE IN« sockets on the hi-fi system.
Connecting the power cord
Notes:
- Check that the mains voltage on the type plate (on the rear of the hi-fi system) corresponds to your local mains supply. If this is not the case, contact your specialist dealer.
■ All the other devices/loudspeakers must be connected before you connect the power cord.
1 Plug the power cord into the wall socket.
Caution:
■ The hi-fi system is connected to the mains with the power cord. Pull out the power plug if you want to completely disconnect the hi-fi system from the mains.
■ Make sure the power plug is easily accessible during operation and not hindered by other objects.
Loading or Changing the remote control battery
1 Remove the battery compartment cover on the back of the remote control.
2 Load or change one AAA/1.5V battery into the battery compartment making sure that the battery has been inserted with the correct polarities matching the symbols +, - as indicated inside the battery compartment.
3 Replace the cover.
Notes:
- Do not expose the batteries to extreme heat, caused for example by direct sunlight, heaters or fire.
■ Remove the batteries when they are flat or when you know that the hi-fi system will not be used for a long period of time. The manufacturer accepts no liability for damage caused by leaking batteries.
Environmental note:
■ Batteries, including those which do not contain heavy metal, should not be disposed of with household waste. Always dispose of used batteries in accordance with local environmental regulations.
Automatic station search for FM radio stations
After connecting the hi-fi system to the mains power for the first time, you can start the automatic station search.
1 Switch on the hi-fi system by pressing » ⏻ « on the device or » ⏻ « or » SOURCE « on the remote control to switch to the FM mode.
2 Activate the automatic station search by pressing and holding » □ «.
- The device searches for up to 40 stations with strong reception and stores them automatically. After the search has finished, you will hear the station stored at preset 01.
Notes:
- You can cancel the automatic station search by pressing » □«.
Setting and storing radio stations manually
1 Set the radio station by briefly pressing
- Display: the frequency changes in steps of 50 kHz;
or
» TUNE- « until the frequency changes to rapid run-through.
2 Save a radio station as a preset by pressing » MEMORY/PROG «, se-
3 To search and save more radio stations, repeat steps 1 to 2.
Selecting the tuner input source
1 Select the TUNER input source by pressing »SOURCE« on the remote control.
- The most recently selected station is played (Last Station Memory).
Selecting presets
1 Select a preset by pressing » « or » « on the remote control to switch to the FM mode.
Displaying RDS station information
If the device receives an RDS station, the station name appears in the display together with »RDS«. If no information is available, the reception frequency appears in the display.
Additional information can be displayed.
1 To display information on the current RDS station, press »INFO« repeatedly.
- The following displays appear in sequence: The name of the radio station.
The current programme type (PTY), e.g. »Pop music«. »[No PTY]« appears if information is not available.
The time.
The radio text.
The frequency.
ECO Mode
The hi-fi system switches to standby in the ECO mode after 15 minutes. This lowers the power consumption to below 0.5 W.
1 In ECO mode, press »CLOCK« once.
- The clock is displayed. The device switches back to ECO mode after 15 minute.
2 In ECO mode, press and hold down » ⏻ « for two seconds.
- The device switches to standby, the clock is displayed.
- The device switches back to ECO mode after 15 minutes.
In order to prevent injuries, the hi-fi system must be securely fasten to the wall in accordance with the below installation instructions.
Caution:
■ The ground must be firm and capable of handling the load.
■ Use mountings that are appropriate for the weight of the device.
■ For wooden or hollow wall structures use suitable plugs and screws. Seek advice from a specialist dealer.
Warning:
In order to prevent injuries, the device must be securely fastened to the wall in accordance with the installation instructions.
Note:
■ Installation of the hi-fi system MF 2000 BT for professional use (e.g. in a bistro) must only be carried out by an electrically qualified person, in accordance with the applicable construction regulations as per VDE 0100.
1 Drill the two holes (about 6mm diameter) in the wall and keep the distance between drill holes of the sound bar is 181.2mm (Diagram 1).

text_image
181,2mm(Diagram 1)
2 Insert the two plugs supplied into two drilled holes and then insert two screws supplied into two holes and tighten (Diagram 2).

natural_image
Diagram of a brick wall with two bolt holes and two separate cylindrical components (no text or symbols)(Diagram 2)
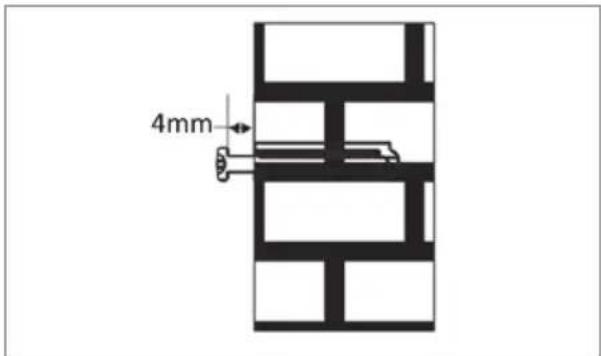
3 Take care to leave 4 mm between the screw heads and wall (Diagram 3).
text_image
4mm(Diagram 3)
4 Use the assembled hi-fi system to hang on the setscrews on the wall (Diagram 4).

natural_image
Diagram of a car interior showing front and rear views with a brick wall panel and ventilation grilles (no text or symbols)(Diagram 4)
Switching on and off
The only way to disconnect the hi-fi system from the mains supply is to pull out the plug.
1 Switch on the hi-fi by pressing » ⏻ « on the device.
- The last input source used is automatically selected.
Note:
■ The hi-fi system can also be switched on by pressing » △ on the remote control.
2 Switch the hi-fi system to standby mode by pressing » ⏻ «.
Automatic switch-off
The device switches off automatically after 15 minutes in standby mode if:
- the device is in the stop position;
- there is no audio signal detected at the »LINE IN« socket;
- the Bluetooth auxiliary devices is not sending an audio signal.
To use the device, switch it back on.
Adjusting the volume
1 Press» - VOL+ « on the hi-fi system or press» - VOL+ « on the remote control to change the volume.
Muting
You can switch the hi-fi speakers to and from mute mode with this function.
1 Activate mute with » « on the remote control.
2 Deactivate mute with » « on the remote control.
Time Setting
1 To set the time, your micro system must be in standby mode first. Then press and hold the » CLOCK « button for about 2 seconds.
- Display: » 24 H «.
- Display: current time.
- SYNC ON: The time is synchronized through RDS signal.
- SYNC OFF: The time isn't synchronized through RDS signal.
Notes:
■ Some RDS stations transmits an RDS time signal. If the selected RDS station transmits time information, the time can be set automatically.
Press » INFO « repeatedly until the time is displayed. The » ROS CLK « display means that the time signal is not yet received. Wait for the time to display.
■ The time must be reset after a power outage or after disconnecting the device from the main line.
Alarm Setting
To program the alarm, your micro system must first be in standby mode. Then press the »TIMER« button on your remote control and hold it down for about 2 seconds.
- Display: » TIMER «.
2 Proposal and display of the different alarm programs: »DISC», »USB« or »TUNER«. Press the button » ««« or »» and confirm using the »TIMER« button.
- Hours tick.
3 Select the time by pressing button »« or »» and confirm using the »TIMER« button.
- Minutes tick.
4 Set the minutes by pressing button » « or » and confirm using the » TIMER « button.
- Volume settings blink.
5 The volume displays » VOL 10 «. Adjust the volume by pressing button » ◀◀ « or » ▶ and confirm using the » TIMER « button.
- You can adjust the volume between »VOL 01« and »VOL 31«.
- You can adjust the alarm duration among "DUR 15, DUR 30, DUR 45, DUR 60".
6 The symbol » ⏻ « will then display on the right screen of the minutes to confirm the programming of the alarm.
Note:
If you want to disable the alarm, press the »TIMER« button on the remote control once and the alarm symbol » ⏻ « will disappear from the screen.
Using CDs

text_image
COMPACT DISC DIGITAL AUDIOThe device is suitable for music CDs displaying the logo shown here (CD-DA) and for CD-Rs and CD-RWs with audio data.

text_image
(MPa)■ The device cannot play CD-ROM, CD-I, CDV, VCD, DVD or computer CDs.
In MP3/WMA mode, the terms "album" and "file" are very important. "Album" corresponds to a folder on a PC, "file" to a file on a PC or a CD-DA track. An MP3/WMA CD may not contain more than 999 tracks/folders in total.
- When burning CD-R and CD-RWs with audio files, various problems may arise which could lead to problems with playback. This can be caused by faulty software or hardware settings or by the CD being used. Should such problems arise, contact the customer services of your CD burner or software manufacturer or look for relevant information, for example on the Internet.
■ When you are making audio CDs, observe all legal guidelines and ensure that the copyright of third parties is not infringed.
■ Always keep the CD compartment closed to prevent dust from collecting on the laser optics. The CD compartment closes automatically after a short time.
- Do not attach adhesive labels to CDs. Keep the surfaces of CDs clean.
■ You can play standard 12 cm CDs as well as 8 cm CDs on your device. An adapter is not necessary.
Operation with an MP3 player or USB memory stick
The » « socket is not compatible with USB hubs and cannot be connected directly to a PC.
The USB interface of this device is a standard interface. All currently-known MP3 chip concepts were taken into account when it was developed. Due to rapid progress in MP3 technology and new manufacturers appearing every day, the compatibility of MP3 players/USB memory sticks can only be partially guaranteed.
If USB operation is impaired or is not possible, this does not indicate a malfunction of the device.
■ Bi-directional data transfer as defined for ITE devices in EN 55022/EN 555024 is not possible.
■ USB transfer is not in itself an operating mode. It is only an additional function.
■ Never remove a MP3 player/USB memory stick during playback. This can result in damage to the data and the devices.
No warranty claims are accepted for damage incurred as a result of this.
Inserting/connecting music data media
Inserting the disc
1 Press » △ to open the CD compartment.
- The CD compartment opens.
2 Put in the disc with its label facing upwards.
3 Press » △ « to close the CD compartment.
- The disc is read.
- Display in MP3/WMA mode: the total number of albums and tracks.
- Display in CD-DA mode: the total number of tracks and the total playing time.
4 Playback starts automatically.
Connecting an MP3 player or a USB memory stick
1 Switch the device to standby mode by pressing » ⏻ «.
2 Connect the USB interface of the MP3 player to the » ↩ ↙ ↖ socket of the hi-fi system with a standard USB cable;
or
insert the USB plug of the USB memory stick into the USB interface » ◆ « of the hi-fi system.
3 Switch on the device from standby by pressing ».
- Display: the total number of albums and tracks.
Selecting the input source
1 Select the input source (»CD« or »USB«) by pressing »SOURCE«.
- Playback starts automatically.
Note:
If no data medium is inserted/connected, the message »NO DISC« or »NO USB« appears.
Playback
Pausing and resuming playback
1 Press » ▷ to pause playback.
- Display: the playing time flashes.
2 Resume playback with » ▷III «.
- Display: number of folders and tracks or track information and the elapsed playing time.
Resuming playback
1 Pause playback by selecting another input source or press » ⏻ «.
- If you select the data medium again, play-back continues from the point at which it stopped.
Stopping playback
1 To stop playback, press » □.
- When playback starts again, it begins from the first track.
Repeating the current track
1 Press » REPEAT « briefly during playback.
Selecting another track or folder
When you play music CDs, you can select the track; when you play MP3/WMA files, you can also select folders.
1 Press » « or » » repeatedly during play-back until the number of the track you want appears in the display;
or
select the folder by pressing » FOLD + / -«, then select the track with » | « or » «»
- Playback of the selected track starts automatically.
Searching for a passage within a track
During playback, press » « or » « and hold down until the passage has been found.
Displaying track information (for MP3/WMA)
If information about the artist, album and track are available on the data medium, this is displayed (ID3 tag).
1 Long Press » INFO « to turn off ID3 information or turn on ID3 tag.

Bluetooth®
Compatible with the following devices
Your MF 2000 BT can be connected to any commercially available Bluetooth-compatible devices that comply with the A2DP standard. This includes smartphones, laptops and tablet PCs, for example.
Selecting the Bluetooth input source
1 Select the Bluetooth input source by pressing »SOURCE« on the remote control.
- Display: »PAIRING«.
Finding and connecting a Bluetooth auxiliary device
1 Activate the Bluetooth function on the Bluetooth auxiliary device.
2 Start the search function on the Bluetooth auxiliary device.
- After a short time, your MF 2000 BT will be displayed on the Bluetooth auxiliary device.
3 Select the »Grundig MF 2000« on the Bluetooth auxiliary device and connect to it.
4 When the Bluetooth auxiliary device is connected to your device, »BT« is displayed on the MF 2000 BT.
Note:
- Your MF 2000 BT can only receive and play the audio signal from one Bluetooth device; however, up to 6 Bluetooth auxiliary devices can be logged on.
Activating a Bluetooth auxiliary device that is logged on
Notes:
■ You only have to log Bluetooth auxiliary devices on once.
- When the Bluetooth auxiliary device leaves and then moves back into signal range of the MF 2000 BT, the auxiliary device logs on automatically.
■ The MF 2000 BT automatically connects to the last Bluetooth auxiliary device that was logged on.
If the Bluetooth auxiliary device is not recognised, it has to be activated again via its own menu.
Playback from the Bluetooth auxiliary device
1 Start playback on the Bluetooth auxiliary device.
2 Set the preferred volume with the control knob on the hi-fi system or press »— VOL+ « on the remote control.
3 End playback on the Bluetooth auxiliary device.
Notes:
■ Various functions can also be controlled on the MF 2000 BT.
press » ▷ III « again to resume playback; press » ▶ to select the previous track and » ▷ for the next track.
Note that the data transmission range can be as much as 9 m, depending on the Bluetooth device that is used and the structure of the building.
Compliance with the WEEE Directive and Disposing of the Waste Product:
This product complies with EU WEEE Directive (2012/19/EU). This product bears a classification symbol for waste electrical and electronic equipment (WEEE).
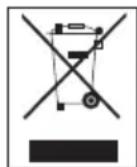
This symbol indicates that this product shall not be disposed with other household wastes at the end of its service life. Used device must be returned to official collection point for recycling of electrical and electronic devices. To find these collection systems please contact to your local authorities or retailer where the product was purchased. Each household performs important role in recovering and recycling of old appliance. Appropriate disposal of used appliance helps prevent potential negative consequences for the environment and human health.
Compliance with RoHS Directive
The product you have purchased complies with EU RoHS Directive (2011/65/EU). It does not contain harmful and prohibited materials specified in the Directive.
Package information

Packaging materials of the product are manufactured from recyclable materials in accordance with our National Environment Regulations. Do not dispose of the packaging materials together with the domestic or other wastes. Take them to the packaging material collection points designated by the local authorities.
Technical data

This device is noise-suppressed according to the applicable EU directives. This product fulfils the European directives 2014/53/
EU, 2009/125/ EC and 2011/65/EU.
You can find the CE declaration of conformity for the device in the form of a pdf file on the Grundig Homepage www.grundig.com/downloads/doc.

This equipment is a Class II or double insulated electrical appliance. It has been designed in such a way that it does not require a safety connection to electrical earth.
The type plate is located on the rear of the hi-fi system.
System
Power supply
Operating voltage: 100 - 240 V\~
Mains frequency: 50/60 Hz
Rated power consumption: 25 W
Power consumption (ECO mode): ≤ 0.5 W
Amplifier unit
Output:
Sine wave power: 2 x 20 W
Loudspeaker impedance: 6 Ω
Signal-to-noise ratio: ≥ 55 dBA
Receiver unit
Reception range: FM: 87.5 ...108.0 MHz
BT MAX. Transmitted power: 13dBm
BT Frequency: 2402MHz - 2480MHz
BT Firmware version: 120201
BT Hardware version: V01A
CD unit
Frequency response: 50 Hz ... 20 kHz
Noise voltage ratio: ≥ 60 dBA
MP3/WMA
Folder and track:
Max. 256 folders and 999 tracks per CD
File system/folder management:
ISO 9660 Level 1 compatible
USB
USB 2.0 for FAT 32/16 format
USB Output: 5V—1A max
Power consumption of standby (ECO)
mode: <0.5 W
The period of time after which the power management function switches the equipment automatically into the condition providing standby mode: 15 minutes.
The power consumption if all wireless network ports are activated:
7.7 W.
Dimensions and weight
Device dimensions:
W x H x D : 450 X 228 X 124mm
Device weight:
2.61 kg
Technical and design modifications are reserved.
General information on laser devices
CLASS 1
LASER PRODUCT
This device is a CLASS 1 LASER PRODUCT.
This means that the laser is designed in
such a way as to ensure that the maximum permissible emission value cannot be exceeded under any circumstances.
Caution:
If operating devices or methods other than those specified here are employed, it may lead to dangerous exposure to emissions.
This device emits laser radiation. Because of the danger of eye injuries, the unit may only be opened or serviced by trained personnel.
If settings other than those stated here are used or other procedures are carried out, this may lead to dangerous exposure to radiation.
natural_image
Diagram of a brick wall with two cylindrical objects below, no text or symbols present(Diagrama 2)
natural_image
Diagram of a car backrest showing the front panel and wall-mounted panel, with no text or symbols present.(Diagrama 4)
Encendido y apagado
text_image
COMPACT DISC DIGITAL AUDIOUso de CD
FM: 87.5 ...108.0 MHz
natural_image
Diagram of a brick wall with two bolt holes and two separate cylindrical components (no text or symbols)(Rysunek 2)
natural_image
Diagram of a car interior showing front and rear views with labeled fixtures (no text or symbols present)(Rysunek 4)
natural_image
Diagram of a brick wall with two separate screw fasteners (no text or symbols)(Diagramme 2)
natural_image
Diagram of a car interior showing front and rear views with a brick wall panel and ventilation grilles (no text or symbols)(Diagramme 4)
text_image
COMPACT DISC DIGITAL AUDIOCLASSE 1 PRODUIT LASER