MS 300 - Hi-Fi System GRUNDIG - Free user manual and instructions
Find the device manual for free MS 300 GRUNDIG in PDF.
| Product type | Micro Hi-Fi System (Micro Hi-Fi) |
| Brand | Grundig |
| Model | MS 300 |
| Dimensions (main unit) | 150 x 220 x 200 mm (WxHxD) |
| Dimensions (speaker) | 140 x 220 x 150 mm (WxHxD) |
| Net weight (main unit) | 1.5 kg |
| Net weight (speakers) | 2.2 kg (1.1 kg x 2) |
| Power supply | AC 220-240 V ~ 50/60 Hz |
| Power consumption | 20 W (max), standby < 1.0 W |
| Amplifier output power | 20 W (max total) |
| Speaker impedance | 4 Ω x 2 |
| Supported audio formats (USB/SD) | MP3, WMA, WAV, FLAC (up to 48 kHz/16 bit) |
| Max USB/SD capacity | 64 GB, 980 folders, 8500 files |
| Bluetooth | Version 4.2, range approx. 8 m, profiles A2DP/AVRCP |
| FM radio | 87.5 – 108.0 MHz, 40 presets |
| Cassette player | Yes, recording and playback |
| Special functions | Alarm, sleep timer, equalizer (Pop/Rock/Classic/Flat), brightness adjustment |
| Remote control | Range 6 m, angle 30°, batteries 2 x AAA 1.5 V |
| Maintenance | Clean with a soft, dry cloth; do not use solvents |
| Safety | Double insulation (Class II), do not expose to water, do not block ventilation |
| Availability of spare parts | Accessories available for at least 5 years |
| Environmental compliance | WEEE, RoHS, recyclable packaging |
Frequently Asked Questions - MS 300 GRUNDIG
User questions about MS 300 GRUNDIG
0 question about this device. Answer the ones you know or ask your own.
Ask a new question about this device
Download the instructions for your Hi-Fi System in PDF format for free! Find your manual MS 300 - GRUNDIG and take your electronic device back in hand. On this page are published all the documents necessary for the use of your device. MS 300 by GRUNDIG.
USER MANUAL MS 300 GRUNDIG
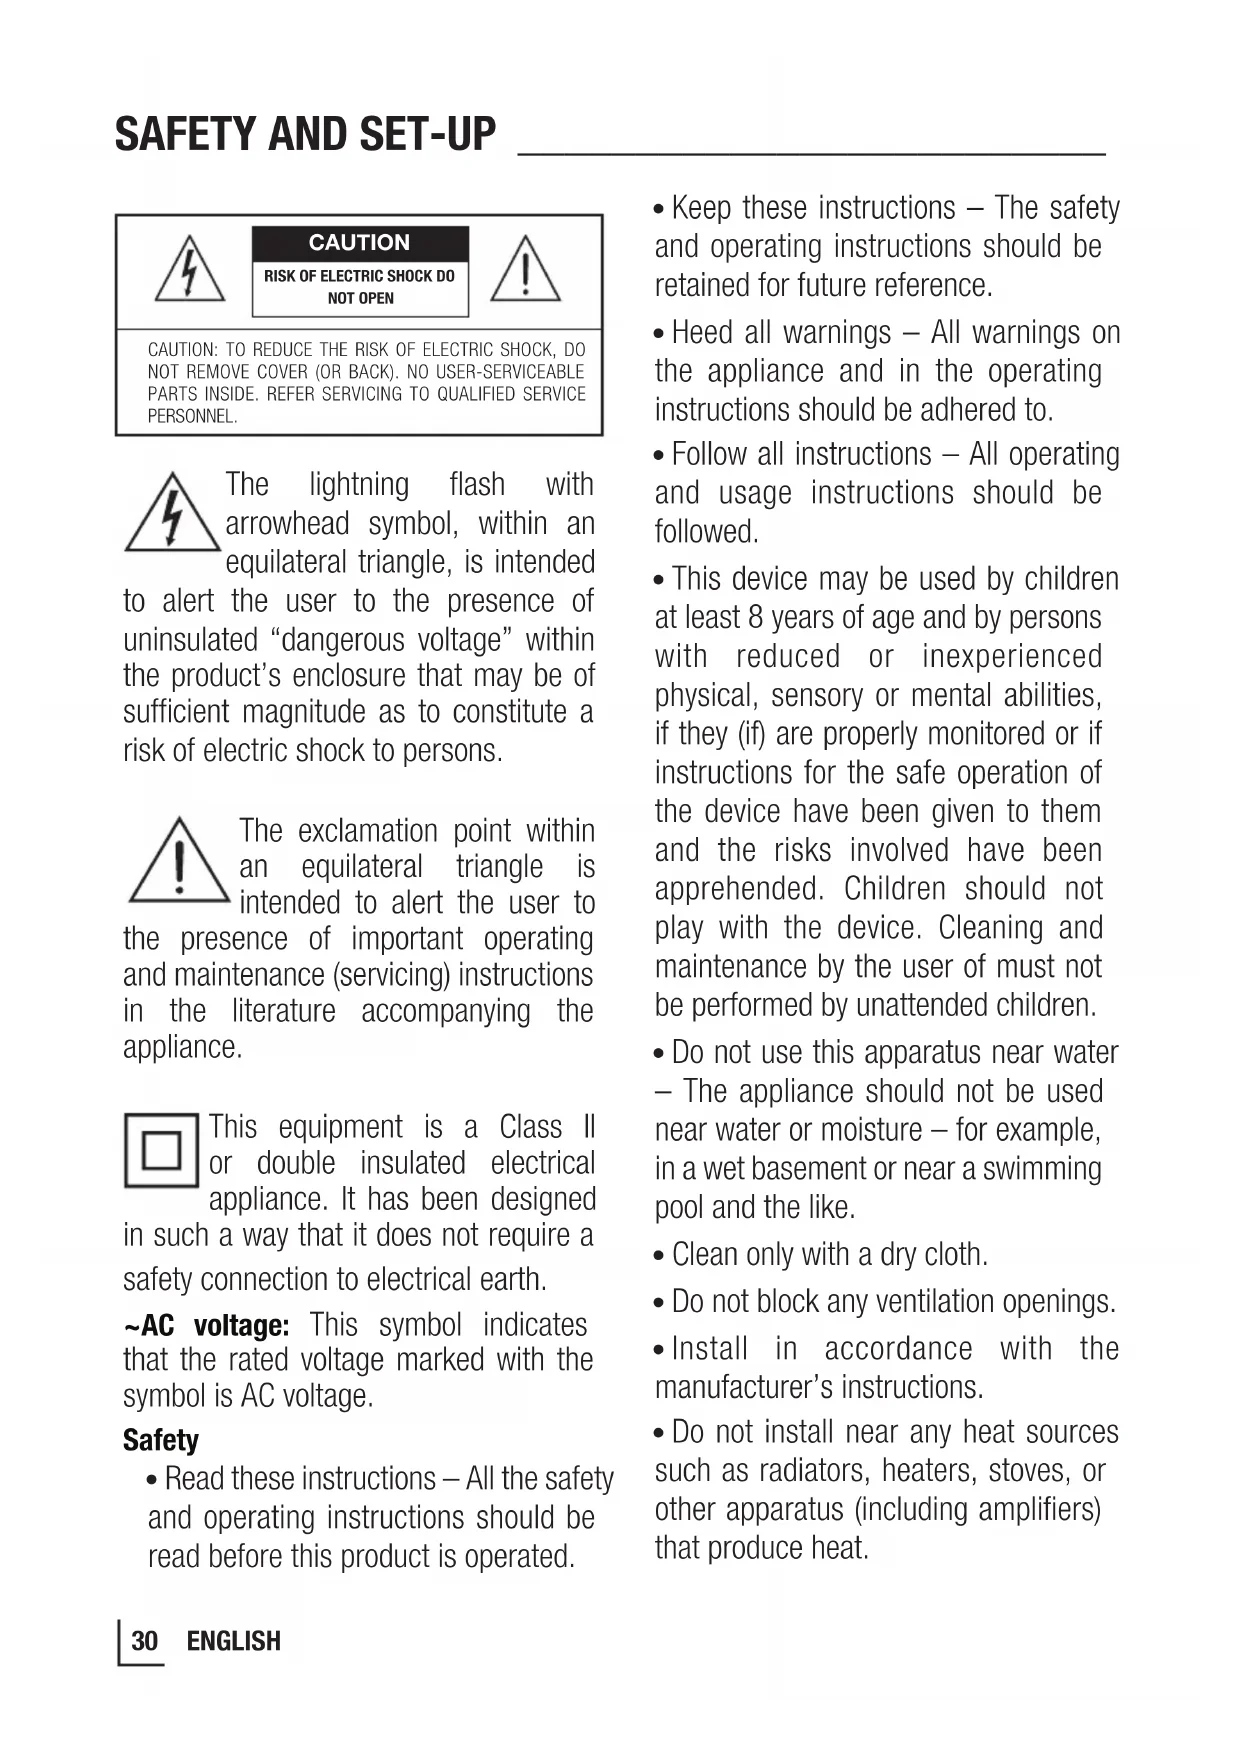
The lightning flash with arrowhead symbol, within an equilateral triangle, is intended
to alert the user to the presence of uninsulated "dangerous voltage" within the product's enclosure that may be of sufficient magnitude as to constitute a risk of electric shock to persons.

The exclamation point within an equilateral triangle is intended to alert the user to
the presence of important operating and maintenance (servicing) instructions in the literature accompanying the appliance.

This equipment is a Class II or double insulated electrical appliance. It has been designed
in such a way that it does not require a safety connection to electrical earth.
AC voltage: This symbol indicates that the rated voltage marked with the symbol is AC voltage.
Safety
-
Read these instructions - All the safety and operating instructions should be read before this product is operated.
-
Keep these instructions - The safety and operating instructions should be retained for future reference.
- Heed all warnings - All warnings on the appliance and in the operating instructions should be adhered to.
- Follow all instructions - All operating and usage instructions should be followed.
- This device may be used by children at least 8 years of age and by persons with reduced or inexperienced physical, sensory or mental abilities, if they (if) are properly monitored or if instructions for the safe operation of the device have been given to them and the risks involved have been apprehended. Children should not play with the device. Cleaning and maintenance by the user of must not be performed by unattended children.
- Do not use this apparatus near water - The appliance should not be used near water or moisture - for example, in a wet basement or near a swimming pool and the like.
- Clean only with a dry cloth.
- Do not block any ventilation openings.
- Install in accordance with the manufacturer's instructions.
-
Do not install near any heat sources such as radiators, heaters, stoves, or other apparatus (including amplifiers) that produce heat.
-
Do not defeat the safety purpose of the polarized or grounding plug. A polarized plug has two blades with one wider than the other. A grounding plug has two blades and a third grounding prong. The wide blade or the third prong is provided for your safety. If the provided plug does not fit into your outlet, consult an electrician for replacement of the obsolete outlet.
- Protect the power cord from being walked on or pinched particularly at plugs, convenience receptacles, and the point where they exit from the apparatus.
- Only use attachments/accessories specified by the manufacturer.
Use only with the cart, stand, tripod, bracket or table specified by the manufacturer, or sold with the apparatus.
When a cart or rack is used, use caution when moving the cart/apparatus combination to avoid injury from tip-over.
- Unplug the apparatus during lightning storms or when unused for long periods of time.
- Refer all servicing to qualified personnel. Servicing is required when the apparatus has been damaged in any way, such as power supply cord or plug is damaged, liquid has been spilled or objects have fallen into the apparatus, the unit has been exposed to rain or moisture, does
not operate normally, or has been dropped.
- The apparatus shall not be exposed to dripping or splashing. No objects filled with liquids, such as vases, shall be placed on the apparatus.
- Minimum distance around the apparatus for sufficient ventilation is 5cm .
- The ventilation should not be impeded by covering the ventilation openings with items, such as newspapers, tablecloths, curtains, etc...
- No naked flame sources, such as lighted candles, should be placed on the apparatus.
- Batteries should be recycled or disposed of as per state and local guidelines.
The use of apparatus in moderate climates.
Caution:
- Use of controls or adjustments or performance of procedures other than those described herein, may result in hazardous radiation exposure or other unsafe operation.
-
To reduce the risk of fire or electric shock, do not expose this apparatus to rain or moisture. The apparatus must not be exposed to dripping or splashing and objects filled with liquids, such as vases, must not be placed on apparatus.
-
The mains plug/appliance coupler is used as the disconnect device, the disconnect device must remain readily operable.
- Danger of explosion if battery is incorrectly replaced. Replace only with the same or equivalent type.
Changes or modifications to this unit not expressly approved by the party responsible for compliance will void the user's authority to operate the equipment.
- The rating label is pasted on the bottom or back of the equipment.
Warning:
- The battery (batteries or battery pack) shall not be exposed to excessive heat such as sunshine, fire or the like.
- Before operating this system, check the voltage of this system to see if it is identical to the voltage of your local power supply.
- Do not place this unit close to strong magnetic fields.
- Do not place this unit on the amplifier or receiver.
- Do not place this unit close to damp areas as the moisture will affect the life of the laser head.
- If any solid object or liquid falls into the system, unplug the system and have it checked by qualified personnel before operating it any further.
- Do not attempt to clean the unit with chemical solvents as this may damage the finish. Use a clean, dry or slightly damp cloth.
- When removing the power plug from the wall outlet, always pull directly on the plug, never yank on the cord.
Battery usage CAUTION To prevent battery leakage which may result in bodily injury, property damage, or damage to the apparatus:
- Install all batteries correctly, + and - as marked on the apparatus.
- Do not mix old and new batteries.
- Do not mix alkaline, standard (Carbon-Zinc) or rechargeable (Ni-Cd, Ni-MH, etc.) batteries.
- Remove batteries when the unit is not used for a long time.
- Excessive sound pressure from the earphones or headphones can cause hearing loss.
Note:
- Do not connect any other equipment while the device is switched on. Switch off the other devices as well before connecting them.
- Only plug the device into the mains socket after you have connected the external devices. Make sure the power plug is freely accessible.
This apparatus includes this label:
Class 1 Laser Product
- Use of controls adjustments or performance of procedures other than those specified herein may result in hazardous radiation exposure.

Disc drawer

- Do not look directly at the laser beam produced by the device as this can cause damage to the eyes.
- Do not attempt to open the device casing. Never insert objects into the device openings as this may cause the laser beam to be activated whilst the Disc drawer is open.
Notice for CDR/CDRW MP3 users:
Depending on the type of CD burner, on the disc brand, the burning speed and the MP3 compression level, some reading problems may occur.
WARNING
- To avoid danger of suffocation, keep this bag away from babies and children. Do not use in cribs, beds, carriages or playpens. This bag is not a toy. Discard bag and any other packing materials
immediately after removing product. Do not re-use this bag.
- To keep the laser pickup clean, do not touch it, and always close the disc tray.
Do not move the unit during playback
- During playback, the disc rotates at high speed.
- Do not lift or move the unit during playback, as doing so may damage the disc or the unit.
When moving this unit
When changing places of installation or packing the unit for moving, be sure to remove the disc and return the disc tray to its closed position in the player. Then, press the power switch to turn the power off before disconnecting the power cord. Moving this unit with the disc loaded may result in damage to this unit.
Handling
Do not touch the playback side of discs. Hold discs by the edges to avoid leaving fingerprints on the surface. Any dust, fingerprints or scratches may cause a malfunction.
Never attach a label or sticky tape to the disc.


Storage
Put disc back in their case after playing them. Never expose disc to direct sunlight or heat sources. Never leave discs inside a car parked in full sunlight.
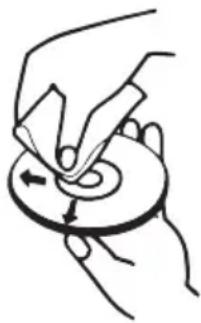
Cleaning
Use a clean soft lint-free cloth to clean the discs, working from the centre outwards in a straight line. Do not use solvents such as petrol, thinners, commercially available cleaners or antistatic sprays for vinyl records.
Hearing safety
Listen at a moderate volume.
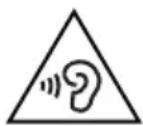
- Warning: Excessive sound pressure from earphones and headphones can cause hearing loss.
- To prevent possible hearing damage, do not listen at high volume levels for long periods.
Dear Customer,
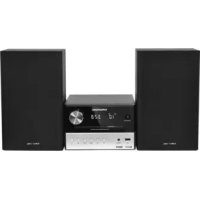
Congratulations on the purchase of your new GRUNDIG Micro HIFI System MS 300.
Please read the following user notes carefully to ensure full enjoyment of your quality GRUNDIG product for many years to come.
A responsible approach!

GRUNDIG focuses on contractually agreed social working conditions with fair wages for both internal employees and suppliers. We also attach great importance to the
efficient use of raw materials with continuous waste reduction of several tonnes of plastic every year. Furthermore, all our accessories are available for at least 5 years.
For a future worth living.
Grundig.
Controls and parts
See the figure on page 3.
A Main-Unit
- Display Window
- Disc Compartment
- K Button
Open and close the disc compartment.
- (Source) Button
Select the play function.
按钮
In Disc/USB/BT/SD mode, press to skip to previous/next track.
Button
Play/pause/resume playback.
In standby mode, press the button repeatedly to activate or deactivate the alarm timer.
VOL+/- Buttons
Increase/decrease the volume level.
- (ON/OFF) Button
Switch the unit between ON and STANDBY mode.
- SD CARD Socket
Card slot for inserting a memory card (SD, SDHC, MMC).
- USB Socket
Insert the USB device to play music.
- (Headphone) Socket
Connect to Headphone. This automatically switches off the loudspeakers.
-
Tape compartment
-
In tape mode
Open the front flap which is marked OPEN on the front panel.
Startsrecording.
Starts playback.
Revinds the tape to the beginning.
Fast forwards the tape to the end.
Ends playback/recording of the tape and opens the tape compartment.
Pauses recording and playback.
- Speakers (Left / Right)
Do not block or cover the speakers. To avoid damaging the speaker units, please don't touch they directly.
-
SPEAKERS OUT (R/L) Sockets
-
AUX Socket
- ANT. Socket
- AC~ Socket
- Speakers (R/L) Sockets
What's in the Box
1 Main Unit x1
2 Speakers (Left / Right) x2
Remote Control x1
AAA Batteries x2
4 AC Power Cord x1
Speaker Cable x2
FM Aerial x1
3.5mm to 3.5mm Audio Cable x1
B Remote Control
- ①
Switch the unit between ON and STANDBY mode.
- MODE
Select the play function.
- MENU
Entering menu setup.
- CLOCK
In standby mode, press and hold to activate clock setup.
- ALARM
Display current clock.
- INFO
In standby mode, press and hold to set the alarm timer.
- INTRO
View extra information of playing content or mode.
8.
In Disc/USB mode, every soundtrack will be played for 10 Sec.
9.
In Disc/USB mode, stop play.
In Disc/USB/BT mode, start, pause or resume play.
10.
Select shuffle play modes.
11.
Navigate left/right/up/down through menus.

FM mode, Select a previous/next preset station.
Previous track / Next track.
In FM mode, short press for 0.05MHz frequency change, long press will scan to previous/next available station.
(OK) Confirm a selection.
-
A-B
-
POP ROCK
14.
Repeat a specific section within a track/chapter.
Increase/decrease the volume level.
15.0-9
- SCAN
17.
18.
- DIMMER
20.
-
SN00ZE
-
Folder Down / UP
-
D, C
24.
25.
- CLASSIC FAT
27.PROG
Numric Button: Select preset radio station or stored programme
Scan for radio station.
Open and close the disc compartment.
Select the BT (Bluetooth) function.
Adjust display brightness (low/mid/high)
Set the sleep timer (120 - 90 - 60 - 30 - 15 - OFF)
Delay alarm ringing.
Play all tracks in next/last folder
Perform fast forward/ reverse playback
Select repeat play modes.
Mute or resume the sound.
Adjust the treble level.
Programme sound tracks in Disc/USB mode.
Presets radio stations.
Prepare the Remote Control
The provided Remote Control allows the unit to be operated from a distance.
- Even if the Remote Control is operated within the effective range 19.7 feet (6m), remote control operation may be impossible if there are any obstacles between the unit and the remote control.
- If the Remote Control is operated near other products which generate infrared rays, or if other remote control devices using infra-red rays are used near the unit, it may operate incorrectly. Conversely, the other products may operate incorrectly.
Replace the Remote Control Battery
1 Press and slide the back cover to open the battery compartment of the remote control.
2 Insert two AAA size batteries (not included). Make sure the (+) and (-) ends of the batteries match the (+) and (-) ends indicated in the battery compartment.
3 Close the battery compartment cover.
Precautions Concerning Batteries
- Be sure to insert the batteries with correct positive “ ” and negative “ ” polarities.
- Use batteries of the same type. Never use different types of batteries together.
- Either rechargeable or non-rechargeable batteries can be used. Refer to the precautions on their labels.
- Be aware of your fingernails when removing the battery cover and the battery.
- Do not drop the remote control.
- Do not allow anything to impact the remote control.
-
Do not spill water or any liquid on the remote control.
-
Do not place the remote control on a wet object.
- Do not place the remote control under direct sunlight or near sources of excessive heat.
- Remove the battery from the remote control when not in use for a long period of time, as corrosion or battery leakage may occur and result in physical injury, and/or property damage, and/or fire.
- Do not use any batteries other than those specified.
- Do not mix new batteries with old ones.
- Never recharge a battery unless it is confirmed to be a rechargeable type.
Connect to Speakers
Note:
- For optimal sound, use the supplied speakers only. Connect only speakers with impedance that is the same or higher than the supplied speakers. Refer to the Specifications section of this manual.
1 Loosen the left / right speakers connector.
2 Use the speaker cable (included) to connect the speaker port on the left/right speaker.
Golden harness cable connect to the ^+ (red connector) terminal
Silver harness cable connect to " - " (black connector) terminal
1 Screw the red (+) / black (-) connector to secure the cable.
2 Connect the speakers to the SPEAKER OUT (R/L) sockets on the rear of the main unit.
Connect to Headphone
Plug a headphone into the (Headphone) socket. When you connect headphones to hear the sound from the speakers.
- Please note that the Hearing Safety.
Use the LINE IN/AUX Socket
- Use a RCA to 3.5mm audio cable (not included) to connect the TV's audio output sockets to the AUX socket on the unit.
- Use a 3.5mm to 3.5mm audio cable (included) to connect the TV's or external audio device headphone socket to the AUX socket on the unit.
Connect the (FM) Aerial
- Connect one end of the (FM) aerial (included) to the ANT. socket at the rear of the unit. Then position the aerial to obtain optimum reception.
IMPORTANT:
-
You may need to adjust the position of the aerial when tuning the radio to receive the strongest signal.
-
Never leave the aerial where it can be pulled by pulled by young children.
Connect Power
Risk of product damage!
- Ensure that the power supply voltage corresponds to the voltage printed on the back or the underside of the unit.
- Before connecting the AC power cord, ensure you have completed all other connections.
- Connect the mains cable to the AC~ socket of the main unit and then into a mains socket.
Set the Clock
1 In Standby mode, press and hold CLOCK button.
2 Press the buttons on the remote control to select 12/24 hour format, then press the OK button on the remote control to confirm. The hour digits will flash.
3 Press the 4 buttons on the remote control to adjust the hour digits while flashing, then press the OK button on the remote control to confirm. Then the minute digits will flash.
4 Press the buttons on the remote control to adjust the minute digits while flashing, then press the OK button on the remote control to confirm.
Note:
Each activated state will be cleared if any buttons are not pressed within 15 seconds.
Time Display
- Press the CLOCK button to show the current time on the display for a few seconds.
Set the alarm Timer
- The clock must be correctly set for the timer to operate correctly.
1 In Standby mode, press and hold ALARM button. Then the hour digits flash.
2 Press the buttons on the remote control to adjust the hour digits, and then press the OK button on the remote control to confirm, the minute digits will flash on the display.
3 Press the buttons on the remote control to adjust the minute digits, and then press the OK button on the remote control to confirm, the mode will flash on the display.
4 Press the buttons on the remote control to select:
- BUZZER (to wake to a buzzer sound)
- FM (to wake your selected FM Radio Station)
- DISC (to wake to your CD music)
- USB (to wake to your USB music)
5 Press the OK button on the remote control to confirm, the display will show the volume level.
6 Press the buttons on the remote control to adjust the volume, and then press the OK button on the remote control to confirm, will show on the display.
Activate and Deactivate the Alarm Timer
- After setting the alarm timer, press the ALARM button on the remote control to view the alarm settings.
- The alarm is active when is shown on the display.
- To deactivate the alarm, press the ALARM button twice. The will disappear on the display. Press the ALARM button twice again to activate the alarm timer.
- When the alarm rings, press the SNOOZE button on remote control. The alarm repeats ringing 9 minutes later.
- When the alarm rings, press button to turn off the alarm.
Tips:
Each enabled state will be cleared if a button is not pressed within 15 seconds.
- When the alarm rings, press the button on the remote control or on the unit. The alarm stops but the alarm settings remain.
Set Clock/Alarm while in ON mode
1 In ON mode, press MENU button on the remote control to entering system menu setup.
2 Press buttons on the remote control to select CLOCK or ALARM setting, and then press OK button to confirm.
3 Press / buttons to setup and confirm with OK button.
Standby/ON
When you first connect the main unit to the mains socket, the main unit will be in Standby mode.
- Press the button on the remote control or on the main unit to switch the main unit ON.
- Press the button on the remote control or on the main unit to switch the main unit back to Standby mode.
- Disconnect the mains plug from the mains socket if you want to switch the unit off completely.
Tips:
- If there is no signal input under the DISC, USB, BT (Bluetooth), SD, CASSETTE or AUX mode, the unit will automatically switch off within 15 minutes.
Select Modes
- Press the button on the unit or MODE button on the remote control to select the desired mode.
- The selected mode FM, DISC, USB, SD, BT, AUX, CASSETTE will show on the display.
Adjust the Volume
- Press the + / - buttons on the remote control or rotate VOL+/- knob on the unit to adjust the volume.
- If you wish to turn the sound off, press the button on the remote control. Press the button again or press buttons to resume normal volume.
- Press the POP - CLASSIC - ROCK - FLAT buttons on the remote control to select the Equalizer.
Adjust the Brightness
- Press the DIMMER button on the remote control to select brightness level.
(low/mid/high)
Set the Sleep Timer
This unit can switch to standby automatically after a set period of time.
1 Press the button on the remote control repeatedly to select your desired number of minutes. The number of minutes shown will display in this sequence:
$$ \begin{array}{c}\text {S L E E P 1 2 0} \rightarrow \text {S L E E P 9 0} \rightarrow \text {S L E E P 6 0}\\text {S L E E P O F F} \leftarrow \text {S L E E P 1 5} \leftarrow \text {S L E E P 3 0}\end{array} $$
2 Stop pressing the button when your desired number of minutes is displayed. The sleep timer is now set.
- Press the button to view the remaining time before switch off.
- To cancel the sleep timer, press the button repeatedly until "SLEEPOFF" shows on the display.
Factory Reset
- Reset device to default setting.
1 In ON mode, press MENU button on the remote control to entering system menu setup.
2 Press / buttons on the remote control to select RESET and then press OK button to entering reset setting.
3 Press / buttons to select Y and then press OK button to reset the factory default settings.
- The main unit back to Standby mode.
AUX Operation
Play for External Audio Devices
1 Ensure that the unit is connected to the TV or audio device.
2 Press the MODE button on the unit or on the remote control to select the AUX mode.
3 Operate your audio device directly for playback features.
4 Press the VOL+/- buttons to adjust the volume to your desired level.
DISC Operation
1 While in ON mode, Press the button on the unit or MODE button on the remote control to select DISC mode.
2 Press the button on the unit or on the remote control and the disc tray will open automatically.
3 Place the disc with the label side up into the disc compartment, and then press the button on the unit or on the remote control to close the disc tray.
4 Play starts automatically. If play does not start automatically, select a title/chapter/track and then press button.
USB/SD CARD Operation
1 Insert the USB device or SD CARD device.
2 Press the button on the unit or MODE button on the remote control to select USB or SD mode.
3 Play starts automatically. If play does not start automatically, select a title/chapter/track and then press button.
Play Control
| ■ | Stop play. |
| ► | Start, pause or resume play. |
| ←/→ | Previous track / Next track. |
| / | Perform fast forward/ reverse playback |
| →← | Select shuffle play modes. |
| ← | Repeat one: ← Repeat all: ← Repeat folder: flashing |
| INFO | View extra information of playing content or mode. |
| INTRO Every soundtrack will be played for 10 Sec. | |
| Folder Down/Up | Play all tracks in next/last folder |
Programme Setting
The user can programme up to 20 tracks in CD/USB mode in any desired order. Programme mode is activated while in STOP mode.
1 Press the button on the remote control. Press the PROG button to enter MEMORY mode.
2 Press the number (0-9) buttons or buttons on the remote control to select the track that you want to preset, then press PROG button to confirm.
3 Repeat step 2 to programme more tracks.
4 Press the button to playback programme tracks.
Note:
- If you want to change the programed files, press the button two times to clear the current program files, display shows "PRG CLR", then repeat the program steps as above to re-enter the new program files.
- Or opening the CD door to clear the current program files.
Note:
- The operational range between this player and a Bluetooth device is approximately 8 meters (without any object between the Bluetooth device and the unit).
- Before you connect a Bluetooth device to this unit, ensure you know the device's capabilities.
- Compatibility with all Bluetooth devices is not guaranteed.
- Any obstacle between this unit and a Bluetooth device can reduce the operational range.
- If the signal strength is weak, your Bluetooth receiver may disconnect, but it will re-enter pairing mode automatically.
1 Press the button on the unit or MODE button on the remote control to select BT (Bluetooth) mode. "NO BT" will show on the display if the unit is not paired to any Bluetooth device.
2 Activate your Bluetooth device and select the search mode. "Grundig MS 300" will appear on
your Bluetooth device.
- If you cannot find the unit, press and hold the "▶" button on the unit or the "×" on the remote control. The system has entered pairing mode. The unit will show "PAIRING".
3 Select "Grundig MS 300" in the pairing list. On successful pairing, the display panel shows "BT".
4 Play music from the connected device.
| Start, pause or resume play. |
| Previous track / Next track. |
To disconnect the Bluetooth function, you can :
- Switch to another function on the unit;
- Disable the function from your Bluetooth device.
- Press and hold the button on the unit or the button on the remote control. The Bluetooth device will be disconnected from the unit.
FM OPERATION
Auto Scan and Save Preset Station
1 Press the MODE button on the unit or on the remote control to select FM mode.
2 Press the SCAN button on the remote control to activate automatic programming. All available stations are programmed in the order of waveband reception strength.
The first programmed radio station is played automatically.
1 Press the , buttons to select a next / previous preset station.
Tuning in a Station
Tune in radio stations automatically
- Press and hold the , buttons on the remote control, the frequency changes down or up automatically until a station is found.
- The search may not stop at a station with a very
Tune in radio stations manually
- Press the , buttons repeatedly until you find the station you want.
- If reception is still poor, try to adjust the position of the aerial or try to move the radio to another location.
Presetting Stations Manually
You can preset up to 40 FM stations.
1 Tune in the desired station, then press the PROG button.
2 Press the , or number (0 - 9) buttons to select the preset number.
3 Press the PROG button to store the station.
4 Repeat above steps 1 to 3 for each station you want to store in memory with a preset number.
Selecting the cassette input source
1 Press the button on the unit or MODE button on the remote control to select the CASSETTE mode.
Playback
1 Open the front flap which is marked with OPEN on the front panel.
2 Press » to open the tape compartment.
3 Insert a cassette in the compartment with the open side facing downwards and the full reel on the left side and close the compartment.
4 Press » ▶ to start playback.
- The button is automatically released at the end of the tape, except if pause function has been activated.
5 To pause playback press and resume playback by pressing again.
6 End playback with
Note:
- The source cannot be changed while recording a cassette.
Fast forward and reverse search
1 In stop mode, press or
- rewrites to the beginning, fast forwards to the end.
Recording onto cassette
1 Press to open the tape compartment. Put in a recordable cassette.
2 Go to other source besides cassette playback.
3 Press and buttons at the same time to record.
Erase protection
Each new recording writes over the previous recording.
- You can protect your recordings against inadvertent deletion by breaking the protection tab in the opening in the spine of the tape.
- Purchased recordings on music tapes are already protected against accidental deletion.
- If you wish to record on a protected tape, seal the opening with adhesive tape.
Note:
- Only use NORMAL-type cassettes (IEC I) for recording. CHROME (IEC II) or METAL (IEC IV) tapes are not suitable.
To keep the warranty valid, never try to repair the system yourself. If you encounter problems when using this unit, check the following points before requesting service.
| Fault Possible cause/action | |
| GENERAL INFORMATION No function | -If the device has been disrupted by a thunderstorm, a static charge or another external factor, follow this procedure to resolve the problem: Disconnect the mains and then plug it in again. |
| No sound -The volume may be set too low | or in mute mode. -In Bluetooth mode: Set the volume of the external device to the maximum and then control the volume using the kitchen radio. |
| RADIO Poor radio reception No station is found. | -Weak radio signal. Adjust the wire antenna to optimize the radio reception. -Interference from electrical devices such as television, neon lamps, computer etc. -If necessary, select another location to improve the radio signal. -The station may not be available currently, try it again later or select another station. -The link of the station is changed or the station no longer transmits – ask the provider for information (when necessary). |
| BLUETOOTH No connection | -Take care to ensure that all settings have been made correctly on all devices. The Bluetooth® function may be deactivated on the external device. Activate this, if necessary. -Check whether the device to be connected is switched on and is in search mode. |
| Disc The disc does not play. Disc skips | -There is no disc inside the unit ("NO DISC" appears on the display). -Insert the disc correctly with the label side facing up. -Clean the disc. -PAUSE mode may be activated, deactivate it. -A non-valid disc has been inserted. -Condensation may have formed inside the unit due to a sudden change in temperature. Wait about an hour for it to clear and try again. -Make sure the unit is on a secure spot. Vibrations or jarring can cause the disc to skip. |
| USB Cannot play some files from USB device | -Insert the USB device the other way round. -Some USB devices may not be compatible with the unit. |
| System Section | |
| Power Supply AC220-240V~ 50/60Hz | |
| Power Consumption 20 W | |
| Standby Mode Power Consumption < 1.0 W (Eco mode) | |
| Amplifier (Total Max. output power) 20W | |
| Speaker Impedance 4Ω x 2 | |
| BluetoothFrequency BandRadio Frequency Power Transmitted | V 4.2 (Supports A2DP, AVRCP profiles)2400MHz ~ 2483.5MHz<5 dBm |
| USB | USB: 5.0 V=500 mASupported formats: MP3 / WMA / WAV /FLAC (Up to 48KHz/16bit)File system: FAT 32, FAT16System compatibility: 64G (max)Albums and files: max. 980 folder 8500 file |
| SD | Supported formats: MP3 / WMA / WAV / FLAC (Up to48KHz/16bit)File system: FAT 32, FAT16System compatibility: 64G (max)Albums and files: max. 980 folder 8500 file |
| Disc | Frequency response: 100 Hz ... 18 kHzSignal to Noise ratio: 65 dBAAlbums and files: max. 980 folder 8500 file |
| FM 87.5 - 108.0 MHz | |
| Unit Dimension (WxHxD)Speaker Dimension | 150 x 220 x 200 mm140 x 220 x 150 mm |
| Unit Net WeightSpeaker (R/L) Net Weight | 1.5 kg2.2 kg (1.1kg x 2) |
| Audio Input Sensitivity 400 mV | |
| Frequency Response 40Hz - 20KHz | |
| Remote Control | |
| Distance/Angle 6m / 30° | |
| Battery type 2×LR03, 1.5V, AAA | == |
Technical and design modifications reserved.
Compliance with the WEEE Directive and Disposing of the Waste Product:
This product complies with EU WEEE Directive (2012/19/EU). This product bears a classification symbol for waste electrical and electronic equipment (WEEE).
This symbol indicates that this product shall not be disposed with other household wastes at the end of its service life. Used device must be returned to official collection point for
recycling of electrical and electronic devices. To find these collection systems please contact to your local authorities or retailer where the product was purchased. Each household performs important role in recovering and recycling of old appliance. Appropriate disposal of used appliance helps prevent potential negative consequences for the environment and human health.
Compliance with RoHS Directive
The product you have purchased complies with EU RoHS Directive (2011/65/EU). It does not contain harmful and prohibited materials specified in the Directive.
Package information

Packaging materials of the product are manufactured from recyclable materials in accordance with our National Environment Regulations. Do not
dispose of the packaging materials together with the domestic or other wastes. Take them to the packaging material collection points designated by the local authorities.
Technical Information
This device is noise-suppressed according to the applicable EU directives. This product fulfils the European directives 2014/53/EU, 2009/125/EC and 2011/65/EU.
You can find the CE declaration of conformity for the device in the form of a pdf file on the Grundig Homepage www.grundig.com/downloads/doc.

ATTENTION
RISQUE DE CHOC ÉLECTRIQUE
NE PAS OUVRIR

ATTENTION:POUR REDUIRE TOUT RISQUE DELECTROCUTION, NE PAS RETIRER LE COUVERCLE ARRIERE.LENTRETIEN DES PIECES INTERNES EST INTERDIT AUX UTILISATEURS.VEUILLEZ CONFIER L'ENTRETIEN A UN PERSONNEL QUALIFIÉ.

Lecture/pause/reprise de la lecture.