KM7300 - Food Processor AEG - Free user manual and instructions
Find the device manual for free KM7300 AEG in PDF.

| Product type | Food processor |
| Brand | AEG |
| Model | KM7300 |
| Power | Approximately 1000 W |
| Bowl capacity | Stainless steel bowl (capacity not specified, estimated 3.5 L) |
| Speeds | 10 speeds + OFF position |
| Main functions | Whisk, mix, knead, beat |
| Included accessories | Wire whisk, plastic flat beater (rubber edges), metal flat beater, dough hook |
| Accessory adapter | Yes (removable cover for optional accessories) |
| Additional bowl | Yes (depending on model) |
| Splash cover | Yes |
| Tilt-back motor head | Yes, with lock |
| Operation indicator | White LED around selector + indicator under motor head |
| Cord storage | Yes, manual rewind at the back |
| Non-slip feet | Yes |
| Housing material | Plastic |
| Weight | Approximately 6.5 kg |
| Dimensions (L x D x H) | Approximately 35 x 25 x 40 cm |
| Care and cleaning | Bowl, accessories hand-washable or dishwasher safe (top rack). Wipe motor base with damp cloth. Do not immerse motor unit. |
| Safety | Motor head lock, automatic overload stop, unplug before handling |
| Power supply | 220-240 V ~ 50/60 Hz |
Frequently Asked Questions - KM7300 AEG
User questions about KM7300 AEG
0 question about this device. Answer the ones you know or ask your own.
Ask a new question about this device
Download the instructions for your Food Processor in PDF format for free! Find your manual KM7300 - AEG and take your electronic device back in hand. On this page are published all the documents necessary for the use of your device. KM7300 by AEG.
USER MANUAL KM7300 AEG
natural_image
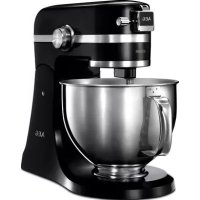
Modern AEG kitchen mixer with a mixing bowl and control panel (no visible text or symbols)CONTENTS
ENGLISH 23-29
DEUTSCH 3-22
ΕΛΛΗΝΙΚΑ 3-22
NEDERLANDS 3-22
FRANÇAIS 3-22
FOR PERFECT RESULTS
Thank you for choosing this AEG product. We have created it to give you impeccable performance for many years, with innovative technologies that help make life simpler features you might not find on ordinary appliances. Please spend a few minutes reading to get the very best from it.
Visit our website to:

Get usage advice, brochures, trouble shooter, service information: www.aeg.com/webselfservice

Register your product for better service: www.registeraeg.com

Buy accessories and consumables for your appliance: www.aeg.com/shop
CUSTOMER CARE AND SERVICE
When contacting Service, ensure that you have the following data available:
- Model Number
- PNC number
- Serial number
The information can be found on the rating plate.
text_image
Labeled diagram of a kitchen mixer with parts numbered A through Q, showing exploded view and component views.Teile
natural_image
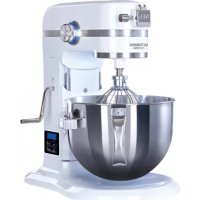
Modern kitchen mixer device with a bowl and control panel (no visible text or symbols)
natural_image
Monochrome image of kitchen utensils including a stand mixer and a bowl with a curved handle (no text or symbols visible)
natural_image
Illustration of a coffee maker with a paper feed and two circular icons showing speaker and printer symbols (no text or labels)D
natural_image
Modern stainless steel milk dispenser with a small base and power cord (no visible text or symbols)natural_image
Mechanical component with labeled parts A and B, showing internal structure (no text or symbols beyond labels)natural_image
Close-up of a kitchen mixer with labeled parts A and B (no text or symbols beyond labels)natural_image
Mechanical assembly diagram showing a component with labeled parts A and B (no text or symbols beyond labels)D
natural_image
Close-up of a kitchen mixer with labeled parts A and B, showing internal components (no text or symbols beyond labels)natural_image
Close-up of a mechanical device with a magnified inset showing a component detail (no text or symbols visible)natural_image
Close-up of a metallic rotary knob with a white arrow pointing to the knob (no text or symbols visible)natural_image
3D rendering of a modern kitchen mixer with floral design (no text or symbols visible)natural_image
Exterior view of a modern kitchen appliance with a circular inset showing its internal components (no text or symbols visible)natural_image
Close-up of a kitchen mixer with labeled component A and D (no text or symbols beyond labels)
natural_image
Illustration of hands using a tool to apply liquid into a container (no text or symbols visible)
natural_image
Mechanical component diagram showing a lever mechanism with labeled parts A, B, and C (no text or symbols beyond labels)D
natural_image
Modern stainless steel milk dispenser with a small base and power cord (no visible text or symbols)natural_image
Product photo of a kitchen mixer with standers and a bowl (no text or symbols visible)natural_image
Illustration of a microwave oven with a grid-patterned lid and a magnified inset showing a key inserted into a socket (no text or symbols present)text_image
Labeled diagram of a kitchen mixer with parts numbered A through Q, showing exploded view and component views.GB
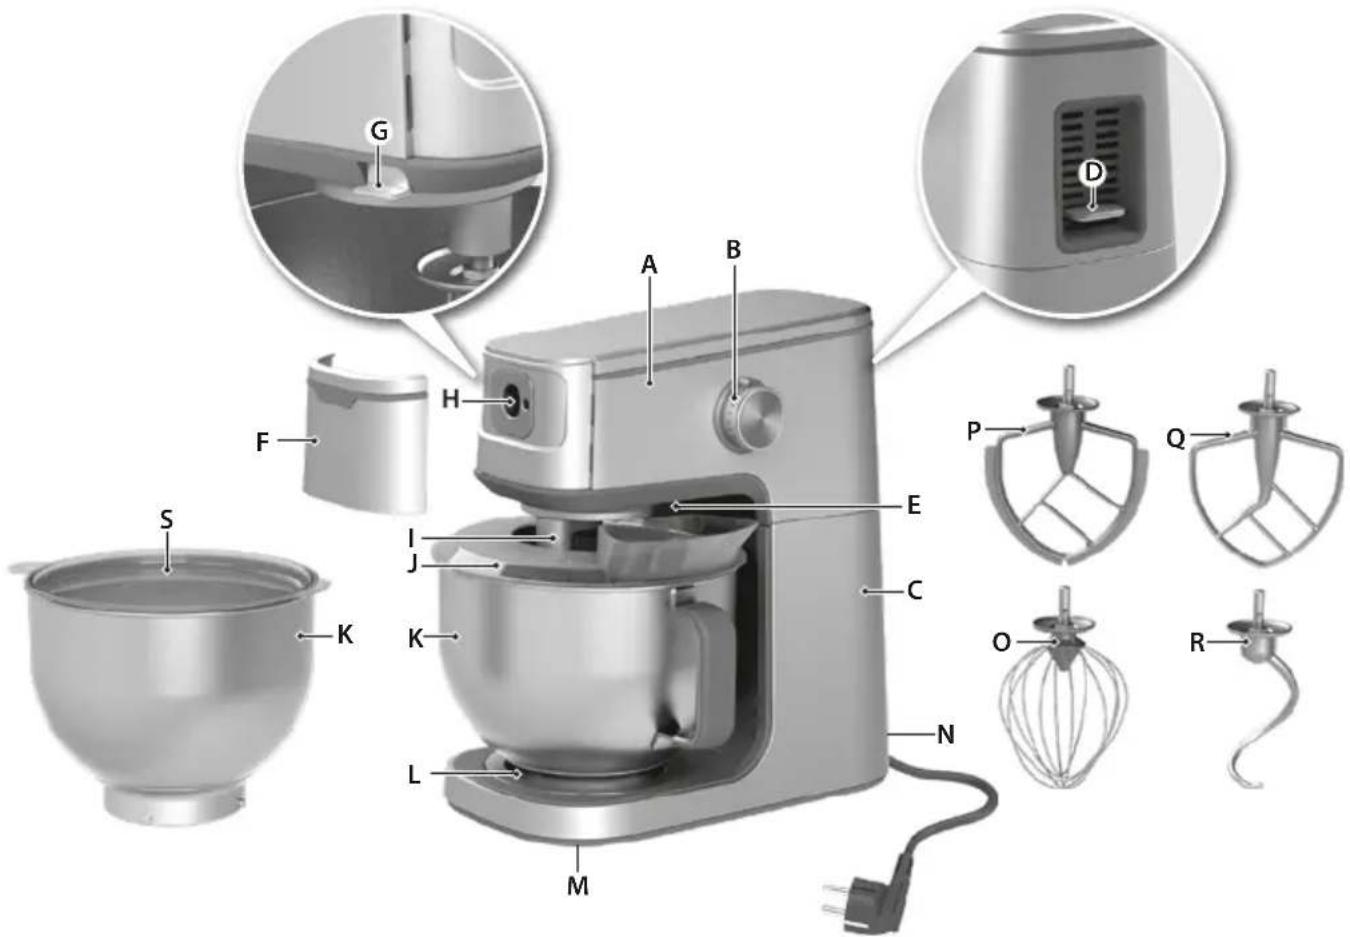
Components
A. Motor head (tiltable)
B. Speed selector
C. Housing
D. Tilt head locking lever
E. Working light
F. Attachment cover
G. Button to open the attachment cover
H. Attachment hub
I. Tool shaft
J. Bowl cover*
K. Stainless steel bowl + extra bowl*
L. Bowl locking plate
M. Non-slip feet
N. Power cord storage (manual rewind)
0. Wire whisk (for whipping cream and whisking egg whites)
P. Plastic flat beater (with soft rubber spatula for mixing liquid ingredients)
Q. Metal flat beater (for blending cake sponges, cookie dough, and pie crusts)
R. Dough Hook (for kneading yeast doughs)
S. Bowl lid*
Read the following instruction carefully before using the appliance for the first time.
- This appliance shall not be used by children. Keep the appliance and its cord out of reach of children.
- Care shall be taken when handling the tools, emptying the bowl and during cleaning.
- Appliances can be used by persons with reduced physical, sensory or mental capabilities or lack of experience and knowledge if they have been given supervision or instruction concerning use of the appliance in a safe way and if they understand the hazards involved.
• Children shall not play with the appliance. - Cleaning and user maintenance shall not be made by children without supervision.
- The appliance may only be connected to a power supply whose voltage and frequency comply with the specifications on the rating plate!
- Never use or pick up the appliance if – the supply cord is damaged, – the housing is damaged.
- If the appliance or the supply cord is damaged, it must be replaced by the manufacturer, its service agent or similarly qualified person, in order to avoid hazard.
• Always place the appliance on a flat, level surface. - Always disconnect the appliance from the supply if it is left unattended and before assembling, disassembling or cleaning.
- Do not immerse the appliance, cord or plug in water or any other liquid.
- Do not let cord hang over edge of table or counter, do not let cord contact hot surface, including the stove.
- Never use accessories or parts made by other manufactures not recommended or sold; may cause a risk of injury to persons.
- Make sure the motor has completely stopped before disassembling and cleaning.
- Avoid contact with moving parts. Contact could result in injury! Do not use other tools or utensils during the appliance usage.
- Do not leave this product out of your sight when it is running.
- Ensure all loose matters and your clothes/accessories are kept away while using this product.
- Never process boiling liquids (max 90^ ).
- Do not use this appliance to stir paint. Danger, could result in an explosion!
- Never operate appliance with the attachments wire whip, flat beater or dough hook unless the bowl is in place.
- This appliance is intended for domestic use only. The manufacturer cannot accept any liability for possible damage caused by improper or incorrect use.
- CAUTION: In order to avoid a hazard due to inadvertent resetting of the thermal cut-out, this appliance must not be supplied through an external switching device, such as a timer, or connected to a circuit that is regularly switched on and off by the utility.
- Switch off the appliance and disconnect from supply before changing accessories or approaching parts that move in use.
- UNPLUG BEFORE INSERTING OR REMOVING PARTS.

natural_image
Modern kitchen mixer device with a bowl and control panel (no visible text or symbols)- Before using your appliance, remove all packing material, plastic, labels, stickers or tags that may be attached to the motor base, bowls or attachments.
Warning! Never immerse the housing, plug, or cord in water or any other fluid.
Caution! Switch off the appliance and disconnect from supply before changing accessories or approaching parts that move in use.
natural_image
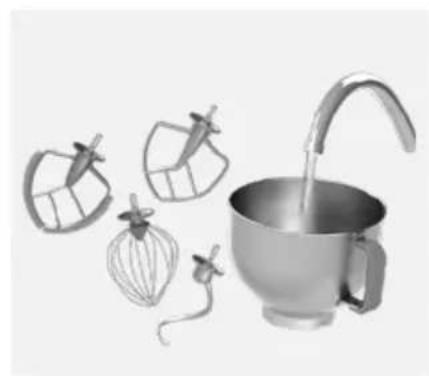
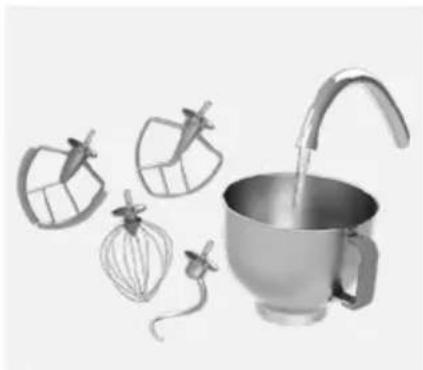
Product photo of kitchen utensils including a stand mixer and a bowl with a fork (no text or symbols visible)- Wash all parts, except for the motor base, in warm soapy water. Dry each part thoroughly before use.
If using the dishwasher, place parts only on the top rack of your dishwasher.
natural_image
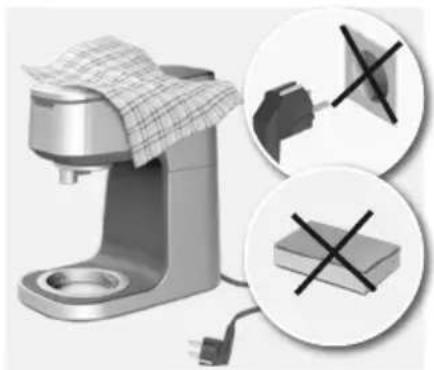
Illustration of a coffee maker with a checkered cloth and two circular icons showing incorrect warning symbols (no text or labels)- The housing should only be cleaned with a soft damp cloth, then dried with a cloth.
Note: Do not use abrasive cleansers or scouring pads to clean the surfaces of your appliance.
Getting started

natural_image
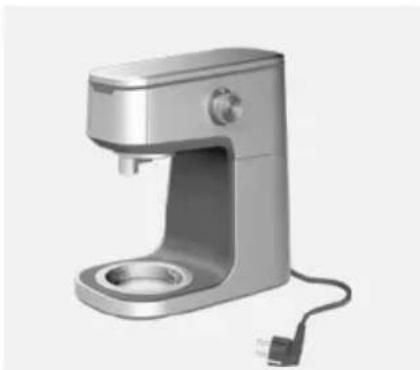
Exterior view of a modern stainless steel coffee maker with a small base and power cord (no text or symbols visible)- Place the motor base on a dry, level, stable, surface such as a countertop or table. Keep it away from the countertop edge. Be sure to leave plenty of room around air vents at the back of the appliance.
Caution! Ensure that the power cord is unplugged.

text_image
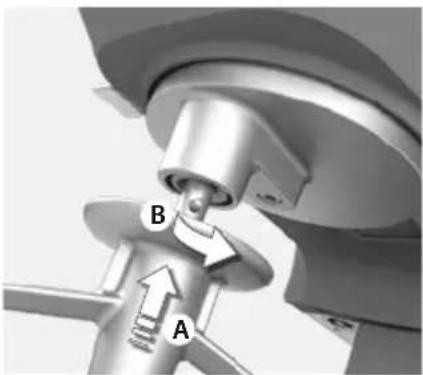
Technical diagram showing mechanical component with labeled parts A and B, including a magnified inset view of a slot or slot.- Tilting the motor head (B) up: gently press the lever (A) downwards, the motor head will then be lifted.
Warning: Keep fingers and hands away from areas with movable parts.
Note: As a safety precaution, once you move the motor head up, it locks into that position.
Note: If difficult to release locking function, gently push motor head downwards then press button (A).

natural_image
3D rendering of a kitchen mixer with labeled parts A and B (no text or symbols beyond labels)- Place the processing bowl onto the motor base (the bowl will only fit correctly on the base when the handle is positioned to the right). Rotate the handle clockwise to lock.
Warning: Never operate appliance with the attachments wire whip, flat beater or dough hook unless the bowl is in place.
text_image
B A- Place tool (A) on the tool shaft (B): Align the pin at the top of the tool (whisk, dough hook, beater) with the slot on the shaft. Push attachment up and turn it counterclockwise until the pin is locked into position. To remove attachment, push upwards, move it clockwise and pull down and out.

natural_image
Close-up of a kitchen mixer with labeled parts A and B, showing internal components without any text or symbols.- Tilting the Motor head down: gently press the lever (A) down and slide the motor head (B) downwards with your other hand until it locks into correct position. Insert the plug in the main socket.

natural_image
Close-up of a mechanical device with a magnified inset showing a component detail (no text or symbols visible)- Place the bowl cover* on the bowl. Gently push the cover down until it locks into place. Only add ingredients using the pouring hole on the bowl cover.
*Included in specific models.
natural_image
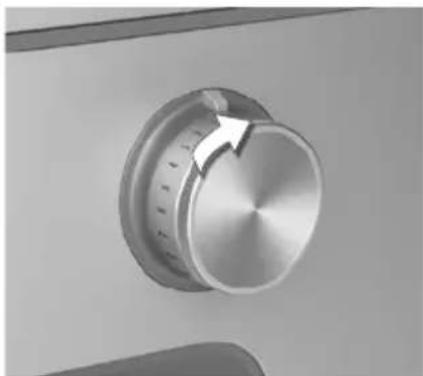
Close-up of a metallic rotary dial with a white arrow pointing to the dial (no text or symbols visible)- Move the Speed selector from "OFF" to desired speed (1-10). Once mixing is complete, turn the Speed selector to "OFF" and unplug the appliance. Note: Always start on the slowest possible speed to avoid splashing ingredients out of the bowl.
natural_image
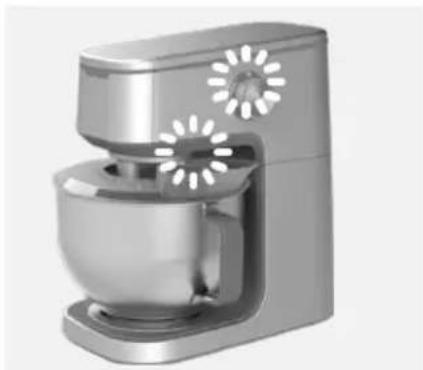
3D rendering of a modern kitchen mixer with floral patterns (no text or symbols visible)- Work light and Power indicator light: If the appliance is plugged in and a speed is selected, a white LED lights up around the speed selector. A work light will also light up over the working area. If the Speed selector is moved to "OFF", the working light will automatically shut off after 3 min.

natural_image
Illustration of a coffee maker with a circular inset showing its lid and handle (no text or symbols)- Note: If the speed selector is already turned on before the appliance is plugged in, the speed selector LED light will flash off and on to let you know the speed selector has been left on. Turn the Speed selector to "OFF" and the lights will stop flashing. Then resume operating normally.
natural_image
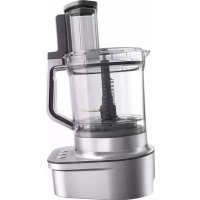
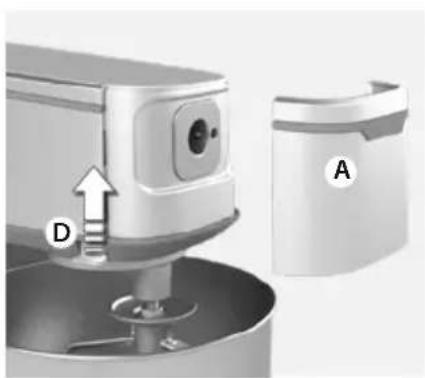
Close-up of a kitchen mixer with labeled component A and D (no text or symbols beyond labels)- Attachment hub: The appliance comes with a built in multipurpose attachment hub. You can remove the attachment cover (A) by pressing the attachment knob (D) upwards. It is possible to purchase meat mincer, pasta accessories and vegetable shredder as additional accessories. Kindly see www.electrolux.com for more information.

natural_image
Illustration of hands using a tool to apply liquid into a container (no text or symbols visible)2. Adjusting the tool shaft:
The appliance is adjusted at the factory so that the attachment clears the bottom of the bowl. If the attachment hits the bottom of the bowl or is too far away from the sides, you can adjust it correctly.
See 3 for further instructions.
Note: Make sure the attachment is as close to the bottom of the bowl as possible for best results.

natural_image
Mechanical component diagram showing a motor and gear assembly with labeled parts A, B, C (no text or symbols present)- Release the nut on the shaft of the tool. If the tool scrapes the bottom of the bowl: Loosen the nut (A), screw shaft (B) downward into the tool. Fasten the nut (A). If the tool is to far away from the sides/bottom of the bowl: Screw the shaft (B) upwards. Fasten the nut (A).
Cleaning and care
natural_image
Modern stainless steel coffee maker with a circular base and power cord (no visible text or symbols)- Switch the appliance off, remove the plug from the wall socket and wait until the tools have stopped completely.

Warning! Never immerse the
housing, plug, or cord in water or any other fluid.
natural_image
Product photo of kitchen utensils including a stand mixer and a bowl with a curved handle (no text or symbols visible)- Wash all parts, except for the motor base, in warm soapy water. Dry each part thoroughly before use.

If using the dishwasher, place only on the top rack of your washer.
Note: The bowl lid* and bowl cover* are not dishwasher safe.

natural_image
Illustration of a digital washing machine with a grid-patterned cloth and an inset showing a cross symbol (no text or labels present)- The housing should only be cleaned with a soft damp cloth, then dried with a cloth.
Note: Do not use abrasive cleansers or scouring pads to clean the surfaces of your appliance.
Store the power cord in the cord storage (manual rewind) - push the cord inwards into the hole on the rear of the appliance.
Recipes
| Whisking function quantities and Processing Times | ||||
| Ingredients Quantity Unit Time Speed | ||||
| Cream 100-900 g 60-120 8-10 | ||||
| Egg-white 50-730 (1-14) g/pcs 60-120 8-10 | ||||
| Beating function quantities and Processing Times (mixing light dough (e.g: cake dough)) | |||||
| Recipe Ingredients | Quantity Unit Time Speed | ||||
| Cake sponge | Flour 360 g | 200-230 s | Medium setting(4-6 setting) | ||
| Margarine | 135 | g | |||
| Sugar | 150 | g | |||
| Baking powder 1 tsp | |||||
| Chocolate cake | Flour 480 g | 300-360 s | Medium setting(4-6 setting) | ||
| Egg | 200/4 | g/pcs | |||
| Butter | 180 | g | |||
| Sugar | 150 | g | |||
| Vanilla Sugar | 2 | tsp | |||
| Sour cream | 100 | g | |||
| Nougat raw mixture | 100 | g | |||
| Baking soda | 3 | tsp | |||
| Method | |||||
| The butter should be soft not hard. Stir the soft butter with sugar until creamy. Add the eggs one after another.While stirring, add the sour cream and vanilla sugar. Finally stir in the flour together with baking soda. | |||||
| Butter Cake | Flour 120 g | 60-90 s | Medium setting(4-6setting) | ||
| Butter | 36 | g | |||
| Sugar 36 | g | ||||
| Fresh egg | 200 | g | |||
| Baking powder 1 | tsp | ||||
| Method | |||||
| Place all ingredients in the bowl, and mix them, till it is ready. | |||||
| Hooks function quantities and Processing Times | |||||
| Recipe | Ingredients | Quantity | Unit | Time | Speed |
| Yeast dough*(bread)min.Quantities | flour | 252 | g | At least 120 s | Low setting(1-3 setting) |
| water 240 g | |||||
| Sugar | 2 | tsp | |||
| Margarine | 1 | tbs | |||
| Salt | 1 | tsp | |||
| Dry Yeast | 2 | tsp | |||
| Method | |||||
| Place all the ingredients into the bowl and knead until satisfactory. | |||||
| Yeast dough*(Pizza dough)max quantities | Wheat flour | 960 | g | At least 120 s | Low setting(1-3 setting) |
| Water | 400 | g | |||
| Oil | 93 | g | |||
| Salt | 3 | tsp | |||
| Sugar | 2 | tsp | |||
| Dry Yeast | 1 | tbs | |||
| Method | |||||
| 1. In a container mix the half of yeast with the salt and the sugar and set aside;2. In the bowl of stand mixer put the remaining yeast, the water and the oil;3.This dough should be mixed with common beaters, at minimum speed until obtain a smooth mixture;4. After, add the yeast mixed with salt and sugar;5. The speed should be increased to medium and the flour should be added gradually;6. After realizing that the mass tends to rise by the beaters, they must be changed by the beaters for heavy mass;7. Put all the flour and mix until obtain a homogenous mixture;8. At this point you will need to monitor the input power of stand mixer, so that it not exceed the maximum value determined by the manufacturer;9. The mass reaches the point when no more paste in the hand. | |||||
Recipes
| Hooks function quantities and Processing Times | |||||
| Recipe Ingredients | Quantity Unit Time Speed | ||||
| Soft dough | Flour 1,9 kg | 120 s | Low setting(2 setting) | ||
| Water | 1450 | g | |||
| Salt | 3 | tsp | |||
| Flex edge beater function quantities and processing times | |||||
| Recipe Ingredients | Quantity Unit Time Speed | ||||
| Chocolate butter cream frosting | Semi-sweet chocolate chips | 250 | g | 200-300 s | Medium setting (4 - 6 setting) |
| Butter | 117 | g | |||
| Confectioners' sugar | 432 | g | |||
| Milk | 5 | tbs | |||
| Vanilla extract 1/2 tsp | |||||
| Method | |||||
| 1. Melt the chocolate and keep warm.2. Add softened butter into the bowl and beat until the butter become creamy.3. Add milk and sugar into the bowl and beat together with butter until the mixture become creamy and fluffy.4. After that, put the melted chocolate into the bowl and mix with plastic beater to get a good mixture. | |||||
Troubleshooting
| Troubleshooting | ||
| Problem Possible cause Solution | ||
| The motor slows down during operation. | Amount of dough may exceed maximum capacity. | Remove half and process in two batches. |
| Dough may be too wet, it sticks onto the side of the bowl. | Add more flour, 1 tablespoon at a time until the motor speeds up. Process until dough cleans the side of the bowl. | |
| The motor does not work. The appliance is not connected to the mains. Make sure to plug in the appliance before operation. | ||
| The appliance vibrates/ moves during operation. | The rubber feet are wet. Make sure the rubber feet at the bottom of the unit are clean and dry. | |
| It is normal for heavy loads (e.g heavy dough, cheese). | Remove half and process in two batches. | |
| The Work light and Power indicator light flashes on and off. | The Speed selector has been left turned on. Turn the Speed selector to "Arrest". | |
Disposal
Recycle the materials with the symbol

. Put the packaging in applicable ainers to recycle it.
Help protect the environment and human health and to recycle waste of electrical and electronic appliances.

This marking indicates that this product should not be disposed with other household wastes ghout the EU. To prevent pos-harm to the environment or hu-health from uncontrolled waste sal, recycle it responsibly to pro-
mote the sustainable reuse of material resources. To return your used device, please use the return and collection systems or contact the retailer where the product was purchased. They can take this product for environmental safe recycling.
AEG