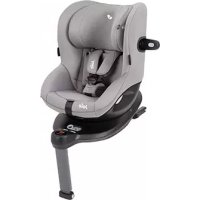
Bold - Car seat Joie - Free user manual and instructions
Find the device manual for free Bold Joie in PDF.
Download the instructions for your Car seat in PDF format for free! Find your manual Bold - Joie and take your electronic device back in hand. On this page are published all the documents necessary for the use of your device. Bold by Joie.
USER MANUAL Bold Joie
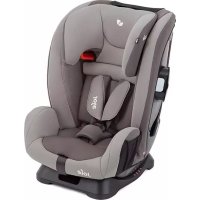
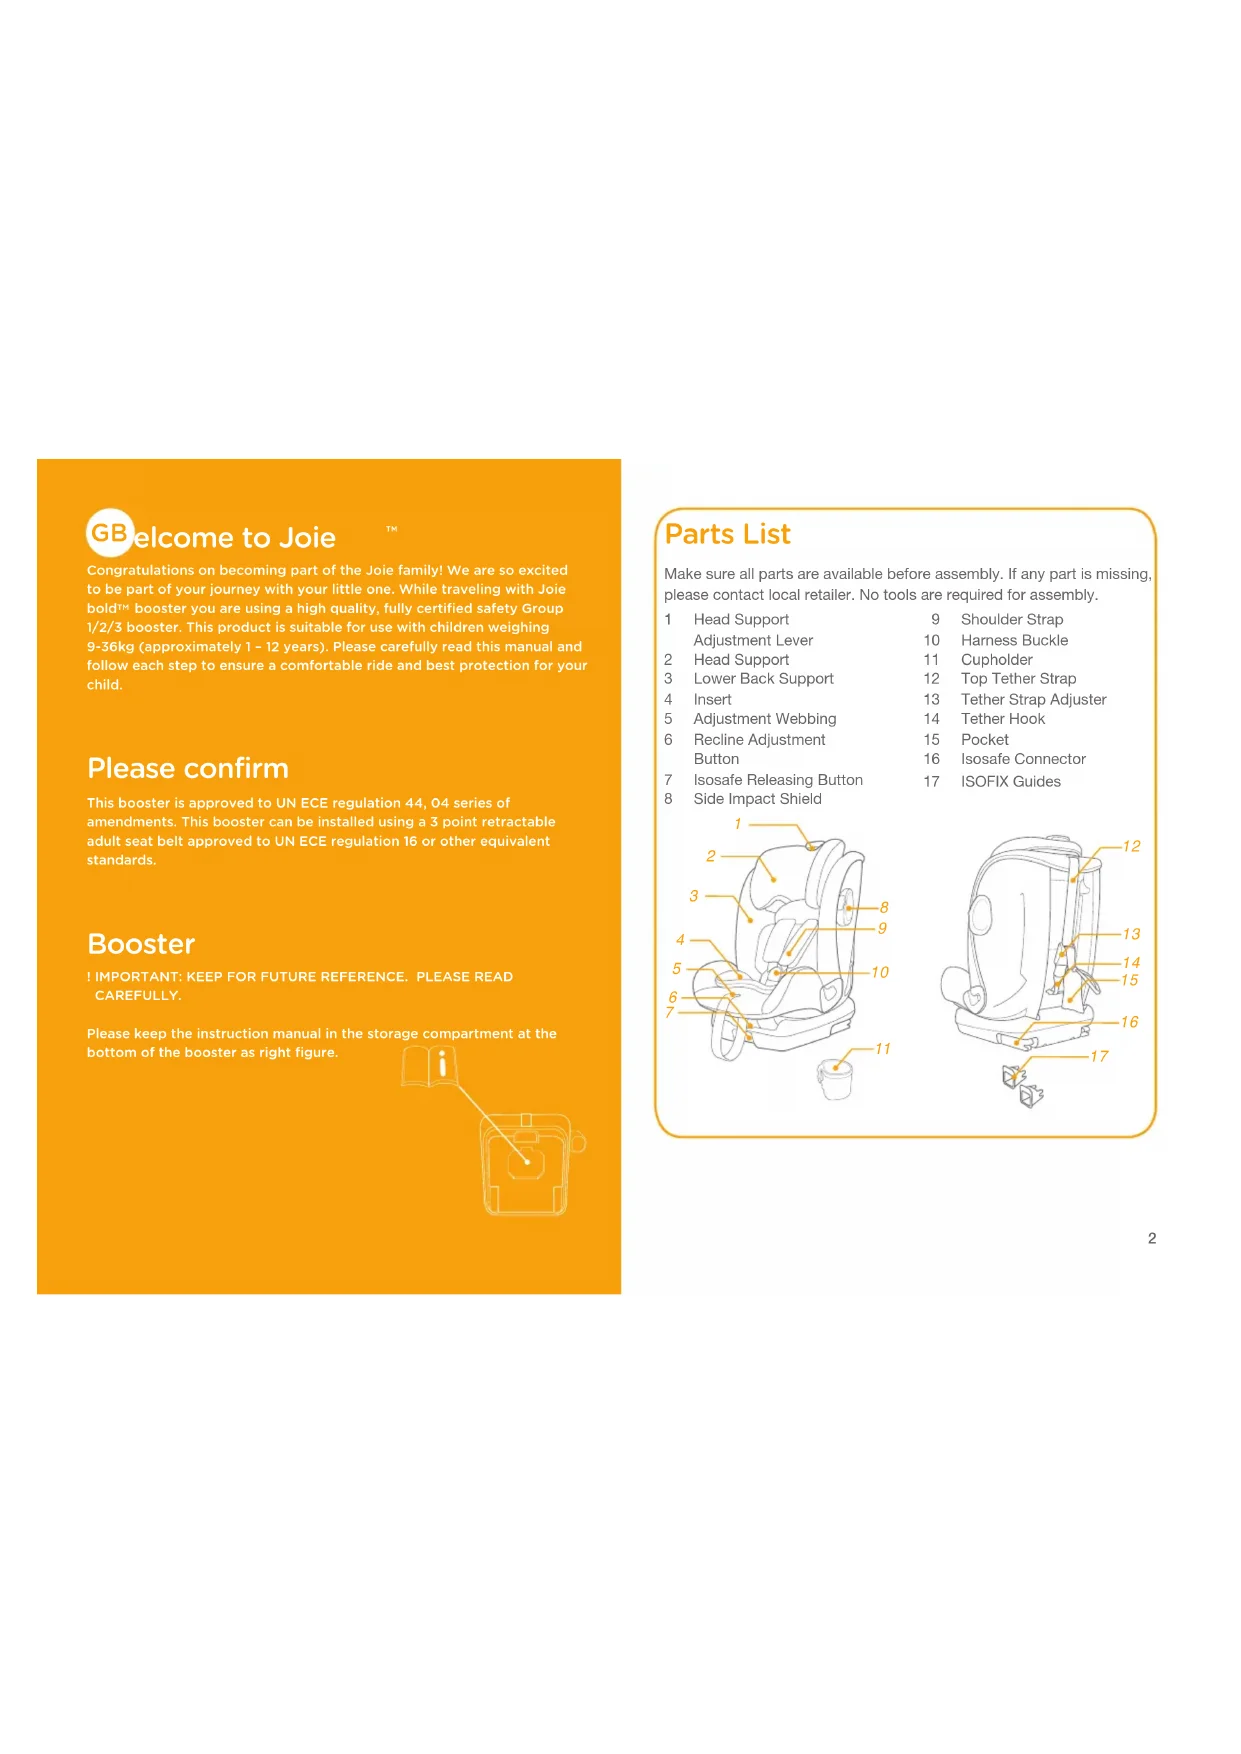
Congratulations on becoming part of the Joie family! We are so excited to be part of your journey with your little one. While traveling with Joie bold
booster you are using a high quality, fully certified safety Group 1/2/3 booster. This product is suitable for use with children weighing 9-36kg (approximately 1 – 12 years). Please carefully read this manual and follow each step to ensure a comfortable ride and best protection for your child. Please confirm This booster is approved to UN ECE regulation 44, 04 series of amendments. This booster can be installed using a 3 point retractable adult seat belt approved to UN ECE regulation 16 or other equivalent standards. Booster ! IMPORTANT: KEEP FOR FUTURE REFERENCE. PLEASE READ CAREFULLY.Please keep the instruction manual in the storage compartment at the bottom of the booster as right figure.
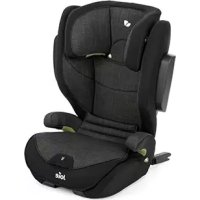
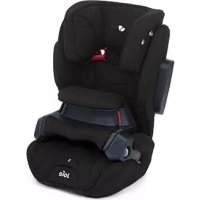
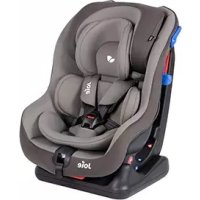
Parts List Make sure all parts are available before assembly. If any part is missing, please contact local retailer. No tools are required for assembly. 1 Head Support Adjustment Lever2 Head Support3 Lower Back Support4 Insert5 Adjustment Webbing6 Recline Adjustment Button7 Isosafe Releasing Button8 Side Impact Shield 9 Shoulder Strap10 Harness Buckle11 Cupholder12 Top Tether Strap13 Tether Strap Adjuster14 Tether Hook15 Pocket16 Isosafe Connector17 ISOFIX Guides
Do take care to locate and install the booster so that it is not liable to become trapped by a moveable seat or in a door of the vehicle.
This booster is designed ONLY for child weighing 9-36kg (approximately 1 – 12 years or under).
Make sure that the straps holding the restraint to the vehicle should be tight and any straps restraining the child should be adjusted to the child’s body. Check to make sure that the straps are not twisted.
After your child is placed in this booster, the safety belt must be used correctly, and ensure that any lap strap is worn low down, so that the pelvis is firmly engaged.
Replace the booster after an accident of any kind. An accident can cause unseen damage to the booster.
NEVER use a booster if it has damaged or missing parts. DO NOT use a cut, frayed or damaged vehicle seat belt. WARNING
NEVER leave your child unattended with this booster.
Failure to properly use this booster increases the risk of serious injury or death in a sharp turn, sudden stop or crash.
DO NOT use this booster without the soft goods.
The soft goods should not be replaced with any besides the ones recommended by the manufacturer, because the soft goods constitute an integral part of the booster performance.
DO NOT use any load bearing contact points other than those described in the instructions and marked on the booster.
NEVER leave luggage or other objects unsecured in a vehicle, they are liable to cause injuries in the event of a collision.
NEVER give this booster to someone else without also giving them this manual.
NEVER leave a booster unsecured in your vehicle. An unsecured booster can be thrown around and may injure occupants in a sharp turn, sudden stop or crash. Remove it or make sure that it is securely belted in the vehicle.
DO NOT modify your booster or use any accessories or parts supplied by other manufacturers.
NEVER use a second-hand booster or a booster whose history you do not know.
DO NOT face your booster toward the rear of the vehicle.
To avoid burns, never put hot liquids in your booster’s cupholder.
DO NOT have your child in swaddled clothes when using this booster in forward facing mode, because this may prevent your child from being properly and securely fastened by the shoulder harnesses and the harnesses between thighs. WARNING
The booster can become very hot if left in the sun. Contact with these parts can burn your child’s skin. Always touch the surface of any metal or plastic parts before putting your child in the booster.
According to accident statistics, children are safer when properly restrained in rear vehicle seating positions, rather than front seating positions. For a vehicle with a front passenger air bag, refer to your vehicle owner’s manual as well as these instructions for a booster installation.7 8
+ Top Tether Choose the Installation Mode Emergency In case of emergency or accidents, it is most important to have your child taken care of with first aid and medical treatment immediately. Product Information Read all the instructions in this manual before using this product. If in doubt, consult either the booster manufacturer or the retailer.
1. This booster is a ‘Semi-Universal’ child restraint. It is
approved to UN ECE regulation 44, 04 series of amendments for general use in vehicles fitted with ISOFIX anchorages systems.
2. Seat positions in other cars may also be suitable to accept
the booster. Please refer to our vehicle fitting list (on-product as well as online at our website). Product Bold Suitable for Child weighing 9-36kg (approximately 1 – 12 years) Mass Group Group 1/2/3 Materials Plastics, metal, fabrics Patent No. Patents pending9 10
Concerns on Installation
Height Adjustment – for Head Support see images
1. Please adjust the head support
to proper height according to the child's height.
2. Squeeze the head support
adjustment lever, meanwhile pull up or push down the head support until it snaps into one of the 11 positions. ! Before adjusting the head support height have your child lean forward slightly.
Use Cupholder Check provided car fitting list for approved seats for booster attachment.
1. Squeeze the recline adjustment
, to adjust the booster to the proper position. The recline angles are shown as
2. There are 3 recline positions
for forward facing mode. see images
! Make sure to open the side impact protection shield for more side impact safety.
The side impact shield opposite the vehicle door can be closed to allow more seating space. Recline Adjustment
1. Unlock the buckle of the
harnesses by pressing the red button.
! To ensure the best protection for the child, always use the small insert when the child's shoulder height is lower than the headrest bottom. Use Insert
2. Engage the buckle. Please
3. When the child's shoulders are
higher than the headrest bottom without the support from the small insert, remove the lower body insert
, and use upper body insert only until the child does not fit comfortably. ! This may vary depending on regions.
guides onto the vehicle ISOFIX bars.
by depressing on the release button
whilst pulling on the connector.
securely to the anchorage fitting.
! Use top tether for installation if vehicle is equipped with a tether anchorage fitting and vehicle requirements are met (see vehicle owner's manual). ! When not in use, top tether must be properly stored. To make sure the top tether is properly stored away, remove any slack in strap to avoid the top tether swinging around when the vehicle is in progress.
and move back Isosafe connector so it is folded completely.
! Make sure that both Isosafe connectors are securely attached to their ISOFIX anchor points. The colors of the indicators on both Isosafe connectors should be completely green.
and push the base back against the vehicle seat until tight. Removing the base
1. To remove base from the
vehicle press the release button
and pull the base back from the seat.
-1 and pull back on the Isosafe connector.
1. Press the webbing adjustment
button, while pulling out the shoulder harnesses to the proper length.
2. Press the red button to
GROUP 1 (9-18kg) & GROUP 2 (15-25kg) With Isosafe system + 3-point-belt + top tether + harness buckle19 20
3. Make sure that both Isosafe connectors are securely
attached to their ISOFIX anchor points. The colors of the indicators on both Isosafe connectors should be completely green.
4. The booster can not be used if the vehicle safety belt
buckle (female buckle end) is too long to anchor the booster securely.
5. Make sure that tether hook are securely attached to the
anchorage fitting. The colors of the indicators on tether strap adjuster should be completely green.
6. To ensure the correct head support height is obtained, the
bottom of the headrest MUST be even with the top of child’s shoulders as shown in
! Store the shoulder strap cover, crotch belt cover, buckle and harness straps in a safe place.
7. Pull down the adjustment webbing and adjust it to the
proper length so that your child is snugly secured. Make sure the space between the child and the shoulder harness is about the thickness of one hand.
GROUP 2 (15-25kg) & GROUP 3 (22-36kg) With Isosafe system + 3-point-belt With Isosafe system + 3-point-belt + top tether
1. Make sure that both Isosafe connectors are securely
attached to their ISOFIX anchor points. The colors of the indicators on both Isosafe connectors should be completely green.
2. The booster can not be used if the vehicle safety belt
buckle (female buckle end) is too long to anchor the booster securely.
3. Position shoulder belt through the shoulder belt guide
4. It is very important to ensure that any lap strap is worn
low down, so that the pelvis is firmly engaged. The booster is shown as
For installation with Isosafe system + 3-point-belt + top tetherFor installation with Isosafe system + 3-point-belt
1. Make sure that both Isosafe connectors are securely
attached to their ISOFIX anchor points. The colors of the indicators on both connectors should be completely green.
2. The booster can not be used if the vehicle safety belt
buckle (female buckle end) is too long to anchor the child restraint securely.
3. Make sure that tether hook are securely attached to the
anchorage fitting. The colors of the indicators on tether strap adjuster should be completely green.
4. Position shoulder belt through the shoulder belt guide
to remove shoulder strap cover, crotch belt cover, buckle and harness straps, and keep them properly. ! To refit the seat pad simply reverse the steps above. Detach Soft Goods
Please wash the soft goods and inner padding with cold water under 30°C.
Do not iron the soft goods.
Do not bleach or dry clean the soft goods.
Do not use undiluted neutral detergent gasoline or other organic solvent to wash the booster. It may cause damage to the booster.
Do not twist the soft goods and inner padding to dry with great force. It may leave the soft goods and inner padding with wrinkles.
Please hang dry the soft goods and inner padding in the shade.
Please remove the booster from the vehicle seat if not in use for a long period of time. Put the booster in a cool, dry place and somewhere your child cannot access it. Care and Maintenance
To ensure the correct head support height is obtained, the bottom of the headrest MUST be even with the top of child’s shoulders as shown in
and the shoulder belt must be positioned in the red zone as shown in
5. It is very important to ensure that any lap strap is worn
low down, so that the pelvis is firmly engaged. The booster is shown as