TKG FT 1012 F KTO - Deep fryer KALORIK - Free user manual and instructions
Find the device manual for free TKG FT 1012 F KTO KALORIK in PDF.



User questions about TKG FT 1012 F KTO KALORIK
0 question about this device. Answer the ones you know or ask your own.
Ask a new question about this device
Download the instructions for your Deep fryer in PDF format for free! Find your manual TKG FT 1012 F KTO - KALORIK and take your electronic device back in hand. On this page are published all the documents necessary for the use of your device. TKG FT 1012 F KTO by KALORIK.
USER MANUAL TKG FT 1012 F KTO KALORIK
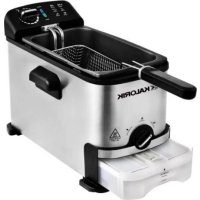
Oil filtration deep fat fryer
- Lid handle
- View window
- Lid
- Reset button
- Safety switch
- Frying basket
- Basket handle
- Basket hook
- Oil reservoir
- Oil level marking MIN MAX
- Oil filter cover
- Oil valve
- Housing
- Oil filtration control knob
- Oil container
- Cap
- Power cord with plug
- Anti-slip feet
- Side handles
- Immersion heater
- Control panel
- Silicon rubber sealing plate
- Temperature control knob
- READY indicator (green)
- POWER indicator (blue)
- White grease filter
- Charcoal odor filter
- Filter cover
D
natural_image
Diagram of a mechanical or structural component with a central cylindrical part and a diagonal line, resting on a grid-like surface (no text or symbols)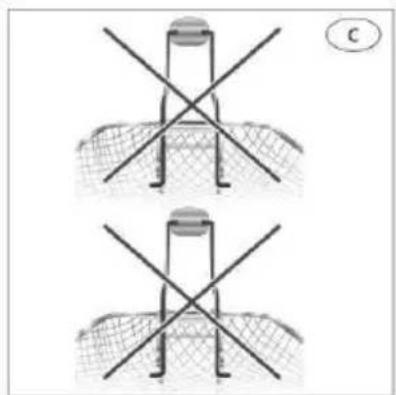
natural_image
Two identical diagrams showing a cross-shaped object on a grid surface, with no text or symbols present.
natural_image
Illustration of a stainless steel kitchen appliance with a lid and directional arrows indicating motion (no text or symbols)
natural_image
Close-up of a kitchen stainless steel evaporator with a digital display and a close-up inset showing a ladder (no text or symbols visible)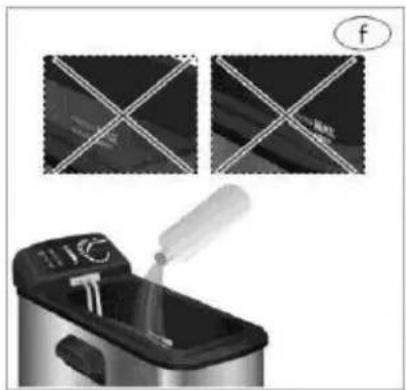
natural_image
Illustration of a food processor with a pipette and a close-up of its kitchen glassware (no text or symbols)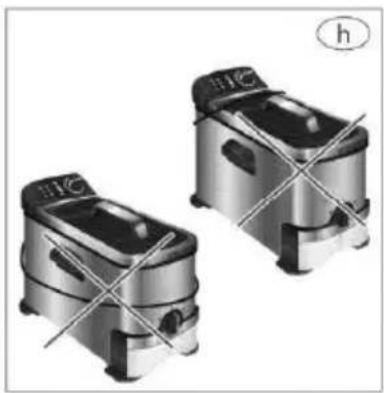
natural_image
Two stainless steel kitchen appliances with cross-shaped cutouts, no visible text or symbols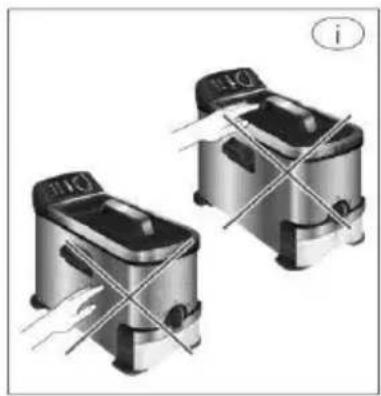
natural_image
Two identical kitchen grilles with crossed handles, no visible text or symbols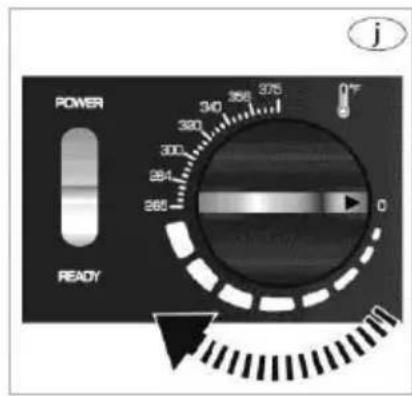
text_image
POWER READY 340 356 375 320 300 284 265 0° j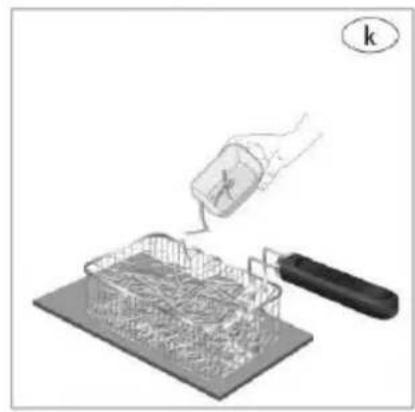
natural_image
Illustration of a hand pouring liquid into a griddle on a tray, with no visible text or symbols.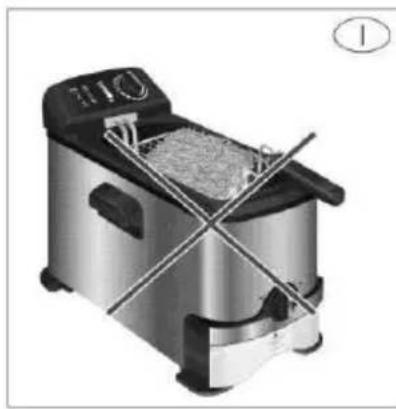
natural_image
Exterior view of a stainless steel three-fried kitchen appliance with crossed cutlery (no text or symbols visible)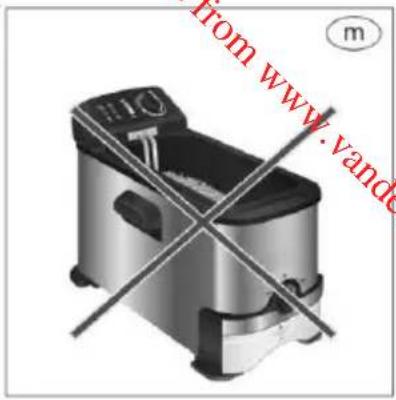
text_image
from www.vande m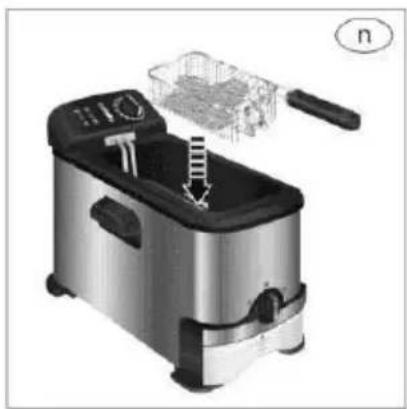
natural_image
Exterior view of a stainless steel kitchen griff with a side panel and filter array (no text or symbols)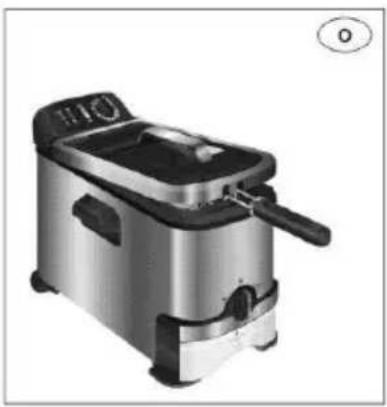
natural_image
Exterior view of a stainless steel two-fried food grater (no text or symbols visible)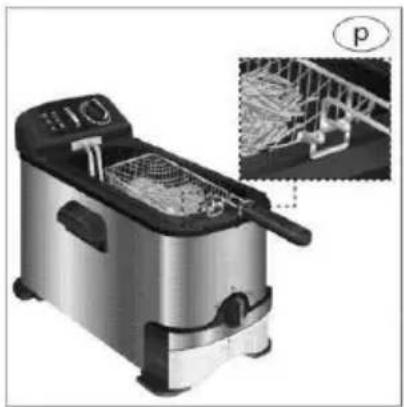
natural_image
Exterior view of a stainless steel kitchen grater with a side panel and internal filter array (no text or symbols visible)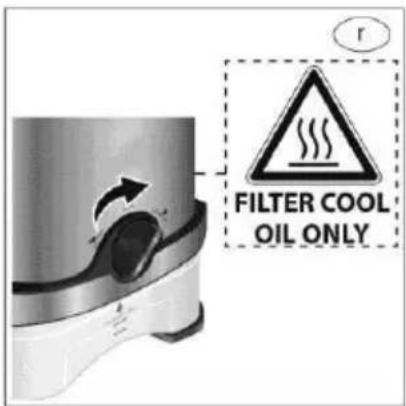
text_image
FILTER COOL OIL ONLY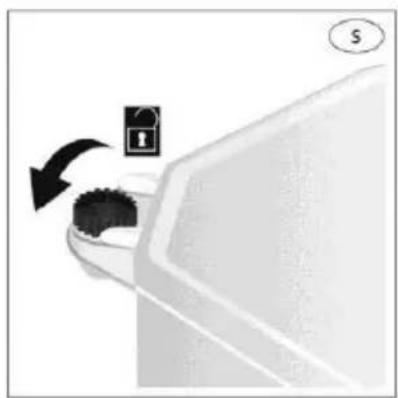
natural_image
Diagram showing a door handle with a padlock icon and arrow indicating rotation (no text or symbols)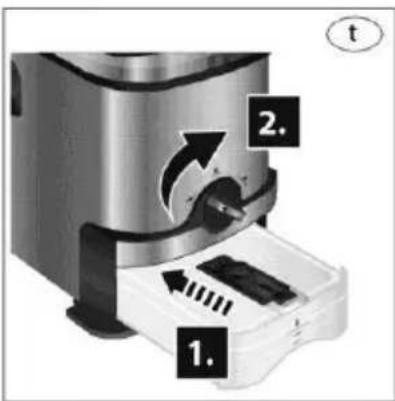
text_image
1. 2. t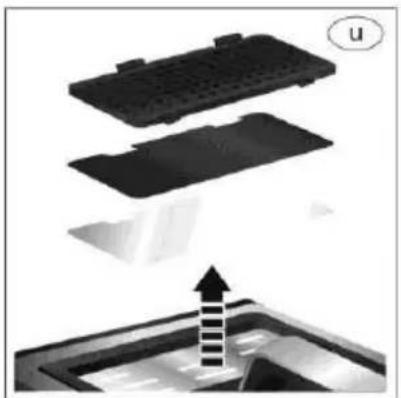
natural_image
Diagram showing a device's internal components with an upward arrow indicating motion (no text or symbols present)GB OPERATING INSTRUCTIONS
IMPORTANT SAFEGUARDS
Please read these instructions carefully before using the appliance, and always follow the safety and operating instructions.
Important: This appliance can be used by children over 8 years old and people with reduced physical, sensory or mental capacities or with a lack of experience or knowledge if they have been given supervision or instructions concerning the safe use of the appliance and the risks involved. Children shall not play with the appliance. Cleaning and user maintenance shall not be made by children unless they are older than 8 years and supervised. Never leave the appliance and its cord unsupervised and within reach of children less than 8 years old or irresponsible persons, especially when it is plugged into the wall or when it is cooling down.
☐ Check that your mains voltage corresponds to that stated on the appliance.
□ Never leave the appliance unsupervised when in use.
From time to time check the appliance for damages. Never use the appliance if cord or appliance shows any signs of damage. In that case, repairs should be made by a competent qualified electrician(*). Should the cord be damaged, it must be replaced by a competent qualified electrician(*) in order to avoid all danger.
☐ Only use the appliance for domestic purposes and in the way indicated in these instructions.
□ Never immerse the appliance in water or any other liquid for any reason whatsoever. Never place it into the dishwasher.
□ Never use the appliance near hot surfaces.
Before cleaning, always unplug the appliance from the power supply.
□ Never use the appliance outside and always place it in a dry environment.
□ Never use accessories that are not recommended by the producer. They could constitute a danger to the user and risk to damage the appliance.
☐ Never move the appliance by pulling the cord. Make sure the cord cannot get caught in any way. Do not wind the cord around the appliance and do not bend it.
☐ Stand the appliance on a flat surface to prevent it from falling.
☐ Only use the appliance for deep-frying. Only cook friable and consumable foodstuffs.
☐ Outer jacket, inner bowl, lid, basket and handle can be washed by hand. Never immerse the appliance in water or any other liquid for cleaning or for any reason whatsoever (see "Cleaning" section).
☐ Wait until the appliance is completely cool before moving, cleaning or storing it. Always take the appliance by the carrying handles. Always unplug the appliance before handling it.
☐ Never operate the appliance without oil or fat in it. Ensure that the oil or fat level is always between the minimum and maximum marks inside the bowl. Never overfill as hot oil or fat might be ejected.
☐ It is absolutely necessary to keep this appliance clean at all times as it comes into direct contact with food.
☐ Make sure the cord never comes in contact with the hot parts of the appliance. Be aware never to touch these hot parts.
☐ Make sure the hot parts of the appliance are not exposed to inflammable materials, such as curtains, tablecloth... as a fire might occur.
□ Never cover the appliance with any kind of material.
□ Never add water to the oil.
Make sure the foodstuffs are as dry as possible.
☐ Your deep fat fryer is equipped with an anti-odour filter. This means you can keep the lid closed during frying. However, please clean this filter regularly (see "Cleaning" section). CAUTION: the deep fryer can reach high temperatures when in use. Oil and fat preparations might catch fire if overheated. Be extremely cautious never to leave your deep fryer in use for long periods. Do not forget to switch off the appliance once your preparation is ready and the fryer is no longer in use. Before pulling the mains plug, switch the temperature selector to "MIN".
☐ Provide proper ventilation when using the appliance.
☐ If you wish to use solid fat, cut it into small pieces and place them into the bowl. Slide the temperature knob to its minimum position.
Each time the pilot light goes out, slide the temperature knob to a slightly higher temperature until all the fat has melted. Once all the fat has melted, set the temperature knob to the desired cooking temperature. This type of fat will solidify when the appliance cools down.
☐ Your appliance must never be switched on through an external timer or any kind of separate remote control system.
☐ Please note: Should the symbol be indicated on a certain surface, you need to be careful when handling the product. This symbol means: CAUTION, this surface may get very hot during use.
The symbol is always put on the surface with the highest temperature, however the other metallic or non-metallic surfaces can also become very hot during use and it is therefore advisable to always handle them with care and if possible with the help of isothermal gloves or other thermal protection. In case of doubt concerning the temperature of a certain surface it is always preferable to protect oneself.
(*) Competent qualified electrician: after-sales department of the producer or importer or any person who is qualified, approved and competent to perform this kind of repairs in order to avoid all danger. In case of need you should return the appliance to this electrician.
BEFORE THE FIRST USE
- Remove all packaging materials.
- Check package content to verify it is complete and undamaged. Do not operate the appliance if the content is incomplete or appears damaged.
Danger of suffocation!
Packaging materials are not toys. Always keep plastic bags, foils and foam parts away from babies and children. Packaging material could block airways and prevent breathing.
NOTE:
The appliance may produce an odor and/or emit smoke when switched on for the first time, as residues from the production process are eliminated. This is normal and does not indicate a defect or hazard. Ensure ample ventilation.
Clean the appliance thoroughly before using for the first time (Cleaning and Maintenance).
ASSEMBLY
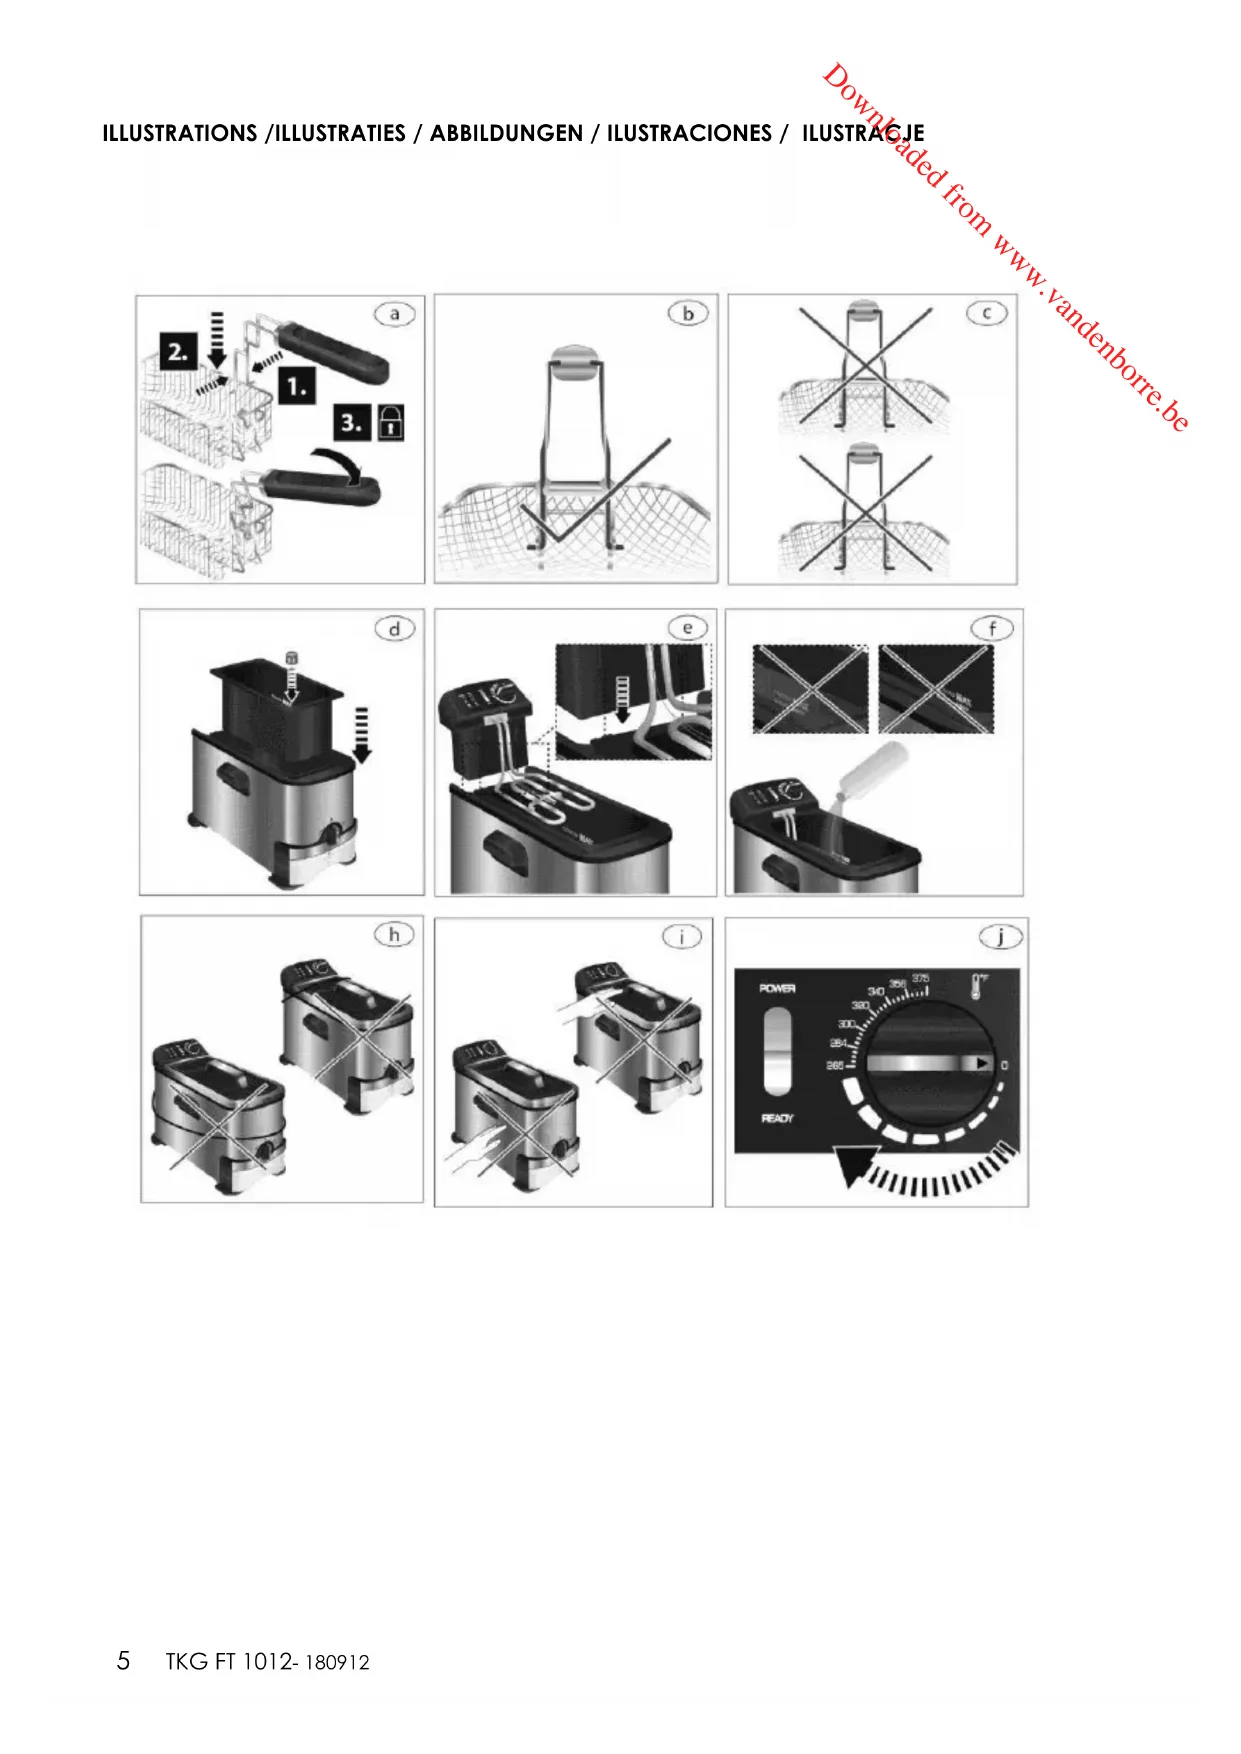
See Illustrations
- Place the appliance on a clean, flat and heat resistant surface.
-
Before using your appliance make sure:
-
The basket handle (7) is locked in place in the basket (6).
To lock the basket handle (7) in place, press the bars together and slide them between the slots.
To insert the ends of the bars into the bracket on the basket (6) and push the handle (7) backwards (ill. a and b). Do not assemble any other way (ill. c).
The oil reservoir (9) is secured in the correct position with the oil filter cover (11) and oil valve (12) on the same side as the oil filtration control knob (14) (ill. d). Ensure the oil filter cover (11) is in place inside the oil reservoir (9).
The control panel (21) is placed on the connecting plate on the back of the housing (13). Ensure the grooves of the connecting plate are in the guides of the control panel (ill. e).
NOTE:
Your appliance is equipped with a safety switch (5) located on the control panel (21). If the control panel (21) is not placed properly in its position, the appliance will not operate.
• Incorrect assembly may lead to an unstable setup and might cause injuries.
- The silicon rubber sealing plate (22) prevents hot steam escaping from under the lid. Do not attempt to remove it.
USING THE APPLIANCE
This appliance can be used for frying food such as French fries, chicken or fish (see Recommended frying times and temperatures).
NOTE:
The appliance has a rated power of 1700W. Before plugging it into the wall outlet, ensure that the electrical circuit is not overloaded with other appliances. This appliance should always be operated on a separate 230V \~ 60Hz wall outlet.
Make sure the appliance is switched off before connecting it to a wall outlet.
- Place the appliance on a clean, flat and heat-resistant surface. When using the appliance on wooden surfaces, use a heat resistant mat to protect the wood from damages. Ensure a minimum distance around the appliance of at least 4 inches to other objects, cupboards and walls.
- Ensure the oil container (15) is assembled, empty and in place inside the appliance, the oil filtration control knob (14) is on the LOCK position and the oil filter cover (11) is in place inside the oil reservoir (9). Then, pour suitable cooking oil into the oil reservoir (9) (ill. f).
Danger of burns!
➢ Never refill the oil reservoir (9) during use or while hot. Always allow the appliance to cool down completely. Do not mix new and old oil.
WARNING:
DO NOT OVER OR UNDER FILL (ill. f). The minimum oil capacity is 1.9L (MIN), the maximum oil capacity is 3L (MAX). Ensure the oil level always remains between the MIN and MAX marking (10).
- Spread a little oil on the inside of the view window (2) to prevent condensation
- Place the lid (3) onto the housing (13).
- Ensure the temperature control knob (23) is on the 0 position
NOTE:
- Insert the plug (17) into a wall outlet.
WARNING:
Only use accessories recommended by the manufacturer. Do not place any other materials in the appliance.
➢ Never let the power cord (17) come in contact with the lid (3) or appliance housing (13) during use (ill. h).
Danger of burns!
Do not touch the lid (3) or appliance housing (13) during or after use (ill. i). Only use the handles (2, 7, 19) provided.
Always pay special attention when adding or removing accessories and food from the appliance. Never touch the lid (3) or appliance housing (13) when the appliance is plugged in and switched on or immediately after use. It is recommended to always use oven mitts.
▶ Escaping steam can burn.
- Turn the temperature control knob (14) to the required temperature (see Recommended frying times and temperatures) (ill. j). The POWER indicator (25) will turn on to indicate the appliance is heating. Once the set temperature has been reached, the READY indicator (24) will turn on.
Approximate time durations until set temperature is reached:
| Temperature setting (°C) | Time (minutes) |
| 130 | About 7 |
| 150 | About 8 |
| 170 | About 10 |
| 190 | About 13 |
• After the oil has been preheated, remove the lid (3).
- Place the basket (6) on a clean, flat and heat resistant surface.
• Fill the basket (6) with food (ill. k). Do not overfill the basket (6) (ill. k).
WARNING
Do not fry food without the basket (6) (ill. I).
Do not fill the basket (6) over half way. Too much food can cause excess foaming and could cause the oil to overflow during operation.
➢ Food added to the appliance must be dry. If frying frozen foods such as French fries or chicken wings, remove all ice particles from the frozen foods prior to frying to prevent oil from overflowing.
➢ Always remove excess moisture from food with a paper towel before frying. Even
a small amount of water can cause severe splattering of hot oil.
After immersing the basket (6) in the oil, immediately place the lid (3) on the appliance. Danger of hot oil splashing out.
• Carefully lower the basket (6) into the oil reservoir (9) (ill. n).
- Cover the oil reservoir (9) with the lid (3) (ill. o). Ensure the recessed parts of the lid (3) fit properly over the basket handle (7) and silicon rubber sealing plate (22).
NOTE:
When frying fresh cut potatoes and high moisture content food, lower the basket slowly into the oil. If the oil boils or foams too rapidly, raise the basket for a few seconds and lower again. Do this until the basket can be lowered without excess foaming.
Do not place the lid (3) on the appliance when frying fresh cut potatoes or other high moisture content foods.
For frying times, see 'Recommended frying times and temperatures' or follow the instructions from the food manufacturer.
• After the frying time has elapsed, remove the lid (3).
- Use the handle (7) to lift out the basket (6) and hang it onto the basket hook (8) onto the rim of the oil reservoir (9) (ill. p).
- Let the food drain in the basket (6) for a few seconds to remove excess oil and retain crispness.
- Use the handle (7) to carefully lift the basket (6) and pour the food onto a heat resistant dish that has been covered with a paper towel to collect remaining oil.
WARNING
➢ Never place the hot basket (6) directly on a tabletop or countertop to avoid damage to surfaces. It is recommended to use a heat resistant trivet or cutting board.
- Place the basket (6) on a clean, flat and heat resistant surface.
- After the cooking process is finished, turn the temperature control knob (23) to the 0 position and remove the plug (17) from the wall outlet.
WARNING
Always disconnect the plug (17) and socket before disconnecting to avoid accidents. Don't remove plug during normal operation. If it is disconnected, immediately remove from the socket. Turn the temperature control knob (23) to the 0 position. Reconnect the plug (17) to the socket.
This appliance generates heat and steam during use. Proper precautions must be taken to prevent the risk of burns, fires or other injuries to persons or damage to property. Do not leave the appliance unattended while in use.
The surfaces of the appliance become hot. Do not touch while in use. Allow the appliance to cool down at least 30 minutes before handling.
RECOMMENDED FRYING TIMES AND TEMPERATURES
NOTE:
The frying times in the chart below are approximate and should be adjusted to suit your own tastes, different food quantities and food manufacturer's instructions.
| Temperature setting (°C) | Time (minutes) |
| 130 | About 7 |
| 150 | About 8 |
| 170 | About 10 |
| 190 | About 13 |
| Food | ||
| Food | Temperature setting (°C) | Time (minutes) |
| Frozen French fries | 190 | 8-12 |
| French Fries | 190 | 8-10 |
| Meat strips | 190 | 10-14 |
| Chicken wings | 190 | 10-14 |
| Fish (battered) | 170 | 3-5 |
| Seafood | 170 | 3-5 |
COOKING WITH OIL
Cooking oil can enhance the food's flavor – or spoil its taste. As with any other food component, freshness and correct handling of the oil is the key to successful deep frying results.
| Temperature setting (°C) | Time (minutes) |
| 130 | About 7 |
| 150 | About 8 |
| 170 | About 10 |
The quality of the oil decreases with use at high temperatures. Food particles, water and other liquids will further lower its quality, therefore:
- Do not mix different cooking oils.
-
Only use fresh and clean cooking oils:
-
Regularly remove burnt food particles while frying. Always use utensils that are safe to immerse into hot oils without damaging the utensil or the appliance, and always wear oven mitts when removing any burnt food particles.
- After use and before storage, filter oil with the integrated filtration system (see Oil Filtration)
- Do not reuse oil that has been used to fry fish or other strongly flavored food.
Some meats, such as chicken wings, will release large amounts of liquids when frying, thus watering down the oil. Do not reuse this oil.
OIL FILTRATION
NOTE:
Filter the oil after each use. Store filtered oil properly (see Storing oil)
➢ Discard of oil on a regular basis depending on oil quality (see Cooking with oil).
After switching off the appliance, wait at least 3 hours for the oil to cool down, depending on the settings selected during use. Hotter oil will take longer to reach a cool temperature.
Filtering the oil after each use will help prolong the life of the cooking oil, but it should still be discarded if the oil is deteriorated after multiple use. We estimate that oil, in normal use, should be changed at least after every 10 uses.
- Ensure the oil container (15) is assembled, empty and in place inside the appliance.
- Once the oil has cooled down to room temperature, turn the oil filtration control knob (14) to the FILTER OIL position (ill. r). The oil will start dripping inside the oil container (15). The oil filter cover (11) will keep food residues from being transferred to the oil container (15).
- When all oil has been filtered:
Turn the oil filtration control knob (14) to the LOCK position if the container will remain inside the appliance.
Turn the oil filtration control knob (14) to UNLOCK position if the container is to be removed from the appliance.
NOTE:
Always wait 3 to 4 hours until the oil has cooled down completely, before draining or filtering.
Extreme caution must be used when moving the appliance while the oil reservoir (9) and oil container (15) are not both empty.
When removing the oil container (15) from the appliance, handle with care. Keep the oil container (15) flat and hold it with both hands.
EMPTYING THE OIL CONTAINER
Filtered oil can be stored in a suitable container (see Storing oil) or re-used for frying a new batch of food (see Cooking with oil).
- Unscrew the cap (16) on top of the oil container (15) (ill. s).
- Slowly pour the oil container (15) content into a suitable container or the oil reservoir (9), if required.
NOTE:
➢ Ensure the oil filtration control knob (14) is on UNLOCK position before pouring oil into the oil reservoir (9).
➢ Tilt the oil container (15) upwards (vertical position) gradually to avoid leaks from the side of the container.
Oil can be stored in the oil reservoir (9), inside the deep fryer or in another cool dry place (see Storing oil).
- Screw the cap (16) back on top of the oil container (15).
- Insert the oil container (15) back into the appliance and turn the oil filtration control knob (14) to the LOCK position to secure the oil container (15) in place (ill. t).
STORING OIL
- Do not store used cooking oil in the refrigerator. Choose a cool place that is not subject to sunlight. Generally, oil may be stored for a period of 3 months, once the bottle is opened. Please observe the oil manufacturer's storage directions as well.
HINTS AND TIPS
- Smaller quantities of food normally require a slightly shorter cooking time than larger quantities of food.
- To reduce cooking time, defrost food prior to cooking. It is recommended that some foods should not be thawed/defrosted prior to cooking, such as frozen fish, and frozen French fries.
• It is recommended to use a meat thermometer to check the cooking progress. - In the event of food flare-ups, do not remove the lid (3), do not remove the basket (6); turn the temperature control knob (23) to the 0 position and unplug the appliance.
- When the food you are cooking requires shaking, it is recommended to use a timer set for half of the suggested cooking time. This way a bell will ring and remind you to shake the basket (6).
- It is recommended to only use nylon, heat-proof plastic or wooden cooking utensils. Metal utensils may become hot and damage the non-stick surface. Always remove utensils from the appliance. Do not leave them in the appliance during use.
CLEANING AND MAINTENANCE
Proper maintenance will ensure many years of service from your appliance. Clean the appliance after every use. The appliance contains no user serviceable parts and requires little maintenance. Leave any servicing or repairs to qualified personnel.
WARNING:
Always turn the temperature control knob (23) to the 0 position, after cleaning thoroughly, before using or storing the appliance. Ensure that no water enters the appliance housing (13).
Do not attempt to attach the magnetic plug permanently to the appliance.
Do not attempt to remove the silicon rubber sealing plate (22).
- Ensure the oil container (15) is in place, then turn the oil filtration control knob (14) to FILTER OIL position to empty the oil reservoir (9) (see Oil filtration).
- Place the basket (6) on a clean, flat and heat resistant surface.
Danger of burns!
➢ Ensure the basket (6) cooled down completely before touching its surface and attempting to remove the basket handle (7).
➢ Ensure the oil cooled down completely before emptying the oil reservoir (9) into the oil container (15).
- Remove the basket handle (7) from the basket (6).
- Remove the control panel (21) from the oil reservoir (9). Carefully clean the control panel (21) and immersion heater (20) with a damp cloth.
- Pull the oil filter cover (11) from the oil reservoir (9) and then remove the oil reservoir (9) from the housing (13).
- Open the lid filter cover (28) and remove both black and white filters (26, 27) (ill. u).
-
Clean the appliance housing (13) with a damp cloth.
-
Wash the lid (3), basket (6), basket handle (7), oil reservoir (9) and oil filter cover (11) with hot soapy water or in a dishwasher. Rinse and dry carefully.
• Dry all parts thoroughly after cleaning and before using the appliance again.
NOTE:
If the oil container (15) needs to be cleaned, ensure it is empty before attempting to clean (see Emptying the oil container). Wash with hot soapy water or in a dishwasher. Rinse and dry carefully.
Clean the filters (26, 27) every 3 months or after every 12 uses with hot soapy water. Do not clean in a dishwasher.
Dry all parts and surfaces thoroughly before use. Make sure that all parts and surfaces are completely dry before connecting the appliance to a wall outlet. Even a small amount of water can cause severe splattering of hot oil.
STORAGE
• Before storage, always make sure the appliance is completely cool, clean and dry.
- It is recommended to store the appliance in a dry place.
- Store the appliance on a stable shelf or in a cupboard. To avoid accidents, ensure that both the appliance and its power cord are beyond reach of children or pets.
PROTECTION OF THE ENVIRONMENT – DIRECTIVE 2012/19/EU
In order to preserve our environment and protect human health, the waste electrical and electronic equipment should be disposed of in accordance with specific rules with the

implication of both suppliers and users. For this reason, as indicated by the symbol ■ the rating label or on the packaging, your appliance should not be disposed of as unsorted municipal waste. The user has the right to bring it to a municipal collection point performing waste recovery by means of reuse, recycling or use for other applications in accordance with the directive.
The user manual is also available in electronic format from the after-sales service (see warranty card) by simple request.
ErP Declaration – Regulation 1275/2008/EC
We, Team Kalorik Group SA/NV, hereby confirm that our product meets the requirements of regulation 1275/2008/EC. Admittedly, our product does not dispose of a function to minimize the power consumption, which should according to regulation 1275/2008/EC put the product in off or standby mode after finishing the main function, but this is practically impossible, as it would compromise the main function of the product so strongly, that using the product would no longer be possible!
For this reason we always tell the customer in our instruction manual to unplug the appliance immediately after use.
The user manual is by simple request also available in electronic format from the after-sales service (see warranty card).
- When all oil has been filtered:
➢ Ensure the oil filtration control knob (14) is on UNLOCK position before pouring oil into the oil reservoir (9).
➢ Tilt the oil container (15) upwards (vertical position) gradually to avoid leaks from the side of the container.
Oil can be stored in the oil reservoir (9), inside the deep fryer or in another cool dry place (see Storing oil).
natural_image
Abstract black-and-white geometric design with a circle and two angular shapes (no text or symbols)KALORIK