Get Set Grow iSize 360 - Car seat COSATTO - Free user manual and instructions
Find the device manual for free Get Set Grow iSize 360 COSATTO in PDF.
| Product Type | i-Size Rotatable Car Seat |
| Brand | Cosatto |
| Model | Get Set Grow iSize 360 |
| Category | Car Seat |
| Dimensions (approx.) | Height 62 cm, Width 44 cm, Depth 54 cm |
| Weight (approx.) | 13.5 kg |
| Power Supply | None (mechanical) |
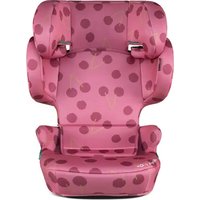
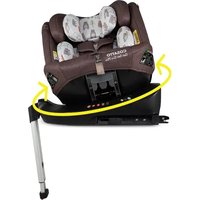
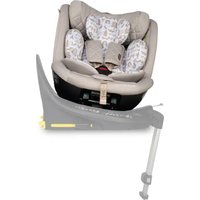
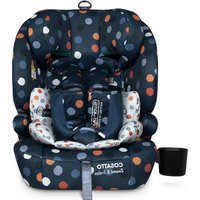
| Main Features | 360° rotation, rear-facing use (40-105 cm), forward-facing use (76-105 cm), booster mode (100-150 cm), ISOFIX attachment + top tether, adjustable 5-point harness, adjustable headrest |
| Care and Cleaning | Machine washable cover (max 30°C), clean plastic parts with warm water and mild detergent, do not use abrasives or ammonia |
| Safety | i-Size approval (R129), green ISOFIX locking indication, top tether tension indicator, airbag deactivation required on passenger side |
| Spare Parts and Repairability | Covers (headrest, seat), padding (crotch, shoulder straps), infant insert, ISOFIX guides available (order on cosatto.com) |
| General Information | Use from birth to approx. 12 years (up to 150 cm), store manual in designated compartment, warranty void if instructions are not followed |
Frequently Asked Questions - Get Set Grow iSize 360 COSATTO
User questions about Get Set Grow iSize 360 COSATTO
0 question about this device. Answer the ones you know or ask your own.
Ask a new question about this device
Download the instructions for your Car seat in PDF format for free! Find your manual Get Set Grow iSize 360 - COSATTO and take your electronic device back in hand. On this page are published all the documents necessary for the use of your device. Get Set Grow iSize 360 by COSATTO.
USER MANUAL Get Set Grow iSize 360 COSATTO
Email: cuddle@cosatto.com
Letter: Cosatto Limited, Bentinck Mill, Bentinck Street,
Farnworth, Bolton, Lancs, BL4 7EP, England.
*This is a local rate chargeable number, prices may vary
Please check with your provider.
All the design and trademarks contained herein are the property of Cosatto Limited. No part of this document may be reproduced without the permission of Cosatto Limited.
www.cosatto.com
(EN) NOTICE:
(40 - 105CM) THIS IS AN I-SIZE ENHANCED CHILD RESTRAINT
SYSTEM. IT IS APPROVED ACCORDING TO REGULATION NO.129
FOR USE IN, I-SIZECompatible Vehicle Seating POSITIONS AS
INDICATED BY VEHICLE MANUFACTURERS IN THE VEHICLE USERS' MANUAL.
(100 - 150CM) THIS IS AN I-SIZE BOOSTER SEAT ENHANCED
CHILD RESTRAINT SYSTEM. IT IS APPROVED ACCORDING TO UN
REGULATION NO.129, FOR USE PRIMARILY IN" I-SIZE SEATING
POSITIONS" AS INDICATED BY VEHICLE MANUFACTURERS IN THE
VEHICLE USER'S MANUAL.
FOR COMPATIBILITY OF NON I-SIZE VEHICLE, PLEASE REFER
TO THE FIT CHECKER APP (HTTP://COSAT.TO/FITCHECKER) OR
THE COMPATIBILITY LIST ON THE WEBSITE (HTTP://COSAT.TO/GETSETGROVL).
NEVER USE THIS CHILD RESTRAINT SYSTEM IN SEATING POSITIONS
WHERE AN ACTIVE FRONTAL AIRBAG IS INSTALLED.
IMPORTANT - DO NOT USE FORWARD FACING BEFORE THE
CHILD'S AGE EXCEEDS 15 MONTHS (REFER TO INSTRUCTIONS).
IF IN DOUBT, CONSULT EITHER THE CHILD RESTRAINT
MANUFACTURER OR RETAILER.
COSATTO
clever stuff for happy babies
The ABCs
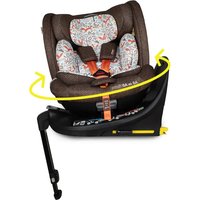
Get Set Gro i-Size 360
i-Size Car Seat
(EN) Instruction 1 - 32
(FR) Instruction, (DE) Gebrauchsanleitung, (IT) Istruzioni,
(EN) Part list diagram 33
(FR) Schéma de nomenclature, (DE) Teilelisteabbildung, (IT) Diagramma della lista delle parti
(EN) Spare part list diagram 34
Important: Keep these instructions for future reference.
Important safety Information
The instruction manual should be kept safely with child car seat for its life period:
There is a compartment at the side of the child car seat for storage of the instruction manual.
It is recommended to check that the child restraint is compatible with the intended vehicle at the time of purchase.
Please refer to the vehicle list, Cosatto fit checker app (http://cosat.to/fitchecker) or the vehicle fitting list section on the website (http://cosat.to/getsetgrovl).
Seat positions in other vehicles may also be suitable to accept the child restraint. If in doubt, consult either Cosatto or the retailer.
Child age and weight:
- When used in rearward facing mode, the car seat is suitable from birth, height between 40 and 105cm , up to maximum weight of 20kg .
- IMPORTANT - DO NOT USE FORWARD FACING BEFORE THE CHILD'S AGE EXCEEDS 15 MONTHS.
- When used in forward facing mode, the car seat is suitable from 15 months, height between 76 and 105 cm ,up to maximum weight of 20 kg .
- When used in booster mode, the car seat is suitable for height between 100 and 150 cm .
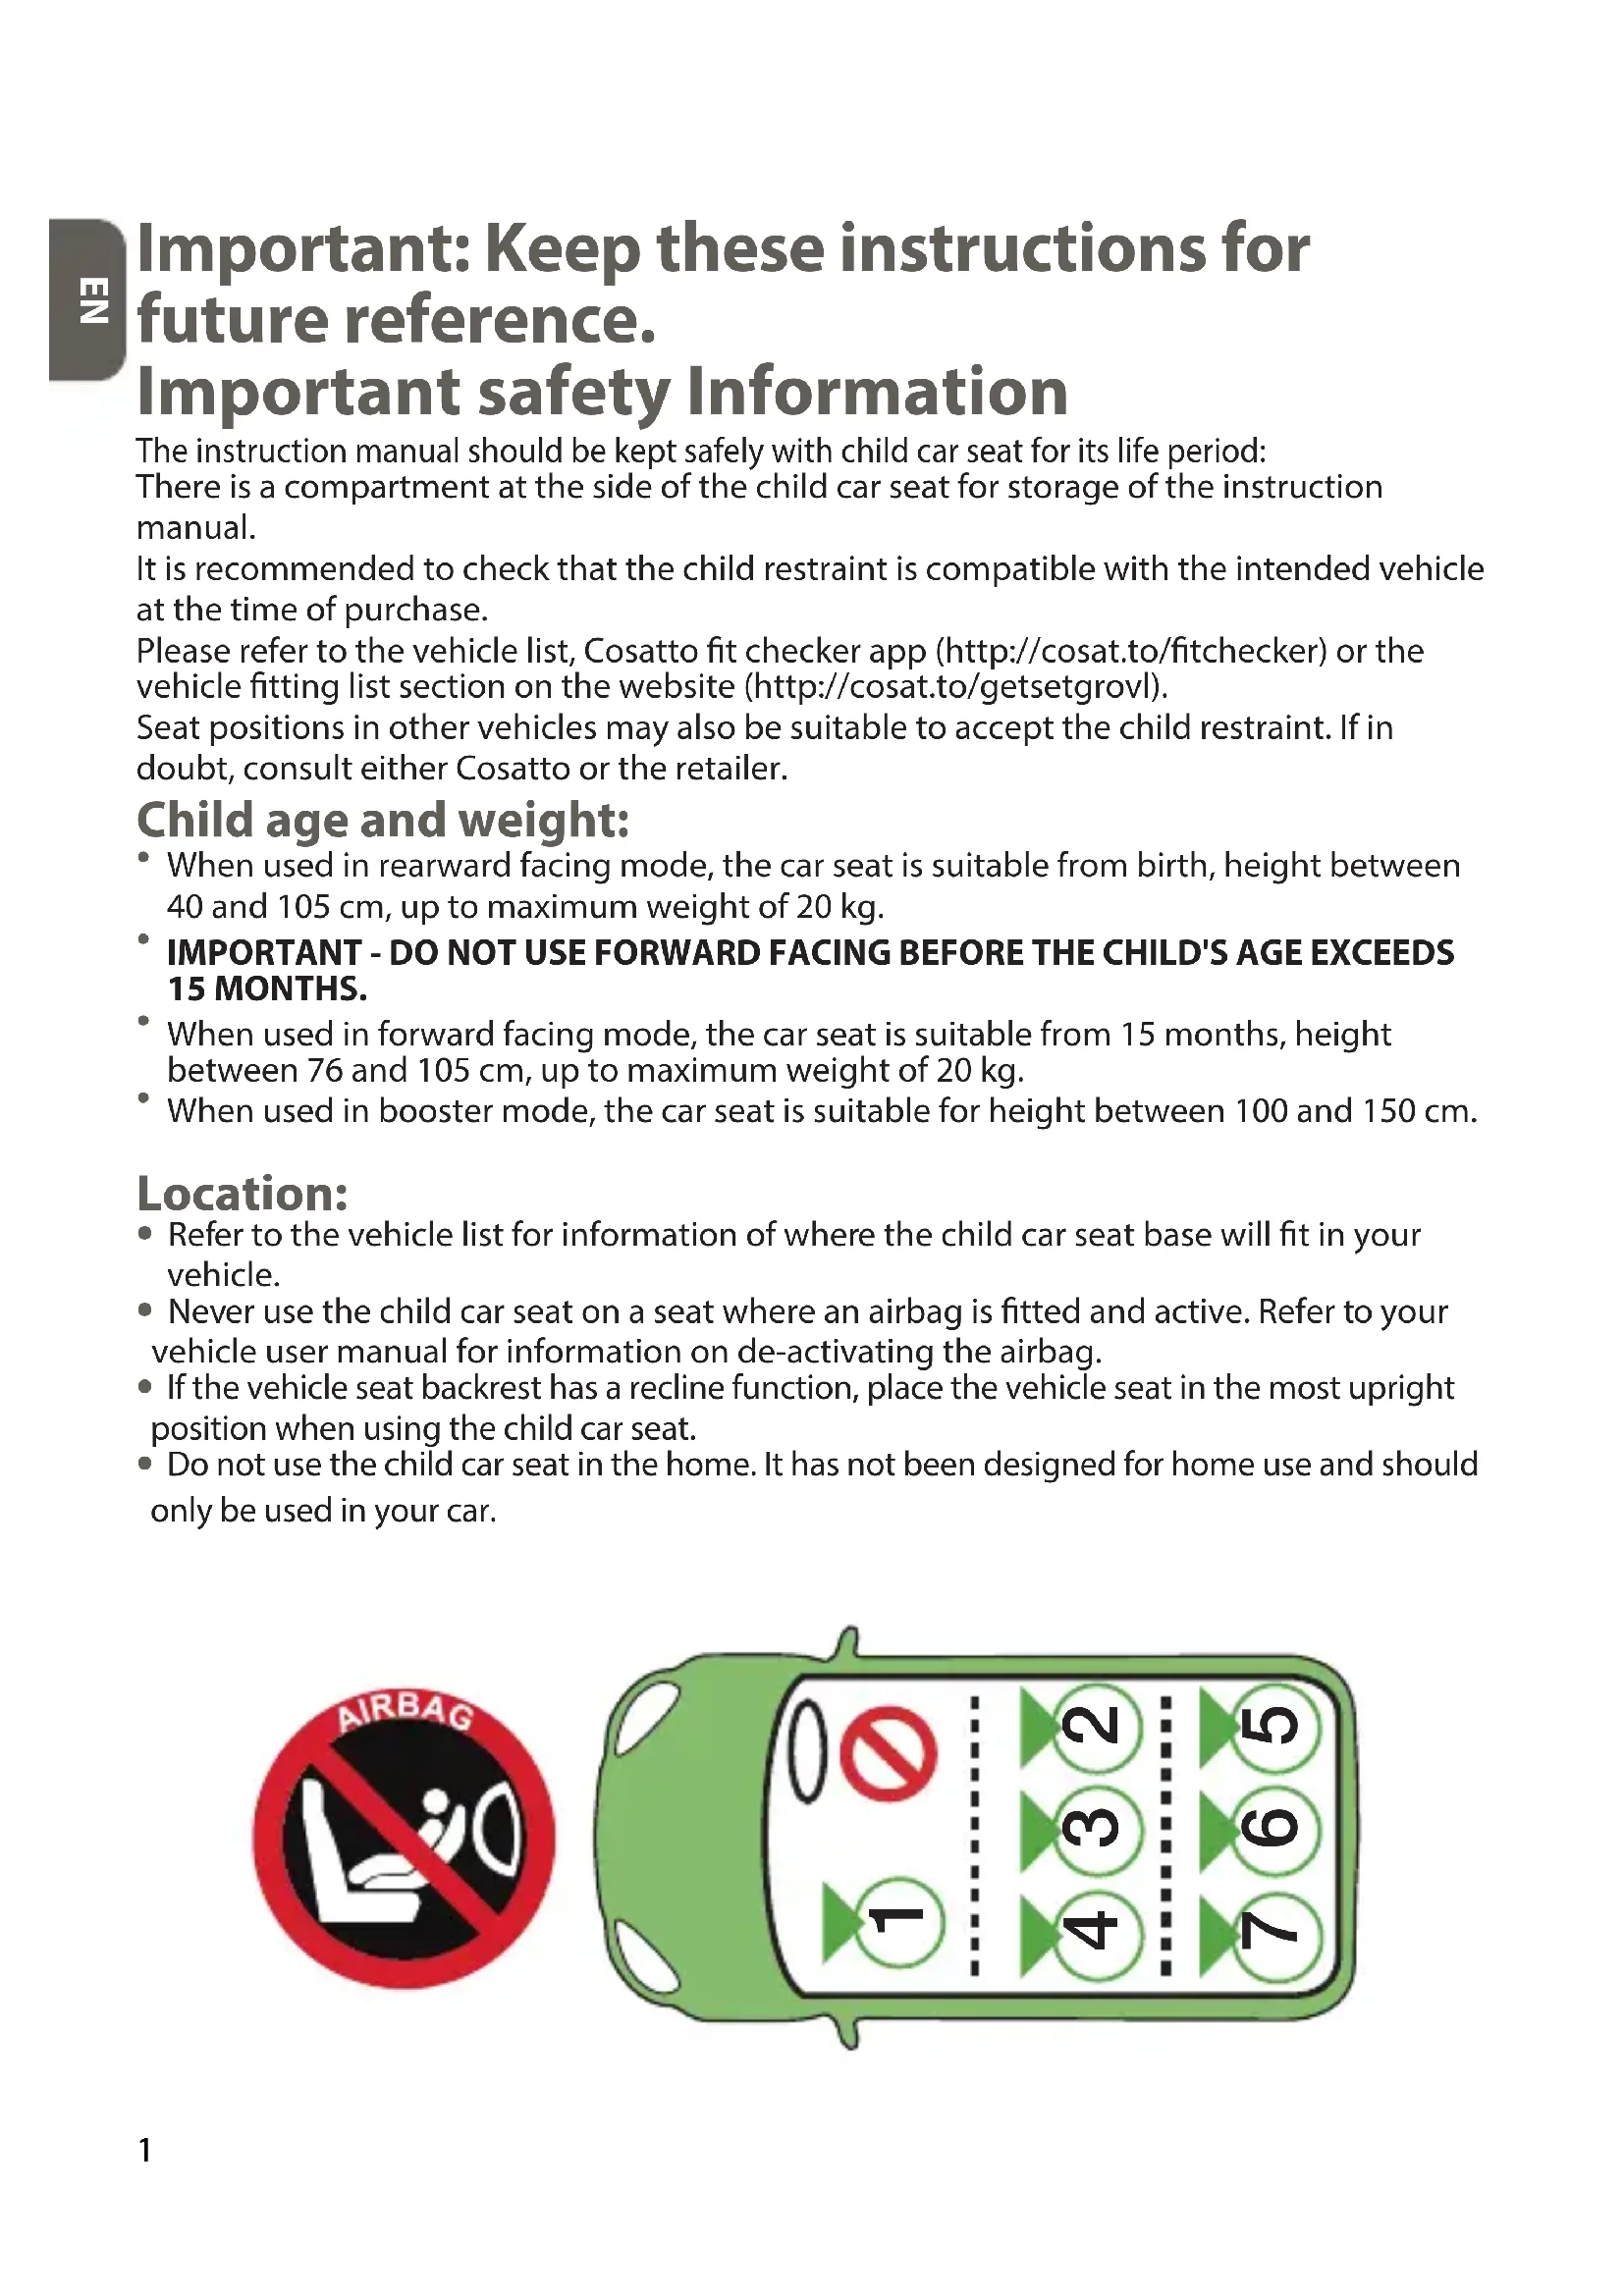
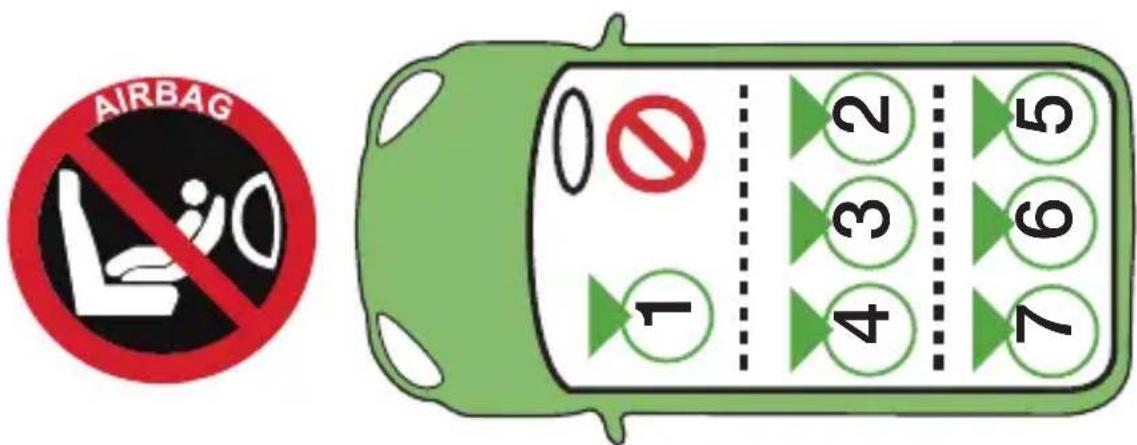
Location:
- Refer to the vehicle list for information of where the child car seat base will fit in your vehicle.
- Never use the child car seat on a seat where an airbag is fitted and active. Refer to your vehicle user manual for information on de-activating the airbag.
- If the vehicle seat backrest has a recline function, place the vehicle seat in the most upright position when using the child car seat.
- Do not use the child car seat in the home. It has not been designed for home use and should only be used in your car.
Safety - Please read carefully:
- NEVER use this child car seat with its side facing the vehicle seat.
- Any rigid items and plastic parts of the child car seat must be so located and installed that they are not liable, during everyday use of the vehicle, to become trapped by a movable seat or in a door of vehicle.
- If any load bearing points other than those described in the instructions are used, this can significantly reduce the protection factor of the child car seat.
ALWAYS secure your child with the safety harness when using this child car seat. - Never leave your child unattended.
- Do not attempt to dismantle, modify or add to any part of the child car seat or change the way your vehicle seat belts are made or used.
- After an accident the child car seat should be replaced and the vehicle seat belts. Although they may look undamaged, they may not protect your child as well as they should.
- Do not place anything such as a towel or cushion under the child car seat. This could affect the performance of the child restraint system in an accident.
- Any vehicle seat belt holding the child car seat to the vehicle should be tight, and that belt should not be twisted.
- Always make sure that the child car seat harness and vehicle seat belt are correctly tensioned to ensure maximum protection for your child.
- Prevent harness/ vehicle seat belt from getting trapped between car doors or rubbing against sharp parts of the seat or body.
- If the harness/vehicle belts becomes cut or frayed, replace it before travelling.
- Never use replacement parts other than those approved by Cosatto.
- Cosatto advise that child car seat should not be bought or sold second-hand. Many child car seat acquired this way have been found to be dangerous.
- NOTE: The child car seat can mark vehicle seat upholstery. Cosatto cannot be held responsible for damage or marking to vehicle seat upholstery.
- Security is only guaranteed if the child car seat is fitted in accordance with these instructions.
- Safely secure any luggage or other objects that might cause injuries to the occupant of the child car seat in the event of a collision.
- Failure to comply with the instructions would be dangerous, and will automatically void the warranty and exempt Cosatto from any liability.
- The harness buckle has been designed to be released quickly in an emergency. IT IS NOT CHILD PROOF. More inquisitive children may learn to undo the buckle. Children should be told never to play with the harness buckle or any other part of the child car seat.
- It is important that the lap harness is worn low down, so that the pelvis of the child is firmly engaged.
- In booster seat mode, the lap vehicle seat belt must be worn in such a way as to properly secure the pelvis of the child.
- Never use the child car seat without its fabric cover because the fabric cover constitutes as an integral part of the child car seat performance. The fabric cover should not be replaced with any other than the ones recommended by Cosatto.
- Cover the child car seat if it is left in direct sun light for prolonged period as the child car seat base surfaces may get very hot. Check the child car seat surface before placing your child in the seat.
Notice:
- (40 - 105cm) This is an i-Size Enhanced Child Restraint System. It is approved according to Regulation No.129, for use in, i-Size compatible vehicle seating positions as indicated by vehicle manufacturers in the vehicle users' manual.
- (100 - 150cm) This is an i-Size booster seat Enhanced Child Restraint System. It is approved according to UN Regulation No.129, for use primarily in" i-Size seating positions" as indicated by vehicle manufacturers in the vehicle user's manual.
- Never use this child car seat on passenger seat fitted with an active airbag is installed.
- If in doubt, consult either the child restraint manufacturer or retailer.
Care & Maintenance:
- Your child restraint system has been designed to meet safety standards and with correct use and maintenance will give many years of trouble free performance.
- Store your child restraint system in a dry, safe place.
- Storing a damp child restraint system will encourage mildew to form, so after exposure to damp conditions, dry off with a soft cloth and allow to dry thoroughly before storing.
- Avoid leaving the child restraint system in sunlight for prolonged periods as this may cause fabrics to fade.
- Inspect the child restraint system regularly for signs of damage- stop using the product if damage is found.
- DO NOT take apart, or attempt to take apart the child restraint system when cleaning. It is unnecessary and dangerous to do so.
- Plastic and metal parts may be sponged clean with warm water and a mild detergent.
Refer to the wash care on soft goods for cleaning instruction. - Remove insert from seat cover/ seat liner prior to cleaning.
- Never clean with abrasive, ammonia based, bleach based or spirit type cleaners.
- Remove all packaging & protective materials on the product before using.
Visual language Key:
| XX | Refer to warning XX | XX | Repeat action x times | G | Press and hold |
| ✓ | Correct action | General action arrow | Check | ||
| X | Incorrect action | Lock | Cont.xx | Continue to step XX | |
| CLICK! | Audible sound | Unlock | Repeat on other side |
Part List:
Please refer to diagrams:
P1: Headrest P5: Crotch pad
P2: Seat liner P6: ISOFIX arm
P3: Chest pads (pair) P7: Top-tether strap
P4: Harness P8:ISOFIX guide (x2)
Replacement Parts:
The replacement parts shown below are available for your product. For UK & Ireland customers, order through our website: http://www.cosatto.com/service-centre/spares
For customer outside UK & Ireland, contact information for your local distributor can be found on http://www.cosatto.com/stockists
If you require any further assistance, please contact us at cuddle@cosatto.com
S1: Seat liner S4: Headrest cover
S2: Crotch pad S5: Seat cover
S3: Chest pads (pair) S6: ISOFIX guide (set)
Fitting & Operation Information:
Please refer to the following diagrams:
Location 1- IMPORTANT: Never use the child car seat on a seat where an
airbag is fitted and active. Refer to your vehicle user manual for information on de-activating the airbag.
Backrest recline
2-Adjusting:
Important: Only use the specified recline position(s) for each mode:
Rearward facing mode (40 - 105cm): R
Forward facing mode (76 -105cm): 1, 2, 3
Booster seat mode (100 - 150cm): 1
Headrest
3-Adjusting:
4-Satisfactory headrest position:
Harness
5-Loosening:
NOTE: Pull only the harness straps.
6-Tightening:
NOTE: The harness must be reasonably tight. It should restrain but not make the child uncomfortable.
Check that the straps are not twisted while the child is seated.
7- Opening:
8-Closing:
Child car seat
Securing your child in the child car seat:
9- Open the harness (refer to step 7) (a). Raise the headrest (refer to step 3) (b).
10- Place your child in the child car seat. Close the harness (refer to step 8) (a). Adjust the headrest (refer to step 3) (b). Tighten the harness (refer to step 6) (c).
11- Adjusting the seat unit's orientation:
Recline the backrest to either position R or 3 (refer to step 2) (a). Push and hold the seat rotate adjustment button (b) then rotate the seat (c).
12- Seat positions:
b, c: Sideward facing position: The sideward facing position allow access for placing or removing a child from the seat unit after the car seat is fitted.
WARNING: Do Not travel with the seat unit in this position.
d: Rearward facing position:
When use as a rearward facing child car seat, the car seat is suitable from birth, height between 40 and 105cm up to maximum weight of 20kg .
IMPORTANT - DO NOT USE FORWARD FACING BEFORE THE CHILD'S AGE EXCEEDS 15 MONTHS.
a: Forward facing position :
When use as a forward facing child car seat, the car seat is suitable from 15 months, height between 76 and 150~cm
ISOFIX arm 13- Location:
The two ISOFIX low anchorage anchor points are usually located between the vehicle seat base and back (a).
Some vehicles have ISOFIX indicator near the ISOFIX low anchorage anchor points (b).
14-Fitting the ISOFIX guides (Optional):
The ISOFIX guides can help identify the vehicle ISOFIX anchor points and make installation easier. They can also help with the protection of your vehicle seat.
15-Fitting:
Press and hold ISOFIX arm adjustment buttons and extended the arms fully (a).
Engage the ISOFIX arms (b) and ensure that the ISOFIX arm security indicators are green (c).
Push the base back until it rests firmly against the vehicle seat backrest (d).
Removal is a reversal of this procedure.
Top-tether strap
16-
Location:
The ISOFIX top-tether strap anchor point is located at either the top of the seat (saloon) (a), the rear of the seat (b), the vehicle floor (c) or the vehicle ceiling (d). If in doubt, please consult the vehicle handbook.
Fitting:
17- Unfasten the top-tether strap (a) and bring it over the child car seat (b).
18- The top-tether strap may need to be lengthened to reach the ISOFIX anchor point. To lengthen the top-tether strap squeeze the release adjuster (a) and pull the strap out (b).
For hatchback and estate vehicles, remove the parcel shelf (consult the vehicle handbook for instruction).
Pass the top-tether strap under the vehicle headrest (c). Remove the headrest if it interferes with the strap (consult the vehicle handbook for instruction).
Attach the ISOFIX top-tether strap clip (d & e) to the anchor point (f, g, h or i).
19- Pull the top-tether strap (a) until the tension indicator is green (b). The strap is now adequately tensioned.
Removal is a reversal of this procedure.
Rearward facing mode (40 - 105cm):
20-Fitting:
Convert the seat unit to rearward facing orientation (refer to step 12).
Recline the backrest to position R (refer to step 2) (a).
Position the child car seat on the vehicle seat, rearward facing.
Attach the ISOFIX arms to the anchor points (refer to step 13 - 15) (b).
Attach the ISOFIX top-tether strap clip to the anchor point (refer to step 17 - 19) (c).
Removal is a reversal of this procedure.
Seat liners 21- When your child's height is 75~cm or below, the child car seat
must be used WITH the seat liner.
When your child's height 76 cm or above, the child car seat must be used WITHOUT the seat liner.
Forward facing mode (76 - 105cm):
IMPORTANT - DO NOT USE FORWARD FACING BEFORE THE CHILD'S AGE EXCEEDS 15 MONTHS.
22-Fitting:
Convert the seat unit to forward facing orientation (refer to step 12).
Recline the backrest to forward facing positions (refer to step 2) (a).
Position the child car seat on the vehicle seat, forward facing.
Attach the ISOFIX arms to the anchor points (refer to step 13 - 15) (b).
Attach the ISOFIX top-tether strap clip to the anchor point (refer to step 17 - 19) (c).
Removal is a reversal of this procedure.
Booster seat mode (100- 150cm):
Converting to booster seat mode:
23- Convert the seat unit to forward facing orientation (refer to step 12).
Open the harness (a, refer to step 5).
Lift up the headrest cover tongue (b) & seat cover flap (c).
Store the harness behind the seat cover flap (d).
Store the harness clip in the waist harness slot (e).
24- Refit the seat cover flap & headrest cover flap (a).
Remove the crotch pad (b).
Push the buckle under seat cover (c).
25-Lift the seat cover to gain access to buckle storage compartment (a).
Store the buckle in the storage compartment (b).
Refit the seat cover (c).
Note: The buckle must be stored lowdown in the storage compartment.
Belted only:
Fitting:
26- Convert the seat unit to forward facing orientation (refer to step 12).
Recline the backrest to position 1 (Refer to step 2) (a).
Position the child car seat on the vehicle seat, forward facing.
Retract the ISOFIX arms (refer to step 15) (b).
Secure your child with vehicle belt (refer to step 27 - 28) (c).
Removal is a reversal of this procedure.
Vehicle belt 27- Place your child into the child car seat.
Pull the vehicle belt out and around the child (a) and fasten the buckle (b).
Fit the diagonal vehicle belt through the headrest diagonal vehicle belt guide (c).
28-Tension the vehicle belt (a & b).
IMPORTANT: The position of the vehicle belt buckle can affect the stability of the child restraint system. In an accident this could stop the child restraint system from protecting your child as well as it should. After tightening the vehicle belt, if the buckle lies in the position marked (X) then try fitting the child restraint system in another seating position in your vehicle.
Removal is a reversal of this procedure.
Belted with ISOFIX arms only:
29-Fitting:
Convert the seat unit to forward facing orientation (refer to step 12).
Recline the backrest to position 1 (Refer to step 2) (a).
Position the child car seat on the vehicle seat, forward facing.
Attach the ISOFIX arms to the anchor points (refer to step 13 - 15) (b).
Secure your child with vehicle belt (refer to step 27 - 28) (c).
Removal is a reversal of this procedure.
Softgoods Removing:
30- Convert the car seat to booster seat mode (refer to step 23 - 25).
Unfasten the headrest cover poppers (a) and remove the headrest cover (b).
31- Open the seat cover flap (a).
Release the fabrics around the top-tether strap guides (b) and unfasten the seat cover poppers (c) then remove the seat cover (d).
Reverse the procedures above to refit the softgoods.
Checklist:
- Have you check the compatibility of the child car seat with the intended vehicle?
- If applicable, is the air-bag de-activated?
- Is your child car seat correctly fitted to the vehicle seat?
- Have you check the safety indicators on ISOFIX arms & ISOFIX top-tether strap clip?
- Is your child correctly secure in the child car seat?
- Is harness adequately tensioned and not twisted?

http://www.cosatto.com/service-centre/spares
compartment de rangement.