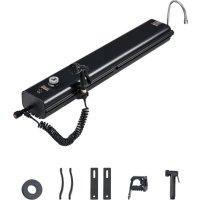
YKSX20L - Bike rack Vevor - Free user manual and instructions
Find the device manual for free YKSX20L Vevor in PDF.


| Product Type | Water tank for roof rack |
| Brand | Vevor |
| Model | YK-SX-20L |
| Capacity | 17 L |
| Operating pressure | 2.7 - 3 bar |
| Operating temperature | 0 °C to 60 °C |
| Bar installation distance (AA) | 1080 mm |
| Crossbar width (BB) | 130 mm |
| Main functions | Pressurized water storage, washing with gun and sprinkler |
| Material | Plastic |
| Delivery contents | Tank, expansion hose, gun, sprinkler, valves, gaskets, mounting brackets |
| Safety | Do not drink the water, empty in case of frost, securely attach to the roof |
| Maintenance | Regularly check and tighten fasteners, drain water in freezing weather |
| Spare parts | Available (gaskets, valves, brackets) |
| General information | Use on oval or square roof bars |
Frequently Asked Questions - YKSX20L Vevor
User questions about YKSX20L Vevor
0 question about this device. Answer the ones you know or ask your own.
Ask a new question about this device
Download the instructions for your Bike rack in PDF format for free! Find your manual YKSX20L - Vevor and take your electronic device back in hand. On this page are published all the documents necessary for the use of your device. YKSX20L by Vevor.
USER MANUAL YKSX20L Vevor
Technical Support and E-Warranty Certificate www.vevor.com/support
ROOF RACK WATER TANK
MODEL:YK-SX-20L/YK-SX-15L/YK-SX-26L/YK-SX-30L
We continue to be committed to provide you tools with competitive price. "Save Half", "Half Price" or any other similar expressions used by us only represents an estimate of savings you might benefit from buying certain tools with us compared to the major top brands and does not necessarily mean to co all categories of tools offered by us. You are kindly reminded to verify carefully when you are placing an order with us if you are actually Saving Half in comparison with the top major brands.
Model:YK-SX-20L/YK-SX-15L/YK-SX-26L/YK-SX-30L
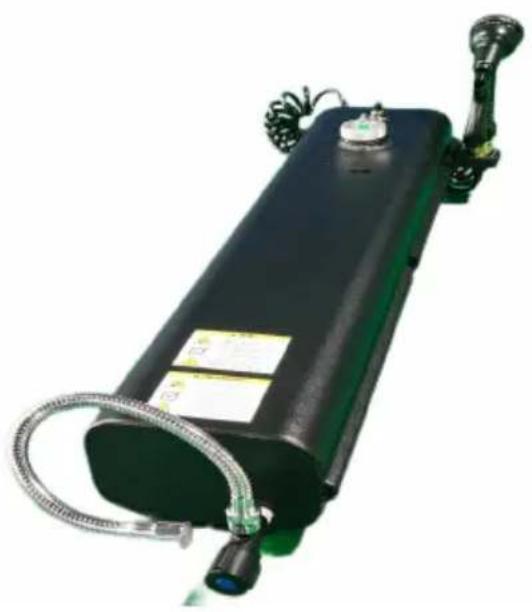
NEED HELP? CONTACT US!
Have product questions? Need technical support? Please feel free to contact us:
Technical Support and E-Warranty Certificate www.vevor.com/support
This is the original instruction, please read all manual instructions carefully before operating. VEVOR reserves a clear interpretation of our user manual. The appearance of the product shall be subject to the product you received. Please forgive us that we won't inform you again if there are any technology or software updates on our product.
SAFETY INSTRUCTIONS
- Please read and understand this manual carefully before using the Roof R Water Tank.
- The installation should be done by an adult, and children should not use without supervision.
- Please ensure that the Roof Rack Water Tank is firmly installed, otherwise may fall off and cause harm to people.
- Check and tighten the mounting bracket regularly. Also, when driving on ro roads, always stop to check and tighten the mounting bracket. Otherwise may cause the tank to fall from your vehicle during driving or cause a crash. The cause damage, injury, or death of the water tank, your vehicle, or other veh We are not responsible for any damage or injury caused by the detachment water tank from the vehicle.
- Do not leave water in the Roof Rack Water Tank at freezing temperatures may damage your equipment. Do not put the RV antifreeze in the equipment Ensure that the water tank is emptied under icing conditions.
- Cars with a Roof Rack Water Tank installed, do not use the automatic machine. Before entering the automatic car wash, you must remove the Roof Water Tank from the vehicle to avoid damage to your vehicle and the Roof Water Tank.
- Do not drink any water from the water tank
- Service temperature of water tank: 0^ - 60^ , service pressure of water tank: less than 3 Bar.
- Safety warnings are attached to the Roof Rack Water Tank, as important must follow these safety protocols when operating the Roof Rack Water Tank
PARAMETER LIST
| Model | YK-SX-20L | YK-SX-15L | YK-SX-26L | YK-SX-30L |
| Volume | 17L | 15L | 26L | 30L |
| Pressure discharge valu | 2.7-3bar | 2.7-3bar | 2.7-3bar | 2.7-3bar |
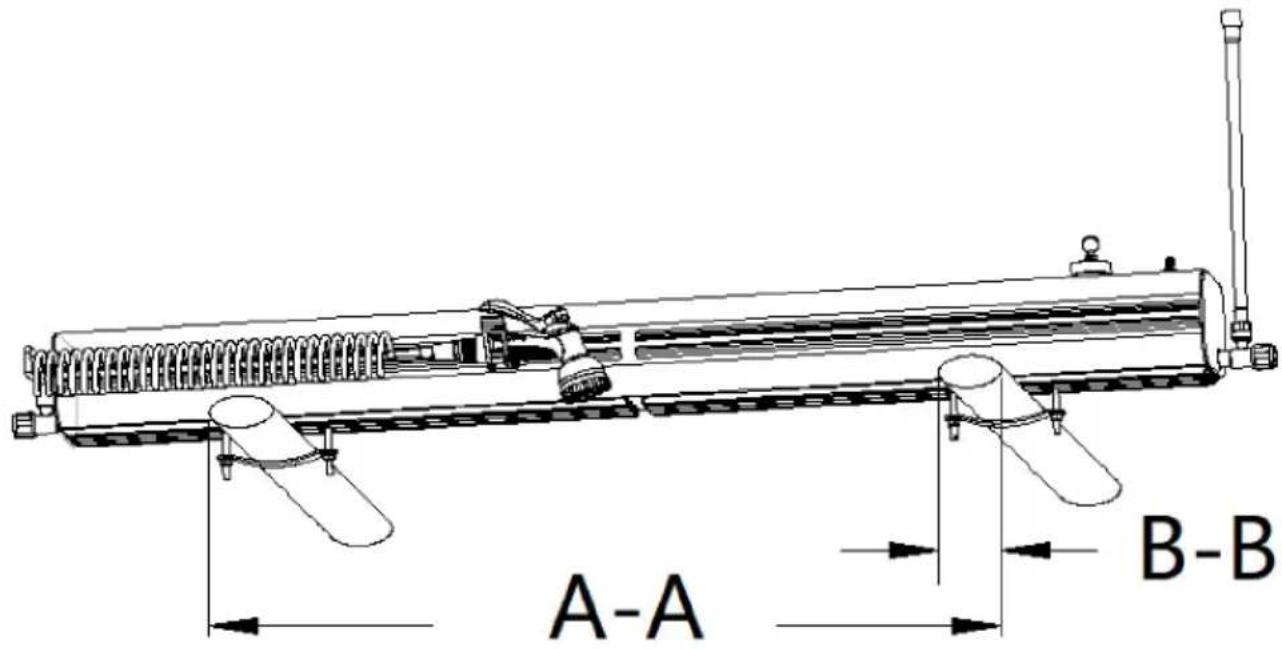
| Install the horizontal ba distance (A-A) | <1080mm | <810mm | <1420mm | <1630mm |
| Crossbar width(B-B) | <130mm | <130mm | <130mm | <130mm |
List of parts
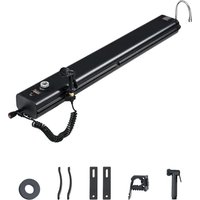
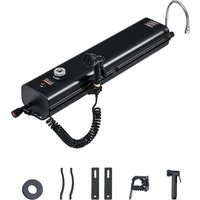
| 1: water tank × 1pc | 2: Expansion hose× 1p | 3: Water gun nozzle×1pc |
| 4: sprinkler×1pc | 5: angle valve×2pcs | 6: Male Quick disassembly joint×1pc |
| 7: female Quick disassembly joint×1pc | 8: Faucet extension×1pc | 9: Ø20×2mm Silicone gasket×1pc |
| 10: Ø20×2.5mm Silicone gasket×1pc | 11: Ø20×3.5mm Silicone gasket×1pc | 12: Plastic seal cover×1pc |
| 13: Electroplated plastic sealant sleeve×1pc | 14: raw adhesive tape×1pc | 15: Horizontal rod installation sheet×2pcs |
| 16: Luggage frame installation sheet×2 | 17: M8×65 Type T bolt×4pcs | 18: M8×45 Type T bolt×4pcs |
| 19: M8 pine nut×8pcs | 20: metallic gasket ×8p | 21: Spray head clip×1 |
| 22: atmospheric valve ×1 | 23:Pressure valve×1pc |
INSTRUCTIONS
Safety and Care Advice
- Check you have all the components and tools listed on the following pages:
- Remove all fittings from the plastic bags and separate them into their group
- Keep children and animals away from the work area, small parts could chow swallowed.
- Make sure you have enough space to layout the parts before starting.
- Parts of the assembly will be easier with 2 people.
- You need to buy your own pressure tools to pressurize the water tank.
- The atmospheric valve should be removed from the water tank; Fill water from the mounting hole of the atmospheric valve and install the atmospheric valve after water injection.
- It is recommended that the water tank should store no more than 80% of maximum capacity.
THE STANDARD INSTALLATION METHOD
Step1: Install Angle Valve
- Wrap 2-3 laps raw adhesive tape at the angle valve thread.
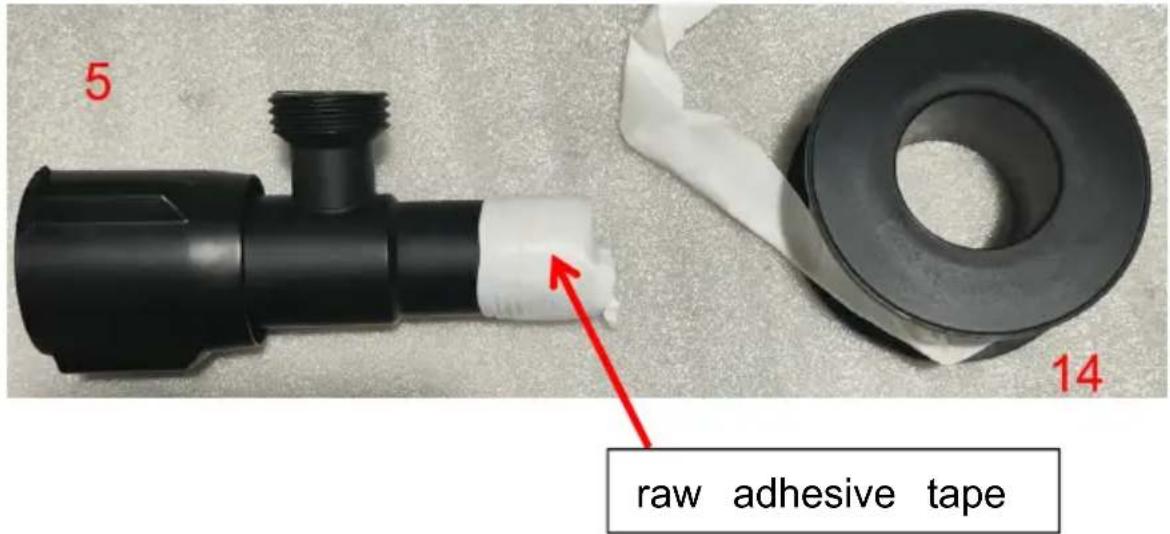
- Install the two corner valves on each side of the water tank.
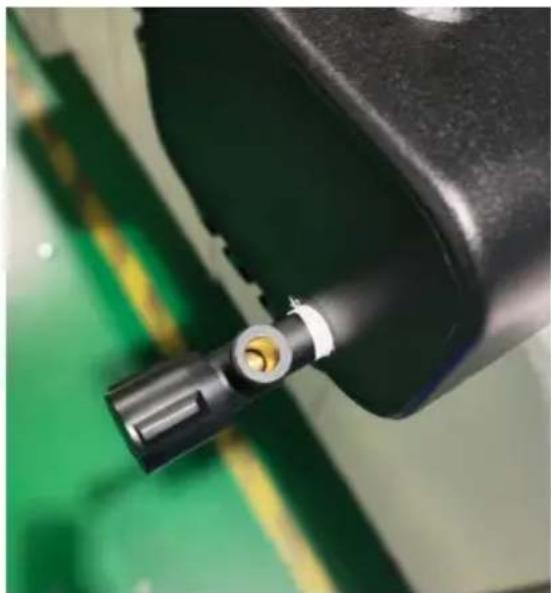
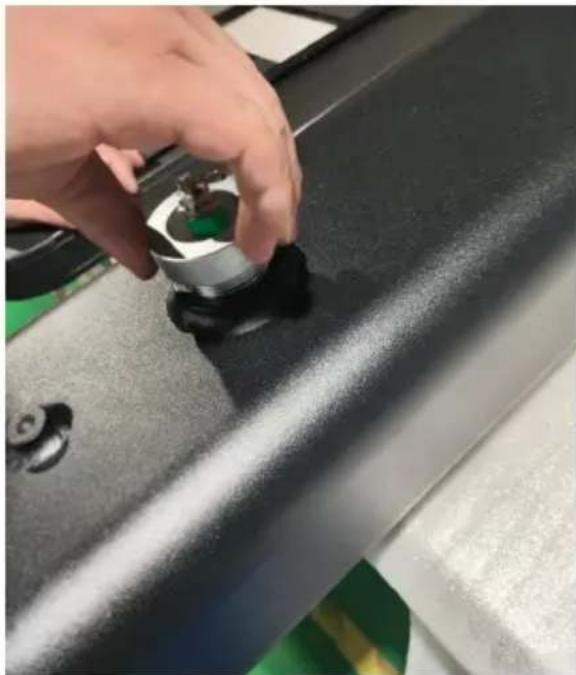
Step 2: Install the atmospheric valve 22 and the Pressure v 23.
- Install the atmospheric valve at the threaded hole at the top of the water
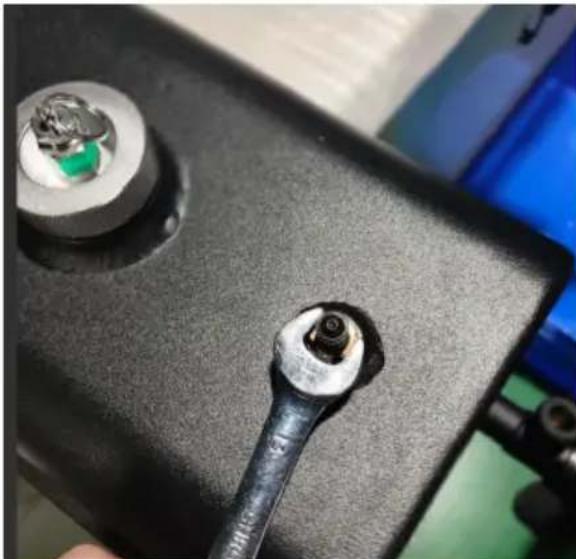
- Use a wrench for opening 13 to screw the pressure valve 23 into the top tank.
Step 3: Install Water gun nozzle 3 and sprinkler 4;
- Screw the Expansion hose 2 into the angle valve 5.
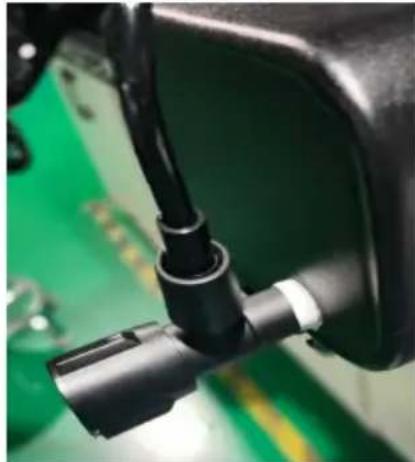
- Install female Quick disassembly joint 7 in the screw hole of Expansion hose 2 first.
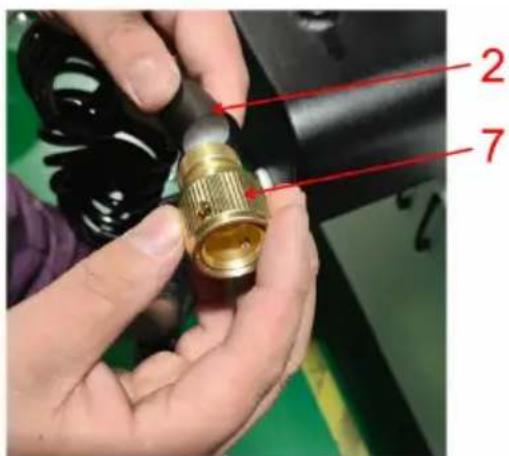
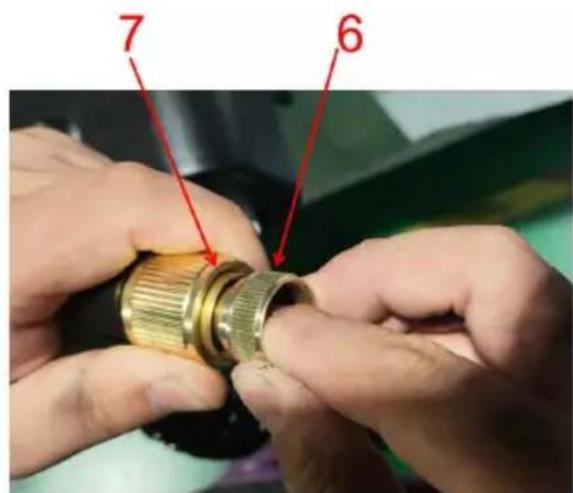
- The outer circle of the next female Quick disassembly joint 7 is pressed b and then put the Male Quick disassembly joint 6 sets into the hole position female Quick disassembly joint 7.
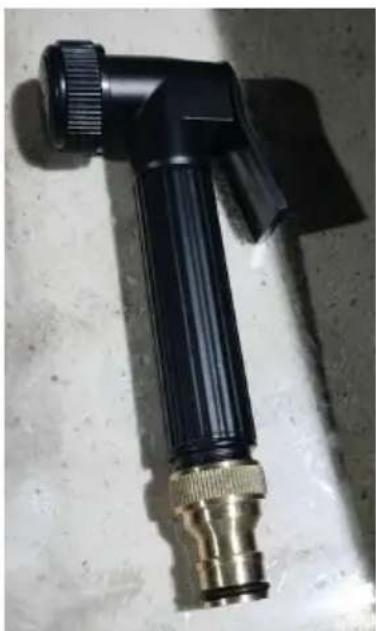
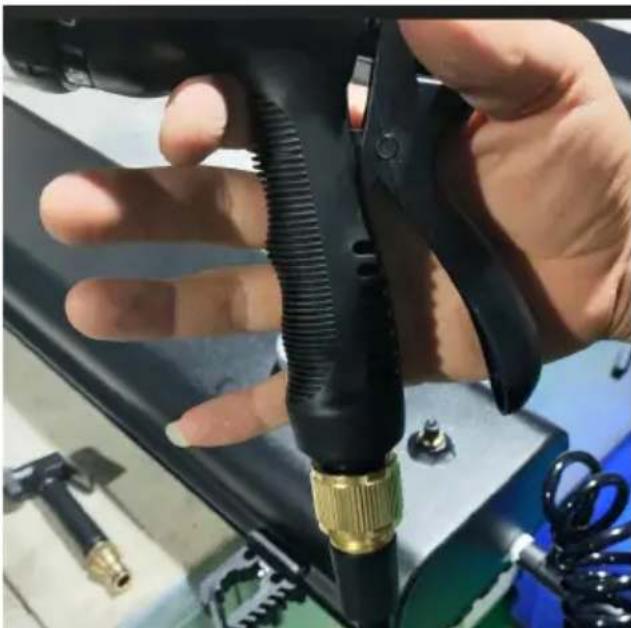
- Screw the Water gun nozzle 3 into the screw hole of Male Quick disasser joint 6
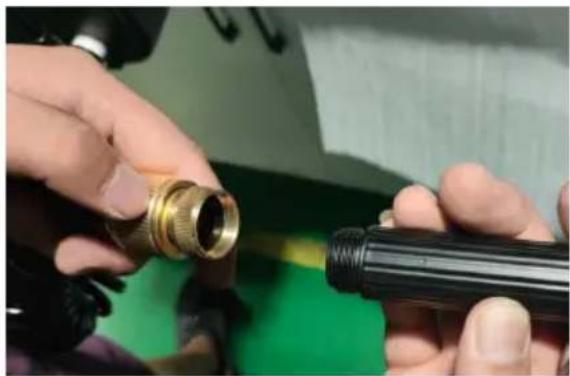
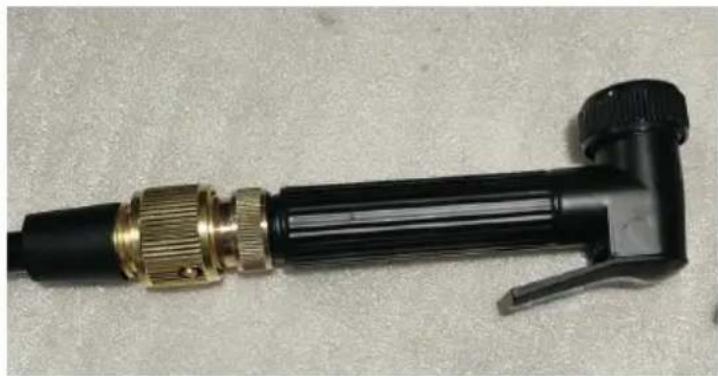
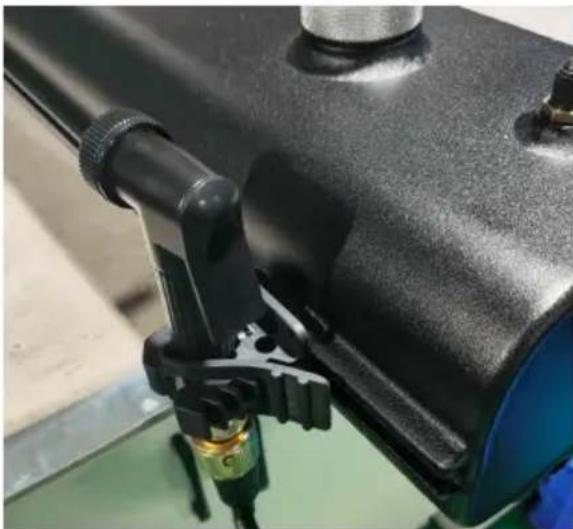
- Place the Spray head clip 21 into the side slot of the water tank and tigh threads on the Spray head clip 21 using the S4 inner hexagonal wrench.
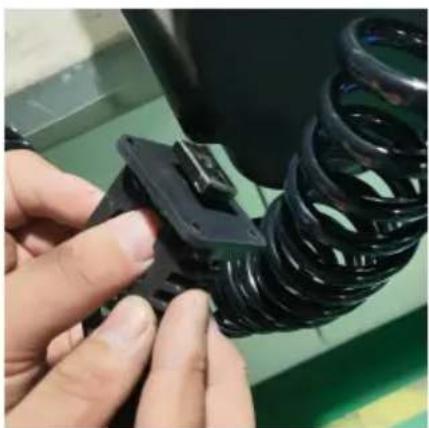
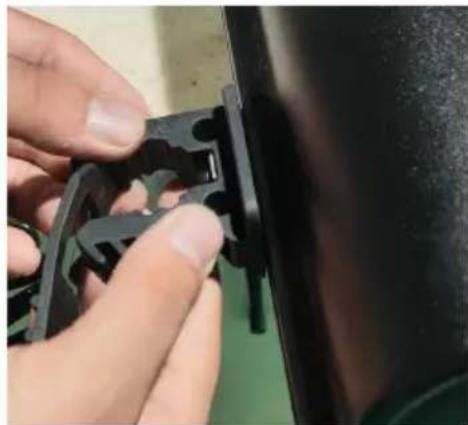
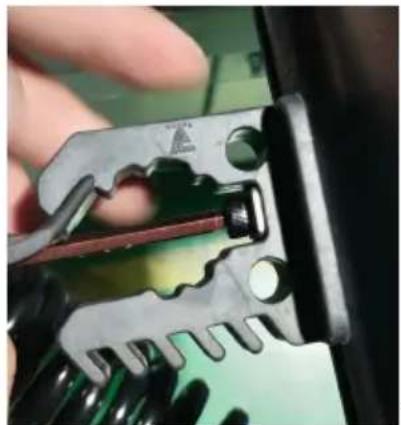
- Install the Water gun nozzle 3 on Spray head clip 21 and tighten the mobelt of the clip to stabilize the Water gun nozzle 3.
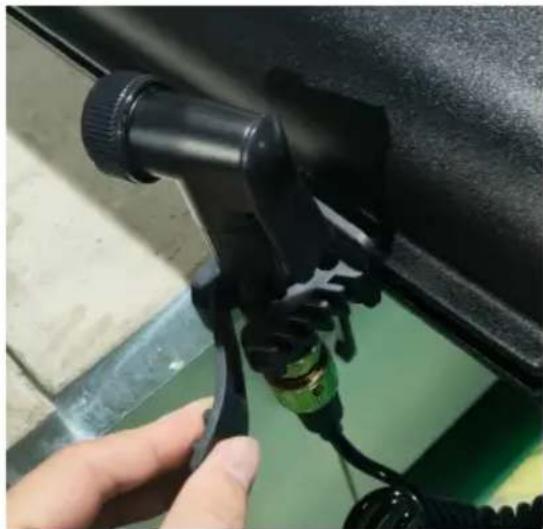
- The outer circle of the next female Quick disassembly joint 7 is pressed b After pulling out the Water gun nozzle 3, insert the shower 4 into the femal disassembly joint 7.
Step 4: Install the faucet extender 8
- Place the white silicone gasket into faucet extender 8 and screw the Electroplated plastic sealant sleeve 13 into faucet extender 8.
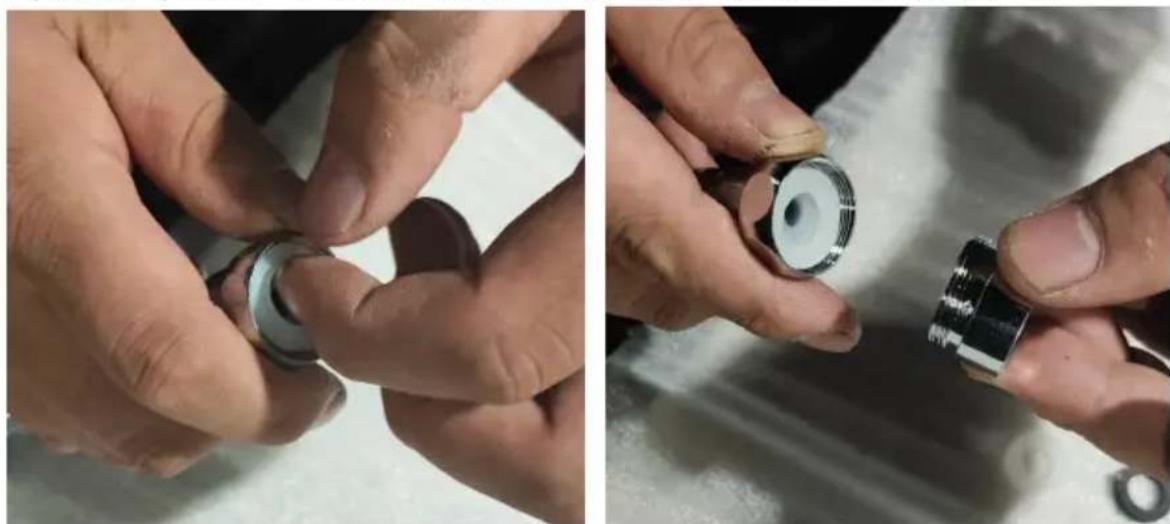
- Place the black silicone gasket into Electroplated plastic sealant sleeve13 and screw the faucet extender into angle valve 5.
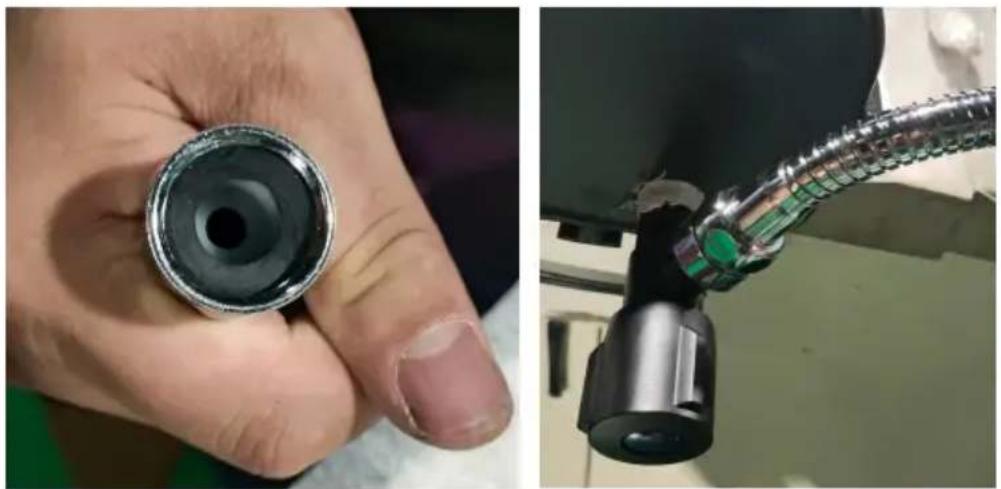
Step 5: The water tank 1 is mounted on the top bracket of car.
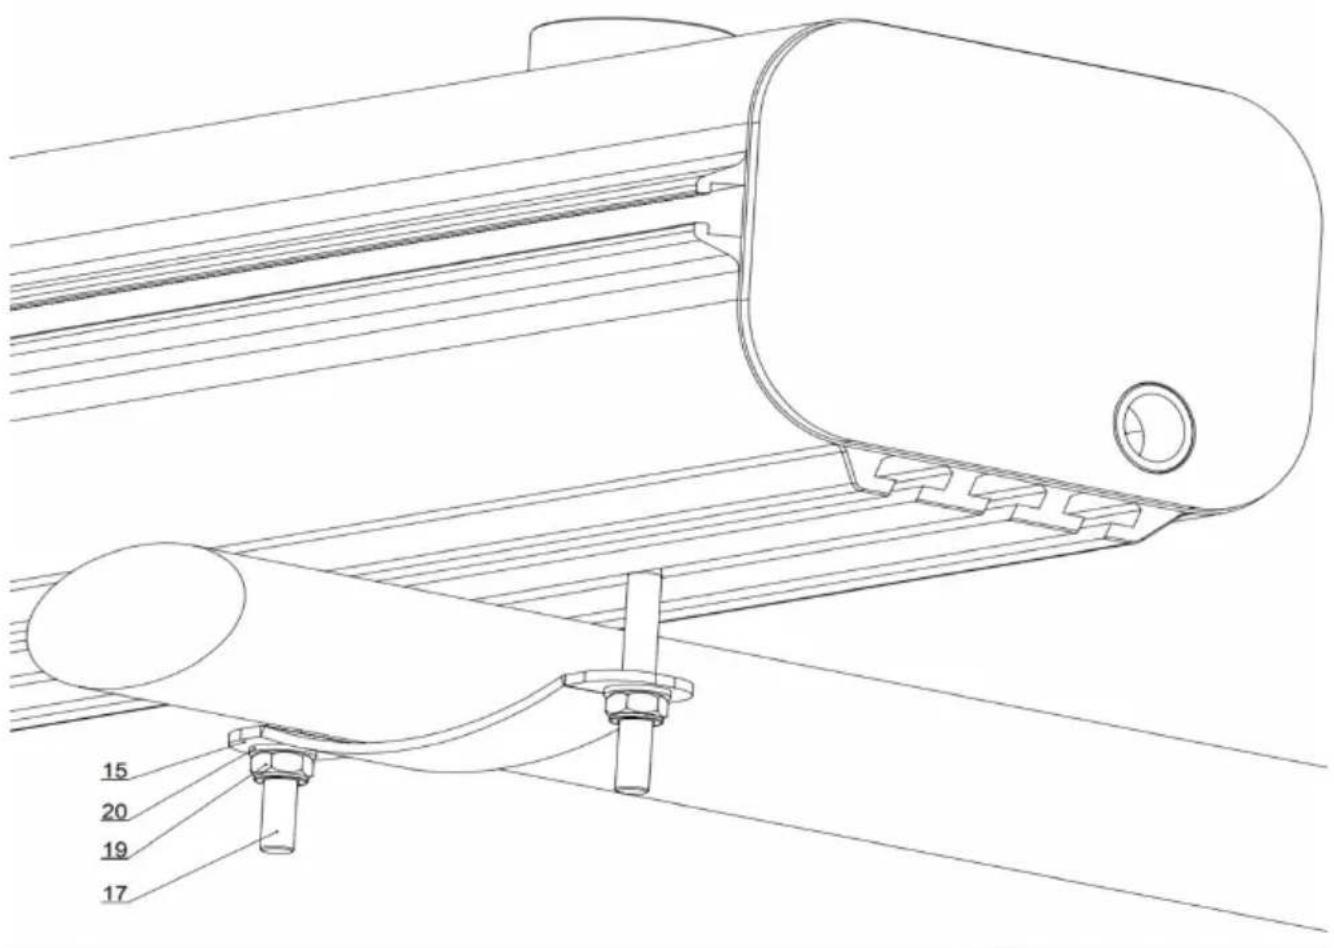
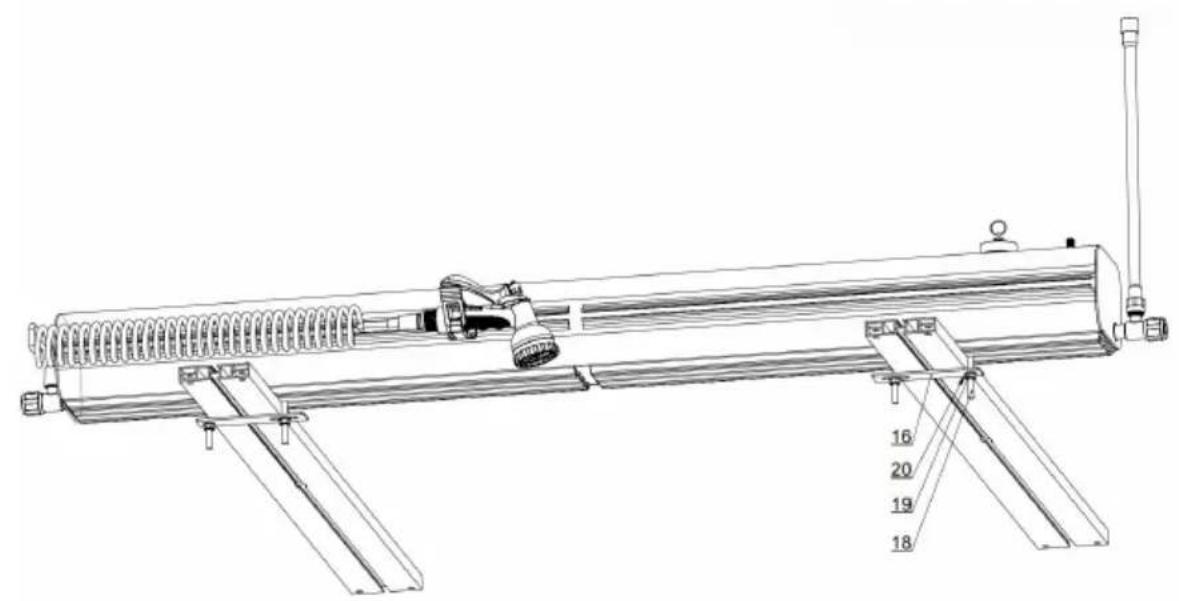
Oval cross-bar is mounted: Place the water tank 1 on the support of the and put the M8×65 type T bolt 17 into the T-type groove at the bottom of tank; one bolt is distributed on each side of the oval horizontal bar; put the Horizontal rod installation sheet 15 into the bolt, then into the metallic gasket and finally tighten the M8 pine nut 19;
Attach the other end of the water tank to the oval bar of the roof in the s
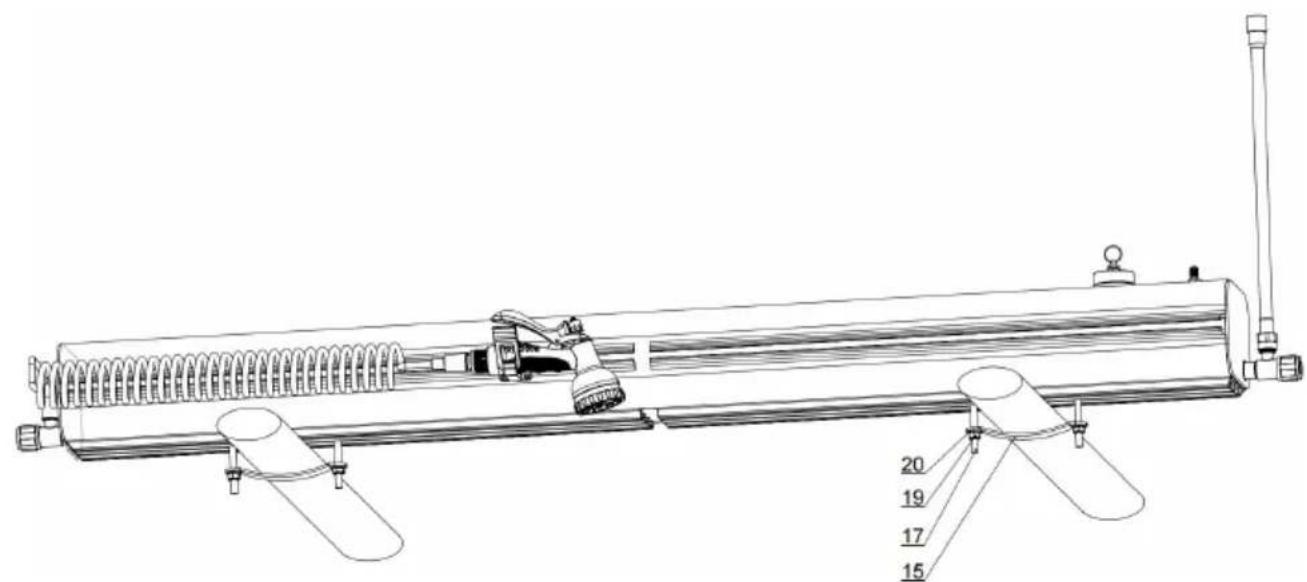
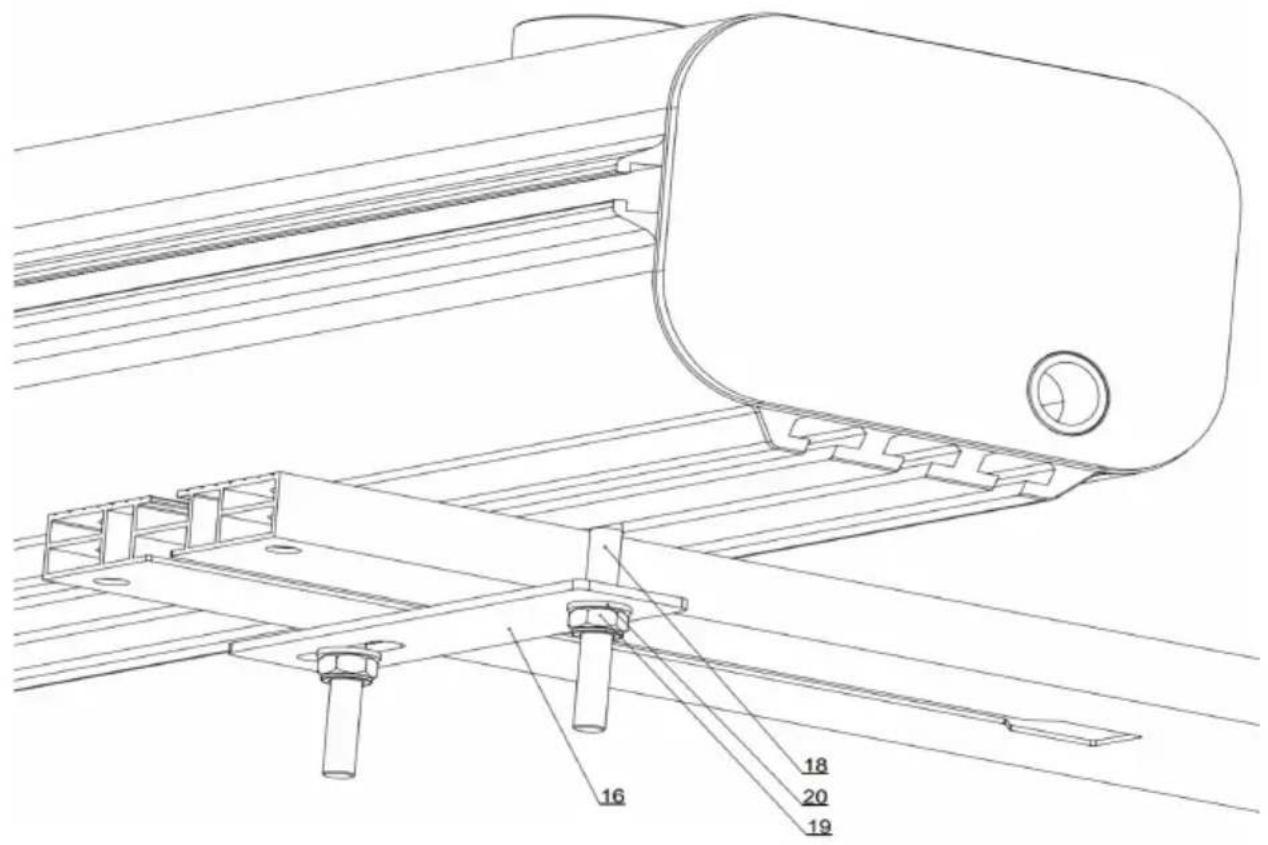
Square horizontal bar mounting mode: Place the water tank 1 on the support of the roof car, and put the M8×45 type T bolt 18 into the T-type the bottom of the water tank; one bolt is distributed on each side of the sc horizontal bar; put the luggage frame installation sheet 16 into the bolt, then the metallic gasket 20, and finally tighten the M8 pine nut 19;
Attach the other end of the water tank to the oval bar of the roof in the s
Manufacturer: Shanghaiuxinmuyeyouxianggsi
Address: Shuangchenglu 803nong11hao1602A-1609shi, baoshanqu, shanghai 200000 CN.
Imported to AUS: SIHAO PTY LTD. 1 ROKEVA STREETEASTWOOD NSW 2122 Australia
Imported to USA: Sanven Technology Ltd. Suite 250, 9166 Anaheim Place, Rancho Cucamonga, CA 91730
| UK | REP |
YH CONSULTING LIMITED. C/O YH Consultin Limited Office 147, Centurion House, London Road, Staines-upon-Thames, Surrey, TW18 4A
| EC | REP |
Technical Support and E-Warranty Certificate
www.vevor.com/support
VEVOR
TOUGH TOOLS, HALF PRICE
Assistance technique et certificat de garantie electronique www.vevor.com/support
RÉSERVOIR D'EAU POUR GALERIE DE TOIT
Modèle: YK-SX-20L/YK-SX-15L/YK-SX-26L/YK-SX-30L
www.vevor.com/support
YH CONSULTING LIMITEE. C/O YH Consulting Limited Bureau 147, Centurion House, London Road, Stainesupon-Thames, Surrey, TW18 4AX
E-CrossStu GmbH
Mainzer Landstr.69, 60329 Francfort-sur-le-Main.
VEVOR
TOUGH TOOLS, HALF PRICE
Assistance technique et certificate de garantielectronique www.vevor.com/support
VEVOR
TOUGH TOOLS, HALF PRICE
YH CONSULTING LIMITED. C/O YH Consulting Limited Office 147, Centurion House, London Road, Staines-upon-Thames, Surrey, TW18 4AX
www.vevor.com/support
Importato in AUS: SIHAO PTY LTD. 1 ROKEVA STREETEASTWOOD NSW 2122 Australia
YH CONSULENZA LIMITATA. C/O YH Consulting Limited Office 147, Centurion House, London Road, Stainesupon-Thames, Surrey, TW18 4AX
E-CrossStu GmbH
Mainzer Landstr.69, 60329 FrancofortesulMeno.
VEVOR
TOUGH TOOLS, HALF PRICE
www.vevor.com/support
YH CONSULTING LIMITADO. C/O YH Consulting Limited Oficina 147, Centurion House, London Road, Staines-upon-Thames, Surrey, TW18 4AX
E-CrossStu GmbH
Mainzer Landstr.69,
ODPOWIEDZIALNOSCIA. C/O YH Consulting Limited
Office 147, Centurion House, London Road, Staines-upon-Thames, Surrey, TW1
| REPREZENT KE |
E-CrossStu GmbH
Mainzer Landstr.69,
60329 Frankfurt nad Menem.
VEVOR
TOUGH TOOLS, HALF PRICE
HULP NODIG? NEEM CONTACT MET ONS OP!
www.vevor.com/support
YH CONSULTING LIMITED. C/O YH Consulting Limited Office 147, Centurion House, London Road, Staines-upon-Thames, Surrey, TW18 4AX
garantiecertificaat www.vevor.com/support
VEVOR®
TOUGH TOOLS, HALF PRICE
YH CONSULTING LIMITED. C/O YH Consulting Limited Office 147, Centurion House, London Road, Staines-upon-Thames, Surrey, TW18 4AX
E-CrossStu GmbH
Mainzer Landstr.69,
60329 Frankfurt am Main.
VEVOR
TOUGH TOOLS, HALF PRICE
- ROOF RACK WATER TANK
- MODEL:YK-SX-20L/YK-SX-15L/YK-SX-26L/YK-SX-30L
- NEED HELP? CONTACT US!
- Technical Support and E-Warranty Certificate www.vevor.com/support
- SAFETY INSTRUCTIONS
- PARAMETER LIST
- List of parts
- INSTRUCTIONS
- Safety and Care Advice
- THE STANDARD INSTALLATION METHOD
- Step1: Install Angle Valve
- Step 2: Install the atmospheric valve 22 and the Pressure v 23.
- Step 3: Install Water gun nozzle 3 and sprinkler 4;
- Step 4: Install the faucet extender 8
- Step 5: The water tank 1 is mounted on the top bracket of car.
- VEVOR
- TOUGH TOOLS, HALF PRICE
- RÉSERVOIR D'EAU POUR GALERIE DE TOIT
- Modèle: YK-SX-20L/YK-SX-15L/YK-SX-26L/YK-SX-30L
- VEVOR®
Brand : Vevor
Model : YKSX20L
Category : Bike rack