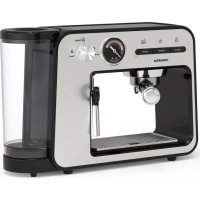
TST693BGS - Coffee machine TORNADO - Free user manual and instructions
Find the device manual for free TST693BGS TORNADO in PDF.



| Brand | Tornado |
| Model | TST693BGS |
| Product Type | Espresso coffee machine |
| Color | Black / Stainless steel (not specified, estimation) |
| Power Supply | 220-240 V~, 50/60 Hz |
| Power | 1450 W |
| Water Tank Capacity | Approximately 1.2 L (estimated from dimensions) |
| Pressure | 15 bars (estimated for espresso machine) |
| Compatible Coffee Types | Ground coffee, Nespresso capsules, Dolce Gusto, Lavazza Blue, Caffitaly |
| Main Functions | One or two cups of coffee, steam for milk frothing, hot water, descaling, energy saving mode (15 min) |
| Volume Adjustment | Customizable (10 to 90 seconds) |
| Display | Indicator lights for each function, pressure gauge |
| Material | Plastic and stainless steel |
| Dimensions (W x D x H) | Approximately 32 x 26 x 30 cm (estimated) |
| Weight | Approximately 5 kg (estimated) |
| Cable Length | Approximately 0.8 m (estimated) |
| Maintenance and Cleaning | Clean steam nozzle with needle, descale every 400 cups, do not immerse |
| Safety | Automatic shutdown, overheating protection, grounding required, do not touch hot parts |
| Spare Parts and Repairability | Replace parts only by approved service center |
| Usage | Indoor domestic use only |
| Warranty | Not specified, contact manufacturer |
Frequently Asked Questions - TST693BGS TORNADO
User questions about TST693BGS TORNADO
0 question about this device. Answer the ones you know or ask your own.
Ask a new question about this device
Download the instructions for your Coffee machine in PDF format for free! Find your manual TST693BGS - TORNADO and take your electronic device back in hand. On this page are published all the documents necessary for the use of your device. TST693BGS by TORNADO.
USER MANUAL TST693BGS TORNADO
Important Safeguards
Please take time to read these safety precautions carefully before connecting your machine to the power supply. It is essential to follow them and the operating instructions.
- First read this entire operating manual.
- Danger of electric shock! Never immerse the machine in water or any other liquid.
- Connect only to a properly grounded power point.
- To make sure that the machine is switched off, remove the plug from the power point.
-
Always pull out the power plug before:
-
Relocating the machine.
- Cleaning or maintenance.
-
Long periods of disuse.
-
Never clamp or run the power cable over sharp corners or edges.
-
Danger of electric shock! Damaged power cables may only be replaced at the customer service centre.
-
Danger of electric shock! Never touch the power plug/socket/cable or the machine with damp or wet hands. Never unplug by pulling out the power cable; always remove the plug.
-
If you need an extension cable, make sure it is suitable for your machine (3-pole grounded, 1.5 mm2 conductor cross-section), and lay the cable to avoid tripping.
-
Danger of scalding! Never move the machine during operation!
-
Never operate the machine without water
-
Always make sure there is water in water tank not less than minimum level.
-
Danger of burning! Never touch very hot parts of the machine (e.g. brew unit during operations).
-
Danger of scalding! Do not touch the steam or water jets.
-
Danger of scalding! Do not move the operating lever when the machine is still under pressure making Coffee.
-
Do not use the machine in case of:
- Faulty operation.
- Damaged power cable.
- After falling or other damage.
- In such cases immediately have the machine checked and repaired if necessary at the customer service centre.
- The machine location must meet the following requirements:
- Choose a dry, stable and level support surface not immediately underneath the power point. at least 60 cm away from the wflashbasin and taps.
- Never place on flammable/fusible surfaces or equipment.
- Never place the machine or power cable on or nearer than 50 cm to hot surfaces or open flames.
- Never cover the machine during operation.
-
Keep children away from the machine during operation.
-
Only use the machine in dry rooms.
-
Never cover the machine during operation.
-
Keep children away from the machine during operation.
-
Only use the machine in dry rooms.
-
Danger of tripping! Do not let the power cable hang down.
-
This machine is only intended for household use.
-
Pull out the power plug and allow the machine to cool
down completely before cleaning and or Maintenance. 26. To prevent damage, never use replacement parts or accessories not recommended by the manufacturer. This appliance can be used by children aged from 8 years and above if they have been given supervision or instruction concerning use of the appliance in a safe way and if they understand the hazards involved.
Cleaning and user maintenance shall not be made by children unless they are older than 8 and supervised. Keep the appliance and its cord out of reach of children aged less than 8 years.
Appliances can be used by persons with reduced physical, sensory or mental capabilities or lack of experience and knowledge if they have been given supervision or instruction concerning use of the appliance in a safe way and understand the hazards involved.
Children shall not play with the appliance.
This appliance is not intended for use by persons (including children) with reduced physical, sensory or mental capabilities, or lack of experience and knowledge, unless they have been given supervision or instruction concerning use of the appliance by a person responsible for their safety.
Children should be supervised to ensure that they do not play with the appliance.
If the supply cord is damaged, it must be replaced by the manufacturer, its service agent or similarly qualified persons in order to avoid a hazard.
This appliance is for household and indoor use only. The appliance must not be immersed.
Caution! There is potential injury from misuse.
Heating element surface is subject to residual heat after use.
Coffee-maker shall not be placed in a cabinet when in use. Cleaning and user maintenance shall not be made by children without supervisor
This appliance is intended to be used in household and similar applications such as:
-staff kitchen areas in shops, offices and other working environments;
-Farm houses;
- By clients in hotels, motels and other residential type environments;
- Bed and breakfast type environments.
Content
This operating manual cannot cover all possible circumstances. For further information or in case of problems not adequately covered in this operating manual, please contact the service and sales centre.
Please keep this operating manual safe and pass it on to the next user.
Unpackaging
-Remove your espresso Capsule Coffee machine from its packaging.
- After unpackaging, please check that the following parts are included:
-
Water tank
-
Coffee machine
3.Manual
Note:
- Check that your home power supply voltage is the same as marked on the machine rating plate
-Destroy all the plastic bags to prevent danger to children!
Tip:
Keep the packaging for transporting the machine (e.g. for removals, servicing, etc.)
Note:
You may find a little water remaining in the machine.
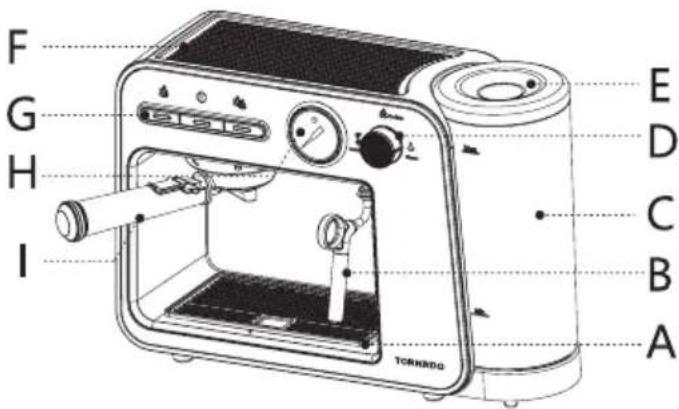
Component description
A: Waste water tray
B : Steam pipe
C : water tank
D : Button button
E: Water tank cover
F: Temperature plate
G: Switch button
H : Pressure gauge
I : Handle brewing (for ground Coffee)
Function description
| Function description | |||||
| Switch button | Button Button | ||||
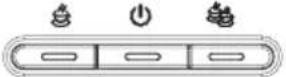 |  | ||||
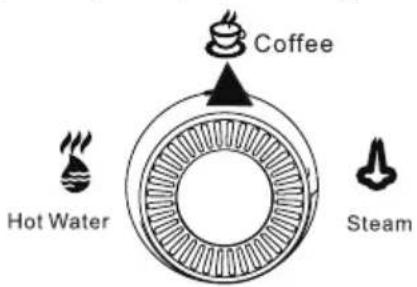
| Switch button | Control machine switch function | Coffee Function Gear | Turn here when making coffee | ||
| Single cup function key | Press the single cup key, the light flickers slowly, the machine starts brewing coffee, and the machine stops automatically after brewing | Steam Funding gear | Turn here when making steam | ||
| Hot water indicator | The lamp flashes quickly when making hot water | ||||
| Double cup function key | Press the double cup button, the light flickers slowly, the machine starts brewing coffee, and the machine stops automatically after brewing | Hot water Funding gear | Turn here when making hot water | ||
| Steam indicator | The lamp flashes rapidly when steam is made | ||||
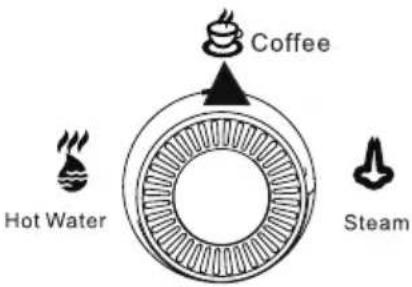
| Coffee Function Gear | Turn here when making coffee | |
| Steam function gear | Turn here when making steam | |
| Hot water function gear | Turn here when making hot water |
Preparation before startup



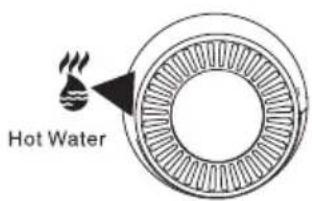
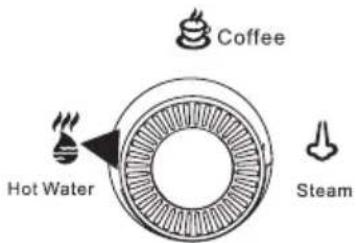
The twist key must be turned to this position before starting the machine

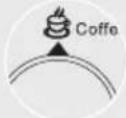
usage method

The machine must be washed if it is used for the first time or not used for a long time.
At least 100 ml hot water should be washed with steam pipe, and then one cup of hot water should be washed in
the handle brewing cup.
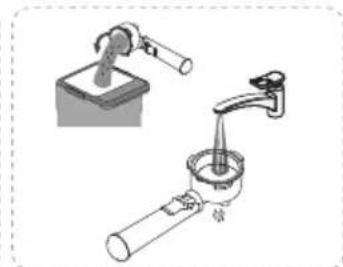
The Specific washing methods are as follows:

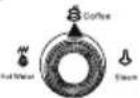
Make sure the twist key is turned to this position

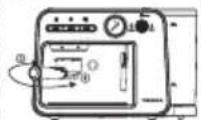
Transfer to the handle
brewing cup

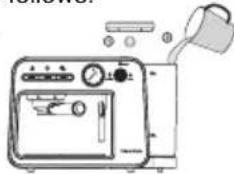
natural_image
Line drawing of a portable electronic device with control panel and speaker (no text or symbols)- Lift the water tank cover.
- Add no more than 1.1 liter of purified water to the water tank (water temperature not higher than 35 °C)

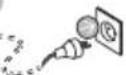
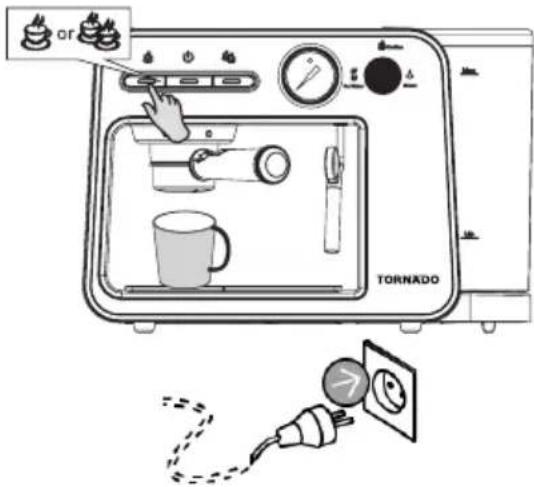
Plug in the corresponding power supply

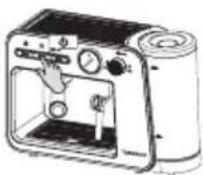
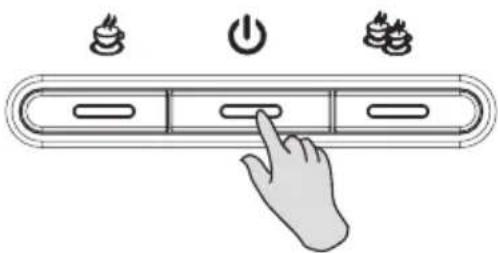
1. Press the switch function key.
2. Each function key indicator flashes and the machine is warmed up.
3. All indications light up after prehealing
Steam pipe flushing
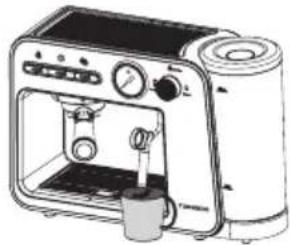
- Place the cup under the steam pipe (capacity above 100ml)
- Turn key from Transposition, The steam pipe starts making hot water until it is 100 ml.
Note: make hot water continuously for 120 seconds. If the rotary knob does not turn back to the Coffee position, it will automatically stop making hot water. It is necessary to turn the turning back to the Coffee position and then turn to the hot water.

Handle brewing cup washing
- Place a cup (more than 100ml) above the waste water tray.
- Press the single or double cup button and wait for the equipment to finish flushing, (make sure there is more than 150 ml of purified water in the tank).
- Precautions: before pressing the key, make sure that the handle brewing cup has been turned into the machine.
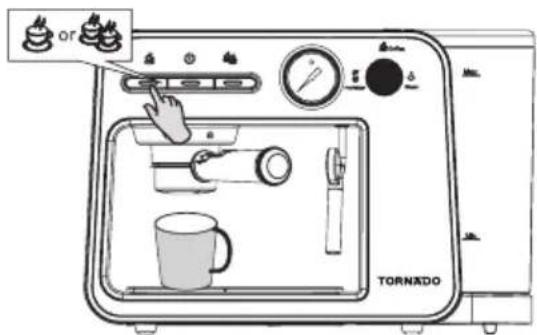
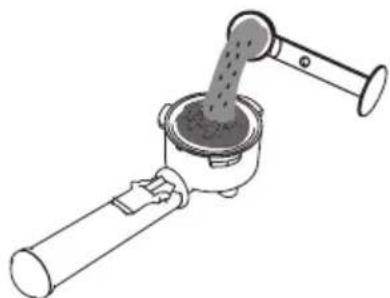
Brewed coffee(for ground coffee)
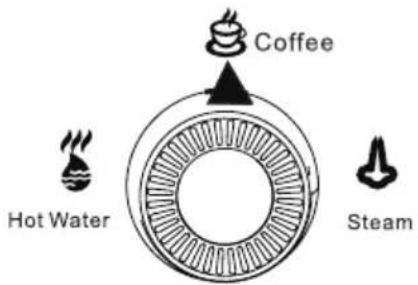
- Make sure the twist key is turned to this position
natural_image
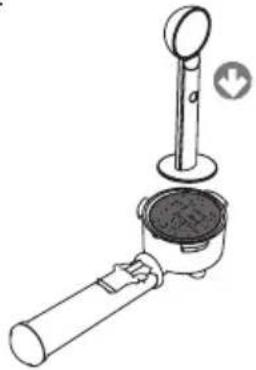
Technical line drawing of a mechanical device with a lever and cylindrical base (no text or symbols)- Add Coffee powder to the handle brewed cup with a coffee spoon.
natural_image
Diagram of a handheld device with a cylindrical sensor and a circular base, showing internal components (no text or symbols)Press the Coffee powder with a coffee spoon

- Transfer to the handle brewing cup
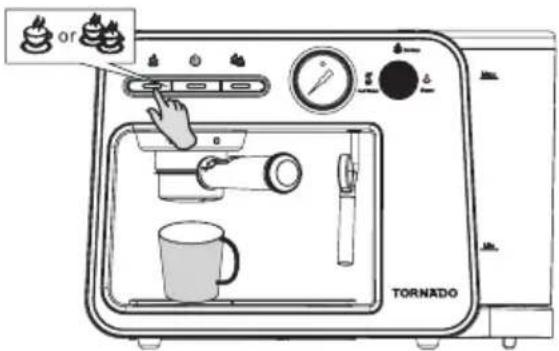
4. Brewed Coffee
-
Put the cup above the waste water pan (make sure there is more than 150 ml pure water in the water tank).
-
Press the required amount of Coffee button (single or double) until the brewing is finished. (make sure there is more than 150 ml of purified water in the tank).
Tip: when the button is pressed, the button light will flash for a few seconds before brewing. The flash process is in the state of machine heating, which is normal.
Brewed coffee(for Nespresso capsule)
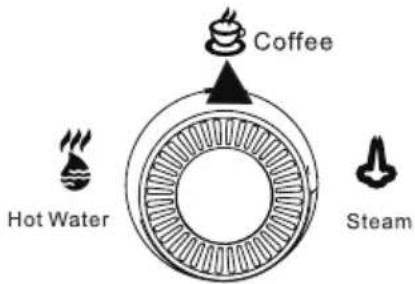
- Make sure the twist key is turned to this position
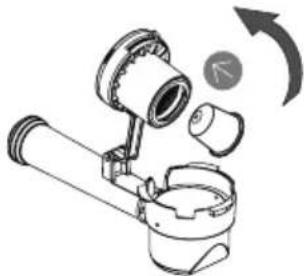
natural_image
Diagram of a mechanical device with a cylindrical component and a curved arrow indicating rotation (no text or symbols)- Open the cover of the handle, put the Nespresso capsule inside.
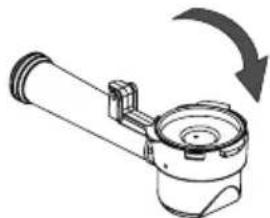
natural_image
Mechanical component diagram showing a rotating shaft and housing with a curved arrow indicating rotation (no text or symbols)Close the cover of the handle.
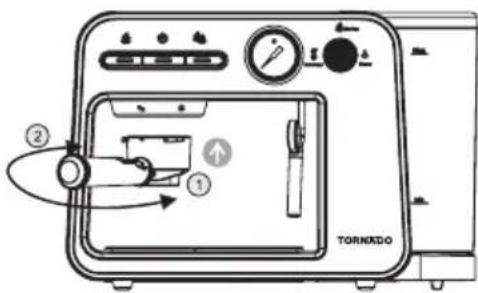
- Transfer to the handle brewing cup
4. Brewed coffee
- Put the cup above the waste water pan (make sure there is more than 150 ml pure water in the water tank).
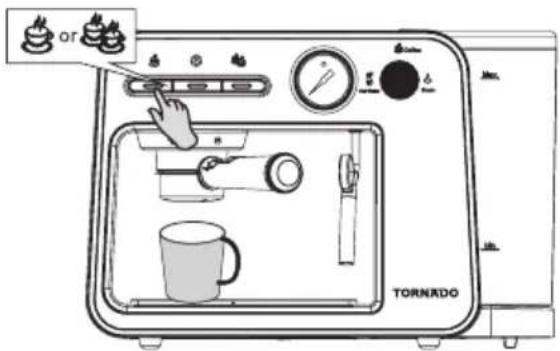
- Press the required amount of Coffee button (single or double) until the brewing is finished. (make sure there is more than 150 ml of purified water in the tank). Tip: when the button is pressed, the button light will flash for a few seconds before brewing. The flash process is in the state of machine heating, which is normal.
Brewed coffee (for Dolce Gusto Capsule)
- Make sure the twist key is turned to this position
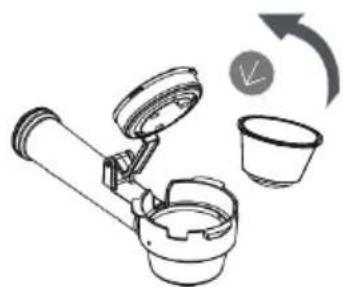
natural_image
Illustration of a coffee maker with a lid, cup, and clock icon (no text or symbols)Open the cover of the handle, put the Dolce Gusto Capsule inside.
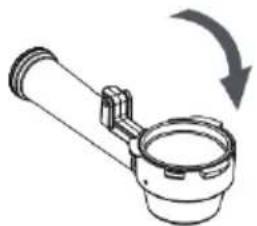
natural_image
Diagram of a pipe fitting with a rotating arrow indicating rotation (no text or symbols)- Close the cover of the handle.
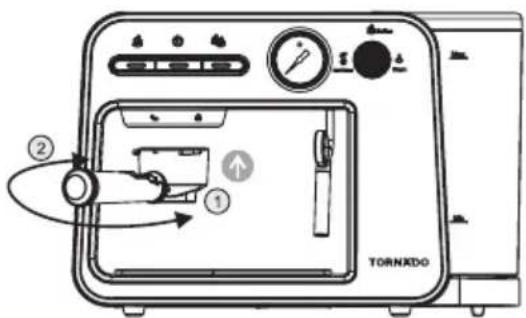
- Transfer to the handle brewing cup
4. Brewed coffee
- Put the cup above the waste water pan (make sure there is more than 150 ml pure water in the water tank).
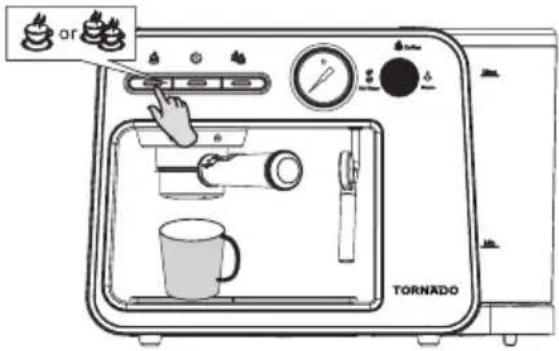
- Press the required amount of Coffee button (single or double) until the brewing is finished. (make sure there is more than 150 ml of purified water in the tank).
Tip: when the button is pressed, the button light will flash for a few seconds before brewing. The flash process is in the state of machine heating, which is normal.
Brewed coffee(for Lavazza Blue Capsule)
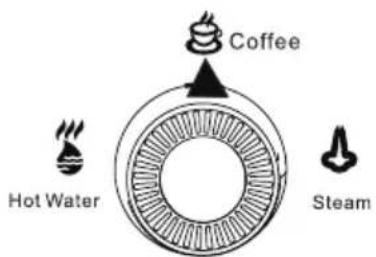
1 Make sure the twist key is turned to this position
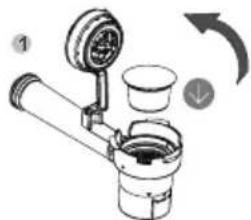
2 Open the cover of the handle, put the Lavazza Blue Capsule inside.
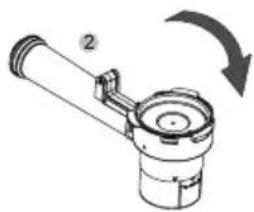
natural_image
Mechanical component diagram showing a lever and shaft assembly with a curved arrow indicating rotation (no text or symbols)Close the cover of the handle.
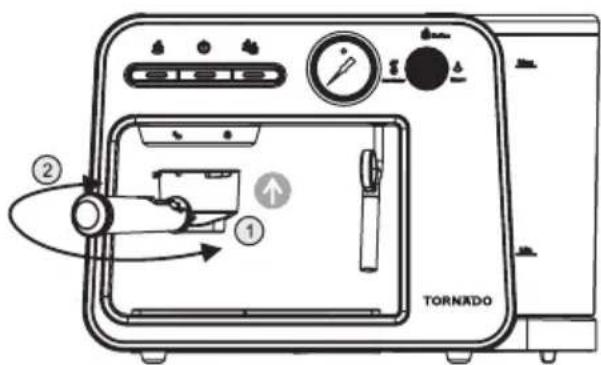
3.Transfer to the handle brewing cup
4. Brewed coffee
-
Put the cup above the waste water pan (make sure there is more than 150 ml pure water in the water tank).
-
Press the required amount of Coffee button (single or double) until the brewing is finished. (make sure there is more than 150 ml of purified water in the tank).
Tip: when the button is pressed, the button light will flash for a few seconds before brewing. The flash process is in the state of machine heating, which is normal.
Brewed Coffee (for Caffitaly Capsule)
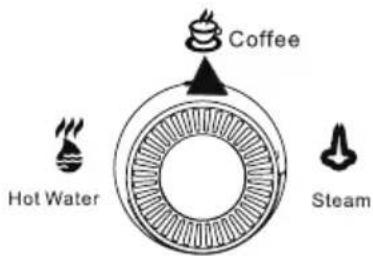
Make sure the twist key is turned to this position

natural_image
Diagram of a mechanical device with a dial and cup, showing internal components and a circular arrow indicating rotation (no text or symbols)Open the cover of the handle, put the Caffitaly Capsule inside.
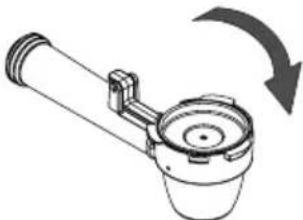
natural_image
Diagram of a mechanical component with a curved arrow indicating rotation or assembly (no text or symbols present)Close the cover of the handle.
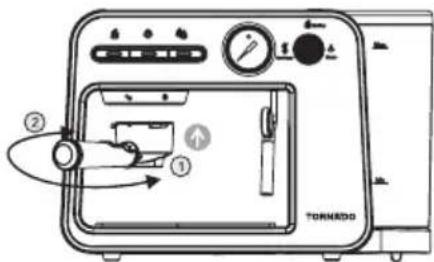
- Transfer to the handle brewing cup
4. Brewed Coffee
- Put the cup above the waste water pan (make sure there is more than 150 ml pure water in the water tank).
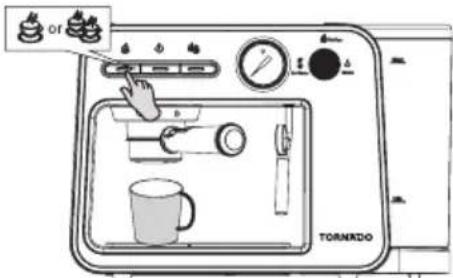
- Press the required amount of Coffee button (single or
double) until the brewing is finished. (make sure there is more than 150 ml of purified water in the tank).
Tip: when the button is pressed, the button light will flash for a few seconds before brewing. The flash process is in the state of machine heating, which is normal.
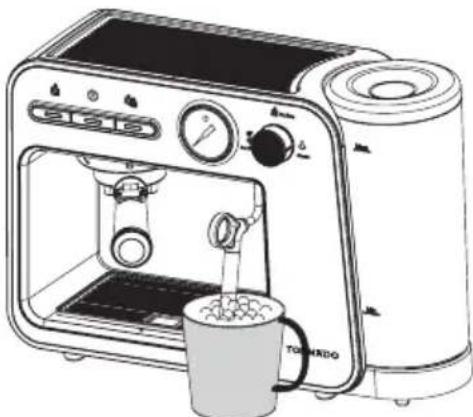
Milk bubble making
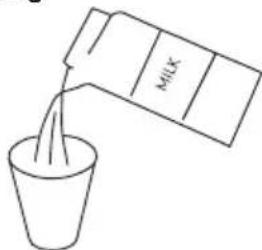
Pour no less than 50ml pure milk into the cup.
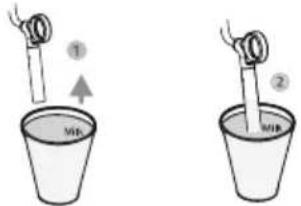
Put the milk cup into the steam pipe, making sure the steam pipe is immersed in the milk
Turn key from ⚙ Bit to ↓, At this time, the steam indicator lamp flashes rapidly, and the machine enters the steam mode.
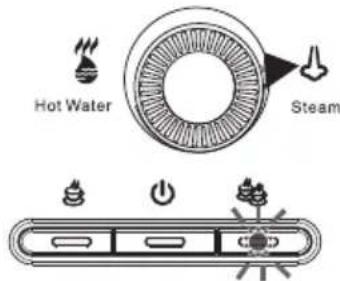
At the beginning, there will be a certain time waiting for the machine to heat up. This is a normal phenomenon.
After heating, steam will automatically eject foaming milk. After finishing Needs milk bubble, Turn ⏻ Key from ⏻ turn back, Complete milk bubble making ( make sure there is more than 150 ml of purified water in the tank).
natural_image
Line drawing of a modern toaster with a cup of coffee being poured into it (no text or symbols)Note: after 120 seconds of continuous steam blowing, if the rotary knob does not return to the Coffee position, it will automatically stop steam blowing.
It is necessary to turn the rotor back to the Coffee position, and then turn to the steam position to start steam again.
Since the machine has just finished making milk
bubbles, the heating body inside the machine is in a high temperature state
To ensure the Coffee effect and taste, please do not start the Coffee mode immediately to brew Coffee Treatment It can be made by hot water once ⏻, When the heating body of the machine is cooled down, a certain amount of steam will be ejected from the steam pipe orifice at the beginning. When the temperature of the heating body decreases, the steam will disappear and only hot water will be ejected. At this time, the hot water function will be turned off and Coffee can be brewed
Hot water production
natural_image
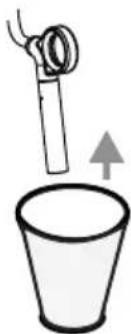
Simple line drawing of a magnifying glass above a cup with an upward arrow (no text or symbols)1 Put the cup into the steam pipe.
2 Turn key from Bit to, At this time, the hot water indicator flashes rapidly, and the machine enters the hot water mode and starts to make hot water.
natural_image
Pure electrical circuit lines without any symbols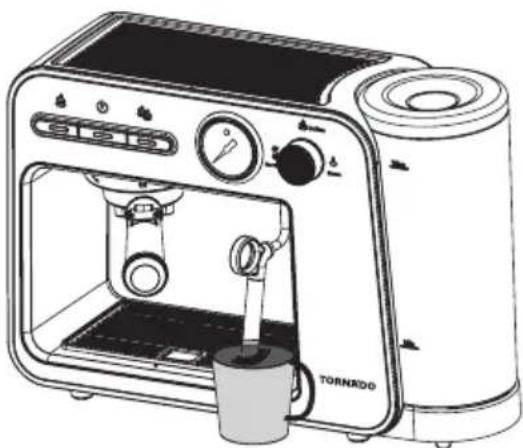
natural_image
Line drawing of a standard 19-inch toaster with a coffee cup and control panel (no text or symbols)3 After the completion of Needs hot water, Turn key
from turn back, Complete hot water production. (make sure there is more than 150 ml of purified water in the tank). Note: make hot water continuously for 120 seconds. If the rotary knob does not turn back to the coffee position, it will
automatically stop making hot water.
It is necessary to turn the turning back to the coffee position, and then turn to the hot water position to start the hot water again.
Energy saving mode
Energy saving mode>15 minutes
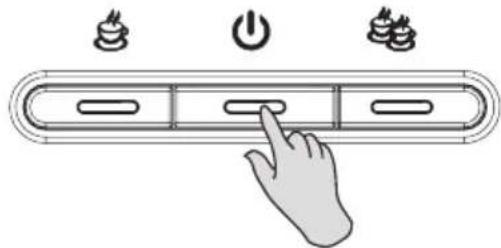
- The machine comes with energy saving mode. The machine will turn off automatically after 15 minutes, and all function indicators will be displayed.
- When the machine is off, press the on key again and restart the machine again.
Energy saving mode setting
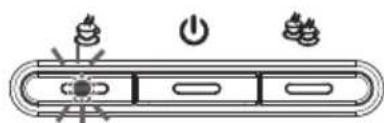
At the same time, press and hold the single cup and double cup buttons, plug in the power supply, and the on-off key lights up.
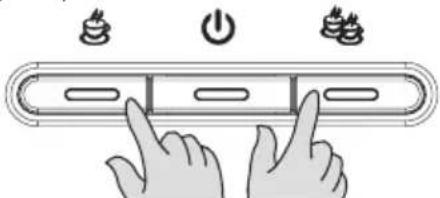
- Press the single cup key, the single cup key light will go out. The energy saving mode will be cancelled. - Press the single cup key, the single cup key light will be on. The energy saving mode is enabled.
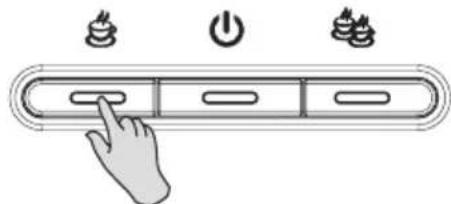
Descaling mode
Descaling mode function
- Place a cup at the water outlet in front of the machine.
- Put a proper amount of scale remover into the water tank.
- Press and hold the single cup button at the same time and plug in the power supply.
- When the on key and single cup key lights are on, press the single cup key to start the descaling function, and the start working time is 120s. Press the small cup key to stop.
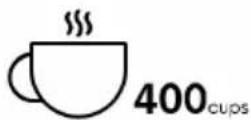
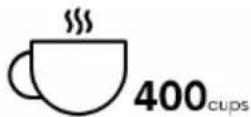
When the machine makes no more than 400 cups of Coffee, it is
matters needing attention:

necessary to regularly remove the scale according to the above functions
Coffee ration setting
Single cup time function setting
- Place a cup at the water outlet in front of the machine.
- In standby mode, press and hold the single cup key and the machine starts to work. The machine starts to brew Coffee. When it is out to Needs brewing time, release the button. Single cup time setting completed (minimum 10s, maximum 90s).
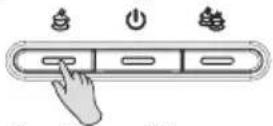
Double cup time function setting
- Place a cup at the water outlet in front of the machine.
- In the standby mode, press and hold the double cup button and the machine starts to work. The machine starts to brew coffee. When it is out to Needs brewing time, release the button. Double cup time issue setting completed (minimum 10s, maximum 90s).
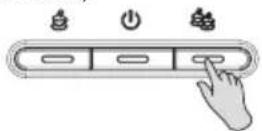
Restore factory settings

Restore settings
- Press and hold the double cup button, plug in the power supply, and the power on indicator will flash twice to restore the factory setting.
Treatment method of machine
Question 1
In the process of making Coffee, due to the lack of water in the water tank and adding water again, there is air entering into the internal water path, resulting in no water coming out of the Coffee making process.
processing method
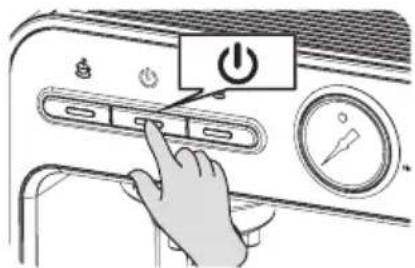
- Shut down the machine first and make sure that the power is not pulled out.
- Turn the twist key to 🎩, Make sure there is more than 150 ml of pure water in the tank.
natural_image
Line drawing of a standard 10-inch toaster with front panel and side arm (no text or symbols)- Put down a cup with a capacity of more than 100ml under the steam pipe. Press and hold the switch key when the machine is off, and the steam pipe will have clear water until there is water in the cup.
Question 2
When the new machine is used for the first time, or it is not used for a long time, the internal drying of the water pump causes the machine not to discharge water.
Solution: the machine accessories in the "manual air pump" to the machine water.
processing method
-
Turn the twist key
-
Insert the air pump into the water inlet hole of the water tank, and then add appropriate amount of water.
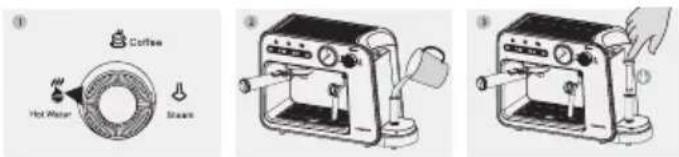
- Pump water into the machine with an air bar.
clean matters needing
▲ attention:
- Do not immerse the Coffee machine in water.
- Before cleaning the machine, make sure to unplug the power cord
- Do not use strong detergent, sharp objects, brushes and other objects to clean the Coffee machine
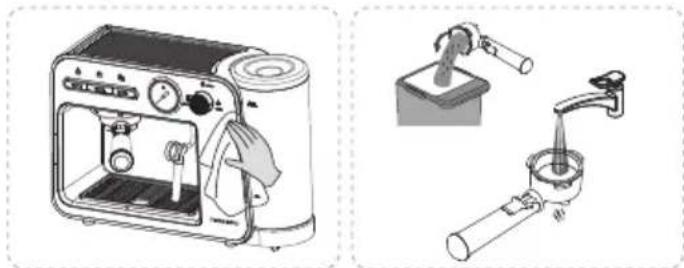
natural_image
Illustration of a toaster and a tap tap with water spray (no text or symbols)Machine cleaning
Handle brewing cup cleaning
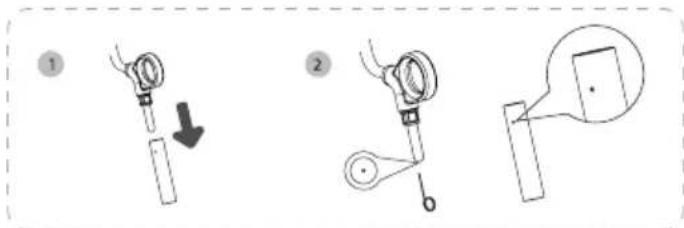
Steam pipe cleaning
When the steam pipe water and steam significantly reduced, please install the next step to clean in time 1. Take out the steam pipe sleeve
- Clean the steam pipe with a cleaning needle

natural_image
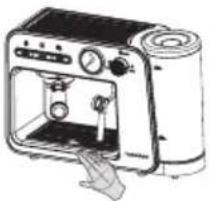
Line drawing of a toaster oven with control panel and door, showing no text or symbolsDo not pour water directly on the machine

matters needing attention
When the machine has made no more than 400 cups of Coffee, the descaling mode function should be used for regular descaling
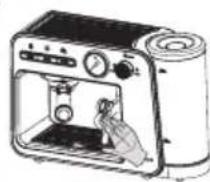
Pay attention to high temperature
The steam pipe has high temperature and waste heat when making hot water and milk bubb

natural_image
Illustration of a toaster with hand inserting a button to the front panel (no text or symbols)Before using for the first time or after long pauses (e.g. holidays the machine may be difficult to pump water, this short procedure can help pump to self-priming by using the pipe to fill water into the circuit manually prior to turn on the machine for first refill.
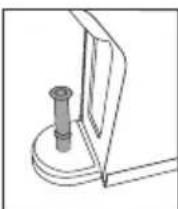
1- Remove the water tank and insert the hose into the water inlet at the bottom of the water tank.

2- Inject a small amount of water into the hose
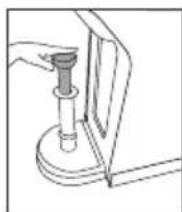
3- Push the pump down to allow water to enter the coffee machine and force the air out of the pipe to make the pipe clear.
After above steps, the machine will be able to pump water out normally.
* If necessary, repeat the steps for 2 or 3 times
common problem
| Fault phenomenon | Possible causes Exclusion method | |
| The indicator light doesn't work | 1. The power supply is not connected2. The function is not pressed | 1. Check whether the power connector is plugged in properly2. The switch key is not pressed,3. Make sure that the power supply is plugged in properly and the power supply is matched correctly. If this phenomenon still occurs, please ask professional personnel for maintenance |
| No Coffee or dripping too slowly | 1. There is no water in the water tank2. The Coffee powder in the handle brewing cup is squeezed too tightly, and the Coffee powder is too small or too much | 1. Add water to the water tank2. Choose the right Coffee powder and put it into the brewing cup with middle handle |
| Water leakage or seepage | 1. Water tank leaks2. The handle brewing cup is leaking | 1. Check whether the water tank is installed in place or damaged2. The Coffee powder in the handle brewing cup is not pressed wel |
| The machine can't work normally, all the indications are on, but not on when pressed | The power supply is not connected | Check whether the power socket is plugged in properly. If it doesn't work, please ask a professional for maintenance |
Product Technical Data :
Product model: TST-693B-GS
Rated voltage: 220V-240V\~
Rated power: 1450W
Rated frequency: 50Hz/60Hz
Correct Disposal of This Product
(Waste Electrical & Electronic Equipment)
(Applicable in countries with separate collection systems)
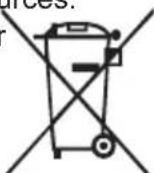
This marking on the product, accessories or literature indicates that the product and its electronic accessories should not be disposed of with other household waste.
To prevent possible harm to the environment or human health from uncontrolled waste disposal, please separate these items from other types of waste and recycle them responsibly to promote the sustainable reuse of material resources.
Household users should contact either the retailer where they purchased this
product, or their local government office, for details of where and how they can take these items for environmentally safe recycling.

flowchart
graph TD
    A["Hot Water"] --> B["Steam"]
    C["Coffee"] --> B
    B --> D["Radial Cone"]
natural_image
Diagram of a mechanical device with a lever and shaft, showing internal components (no text or symbols)natural_image
Diagram of a portable electronic device with a cylindrical sensor and a base, showing internal components (no text or symbols)Gebrühter Kaffee
natural_image
Diagram of a mechanical device with a rotating knob and directional arrow (no text or symbols)natural_image
Mechanical component diagram showing a rotating shaft and housing with a curved arrow indicating rotation (no text or symbols)natural_image
Diagram of a coffee maker with a lid, cup, and arrow indicating rotation (no text or symbols)natural_image
Diagram of a mechanical component with a rotating arrow indicating rotation (no text or symbols)Gebrühter Kaffee
flowchart
graph TD
    A["Hot Water"] --> B["Steam"]
    B --> C["Coffee"]
    C --> D["Radial Cone"]
natural_image
Diagram of a water tap with a pump, cup, and directional arrow indicating flow (no text or symbols)natural_image
Mechanical component diagram showing a rotating shaft and housing (no text or symbols)flowchart
graph TD
    A["Coffee"] --> B["Hot Water"]
    B --> C["Steam"]
    C --> D["Circular Process"]
natural_image
Diagram of a mechanical device with gears and a base, showing rotational motion (no text or symbols)natural_image
Diagram of a mechanical switch or lever assembly with a curved arrow indicating rotation (no text or symbols present)natural_image
Line drawing of a modern microwave oven with a cup of food being poured into it (no text or symbols)natural_image
Simple line drawing of a magnifying glass above a cup with an upward arrow (no text or symbols)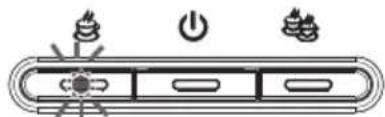
natural_image
Simple line drawing of a device with three labeled buttons (no text or symbols)natural_image
Line drawing of a standard 10-inch toaster with a coffee maker in the foreground (no text or symbols)Energy saving mode >15 minutes
natural_image
Line drawing of a toaster oven with control panel and cloth (no text or symbols)Maschinenreinigung
natural_image
Illustration of a hand pouring liquid into a pipe with a tap, showing mechanical components (no text or symbols)natural_image
Technical line drawing of a toaster oven with control panel and door (no text or labels)
Hinweise:
natural_image
Three illustrations of a toaster oven with hand gestures, showing different interior states (no text or symbols present)natural_image
Simple line drawing of a mechanical component with a cylindrical pin and curved base (no text or symbols)natural_image
Simple line drawing of a mechanical device with a handle and base (no text or symbols)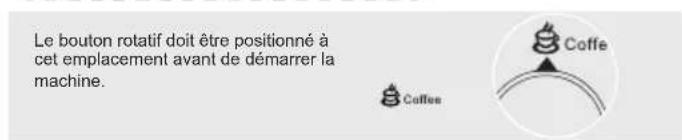
Branchez l'alimentation correspondante.
flowchart
graph TD
    A["Hot Water"] --> B["Steam"]
    C["Coffee"] --> B
    B --> D["Radial Cone"]
natural_image
Technical line drawing of a mechanical device with a lever and cylindrical base (no text or symbols)natural_image
Diagram of a portable electronic device with a cylindrical sensor and a base, showing internal components (no text or symbols)natural_image
Diagram of a mechanical device with a rotating knob and handle, showing internal components (no text or symbols)natural_image
Mechanical component diagram showing a rotating shaft and housing with a curved arrow indicating rotation (no text or symbols)flowchart
graph TD
    A["Hot Water"] --> B["Steam"]
    B --> C["Coffee"]
    C --> D["Radial Cone"]
natural_image
Diagram of a coffee maker with a lid, cup, and arrow indicating rotation (no text or symbols)natural_image
Mechanical diagram of a pipe fitting with a rotating arrow indicating rotation (no text or symbols)natural_image
Diagram of a water pump with a dial and cup, showing mechanical components and airflow direction (no text or symbols)natural_image
Mechanical component diagram showing a lever mechanism with a curved arrow indicating rotation (no text or symbols)natural_image
Diagram of a washing machine with a dial and cup, showing mechanical components and a circular arrow indicating rotation (no text or symbols)natural_image
Diagram of a mechanical component with a curved arrow indicating rotation or direction (no text or symbols)natural_image
Line drawing of a modern toaster with a coffee cup and digital meters (no text or symbols)natural_image
Simple line drawing of a magnifying glass above a cup with an upward arrow (no text or symbols)natural_image
Line drawing of a standard 30-inch toaster with a baseplate and control panel (no text or symbols)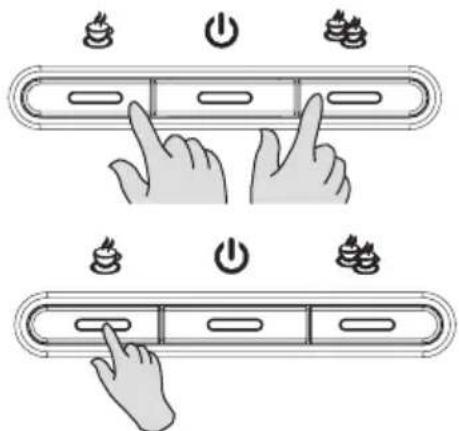
natural_image
Line drawing of a standard 3D toaster with a coffee cup and digital display (no text or symbols)natural_image
Line drawing of a toaster oven with control panel and door handle (no text or symbols)Nettoyage de la machine

natural_image
Illustration of a hand pouring liquid into a container using a tool, with no visible text or symbols.natural_image
Line drawing of a toaster oven with control panel and door, shown without any text or symbols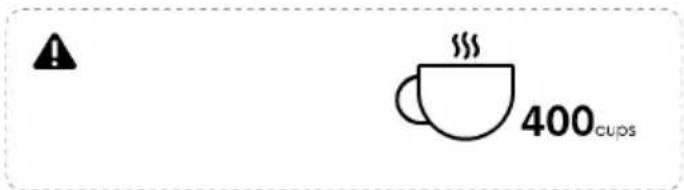
natural_image
Three identical illustrations of a toaster oven with hand gestures, showing different kitchen settings (no text or symbols)natural_image
Pure technical line drawing of a mechanical component with no text or symbolsnatural_image
Simple line drawing of a mechanical device with a handle and base (no text or symbols)natural_image
Line drawing of a hand holding a cylindrical object inserted into a container (no text or symbols)natural_image
Illustration of a toaster oven with a hand operating the front panel (no text or symbols visible)natural_image
Illustration of a modern toaster with digital display and control panel (no text or symbols)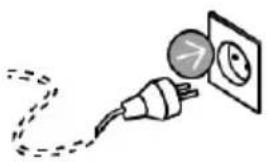
natural_image
Illustration of a plug connecting a power outlet with a circular symbol (no text or labels)flowchart
graph TD
    A["Hot Water"] --> B["Steam"]
    C["Coffee"] --> B
    B --> D["Radial Cone"]
natural_image
Technical line drawing of a mechanical device with a lever and handle (no text or symbols)natural_image
Diagram of a mechanical device with a cylindrical component and a base, showing internal components without any text or symbols.natural_image
Mechanical component diagram showing a lever mechanism with a curved arrow indicating rotation (no text or symbols)flowchart
graph TD
    A["Hot Water"] --> B["Steam"]
    C["Coffee"] --> B
    B --> D["Radial Cone"]
natural_image
Illustration of a coffee maker with a magnifying glass and cup, showing a circular arrow indicating rotation (no text or symbols)natural_image
Diagram of a water pump or drain system with a valve, cup, and directional arrow (no text or symbols)natural_image
Mechanical component diagram showing a lever mechanism with a curved arrow indicating rotation (no text or symbols)Caffè preparato
Caffè preparato (per Capsule Caffitaly)
flowchart
graph TD
    A["Hot Water"] --> B["Coffee"]
    C["Steam"] --> B
    B --> D["Concentric Tank"]
Make sure the twist key is turned to

natural_image
Diagram of a cleaning or cleaning tool with a valve and cup, showing a circular arrow indicating rotation (no text or symbols)natural_image
Diagram of a mechanical valve or connector with a curved arrow indicating rotation (no text or symbols present)natural_image
Line drawing of a modern toaster with a cup of coffee being poured into it (no text or symbols)natural_image
Simple line drawing of a hand holding a magnifying glass above a cup with an upward arrow (no text or symbols)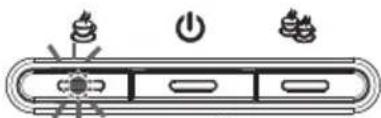
natural_image
Simple line drawing of a device with three icons: candle, power button, and leaf (no text or symbols)natural_image
Line drawing of a standard 10-inch toaster with a coffee cup and digital meters (no text or symbols)natural_image
Line drawing of a toaster oven with control panel and door (no text or symbols)natural_image
Illustration of a hand pouring liquid into a bottle and pipe (no text or symbols)natural_image
Line drawing of a microwave oven with control panel and door (no text or symbols)
Avvertenze
natural_image
Illustration of a toaster with digital display and control panel (no text or symbols)flowchart
graph TD
    A["Hot Water"] --> B["Steam"]
    C["Coffee"] --> B
    B --> D["Radial Cone"]
natural_image
Technical line drawing of a mechanical device with a lever and cylindrical base (no text or symbols)natural_image
Diagram of a mechanical device with a cylindrical component and a base, showing internal components (no text or symbols)flowchart
graph TD
    A["Hot Water"] --> B["Steam"]
    C["Coffee"] --> B
    B --> D["Radial Cone"]
natural_image
Mechanical assembly diagram showing piston and crankshaft components with a rotating arrow (no text or symbols)natural_image
Mechanical component diagram showing a rotating shaft and housing with a curved arrow indicating rotation (no text or symbols)natural_image
Illustration of a coffee maker with a magnifying glass and a cup, showing a rotation arrow (no text or symbols)flowchart
graph TD
    A["Hot Water"] --> B["Steam"]
    C["Coffee"] --> B
    B --> D["Radial Cone"]
natural_image
Diagram of a water tap with a pump, valve, and cup (no text or symbols)natural_image
Mechanical component diagram showing a lever mechanism with a curved arrow indicating rotation (no text or symbols)natural_image
Diagram of a kitchen sink with faucet and cup, showing mechanical components and rotation arrow (no text or symbols)natural_image
Diagram of a mechanical component with a curved arrow indicating rotation or direction (no text or symbols)natural_image
Line drawing of a modern toaster with a cup of coffee being poured into it (no text or symbols)natural_image
Simple line drawing of a magnifying glass above a cup with an upward arrow (no text or symbols)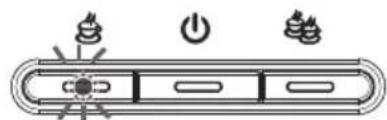
natural_image
Pure electrical circuit lines without any symbolsnatural_image
Line drawing of a standard 2<|im_start|> Guyan 100 breakfast toaster with a cup and stand mixer (no text or symbols)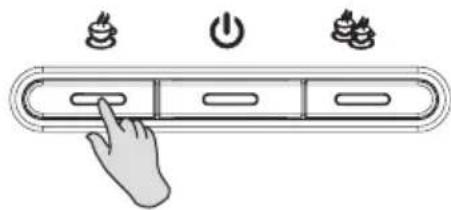
natural_image
Line drawing of a modern toaster with digital display and control panel (no text or symbols)natural_image
Line drawing of a toaster oven with control panel and door (no text or symbols)natural_image
Illustration of a hand washing a cup with a water tap, showing mechanical components (no text or symbols)natural_image
Line drawing of a toaster oven with control panel and door (no text or symbols)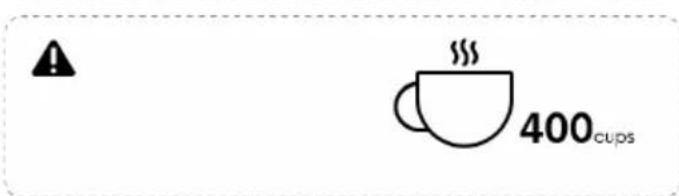
Precauciones
natural_image
Three identical line drawings of a toaster oven with handles and control knobs, showing hand positioning (no text or symbols)natural_image
Simple line drawing of a mechanical component with a cylindrical pin and curved base (no text or symbols)natural_image
Simple line drawing of a mechanical device with a lever and base (no text or symbols)natural_image
Simple line drawing of a hand holding a cylindrical object mounted on a curved base, next to a vertical panel (no text or symbols)
- Important Safeguards
- Content
- Unpackaging
- Note:
- Tip:
- Component description
- Preparation before startup
- usage method
- Steam pipe flushing
- Handle brewing cup washing
- Brewed coffee(for ground coffee)
- Brewed Coffee
- Brewed coffee(for Nespresso capsule)
- Brewed Coffee (for Caffitaly Capsule)
- Milk bubble making
- Hot water production
- Energy saving mode
- Energy saving mode>15 minutes
- Energy saving mode setting
- Descaling mode
- Descaling mode function
- matters needing attention:
- Coffee ration setting
- Single cup time function setting
- Double cup time function setting
- Restore factory settings
- Restore settings
- Treatment method of machine
- Question 1
- processing method
- Question 2
- clean matters needing
- ▲ attention:
- Steam pipe cleaning
- matters needing attention
- Pay attention to high temperature
- Product Technical Data :
- Correct Disposal of This Product
- Gebrühter Kaffee
- Hinweise:
- Caffè preparato
- Avvertenze
- Precauciones
Brand : TORNADO
Model : TST693BGS
Category : Coffee machine