
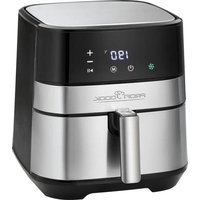
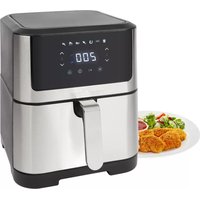
PCFR 1313 H - Deep fryer PROFICOOK - Free user manual and instructions
Find the device manual for free PCFR 1313 H PROFICOOK in PDF.

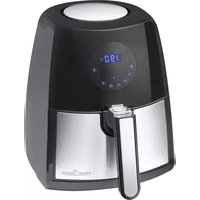
| Product type | Double compartment air fryer |
| Brand | ProfiCook |
| Model | PCFR 1313 H |
| Power supply | 220-240 V~, 50/60 Hz |
| Power consumption | 2400 W |
| Net weight | approx. 7,4 kg |
| Temperature range | 80 °C to 200 °C |
| Timer | 1 to 60 minutes |
| Number of compartments | 2 (left and right) |
| Automatic programs | Fries, Steak, Pizza, Vegetables, Chicken wings, Cake, Bacon, Fish, Shrimp, Keep warm |
| Functions | Single or combined cooking, interior lighting, automatic shut-off, standby mode |
| Control type | Touch |
| Included accessories | Sieve insert, separation plate, frying basket |
| Cleaning | Non-stick coating, hand washing (hot water and dish soap) |
| Safety | Safety switch (prevents operation without basket), automatic shut-off at end of cooking |
| Protection class | I |
| Standby power consumption | 0,5 W |
Frequently Asked Questions - PCFR 1313 H PROFICOOK
User questions about PCFR 1313 H PROFICOOK
0 question about this device. Answer the ones you know or ask your own.
Ask a new question about this device
Download the instructions for your Deep fryer in PDF format for free! Find your manual PCFR 1313 H - PROFICOOK and take your electronic device back in hand. On this page are published all the documents necessary for the use of your device. PCFR 1313 H by PROFICOOK.
USER MANUAL PCFR 1313 H PROFICOOK
natural_image
PROFIT BOOK air fryer oven with two roasted chicken in a glass tray, displaying digital temperature and menu controls (no readable text beyond branding)B
WICHTIG:
Be sure to read the separately enclosed safety instructions first.
Instruction Manual
Thank you for choosing our product. We hope you will enjoy using the appliance.
Read the instruction manual and the separately enclosed safety instructions very carefully before using this appliance. Keep these documents, including the warranty certificate, receipt and, if possible, the box with the inner packaging in a safe place. If you pass the appliance on to a third party, always include all the relevant documents.
Symbols in this Instruction Manual
Important information for your safety is specially marked. It is essential to comply with these instructions in order to avoid accidents and prevent damage to the appliance:

WARNING:
This warns you of dangers to your health and indicates possible injury risks.

CAUTION:
This refers to possible hazards to the appliance or other objects.
Content
Overview of the Components....3
Unpacking the Appliance....9
Scope of Delivery....9
Overview of the Components....9
Warnings for the Use of the Appliance ....10
Notes for Use....10
Location....10
Electrical Connection 10
Standby (Ready State)....10
Before First Use 10
Important Information for Use 10
Function Buttons 10
Interior lighting....11
Switching the Appliance On/Off 11
Selecting Single or Combination Operation 11
Setting the Temperature and Cooking Time (8 ^2 )...... 11
Start/interrupt cooking process....11
Automatic Programmes 11
Operation 11
Interrupting Operation....12
Ending Operation 12
Cleaning....12
Storage....12
Troubleshooting....13
Technical Data....13
Disposal 13
Meaning of the "Dustbin" Symbol 13
Unpacking the Appliance
- Remove the appliance from its packaging.
- Remove all packaging material, such as foils, filling material, cable ties and cardboard packaging.
- Check the scope of delivery for completeness.
- If the contents of the packaging are incomplete or if damage can be detected, do not operate the appliance. Return it to the dealer immediately.
Scope of Delivery
1× Double hot air deep fryer
1× Sieve insert
1× Frying container
1× Separator plate
Overview of the Components
Figure A
1 Air outlet openings
2 Air inlet openings
3 Control panel
4 Separator plate
5 Sieve insert
6 Silicone knobs
7 Handle of the deep-frying container
8 Deep-frying container
9 Recessed handle
10 Housing
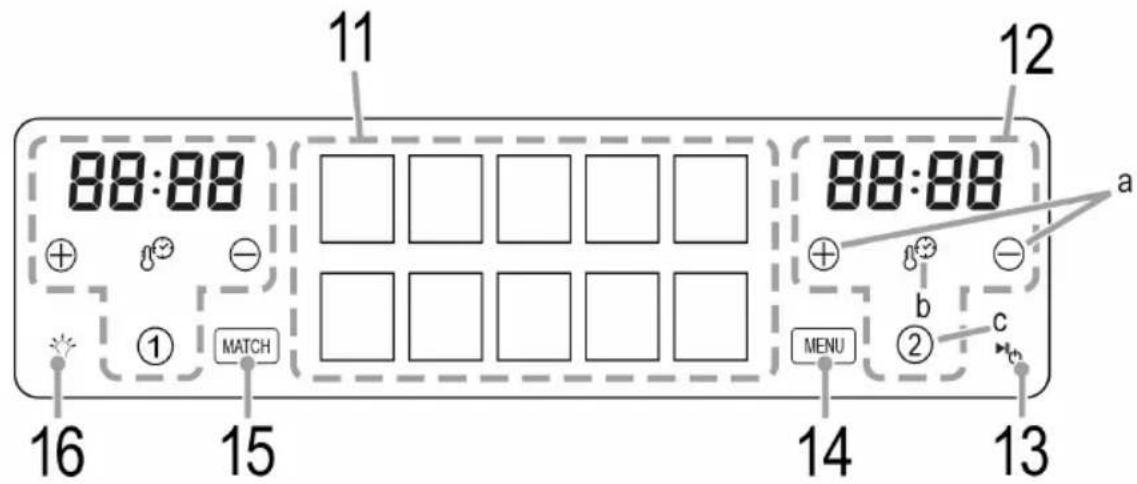
Figure B
11 Indicator light for automatic programmes:
FRENCH FRIES (French fries)
STEAK (Steak)
PIZZA (Pizza)
VEGETABLE (Vegetable)
CHICKEN (Chicken wings)
CAKE (Cake)
BACON (Speck)
FISH (Fish)
SHRIMPS (Shrimps)
KEEP WARM (Keep warm)
12 Control panels for the compartments of the deep fryer (compartment ① (left)/compartment ② (right))
a Ⓗ buttons (set temperature and cooking time)
b button (temperature / cooking time selection)
c ① / ② buttons (selection left / right compartment)
13 button (start / end)
14 MENU button (Automatic programme selection)
15 MATCH button (combined operation)
16 button (interior lighting)
Warnings for the Use of the Appliance

WARNING: Risk of Burns!
- Only touch the deep-frying containers by the handles. Use oven gloves if necessary.
- Hot steam may escape from the air outlet during operation. Keep enough distance.

CAUTION:
- Do not cover the air inlet and air outlet openings to ensure sufficient air circulation.
- Keep a sufficient safety distance (30 cm) from easily inflammable objects such as furniture, curtains, etc.!
- Do not operate the appliance under wall cabinets because of the rising heat and vapours.
- Do not manipulate the safety switches.
- Overload! Do not use a multiple socket, as this appliance is too powerful.
Notes for Use
Location
- Place the appliance on a non-slip, level and heat-resistant surface.
- Do not place the appliance with the back directly against a wall.
- Never place the appliance or the power cord on hot surfaces or near heat sources (e. g. cooker, hob).
Electrical Connection
Before inserting the mains plug into the socket, make sure that the mains voltage matches that of the appliance. You will find the information on the type plate. Unwind the mains cable completely.
Standby (Ready State)
The appliance is in standby mode when only the button is lit. The appliance switches to standby mode in the following situations:
- When the mains plug is plugged in.
- When the time has expired.
- When you press the button, a short beep will sound.
• After a power failure.
Before First Use
- There is a protective layer on the heating element. To remove this, operate the appliance for approx. 15 minutes without contents. Slight smoke and odours are normal during this process. Ensure that there is sufficient ventilation.

WARNING:
Let the appliance cool down before cleaning it!
- Disconnect the mains plug from the socket.
- Wipe out the deep-frying container, the separator plate, the sieve insert and the interior of the appliance before using the appliance.
Important Information for Use
- This appliance is intended for the preparation of solid food. Do not prepare soups or other liquid foods in it.
- A safety switch prevents the appliance from being used without a deep-frying container.
- To achieve the best results, never overfill the deep-frying container so that the food does not come into contact with the heating element.
- Never add oil or any other liquid to the deep-frying container. To achieve a crispy result, the food can be spread with a little oil.
- All foods that are also suitable for the oven can be prepared in the appliance.
- The sieve insert ensures that the accumulated fat settles to the bottom of the deep-frying container. This makes the food crispier.
- When baking cakes, bread, etc., note that the dough expands. The dough must not come into contact with the heating element.
- The sieve insert can be removed for baking bread or similar.
- Food that lies on top of each other during cooking should be shaken halfway through the cooking time. This optimises the cooking result and prevents uneven cooking.
- Soak homemade potato products for at least 30 minutes after cutting to reduce potato starch. Then dry the potato pieces well with kitchen paper.
- The cooking time depends on various factors: Size, texture, amount of food and set temperature.
- If you do not preheat the hot air fryer, add 4 minutes to the cooking time.
Function Buttons
- The buttons on the appliance are touch buttons. Touch the buttons lightly with a finger to perform the function. Each keystroke is confirmed with a beep.
- If you press and hold the button Ⓞ, a fast run starts.
Interior lighting
You can switch the interior lighting in the appliance on and off with the button.
Switching the Appliance On/Off
- Switch the appliance on with the button. The buttons for activating the control panels (① / ②) appear.
- Press and hold the button to switch the appliance off.
• After the time has elapsed, the fan continues to run to cool the appliance. The appliance then automatically switches to standby mode.
Selecting Single or Combination Operation
After you have switched on the appliance, the buttons for activating the control panels appear.
- If you want to use the left compartment of the deep fryer, activate it with the button ①. The control panel for the left compartment appears when you press the button MENU.
- If you want to use the right compartment of the deep fryer, activate it by pressing the button ②. The control panel for the right compartment appears when you press the button MENJ.
- To operate both compartments of the deep fryer at the same time, press both the button ① and the buttone ②.
- To operate both compartments with the same programme, press the button MATCH. The buttons ①, ② and MATCH flash. Then press the button MENU. Select the desired programme or set the temperature and cooking time manually. The settings will be synchronised in the other compartment.
Setting the Temperature and Cooking Time (8)
The buttons and are located once on each side of the appliance's control panel.
- With the button, you can switch between entering the temperature and the cooking time.
- Set the temperature (80 °C – 200 °C) with the buttons⊕ and ⊖
- Set the cooking time (1 – 60 minutes) with the buttons and.
- The display automatically switches between the temperature and the cooking time.
Start/interrupt cooking process
- Start the cooking process with the button.
- Press the button again to interrupt the cooking process.
Automatic Programmes
Select the desired automatic programme. To do this, press the MENU button. The automatic programme symbol flashes.
- The following table shows the factory preset temperatures in degrees Celsius and the minutes. The pre-settings are only guide values. Depending on the size and weight of the food, the temperature and time may have to be adjusted individually.
- Also observe the information on the food packaging.
| Programmes °C min | ||
| FRENCH FRIES | 200 | 20 |
| STEAK | 170 | 15 |
| PIZZA | 150 | 12 |
| VEGETABLE | 180 | 10 |
| CHICKEN | 200 | 25 |
| CAKE | 160 | 8 |
| BACON | 200 | 10 |
| FISH | 160 | 15 |
| SHRIMP | 180 | 8 |
| KEEP WARM | 90 | 15 |
Operation
- Pull the deep-frying container out of the appliance using the handle.
- If necessary, place the sieve insert with the silicone nubs and the separator plate in the deep-frying container. Press the sieve insert and the separator plate down to the bottom.
-
Insert the separator plate in the direction of the arrow into the recess of the deep-frying container.
-
Slide the deep-frying container back into the appliance. It must engage.
-
Plug the appliance into a properly installed earthed socket. A beep sounds and all the symbols light up briefly. The button lights up.
-
Press the button to switch on the appliance.
-
We recommend preheating the appliance for approx. 4 minutes. To do this, set the required temperature and cooking time to 4 minutes.
-
Press the button to start the preheating phase.
-
When the preheating phase is complete, the appliance shows End.
-
Pull the deep-frying container out of the appliance using the handle. Place it on a heat-resistant surface.
-
Fill the deep-frying container with the desired food.
- Slide the deep-frying container back into the appliance.
- Switch the appliance on again with the button.
-
Activate the control panel for the compartment containing the food.
-
Select an automatic programme or set the cooking time and temperature manually.
- Press the button to start the cooking process.
- If necessary, shake the food halfway through the cooking time. To do this, pull out the deep-frying container by the handle. Then push the deep-frying container back into the appliance.
Interrupting Operation
- Operation is interrupted when you press the button. If you wish to resume the operation, press the button again.
-
Operation is also interrupted when you pull out the deep-frying container. The control panel displays Pot Reinsert the deep-frying container to resume operation. The Pot display goes out.
-
Operation can also be interrupted by pulling the mains plug. Insert the mains plug back into the socket to resume operation.
- After a failure of power, the appliance will automatically resume the operation from the point at which it was interrupted.
Ending Operation
Once the cooking time has elapsed, the appliance displays End.
- Unplug the mains plug from the socket.
- Remove the deep-frying container with the handle from the appliance.
- Put the food in a heat-resistant bowl.
- Slide the deep-frying container back into the appliance to cool.
Cleaning

WARNING:
- Always switch off the appliance and unplug it from the mains before cleaning. Wait until the appliance, the deep-frying container, the separator plate and the sieve insert have cooled down.
- Do not immerse the appliance in water! It could cause an electric shock or fire.

CAUTION: Non-stick Coating
- Do not use a wire brush or other abrasive objects.
- Do not use harsh or abrasive cleaners.
- You can clean the deep-frying container, the separator plate and the sieve insert in warm dishwater with a little washing-up liquid.
- Clean the inside and outside of the appliance with a slightly damp, not wet cloth.
- Also remove any food / grease residues on and next to the heating element with a slightly damp cloth. Do not switch the appliance on again until the heating element is completely dry!
Storage
- Clean the appliance as described. Allow the accessories to dry completely.
- We recommend storing the appliance in its original packaging if you do not intend to use it for a longer period of time.
• Always store the appliance out of the reach of children in a well-ventilated and dry place.
Troubleshooting
| Problem Possible Cause Remedy | ||
| The appliance has no function. | The appliance has no power supply. Check the | power socket with another appliance. |
| Insert the mains plug correctly. | ||
| Check the house fuse. | ||
| The appliance is not switched on. Only the ➤ button is visible. | Press the ➤ button to switch the appliance on. The control panel is activated. | |
| You have not started the cooking process. | Press the ➤ button to start the cooking process. | |
| The deep-frying container is not inserted correctly. The safety switch prevents operation with the deep-frying container not correctly inserted. | Insert the deep-frying container correctly. It must engage audibly. | |
| The food is not fully cooked. | The deep-frying container is overfilled. Reduce the amount of food. Smaller quantities cook more evenly. | |
| The temperature is set too low. Set a higher temperature. | ||
| The cooking time is set too short. Set a longer cooking time. | ||
| The food is cooked unevenly. | The food is on top of each other. This does not ensure sufficient air circulation. | Shake the food halfway through the cooking time. |
| The food is not crispy. You have used food that is only suitable for a conventional deep fryer. | Use foods suitable for the oven or spread them with a little oil. | |
| Smoke is coming out of the appliance. | You are preparing very fatty food. Smoke may develop due to splashes of fat inside the appliance. Make sure there is sufficient ventilation. | |
| The deep-frying container is overfilled. The food is touching the heating element. | Reduce the amount of food. | |
| There is still food / fat residue in the deep-frying container or on the heating element from previous use. | Clean the appliance after each use as described in the chapter “Cleaning”. | |
Technical Data
Model: PC-FR 1313 H
Power supply: 220 - 240 V\~, 50 / 60 Hz
Power consumption: 2400 W
Power consumption in standby-mode: 0.5W
Protection class: I
Net weight: .... approx. 7.4 kg
This product contains a light source of energy efficiency class
The light source is resistant to high temperatures and is only intended for use in this appliance.
The right to make technical and design modifications in the course of continuous product development remains reserved.
This appliance has been tested according to all applicable, current CE directives and built according to the latest safety regulations.
Disposal
Meaning of the "Dustbin" Symbol
Protect our environment: do not dispose of electrical equipment in the domestic waste.
Please return any electrical equipment that you will no longer use to the collection points provided for their disposal.
This helps avoid the potential effects of incorrect disposal on the environment and human health.
This will contribute to the recycling and other forms of re-utilisation of electrical and electronic equipment.
Information concerning where the equipment can be disposed of can be obtained from your local authority. Your dealer and contractual partner is also obliged to take back the old appliance free of charge.
BELANGRIJK:
KEEP WARM (Warm houden)
LET OP: Anti-aanbaklaag
CTC Clatronic Sp. z o.o
Ul. Brzeska 1
45-960 Opole
Usuwanie

- WICHTIG:
- Be sure to read the separately enclosed safety instructions first.
- Instruction Manual
- Symbols in this Instruction Manual
- WARNING:
- CAUTION:
- Content
- Unpacking the Appliance
- Scope of Delivery
- Overview of the Components
- Figure A
- Figure B
- Warnings for the Use of the Appliance
- WARNING: Risk of Burns!
- Notes for Use
- Location
- Electrical Connection
- Standby (Ready State)
- Before First Use
- Important Information for Use
- Function Buttons
- Interior lighting
- Switching the Appliance On/Off
- Selecting Single or Combination Operation
- Setting the Temperature and Cooking Time (8)
- Start/interrupt cooking process
- Automatic Programmes
- Operation
- Interrupting Operation
- Ending Operation
- Cleaning
- CAUTION: Non-stick Coating
- Storage
- Troubleshooting
- Technical Data
- Disposal
- Meaning of the "Dustbin" Symbol
- BELANGRIJK:
- LET OP: Anti-aanbaklaag
- Usuwanie
Brand : PROFICOOK
Model : PCFR 1313 H
Category : Deep fryer