XGS 3300 - Firewall SOPHOS - Free user manual and instructions
Find the device manual for free XGS 3300 SOPHOS in PDF.
| Product type | Hardware firewall (network security appliance) |
| Brand | Sophos |
| Model | XGS 3300 |
| Form factor | 1U, rack-mountable |
| Dimensions (H x W x D) | 44 x 438 x 400 mm |
| Weight | 8 kg (approx.) |
| Power supply | Dual redundant power supply (built-in) |
| Power consumption | 400 W max (each unit) |
| Processor | 8 cores (x64 architecture) |
| RAM | 8 GB DDR4 |
| Storage | 160 GB SSD |
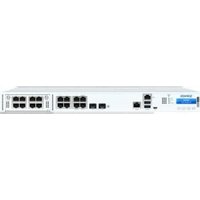
| Network interfaces | 8 RJ45 10/100/1000 ports, 2 SFP+ 1/10 Gbps ports, 2 SFP 1 Gbps ports, 1 dedicated MGMT port |
| Modular ports | Flexi Port slot for optional modules (copper, SFP, PoE, etc.) |
| Main functions | Firewall, VPN, intrusion prevention, web filtering, application control, antivirus |
| Hardware bypass | Bypass port pair (ports 1/2) in case of failure |
| LED indicators | Power, SSD, Bypass, link/speed on each port |
| Initial setup | Via web interface (https://10.0.1.1:4444), default credentials admin/admin |
| Maintenance and cleaning | Clean with a dry, soft cloth. Do not use chemical products. |
| Security | Change default password, keep firmware up-to-date, use strict security policies |
| Spare parts and repairability | Replaceable SSD, redundant power supplies. Contact Sophos support for repairs. |
| General information | Professional network security appliance, suitable for SMBs. Manufacturer warranty. |
Frequently Asked Questions - XGS 3300 SOPHOS
User questions about XGS 3300 SOPHOS
0 question about this device. Answer the ones you know or ask your own.
Ask a new question about this device
Download the instructions for your Firewall in PDF format for free! Find your manual XGS 3300 - SOPHOS and take your electronic device back in hand. On this page are published all the documents necessary for the use of your device. XGS 3300 by SOPHOS.
USER MANUAL XGS 3300 SOPHOS
XGS 2100/2300/3100/3300

For more information about your appliance, scan the QR code or visit www.sophos.com/get-started-firewall

Before you begin, please confirm that you have a working Internet connection and make sure you have the account information available that was provided by your ISP.
1. Before Deploying
Congratulations on the purchase of your Sophos XGS appliance. This Quick Start Guide describes in short steps how to connect your appliance and explains how to open the web-based Admin Console from your administration PC. The Admin Console allows you to configure every aspect of the appliance.
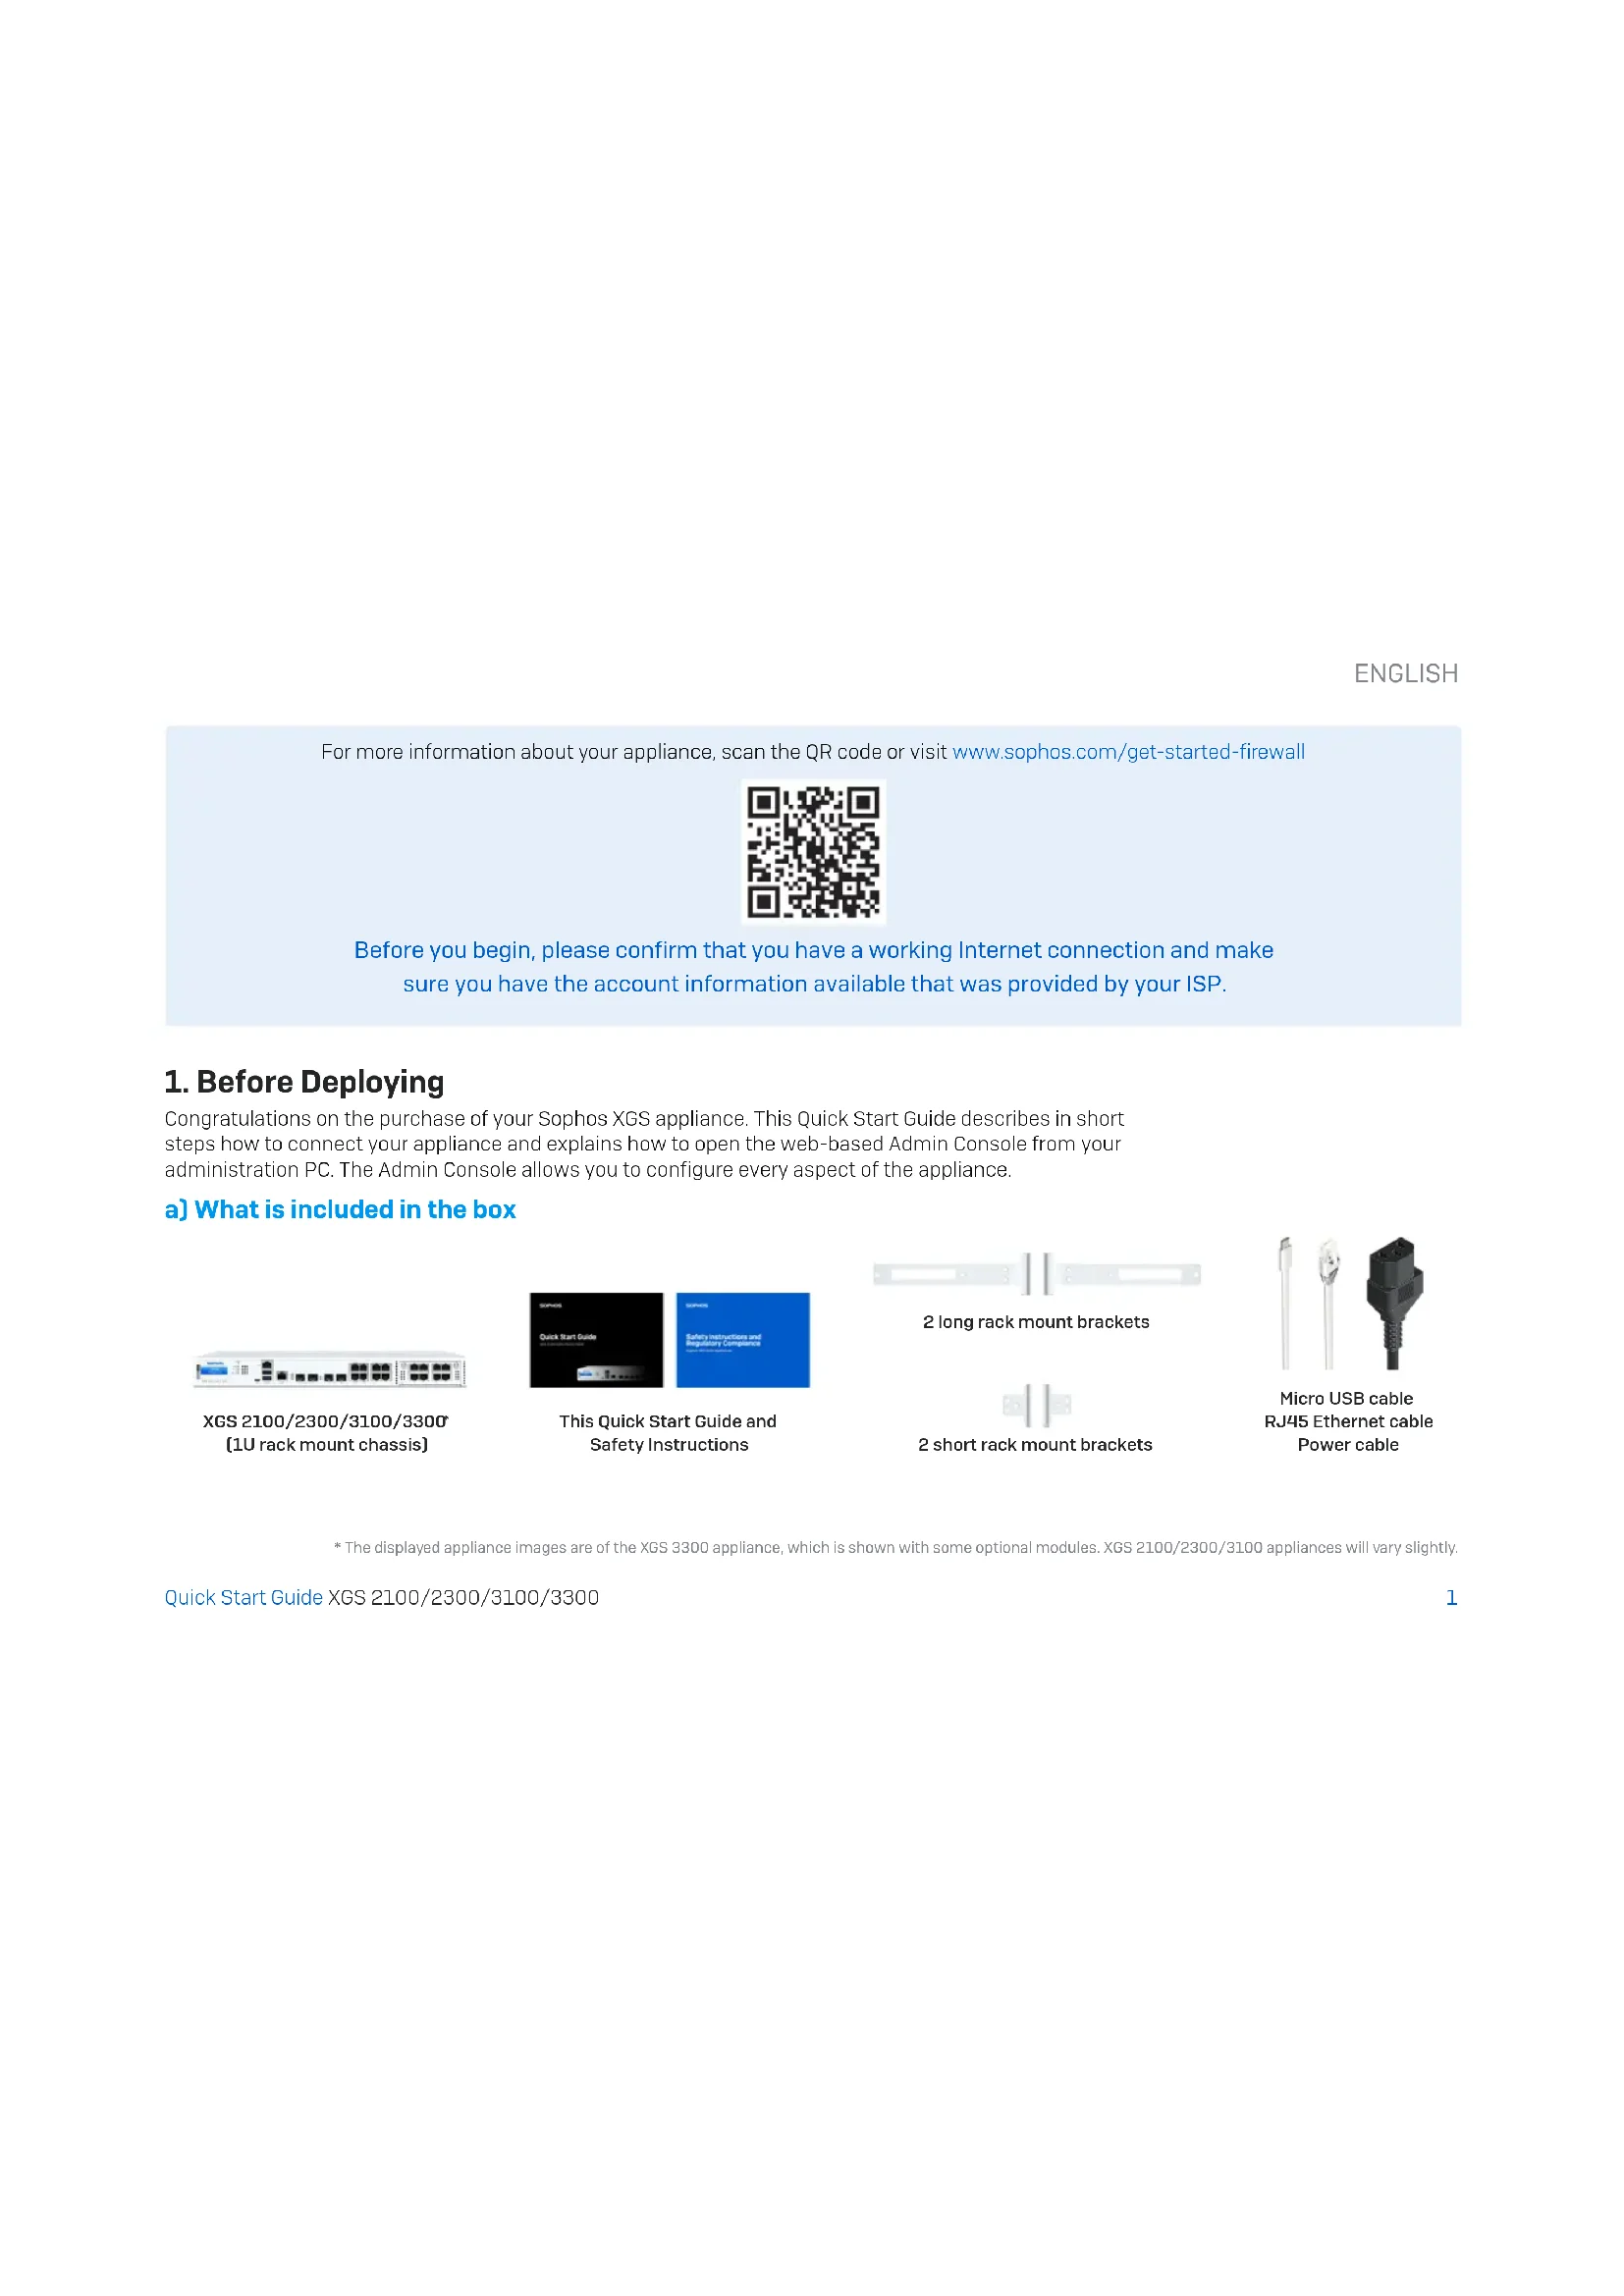
a] What is included in the box
![SOPHOS XGS 3300 - a] What is included in the box - 1](/content/2026/03/524043/images/18e5321cf2017bf564d3733230636973d296beac7e0586c64342757ef50d52fb.jpg)
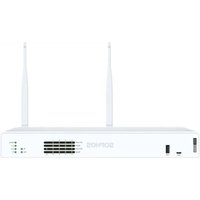
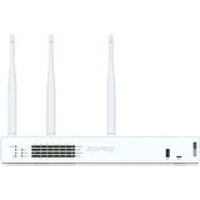
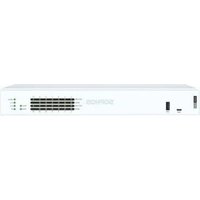
XGS 2100/2300/3100/3300 (1U rack mount chassis)
![SOPHOS XGS 3300 - a] What is included in the box - 2](/content/2026/03/524043/images/bacbb8bf1914fcb771d8ebbd458b802aac823709bd9d6736972584e6ced18eb3.jpg)
This Quick Start Guide and Safety Instructions
![SOPHOS XGS 3300 - a] What is included in the box - 3](/content/2026/03/524043/images/d83e759dc9ee05fd9bc9fc33248bd0408ed9caa8134637bc159041199c70e8b4.jpg)
![SOPHOS XGS 3300 - a] What is included in the box - 4](/content/2026/03/524043/images/b96691c35d72654f73081ae515f46a2738dd87844f7a0d11fac8329e3b63fe1e.jpg)
2 long rack mount brackets
![SOPHOS XGS 3300 - a] What is included in the box - 5](/content/2026/03/524043/images/93445ed3218ba9a6a60a8434d6c200d96b62ef3b1626834b1d4dff3be6b44070.jpg)
2 short rack mount brackets
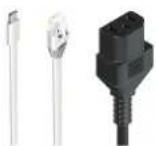
![SOPHOS XGS 3300 - a] What is included in the box - 6](/content/2026/03/524043/images/c557d310dd4133fbf43f382d7698d59d0f8d02aa1b4d90bdc8548a6acc13d000.jpg)
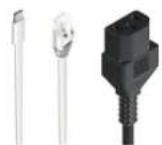
Micro USB cable RJ45 Ethernet cable Power cable
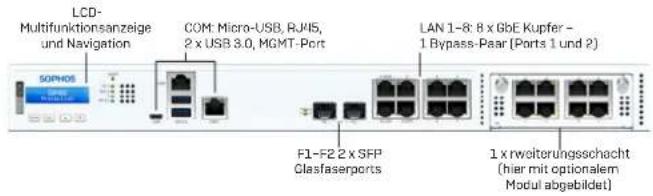
The displayed appliance images are of the XGS 3300 appliance, which is shown with some optional modules. XGS 2100/2300/3100 appliances will vary slightly.
ENGLISH
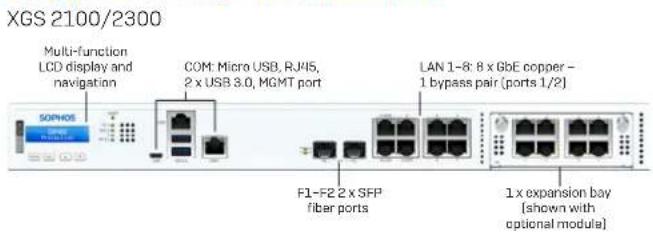
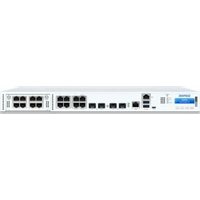
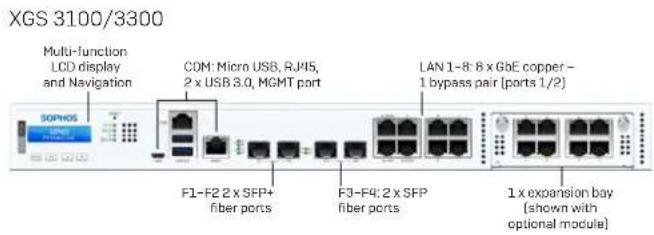
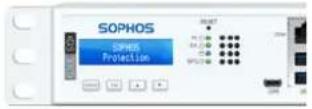
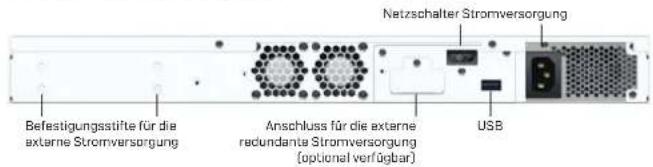
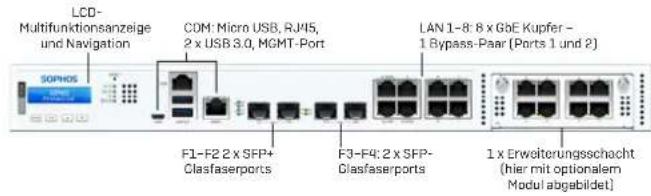
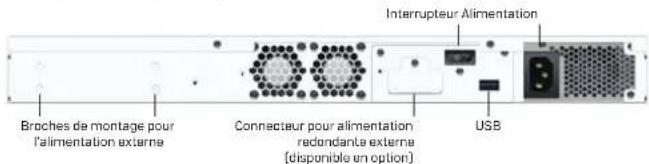
b] Appliance images: front and back
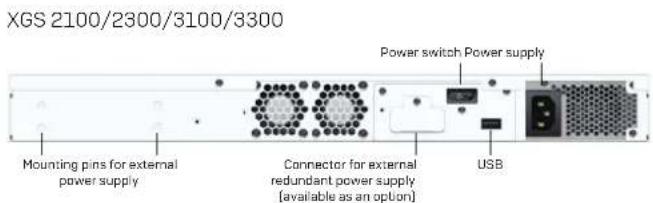
Interfaces [front]
| LAN Ports Type Speed Comment | |||
| 1-8 RJ45 10/100/1000 Mbps Ports | 1/2 can be configured as a bypass pair. | ||
| F1-F2(XGS 2100/2300 only) | SFP 1 Gbps | ||
| F1-F2(XGS 3100/3300 only) | SFP+1/10 Gbps | ||
| F3-F4(XGS 3100/3300 only) | SFP 1 Gbps |
ENGLISH
| Other Ports Type Comment | ||
| COM RJ45/Micro USB You can connect a serial console to either the RJ45 or micro USB COM port to access the CLI. Only one port can be used at any time. If both ports are connected then the micro USB port will take precedence.The required connection settings are:• Bits per second: 38,400• Data bits: 8• Parity: N (none)• Stop bits: 1 | ||
| USB USB 3.0 [Type A] You can connect a USB 2.0 or 3.0 compatible device to this port [e.g. USB thumb drive, UPS, 3G/4G dongles]. | ||
| MGMT RJ45 [10/1000 Mbps] We recommend using this dedicated port to connect your Admin PC. | ||
| USB [rear] | USB 2.0 (Type A) | You can connect a USB 2.0 compatible device to this port (e.g. keyboard). |
| Module Slots Type Comment | ||
| A | Flexi Port Can be used for any Flexi Port module listed in the table below | |
| Compatible Modules* | Comment |
| 8 port GbE copper | Flexi Port |
| 8 port GbE SFP | Flexi Port |
| 4 port GbE copper - 2 Bypass groups | Flexi Port |
| 4 port 10 GbE SFP+ | Flexi Port |
| 2 port GbE fiber (LC) Bypass + 4 port GbE SFP | Flexi Port |
| 4 port 2.5 GbE copper PoE | Flexi Port |
| 4 port GbE copper PoE + 4 port GbE copper | Flexi Port |
- SFP/SFP+ transceivers are sold separately
ENGLISH
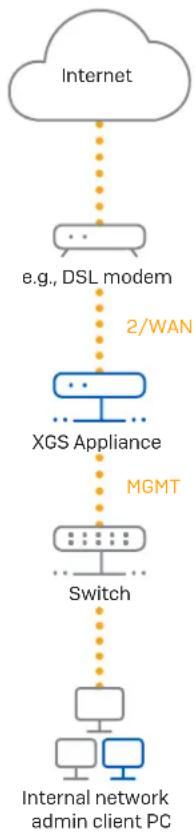
2. Mount and Connect the Appliance
Please follow the rack mounting instructions as described in the XGS Operating Instructions Guide or the separate instructions provided with your rack mount rails.
Connect the ports to the internal and external networks
- Connect the MGMT port via a switch to the internal network. For this purpose, use the RJ45 Ethernet cable provided. Note that your Administration PC must also be connected to this network.
- Connect Port 2 to the external network. The connection to the WAN depends on the type of Internet access.
XGS appliances are shipped with the following default settings:
| Ethernet Port IP Address Zone | |
| 1/LAN 172.16.16.16/255.255.255.0 LAN | |
| 2/WAN DHCP WAN | |
| MGMT 10.0.1.1/255.255.255.0 LAN | |
| Admin ConsoleUserName Admin Console Password | CLI Console Password |
| admin admin admin | |
| Default Gateway DNS DHCP Service | |
| DHCP DHCP Enabled |
- Available at www.sophos.com/firewall-documentation
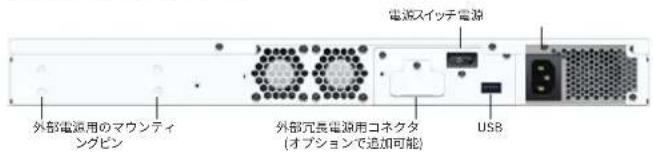
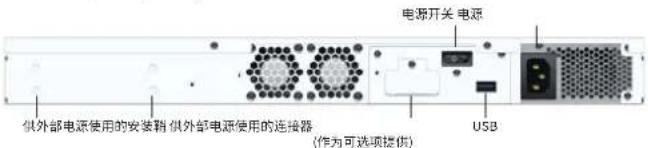
3. Power Up the Appliance
Connect the power cable and turn on the appliance
Connect the appliance to the power supply using the power cable[s]. Turn the appliance on. The power switch is on the back of the appliance next to the power connection. Once the appliance has booted completely, you will hear an acoustic signal: five beeps in a row.
4. Connect Your Administration PC
Please note: We recommend that you use the MGMT interface to connect the Administration PC and all other network interfaces for regular network traffic. Therefore, the following settings are for the MGMT port only. However, if required, you can also connect your Admin PC to any other LAN port. Please make sure that you use the correct IP address.
Administration PC connection properties:
Use the settings below to configure your (PC/laptop) network interface:
IP address: 10.0.1.2
Netmask:Enter 255.255.255.0
- Default Gateway: Enter the IP address of the appliance's internal network card (MGMT): 10.0.1.1
DNS Server: Enable this option and enter the IP address of the internal network card (MGMT): 10.0.1.1
Connect your PC/laptop to the MGMT port of the appliance:
Start the browser and enter the IP address of the appliance's MGMT port that your PC is connected to: https://10.0.1.1:4444
Login with the default details below:
Username: admin
Password: admin
ENGLISH
ENGLISH
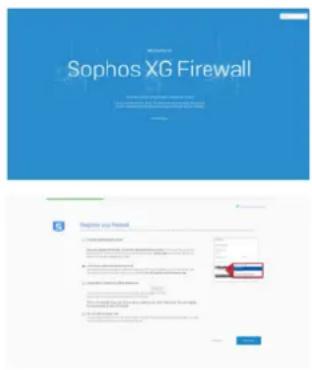
5. Set Up the Appliance
a) Start network configuration
Select 'Click to begin' on the 'Welcome' screen to start your basic appliance configuration. Change the interface IP addresses, default gateway, DNS settings and date/time zone to match your local network settings.
b] Register the appliance
If you have not previously registered your appliance on MySophos, you will see the registration screen "Register Your Firewall." The appliance requires Internet connectivity for it to be registered with MySophos. If you want to register later, click the check box "I do not want to register now" and proceed with section c).
If you have a serial number provided on your License Schedule please enter it into the first field and click "I have an existing serial number," otherwise click "I don't have a serial number [Start a Trial]."
If you are upgrading from an existing UTM/SG appliance and want to migrate your existing UTM license to your new firewall, click the respective button on the screen and browse for your UTM license to upload it to your firewall.
After clicking 'Continue', you will be redirected to the MySophos portal. If you already have a MySophos account, enter your login credentials under 'Log in to MySophos'. If you are a new user, sign up for a MySophos account by entering the details under 'Register for MySophos'.
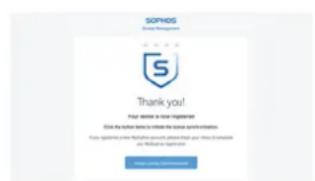
Click 'Continue' to complete the registration process. Please wait while the process completes - it will take a few seconds. After successful registration, you will see a screen with the message. 'Your device is now registered'. Please note that you should proceed with the next step, i.e. 'Synchronize License' only after the appliance is successfully registered.
c) Synchronize license
Click 'Initiate License Synchronization' to get the license information from Sophos onto the appliance. After synchronization, you will see a screen with the message, "Synchronization with server was successful."
ENGLISH
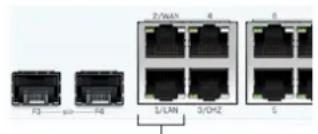
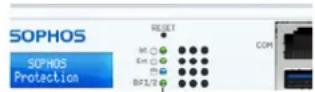
6. Set Up Bypass Mode
Your XGS appliance can go into LAN Bypass Mode [Hardware Bypass Mode] in case of a power failure or hardware malfunction. In Bypass Mode, the firewall allows all traffic to pass through without any scanning. In this mode, one pair of interfaces are bridged allowing uninterrupted traffic flow.
Your XGS appliance comes with one pair of bypass ports as shown on the picture to the right.
After a power failure, the firewall automatically resumes normal functionality when power is restored. In case of a hardware failure, please contact Sophos Support.
By default, LAN Bypass Mode is disabled on your XGS appliance. You can enable/disable LAN Bypass Mode by following the steps given below.
- Log in to the CLI Console via Telnet or SSH.
- Choose 'Option 4. Device Console' and press 'Enter'.
- View the LAN Bypass Mode status by executing the following command:
console> show lanbypass
- Enable or disable Bypass Mode by executing the following command:
console> set lanbypass
The LED on the front panel of the appliance [see picture to the right] turns on when Bypass Mode is enabled for the specific port pair.
Please note: Within initial SFOS releases Bypass Mode can only be enabled/disabled for all Bypass ports/ pairs at once (LEDs for all available bypass pairs will turn ON/OFF synchronously).
Enabling/disabling Bypass Mode for each bypass port pair individually will be added in a future SFOS release. Please check the KBA at https://community.sophos.com/kb/en-us/127014 for further information.
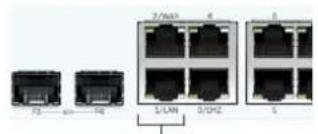
Bypass pair 1 [ports 1/2]
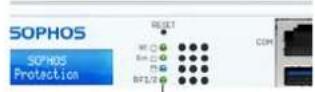
Bypass LEDs-Bypass ports 1/2
ENGLISH
7. Appliance LED codes
| Status LEDs | ||
| Power 1 Green Solid | Power Supply 1 Active. | |
| Red Solid Power Supply 1 Failure. | ||
| Power 2 Green Solid | Power Supply 2 Active. | |
| Red Solid Power Supply 2 Failure. | ||
| SSD Blue Flashing SSD reading/writing data. | ||
| BP 1/2 Green Solid | Bypass mode on Ports 1/2 enabled. | |
| Off Bypass mode on Ports 1/2 disabled and inactive. | ||
| LEDs on each RJ45 Ethernet connector | ||
| ACT/LNK (Left LED) | Green Solid 1. The Ethernet port has established link. 2. Good connection between the Ethernet port and hub. | |
| Flashing The adapter is sending or receiving network data. | ||
| Off 1. The adapter is switched are not receiving power. 2. No connection between both ends of network. 3. Network drivers have not been loaded or do not function correctly. | ||
| Speed (Right LED) | Amber On If Ethernet port is operating at 1000 Mbps. | |
| Green On If Ethernet port is operating at 100 Mbps. | ||
| Off If Ethernet port is operating at 10 Mbps. | ||
ENGLISH
| LEDs on each SFP connector | ||
| ACT/LNK Green Solid 1. The SFP connector is receiving power. | ||
| 2. Good connection between the SFP port and hub. | ||
| Flashing The adapter is sending or receiving network data. | ||
| Off 1. The adapter aand switch are not receiving power.2. No connection between both ends of network.3. Network drivers have not been loaded or do not function correctly. | ||
| LEDs on each SFP+ connector | ||
| ACT/LNK Green Solid 1. The SFP+ connector is receiving power. | ||
| 2. Good connection between the SFP+ port and hub. | ||
| Flashing The adapter is sending or receiving network data. | ||
| Off 1. The adapter aand switch are not receiving power.2. No connection between both ends of network.3. Network drivers have not been loaded or do not function correctly. | ||
| Speed Blue On If SFP+ connector is operating at 10,000 Mbps. | ||
| Amber On If SFP+ connector is operating at 1,000 Mbps. | ||
| Off Either the LED is not working or the SFP+ connector is operating at a speed below 1,000 Mbps. | ||
8. Support and Documentation
For more information and technical support, please visit www.sophos.com/en-us/support or contact your local Sophos reseller.
Check our Getting Started resources to find out how you can get the most out of your purchase www.sophos.com/get-started-firewall
DEUTSCH
XGS2100/2300XGS2100/2300
XGS 2100/2300/3100/3300
XGS3100/3300
console>show lanbypass
console> set lanbypass
XGS2100/2300/3100/3300
Interfaces (avant)
console> set lanbypass
Paire Bypass 1 [ports 1/2]
Voyants Bypass Ports Bypass 1/2
FRANCAIS
console> show lanbypass
console> set lanbypass
console> show lanbypass
- Habilité ou désbilite o modo Bypass executando o seguinfe comando:
console> set lanbypass

LEDs de bypass-Portas de bypass 1/2
7. Códigos LED do disposicao
LED de status
XGS2100/2300/3100/3300(1U拉克卡王卜
本书兑习快斯夕卜吉伏 0

LackMunl用的长F

LackMunl用的短FRAKtT(2個)
XGS 2100/2300/3100/3300
12. 13.
www.sophos.com/firewall-documentation 1
日本
夕习KST-10XGS2100/2300/3100/3300
日本
3.アTPLIAIN'Sの電源を入る
console> show lanbypass
console> set lanbypass
XGS2100/2300/3100/3300(1U机架式)
快速安装指南和安全说明

2个长的机架安装支架

2个短的机架安装支架
XGS2100/2300/3100/3300
接口(正面)
| LAN端口类型速度注释 | |||
| 1-8 | RJ45 10/100/1000 Mbps | 端口1/2可配置为旁路对。 | |
| F1-F2(仅XGS 2100/2300) | SFP 1 Gbps | ||
| F1-F2(仅XGS 3100/3300) | SFP+1/10 Gbps | ||
| F3-F4(仅XGS 3100/3300) | SFP 1 Gbps |
中国
United Kingdom Sales
Tel.:+44(0)8447671131
Email: sales@sophos.com
North American Sales
Toll Free: 1-866-866-2802
Email: nasales@sophos.com
Sales DACH
Australia and New Zealand Sales
Tel.: +61 29409 9100
Email: sales@sophos.com.au
Japan Sales
Tel.: +81 3 3568 7550
Email: sales@sophos.co.jp
China Sales
Tel.: +86-10-65675820
Email: sales@sophos.co.jp
Shanghai Sales
Tel.:+86-21-32517160
Email: sales@sophos.co.jp
SOPHOS
Copyright 2020. Saphos Ltd. All rights reserved.
Registered in England and Wales No.2096520, The Pentagon, Abingdon Science Park, Abingdon, OX14 3YP, UK
Sphos is the registered trademark of Soghos Ltd. All other product and company names mentioned are
trademarks or registered trademarks of their respective owners.
2020-12-17 QSG [DD]