
E4WP31 - Washing machine AEG - Free user manual and instructions
Find the device manual for free E4WP31 AEG in PDF.
| Product type | Washing machine |
| Brand | AEG |
| Model | E4WP31 |
| Reference | 9029801843 |
| Washing capacity | 8 kg |
| Maximum spin speed | 1400 rpm |
| Energy class | A |
| Dimensions (H x W x D) | 850 x 600 x 600 mm |
| Weight | 75 kg |
| Power supply | 220-240 V, 50 Hz, 10 A |
| Installation type | Integrated under worktop |
| Main functions | Washing, rinsing, spinning, cotton, synthetics, delicates programs, etc. |
| Safety | Child safety, overflow protection, overload stop |
| Maintenance and cleaning | Regular filter cleaning, draining after each cycle |
| Spare parts and repairability | Parts available through AEG service (repairability index: 7.5/10) |
| Noise level washing/spinning | 52 dB / 76 dB |
| Annual water consumption | 10,500 L/year |
| Annual energy consumption | 150 kWh/year |
Frequently Asked Questions - E4WP31 AEG
User questions about E4WP31 AEG
0 question about this device. Answer the ones you know or ask your own.
Ask a new question about this device
Download the instructions for your Washing machine in PDF format for free! Find your manual E4WP31 - AEG and take your electronic device back in hand. On this page are published all the documents necessary for the use of your device. E4WP31 by AEG.
USER MANUAL E4WP31 AEG
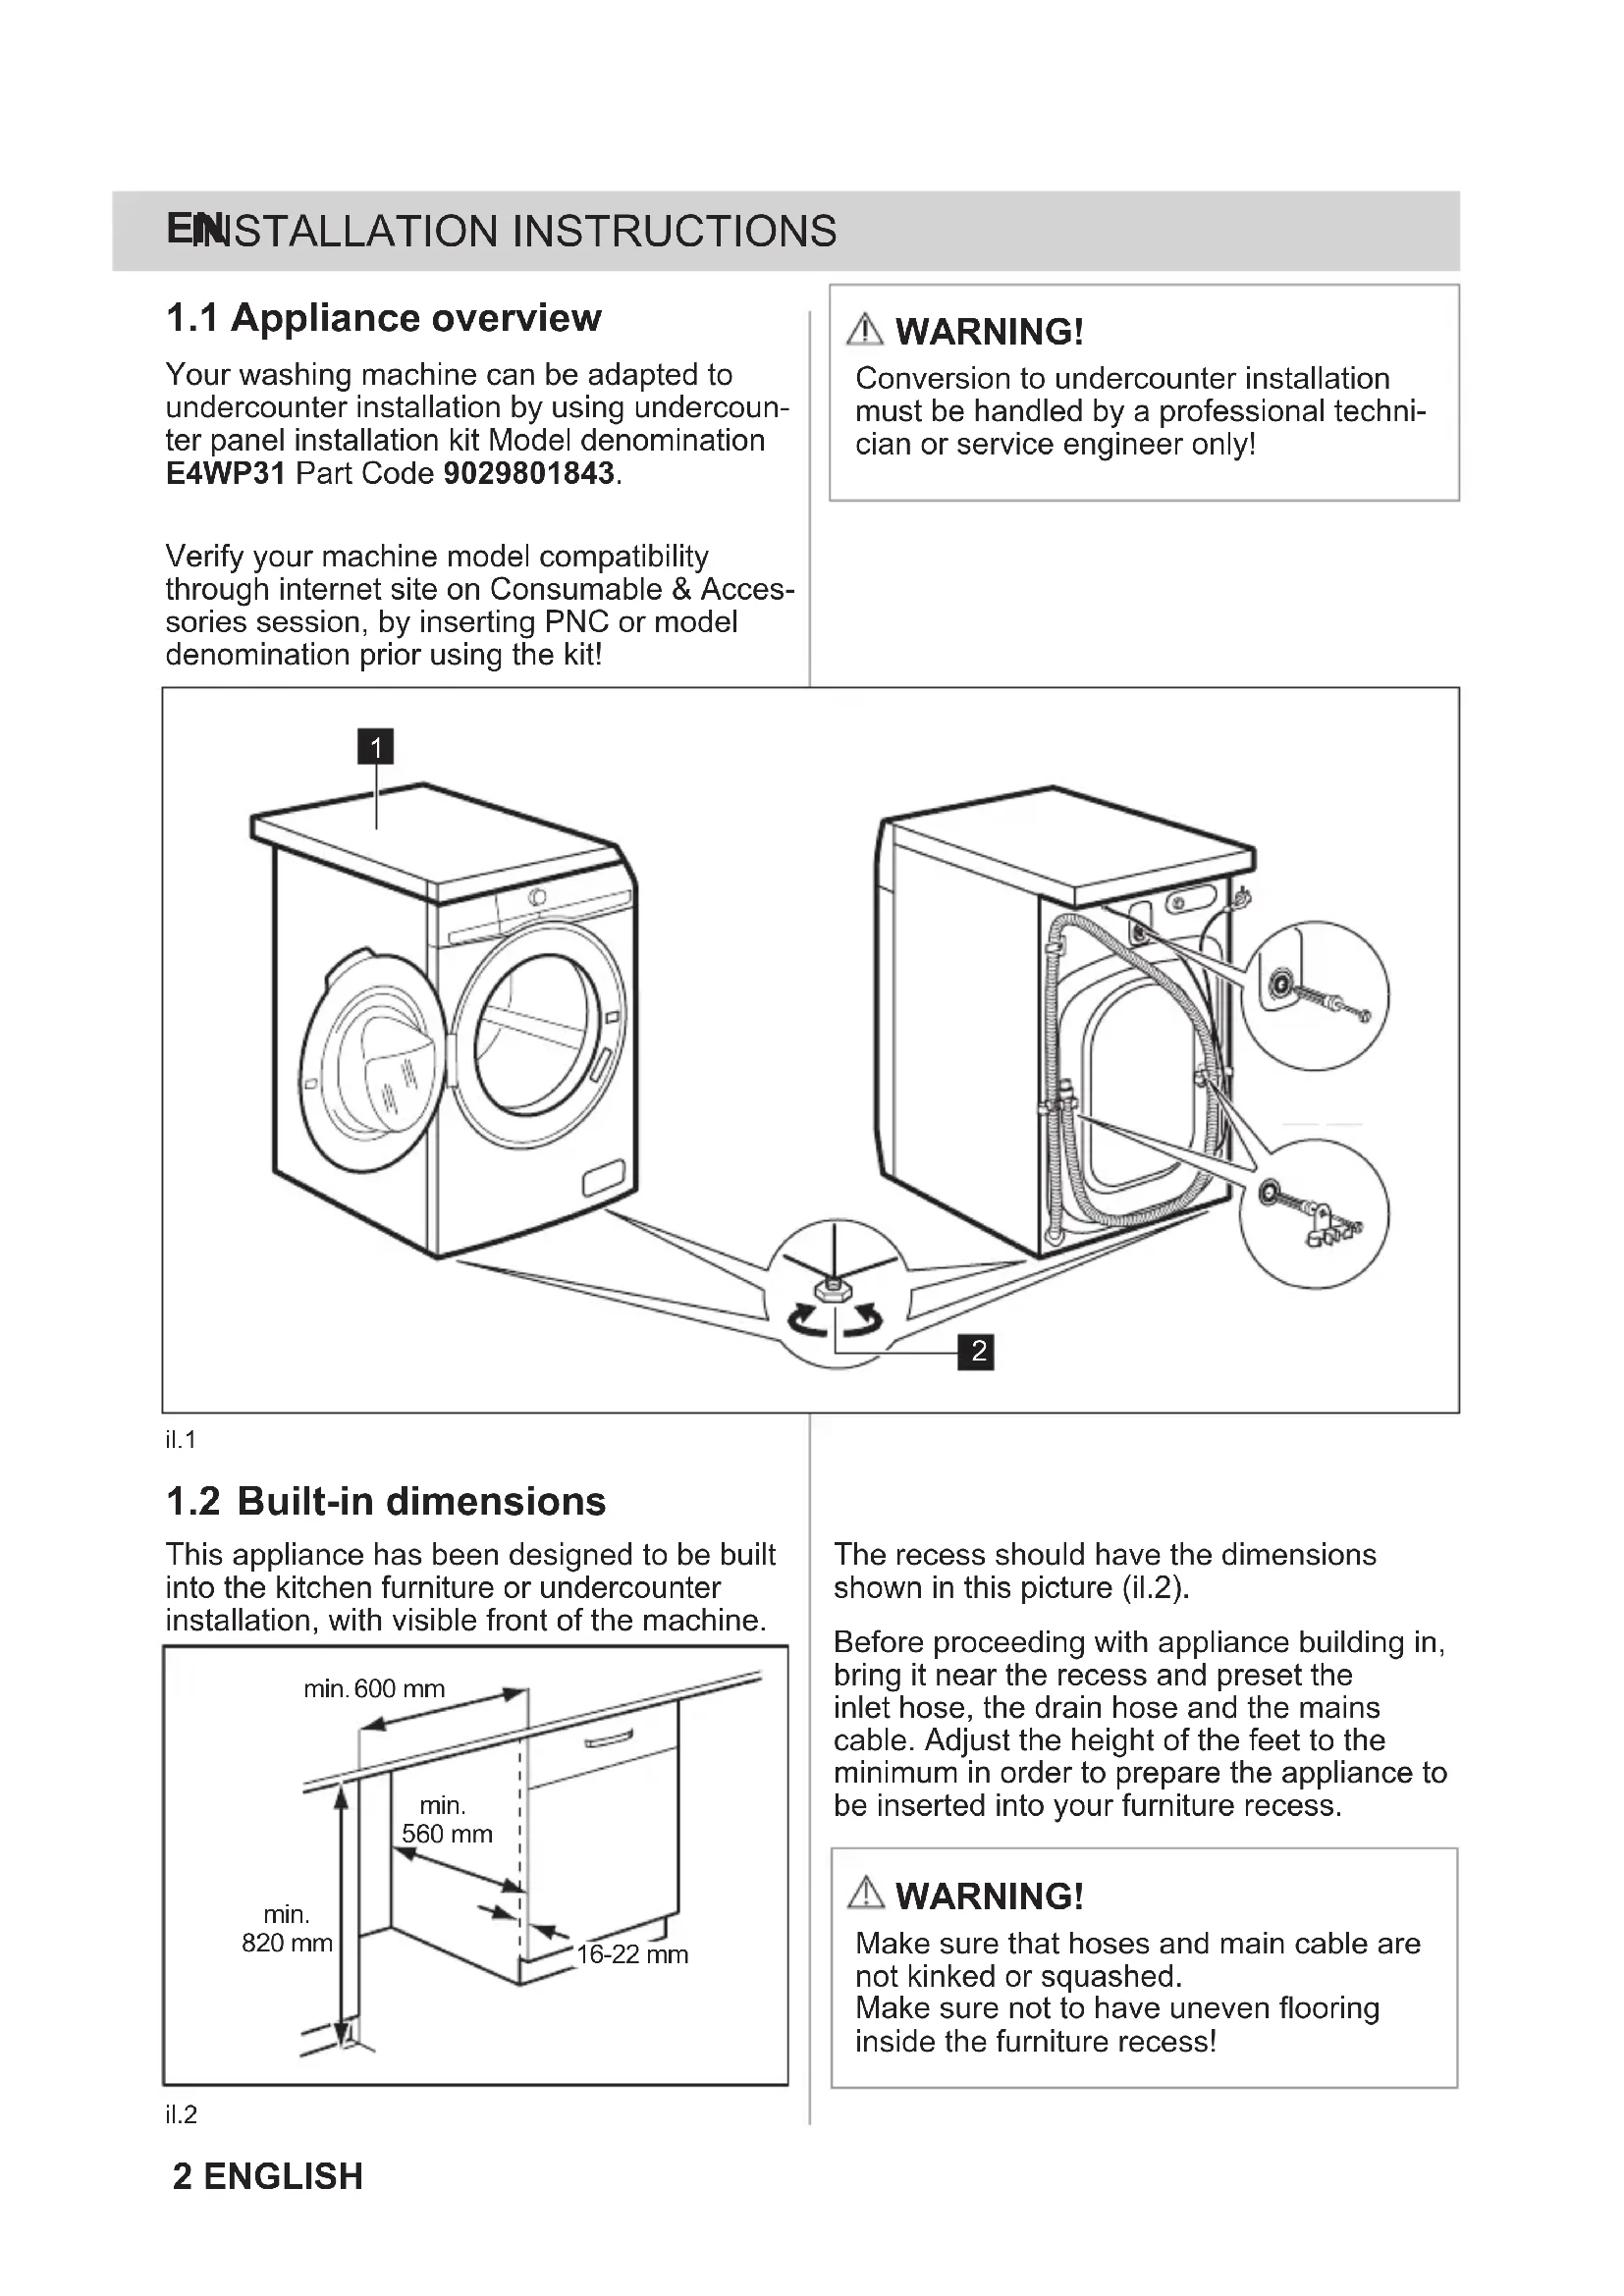
Your washing machine can be adapted to undercounter installation by using undercounter panel installation kit Model denomination E4WP31 Part Code 9029801843.
Verify your machine model compatibility through internet site on Consumable & Accessories session, by inserting PNC or model denomination prior using the kit!
WARNING!
Conversion to undercover installation must be handled by a professional technician or service engineer only!
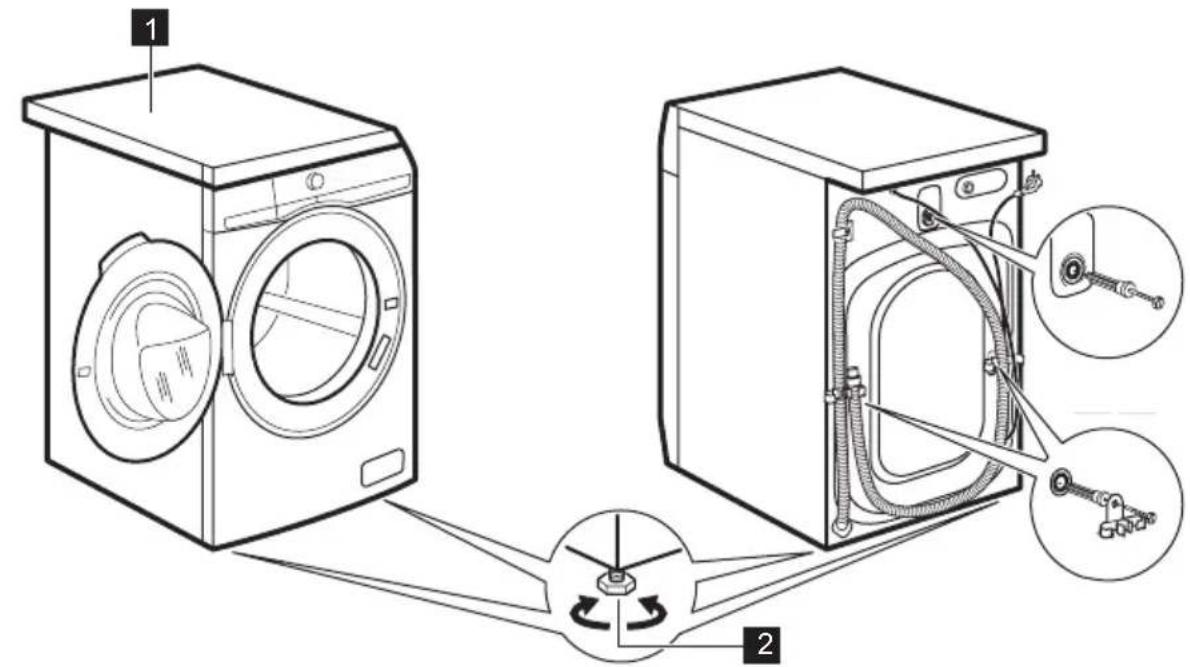
il.1
1.2 Built-in dimensions
This appliance has been designed to be built into the kitchen furniture or undercover installation, with visible front of the machine.
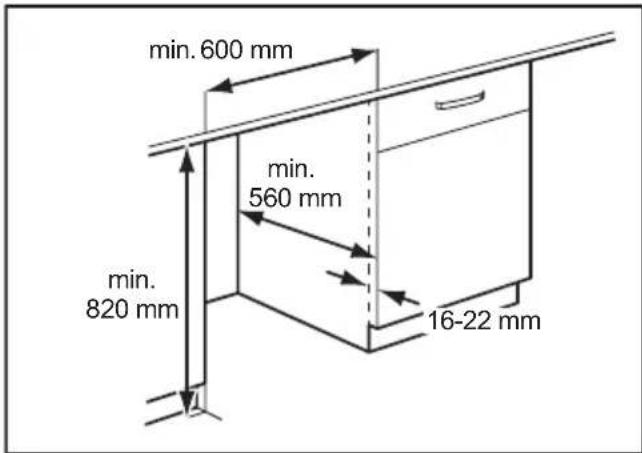
il.2
The recess should have the dimensions shown in this picture (il.2).
Before proceeding with appliance building in, bring it near the recess and preset the inlet hose, the drain hose and the mains cable. Adjust the height of the feet to the minimum in order to prepare the appliance to be inserted into your furniture recess.
WARNING!
Make sure that hoses and main cable are not kinked or squashed.
Make sure not to have uneven flooring inside the furniture recess!
1.3 Installation Instructions
Tools needed: Electrical screwdriver with Cross, Torx T20 & Hexagonal 7, 8 mm bits
1.3.A
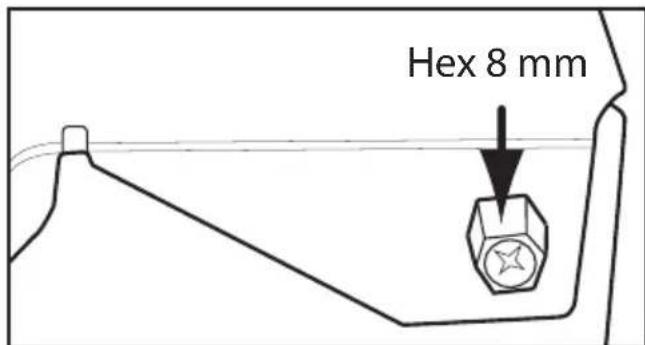
To install the kit please remove the original worktop by unscrewing the two back top fastening screws located left and right side on the machine back.
- Use a screwdriver with cross (or hexagonal 8mm) bit.
- Save the 2 screws removed as they will be reused afterwards.
- Slide the Worktop towards the back to disengage it from front fastening. Store the original worktop for any future reuse, if the case.
- Open the conversion kit package to access to the flat steel metal panel.
1.3.B
- Please unscrew and remove the 2 front screws highlighted by arrow.
ii.3
1.3.C
-
Seal assembly between facia panel and front beam.
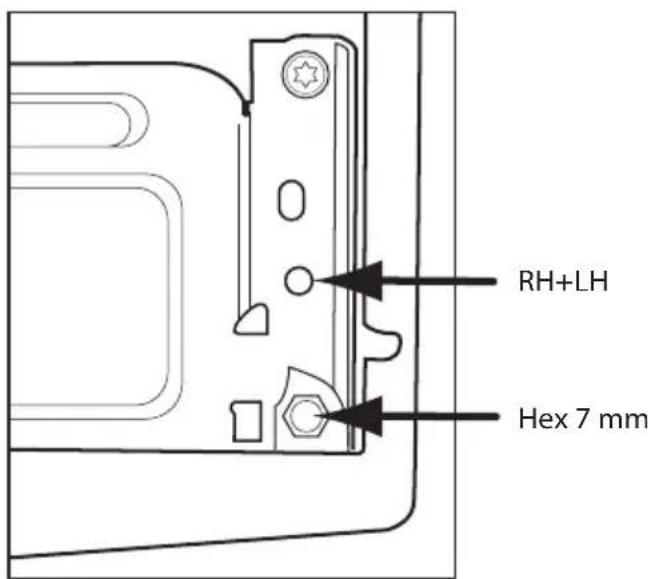
-
Remove the hexagonal head screws that hold facia panel on LH & RH front side, using a 7 mm bit.
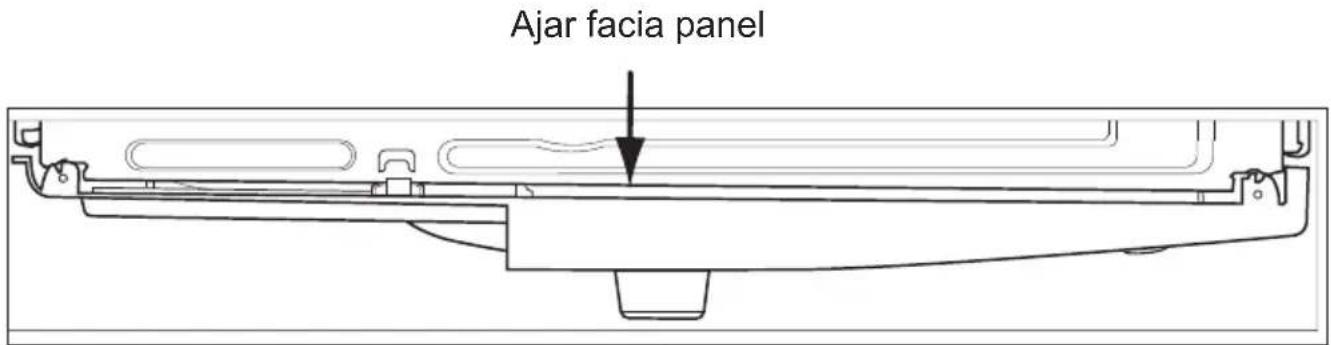
- Unsnap the highlighted facia panel hook (il.4). Facia panel can go in ajar condition.
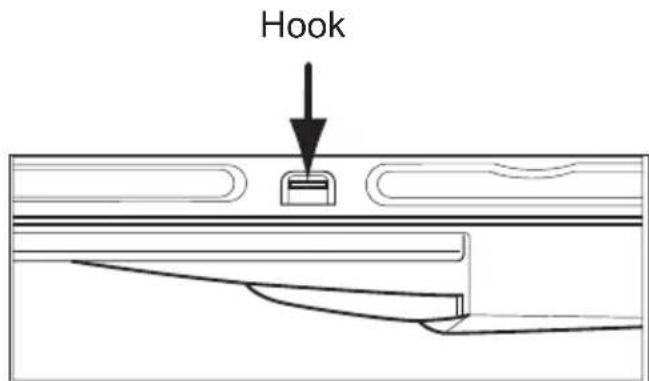
il.4
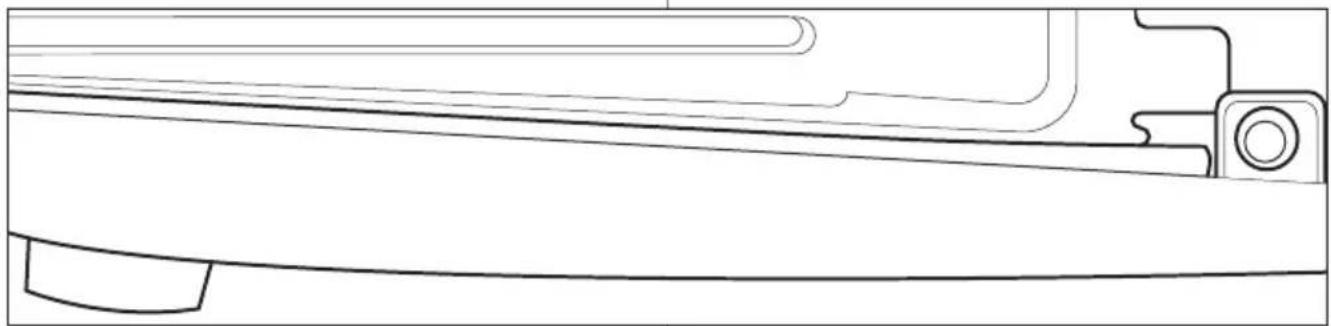
Take the grey shaped rubber seal from kit, position it between facia panel hook and RH machine side, with three shape on the bottom (il.5).
- Re-snap the facia panel hook, re-use the 7 mm hexagonal head screws on LH & RH side.
- The seal will be kept in position between facia panel and top front beam (il.6).
1.3.D
Take the metal worktop and assemble it on machine by sliding it on the top of the machine.
- Pay attention to insert the front middle protruding rivet engaging it inside own slot on machine front beam!
- Ensure that rubber facia panel rubber seal is going underneath metal panel flanged profile!
- Push the metal top towards the machine front, such to have the protruding back ears going in contact with machine cabinet back.
- Reuse the 2 original screws of which at point 1.3.A, to fix the metal worktop on the back (il.7).
il.5
il.6
il.7

il.8
1.3.E
- Take the hardware bag from the kit packaging and complete the top 4 fastenings using 4 screws M5x20. Please note that the top right middle screw shall be fixed at last one using an electrical screwdriver (Pos. 4-Metric self holing screw).
- Please complete the screwing by screwdriver with low speed selected. This to avoid over screwing. All 4 top fastening have Torx Bit T20 (il.8).
Your machine is ready to be built into your furniture.

WARNING!
Make sure that mains cable and hoses are not kinked or squashed! Ensure final machine levelling by adjusting front feet 2!