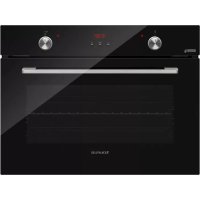
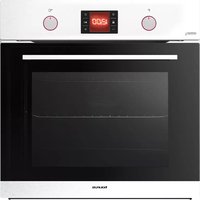
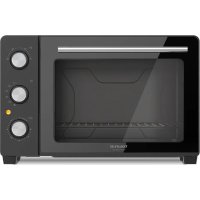
HM750BKD - Electric oven TAURUS - Free user manual and instructions
Find the device manual for free HM750BKD TAURUS in PDF.



| Product Type | Built-in Electric Oven |
| Brand | Taurus |
| Model | HM750BKD |
| Volume | 50 L |
| Net Weight | 27.6 kg |
| Built-in Dimensions (W x H x D) | 557 x 595 x 550 mm (min.) |
| Power Supply | 220-240 V ~ / 380-415 V 3N~ ; 50/60 Hz |
| Energy Class | A |
| Energy Consumption (Conventional) | 0.79 kWh/cycle |
| Energy Consumption (Forced Air) | 0.72 kWh/cycle |
| Cooking Functions | Natural Convection, Ventilation, Fan-assisted Bottom Heat, Grill, Fast Grill, Double Fan Grill, Defrost, Light, WaterSteam Clean |
| Electronic Timer | Semi-automatic and automatic programming, adjustable audible alarm |
| Included Accessories | Baking tray, grill pan with removable handle, small tray, metal grid, telescopic rails, drip tray |
| Door | Silent closing, removable for cleaning |
| Interior Lighting | E14 bulb, 15-25 W, 300 °C (replaceable by professional) |
| Cleaning System | WaterSteam Clean (steam cleaning) |
| Cleaning and Maintenance | Cleaning with soft cloth and soapy water; removal of inner glass panels; door disassembly |
| Safety | Automatic timer shut-off, key lock (touch), door must be closed for grill |
| Energy Efficiency Index (Conventional) | 103.9 |
| Energy Efficiency Index (Forced Air) | 94.7 |
Frequently Asked Questions - HM750BKD TAURUS
User questions about HM750BKD TAURUS
0 question about this device. Answer the ones you know or ask your own.
Ask a new question about this device
Download the instructions for your Electric oven in PDF format for free! Find your manual HM750BKD - TAURUS and take your electronic device back in hand. On this page are published all the documents necessary for the use of your device. HM750BKD by TAURUS.
USER MANUAL HM750BKD TAURUS
Thank you for choosing this product.
This User Manual contains important safety information and instructions on the operation and maintenance of your appliance.
Please take the time to read this User Manual before using your appliance and keep this book for future reference.
| Icon Type Meaning | ||
| WARNING Serious injury or death risk | ||
| RISK OF ELECTRIC SHOCK Dangerous voltage risk | ||
| FIRE Warning; Risk of fire / flammable materials | ||
| CAUTION Injury or property damage risk | ||
| IMPORTANT / NOTE Operating the system correctly | ||
CONTENTS
1.SAFETYINSTRUCTIONS 4
1.1 General Safety Warnings 4
1.2 InstallationWarnings 6
1.3 During Use 7
1.4 During Cleaning and Maintenance 8
2. INSTALLATION AND PREPARATION FOR USE 10
2.1 Instructions for the Installer 10
2.2 Installation of the Oven 10
2.3 Electrical Connection and Safety 11
3.PRODUCT FEATURES 13
4. USE OF PRODUCT 14
4.1 Oven Controls 14
4.2 Cooking Table. 15
4.3 Use of the Digital Timer 15
4.4 Accessories 18
5.CLEANING AND MAINTENANCE 19
5.1 Cleaning 19
5.2 Maintenance 21
6.TROUBLESHOOTING&TRANSPORT 22
6.1 Troubleshooting 22
6.2 Transport 22
1. SAFETY INSTRUCTIONS
- Carefully read all instructions before using your appliance and keep them in a convenient place for reference when necessary.
- This manual has been prepared for more than one model therefore your appliance may not have some of the features described within. For this reason, it is important to pay particular attention to any figures whilst reading the operating manual.
1.1 GENERAL SAFETY WARNINGS
- This appliance can be used by children aged from 8 years and above and by persons with reduced physical, sensory or mental capabilities or lack of experience and knowledge if they have been given supervision or instruction concerning use of the appliance in a safe way and understand the hazards involved. Children should not play with the appliance. Cleaning and user maintenance should not be made by children without supervision.
WARNING: The appliance and its accessible parts become hot during use. Care should be taken to avoid touching heating elements. Keep children less than 8 years of age away unless they are continually supervised.
WARNING: Danger of fire: Do not store items on the cooking surfaces.
WARNING: If the surface is cracked, switch off the appliance to avoid the possibility of electric shock.
- Do not operate the appliance with an external timer or separate remote-control system.
- During use the appliance will get hot. Care should be taken to avoid touching heating elements inside
the oven.
- Handles may get hot after a short period during use.
- Do not use harsh abrasive cleaners or scourers to clean the oven door glass and other surface. They can scratch the surfaces which may result in shattering of the door glass or damage to surfaces.
- Do not use steam cleaners for cleaning the appliance.
WARNING: To avoid the possibility of electric shock, make sure that the appliance is switched off before replacing the lamp.
CAUTION: Accessible parts may be hot when cooking or grilling. Keep young children away from the appliance when it is in use.
- Your appliance is produced in accordance with all applicable local and international standards and regulations.
- Maintenance and repair work should only be carried out by authorised service technicians. Installation and repair work that is carried out by unauthorised technicians may be dangerous. Do not alter or modify the specifications of the appliance in any way. Inappropriate hob guards can cause accidents.
- Before connecting your appliance, make sure that the local distribution conditions (nature of the gas and gas pressure or electricity voltage and frequency) and the specifications of the appliance are compatible. The specifications for this appliance are stated on the label.
CAUTION: This appliance is designed only for cooking food and is intended for indoor domestic household use only. It should not be used for any other purpose or in any other application, such as for non-domestic use, in a commercial environment or for
heating a room.
- Do not use the oven door handles to lift or move the appliance.
- All possible measures have been taken to ensure your safety. Since the glass may break, care should be taken while cleaning to avoid scratching. Avoid hitting or knocking the glass with accessories.
- Make sure that the supply cord is not trapped or damaged during installation. If the supply cord is damaged, it must be replaced by the manufacturer, its service agent or similarly qualified persons in order to prevent a hazard.
- Do not let children climb on the oven door or sit on it while it is open.
- Please keep children and animals away from this appliance.
1.2 INSTALLATION WARNINGS
- Do not operate the appliance before it is fully installed.
- The appliance must be installed by an authorised technician. The manufacturer is not responsible for any damage that might be caused by defective placement and installation by unauthorised people.
- When the appliance is unpacked, make sure that it has not been damaged during transportation. In case of any defect do not use the appliance and contact a qualified service agent immediately. The materials used for packaging (nylon, staplers, Styrofoam, etc.) may be harmful to children and they should be collected and removed immediately.
-
Protect your appliance from the atmosphere. Do not expose it to effects such as sun, rain, snow, dust or excessive humidity.
-
Any materials (i.e. cabinets) around the appliance must be able to withstand a minimum temperature of 100^ .
- The appliance must not be installed behind a decorative door, in order to avoid overheating.
1.3 DURING USE
- When you first use your oven you may notice a slight smell. This is perfectly normal and is caused by the insulation materials on the heater elements. We suggest that, before using your oven for the first time, you leave it empty and set it at maximum temperature for 45 minutes. Make sure that the environment in which the product is installed is well ventilated.
- Take care when opening the oven door during or after cooking. The hot steam from the oven may cause burns.
- Do not put flammable or combustible materials in or near the appliance when it is operating.
- Always use oven gloves to remove and replace food in the oven.
- Under no circumstances should the oven be lined with aluminium foil as overheating may occur.
- Do not place dishes or baking trays directly onto the base of the oven whilst cooking. The base becomes very hot and damage may be caused to the product.
Do not leave the oven unattended while cooking with solid or liquid oils. They may catch fire under extreme heating conditions. Never pour water on to flames that are caused by oil, instead switch the oven off and cover the pan with its lid or a fire blanket.
-
If the product will not be used for a long period of time, turn the main control switch off.
-
Make sure the appliance control knobs are always in the "0" (stop) position when it is not in use.
- The trays incline when pulled out. Take care not to spill or drop hot food while removing it from the ovens.
- Do not place anything on the oven door when it is open. This could unbalance the oven or damage the door.
- Do not hang towels, dishcloths or clothes from the appliance or its handles.
1.4 DURING CLEANING AND MAINTENANCE
- Make sure that your appliance is turned off at the mains before carrying out any cleaning or maintenance operations.
- Do not remove the control knobs to clean the control panel.
- To maintain the efficiency and safety of your appliance, we recommend you always use original spare parts and to call our authorised service agents in case of need.
CE Declaration of conformity
We declare that our products meet the applicable European Directives, Decisions and Regulations and the requirements listed in the standards referenced.
This appliance has been designed to be used only for home cooking. Any other use (such as heating a room) is improper and dangerous.
The operating instructions apply to several models. You may notice differences between these instructions and your model.
Disposal of your old machine
This symbol on the product or on its packaging indicates that this product should not be treated as household waste. Instead it should be handed over to the applicable collection point for the recycling of electrical and
electronic equipment. By ensuring this product is disposed of correctly, you will help prevent potential negative consequences for the environment and human health, which could otherwise be caused by inappropriate waste handling of this product. For more detailed information about recycling of this product, please contact your local city office, your household waste disposal service or the retailer who you purchased this product from.
2. INSTALLATION AND PREPARATION FOR USE
WARNING : This appliance must be installed by an authorised service person or qualified technician, according to the instructions in this guide and in compliance with the current local regulations.
- Incorrect installation may cause harm and damage, for which the manufacturer accepts no responsibility and the warranty will not be valid.
- Prior to installation, ensure that the local distribution conditions (electricity voltage and frequency) and the adjustments of the appliance are compatible. The adjustment conditions for this appliance are stated on the label.
- The laws, ordinances, directives and standards in force in the country of use are to be followed (safety regulations, proper recycling in accordance with the regulations, etc.).
- If the product contains removable shelf guides (wire racks) and the user manual includes recipes like yoghurt, the wire racks shall be removed and the oven operated in the defined cooking mode. Removal of the Wire Shelf information is included in the CLEANING AND MAINTENANCE section.
2.1 INSTRUCTIONS FOR THE INSTALLER General instructions
- After removing the packaging material from the appliance and its accessories, ensure that the appliance is not damaged. If you suspect any damage, do not use it and contact an authorised service person or qualified technician immediately.
- Make sure that there are no flammable or combustible materials in the close vicinity, such as curtains, oil, cloth etc. which may catch fire.
- The worktop and furniture surrounding the appliance must be made of materials resistant to temperatures above 100^ .
- The appliance should not be installed directly above a dishwasher, fridge, freezer, washing machine or clothes dryer.
2.2 INSTALLATION OF THE OVEN
The appliances are supplied with installation kits and can be installed in a worktop with the appropriate dimensions. The dimensions for hob and oven installation are given below.
| A (mm) 557 F (mm) 445 |
| B (mm) 550 min./max. G (mm) 560/580 |
| C (mm) 455 min. H (mm) 555 |
| D (mm) 595 min. I (mm) 460 |
| E (mm) 575 min. J/K (mm) 5/10 |
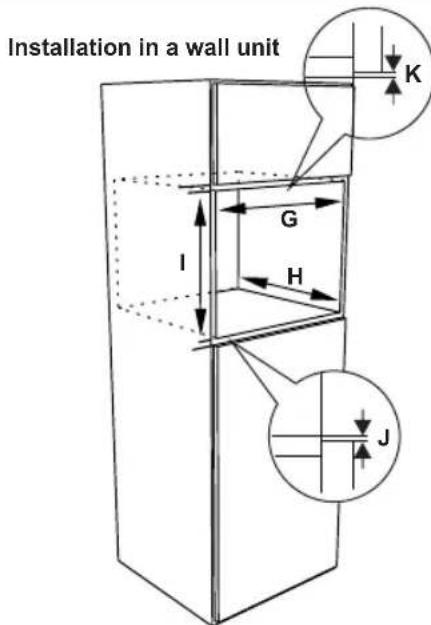

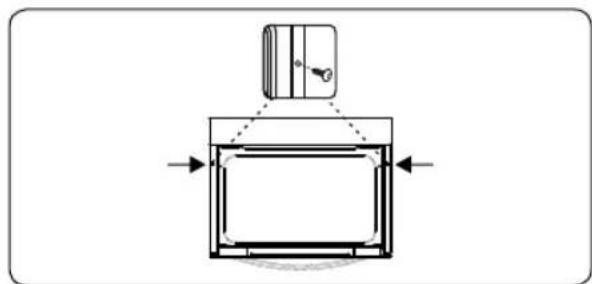
After making the electrical connections, insert the oven into the cabinet by pushing it forward. Open the oven door and insert 2 screws in the holes located on the oven frame. While the product frame touches the wooden surface of the cabinet, tighten the screws.
2.3 ELECTRICAL CONNECTION AND SAFETY
WARNING: The electrical connection of this appliance should be carried out by an authorised service person or qualified electrician, according to the instructions in this guide and in compliance with the current local regulations.
WARNING: THE APPLIANCE MUST BE EARTHED.
- Before connecting the appliance to the power supply, the voltage rating of the appliance (stamped on the appliance identification plate) must be checked for correspondence to the available mains supply voltage, and the mains electric wiring should be capable of handling the
appliance's power rating (also indicated on the identification plate).
- During installation, please ensure that isolated cables are used. An incorrect connection could damage your appliance. If the mains cable is damaged and needs to be replaced this should be done by a qualified personnel.
- Do not use adaptors, multiple sockets and/or extension leads.
- The supply cord should be kept away from hot parts of the appliance and must not be bent or compressed. Otherwise the cord may be damaged, causing a short circuit.
If the appliance is not connected to the mains with a plug, a all-pole disconnector (with at least 3mm contact spacing) must be used in order to meet the safety regulations. - The appliance is designed for a power supply of 220-240V ~ and 380-415V 3N~. If your supply is different, contact the authorised service person or a qualified electrician.
The power cable (H05VV-F) must be long enough to be connected to the appliance, even if the appliance stands on the front of its cabinet. - Ensure all connections are adequately tightened.
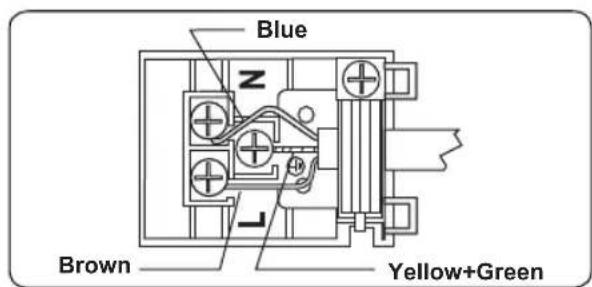
Fix the supply cable in the cable clamp and then close the cover.
- The terminal box connection is placed on the terminal box.
3.PRODUCT FEATURES

Important: Specifications for the product vary and the appearance of your appliance may differ from that shown in the figures below.
List of Components
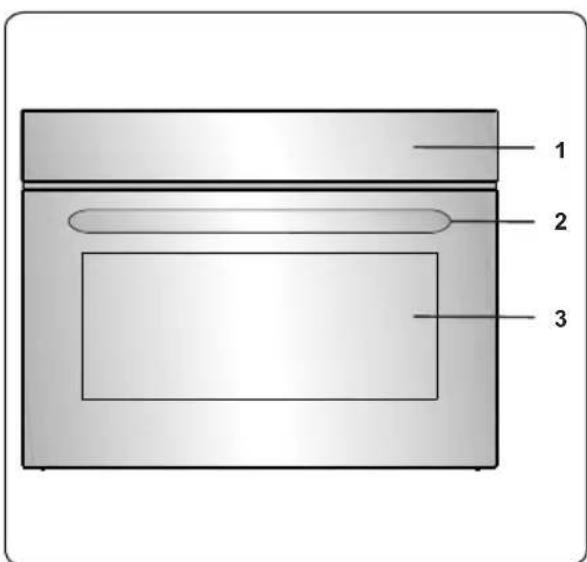
- Control Panel
- Oven Door Handle
- Oven Door
Control Panel
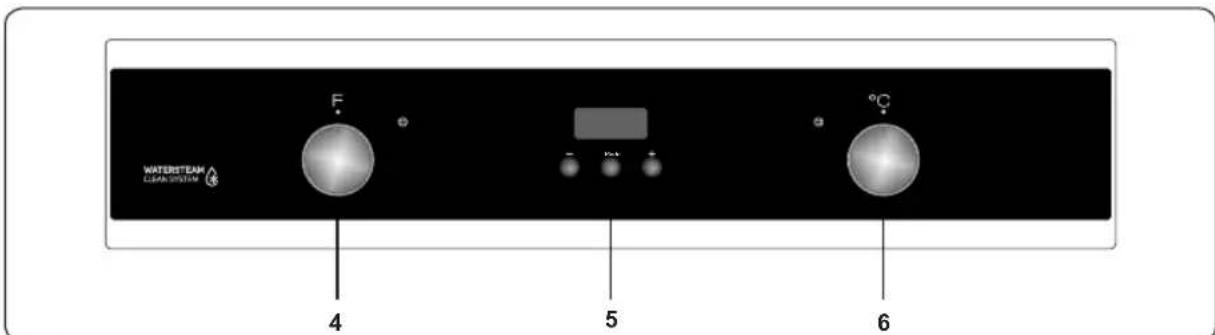
- Oven Function Control Knob
- Timer
- Oven Thermostat Knob
4. USE OF PRODUCT
4.1 OVEN CONTROLS
Oven function control knob
Turn the knob to the corresponding symbol of the desired cooking function. For the details of different functions see 'Oven Functions'.
Oven thermostat knob
After selecting a cooking function, turn this knob to set the desired temperature. The oven thermostat light will illuminate whenever the thermostat is in operation to heat up the oven or maintain the temperature.
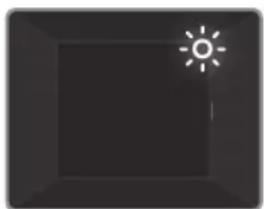
Oven Functions
Oven Lamp: Only the oven light will switch on. It will remain on for the duration of the cooking function.
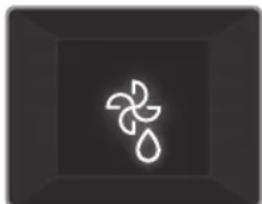
Defrost Function: The oven's warning lights will switch on and the fan will start to operate. To use the defrost function, place your frozen food in the oven
on a shelf in the third slot from the bottom. It is recommended that you place an oven tray under the defrosting food to catch the water accumulated due to melting ice. This function will not cook or bake your food, it will only help to defrost it.

Static Cooking
Function: The oven's thermostat and warning lights will switch on, and the lower and upper heating elements will start operating. The
static cooking function emits heat, ensuring even cooking of food. This is ideal for making pastries, cakes, baked pasta, lasagne and pizza. Preheating the oven for 10 minutes is recommended and it is best to use only one shelf at a time in this function.
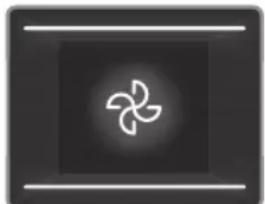
Fan Function: The oven's thermostat and warning lights will switch on, and the upper and lower heating elements and fan will start operating.
This function is good for baking pastry. Cooking is carried out by the lower and upper heating elements within the oven and by the fan, which provides air circulation, giving a slightly grilled effect to the food. It is recommended that you preheat the oven for about 10 minutes.
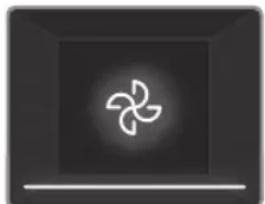
Lower Heating and Fan Function: The oven's thermostat and warning lights will switch on, and the lower heating element and fan will start
operating. The lower heating and fan function is ideal for heating foods evenly in a short time. It is recommended that you preheat the oven for about 10 minutes.
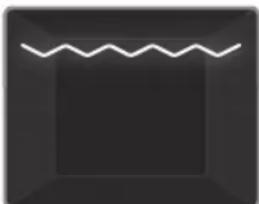
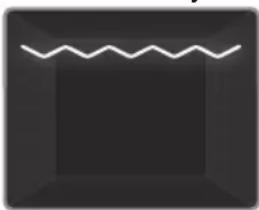
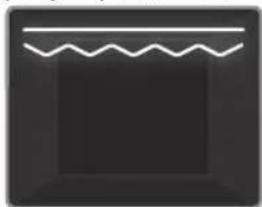
Grilling Function: The oven's thermostat and warning lights will switch on, and the grill heating element will start operating. This function is used for
grilling and toasting foods on the upper shelves of the oven. Lightly brush the wire grid with oil to stop food sticking and place food in the centre of the grid. Always place a tray beneath the food to catch any drips of oil or fat. It is recommended that you preheat the oven for about 10 minutes.

Warning: When grilling, the oven door must be closed and the oven temperature should be adjusted to C.

FasterGrilling
Function: The oven's thermostat and warning lights will switch on, and the grill and upper heating elements will start
operating. This function is used for faster grilling and for grilling food with a larger surface area, such as meat. Use the upper shelves of the oven. Lightly brush the wire grid with oil to stop food sticking and place food in the centre of the grid. Always place a tray beneath the food to catch any drips of oil or fat. It is recommended that you
preheat the oven for about 10 minutes.

Warning: When grilling, the oven door must be closed and the oven temperature should be adjusted to C.
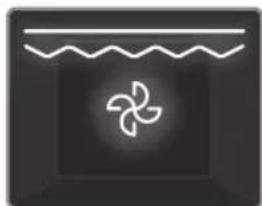
Double Grill and Fan
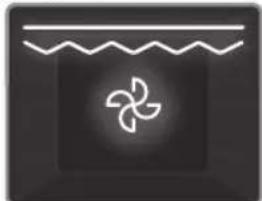
Function: The oven's thermostat and warning lights will switch on, and the grill upper heating elements and fan will
start operating. This function is used for faster grilling of thicker food and for grilling of food with a larger surface area. Both the upper heating elements and grill will be energised along with the fan to ensure even cooking. Use the upper shelves of the oven. Lightly brush the wire grid with oil to stop food sticking and place food in the centre of the grid. Always place a tray beneath the food to catch any drips of oil or fat. It is recommended that you preheat the oven for about 10 minutes.

Warning: When grilling, the oven door must be closed and the oven temperature should be adjusted to C.

WaterSteam Clean System:
Set your oven function to static function at 90^ to operate WaterSteam function. Spill 200-250ml of water to the tray which is stated on the oven base. Start the oven and WaterSteam will take approximately 30 - 60 minutes to prepare your oven for cleaning easily.
4.2 COOKING TABLE
| Function | Dishes | min. | ||
| Static | Puff Pastry 1 - | 2 170-190 | 35-45 | |
| Cake 1 - 2 | 170-190 | 30-40 | ||
| Cookie 1 - 2 | 170-190 | 30-40 | ||
| Stew 2 175 | 200 | 40-50 | ||
| Chicken 1 - 2 | 200 | 45-60 |
| Fan | Puff Pastry 1 - | 2 170-190 | 25-35 | |
| Cake 1 - 2 - | 3 150-170 | 25-35 | ||
| Cookie 1 - 2 - | - 3 150-170 | 25-35 | ||
| Stew 2 175 | 200 40-50 | |||
| Chicken 1 - 2 | 200 45-60 | |||
| Grilling | Grilled meatballs | 4 200 | 10-15 | |
| Chicken * 190 | 50-60 | |||
| Chop 3 - 4 | 200 15-25 | |||
| Beefsteak 4 200 | 200 15-25 |
*If available cook with roast chicken skewer.
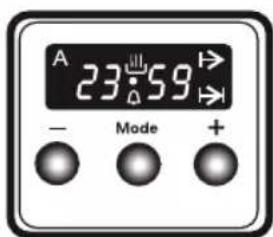
4.3 USE OF THE DIGITAL TIMER
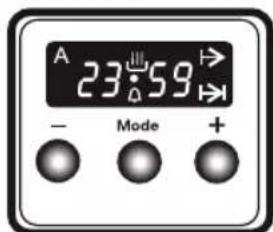
| Function Description | |
| A | Auto cooking |
| Manual cooking | |
| Cooking time | |
| Cooking end time | |
| · | Dot |
| Minute minder | |
| Mode | Mode function |
| - | Decrease timer |
| + | Increase timer |
| 23 59 | Timer display |
Time adjustment
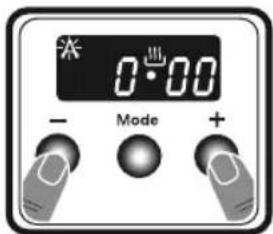
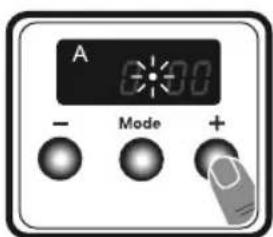
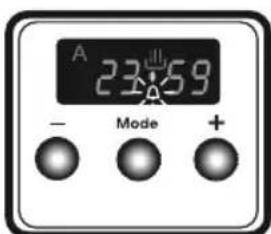
The time must be set before you start using the oven. Following the power connection, the symbol "A" and "000" will flash on the display.
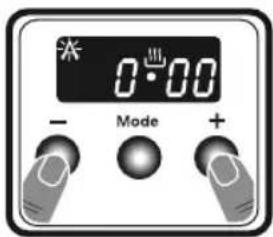
- Press the "+" and "-" keys simultaneously. Symbol will appear, and the dot in the middle of the screen will start to flash.
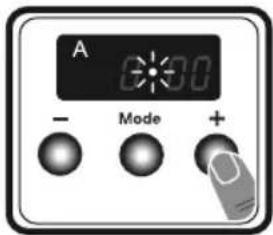
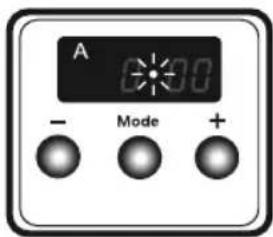
- Adjust the time while the dot is flashing using the "+" and "-" keys.

- After a few seconds, the dot will stop flashing and will remain illuminated.
Audible warning time adjustment
The audible warning time can be set to any time between 0:00 and 23:59 hours. The audible warning time is for warning purposes only. The oven will not be activated with this function.
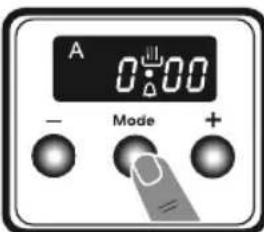
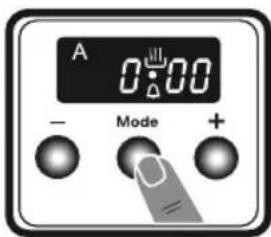
- Press "MODE". The symbol will begin to flash and "000" will be displayed.
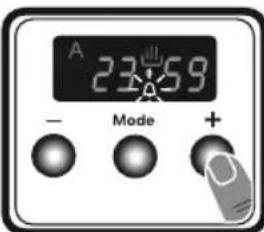
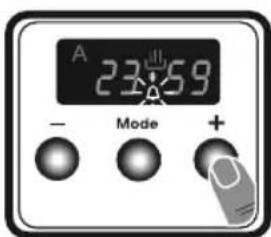
- Select the desired time period using the ^ 十 and - keys while is flashing.
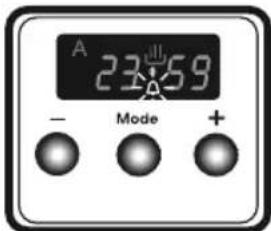
- The symbol will remain illuminated, the time will be saved and the warning will be set.
When the timer reaches zero, an audible warning will sound and the symbol will flash on the display. Press any key to stop the audible warning and the symbol will disappear.
Semi-automatic time adjustment (cooking period)
This function helps you to cook for a fixed period of time. A time range between 0 and 10 hours can be set. Prepare the food for cooking and put it in the oven.
- Select the desired cooking function and the temperature using the control knobs.
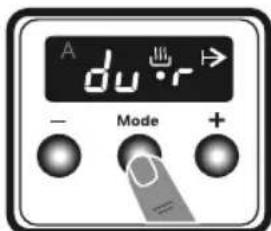
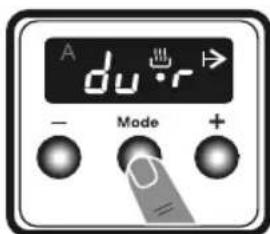
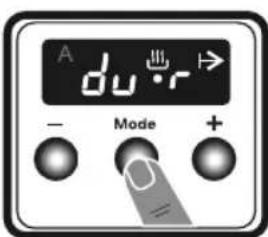
- Press "MODE" until you see "dur" and symbol on the display screen. The symbol "A" will flash.
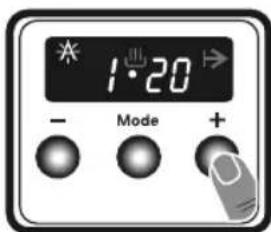
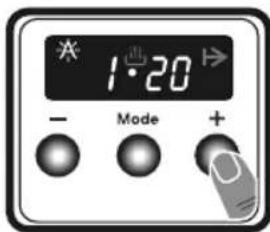
- Select the desired cooking time period using the ^ 十 + ^ 一 and - keys.
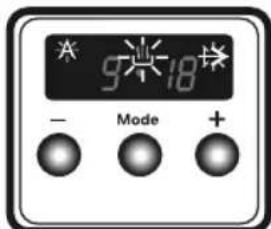
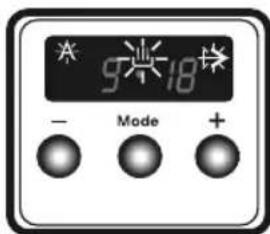
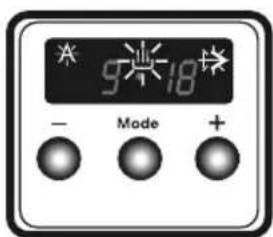
- The current time will reappear on the screen, and the symbols "A", and will remain illuminated.
When the timer reaches zero, the oven will switch off and an audible warning will sound. The symbols "A" and will flash. Turn both control knobs to the "0" position and press any key on the timer to stop the warning sound. The symbols will disappear and the timer will switch back to manual function.
Semi-automatic time adjustment (finishing time)
This function automatically starts the oven so that cooking will finish at a set time. You can set an end time of up to 10 hours after the current time of day. Prepare the food for cooking and put it in the oven.
- Select the desired cooking function and the temperature using the control knobs.
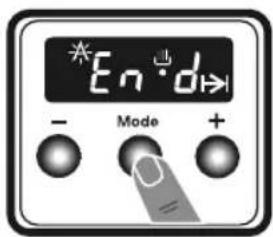
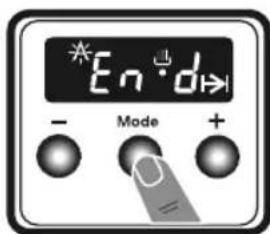
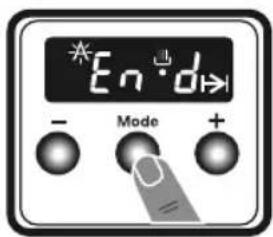
- Press "MODE" until you see "end" and symbol on the display screen. "A" and the current time of day will flash.
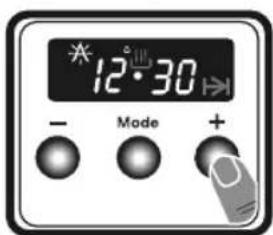
- Use the "+" and " -" buttons to set the desired finishing time.
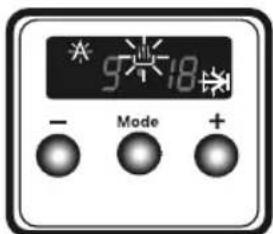
- The current time will reappear on the screen, the symbols "A", and remain illuminated.
When the timer reaches zero, the oven will switch off and an audible warning will sound. The symbol "A" and will flash. Turn both control knobs to the "0" position and press any key on the timer to stop the sound. The symbol will disappear and the timer will switch back to manual function.
Full-automatic programming
This function is used to start cooking after a certain period of time and for a certain duration. A time of up to 10 hours after the current time of day can be set. Prepare the food for cooking and put it in the oven.
- Select the desired cooking function and the temperature using the control knobs.
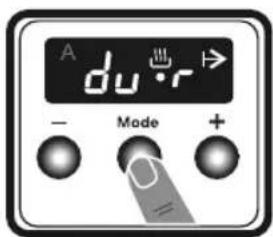
- Press "MODE" until you see "dur" and symbol on the screen. The symbol "A" will flash.
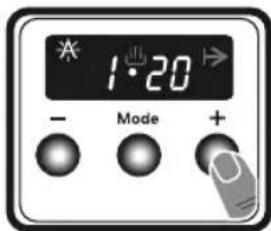
- Select the desired cooking time period using the ^+ and - keys.
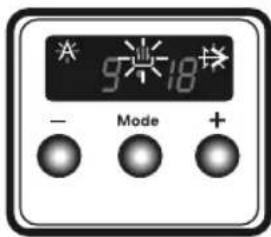
- The current time will reappear on the screen, the symbols "A", and remain illuminated.
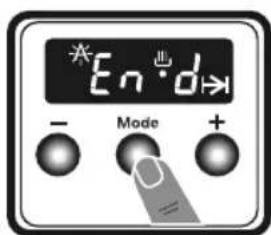
- Press "MODE" until you see "end" and symbol on the screen. The time and the symbols "A" and will flash.
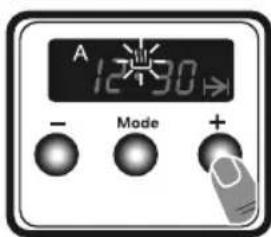
- Select the desired finishing time using the ^ 十 and - keys.

- Add the cooking period to the current time of day. You can set a time of up to 23 hours and 59 minutes after this.

- The current time will reappear on the screen, and the symbols "A", and will remain illuminated.
The operating time will be calculated and the oven will automatically start so that cooking will finish at the set finishing time. When the timer reaches zero, the oven will switch off, an audible warning will sound and the symbols "A" and will flash. Turn both control knobs to the "0" position and press any key to stop the sound. The symbol will disappear and the timer will switch back to manual function.
Sound Adjustment
To adjust the volume of the audible warning sound, while the current time of day is displayed, press and hold the " - " button for 1-2 seconds until an audible signal sounds. After this, each time the " - " button is pressed, a different signal will sound. There are three different types of signal sounds. Select the desired sound and do not press any other buttons. After a short time, the selected sound will be saved.
4.4 ACCESSORIES
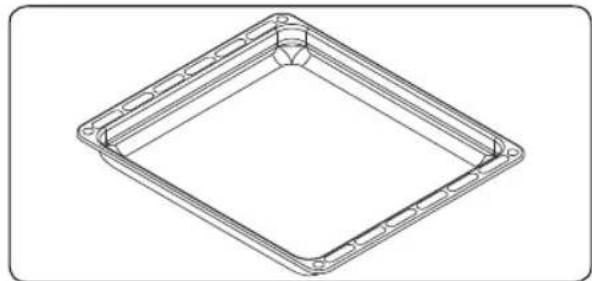
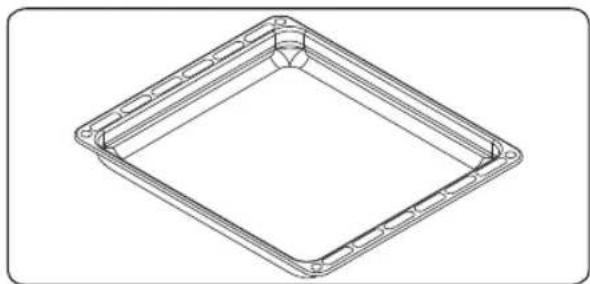
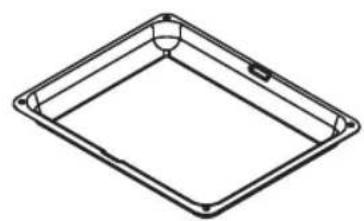
The Deep Tray
The deep tray is best used for cooking stews.
Put the tray into any rack and push it to the end to make sure it is placed correctly.
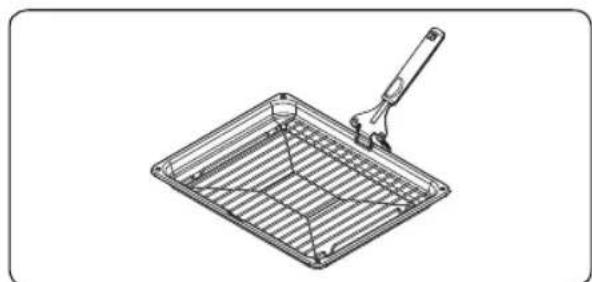
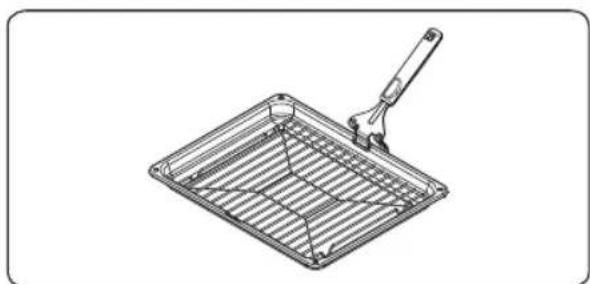
The Grill Pan and Handle Set
The grill pan set is best used for grilling steaks and similar foods.
WARNING: The grill pan has a detachable handle. Make sure when using the grill pan handle that it is centralised and secure, as shown in the figure. Do not leave the handle in position while grilling is in operation.
The Small Tray
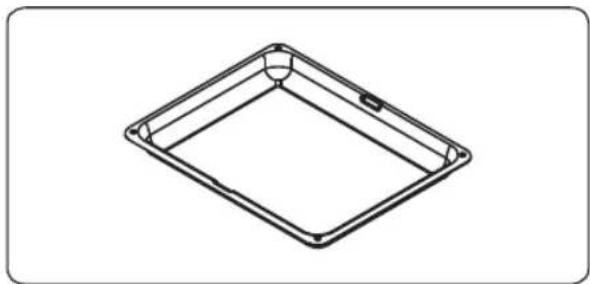
The small tray is best used for baking pastry.
Place the tray in the centre of a wire grid.
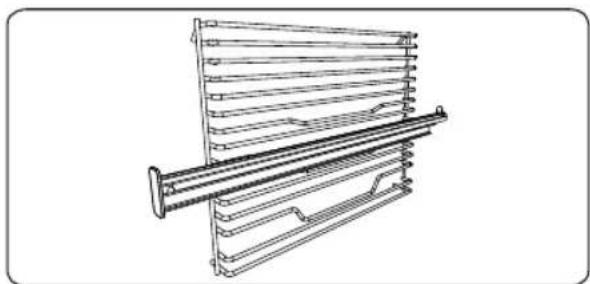
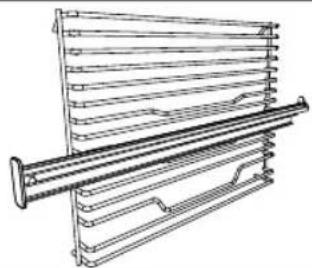
The Wire Rack with Easyfix Half Telescopic Rail
The half telescopic rail extends half-way out, to allow easy access to your food.
Telescopic rails
Clean the accessories thoroughly with warm water, detergent and a soft clean cloth on first use.
-
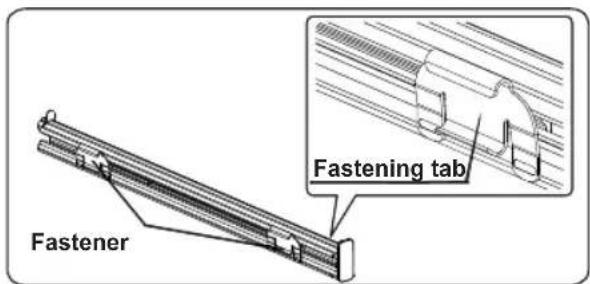
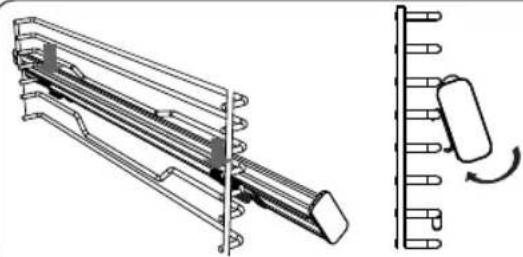
On each telescopic rail there are fasteners that allow you to remove them for cleaning and repositioning.
-
Remove the side runner. See section "Removal of the wire shelf".
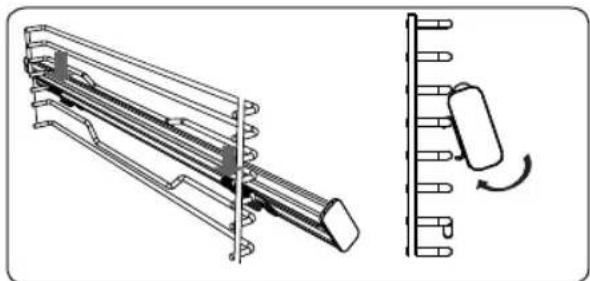
- Hang the telescopic rail top fasteners on the side rack level reference wire
and simultaneously press the bottom fasteners until you clearly hear the fasteners clip into the side rack level fixing wire.
In order to remove, hold the front surface of the rail and repeat the previous instructions in reverse.
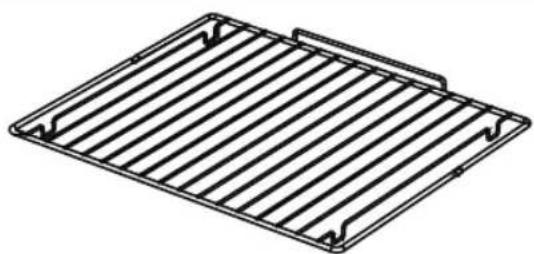
The Wire Grid
The wire grid is best used for grilling or for processing food in oven-friendly containers.


WARNING
Place the grid to any corresponding rack in the oven cavity correctly and push it to the end.

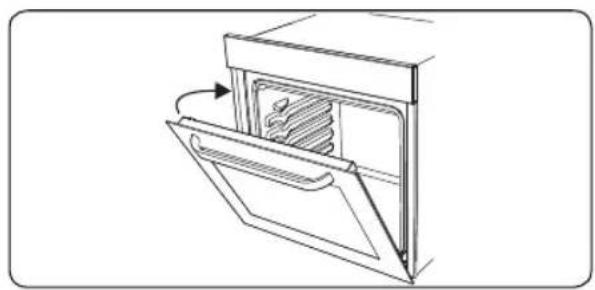
Soft-Close Oven Door
The oven door closes slowly by itself when it is released just before the closed position.

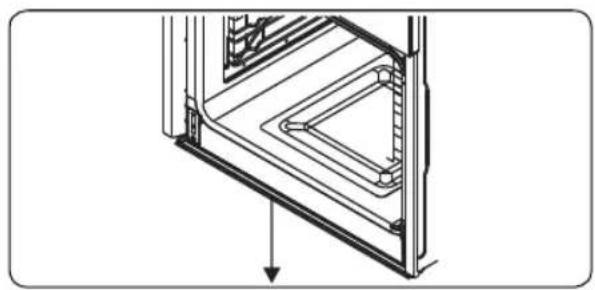
The Water Collector
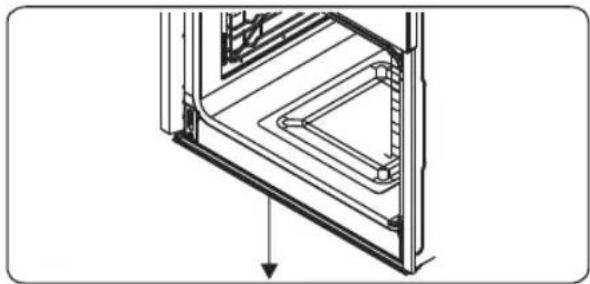
In some cases of cooking, condensation may appear on the inner glass of the oven door. This is not a product malfunction. Open the oven door into the grilling position and leave it in this position for 20 seconds.
Water will drip to the collector.
Cool the oven and wipe the inside of the door with a dry towel. This procedure must be applied regularly.
5. CLEANING AND MAINTENANCE
5.1 CLEANING

WARNING: Switch off the appliance and allow it to cool before cleaning is to be carried out.
General Instructions
- Check whether the cleaning materials are appropriate and recommended by the manufacturer before use on your appliance.
- Use cream cleaners or liquid cleaners which do not contain particles. Do not use caustic (corrosive) creams, abrasive cleaning powders, rough wire wool or hard tools as they may damage the cooker surfaces.

Do not use cleaners that contain particles as they may scratch the glass, enamelled and/or painted parts of your appliance.
- Should any liquids overflow, clean them immediately to avoid parts becoming damaged.

Do not use steam cleaners for cleaning any part of the appliance.
Cleaning the Inside of the Oven
- The inside of enamelled ovens are best cleaned while the oven is warm.
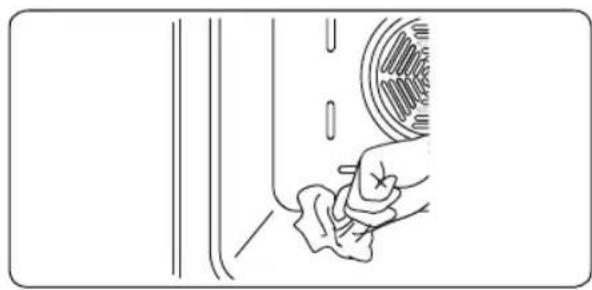
- Wipe the oven with a soft cloth soaked in soapy water after each use. Then, wipe the oven over again with a wet cloth and dry it.
- You may need to use a liquid cleaning material occasionally to completely clean the oven.
Cleaning the Glass Parts
Clean the glass parts of your appliance on a regular basis.
- Use a glass cleaner to clean the inside and outside of the glass parts. Then, rinse and dry them thoroughly with a dry cloth.
Cleaning the Stainless Steel Parts (if available)
- Clean the stainless steel parts of your appliance on a regular basis.
- Wipe the stainless steel parts with a soft cloth soaked in only water. Then, dry them thoroughly with a dry cloth.

Do not clean the stainless steel parts while they are still hot from cooking.

Do not leave vinegar, coffee, milk, salt, water, lemon or tomato juice on the stainless steel for a long time.
Cleaning Painted Surfaces (if available)
- Spots of tomato, tomato paste, ketchup, lemon, oil derivatives, milk, sugary foods, sugary drinks and coffee should be cleaned with a cloth dipped in warm water immediately. If these stains are not cleaned and allowed to dry on the surfaces they are on, they should NOT be rubbed with hard objects (pointed objects, steel and plastic scouring wires, surface-damaging dish sponge) or cleaning agents containing high levels of alcohol, stain removers, degreasers, surface abrasive chemicals. Otherwise, corrosion may occur on the powder painted surfaces, and stains may occur. The manufacturer will not be held responsible for any damage caused by the use of inappropriate cleaning products or methods.
Removal of the Inner Glass
You must remove the oven door glass before cleaning, as shown below.
- Push the glass in the direction of B and release from the location bracket (x) .Pull the glass out in the direction of A.
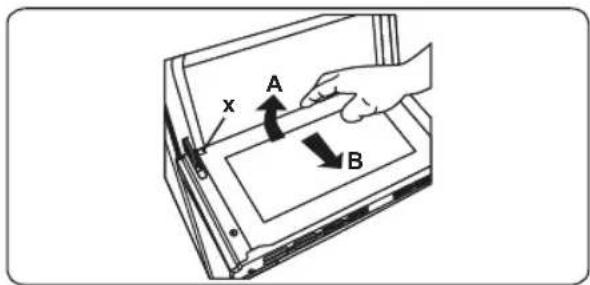
To replace the inner glass:
- Push the glass towards and under the location bracket (y), in the direction of B.
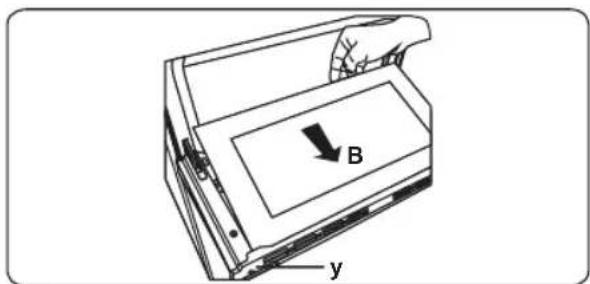
- Place the glass under the location bracket (x) in the direction of C.
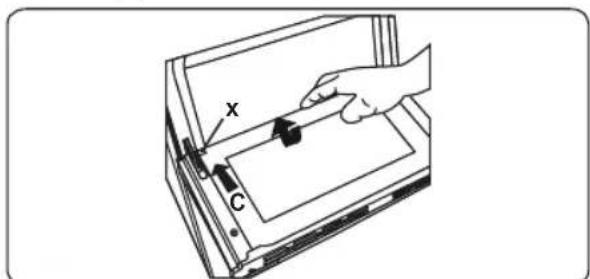

If the oven door is a triple glass oven door, the third glass layer can be removed the same way as the second's layer.
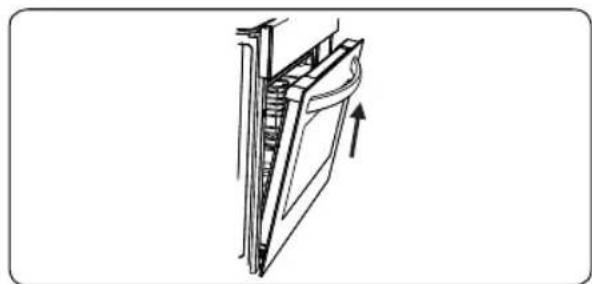
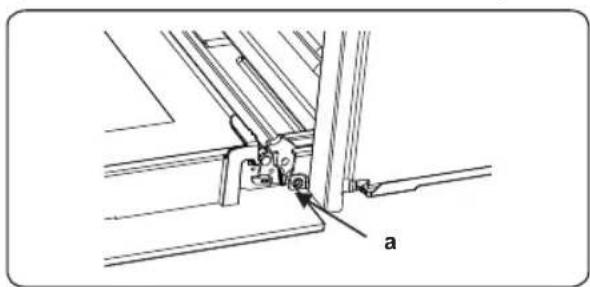
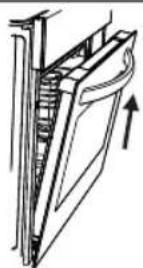
Removal of the Oven Door
Before cleaning the oven door glass, you must remove the oven door, as shown below.
- Open the oven door.
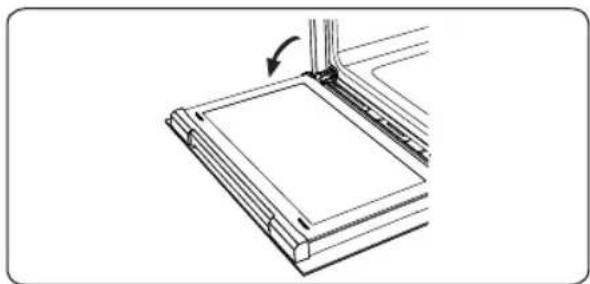
- Open the locking catch (a) (with the aid of a screwdriver) up to the end position.
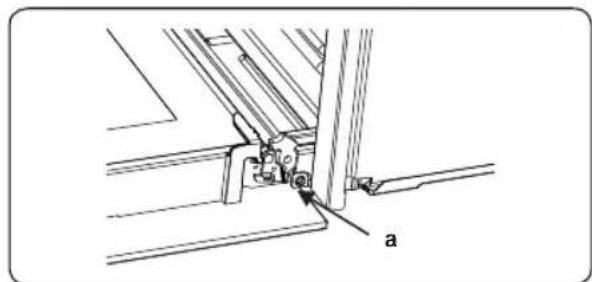
- Close the door until it is almost in the fully closed position, and remove the door by pulling it towards you.
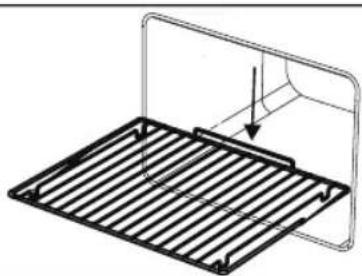
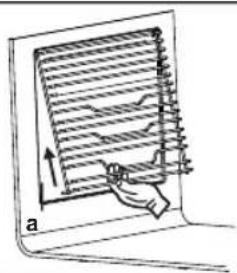
Removal of the Wire Shelf
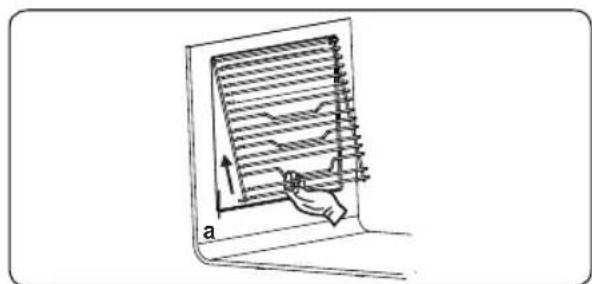
To remove the wire rack, pull the wire rack as shown in the figure. After releasing it from the clips (a), lift it up.
5.2 MAINTENANCE
WARNING: The maintenance of this appliance should be carried out by an authorised service person or qualified technician only.
Changing the Oven Lamp
WARNING: Switch off the appliance and allow it to cool before cleaning your appliance.
- Remove the glass lens, then remove the bulb.
- Insert the new bulb (resistant to 300^ ) to replace the bulb that you removed
(230 V, 15-25 Watt, Type E14).
- Replace the glass lens, and your oven is ready for use.
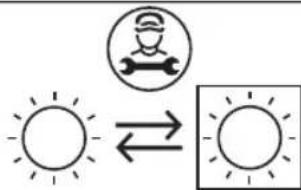
The product contains a light source of energy efficiency class G.
Light source can not be replaced by end user. After sales service is needed. - The included light source is not intended for use in other applications.
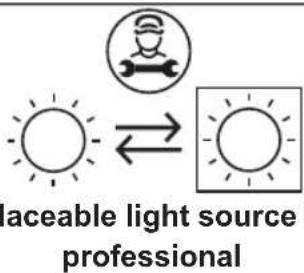
The lamp is designed specifically for use in household cooking appliances. It is not suitable for household room illumination.
6. TROUBLESHOOTING&TRANSPORT
6.1 TROUBLESHOOTING

If you still have a problem with your appliance after checking these basic troubleshooting steps, please contact an authorised service person or qualified technician.
| Problem Possible | Cause Solution | |
| Oven does not switch on. | Power is switched off. | Check whether there is power supplied. Also check that other kitchen appliances are working. |
| No heat or oven does not warm up. | Oven temperature control is incorrectly set. Oven door has been left open. | Check that the oven temperature control knob is set correctly. |
| Oven light (if available) does not operate. | Lamp has failed. Electrical supply is disconnected or switched off. | Replace lamp according to the instructions. Make sure the electrical supply is switched on at the wall socket outlet. |
| Cooking is uneven within the oven. | Oven shelves are incorrectly positioned. | Check that the recommended temperatures and shelf positions are being used. Do not frequently open the door unless you are cooking things that need to be turned. If you open the door often, the interior temperature will be lower and this may affect the results of your cooking. |
| The timer buttons cannot be pressed properly. | There is foreign matter caught between the timer buttons. Touch model: there is moisture on the control panel. The key lock function is set. | Remove the foreign matter and try again. Remove the moisture and try again. Check whether the key lock function is set. |
| The oven fan (if available) is noisy. | Oven shelves are vibrating. | Check that the oven is level. Check that the shelves and any bake ware are not vibrating or in contact with the oven back panel. |
6.2 TRANSPORT
If you need to transport the product, use the original product packaging and carry it using its original case. Follow the transport signs on the packaging. Tape all independent parts to the product to prevent damaging the product during transport.
If you do not have the original packaging, prepare a carriage box so that the appliance, especially the external surfaces of the product, is protected against external threats.
| Brand | taurus | |
| Model HM750BKD | ||
| Type of Oven ELECTRIC | ||
| Mass kg 27,6 | ||
| Energy Efficiency Index - conventional 103,9 | ||
| Energy Efficiency Index - fan forced 94,7 | ||
| Energy Class A | ||
| Energy consumption (electricity) - conventional kWh/cycle | 0,79 | |
| Energy consumption (electricity) - fan forced kWh/cycle 0,72 | ||
| Number of cavities 1 | ||
| Heat Source ELECTRIC | ||
| Volume 150 | ||
| This oven complies with EN 60350-1 | ||
Energy Saving Tips
Oven
Cook the meals together, if possible.
- Keep the pre-heating time short.
- Do not elongate cooking time.
- Do not forget to turn-off the oven at the end of cooking.
- Do not open oven door during cooking period.
2.2 INSTALLATION DU FOUR
3. CARACTERISTIQUES DU PRODUIT

Limpar as Partes de Vidro
WaterSteam Clean System
TepMoCTaTbT Ha cypHaTa n IpeDynpeDInTeHnHTe CBETJINH Nce CE
BKNIOUAT N DOHNHT HArpeBaTeJIeH eJIeMeHT N BeHTNAtOpbT 3e 3aONuHaT da pa6oTAY. BeHTNAtOpbT n FyHKcIyTA 3a DoJHO HArpRABaHe ca IDeaIIHn 3a paBHOMepHO neue He Ha XpaHa, KaTO Niua, 3a KpaTBk nepNoD OT BPeMe. BeHTNAtOpbT paBHOMePHo pa3npedeJIr TOnNIHaTa Ha fypHaT, DOKATO DOHNrT HarpeBaTeJIeH eJIeMENT Neue XpaHATA. PpenOpbYBaMe Da 3arpeete npEdBapNTEnHO FpyHaT a 3a OKOLO 10 MNHyTN.
Функця“Грл”:
TepMoCTaTbT Ha cyypHata n npDeynpeDnTEJHNTe CBETNIHN Uc CE BKJIIOuAT N HArpeBaTeJIHNrT
eIeMeHT 3a rPnIOBaHe Ha neKkata ige
3aNoUHe Da pa6OTn. Ta3n fynKcNna ce
H3NOJ3Ba 3a rPnIOBaHe n IpeneNuHa He Ha
XpaHn Ha roPHTe paTOBe Ha cyPhATA.
IeKO I3MmIte TeJeHATA Mpexa C MacNo,
3a Da cnpTe 3aENBaHoTo Ha xpaHata N
noCTaBeTe XpHa B CEHTbPa Ha peWetKaTa.
BInHar NoCTaBMyTe Taba NOD XpaHata, 3a
da yNoBtE KAnKn OINo INn Ma3HNHa.
IpenOpbYBaMe Da 3arpeete
nPepDbapntEnHO cyphata 3a OKO10
MNHyTN.
IpeDynpexKdHne:Korato rPnIOBaTe, BpaTata Ha cyphata Tp6Ba Da ce 3aTBOpn N Tempepatypata Ha cyphata Tp6Ba da ce perynipa do 190^
Функиа"Бьрз0
rpoIOBaHe":
TeMocTaTbT Ha
fypHata N
IpeDynpednteJIHHTe
CBETINH UcE CBETHa,
a rpnblT n ropHnTe
HarpBaTeHN eIemEnTn 3aNoHaT da pa6oT. Ta3n cyHKunr ce n3no3Ba 3a no-6bp30 neyeHe n 3a neyeHe Ha XpaHa C NO-ROJMA NOBbpxHOCT, Hapmep MECO. N3no3BaIe TropHnte paTOBe Ha cyphata. Ieko n3MnITE TeJeHATA MpeXa C MacNo, 3a Da cnpete 3aJIenBaHETo Ha xpaHata nIOCTaBeTe XpHa B CEHTbPa Ha peWetkata. BuHAn NoCTaBnTe Taba nOxPahata, 3a Da yNobNTe KANK OINo INMa3HnHa. IpenOpbUbame Da 3arpeete npdBapntENHO cyphata 3a OKIo 10 MNHyTN.
IpeDynpexKeHne:Korato rpnOBaTe,BpTaTaHaΦypHaTa Tpa6Ba Da ce 3aTBOpn
TemnepaTypaHa Na cyphata Tp6Ba da ce perynupa do 190^
Функця“ДBoeH rPnI N BeHTnIaTOp": TepMoCTaTbT Ha ФунATA n npdeynpeDnteJHNTe CBETnIH N ue CBeTHaT, a rPnJIbT, rOpHNe
HaRpeBaTeHnElenMeHTN BENTnlaTOpbT 3aNoUHaT da pa6oT. Ta3n FyHKcnaCe n3noJ3Ba 3a no-6bp30 rpnIOBaHe Ha
NO-de6eNa XpaHa N 3a neueHe Ha XpaHa C
No-roJaMa NOBpXHOCT. I rOpHnTe
HaRpeBaTeHn ElenMeHTN, INrpnIbT 3e ce
3axpaHbAT 3aeDnO C BeHTnlaTopa, 3a Da Ce
OCnypn paBHOMepHo rotBeHe.
N3noJ3BaIte rOpHnTe paΦTOBe Ha
fpyhata. JekO n3mInTe TeJeHata Mpeka C
MacJIO, 3a Da CNPeTe 3aJIeNBAHeTo Ha
XpaHaTa N oCtabeTe XpaHa B CEHTbPa Ha
peWeTkata. BnHarn NoCTabYte Taba ND
XpaHaTa, 3a Da yNoBnTe KAnKn OINo NIN
Ma3HnHa. PpenOpbYBaMe Da 3arpeete
PpeDbapntEnho fypHaTa 3a Okono 10
MHHyTN.
IpeDynpexKeHne:Korato rPnIOBaTe,BpATAHa Hpyhata Tpa6Ba Da ce 3aTBOpn N TemnepaTypaHa Hpyhata Tpa6Ba Da ce
perynupa do 190^
WaterSteam (nouctbahe c napa): 3a n3no13BaHe Ha yHKnraTa NouctBaHe c npap, 3aJaTe CtaTnHa yHKnna npn 90 ^ C .Hane Te 200-250 Mn Boda B Tabata, pa3NoJoxeHa Ha DbHOTo Ha cyphata.Cnei KaTO BKIOUHTe cyphata, e Heo6xOIMo Da n3yakate np6bn3ntenHO 30-60 MNHTn,doKaTo yHKnraTa NouctBaHe c npap a noIrotBn 3a JeCHO nouctBaHe.
4.2 TABLIMA 3A FOTBEHE
| Фуншим | Ястя | |||
| Сатуши | Бутер тосто 1 - 2 170-190 35-45 | |||
| Кекс 1 - 2 170-190 30-40 | ||||
| БиCKВИТи 1 - 2 170-190 30-40 | ||||
| Задушаванe 2 175-200 40-50 | ||||
| Пиile 1 - 2 200 45-60 | ||||
| Вернлattор | Бутер тосто 1 - 2 170-190 25-35 | |||
| Кекс 1 - 2 - 3 150-170 25-35 | ||||
| БиCKВИТи 1 - 2 - 3 150-170 25-35 | ||||
| Задушаванe 2 175-200 40-50 | ||||
| Пиile 1 - 2 200 45-60 | ||||
| П ue�е на грп | П ueени Кюфтета | 4 200 | 10-15 | |
| Пиile | * | 190 50-60 | ||
| Пьржоли 3 - 4 200 15-25 | ||||
| БиФТeK 4 200 15-25 | ||||
*Pn Hauuue roTBeTe C uu 3a neueHe Ha nnneUko MECO
4.3 N3NOJ3BAHE HA UNΦPOBNA TAIMEP
| Описане на Функциmate | |
| A | АВТOMATИНО ГOTBEHE |
| Рьчно ГOTBEHE | |
| → | Врeme 3a ГOTBEHE |
| → | Врeme 3a край на ГOTBEHE |
| · | Точа |
| Δ | Брoryн CMиHyтITE |
| Mode | Функция 3a реким |
| - | Намалаяне на таймера |
| + | Увениавае на таймера |
| 23 59 | Показвае на таймера |
HactpoBaHe Ha BpeMeTo
Bpemeto Tpr6Ba Da 6bJe 3aadaeHo, npedn Da 3anOuHete Da n3noJ3BaTe cyphata. Cnei CBbp3BaHe KbM 3axpaHbaHeto CMBOJbT "A" u "000" ue 3anoUHaT da MmraT Ha dncnpe.
1.HaTnchete eHOBpeMeHHO 6byToH“+”N“-". CmBbIbT Ie Ce NOABN TOyKaTa B CpeDaTa Ha ekpaHa 3aNoUHe da Mira.
2.ДOKATOTOUkata Mmra,HACPToIte Bpemeto,N3NOJ3BaIKn 6byToH“+”n“-”.
3.CneHRAKONKO CEkyHnTOyKaTaUe CNpe Da Mura N Ue OCTaHe OCBeteHa.
HactpoKa Ha 3BykoBTo npdeynpejckdneHne
3BykoBTo npDynpExKeHne MoKe Da 6bHe NaCTpoEHO NO BcRAKO BpeMe MeJdy 0:00 n 23:59 Yaca. 3BykoBTo npDynpExKeHne e cAmO 3a npDynpExKeHne. FypHaTa HMa Da ce BKJIouN C Ta3N FyHKUra.
1.HaTnchTe“MODE". CmBONbT 3aNoUHe Da Mura n Ha DnCnpeJe Ce NoRBN "000".
2.И36epeTe JekanHnO T BAc BpeMeBn nepNOi, nIIOJ3BaIKN 6yToHn“+”n“-”, DOKaTO Mnra.
3.CmBbT Oe octaHeOCBeTeH, BpeMeTo 6bJe 3ana3eHO n npEynpeXdeHneTo 1ue 6bJe HacTpoEHO.
Korato TaImepbT DoCTnHRe Hyna, Uce NoaBn 3ByKOBO npeDynpexKeHne,a CnMBoJbT O Ue 3aOnuHne Da Mna Ha DnCnJIe. HatncHete HkoN OT 6yToHtE, 3a Da cPte 3ByKOBOTO npeDynpexKeHne,a CnMBoJbT OUe N3Ye3He.
IOnyabTomTuHo HacTpoBaHe Ha BpeMeTo (NepnoD Ha rotBeHe)
Ta3nФyHKcIg Bn nomara da rotBNTe 3a onpeJeH nepnoD ot Bpeme. MoKe da ce 3aJaIe INHTepBaI ON 0 do 10 yaca.
IoirotBeTe XpaHaTAta 3a rotBeHe n I naocTabeBbB cyphata.
1.И36epete JeknaHaTa Функua 3a rotBeHe N TemnepaTypa T NOMUta Ha KOHTPOHnTE 6yToHn.
- HaTnchTe "MODE", DOKaTO BnDnte "dur" n CmBOna Hn eKpaHa Ha DnCpIe. CmBOnbT "A" 3aNoUHe Da Mna.
3.ИЗберетежеланя otBac nepnoДза rotbehe cnomoцт ha ByToHn“+”n“-”.
- Tekyto Bpeme ce NOBn OTHOBo Ha ekpaHa, a CmBONITE "A", H OctaHaT OCBeTeHn.
Korato TaIMepbT DoCTnHRe Hyna, cypHaTa
Ie Ce n3KnIOUHy N Ie Ce yye 3ByKOBO
npEynpeXeHHe. CmBOnITE "A" n Ie 3aNoOHat Da Mrrat. 3aBbptete
Dbata KOHTPOJHN 6yToHa B No3uNra "0" n
HaTNCHeTe HAKOJ OT 6yTOHnTe Ha TaIMepa,
3a Da cnpTe 3ByKOBOTo npEynpeXeHHe.
CmBOnITE Ie n3Ye3HaT n TaIMepbT Ie
ce BbpHe KbM pBuHa cyHKcua.
IOnyabTomauHnHaCTpOuBaHe Ha BpeMeTo (BpeMe Ha npKluOuBaHe)
TaN FyHKnA ABTomTuH O CTApTnpa Fyphata, Taka Ye RotBeHeTo Da 3aBbPun B ONpeJeNo Bpeme. MoKeTe Da 3aJaTe KpaHOBpeme Do 10 Yaca Cnei TekuOTo Bpeme OT DeH.NoITrotBete XpaHata 3a RotBeHe I NaCTaBeTe BB Fpyhata.
1.И36epete JxenaHata cyHKnna 3a rotBeHe N TeMnepaTypaTc NOMOuTa Ha KOHTPOJHnTe 6yToHn.
2.HaTnchTe“MODE”,DOKATO BnDnTe“BGd"N CnmbOHa HaeKpaHa Ha DnCnIe.“A”N TeKyUTo BpeMe 3aNoHAT Da MmRaT.

3.ИЗпОпЗВайTe 6уToHn“+”и“-”,3aДа HAcTpOte JeJaHOT OТ BacВрeme Ha npNKIOUVAHe.

- Tekyto Bpeme
ue ce NOBn OTHOB
Ha ekpaHa, CmBOJNTe
"A", H
OCTaHaT OCBTeHn.
Korato TaIMepbT DoCTnHHe Hyla, cyphata
Ie Ce n3KnIOuN I ue Ce yye 3ByKOBO
npedynpeXJeHne.CmBOnNTe"A"n
1Ie 3aNoUHa Tda MIRat. 3aBbPTeTe
Dbata KOHTpOJIHN 6yToHa B No3nCnra "0" n
HaTNCHeTe HAKOI OT 6yTOHnTE Ha TaIMepa,
3a Da cInpeTe 3Byka.CmBOnbT Iue n3Ye3He
IN TaIMepbT Iue Ce BBpHe KbM PbUHa
fYHKcIy.
Пьлно abTomatnyho nporpaMPahe
Ta3nФyHKcnaCe n3NoJ3Ba 3a 3aNoUbaHe Ha rotBeHe cIeI onpeJeH nepIOd OT BpeMe I3a onpeJeHa npOdbJxHTeJIHOCT. MoKe Ia ce 3aJaIe BpeMe Do 10 yaca cIeI TeKyuTo BpeMe OT DeH. POnOrTBeTe xpaHaTa 3a rotBeH e I NaCTaBeTe BB FypHaTa.
1.ИЗберетежеланотафункцяза roTbeHи TemnepaTypaTa C NOMOHTa Ha KOHTpOHLHITe 6yToHn.
- HatncheTe "MODE", DOKATO BUNITE "dur" N CmBOJla Ha ekpaHa. CmBOJbT "A" ue 3anoHe da Mna.

3.ИЗБЕРЕТЕЖELANHЯ OTBACNEPNOД3a ROTBEHE C NOMOHTA Ha 6byToHn“+”N“-”.
- Tekyto To BpeMe
ue ce nOBn OTHOBO
Ha ekpaHa, CmBOnJIte
"A", H6
OCTaHaT OCBeTeHn.
- HaTnchTe "MODE", DOKaTO BnDnTe "BGd" n CnMBOJa eKpaHa. BpeMeTo n CmMBONITE "A" n>uze 3aNoOHAT da Mrrat.
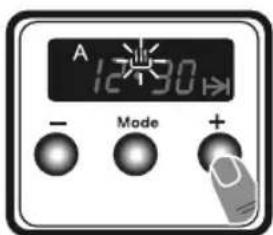
6.N36epete
KeJHaHTo BpeMe
Ha npNKIOUbaHe C
NOMOHTa Ha 6yTOHnTe " ^+ N"
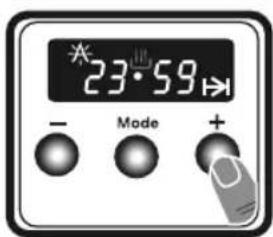
7.Добавeteперноа Ha rotbeHe KbM TekyuToBpeMe OT dHЯ.MoKeTe da 3aJaTe BpeMe Do 23чaca n 59 mHyTu cNeI TOBa.

- TekyuTo BpeMe Ie ce NOBn OTHOBo Ha ekpaHa, a CNMBOJNTe "A", Hn He OCTaHaT OCBETEHN.
BpeMeTo Ha pa6oTa 6e 6bJe n3uCneHo n cyphata 9e Ce BKNIOUaABTomATNUHO, Taka ye rotBeHeTo Da npKIOUH B 3aAedeHOTO BpeMe 3a DOBbpUbaHe. KoraTO TaIMepBT DOCTnHHe Hya, cyPhATA 9e CE n3KIOUH, 9e Ce NOBn 3ByKOBO PpeDynpExdHHe IN CmBOJNTe "A" n HcTe 3aONOHAT Da MMRat. 3aBbptTe DbTA KOHTPOINH 6byToHa B N03Nnra "0" n HAtNCHEte HAKOI OT 6byToHnTe, 3a Da cnpTe 3Byka. CmBOJbT 9e n3Ye3He n TaIMepbT 9e Ce BbpHE KbM pbUHa cyHKnIa.
HactpoBbHe Ha 3Byka
3a da perynnapate cnnaTa Ha 3Byka Ha 3BykoBTo npdeynpejKHeHne,doKaTO ce noka3Ba TekyuToTo BpeMe Ha DeHn, HAtncHeTe H3adpbkTe 6yToHa "3a 1-2 cekyHn,doKaTo Ce yye 3BykOB CnHan. CneT TOBA, npu BCaKO HATnCKaHe Ha
6ytoHa"-,",ue ce noBn Dpyr CnHan.
Ima Tpr pa3JnHn BnDa CnHAnHn 3ByuN.
136epTe JeknHn 3Byk n He HaTnCKaTne
dpyn 6ytoHn.Cnei n3BeCTHO Bpeme
n3bpaHnT 3Byk ue 6bde 3ana3eH.
4.4 AKCECOAPN
ДьлбokedaТаВa
ДьлбokаТаТаБe e Han-До6pe Дa ce n3нОЛЗВa 3a 3aДушаBaHe.
IocTabeTe TaBata B KOITOn I da e paΦT nHaTnCHete DOKpaN, 3a Da ce yBepNTe, Ye eNoCTaBeHa npabuHNO.
KomnneKr npin TnraH ndpbXkKa
KoIJIeKbT rpn TuraH ce n3noJ3Ba HauDobpe 3a npkOHa cKapa N noDobHxpaH.
I PEPDyPPEXJDEHNE: rpnTnraHbT mHa nOdBnKHa dpBkKa. YBepTe ce, ye KOrato n3No13BaTe dpBkKaTa Ha rpnTnraHa, T e cHTpnpaHa n NOcNpyeHa, KaTTo e Noka3aHo Ha fNpypata. He octabYte dpBkKaTa B No3nU, DOKATO CKapata pa6OTn.
Majika TaBa
Maikata Taba e noxodya npedmno 3a nehe Ha cnaKu.
IocTaBeTe TaBaTa B ueHTbpa Ha TeHeHaTa peWeTka.
MeTnHa peWetKa c noJyTeJeckOnuHa penca EasyFix
NonyTeNeckOnnUHaTa peIca ce pa3nbBa HABbH Do cpeIaT, N03BOJIraBaN KeceH IOCTbN Do xpaHaT.
TeleckonnHn peIcn
Ipei npbBOHaayHna ynoTpe6a noocTeTe akcecoapnte do6pe c tonla Boda, nouchTBau npenapat meka Kbpna.
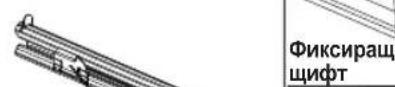
ΦHKcaTop
BcKaOT TeJeCKOnHHTe peCn pa3noJara c KpeEnKHN enemeHTN, KOINTO N03BOJIaBaT 3BaXJaHe 3a NOYNCBaHe H pOMHa Ha No3uIyTa.
CbaJeTe cTpaHnUHnI nnb3rau.Bx. pa3dIeN "V3BaXdaHe Ha peWetbUHnA CTeJaxK".
3aKaayTe TOpHnTe KpenexHn eEnMeHTn Ha TeNeckOnnHaTapeNca 3a CTpaHnUHn JKe6 Ha CbOTBeTHOTO HNBO n EINHOHHe HATNCHE TE DONHnTe KpenexHn eEnMeHTn, DOKaTO uPaKHaT.
3a da ra cbaHnte, XbaHete npedHaTa CTpaHa Ha peIcata N NOBTopeTe ONICAHNTE NO-rope yKa3aHnB O6paTeH pei.
PeweTbyna ckapa
PeueTbUHata ckae Hau-Dope da ce n3noI3Ba 3a neuehe nn 3a o6pa6OTka Ha xpaHn B cbIOBe, NOxOJaUN 3a cyphna.

PPEyPPEKDEHNE
Noctabete npabnHOppeWetkata B CbOTBeTHnpaT BbB cyphaTnHa HATNCHETe DOKpaN.
Bpata Ha cyphatha c OmeKoTeHo 3aTBapnHe
Bpatata Ha cyphahta Ce 3aTbapr 6abHo cama, koraTo ce ocbo6On ToH0 npeDi 3aTBOpEHOT NOJoxKeHne.
KonekTopbT 3a B0da
B HЯКо слуан пи rotBeHe може да ce NOBи KOнДeH3 Ha BbTpEshHOTo CTbKNo Ha BpaTata Ha Фурнata. Toba He e HEN3npaBHOCT Ha npOdykTa.
OTbopete BpataHa foypHaTa B no3nua 3a nehe n octabete B Ta3n no3nua 3a 20 ckyHn.
BɔdaTata Ⅲe Ce n3Teue B KɔneKTopa.
OxnaTe ΦypHaTn N36bPwTe BbTpewHocTTa Ha BpaTaTa Cbc Cyxa Kbpna. Ta3n npoceDpya Tp86Ba da ce npnilara peoBHO.
5. NOUICTBAHE IN IOdIPbJxka
5.1 NOUICTBAHE
I PEPdYPPEXDEHNE: N3KIOUOte UpeJa Iro OCTaBeTe Da ce OxlaDi PpeDn NOuNCtBaHe.
06uHctpyKu
-
Ppei Da n3noJ3BaTe nooNCTBaUm MaTePnAIn 3a ypeDa, npOBepTe DaIn Te ca NoXoJaUu N daNc Ce npenOpbVbAT OT pOn3BOUnTeJ.
-
N3noJ3BaIte KpeMoO6pa3Hn IJI IN TeUHn NOuNCTBaUgIpenapaTN, KOITo He CbIbpxKAT YacTnU. He n3noJ3BaIte CbIbpxAun Coa KayCTNK KpeMOBe (Kopo3NBn), a6pa3NBHn NOuNCTBaUg Nypn, rpy6b TcIyTeA IIN TBbpDn
HNCtpymeHTN, TbKaTO TOBa MoKe Da NOBpeDN rOTBapCKNTe NOBbpXHOCTN.
He n3no3BaIte nouchTbau npenapatn, KOnTO cBdbpxkAT qactnun, TbKATO MORaT da HaDpaKAT CTbKnOTo, emaiHnpaHnte u/nn 6oayncanu qactnHa ypeda.
Ako mma npelenbahe Ha TeuHocTn, NOUCTeTe He3a6abHo, 3a Da n36eHHeTe NOBpeDa B YaCTnte.
He n3noJ3BaIte napOuNCTaUKN 3a NOUInCTBaHcHa YAcTn OT ypeJa.
NouctBaHe Ha BbTpewHocCTTa Ha cyphata
BbtpueHocTtHa eMaJnnpaHnte cyphncce nouchta Hau-do6pe, KoraTo cyphaTa e TOnna.
-БьшeteФунataCMeKaKbpna, HATONEHaBBBODaCnpenapatCneB Bcya ynoTpe6a.CneToba n3bpyeTeФунataOTHOBCBnaXHaKbpnaIЯ NOdcywete.
Moke da ce haoxna n3no3BaTe TeuHn NOcCTBaun MaTePnAaN 3a PbIHO NOcCTBaHe Ha cyphata.
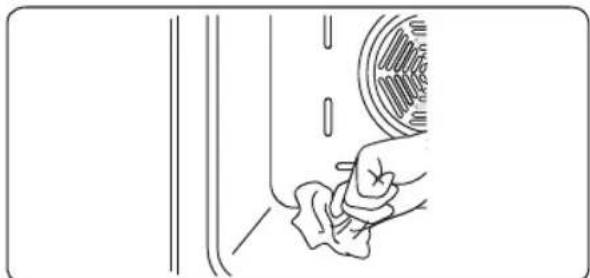
NouchBaHe Ha CTbKNeHnTe Yaactu
- PeIOBHO NOUHCTBaIte CTbKJIeHNITe Yactn Ha ypeHa.
- 3no3BaIte npenapat 3a nouctbaHe Ha cTbKIO, 3a Da nouctte CTbKJIeHITe yactN OTbBn OTBbTppe. Cnei TOBa n3PnakHeTe do6pe n NOcCyWeTe cbc cyxa Kbpna.
NouchTbaHe Ha Yactnte OT HepbXdaema CTomHa (ako NMa TaKnBa)
- PeIOBHO NOUHCTBaIte YactHTe OT HEPbXkdaema CTOMHa Ha ypeHa.
- 36bpuTe yactte OT hepXdaema CTomHa C MeKa Kbpna, HaToneHa BbB BOeH pa3TBOp Ha npenapaT 3a NOuchTahe Ha cbDoBe. Cnei TOBa NoocyuTe cbc cyxa KbPna.

He nouchTaBte yactnte OT HepbXdaema CTomHa, aKO ca BCE Oue ropeuOn OT rotBeHeto.

He octabraye ouet, kafe, MIAKO, COJ, BOda, JIMMOH INI DOMATEH COK Bbpxy Yactnte OT HEPBXJaema CTOMaHa 3a bJXnTeJIHO BpeMe.
NouctBaHe Ha 6oAncAHNOBbpxHocTn (aKo e HauNHyO)
-пет ha OT DOMaTn, domaTeHa nacta, KeTcuN, JIMOH, pON3BOdHn Ha MacNo, MnaKo, 3axapHxpaHn, HAnNTKn CbIbpxaun 3axap n Kafoe Tp8Ba da 6bDat NOuchTeHN He3a6abHO C KbpNa NOToneHa B ToPnB Oda. Ako Te3n NeTHa HE ce NOuchTn IM 6bDe N03BOJeHO Da 3acbxHAT Ha NOBbPxHOCTNe, Bbpy KOnTO ca, HE Tp8Ba Da ce TbPKaT C TBbPdUn PpeDMeTN (3aoCTpeHn PpeDMeTN, CTOMaHeHa I NaCTMaOBA NouchTaBua Ta TeJ, HapaHraBaUa IOBbPxHOCTTa Tb6a 3a NOUCHTaBeHn YHHIn) INI NOUCHBaUu IpnepaTu NcBpaKaUu BucOKO HnBO Ha aIKOXoJ, PpenapTu 3a OTcpanBaHe Ha NEtHa, ObE3MaCInTeJI, abpa3NBHN XmMKaUN. B npOTuBEN clyuA MoKe da ce O6pa3yBa KOpO3Nu Bbpy IpnaxOBO BoJaCaHaTA NobbpxHOCT n Da CE NOBbYrNETHa. IpON3BOUInTeJIr Hma Da 6bde OTROBOpEH 3a KaKBInTo n Da e NOBpeDn PrpUHeHn OT yNoTpe6aTa Ha HEnODXoJau NpOdyKTn N MeToDN Ha NOUYCTBaHe.
OCTpaHraBaHe Ha BbTpewHOTo CTbKJIO
Ipei nouchBaHe Tp6Ba Da OTcpaHnte CTbKnoto Ha BpaTata Ha cyphata, KaKTo e NOKa3aHO NO-DOJy.
- BytheCTbKnoto no nocoka Ha B n ro ocbo6oJeTe OT fNkCnpaata cKo6a (x). DpbHHeTe CTbKnoto HABbH No nocoka Ha A.
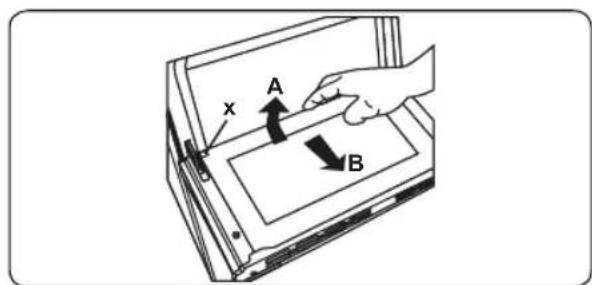
3a da noctabute o6patHO BbTpewHOTO CTbKIO:
- ByTheTe CbKnTo KbM n noD ФИКСИРацета ckoba (y) no nocoka ha B.
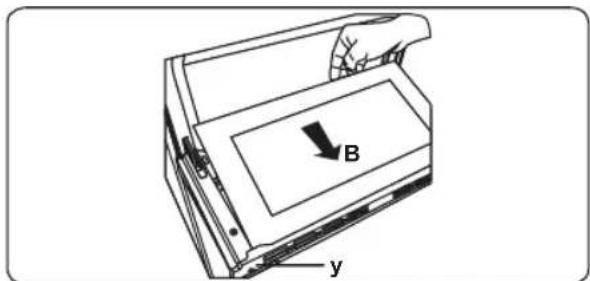
- NocTabete CTbKJIOTo NOd fNkCnpaaatacko6a (x) no nocoka Ha C.


Ako BpaTata Ha cyphaTa e OT TpoHo CTbKJIO, TpeTnAT CbKJIeH CNoI MOKe Da ce OTCTpAH No CbUra HAuH O BTOpNr CTbKJIeH CNoI.
CbaJrHe Ha BpaTaHa hФypHata
Ipei Da nouCTnTe CTbKHeHaTa YacT Ha BpaTata Ha cyphata, e Heo6xOIMo Da Ra CBaNTe, KaTTo e Noka3aHo NO-DOJy.
- OTbopete BpaTata Ha cyphaTata.
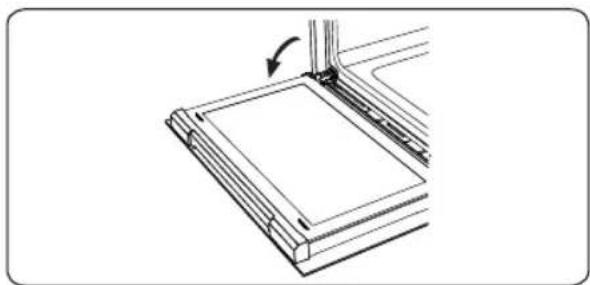
- OTbOpTe 3aKJIHouBaIuIaIgФnKCaTOp (a) B KpaIIHa N03NcIaN C NOMOUsTa Ha OTBeptKa.
- 3aTbOpTe BpaTaTn NOUtn DOKpaN, CneJ KOeTo I3NbPnaTc KbM Ce6e CN, 3a Da J
CBAJNTe.
OTctpaHraBaHe Ha TeJeHna paT
3a da oTcpaHnTe TeJeHaTa peWeTkA, dpbHHeTe TeJeHaTa peWeTkKa KaKTo e noka3aHo Ha cnHypata. Cnei KaTo r OCBO6OJNeOT cKO6Nte (a) Ra NOBdInrHete Harope.
5.2 noDpBxKA
PPEyNPEXKDEHNE:NoDpBxKaTaHaTo3n ype, Tp6Ba Da ce N3BbPwBa cMoOTOTOpn3npaH CepBn3 nJIN KBaJIΦuIcnpaH TexHnK.
CmHa Ha IaMaNaTa Ha yypHaTa
PPEyPPEXDEHNE: Ppei NOuICTBaHe n3KJIIOUeTe ypeDa n ro OCTaBeTe da ce OxJaDi.
- N3BaTeTe cTbKneHaTa JNeUa, cNeI KOeTO N3BaTeTe KpyUkata.
-ПocTaBeTe HOBa KpyUka (yCTOuHbA Ha 300°C)Ha MrcToTo Ha cTapaTa (230 V, 15-25 Watt, TnE14).
CmeHeCTbKHeHaTaJeua,ΦypHaTaBn e roToBa 3a yNoTpe6a. - PpOdykTbT CbIbPka H3TOUHnK Ha CBETINHa C KNaC Ha eHeprInHa eΦeKTNBHOCT G.
I3TOUHNKbT Ha CBETINHa He MoKe Da 6bDe 3aMeHeH OT KpaHnNoTpeBnteJ. Heo6xoJnMo e cneApOdaXk6eHo 06cnyKBaHe.
BkIIOUeHnT n3TOuHnK Ha CBeTnHa He e npEiHa3HaueH 3a N3NoJ3BaHe B dpyrnpuINOxKeHn.
CmeHReM n3ToUHnK Ha CBeTJnHa OT npocceNoHaJIncT
KpyuKaTa e npeHa3HaueHa CneUaJIHO 3a yIOTpe6a B DoMAKnHCKn ypeN 3a roTBeHe. He e nOxDxOJaU 3a OCBetJIeHHe Ha CTaNTe B DoMa.
6. OTCTPAHЯBAHE HA HEN3ПРABHOCTN TPAHCIOPTIUPAHE
6.1 OTCTPAHRAHE HA HEN3IIPABHOCTN

Ako BCE OSe IMaTe npo6Iem Cypea CneI npOBepka Ha OCHOBHIne CTbIK 3a OTcTpaHraBaHe Ha Hen3IpaBHOCTn, Ce CBpbXeTe C yIbJIHOMOueH cepBn3eH TexHNK INI KBaIINΦuIcap H TeXHnK.
| ПюбLEM Вьзможа поочи на Рейчесни | ||
| Фурната не се вклоча. | Ельектохахраимановное ииздочени. | Пробerte дали有很大 зхсанов. Освен това рюberete дали павOTугinte кухненску уреши. |
| Наяма Нагяваце ини Фурната не се заюп. | Бутоьт за Тампегатура на Фурната не состюэн павинно. Вразата на Фурната с отворень. | Пробerte дали бухоть саз упавлике на Тампегатура на Фурната с озстюэн павинно. |
| Освettingлелnetо вьвфурната (ако e налично) не павOTи. | Изrogenда лamпа. Прексысато лими ИЗКлочевоге леслохахpanbahe. | Смене лamпа в сьотьетсные сизтукципente. Уberete се, чь захсанов ськлочевоге вьклочевоге в сөнney Контай. |
| ГотBERETо e Неравно悔ero вьвфурната. | ЛавицITE на Фурната са разнолочевоги Нелравинно. | Пробerte дали сеиздалы вреторьшаны Тампегатура и поизсян на лавицata. He OTваряп чесу врата освенaco He OTвNTe сизу, koetot trябва дьбдд obьратo. Ако OTваряп врата чесу, вьtrightату Semпегату рись сизу. Июма може д поалуся на peэулты ot rotberetо. |
| Бутонite на таймера не могат다 sbдат наимсати павинно. | Има чужда материя, засванatable мени buяду buятонite на таймера. Мonden сьс сизорец ekран: лима влага по КонтPORня панел. Настоpecia на чункци口气 за sbлokира themselves на sbуtheon. | Отскравete чужда материя и поалуte OTHOBO. Премaxнete влага и поалуte OTHOBO. Пробerte дали сух trade на peэулты за sbлokира themselves на sbуtheon. |
| Вентлаторьт на Фурната (ако e наличeenth) сизмен. | ЛавицITE на Фурната Вибрират. | Пробerte дали Фурната сизменя. Пробerte дали лавицITE и поалуte Няжави Готварскс сбдове Вибрират лима са в Контай сбс залия панел на чурната. |
6.2 TPAHCNOPTNPAHE
Ako e Heo6xOIMO da TpaHcnpTnape TpoDyKta, H3noN3BaIte OpRnHaJHaTa onaKOBka nTo HocTe B opRnHaJIHata Kytna. CneBaIte INCTpyKunITE 3a TpaHCnpTnpaHe, NocoueHN Ha onakOBkata. 3aJeNeTe BCnUKN OTdEHN YacTN KbM npOdyKTA, 3a Da npDeOTBpATnTE nobpeDa no BpeMe Ha TpaHCnpTnpaHe.
Ako He pa3noIarate c opuHnHaHaTa onaKOBka, noIrotBeTe KyTna 3a HocHe Taka, yeypebT n Oco6eHO BbHsHInTe My NobbpXHOCTN, da ca 3aUHTeHN OT BbHsHn OnaCHOCTN.
| Mapka | taurus | |
| Моden HM750BKD | ||
| Тил на ФурнатаЕLEKTPИЧЕСКИ | ||
| Maca kg 27,6 | ||
| Индес на[eheproeфektivbnoct - obukhoveni Фурни 103,9] | ||
| Индес на[eheproeфektivbnoct - с вентilatedTop 94,7] | ||
| Енергейн Клас A | ||
| Енергоконсумаця(elektrpurecka) - obukhoveni Фурни kWh/цкыл 0,79 | ||
| Енергоконсумаця(elektrpurecka) - с вentilatedTop kWh/цкыл 0,72 | ||
| Бр氧 кухши 1 | ||
| Торлиен ИЗточникЕLEKTPИCHЕСКI | ||
| Обem I 50 | ||
| Таши Фурна сбответ CTBA на EN 60350-1 | ||
CbBETn 3a cneTbaHe Ha eHepnra
Φypha
-TOTBETeJCTNtTa3aEDHO,aKOeEBb3MOxHO.
- PoiDlbpkaIte KpaTko BpeMe 3a npedBaupTeHnHaarpBaHe.
-He yndjXabaTe BpeMeTo 3a rotBeHe.
- He 3a6paBraIte da n3KnIOuHTe fypHaTa cneI rotBeHeTo.
- He OTBapraIte cypHaTa no BpeMe Ha rotBeHe.
52403493
Espanol
GARANTÍA Y ASISTENCIA TÉCNICA
This product enjoys the recognition and protection of the legal guarantee in accordance with current legislation. To enforce your rights or interests you must go to any of our official technical assistance services.
You can find the closest one by accessing the following web link: http://taurus-home.com/
You can also request related information by contacting us.
You can download this instruction manual and its updates at http://taurus-home.com/
François
GARANTIE ET ASSISTANCE TECHNIQUE
Jaiy jyRj 1al all lds logls bds
.
gogblde dlaiaaig lia clllal Jus Juae diSag
http://taurus-home.com
COUNTRY ADDRESS PHONE
| Algeria Zone d'Activite, N° 62, Constantine 21377077756 | ||
| Argentina Av. del Libertador 1298,(B1638BEY), Vicente López (Pcia. Buenos Aires) | 541153685223 | |
| Belgium Mariëndonkstraat 5, 5154 EG, Elshout 31620401500 | ||
| Bulgaria | 265,Okolovrasten Pat, Mladost 4, 1766, Sofia | 35929211120 / 35929211193 |
| Congo (Republic of) 98 Blvd General Charles de Gaulle, Pointe Noire 242066776656 | ||
| Cyprus 20, Bethlehem Str. / P.O.Box 20430, 2033, Strovolos | 35722711300 | |
| Czech Republic | Milady Horakove 357/4, 568 02, Svitavy | 420 461 540 130 |
| Equatorial Guinea | SN Av Patricio Lumumba y C/ Jesus B, Bata | 00240 333 082958 / 00240 333 082453 |
| Equatorial Guinea | Calle de las Naciones Unidas, PO box 762, Malabo | 240333082958 / 240333082453 |
| Espana | Avda Barcelona, S/N, 25790 Oliana (Lleida) atencioncliente@taurus.es | 902 118 050 |
| France | Za les bas musats 18, 89100, Malay-le-Grand | 03 86 83 90 90 |
| Ghana | Ederick Place, Accra-Ghana | 302682448 / 302682404 |
| Gibraltar | 11 Horse Barrack Lane, 54000, Gibraltar | 00350 200 75397 / 00350 200 41023 |
| Greece Sapfous 7-9, 10553, Athens | +30 21 0373 7000 | |
| Hong Kong | Unit H,13/F., World Tech Centre, Hong kong | (852) 2448 0116 / 9197 3519 |
| Hungary | Késmárk utca 11-13, 1158, Budapest | +36 1 370 4519 |
| India | C-175, Sector-63, Noida, Gautam Budh Nagar - 201301, Delhi | (+91) 120 4016200 |
| Ivory Coast 01 Rue Des Carrossiers-Zone 3, B.P 3747,Abidjan 01 (RCI) | 22521251820 / 225 21 353494 | |
| Luxembourg Mariëndonkstraat 5, 5154 EG, Elshout 31620401500 | ||
| Marruecos Big distribution society 4 Rue 13 Lot. SmaraOulfa, Casablanca | (+212) 522 89 40 21 | |
| Mauritania 134 Avenue Gamal Abdener Ilot D, Nouakchott 2225254469 / 2225251258 | ||
| Mexico Rosas Moreno N° 4-203 Colonia de San RafaelC.P. 06470 – Delegación Cuauhtémoc, Ciudadde México | (+52) 55 55468162 | |
| Montenegro Rastovac bb, 81400, Niksic | +382 40 217 055 | |
| Netherlands Mariëndonkstraat 5, 5154 EG, Elshout 31620401500 | ||
| Nigeria 8, Isaac; John Str,G.R.A Ikeja Lagos 23408023360099 | ||
| Paraguay Denis Roa 155 c/ Guido Spano, Asunción 21665100 | ||
| Peru Calle los Negocios 428, Surquillo, Lima (511) 421 6047 | ||
| Portugal Avenida Rainha D. Amélia, n°12-B, 1600-677,Lisboa | +351 210966324 | |
| RomaniaDudesti Pantelimon 23, 410554, Bucharest | 031.805.49.58 | |
| SerbiaRastovac bb, 81400, Niksic | +382 40 217 055 | |
| Slovakia Milady Horakove 357/4, 568 02, Svitavy | 420 461 540 130 | |
| SouthafricaUnit 25 & 26, San Croy Office Park, Die AgoraRoad, Croydon, Kempton Park, 1619, Johannesburg | (+27) 011 392 5652 | |
| Tunisia2, Rue de Turquie, Tunis | 21671333066 | |
| UkraineBlock 6, Ap Housing Estate Topol-2, B, 49000,Dnepropetrovsk | 380563704161 / 380563704161 | |
| UruguayLuis Alberto de Herrera 3468, 11600, Montevideo | 598 2209 28 00 | |
| VietnamLot 7 Ind. Zone for, Ha Noi | 84437658111 / 84437658110 | |
taurus
www.taurus-home.com
- Thank you for choosing this product.
- CONTENTS
- SAFETY INSTRUCTIONS
- GENERAL SAFETY WARNINGS
- INSTALLATION WARNINGS
- DURING USE
- DURING CLEANING AND MAINTENANCE
- CE Declaration of conformity
- Disposal of your old machine
- INSTALLATION AND PREPARATION FOR USE
- INSTRUCTIONS FOR THE INSTALLER General instructions
- INSTALLATION OF THE OVEN
- ELECTRICAL CONNECTION AND SAFETY
- WARNING: THE APPLIANCE MUST BE EARTHED.
- 3.PRODUCT FEATURES
- List of Components
- Control Panel
- USE OF PRODUCT
- OVEN CONTROLS
- Oven function control knob
- Oven thermostat knob
- Static Cooking
- FasterGrilling
- WaterSteam Clean System:
- COOKING TABLE
- USE OF THE DIGITAL TIMER
- Time adjustment
- Audible warning time adjustment
- Semi-automatic time adjustment (cooking period)
- Full-automatic programming
- Sound Adjustment
- ACCESSORIES
- The Deep Tray
- The Grill Pan and Handle Set
- The Small Tray
- The Wire Rack with Easyfix Half Telescopic Rail
- Telescopic rails
- The Wire Grid
- WARNING
- Soft-Close Oven Door
- The Water Collector
- CLEANING AND MAINTENANCE
- CLEANING
- General Instructions
- Cleaning the Inside of the Oven
- Cleaning the Glass Parts
- Cleaning the Stainless Steel Parts (if available)
- Cleaning Painted Surfaces (if available)
- Removal of the Inner Glass
- Removal of the Oven Door
- Removal of the Wire Shelf
- MAINTENANCE
- Changing the Oven Lamp
- TROUBLESHOOTING&TRANSPORT
- TROUBLESHOOTING
- TRANSPORT
- INSTALLATION DU FOUR
- CARACTERISTIQUES DU PRODUIT
- Limpar as Partes de Vidro
- WaterSteam Clean System
- Функця“Грл”:
- HactpoBaHe Ha BpeMeTo
- HactpoKa Ha 3BykoBTo npdeynpejckdneHne
- IOnyabTomTuHo HacTpoBaHe Ha BpeMeTo (NepnoD Ha rotBeHe)
- IOnyabTomauHnHaCTpOuBaHe Ha BpeMeTo (BpeMe Ha npKluOuBaHe)
- Пьлно abTomatnyho nporpaMPahe
- HactpoBbHe Ha 3Byka
- AKCECOAPN
- ДьлбokedaТаВa
- KomnneKr npin TnraH ndpbXkKa
- Majika TaBa
- MeTnHa peWetKa c noJyTeJeckOnuHa penca EasyFix
- TeleckonnHn peIcn
- ΦHKcaTop
- PeweTbyna ckapa
- PPEyPPEKDEHNE
- Bpata Ha cyphatha c OmeKoTeHo 3aTBapnHe
- KonekTopbT 3a B0da
- NOUICTBAHE IN IOdIPbJxka
- NOUICTBAHE
- 06uHctpyKu
- NouctBaHe Ha BbTpewHocCTTa Ha cyphata
- NouchBaHe Ha CTbKNeHnTe Yaactu
- NouchTbaHe Ha Yactnte OT HepbXdaema CTomHa (ako NMa TaKnBa)
- NouctBaHe Ha 6oAncAHNOBbpxHocTn (aKo e HauNHyO)
- OCTpaHraBaHe Ha BbTpewHOTo CTbKJIO
- CbaJrHe Ha BpaTaHa hФypHata
- OTctpaHraBaHe Ha TeJeHna paT
- noDpBxKA
- CmHa Ha IaMaNaTa Ha yypHaTa
- OTCTPAHЯBAHE HA HEN3ПРABHOCTN TPAHCIOPTIUPAHE
- OTCTPAHRAHE HA HEN3IIPABHOCTN
- TPAHCNOPTNPAHE
- Espanol
- GARANTÍA Y ASISTENCIA TÉCNICA
- François
- GARANTIE ET ASSISTANCE TECHNIQUE
Brand : TAURUS
Model : HM750BKD
Category : Electric oven