Horizon 30 Air Fry - Electric oven TAURUS - Free user manual and instructions
Find the device manual for free Horizon 30 Air Fry TAURUS in PDF.
| Product Type | Electric oven with Air Fry function |
| Brand | Taurus |
| Model | Horizon 30 Air Fry |
| Category | Electric oven |
| Power supply | 230 V ~ 50 Hz |
| Power | Not specified |
| Capacity (volume) | 30 liters |
| Cooking functions | Convection cooking, Grill with convection, Traditional cooking, Grill/Rotisserie, Convection rotisserie, Air Fry (AF model) |
| Temperature range | From 100 °C to 250 °C (estimated) |
| Timer | Up to 120 minutes with Stay on position |
| Included accessories | Rack, tray, handle for tray and grill, rotisserie spit, spit handle, grilling skewers, crumb tray, air fryer basket (AF model) |
| Interior light | Yes (turns on during cooking) |
| Door | Glass door with seal |
| Ventilation | Ventilation grilles - leave 20 cm above, 5 cm behind and on sides |
| Cleaning | Damp cloth with mild detergent; do not immerse; do not use abrasive products or solvents |
| Safety | Do not use if door or seal damaged, if glass cracked; unplug before cleaning; do not use on animals |
| Spare parts | Accessories available separately from technical service |
| Warranty | In accordance with applicable legislation |
Frequently Asked Questions - Horizon 30 Air Fry TAURUS
User questions about Horizon 30 Air Fry TAURUS
0 question about this device. Answer the ones you know or ask your own.
Ask a new question about this device
Download the instructions for your Electric oven in PDF format for free! Find your manual Horizon 30 Air Fry - TAURUS and take your electronic device back in hand. On this page are published all the documents necessary for the use of your device. Horizon 30 Air Fry by TAURUS.
USER MANUAL Horizon 30 Air Fry TAURUS
natural_image
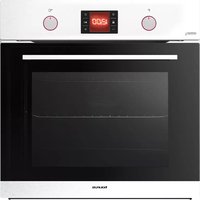
Front view of a black square toaster oven with open grating and control knobs (no visible text or labels)EN. Instructions for use
FR. Mode d'emploi
text_image
Labeled diagram of a microwave oven with six numbered parts for identification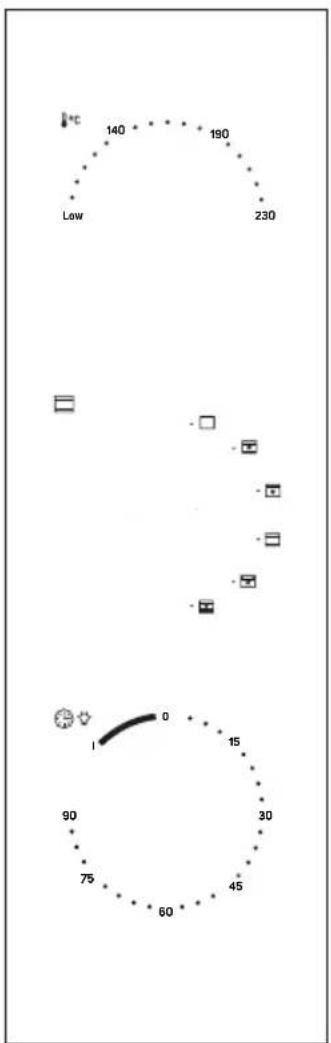
radar
| Metric | Value | |---|---| | Current | 140 | | High | 190 | | Low | 230 | | Current | 0 | | High | 15 | | Low | 75 | | Current | 60 | | High | 45 | | Low | 30 | | Current | 90 | | High | 0 |

natural_image
Technical line drawing of a cylindrical mechanical component with internal mesh structure and labeled part (8), no readable text or symbols beyond annotations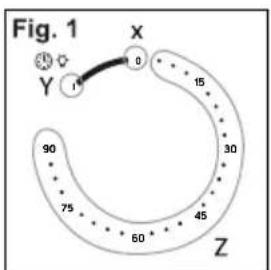
flowchart
graph TD
    A["①"] --> B["②"]
    B --> C["X"]
    C --> D["③"]
    D --> E["④"]
    E --> F["⑤"]
    F --> G["⑥"]
    G --> H["⑦"]
    H --> I["⑧"]
    I --> J["⑨"]
    J --> K["⑩"]
    K --> L["⑪"]
    L --> M["⑫"]
    M --> N["⑬"]
    N --> O["⑭"]
    O --> P["⑮"]
    P --> Q["⑯"]
    Q --> R["⑰"]
    R --> S["⑱"]
    S --> T["⑲"]
    T --> U["⑳"]
    U --> V["㉑"]
    V --> W["㉒"]
    W --> X["㉓"]
    X --> Y["㉔"]
ES
(Original instructions)
ELECTRIC OVEN
HORIZON 30 (VER. VI)
HORIZON 30 AIR FRY
DESCRIPTION
A Handle
B Oven's door
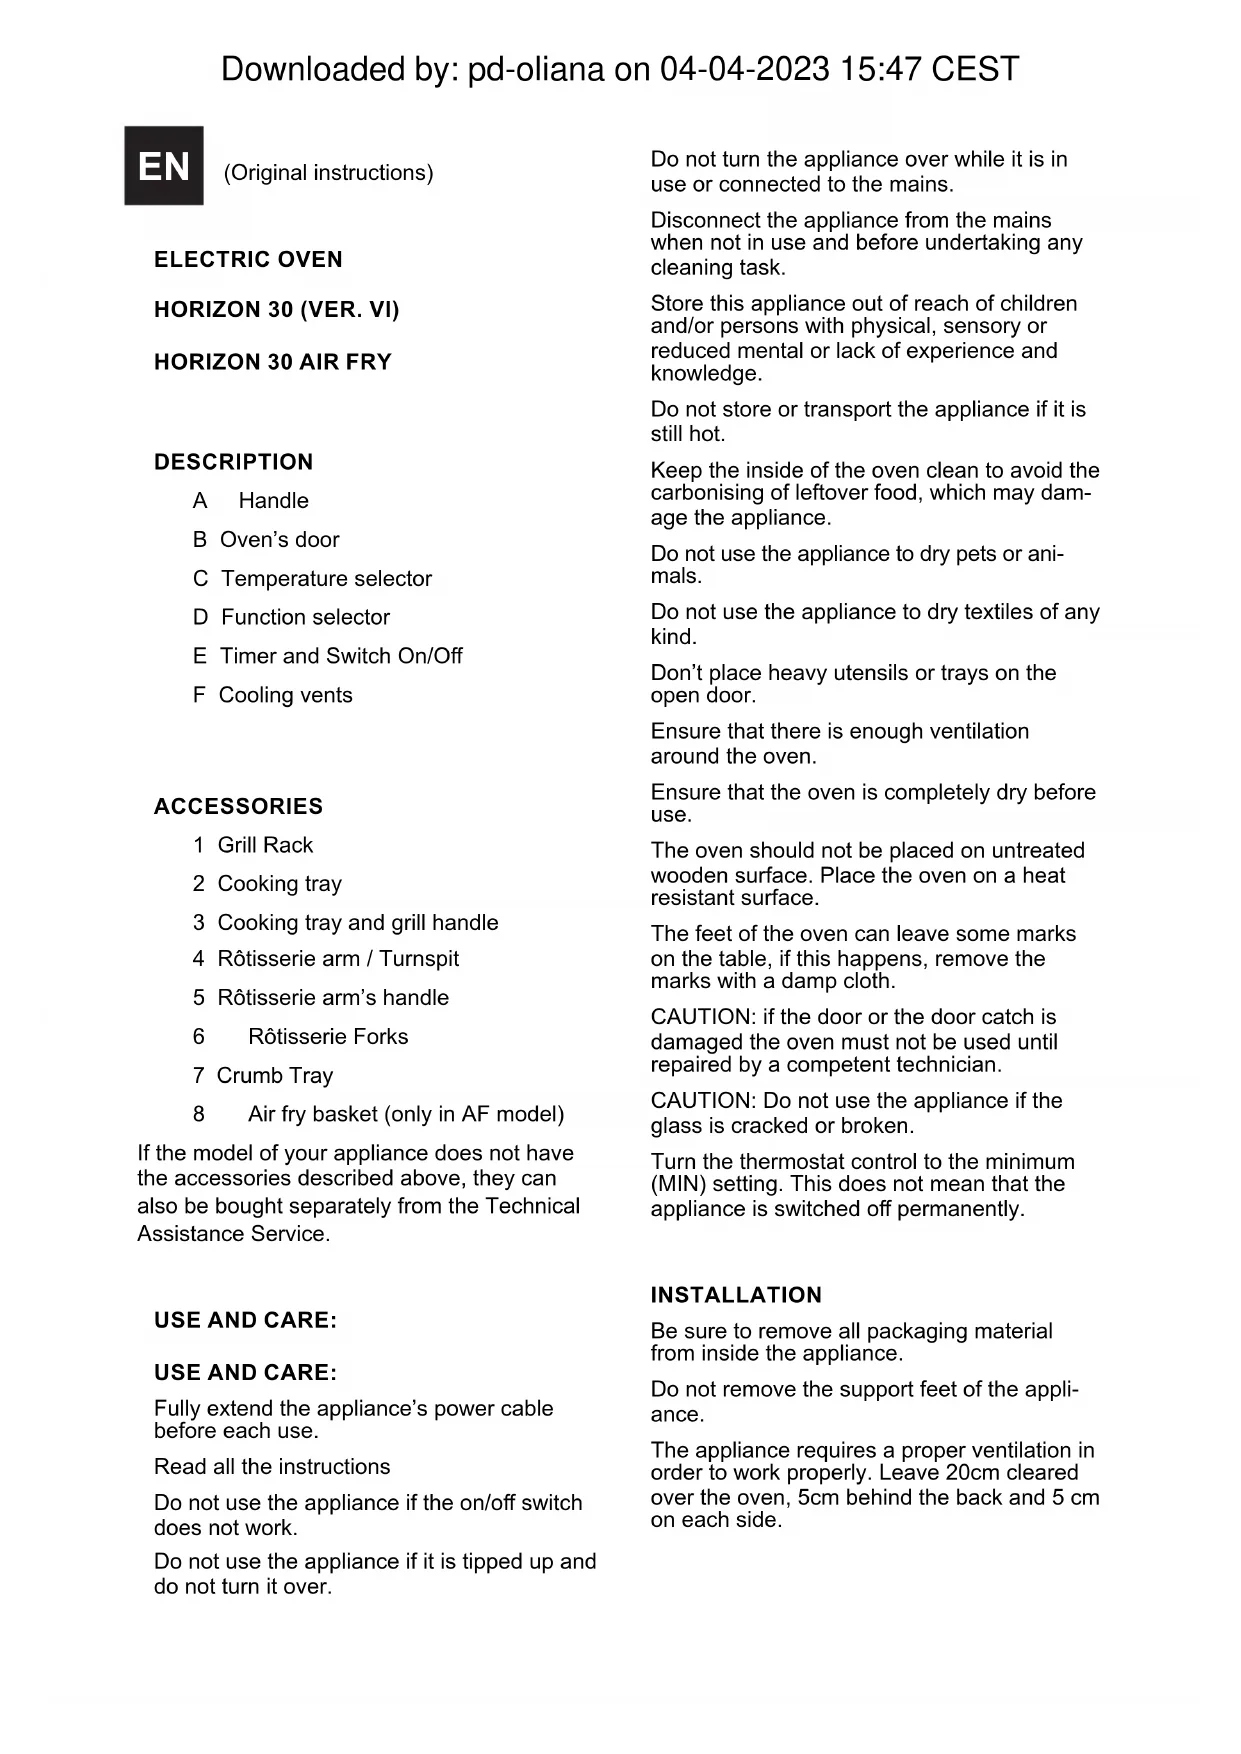
C Temperature selector
D Function selector
E Timer and Switch On/Off
F Cooling vents
ACCESSORIES
1 Grill Rack
2 Cooking tray
3 Cooking tray and grill handle
4 Rôtisserie arm / Turnspit
5 Rôtisserie arm's handle
6 Rôtisserie Forks
7 Crumb Tray
8 Air fry basket (only in AF model)
If the model of your appliance does not have the accessories described above, they can also be bought separately from the Technical Assistance Service.
USE AND CARE:
USE AND CARE:
Fully extend the appliance's power cable before each use.
Read all the instructions
Do not use the appliance if the on/off switch does not work.
Do not use the appliance if it is tipped up and do not turn it over.
Do not turn the appliance over while it is in use or connected to the mains.
Disconnect the appliance from the mains when not in use and before undertaking any cleaning task.
Store this appliance out of reach of children and/or persons with physical, sensory or reduced mental or lack of experience and knowledge.
Do not store or transport the appliance if it is still hot.
Keep the inside of the oven clean to avoid the carbonising of leftover food, which may damage the appliance.
Do not use the appliance to dry pets or animals.
Do not use the appliance to dry textiles of any kind.
Don't place heavy utensils or trays on the open door.
Ensure that there is enough ventilation around the oven.
Ensure that the oven is completely dry before use.
The oven should not be placed on untreated wooden surface. Place the oven on a heat resistant surface.
The feet of the oven can leave some marks on the table, if this happens, remove the marks with a damp cloth.
CAUTION: if the door or the door catch is damaged the oven must not be used until repaired by a competent technician.
CAUTION: Do not use the appliance if the glass is cracked or broken.
Turn the thermostat control to the minimum (MIN) setting. This does not mean that the appliance is switched off permanently.
INSTALLATION
Be sure to remove all packaging material from inside the appliance.
Do not remove the support feet of the appliance.
The appliance requires a proper ventilation in order to work properly. Leave 20cm cleared over the oven, 5cm behind the back and 5 cm on each side.
INSTRUCTIONS FOR USE
BEFORE USE:
Make sure that all products' packaging has been removed.
Before using the product for the first time, clean the parts that will be in contact with food in the manner described in the cleaning section.
USE:
Connect the appliance to the mains.
Select the desired cooking temperature by using the temperature selector. (C)
Select the function to work with by using the function selector (D)
FUNCTION SELECTOR (D)
▶ Switched off.
▶ Cook with convection. Select this function if you would like to cook with bottom and top heating elements and maintaining a constant temperature and an accelerated cooking because of the convection air.
Grill with convection. Use this function in order to gratin the foods while they get heated by the convection to deliver the heat to every part of the food.
Traditional cooking. Use this function to cook with top and bottom heating elements.
▶ Grill / Grill with Rôtisserie. Use this function to gratin the foods in a traditional way or use the rotisserie accessories in order to use de superior heat with the rotisserie.
▶ Rôtisserie (roast) with convection. Select this function to roast the foods using the Rôtisserie accessory and cooking them with the help of convection. Also use this function for frying food with the help of the AIR FRY Basket.
TIMER AND SWITCH ON/OFF (E)
Oven is only activated after a time is selected and or in Stay on position (see Operation of the Oven) After the oven is activated the lamp inside of it is open.
Once you have selected the desired temperature and function, choose, by using the timer / switch on/off the time you need to use it. The oven will be activated only after you select a time. The oven light will be on to indicate that the oven is active. Note that in the first use of the oven there might be some smoke coming out of the oven, it is normal and it will disappear after 5-10 minutes.
CAUTION. If you use the timer remember to add between 10 to 15 minutes before. Doing this, you will add the preheating minutes to the normal time and the results will be better.
CAUTION.
Fig 1.
X → Switched off position. Move the button to this position to Switch off the oven.
Y → Switched on position (Stay on function). In this position, the oven will remain switched on until the user switch it off
Z → Timer scale. Select the time needed for the action you wish to realize. Once the time goes off, the oven will switch off automatically. If the cooking is finished earlier than the set cooking time, please turn back the timer to 0 to turn off the oven.
ACCESSORIES
COOK WITH THE GRILL RACK
Previous to the use of the oven OR during the use:
Insert the grill rack in one of the internal cavities and side rails.
Place the food directly to the grill or over an oven paper. Also, you can use it as to place some oven cookware, as a small tray.
RECOMMENDATION: Use the handle included in order to remove the grill rack from the oven. The grill rack will be hot once finished the job. BE CAREFUL!
COOK WITH THE COOKING TRAY
Place the food you want to cook in the cooking tray.
Once pre-heated the oven or during it is working, introduce the tray in the oven choosing the altitude desired by placing it between the side rails.
CAUTION: Use the handle included in order to remove the tray from the oven. The cook-
ing tray will be hot once finished the job. BE CAREFUL!
COOK WITH RÔTISSERIE
Stab through the food you want to roast with the rotisserie arm.
Use the rotisserie forks to fix the food centered in the arm. To fix the two forks/skewers use the two thumbscrews included.
Place the rotisserie arm by first inserting the side of the arm with one notch inside the hole in the centre of the right-side wall of the oven
Place the side of the arm with two notches in the support of the left side wall, using the first socket to be placed in the support.
REMEMBER: Once finished, this rotisserie arm will be really hot. Use the Rôtisserie's arm handle to remove it and the aid of cooking gloves to remove the rotisserie arm from the prepared food.
COOK WITH AIR FRY BASKET
(ONLY FOR HORIZON 30 AIR FRY)
REMOVE THE FORKS FROM RÔTISSERIE ARM. PLACE THE RÔTISSERIE ARM THROUGH THE BASKET USING THE BIGGER WHOLES IN EACH SIDE OF THE BASKET. FIX THE BASKET USING THE SAME PIECES TO FIX THE FORKS IN THE ARM.
REMEMBER: Once finished, the rôtisserie arm will be really hot. Use the Rôtisserie's arm handle to remove it and the aid of cooking gloves to remove the Basket from the arm. Unscrew the thumbscrews to remove the basket.
CRUMB TRAY
The oven has a crumb tray to make it easy its cleaning process.
Once the oven is cold, remove the crumb tray from the oven and clean it aside. Look up for the cleaning directions ahead in this same manual.
ONCE YOU HAVE FINISHED USING THE APPLIANCE:
Switch off the appliance by placing all the selectors in the switched off position (Min, , O)
Unplug the appliance from the mains.
Clean the appliance.
CLEANING
Disconnect the appliance from the mains and allow it to cool before undertaking any cleaning task.
Clean the equipment with a damp cloth with a few drops of washing-up liquid and then dry.
Do not use solvents, or products with an acid or base pH such as bleach, or abrasive products, for cleaning the appliance.
Do not let water or any other liquid get into the air vents to avoid damage to the inner parts of the appliance.
Never submerge the appliance in water or any other liquid or place it under running water.
It is advisable to clean the appliance regularly and remove any food remains.
If the appliance is not in good condition of cleanliness, its surface may degrade and inexorably affect the duration of the appliance's useful life and could become unsafe to use.
Neither parts of this appliance are suitable for cleaning in the dishwasher.
Then dry all parts before its assembly and storage.

KOKEN MET DE BAKPLAAT
Downloaded by: pd-oliana on 04-04-2023 15:47 CEST
This product enjoys the recognition and protection of the legal guarantee in accordance with current legislation. To enforce your rights or interests you must go to any of our official technical assistance services.
You can find the closest one by accessing the following web link: http://taurus-home.com/
You can also request related information by contacting us.
You can download this instruction manual and its updates at http://taurus-home.com/
Français
GARANTIE ET ASSISTANCE TECHNIQUE
COUNTRY ADDRESS PHONE
| Algeria Zone d'Activite, N° 62, Constantine 213770777756 | ||
| Argentina Av. del Libertador 1298,(B1638BEY), Vicente López (Pcia. Buenos Aires) | 541153685223 | |
| Belgium Mariëndonkstraat 5, 5154 EG, Elshout 31620401500 | ||
| Bulgaria | 265,Okolovrasten Pat, Mladost 4, 1766, Sofia | 35929211120 / 35929211193 |
| Congo (Republic of) 98 Blvd General Charles de Gaulle, Pointe Noire 242066776656 | ||
| Cyprus 20, Bethlehem Str. / P.O.Box 20430, 2033, Strovolos | 35722711300 | |
| Czech Republic | Milady Horakove 357/4, 568 02, Svitavy | 420 461 540 130 |
| Equatorial Guinea | SN Av Patricio Lumumba y C/ Jesus B, Bata | 00240 333 082958 / 00240 333 082453 |
| Equatorial Guinea | Calle de las Naciones Unidas, PO box 762, Malabo | 240333082958 / 240333082453 |
| España | Avda Barcelona, S/N, 25790 Oliana (Lleida) atencioncliente@taurus.es | 945 551 242 |
| France | Za les bas musats 18, 89100, Malay-le-Grand | 03 86 83 90 90 |
| Ghana | Ederick Place, Accra-Ghana | 302682448 / 302682404 |
| Gibraltar | 11 Horse Barrack Lane, 54000, Gibraltar | 00350 200 75397 / 00350 200 41023 |
| Greece Sapfous 7-9, 10553, Athens +30 21 0373 7000 | ||
| Hong Kong | Unit H,13/F., World Tech Centre, Hong kong | (852) 2448 0116 / 9197 3519 |
| Hungary | Késmárk utca 11-13, 1158, Budapest +36 1 370 4519 | |
| India | C-175, Sector-63, Noida, Gautam Budh Nagar - 201301, Delhi | (+91) 120 4016200 |
©
taurus
www.taurus-home.com