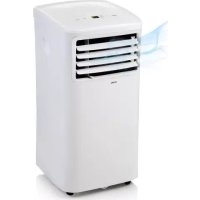
DO266A - Air Conditioning DOMO - Free user manual and instructions
Find the device manual for free DO266A DOMO in PDF.



| Product type | Monoblock mobile air conditioner |
| Brand | DOMO |
| Model | DO266A |
| Refrigerant | R290 (flammable) |
| Operating modes | Auto, Cool, Dry, Fan |
| Temperature range (Cool mode) | 17 °C to 30 °C |
| Fan speed | Low, High, Auto (remote control) |
| Remote control | Yes, range 8 m |
| Timer | Delayed start and stop up to 24 h |
| Sleep function | Yes (gradual temperature increase) |
| Air exhaust | Flexible hose, window or wall kit included |
| Drainage | Manual (tray) or continuous (hose) |
| Air filter | Washable, cleaning recommended every 2 weeks |
| Power supply | 220-240 V ~ 50 Hz |
| Dimensions (approx.) | 33 x 33 x 70 cm |
| Weight (approx.) | 22 kg |
| Casters | Yes |
| Minimum room area (R290) | 7 m² |
| Safety distance around the unit | 30 cm |
| Warranty | 2 years (accessories: 6 months) |
Frequently Asked Questions - DO266A DOMO
User questions about DO266A DOMO
0 question about this device. Answer the ones you know or ask your own.
Ask a new question about this device
Download the instructions for your Air Conditioning in PDF format for free! Find your manual DO266A - DOMO and take your electronic device back in hand. On this page are published all the documents necessary for the use of your device. DO266A by DOMO.
USER MANUAL DO266A DOMO
natural_image
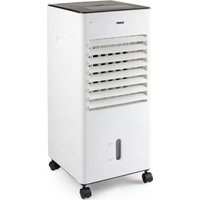
White industrial air conditioner unit with ventilation slots and a small logo (no visible text or symbols on the device body)DO266A
| Handleiding Mobiele airco |
| Mode d'emploi Climatiseur mobile |
| Gebrauchsanleitung Mobile Klimaanlage |
| Instruction booklet Mobile air conditioning |
| Manual de instrucciones Acondicionador |
| Istruzioni per l'uso Condizionatore d'aria portatile |
| Návod k použití Mobilní klimatizace |
| Návod na použitie Mobilná klimatizácia |
natural_image
Two symbolic icons: a warning triangle with an exclamation mark and an open book with stacked pages (no text or labels)natural_image
Coiled white plastic or rubber tube with no visible text or markings9a
10
natural_image
White ceramic bowl with lid and spoon, labeled '10a' in black circle (no other text or symbols)10b
11
11a
natural_image
Plain white rectangular object with a small white mark and a curved line on top (no text or symbols)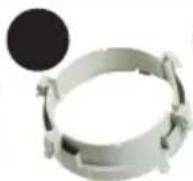
natural_image
Close-up of a black plastic roller with a white inner band, next to a small black circular object (no text or symbols visible)11d
INSTALLATIE
natural_image
Three hand-drawn illustrations of coiled or twisted pipe fittings, no text or symbols presentINSTALLATIE VAN DE RAAMBEVESTIGING
natural_image
Diagram showing a mechanical joint before and after assembly, with no visible text or symbolsnatural_image
Two technical illustrations showing a pipe insertion into a window, with no visible text or symbols.INSTALLATIE MUURBEVESTIGING
natural_image
Diagram showing a mechanical joint before and after assembly, with no visible text or symbolsnatural_image
Technical line drawing of a server unit with a magnified inset showing internal components (no text or symbols)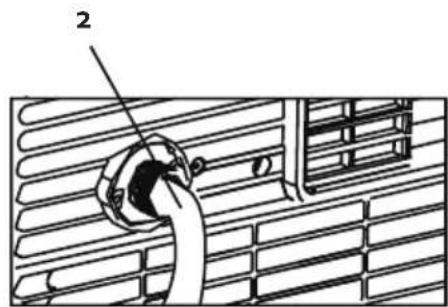
natural_image
Technical line drawing of a server rack unit with labeled component A, showing internal structure and mounting bracket (no text or symbols beyond label)natural_image
Line drawing of a hand opening a portable air conditioner unit with ventilation grilles (no text or symbols)Behuizing
natural_image
Recycling symbol icon with three chasing arrows forming a triangle (no text or labels)natural_image
Coiled white plastic hose with threaded end (no text or symbols visible)9a
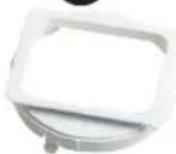
10
10a
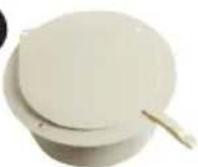
10b
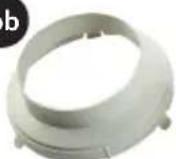
11
11a
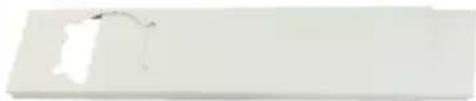
natural_image
Blank white rectangular object with a faint curved line on top (no text or symbols)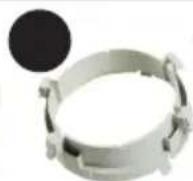
natural_image
Close-up of a black plastic roller with a circular inset showing a separate circular object (no text or symbols visible)11d
INSTALLATION
natural_image
Three hand-drawn illustrations of coiled pipes with different internal shapes, no text or symbols present.INSTALLATION KIT DE FIXATION À LA FENÊTRE
natural_image
Diagram showing a mechanical joint before and after assembly, with no visible text or symbolsnatural_image
Two technical illustrations showing a pipe being inserted into a window, with no visible text or symbols.INSTALLATION KIT DE FIXATION MURALE
natural_image
Diagram showing a mechanical component before and after assembly, with no visible text or symbolsnatural_image
Technical line drawing of a mechanical device with a magnified inset showing a component detail (no text or symbols present)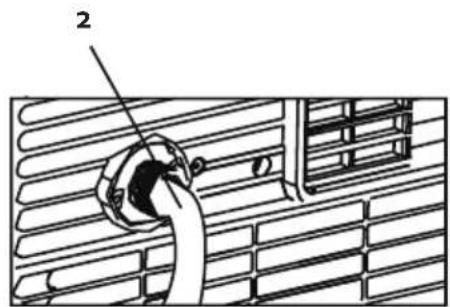
Vidange code P1
natural_image
Technical diagram of a server rack unit with labeled components, showing internal structure and mounting bracket (no text or symbols present)NETTOYAGE
natural_image
Line drawing of a hand opening a refrigerated air conditioner unit with cooling fins and ventilation grilles (no text or symbols)Boîtier
natural_image
Recycling symbol icon with three arrows forming a triangle (no text or labels)natural_image
Coiled white plastic hose with threaded end (no text or symbols visible)9a
10
natural_image
White ceramic pot with lid and handle, labeled '10a' in black circle (no other text or symbols)10b
11
11a
natural_image
Blank white rectangular object with a faint curved line on top (no text or symbols)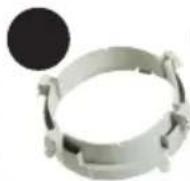
natural_image
Coiled black cable with a white inner band, next to a small black circular object (no text or symbols visible)11d
MONTAGE
natural_image
Three hand-drawn illustrations of coiled, twisted pipe-like structures with no text or symbolsMONTAGE DER FENSTER-LUFTABFUHR
natural_image
Diagram showing a mechanical joint or bracket being adjusted from an angle to a circular component (no text or symbols present)natural_image
Two technical illustrations showing a pipe inserted into a window, with no visible text or symbols.MONTAGE DER WAND-LUFTABFUHR
natural_image
Diagram showing a mechanical joint or bracket before and after assembly, with no visible text or symbols.natural_image
Technical line drawing of a server unit with a magnified inset showing a component detail (no text or symbols present)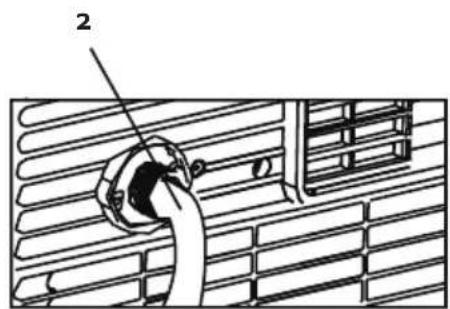
natural_image
Technical line drawing of a server unit with labeled components, showing front and side views (no text or symbols present)natural_image
Illustration of a hand opening a portable air conditioner unit with cooling fan and ventilation grille (no text or symbols)Gehäuse
natural_image
Recycling symbol icon with three chasing arrows forming a triangle (no text or labels)All of our products are always submitted to a strict quality control before they are sold to you. Should you nevertheless experience problems with your device, we sincerely regret this.
In that case, we kindly request you to contact our customer service.
Our staff will gladly assist you.

+32 14 21 71 91

info@linea2000.be
Monday – Thursday: 8.30 – 12.00 and 13.00 – 17.00
Friday: 8.30 - 12.00 and 13.00 - 16.30
This appliance has a two year warranty period. During this period the manufacturer is responsible for any failures that are the direct result of construction failure. When these failures occur the appliance will be repaired or replaced if necessary. The warranty will not be valid when the damage to the appliance is caused by wrong use, not following the instructions or repairs executed by a third party. The guarantee is issued with the original till receipt. All parts, which are subject to wear, are excluded from the warranty.
If your device breaks down within the 2-year warranty period, you can return the device together with your receipt to the shop where you purchased it.
The guarantee on accessories and components that are liable to wear-and-tear is only 6 months.
The guarantee and responsibility of the supplier and manufacturer lapse automatically in the following cases:
- If the instructions in this manual have not been followed.
· In case of incorrect connection, e.g., electrical voltage that is too high.
· In case of incorrect, rough or abnormal use.
· In case of insufficient or incorrect maintenance. - In case of repairs or alterations to the device by the consumer or non-authorised third parties.
- If the customer used parts or accessories that are not recommended or provided by the supplier / manufacturer.
SAFETY INSTRUCTIONS
When using electrical appliances, basic safety precautions should always be taken, including the following:
- Read all instructions carefully. Keep this manual for future reference.
- Make sure all packaging materials and promotional stickers have been removed before using the appliance for the first time. Make sure children cannot play with the packaging materials.
· This appliance is intended to be used in household and similar applications such as: - staff kitchen areas in shops, offices and other working environments;
- farm houses;
- by clients in hotels, motels and other residential type environments;
- bed and breakfast type environments.
- Children should be supervised to ensure that they do not play with the appliance.
- This appliance can be used by children aged from 16 years and above and persons with reduced physical, sensory or mental capabilities or lack of experience and knowledge if they have been given supervision or instruction concerning use of the appliance in a safe way and understand the hazards involved. Children shall not play with the appliance. Cleaning and user maintenance shall not be made by children unless they are older than 16 and supervised.
- Keep the appliance and its cord out of reach of children younger than 16 years.
- Attention: This appliance cannot be used with an external timer.
- Before use, check if the voltage stated on the appliance corresponds with the voltage of the power net at your home.
- The plug must be plugged into an appropriate outlet that is installed and grounded in accordance with all local standards and requirements.
- Do not let the cord hang on a hot surface or on the edge of a table or counter top.
- Never use the appliance when the cord or plug is damaged, after malfunction or when the appliance itself is damaged. In that case, take the appliance to the nearest qualified service center for check-up and repair.
- Close supervision is necessary when the appliance is used near or by children.
- The use of accessories that are not recommended or sold by the manufacturer can cause fire, electrical shock or injuries.
- Unplug the appliance when it is not in use, before assembling or disassembling any parts and before cleaning the appliance. Put all buttons and knobs into the 'off' position and unplug the appliance by grasping the plug. Never unplug by pulling the cord.
· Do not leave a working appliance unattended.
- Never place this appliance near a gas stove or electrical stove or in a place where it may come into contact with a warm appliance.
- Do not use the appliance outdoors.
- Only use the appliance for its intended use.
· Always use the appliance on a steady, dry and level surface. - Only use the appliance for domestic use. The manufacturer cannot be held responsible for accidents that result from improper use of the appliance or not following the instructions described in this manual.
· All repairs should be carried out by the manufacturer or its aftersales service.
· Never immerse the appliance, the cord or the plug in water or any other liquid.
· Make sure that children do not touch the cord or appliance. - Keep the cord away from sharp edges and hot parts or other heat sources.
· Before use, remove all packaging materials and any promotional stickers.
· Never place the unit near a stove, fire or highly inflammable liquids.
· Never hit or shake the unit, to prevent damage.
· Never cover the air inlet or air outlet, to prevent overheating the unit.
· Never splash water on the unit, or place the unit near water, to prevent electrocution.
· Never place another appliance on the same electrical circuit as the air conditioning.
· Never handle the plug with wet hands.
· Never put any foreign objects in the openings of the air conditioning. - Never use an extension cord.
· Never let children play near the unit. - When you turn off the unit and want to turn it on immediately afterwards, the compressor will need 3 min. to start up again.
· Always place the unit at least 1m away from TV or radio, to prevent disturbance.
· Never place the unit in direct sun light, to prevent discoloration of the air conditioning. - Make sure the angle of the unit is never more than 35^ , when you move the air conditioning. Never place the unit upside down.
· Always remove the water from the water tank, when storing the air conditioning. This will keep your air conditioning in optimal condition for a long time.
· Never use any chemicals to clean the unit, this will cause damage.
· Always make sure to disconnect the unit from the electrical supply before attaching or removing the air inlet grill. - Make sure the air conditioning is always protected against condensation, splashing water, etc. Make sure the air conditioning can't come in contact or be pulled into water or any other liquid. If for some reason the air conditioning will fall in to water or any other liquid, immediately remove the plug form the socket.
· Never use the air conditioning in a damp room such as a bathroom or a laundry room.
· Always contact a qualified person for repairing the unit.
· Make sure that the free space around the unit is at least 30 cm.
· Never touch the unit with wet hands or bare feed. -
Do not press the buttons on the control panel with anything other than your fingers.
-
Never remove fixed parts from the air conditioning. Never use the unit when it is not working properly, or when the unit has fallen or has been damaged.
· Never use the plug to turn the unit on or off. Always use the buttons on the control panel. - Reparations, checking for leaks or other services need to happen by a qualified technician with the right certificates.
- Installation must be performed according to the installation instructions. Improper installation can cause water leakage, electrical shock, or fire.
- Do not touch the unit with wet or damp hands or when barefoot.
- If the air conditioner is knocked over during use, turn off the unit and unplug it from the main power supply immediately. Inspect the unit to ensure there is no damage. If you suspect the unit has been damaged, contact a technician or customer service for assistance.
- In a thunderstorm, the power must be cut off to avoid damage to the machine due to lightning.
- When the water drainage function is not in use, keep the upper and the lower drain plug firmly to the unit. When the drain plug is not in use, keep it carefully to prevent children from choking.
- Do not run cord under carpeting. Do not cover cord with throw rugs, runners, or similar coverings. Do not route cord under furniture or appliances. Arrange cord away from traffic area and where it will not be tripped over.
· Disconnect the power if strange sounds, smell, or smoke comes from it.
Specific information regarding appliances with R290 refrigerant gas.
· Thoroughly read all of the warnings.
- When defrosting and cleaning the appliance, do not use any tools other than those recommended by the manufacturing company.
- The appliance must be placed in an area without any continuous sources of ignition (for example: open flames, gas or electrical appliances in operation).
· Do not puncture and do not burn.
- Refrigerant gases can be odourless.
· The appliance must be installed, used and stored in an area that is greater than 7 m ^2 .
- This appliance contains a certain number of grams (see rating label back of unit) of R290 refrigerant gas.
- R290 is a refrigerant gas that complies with the European directives on the environment. Do not puncture any part of the refrigerant circuit.
- If the appliance is installed, operated or stored in a nonventilated area, the room must be designed to prevent the accumulation of refrigerant leaks resulting in a risk of fire or explosion due to ignition of the refrigerant caused by electric heaters, stoves, or other sources of ignition.
· The appliance must be stored in such a way as to prevent mechanical failure.
- Individuals who operate or work on the refrigerant circuit must have the appropriate certification issued by an accredited organisation that ensures competence in handling refrigerants according to a specific evaluation recognized by associations in the industry.
- Repairs must be performed based on the recommendations from the manufacturing company. Maintenance and repairs that require the assistance of other qualified personnel must be performed under the supervision of an individual specified in the use of flammable refrigerants.
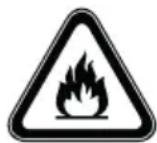
Caution: risk of fire / flammable materials
This appliance uses a flammable refrigerant. If the refrigerant is leaked and exposed to an external ignition source, there is a risk of fire.
SAVE THESE INSTRUCTIONS
ENERGY TIPS
· Never use the unit it rooms that are bigger than the recommended room size.
· Make sure that the airflow of the unit is not blocked by furniture or other objects.
- Keep curtains closed during the warmest hours of the day.
· Make sure the filters of the air conditioning are always clean.
· Always keep doors and windows closed to keep the cool air inside and the warm air outside.
PARTS
Front
- Control panel
- Air outlet
Back
- Air filter
- Air inlet
- Air outlet
- Drain
Parts
- Drain hose
- Remote control
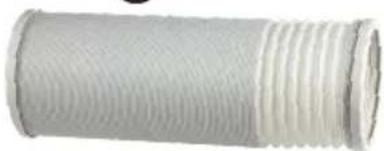
- Air outlet hose
9 a. Air outlet hose connection
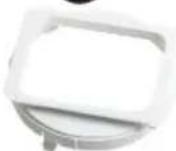
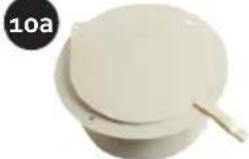
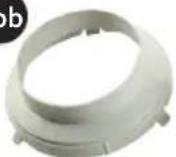
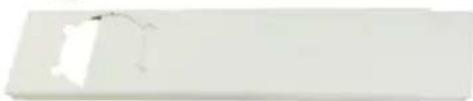
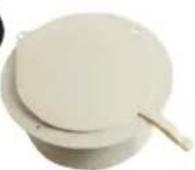
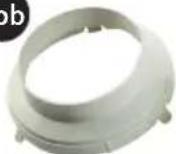
- Wall installation kit
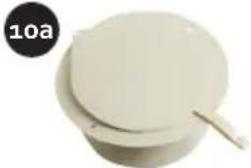
10 a. Wall adaptor
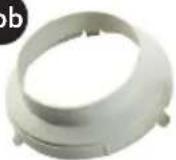
10 b. Wall installation kit connection
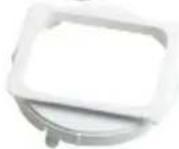
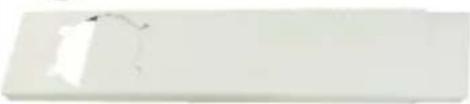
- Window installation kit
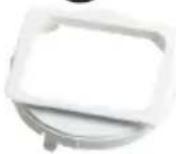
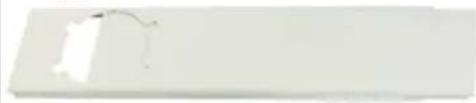
11 a. Window adaptor
11 b. Window installation kit connection
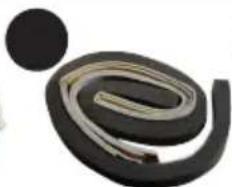
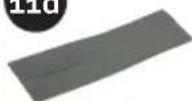
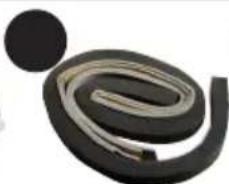
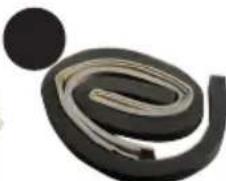
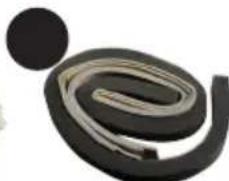
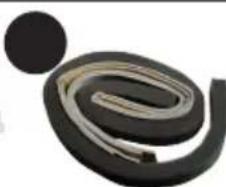
11 c. Window seal
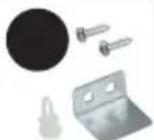
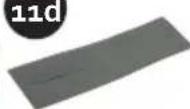
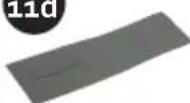
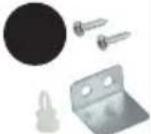
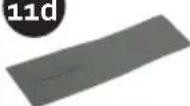
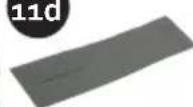
11 d. Adapter plug
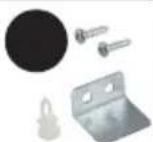
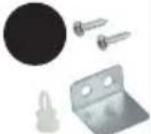
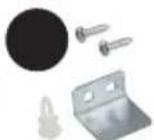
11 e. L-iron with screws
9
natural_image
Coiled white plastic hose with threaded end (no text or symbols visible)9a
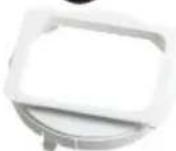
10
10a
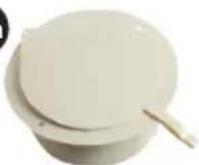
10b
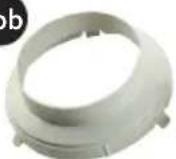
11
11a
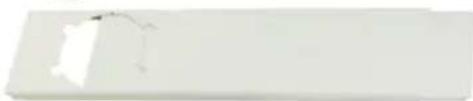
natural_image
Blank white rectangular object with a faint curved line on top (no text or symbols)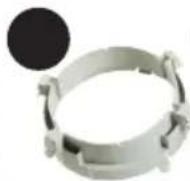
natural_image
Coiled black cable or wire with a circular inset showing a separate black circle (no text or symbols visible)11d
INSTALLATION
- Place the air conditioning on a solid and stable floor, this way you will prevent excessive noise and vibrations. Make sure that the floor is strong enough to support the weight of the appliance.
- The appliance has small wheels for easy moving. Make sure only to move the air conditioning over a flat and level surface. Be careful when moving the air conditioning over carpet. Never roll the unit over an object.
- The plug must be plugged into an appropriate outlet that is installed and grounded in accordance with all local standards and requirements.
· Never place any object within 30 cm round the air conditioning. - The air outlet hose must be used in the "cool" or "auto" mode. During the "fan" or "dry" mode, you don't need to attach the air outlet hose.
· Make sure there is a free surrounding of at least 50 cm around the outlet. - Make sure the air outlet hose isn't bend during use.

natural_image
Three hand-drawn illustrations of a coiled tube or pipe, showing different shapes and internal patterns (no text or symbols)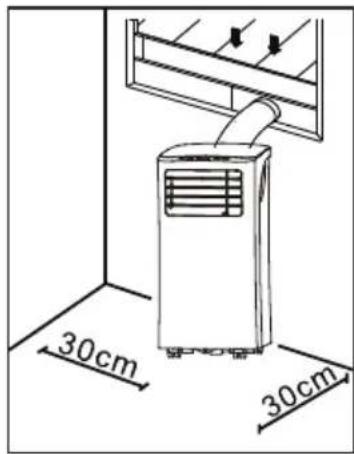
INSTALLATION OF THE WINDOW KIT
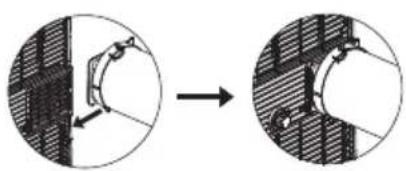
- Place the coupling of the air outlet hose on the end of the hose.
- Place the air outlet hose on the air outlet at the back of the appliance.
natural_image
Diagram showing a mechanical joint before and after assembly, with no visible text or symbols- Place the coupling of the window attachment on the other end of the air outlet hose.
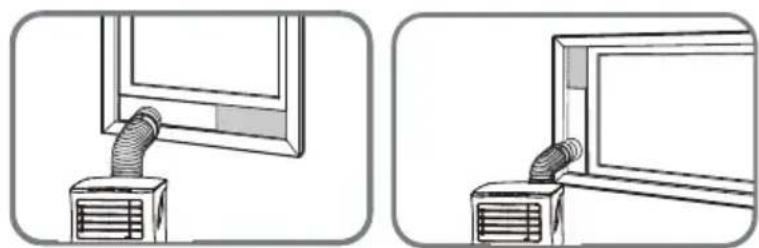
- Place the window adaptor in your window. This is possible for horizontal and vertical sliding windows. Block the window adapter at the desired length.
- Attach the hose with the coupling to the window adapter.
- Make use of the window seals to close off any possible openings in the window.
- Block the window adapter at the desired length using the supplied window adapter plug.
- If desired, you can fix the window with the L-iron and 2 screws.
natural_image
Two technical illustrations showing a pipe insertion into a window, with no visible text or symbols.INSTALLATION WALL KIT
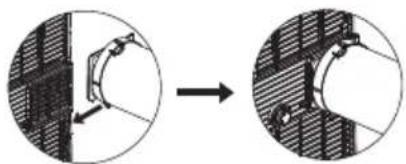
- Place the coupling of the air outlet hose on the end of the hose.
- Place the air outlet hose on the air outlet at the back of the appliance.
natural_image
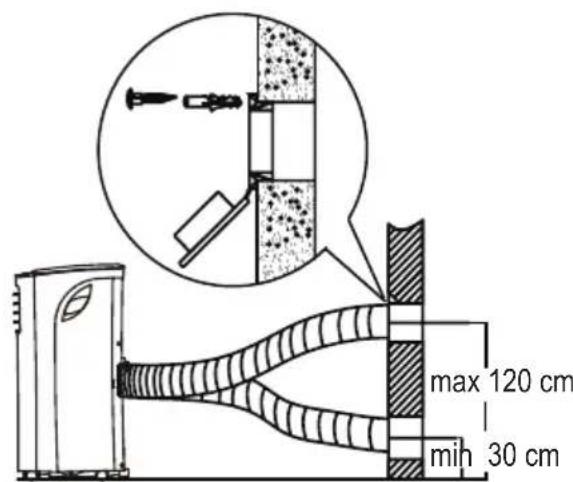
Diagram showing a mechanical joint before and after assembly, with no visible text or symbols- Make an opening in the wall the size of the wall adapter.
- Place the wall adapter in the opening. Attach the wall adapter using the screws supplied.
- Place the coupling of the wall attachment on the other end of the air outlet hose.
· Attach the hose with coupling to the wall adapter.
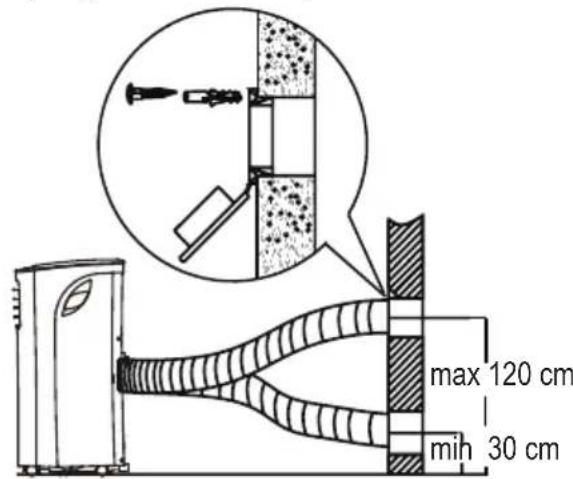
USE
The horizontal strip on the front of the air conditioning can be opened and shut manually in order to aim the air outlet better.
CONTROL PANEL
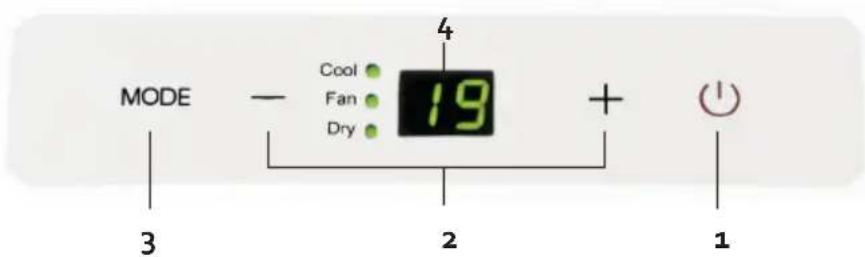
- ON/OFF touch
To turn the unit off or on.
- "+" and "-" touch
Use these touches to select the temperature. The temperature can be set between 17^ C and 30^ C. When pressing both buttons at the same time you can switch between "oC" or "oF".
- MODE-touch
With this touch you can select the desired function. Every time when pressing this touch the function will change: COOL – DRY – FAN. The related indication light will turn on on the control panel. If you choose the FAN setting, the ventilation blows on the automatic position. You can only adapt the ventilation speed with the remote control.
- LED display
Will show het temperature selections. When the "dry or "fan" mode is selected, the display will show the room temperature.
REMOTE CONTROL
When using the remote control make sure that you always aim it towards the apparatus. If you don't do this, you can briefly aim the remote control towards the apparatus and press the ON-OFF button.
When the apparatus receives a signal of the remote control you hear a beep. The remote control must be used within an eight-metre radius around the apparatus.
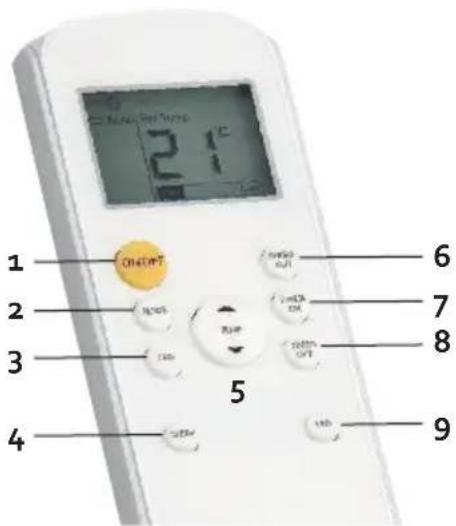
- ON/OFF touch
To turn the unit off or on.
- MODE-touch
With this touch you can select the desired function. Every time when pressing this touch the function will change: COOL – DRY – FAN. The related indication light will turn on on the control panel.
- FAN touch
With this touch you can select the fan speed: LOW >> - HIGH >>>>> - AUTO.
- SLEEP touch
You can use this touch for activating the "sleep" mode.
When pressing the “sleep” touch, the selected temperature will be elevated with 1^ C after 30 min. After another 30 min the temperature will increase with another 1^ C. The air conditioning will maintain this temperature for 7 hours. After this time, the air conditioning will go back to the original set temperature and the “sleep” function will end.
NOTE: this function cannot be selected with the "fan" or "dry" function.
5. TEMP touch
Use these touches to select the temperature. The temperature can be set between 17^ C and 30^ C. When pressing both buttons at the same time you can switch between “°C” or “°F”.
6. SHORT CUT touch
With this button you can fix and switch on a preferential setting.
7. TIMER ON touch
With this function you can select when the unit must turn on.
8. TIMER OFF touch
With this function you can select when the unit must turn off.
9. LED touch
This button turns off the control panel's LED display. This can be used if the display gives too much light when you want to sleep. If you press the button a second time, the display will switch on again.
SET FUNCTIONS
AUTO
In the AUTO function, the apparatus automatically chooses the right setting depending on the chosen temperature. This setting can also be chosen with the remote control.
- Choose AUTO with the MODE button on the remote control.
- Set the desired temperature with the TEMP button. The apparatus will determine the setting accordingly.
You cannot adapt the speed of the ventilation (FAN) in AUTO modus.
COOL

With the COOL function you can cool the room up to a certain temperature.
- Press the MODE button until the COOL indicator lamp is on.
- Use the "+" and "-" buttons on the control panel or the TEMP button on the remote control to set the desired room temperature.
- Use the FAN button on the remote control to set the desired ventilation speed. There are three settings: LOW >>>, HIGH >>>>>> and AUTO.
DRY

With this function you can dehumidify the room. Keep windows and doors closed for this function.
- Press the MODE button until the DRY indicator lamp is on.
- Use the "+" and "-" buttons on the control panel or the TEMP button on the remote control to set the desired room temperature.
- You cannot set the ventilation speed in this setting.
FAN

- Press the MODE button until the FAN indicator lamp is on.
- Press the FAN button of the remote control to set the ventilation speed. There are three settings: LOW >>>, HIGH >>>>>> and AUTO.
- The temperature cannot be adjusted.
Timer on
With this function you can delay the start of the apparatus, up to maximum 24 hours.
- Press the TIMER ON button on the remote control.
- You can now read on the display of the remote control when the air conditioning will go on.
- Press the TIMER ON button several times to increase the time. Or keep the button pressed.
- Once the desired time is set, you will see "Timer on" on the display of the remote control. Two lights will light up on the control panel's display.
- If you want to switch off the timer, press the TIMER ON button several times until the counter goes to "o". Or keep the button pressed.
Timer off
With this function you can switch off the apparatus automatically after some time.
- Press the TIMER OFF button on the remote control.
- You can now read on the display of the remote control when the air conditioning will go off.
- Press the TIMER OFF button several times to increase the time. Or keep the button pressed.
- Once the desired time is set, you will see "Timer off" on the display of the remote control. Two lights will light up on the control panel's display.
- If you want to switch off the timer, press the TIMER OFF button several times until the counter goes to "o".
Timer on + Timer off
You can also switch on both functions simultaneously. This determines when you switch on the apparatus, but also when the apparatus switches off.
Please note: this time is always from the hour when you programme the setting. For example: it is now 1 pm. You want the apparatus to work from 4:30 to 6 pm. Set the TIMER ON on 3.5 h and TIMER OFF on 5.0 h.
Sleep
When pressing the “sleep” touch, the selected temperature will be elevated with 1^ C after 30 min. After another 30 min the temperature will increase with another 1^ C. The air conditioning will maintain this temperature for 7 hours. After this time, the air conditioning will go back to the original set temperature and the “sleep” function will end.
NOTE: this function cannot be selected with the "fan" or "dry" function.
Shortcut
With this button you can set and switch on a preferential setting.
If you use a certain setting more often, you can set this by pressing the SHORTCUT button for three seconds. The apparatus then remembers the settings that are switched on at the moment of pressing. These settings can include: the user setting (MODE), set temperature, ventilation speed (FAN) and possibly also the SLEEP setting.
The moment you press the SHORTCUT button, the apparatus will work at the previously determined settings.
CLEANING AND MAINTENANCE
DRAINING
Permanent drain
During the "dry" mode you can use a permanent drainage.
- Remove the drain plug and the rubber top.
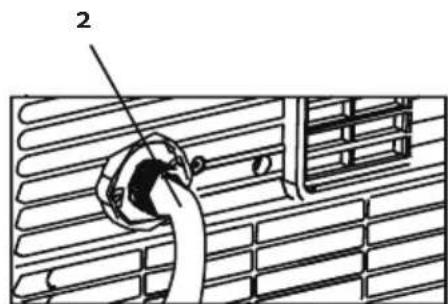
- Attach the drain hose on the drain.
- Make sure the water is drained in a save and permanent way.
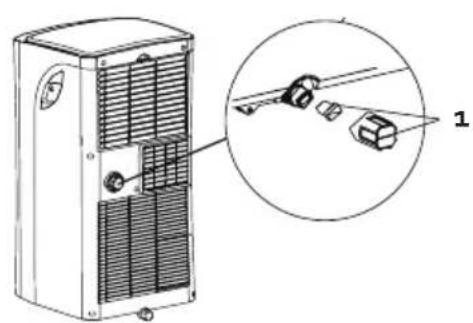

Drain code P1
When you don't use the permanent drain, the non recycled condensation water, will be stored in the water tank.
- When the water tank is full a few beep signals will be heard and on the display the code P1 will appear. The "cool" or "dry" mode will end automatically. The fan will continue to operate, this is normal.
- Move the unit over to a place where you can easily drain the water.
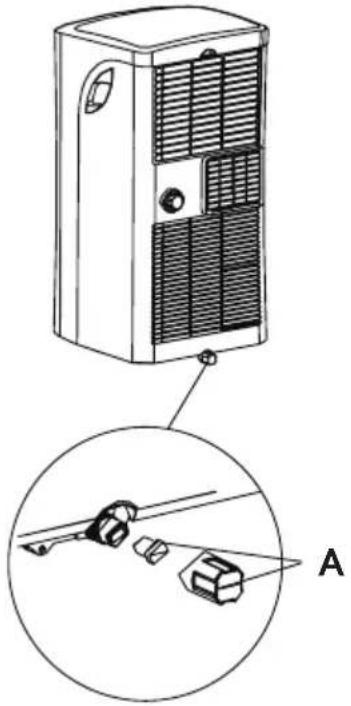
- Remove the drain plug at the bottom of your unit (A) and drain the water.
· After fully draining the water tank, place the drain plug back on the drain opening.
- Restart the unit, make sure the error code P1 is no longer displayed. When the code doesn't disappear, try turning off and on the unit a few times. When the error code continues, please contact the after sales service.
· NOTE : always make sure to install the drain plug, before turning the unit back on.
natural_image
Technical line drawing of a server unit with labeled components, showing internal structure and mounting bracket (no text or symbols present)CLEANING
· Always remove the plug from the socket before cleaning the unit.
· Never use any chemical or abrasive products to clean the unit.
· Never clean the unit with water or any other liquid, this can cause electrocution.
- When the power cord is damaged it must be repaired or replaced by the after sales surface of the manufacturer or by a qualified person.
Air filter
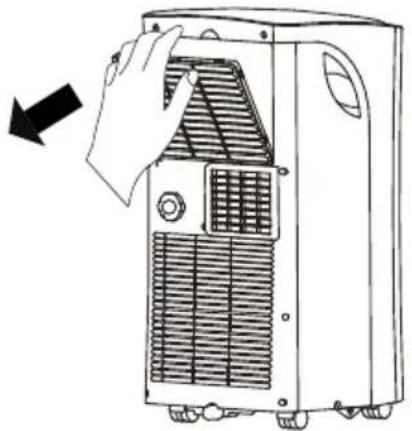
- Clean the air filter at least ever 2 weeks. To make sure the air conditioning can operate in optimal conditions.
· Clean the air filter in lukewarm water with a bit of detergent. Rinse the filter thoroughly and let it dry.
- Make sure the filter is completely dry before placing it back in to the air conditioning.
natural_image
Line drawing of a hand opening a portable air conditioner unit with cooling fins and ventilation slots (no text or symbols)Air conditioning body
Use a damp, soft cloth and a bit of mild detergent, to clean the outside of the unit. Make sure the unit is thoroughly dried afterwards.
Storing
Before storing the unit for a longer period of time, please follow the next steps:
- Drain all the water from the appliance.
· Afterwards turn on the unit in the "fan" mode for half a day. Make sure the unit is placed in a heated room. This will dry the unit completely and prevent the forming of mold. - Turn off the unit, remove the plug from the socket and remove the batteries from the remote control.
- Clean the filters and place them back in the unit.
- Store the unit in a dry, dark place.
POSSIBLE PROBLEMS AND THEIR SOLUTIONS
The appliance isn't working when pressing the on/off touch.
- The error code P1 is displayed, drain the water from the air conditioning.
- The room temperature is lower than the selected temperature. Adjust the selected temperature.
The room is not cool enough.
- The windows and doors aren't closed. Make sure all windows and doors are closed.
- There are heat sources in the room. Remove all heat sources if possible.
- The air outlet hose is not connected or blocked. Attach the hose and check if there is no blockage.
· The selected temperature is too high. Adjust the selected temperature.
· The air filter is dirty. Clean the air filter.
The appliance is making too much noise or is causing vibrations.
· The floor is not level or flat. Place the appliance on the flat and level surface if possible.
· The air filter is dirty. Clean the air filter.
Your appliance makes a gurgling sound
· The sound is produced by the refrigerant in your appliance, this is normal.
ERROR CODES
Following error codes can be displayed on your air conditioning :
E1: the sensor for the room temperature is not working. Turn off the unit and remove the plug from the socket. Wait for 10 sec and plug the unit back in. Turn on the unit. When the error codes repeats, you need to contact the after sales service.
E2: The sensor of the dehumidifier doesn't work. Turn off the unit and remove the plug from the socket. Wait for 10 sec and plug the unit back in. Turn on the unit. When the error codes repeats, you need to contact the after sales service.
E4: The display is not functioning properly. Remove the plug from the socket. Wait for 10 seconds. Plug the unit back in. When the error codes repeats, you need to contact the after sales service.
P1: The water tank is full. Connect the drain hose to the bottom drain and remove the water. When the error codes repeats, you need to contact the after sales service.
ENVIRONMENTAL GUIDELINES
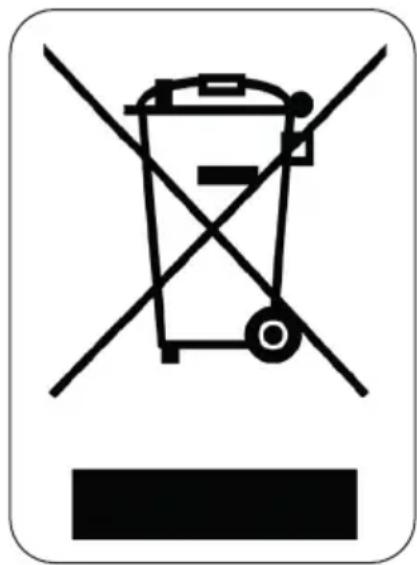
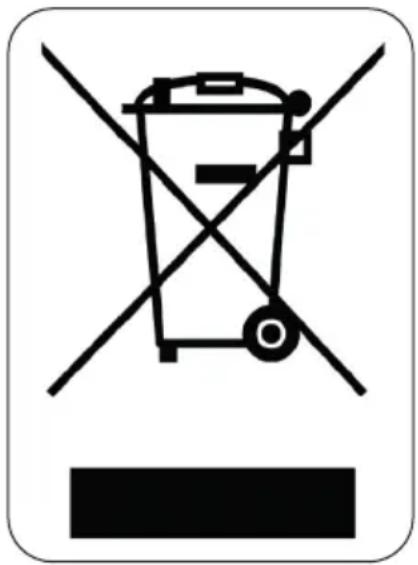
This symbol on the product or on its packaging indicates that this product may not be treated as household waste. Instead it must be brought to the applicable collection point for recycling of electrical and electronic equipment. By ensuring this product is disposed of correctly, you will help prevent potential negative consequences for the environment and human health, which could otherwise be caused by inappropriate waste handling of this product. For more detailed information about recycling of this product, please contact your local city office, your household waste disposal service or the shop where you purchased the product.
natural_image
Recycling symbol icon with three chasing arrows inside a rounded square (no text or labels)The packaging is recyclable. Please treat the packaging ecologically.
GARANTIA
natural_image
White industrial air conditioner unit with ventilation slots and a digital display (no visible text or symbols)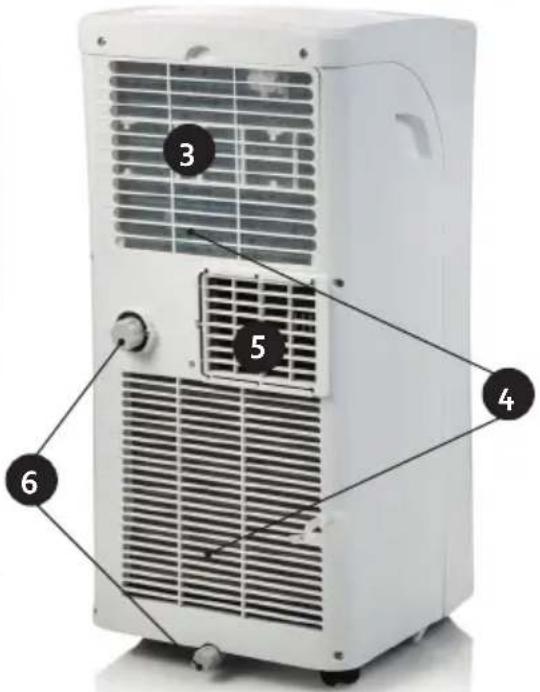
Piezas
natural_image
Simple curved line with a black circle containing the number 7 (no text or symbols on the line itself)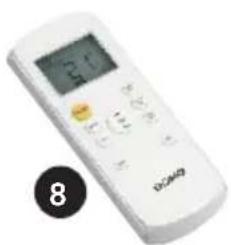
natural_image
White remote control device with digital display and control buttons (no visible text or symbols)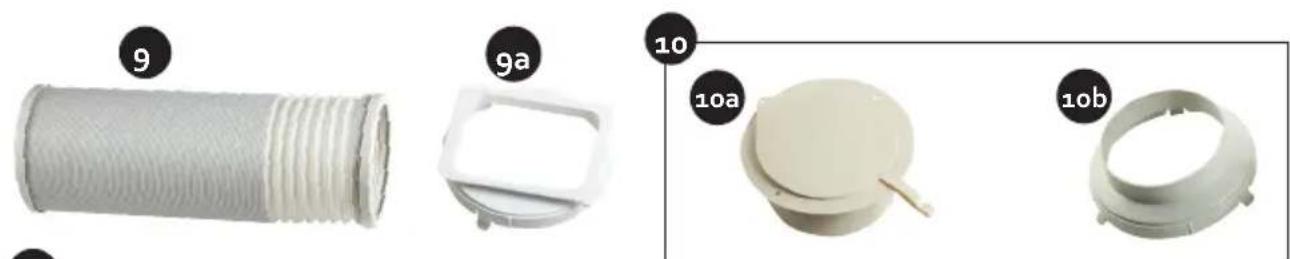
natural_image
Product images of various plastic components including a coiled tube, plastic holder, lid, and ring (no text or symbols visible)
natural_image
Product display image showing various metal components and parts, including a flat panel, coiled cable, and metal sheet (no text or symbols visible)INSTALACIÓN
natural_image
Illustration of a coiled, twisted cable or filament with no text or symbols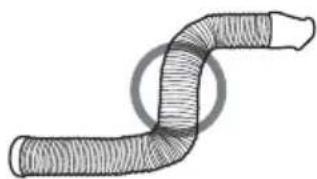
natural_image
Diagram of a coiled tube or pipe with hatched fill, no text or symbols presentnatural_image
Diagram showing a mechanical joint before and after assembly, with no visible text or symbolsnatural_image
Two technical illustrations showing a pipe insertion into a window, with no visible text or symbols.natural_image
Diagram showing a mechanical joint before and after assembly, with no visible text or symbolsnatural_image
Technical line drawing of a server rack with a magnified inset showing mechanical components (no text or symbols)
natural_image
Technical diagram of a server rack unit with labeled components, showing internal structure and mounting bracket (no text or symbols present)LIMPIEZA
natural_image
Line drawing of a hand opening a portable air conditioner unit with ventilation grilles (no text or symbols)natural_image
Recycling symbol with three chasing arrows inside a rounded square (no text or labels)natural_image
Coiled white plastic tube with coiled edges, no visible text or symbols9a
10
10a
10b
11
11a
natural_image
Plain white rectangular object with a small crack on top (no text or symbols)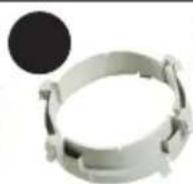
natural_image
Close-up of a black plastic roller with a circular inset showing a separate circular object (no text or symbols visible)11d
INSTALLAZIONE
natural_image
Three hand-drawn illustrations of a coiled tube or pipe, showing different internal structures (no text or symbols)natural_image
Diagram showing a mechanical joint before and after assembly, with no visible text or symbolsnatural_image
Two technical illustrations showing a pipe insertion into a window frame, no text or symbols presentnatural_image
Diagram showing a mechanical joint before and after assembly, with no visible text or symbolsnatural_image
Technical line drawing of a server unit with a magnified inset showing internal components (no text or symbols)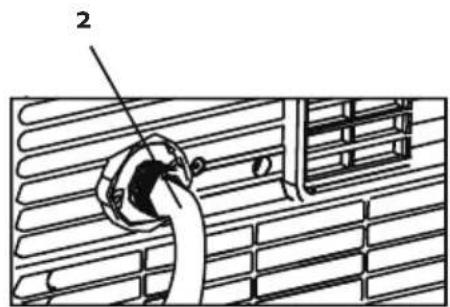
natural_image
Technical diagram of a server unit with labeled components, showing internal structure and mounting bracket (no text or symbols present)PULIZIA
natural_image
Line drawing of a hand opening a refrigerated air conditioner unit with cooling fins (no text or symbols)Alloggiamento
natural_image
Recycling symbol icon with three chasing arrows forming a triangle (no text or labels)natural_image
White industrial air conditioner unit with ventilation slots and a numbered label (1 and 2) on top, no visible text or symbols on the device itself.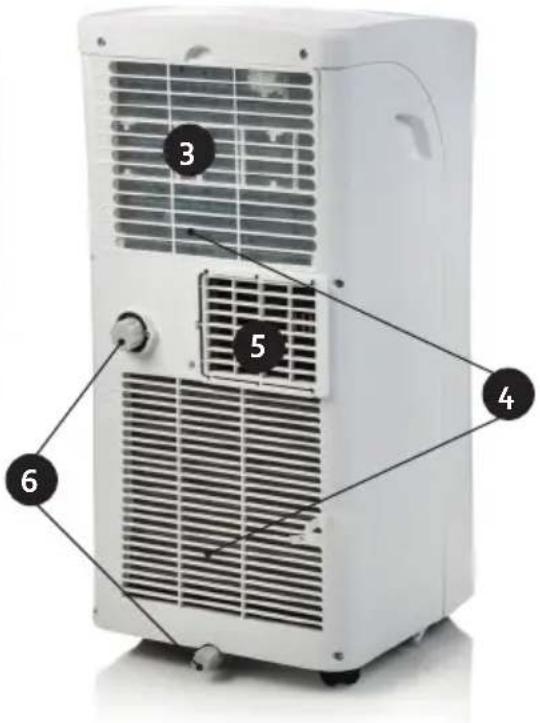
Části
natural_image
Simple curved line with a black circle containing the number 7 (no text or symbols beyond the number)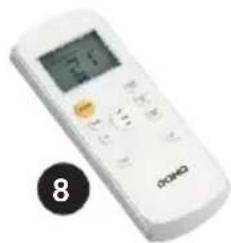
natural_image
White remote control device with digital display and buttons, labeled '8' (no readable text or symbols beyond branding)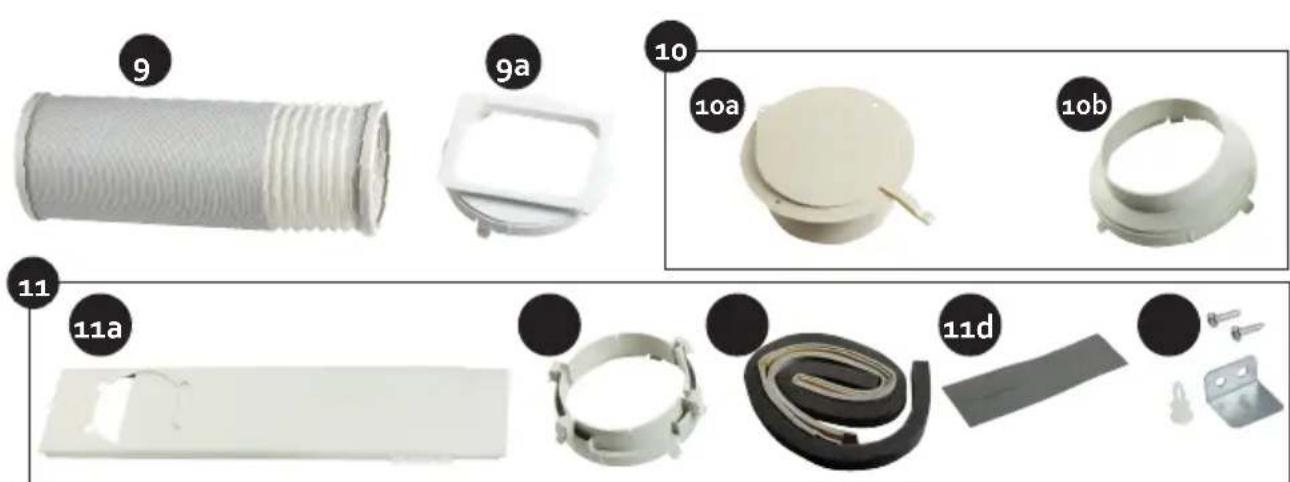
ZAPOJENÍ A INSTALACE
natural_image
Three hand-drawn illustrations of coiled or twisted pipe fittings, no text or symbols presentINSTALACE OKENNÍHO ADAPTÉRU
natural_image
Diagram showing a mechanical joint before and after assembly, with no visible text or symbolsnatural_image
Two-panel illustration showing a pipe insertion into a window, no text or symbols presentINSTALACE NA ZEĐ
natural_image
Diagram showing a mechanical joint before and after assembly, with no visible text or symbolsnatural_image
Technical line drawing of a server unit with a magnified inset showing components (no text or symbols)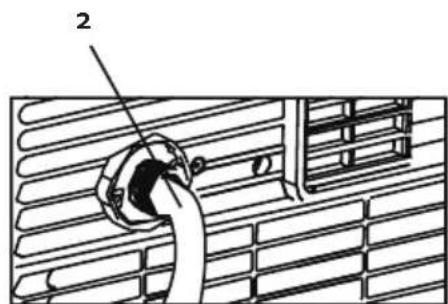
Odtok: kód P1
natural_image
Technical line drawing of a server rack unit with a close-up inset showing its mounting bracket (no text or symbols present)Vzduchový filtr
natural_image
Line drawing of a hand opening a portable air conditioner unit with cooling fan and ventilation grille (no text or symbols)Tělo klimatizace
OHLED NA ŽÍVOTNÍ PROSTŘEDÍ
natural_image
Recycling symbol icon with three chasing arrows forming a triangle (no text or labels)TENTO MANUÁL SI USCHOVAJTE AJ K NEJSKORŠIEMU NAHLIADNUTIU
TIPY NA NIŽŠIE ENERGIE
natural_image
White industrial air conditioner unit with ventilation grilles and a digital display (no visible text or symbols)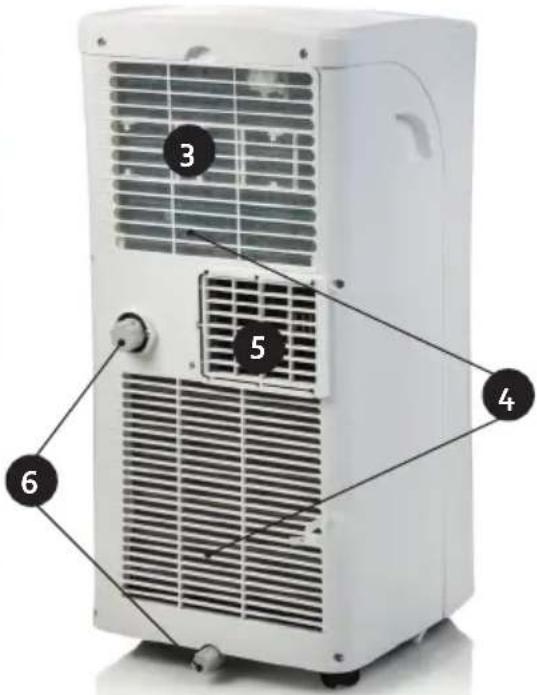
Časti
natural_image
Simple curved line with a black circle containing the number 7 (no text or symbols)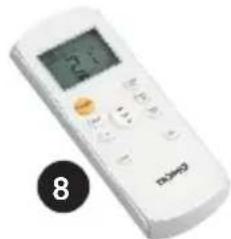
natural_image
White remote control device with digital display and orange button, labeled with number 8 (no readable text or symbols beyond the label)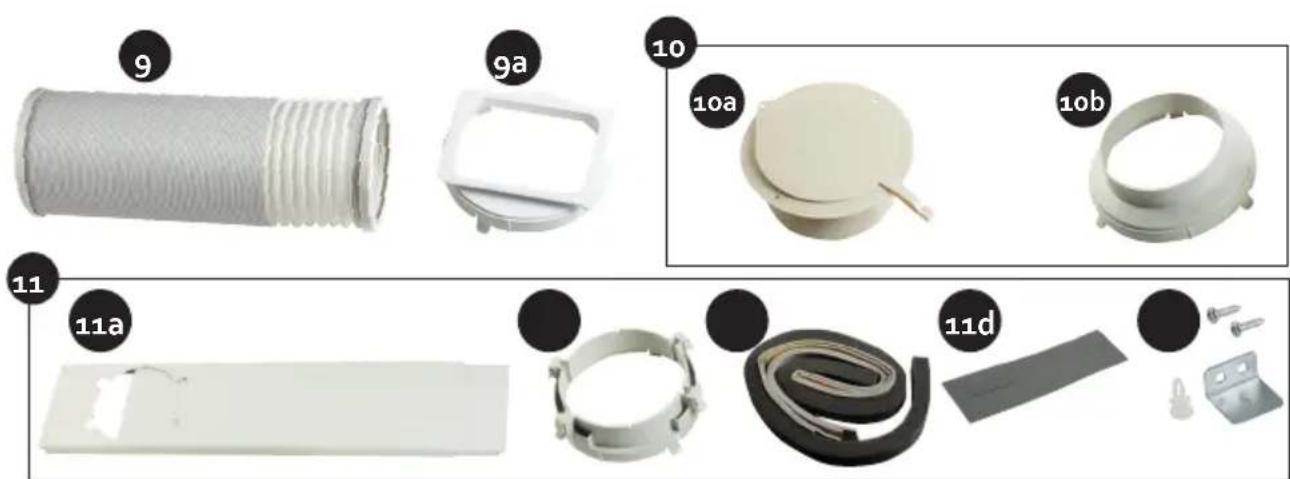
ZAPOJENIE A INŠTALÁCIA
natural_image
Three hand-drawn illustrations of coiled or twisted pipe fittings, no text or symbols presentINŠTALÁCIA OKENNÉHO ADAPTÉRA
natural_image
Diagram showing a mechanical joint before and after assembly, with no visible text or symbolsnatural_image
Two technical illustrations showing a pipe insertion into a window, with no visible text or symbols.INŠTALÁCIA NA STENU
natural_image
Diagram showing a mechanical joint before and after assembly, with no visible text or symbols- Na druhý koniec hadice napevno pripojte koncovku do steny.
· V stene pripravte otvor so zodpovedajúcim rozmerom voči koncovke - Koncovku pripevnite do otvoru v stene a zaistite.
POUŽITIE
- Tlačidlo FUNKCIE (MODE)
Odtok: kód P1
natural_image
Technical line drawing of a server rack unit with a close-up inset showing internal components (no text or symbols)ČISTENIE
natural_image
Line drawing of a hand opening a portable air conditioner unit with ventilation grilles (no text or symbols)Telo klimatizácia
natural_image
Recycling symbol icon with three chasing arrows inside a rounded square (no text or labels)natural_image
Two cylindrical white objects with a small triangular object on top, placed side by side on a plain white background (no text or symbols visible)
natural_image
Three product photos: square-wrapped cards, clear glass coffee maker, and rectangular milk container (no text or symbols visible)of scan hier:
ou scannez ici:
oder hier scannen:
or scan here:


- INSTALLATIE
- INSTALLATIE VAN DE RAAMBEVESTIGING
- INSTALLATIE MUURBEVESTIGING
- Behuizing
- INSTALLATION
- INSTALLATION KIT DE FIXATION À LA FENÊTRE
- INSTALLATION KIT DE FIXATION MURALE
- Vidange code P1
- NETTOYAGE
- Boîtier
- MONTAGE
- MONTAGE DER FENSTER-LUFTABFUHR
- MONTAGE DER WAND-LUFTABFUHR
- Gehäuse
- SAFETY INSTRUCTIONS
- Specific information regarding appliances with R290 refrigerant gas.
- SAVE THESE INSTRUCTIONS
- ENERGY TIPS
- PARTS
- Front
- Back
- INSTALLATION OF THE WINDOW KIT
- INSTALLATION WALL KIT
- USE
- CONTROL PANEL
- REMOTE CONTROL
- TEMP touch
- SHORT CUT touch
- TIMER ON touch
- TIMER OFF touch
- LED touch
- SET FUNCTIONS
- AUTO
- COOL
- DRY
- FAN
- Timer on
- Timer off
- Timer on + Timer off
- Sleep
- Shortcut
- CLEANING AND MAINTENANCE
- DRAINING
- Permanent drain
- Drain code P1
- CLEANING
- Air filter
- Air conditioning body
- Storing
- POSSIBLE PROBLEMS AND THEIR SOLUTIONS
- ERROR CODES
- ENVIRONMENTAL GUIDELINES
- GARANTIA
- Piezas
- INSTALACIÓN
- LIMPIEZA
- INSTALLAZIONE
- PULIZIA
- Alloggiamento
- Části
- ZAPOJENÍ A INSTALACE
- INSTALACE OKENNÍHO ADAPTÉRU
- INSTALACE NA ZEĐ
- Odtok: kód P1
- Vzduchový filtr
- Tělo klimatizace
- OHLED NA ŽÍVOTNÍ PROSTŘEDÍ
- TIPY NA NIŽŠIE ENERGIE
- Časti
- ZAPOJENIE A INŠTALÁCIA
- INŠTALÁCIA OKENNÉHO ADAPTÉRA
- INŠTALÁCIA NA STENU
- POUŽITIE
- ČISTENIE
- Telo klimatizácia
Brand : DOMO
Model : DO266A
Category : Air Conditioning