
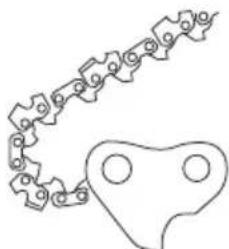
T525 - Saw HUSQVARNA - Free user manual and instructions
Find the device manual for free T525 HUSQVARNA in PDF.

| Product Type | Professional pruning chainsaw |
| Brand | Husqvarna |
| Model | T525 |
| Displacement | 27.0 cm³ |
| Power | 1.1 kW / 9500 rpm |
| Weight (without bar and chain) | 2.7 kg |
| Standard bar length | 10 inches (25 cm) |
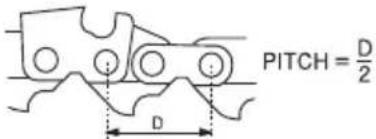
| Chain pitch | 3/8" (9.52 mm) or 1/4" (6.35 mm) |
| Fuel tank capacity | 0.19 liter |
| Chain oil tank capacity | 0.17 liter |
| Idle speed | 2900 rpm |
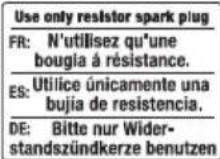
| Spark plug | NGK CMR6A (gap 0.65 mm) |
| Guaranteed sound power level | 111 dB(A) |
| Vibrations (front/rear handle) | 4.2 / 4.9 m/s² |
| Safety equipment | Chain brake, throttle lock, chain catcher, anti-vibration system |
| Power supply | 2-stroke gasoline-oil mixture (1:50) |
| Routine maintenance | Air filter cleaning, carburetor adjustment, chain sharpening, chain brake inspection |
| Common wear parts | Chain, guide bar, spark plug, air filter, fuel filter |
| Intended use | Pruning and tree topping (aerial work by trained operator) |
Frequently Asked Questions - T525 HUSQVARNA
User questions about T525 HUSQVARNA
0 question about this device. Answer the ones you know or ask your own.
Ask a new question about this device
Download the instructions for your Saw in PDF format for free! Find your manual T525 - HUSQVARNA and take your electronic device back in hand. On this page are published all the documents necessary for the use of your device. T525 by HUSQVARNA.
USER MANUAL T525 HUSQVARNA
natural_image
Close-up of a red car hood with an orange logo (no visible text or symbols)Operator's manual, Manuel d'utilisation, Istruzioni per l'uso, Manual de instrucciones, Instruções para o uso, Εγχειρίδιο Χρήσης, Kullanım kılavuzu, Priruãnik
T525
Please read the operator's manual carefully and make sure you understand the instructions before using the machine.
natural_image
Simple line drawing of an open book enclosed in a circle (no text or symbols)EN (1-36)
FR (37-74)
IT (75-110)
ES (1 11 - 146)
PT (147-186)
GR (187-226)
TR (2 27-261)
HR (262-296)
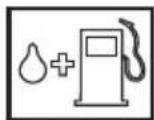
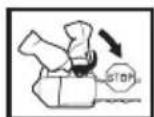
KEY TO SYMBOLS
Symbols on the machine:
WARNING! Chainsaws can be dangerous! Careless or incorrect use can result in serious or fatal injury to the operator or others.
Please read the operator's manual carefully and make sure you understand the instructions before using the machine.
Always wear:
• Approved protective helmet
• Approved hearing protection
- Protective goggles or a visor
This product is in accordance with applicable EC directives.
Noise emission to the environment according to the European Community's Directive. The machine's emission is specified in the Technical data chapter and on the label.
Use appropriate protections for foot-leg and hand-arm.
WARNING! This chainsaw is for use by trained tree-service operators only. Use without proper training can result in severe injuries!
Chain brake, activated (right) Chain brake, not activated (left)
Air purge
Refuelling.
Adjustment of the oil pump
Chain oil fill.
Working position.
2 - English


Choke.
Always use the recommended spark plug type! Use of the wrong spark plug can damage the piston/cylinder. Check that the spark plug is fitted with a suppressor.
Other symbols/decals on the machine refer to special certification requirements for certain markets.
Symbols in the operator's manual:
Switch off the engine before carrying out any checks or maintenance.
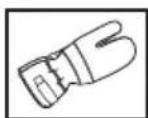
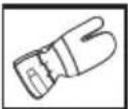
Always wear approved protective gloves.
Regular cleaning is required.
Visual check.
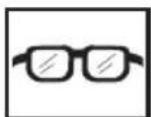
Protective goggles or a visor must be worn.
Refuelling.
Filling with oil and adjusting oil flow.
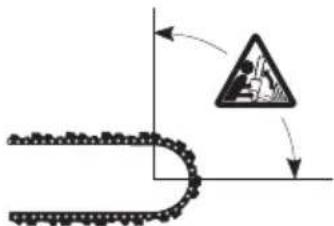
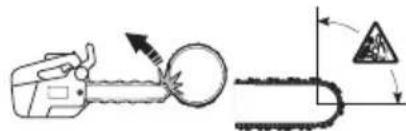
WARNING! Kickback may occur when the nose or tip of the guide bar touches an object, and cause a lightning fast reverse reaction, kicking the guide bar up and towards the operator. May cause serious personal injury.


CONTENTS
Contents
KEY TO SYMBOLS
Symbols on the machine: 2
Symbols in the operator's manual: 2
CONTENTS
Contents 3
INTRODUCTION
Dear Customer, 4
WHAT IS WHAT?
What is what on the chainsaw? 5
GENERAL SAFETY PRECAUTIONS
Before using a new chainsaw 6
Important 6
Always use common sense 7
Personal protective equipment 7
Machine's safety equipment 7
Cutting equipment 11
ASSEMBLY
Fitting the bar and chain 17
FUEL HANDLING
Fuel 18
Fueling 19
Fuel safety 19
STARTING AND STOPPING
Starting and stopping 20
Starting 20
WORKING TECHNIQUES
Basic safety rules 23
Before use: 23
General working instructions 23
How to avoid kickback 26
MAINTENANCE
General 27
Carburettor adjustment 27
Checking, maintaining and servicing chainsaw safety equipment 28
Muffler 30
Starter housing 30
Air filter 31
Spark plug 32
Adjustment of the oil pump 32
Cooling system 32
Trouble shooting 33
Maintenance schedule 34
TECHNICAL DATA
Technical data 35
Guide bar and saw chain combinations 36
Saw chain filing and file gauges 36
EC Declaration of Conformity 36
INTRODUCTION
Dear Customer,
Congratulations on your choice to buy a Husqvarna product! Husqvarna is based on a tradition that dates back to 1689, when the Swedish King Karl XI ordered the construction of a factory on the banks of the Husqvarna River, for production of muskets. The location was logical, since water power was harnessed from the Huskvarna River to create the water-powered plant. During the more than 300 years in existence, the Husqvarna factory has produced a lot of different products, from wood stoves to modern kitchen appliances, sewing machines, bicycles, motorcycles etc. In 1956, the first motor driven lawn mowers appeared, followed by chainsaws in 1959, and it is within this area Husqvarna is working today.
Today Husqvarna is one of the leading manufacturers in the world of forest and garden products, with quality as our highest priority. The business concept is to develop, manufacture and market motor-driven products for forestry and gardening, as well as for the building and construction industry. Husqvarna's aim is also to be at the front edge for ergonomics, usability, security and environmental protection. That is the reason why we have developed many different features to add to our products within these areas.
We are convinced that you will appreciate with great satisfaction the quality and performance of our product for a very long time to come. The purchase of one of our products gives you access to professional help with repairs and service whenever this may be necessary. If the retailer who sells your machine is not one of our authorized dealers, ask for the address of your nearest servicing dealer.
It is our wish that you will be satisfied with your product and that it will be your companion for a long time. Think of this operator's manual as a valuable document. By following its content (usage, service, maintenance, etc), the life span and the second-hand value of the machine can be extended. If you sell this machine, make sure that the operator's manual is passed on to the buyer.
Thank you for using a Husqvarna product.
Husqvarna AB has a policy of continuous product development and therefore reserves the right to modify the design and appearance of products without prior notice.
WHAT IS WHAT?
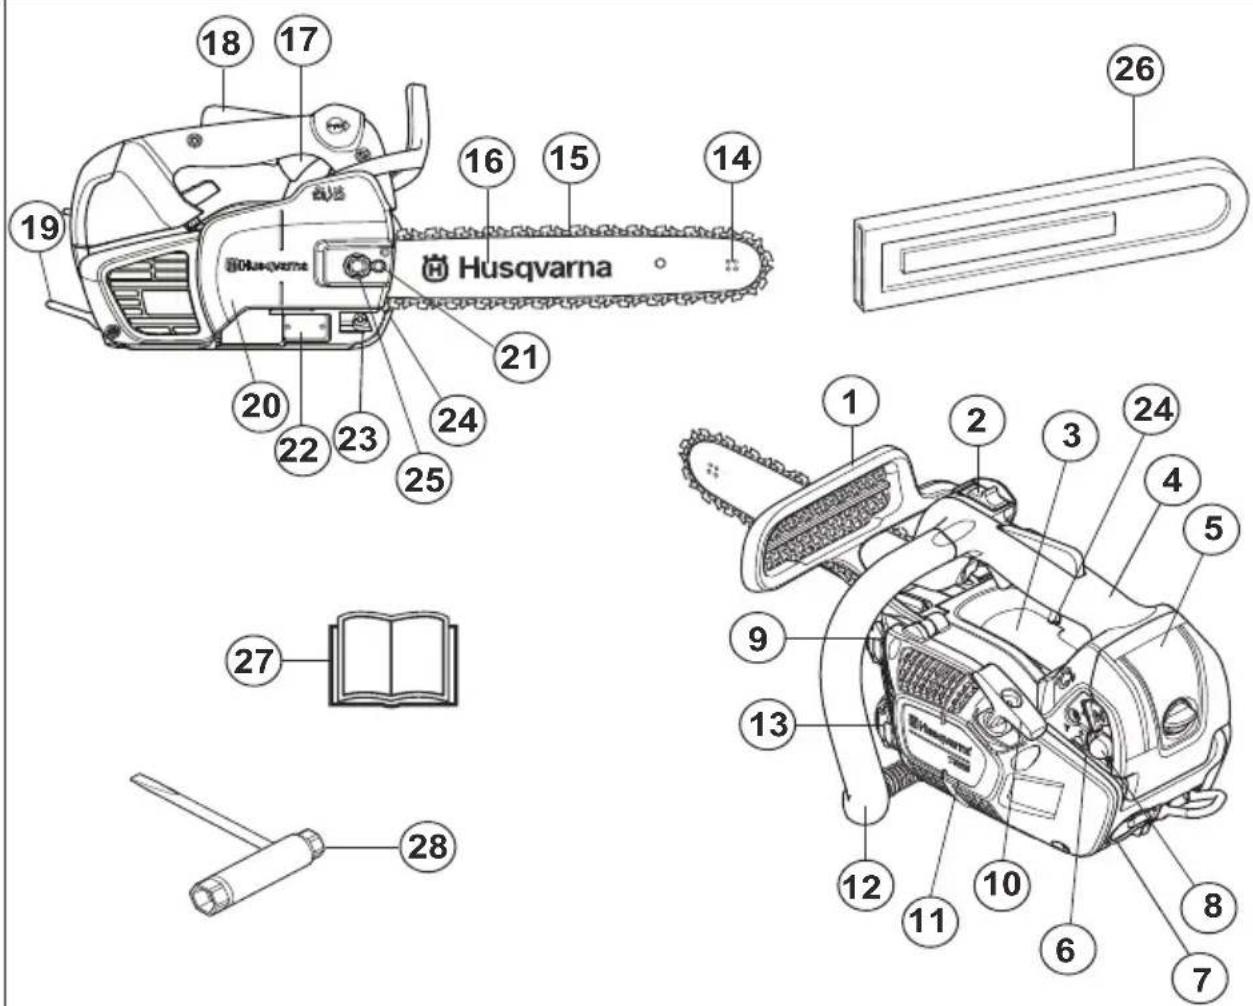
What is what on the chainsaw?
1 Front hand guard
2 Stop switch
3 Information and warning decal
4 Top handle
5 Filter cover
6 Choke control
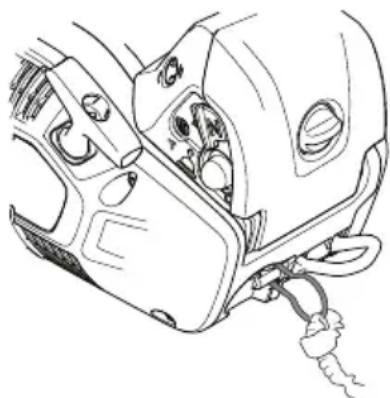
7 Rope eyelet
8 Air purge
9 Fuel tank
10 Starter handle
11 Starter housing
12 Front handle
13 Chain oil tank
14 Bar tip sprocket
15 Saw chain
16 Guide bar
17 Throttle trigger
18 Throttle trigger lockout
19 Belt eyelet
20 Clutch cover
21 Chain tensioning screw
22 Product and serial number plate
23 Chain catcher
24 Oil pump adjustment screw
25 Bar nut
26 Guide-bar cover
27 Operator's manual
28 Combination spanner
Before using a new chainsaw
- Please read this manual carefully.
- Check that the cutting equipment is correctly fitted and adjusted. See instructions under the heading Assembly.
- Refuel and start the chainsaw. See the instructions under the headings Fuel Handling and Starting and Stopping.
- Do not use the chainsaw until sufficient chain oil has reached the chain. See instructions under the heading Lubricating cutting equipment.
- Long-term exposure to noise can result in permanent hearing impairment. So always use approved hearing protection.

WARNING! Under no circumstances may the design of the machine be modified without the permission of the manufacturer. Always use original accessories. Non-authorized modifications and/or accessories can result in serious personal injury or the death of the operator or others.

WARNING! A chainsaw is a dangerous tool if used carelessly or incorrectly and can cause serious, even fatal injuries. It is very important that you read and understand the contents of this operator's manual.

WARNING! The inside of the muffler contain chemicals that may be carcinogenic. Avoid contact with these elements in the event of a damaged muffler.

WARNING! Long term inhalation of the engine's exhaust fumes, chain oil mist and dust from sawdust can represent a health risk.

WARNING! This machine produces an electromagnetic field during operation. This field may under some circumstances interfere with active or passive medical implants. To reduce the risk of serious or fatal injury, we recommend persons with medical implants to consult their physician and the medical implant manufacturer before operating this machine.
Important
IMPORTANT!
This chainsaw for tree-service is designed for pruning and dismantling standing tree crowns.
You should only use the saw with the bar and chain combinations we recommend in the chapter Technical data.
National regulation can restrict the use of the machine.
Never use the machine if you are fatigued, while under the influence of alcohol or drugs, medication or anything that could affect your vision, alertness, coordination or judgement.
Wear personal protective equipment. See instructions under the "Personal protective equipment" heading.
Do not modify this product or use it if it appears to have been modified by others.
Never use a machine that is faulty. Carry out the safety checks, maintenance and service instructions described in this manual. Some maintenance and service measures must be carried out by trained and qualified specialists. See instructions under the Maintenance heading.
Never use any accessories other than those recommended in this manual. See instructions under the headings Cutting equipment and Technical data.
CAUTION! Always wear protective glasses or a face visor to reduce the risk of injury from thrown objects. A chainsaw is capable of throwing objects, such as wood chips, small pieces of wood, etc, at great force. This can result in serious injury, especially to the eyes.

WARNING! Running an engine in a confined or badly ventilated area can result in death due to asphyxiation or carbon monoxide poisoning.

WARNING! Faulty cutting equipment or the wrong combination of bar and saw chain increases the risk of kickback! Only use the bar/saw chain combinations we recommend, and follow the filing instructions. See instructions under the heading Technical data.
GENERAL SAFETY PRECAUTIONS
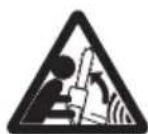
Always use common sense
It is not possible to cover every conceivable situation you can face when using a chainsaw. Always exercise care and use your common sense. Avoid all situations which you consider to be beyond your capability. If you still feel uncertain about operating procedures after reading these instructions, you should consult an expert before continuing. Do not hesitate to contact your dealer or us if you have any questions about the use of the chainsaw. We will willingly be of service and provide you with advice as well as help you to use your chainsaw both efficiently and safely.

natural_image
Illustration of a person falling off a tree with a diagonal no-smoking symbol (no text or labels)Work is constantly in progress to improve the design and technology - improvements that increase your safety and efficiency. Visit your dealer regularly to see whether you can benefit from new features that have been introduced.
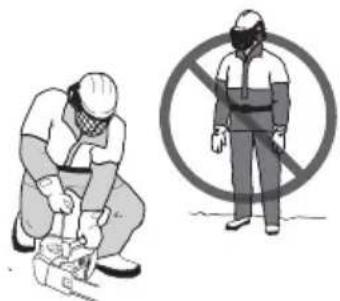
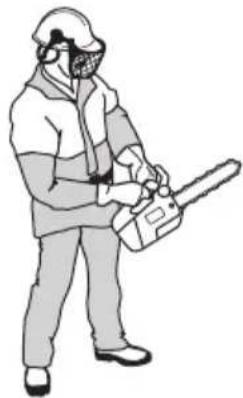
Personal protective equipment

WARNING! Most chainsaw accidents happen when the chain touches the operator. You must use approved personal protective equipment whenever you use the machine. Personal protective equipment cannot eliminate the risk of injury but it will reduce the degree of injury if an accident does happen. Ask your dealer for help in choosing the right equipment.
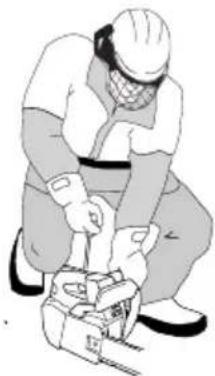
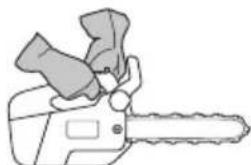
CAUTION! Never use a chainsaw by holding it with one hand. A chainsaw is not safely controlled with one hand; you can cut yourself. Always have a secure, firm grip around the handles with both hands.

natural_image
Illustration of a person wearing full-body protective gear and a first aid kit (no text or symbols)- Protective helmet (approved according to EN 12492)
- Hearing protection
- Protective goggles or a visor
• Gloves with saw protection
• Trousers with saw protection
- Use appropriate protections for arm.
• Boots with saw protection, steel toe-cap and non-slip sole
• Always have a first aid kit nearby.
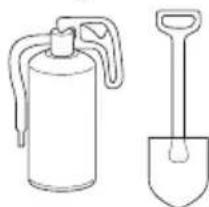
• Fire Extinguisher and Shovel
natural_image
Line drawing of two objects: a fire extinguisher and a manual shov (no text or symbols)Generally clothes should be close-fitting without restricting your freedom of movement.
IMPORTANT! Sparks can come from the muffler, the bar and chain or other sources. Always have fire extinguishing tools available if you should need them. Help prevent forest fires.
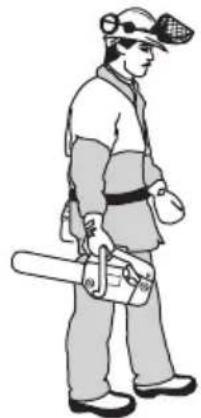
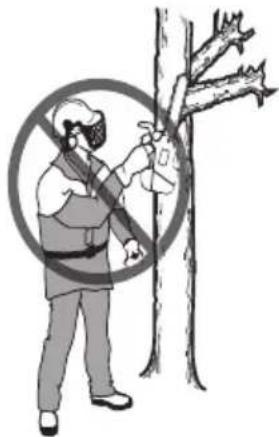
This top handle chainsaw is designed specifically for tree surgery and maintenance in the tree. Due to the special compact handle design (closely spaced handles), there is an increased risk of losing control. For this reason these special chainsaws should be used only for work in a tree by persons who are trained in special cutting and working techniques and who are properly secured (lift bucket, ropes, safety harness). Regular chainsaws (with wider spaced handles) are recommended for all other cutting work at ground level.

WARNING! Working in a tree requires the use of special cutting and working techniques which must be observed in order to reduce the increased risk of personal injury. Never work in a tree unless you have received specific, professional training for such work, including training in the use of safety and other climbing equipment, such as harnesses, ropes, belts, climbing irons, snap hooks, carabiners, etc.
Machine's safety equipment
In this section the machine's safety features and their function are explained. For inspection and maintenance see instructions under the heading Checking, maintaining and servicing chainsaw safety equipment. See instructions under the heading, What is what?, to find where these parts are located on your machine.
The life span of the machine can be reduced and the risk of accidents can increase if machine maintenance is not carried out correctly and if service and/or repairs are not
GENERAL SAFETY PRECAUTIONS
carried out professionally. If you need further information please contact your nearest service workshop.

WARNING! Never use a machine with defective safety components. Safety equipment must be inspected and maintained. See instructions under the heading Checking, maintaining and servicing chainsaw safety equipment. If your machine does not pass all the checks, take the saw to a servicing dealer for repair.
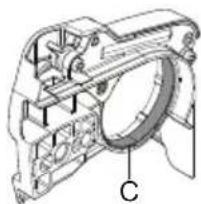
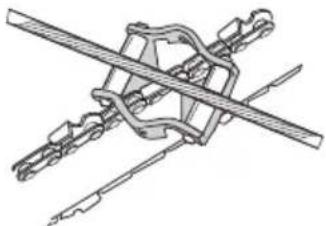
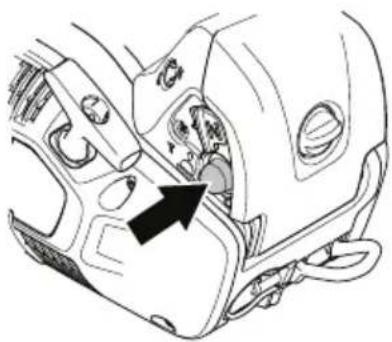
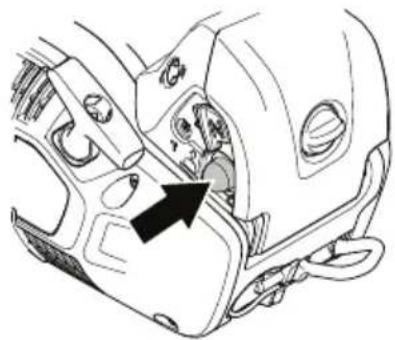
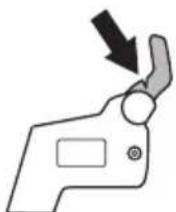
Chain brake and front hand guard
Your chainsaw is equipped with a chain brake that is designed to stop the chain if you get a kickback. The chain brake reduces the risk of accidents, but only you can prevent them.
natural_image
Line drawing of a manual chain saw (no text or symbols)Take care when using your saw and make sure the kickback zone of the bar never touches any object.
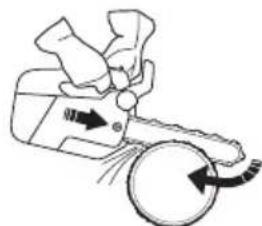
- The chain brake (A) can either be activated manually (by your left hand) or automatically by the inertia release mechanism.
- The brake is applied when the front hand guard (B) is pushed forwards.
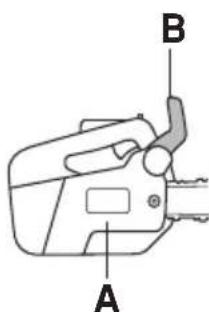

- This movement activates a spring-loaded mechanism that tightens the brake band (C) around the engine drive system (D) (clutch drum).
natural_image
Technical diagram of a mechanical component with labeled parts (no readable text or symbols)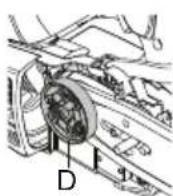
- The front hand guard is not designed solely to activate the chain brake. Another important feature is that it reduces the risk of your left hand hitting the chain if you lose grip of the front handle.
natural_image
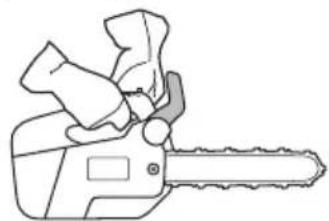
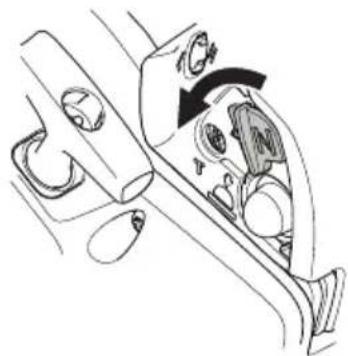
Line drawing of a manual chain saw (no text or symbols)- The chain brake must be engaged when the chainsaw is started to prevent the saw chain from rotating.
- Use the chain brake as a "parking brake" when starting and when moving over short distances, to reduce the risk of moving chain accidentally hitting your leg or anyone or anything close by.
natural_image
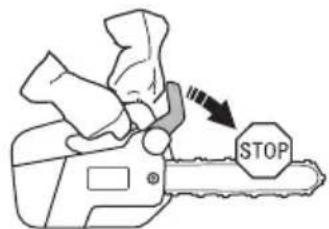
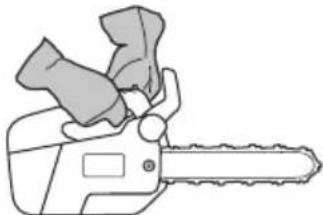
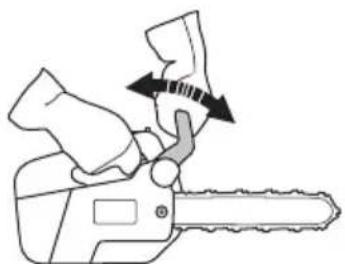
Illustration of a person wearing a helmet and holding a chainsaw (no text or symbols)- To release the chain brake pull the front hand guard backwards, towards the front handle.
natural_image
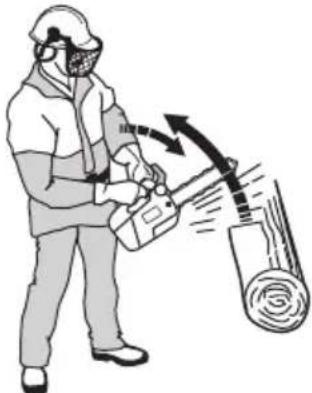
Line drawing of a hand using a chainsaw to lift a piece of material (no text or symbols)- Kickback can be very sudden and violent. Most kickbacks are minor and do not always activate the
chain brake. If this happens you should hold the chainsaw firmly and not let go.
natural_image
Line drawing of a chain-linking tool (no text or symbols)- The way the chain brake is activated, either manually or automatically by the inertia release mechanism, depends on the force of the kickback and the position of the chainsaw in relation to the object that the kickback zone of the bar strikes.
If you get a violent kickback while the kickback zone of the bar is farthest away from you the chain brake is designed to be activated by the inertia in the kickback direction.
natural_image
Illustration of a worker in protective gear using a power shaver to lift a cylindrical device (no text or symbols)If the kickback is less violent or the kickback zone of the bar is closer to you the chain brake will be activated manually by the movement of your left hand.
natural_image
Line drawing of a chainsaw with a hand operating it, showing blade geometry and a black arrow indicating motion (no text or symbols)- In the felling position the left hand is in a position that makes manual activation of the chain brake impossible. With this type of grip, that is when the left hand is placed so that it cannot affect the movement of the front hand guard, the chain brake can only be activated by the inertia action.
natural_image
Illustration of a person bending over a rope with a hand, no text or symbols presentWill my hand always activate the chain brake during a kickback?
No. It takes a certain force to move the hand guard forward. If your hand only lightly touches the front guard or slips over it, the force may not be enough to trigger the chain brake. You should also maintain a firm grip of the chainsaw handles while working. If you do and experience a kickback, your hand may never leave the front handle and will not activate the chain brake, or the chain brake will only activate after the saw has swung around a considerable distance. In such instances, the chain brake might not have enough time to stop the saw chain before it touches you.
There are also certain positions in which your hand cannot reach the front hand guard to activate the chain brake; for example, when the saw chain is held in felling position.
Will my inertia activated chain brake always activate during kickback in the event of a kickback?
No. First your brake must be in working order. Second the kickback must be strong enough to activate the chain brake. If the chain brake is too sensitive it would activate all the time which would be a nuisance.
Will my chain brake always protect me from injury in the event of a kickback?
No. First, the chain brake must be in working order to provide the intended protection. Second, it must be activated during the kickback as described above to stop the saw chain. Third, the chain brake may be activated but if the bar is too close to you the brake might not have enough time to slow down and stop the chain before the chainsaw hits you.
Only you and proper working technique can eliminate kickback and its danger.
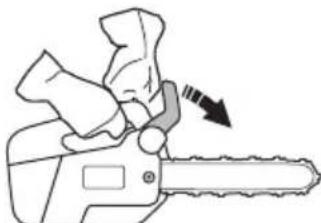
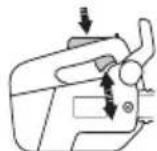
Throttle trigger lockout
The throttle trigger lockout is designed to prevent accidental operation of the throttle trigger. When you press the throttle trigger lockout down (A) (in example when you grasp the handle) it releases the throttle trigger (B). When you let go of the handle, the throttle trigger lockout and the throttle trigger both will return to their default positions. This design locks the throttle trigger at idle setting.

GENERAL SAFETY PRECAUTIONS
Chain catcher
The chain catcher is designed to catch the chain if it snaps or jumps off. This should not happen if the chain is properly tensioned (see instructions under the heading Assembly) and if the bar and chain are properly serviced and maintained (see instructions under the heading General working instructions).
Vibration damping system
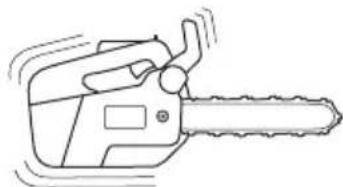
Your machine is equipped with a vibration damping system that is designed to minimize vibration and make operation easier.

natural_image
Line drawing of a chainsaw with motion lines indicating speed (no text or symbols)The machine's vibration damping system reduces the transfer of vibration between the engine unit/cutting equipment and the machine's handle unit. The body of the chainsaw, including the cutting equipment, is insulated from the handles by vibration damping units.
natural_image
Diagram of a car interior showing engine components and directional arrows indicating movement or assembly (no text or labels present)Cutting hardwoods (most broadleaf trees) creates more vibration than cutting softwoods (most conifers). Cutting
with cutting equipment that is blunt or faulty (wrong type or badly sharpened) will increase the vibration level.
natural_image
Simple line drawing of a VR headset with motion lines indicating speed (no text or symbols)
WARNING! Overexposure to vibration can lead to circulatory damage or nerve damage in people who have impaired circulation. Contact your doctor if you experience symptoms of overexposure to vibration. Such symptoms include numbness, loss of feeling, tingling, pricking, pain, loss of strength, changes in skin colour or condition. These symptoms normally appear in the fingers, hands or wrists. These symptoms may be increased in cold temperatures.
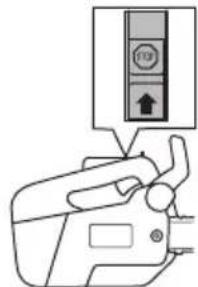
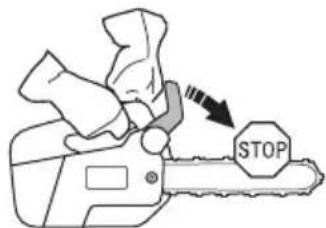
Stop switch
Use the stop switch to switch off the engine.
Muffler
The muffler is designed to keep noise levels to a minimum and to direct exhaust fumes away from the user.
In areas with a hot, dry climate there is a high risk of fires.

WARNING! The exhaust fumes from the engine are hot and may contain sparks which can start a fire. Never start the machine indoors or near combustible material!
CAUTION! The muffler gets very hot during and after use. This also applies during idling. Be aware of the fire hazard, especially when working near flammable substances and/or vapours.

WARNING! Never use a saw without a muffler, or with a damaged muffler. A damaged muffler may substantially increase the noise level and the fire hazard. Keep fire fighting equipment handy.
GENERAL SAFETY PRECAUTIONS
Cutting equipment
This section describes how to choose and maintain your cutting equipment in order to:
- Reduce the risk of kickback.
- Reduce the risk of the saw chain breaking or jumping off the bar.
- Obtain optimal cutting performance.
- Extend the life of cutting equipment.
- Avoid increasing vibration levels.
General rules
- Only use cutting equipment recommended by us! See instructions under the heading Technical data.
- Keep the chain's cutting teeth properly sharpened! Follow our instructions and use the recommended file gauge. A damaged or badly sharpened chain increases the risk of accidents.
- Maintain the correct depth gauge setting! Follow our instructions and use the recommended depth gauge clearance. Too large a clearance increases the risk of kickback.

- Keep the chain properly tensioned! If the chain is slack it is more likely to jump off and lead to increased wear on the bar, chain and drive sprocket.
- Keep cutting equipment well lubricated and properly maintained! A poorly lubricated chain is more likely to break and lead to increased wear on the bar, chain and drive sprocket.
Cutting equipment designed to reduce kickback

WARNING! Faulty cutting equipment or the wrong combination of bar and saw chain increases the risk of kickback! Only use the bar/saw chain combinations we recommend, and follow the filing instructions. See instructions under the heading Technical data.
The only way to avoid kickback is to make sure that the kickback zone of the bar never touches anything.
By using cutting equipment with "built-in" kickback reduction and keeping the chain sharp and well-maintained you can reduce the effects of kickback.
Guide bar
The smaller the tip radius the lower the chance of kickback.
Saw chain
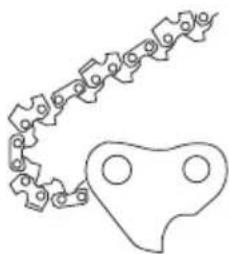
A chain is made up of a number of links, which are available in standard and low-kickback versions.
IMPORTANT! No saw chain design eliminates the danger of kickback.

WARNING! Any contact with a rotating saw chain can cause extremely serious injuries.
Some terms that describe the bar and chain
To maintain the safety features of the cutting equipment, you should replace a worn or damaged bar or chain with a bar and chain combinations recommended by Husqvarna. See instructions under the heading Technical Data for a list of replacement bar and chain combinations we recommend.
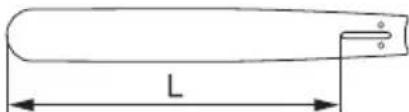
Guide bar
- Length (inches/cm)
• Number of teeth on bar tip sprocket (T).

GENERAL SAFETY PRECAUTIONS
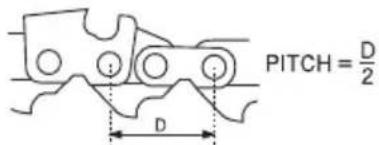
- Chain pitch (inches). The spacing between the drive links of the chain must match the spacing of the teeth on the bar tip sprocket and drive sprocket.
- Number of drive links. The number of drive links is determined by the length of the bar, the chain pitch and the number of teeth on the bar tip sprocket.
natural_image
Pure mechanical linkage diagram without any text, numbers, or symbols- Bar groove width (inches/mm). The groove in the bar must match the width of the chain drive links.
natural_image
Diagram showing a vertical tube inserted into a slot and a tip holding a tool, with no visible text or symbols.- Chain oil hole and hole for chain tensioner. The bar must be matched to the chainsaw design.
Saw chain
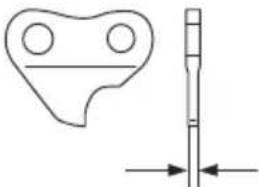
- Chain pitch (inches)
- Drive link width (mm/inches)
natural_image
Pure technical diagram showing a mechanical part with two holes and a vertical rod, no text or symbols present.• Number of drive links.
natural_image
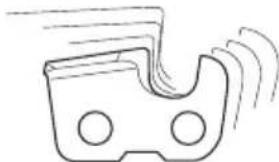
Pure mechanical linkage diagram without any text, numbers, or symbolsSharpening your saw chain and adjusting depth gauge setting
General information on sharpening cutting teeth
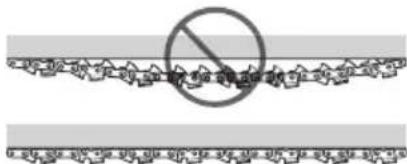
- Never use a blunt chain. When the chain is blunt you have to exert more pressure to force the bar through the wood and the chips will be very small. If the chain is very blunt it will produce wood powder and no chips or shavings.
- A sharp chain eats its way through the wood and produces long, thick chips or shavings.
natural_image
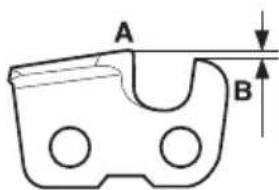
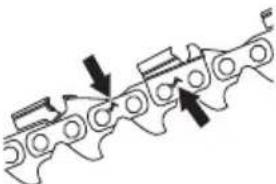
Line drawing of a chain-linking tool with chains and a circular ring (no text or symbols)- The cutting part of the chain is called the cutter and consists of a cutting tooth (A) and the depth gauge (B). The cutters cutting depth is determined by the difference in height between the two (depth gauge setting).
When you sharpen a cutting tooth there are four important factors to remember.
1 Filing angle
natural_image
Technical line drawing of a mechanical tool with an arrow indicating rotation (no text or symbols)2 Cutting angle
3 File position
4 Round file diameter
GENERAL SAFETY PRECAUTIONS
It is very difficult to sharpen a chain correctly without the right equipment. We recommend that you use our file gauge. This will help you obtain the maximum kickback reduction and cutting performance from your chain.
natural_image
Pure mechanical linkage diagram without any text, numbers, or symbolsSee instructions under the heading Technical data for information about sharpening your chain.

WARNING! Departure from the sharpening instructions considerably increases the risk of kickback.
Sharpening cutting teeth

To sharpen cutting teeth you will need a round file and a file gauge. See instructions under the heading Technical data for information on the size of file and gauge that are recommended for the chain fitted to your chainsaw.
natural_image
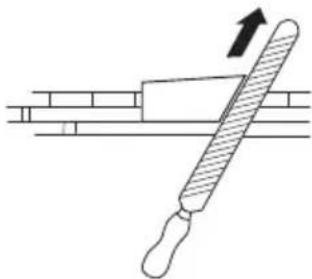
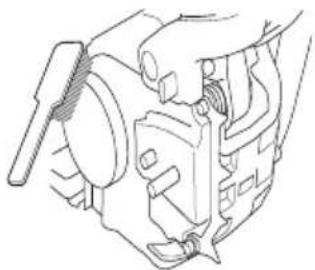
Three technical line drawings of mechanical components: a rod-like tool, a hexagonal bracket, and a multi-pronged bracket (no text or symbols)- Check that the chain is correctly tensioned. A slack chain will move sideways, making it more difficult to sharpen correctly.
• Always file cutting teeth from the inside face. Reduce the pressure on the return stroke. File all the teeth on one side first, then turn the chainsaw over and file the teeth on the other side.
natural_image
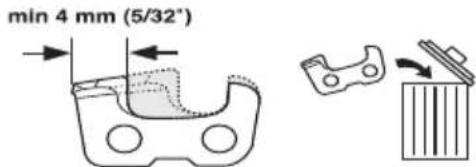
Diagram of a tool pressing down on a brick surface with an arrow indicating motion (no text or symbols)- File all the teeth to the same length. When the length of the cutting teeth is reduced to 4 mm (5/32") the chain is worn out and should be replaced.
General advice on adjusting depth gauge setting
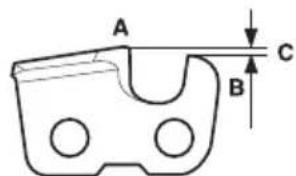
- When you sharpen the cutting tooth (A) the depth gauge setting (C) will decrease. To maintain optimal cutting performance the depth gauge (B) has to be filed down to achieve the recommended depth gauge setting. See instructions under the heading Technical data to find the correct depth gauge setting for your particular chain.

WARNING! The risk of kickback is increased if the depth gauge setting is too large!
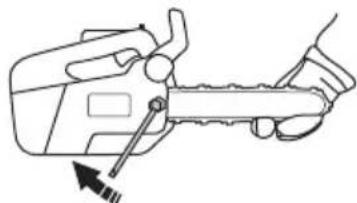
Adjustment of depth gauge setting
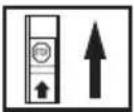
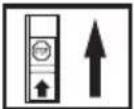
natural_image
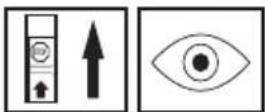
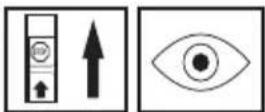
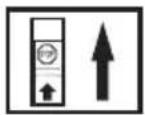
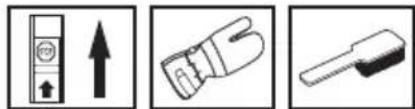
Four black-and-white icons: vertical bar with upward arrow, eye, and palm (no text or symbols)- The cutting teeth should be newly sharpened before adjusting the depth gauge setting. We recommend that you adjust the depth gauge setting every third time you sharpen the cutting teeth. NOTE! This recommendation assumes that the length of the cutting teeth is not reduced excessively.
- You will need a flat file and a depth gauge tool. We recommend that you use our depth gauge tool to achieve the correct depth gauge setting and bevel for the depth gauge.
natural_image
Three technical line drawings of mechanical components: a tool, a bracket, and a clamping device (no text or symbols)- Place the depth gauge tool over the chain. Detailed information regarding the use of the depth gauge tool, will be found on the package for the depth gauge tool. Use the flat file to file off the tip of the depth gauge that protrudes through the depth gauge tool. The depth gauge setting is correct when you no longer feel
GENERAL SAFETY PRECAUTIONS
resistance as you draw the file along the depth gauge tool.
natural_image
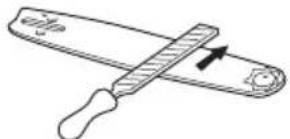
Technical line drawing of a mechanical component with no visible text or symbolsTensioning the saw chain

WARNING! A slack chain may jump off and cause serious or even fatal injury.
The more you use a chain the longer it becomes. It is therefore important to adjust the chain regularly to take up the slack.
Check the chain tension every time you refuel. NOTE! A new chain has a running-in period during which you should check the tension more frequently.
Tension the chain as tightly as possible, but not so tight that you cannot pull it round freely by hand.
natural_image
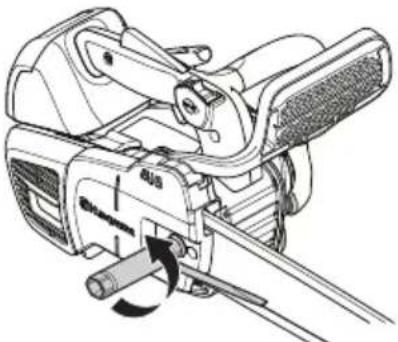
Illustration of two hands holding a cylindrical object with directional arrows indicating movement (no text or symbols)- Loosen the bar nut that holds the clutch cover and chain brake. Use the combination spanner.
natural_image
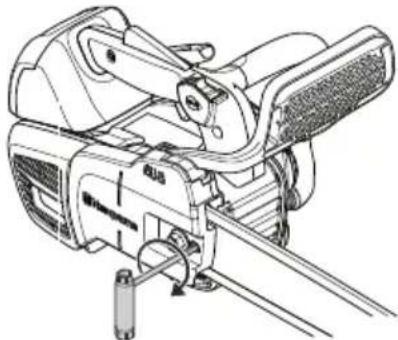
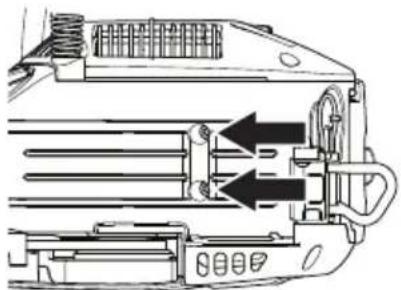
Technical line drawing of a mechanical device with lever and adjustment mechanism (no text or symbols)- Raise the tip of the bar and stretch the chain by tightening the chain tensioning screw using the
combination spanner. Tighten the chain until it does not sag from the underside of the bar.
natural_image
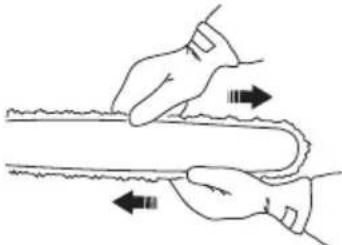
Technical line drawing of a mechanical device with no visible text or symbols- Use the combination spanner to tighten the bar nut while holding up the tip of the bar. Check that you can pull the saw chain round freely by hand, and that there is no slack on the underside of the bar.
natural_image
Illustration of a hand holding a tool with arrows indicating movement or force (no text or symbols present)The position of the chain tensioning screw on our chainsaws varies from model to model. See instructions under the heading What is what? to find out where it is on your model.
Lubricating cutting equipment

WARNING! Poor lubrication of cutting equipment may cause the chain to snap, which could lead to serious, even fatal injuries.
Chain oil
Chain oil must demonstrate good adhesion to the chain and also maintain its flow characteristics regardless of whether it is warm summer or cold winter weather.
As a chainsaw manufacturer we have developed an optimal chain oil which, with its vegetable oil base, is also biodegradable. We recommend the use of our own oil for both maximum chain life and to minimise environmental damage. If our own chain oil is not available, standard chain oil is recommended.
Never use waste oil! Using waste oil can be dangerous to you and damage the machine and environment.
IMPORTANT! When using vegetable based saw chain oil, dismantle and clean the groove in the bar and saw chain before long-term storage. Otherwise there is a risk of the saw chain oil oxidizing, which will result in the saw chain becoming stiff and the bar tip sprocket jamming.
GENERAL SAFETY PRECAUTIONS
Filling with chain oil
- All our chainsaws have an automatic chain lubrication system. On some models the oil flow is also adjustable.
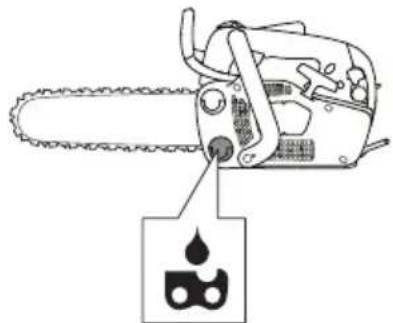
natural_image
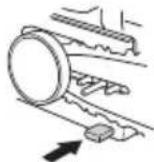
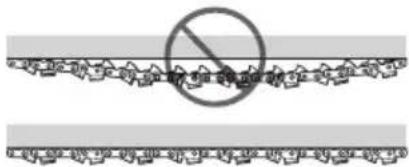
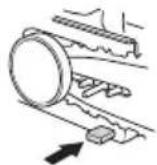
Diagram of a chain drive with a close-up inset showing a water drop symbol (no text or labels)- The saw chain oil tank and the fuel tank are designed so that the fuel runs out before the saw chain oil.
However, this safety feature requires that you use the right sort of chain oil (if the oil is too thin it will run out before the fuel) and that you also use the recommended cutting equipment (a bar that is too long will use more chain oil).
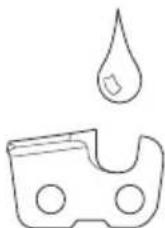
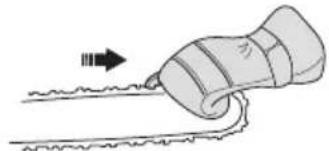
Checking chain lubrication
- Check the chain lubrication each time you refuel.
Aim the tip of the bar at a light coloured surface about 20 cm (8 inches) away. After 1 minute running at 3/4 throttle you should see a distinct line of oil on the light surface.
natural_image
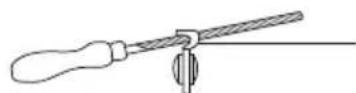
Illustration of a person using a power saw to cut tree bark (no text or symbols)If the chain lubrication is not working:
- Check that the oil channel in the bar is not obstructed. Clean if necessary.
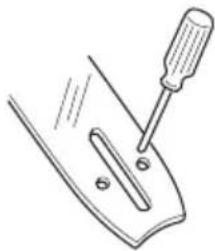
natural_image
Line drawing of a screwdriver inserted into a mechanical component (no text or symbols)- Check that the groove in the edge of the bar is clean. Clean if necessary.
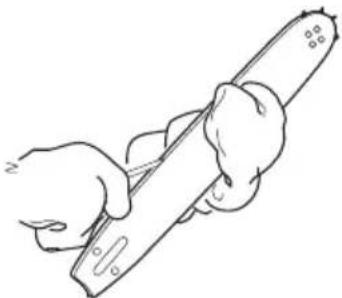
natural_image
Line drawing of a hand holding a tool, no text or symbols present- Check that the bar tip sprocket turns freely and that the lubricating hole in the tip sprocket is not blocked. Clean and lubricate if necessary.

natural_image
Line drawing of a hand holding a smartphone with a pen, no text or symbols presentIf the chain lubrication system is still not working after carrying out the above checks and associated measures you should contact your servicing dealer.
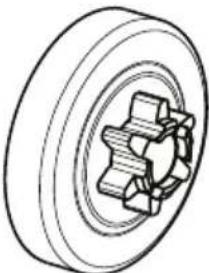
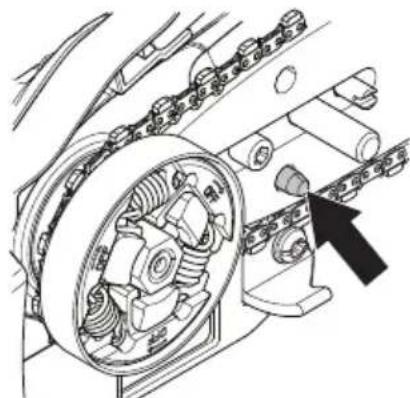
Chain drive sprocket
The clutch drum is fitted with a Spur sprocket (the chain sprocket is welded on the drum).
natural_image
Technical line drawing of a mechanical gear assembly (no text or symbols)Regularly check the degree of wear on the drive sprocket. Replace if wear is excessive. Replace the drive sprocket whenever you replace the chain.
Checking wear on cutting equipment
Check the chain daily for:
natural_image
Pure mechanical linkage diagram without any text, numbers, or symbolsGENERAL SAFETY PRECAUTIONS
• Visible cracks in rivets and links.
- Whether the chain is stiff.
- Whether rivets and links are badly worn.
Replace the saw chain if it exhibits any of the points above.
We recommend you compare the existing chain with a new chain to decide how badly the existing chain is worn.
When the length of the cutting teeth has worn down to only 4 mm the chain must be replaced.
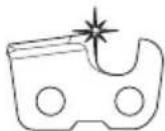
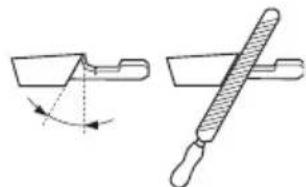
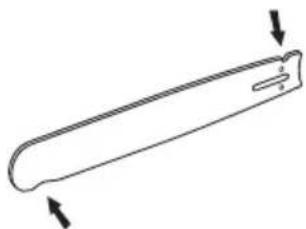
Guide bar
Check regularly:
- Whether there are burrs on the edges of the bar. Remove these with a file if necessary.
natural_image
Line drawing of a pair of sawes with an arrow indicating direction (no text or symbols)- Whether the groove in the bar has become badly worn. Replace the bar if necessary.

- Whether the tip of the bar is uneven or badly worn. If a hollow forms on the underside of the bar tip this is due to running with a slack chain.
natural_image
Simple line drawing of a curved object with two arrows indicating direction (no text or symbols)• To prolong the life of the bar you should turn it over daily.

WARNING! Most chainsaw accidents happen when the chain touches the operator.
Wear personal protective equipment. See instructions under the "Personal protective equipment" heading.
Do not tackle any job that you feel you are not adequately trained for. See instructions under the headings Personal protective equipment, How to avoid kickback, Cutting equipment and General working instructions.
Avoid situations where there is a risk of kickback. See instructions under the heading Machine's safety equipment.
Use the recommended protective equipment and check its condition. See instructions under the headings Technical data and General safety precautions.
Check that all the chainsaw safety features are working. See instructions under the headings General working instructions and General safety precautions.
Never use a chainsaw by holding it with one hand. A chainsaw is not safely controlled with one hand. Always have a secure, firm grip around the handles with both hands.
ASSEMBLY
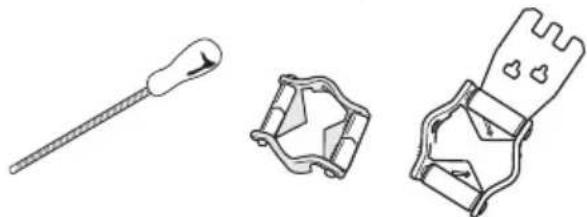
Fitting the bar and chain

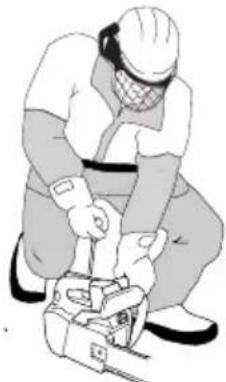
WARNING! Always wear gloves, when working with the chain.
- Check that the chain brake is in disengaged position by moving the front hand guard towards the front handle.
- Unscrew the bar nut and remove the clutch cover (chain brake).
- Make sure that the chain tensioner adjuster pin is in its rearmost position. Fit the bar over the guide bar bolt and locate the chain tensioner adjuster pin in the cut out in the bar.
natural_image
Mechanical assembly diagram showing a motor and gear assembly with no visible text or symbols- Place the chain over the drive sprocket and in the groove in the bar. Begin on the top side of the bar.
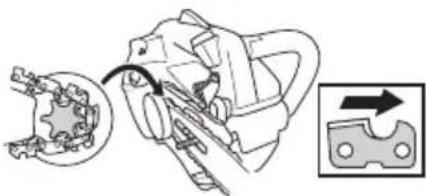
natural_image
Mechanical assembly diagram showing a gear mechanism with a close-up view of the gear (no text or symbols)- Make sure that the edges of the cutting links are facing forward on the top edge of the guide bar.
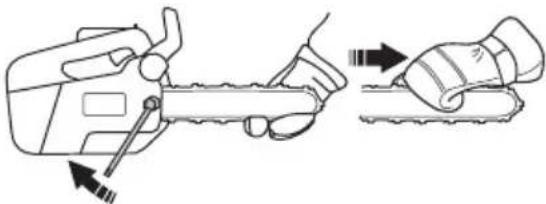
- Check that the drive links of the chain fit correctly on the drive sprocket and that the chain is in the groove on the bar. Fit the clutch cover (chain brake) and tighten the bar nut finger-tight.
- Tension the chain by turning the chain tensioning screw clockwise using the combination spanner. The chain should be tensioned until it does not sag from the underside of the bar. See instructions under the heading Tensioning the chain.
- The chain is correctly tensioned when there is no slack on the underside of the bar, and it can still be turned easily by hand. Tighten the bar nut with the combination spanner while holding up the tip of the bar.
natural_image
Line drawing of a hand holding a chainsaw with a screwdriver, showing mechanical components and a downward arrow (no text or symbols)- When fitting a new chain, the chain tension has to be checked frequently until the chain is run-in. Check the chain tension regularly. A correctly tensioned chain ensures good cutting performance and long life.
natural_image
Illustration of a tool applying material to a surface, showing motion direction (no text or symbols)Assembling the belt eyelet
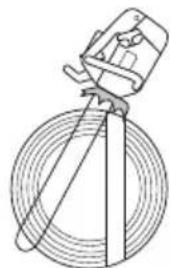
The chainsaw is fitted with two eyelets on the rear edge of the chainsaw cover, a rope eyelet and a belt eyelet. The rope eyelet is fitted on delivery.
The belt eyelet is not fitted on delivery and is used by chainsaw users as a simple way to fasten the saw to a belt or a harness. For more information, please see the Working techniques section.
To fit a belt eyelet - contact your servicing dealer.
natural_image
Technical line drawing of a mechanical assembly inside a vehicle (no text or symbols)Fitting a spiked bumper
A spiked bumper is sold as spare part. Contact your servicing dealer.
FUEL HANDLING
Fuel
Note! The machine is equipped with a two-stroke engine and must always be run using a mixture of petrol and two-stroke oil. It is important to accurately measure the amount of oil to be mixed to ensure that the correct mixture is obtained. When mixing small amounts of fuel, even small inaccuracies can drastically affect the ratio of the mixture.

WARNING! Always ensure there is adequate ventilation when handling fuel.
Petrol
- Use good quality unleaded or leaded petrol.
- The lowest recommended octane grade is 90 (RON). If you run the engine on a lower octane grade than 90 so-called knocking can occur. This gives rise to a high engine temperature and increased bearing load, which can result in serious engine damage.
- When working with continuous high revs (e.g. limbing) a higher octane is recommended.
Husqvarna alkylate fuel
Husqvarna recommends the use of Husqvarna alkylate fuel for best performance. The fuel contains less harmful substances compared to regular fuel, which reduces harmful exhaust fumes. The fuel provides low amount of residues when combusted which keeps the engine parts cleaner and optimizes the engine life. Husqvarna alkylate fuel is not available in all markets.
Ethanol fuel
HUSQVARNA recommends commercial available fuel with maximum 10% ethanol content.
Running-in
Avoid running at a too high speed for extended periods during the first 10 hours.
Two-stroke oil
- For best results and performance use HUSQVARNA two-stroke engine oil, which is specially formulated for our air-cooled two-stroke engines. Mixture 1:50 (2%).
- If HUSQVARNA two-stroke oil is not available, you may use another two-stroke oil of good quality that is intended for air cooled engines. Contact your dealer when selecting an oil.
- Never use two-stroke oil intended for water-cooled outboard engines, sometimes referred to as outboard oil.
- Never use oil intended for four-stroke engines.
| Petrol, litre | Two-stroke oil, litre |
| 2% (1:50) | |
| 5 0,10 | |
| 10 0,20 | |
| 15 0,30 | |
| 20 0,40 |
Mixing

• Always mix the petrol and oil in a clean container intended for fuel.
• Always start by filling half the amount of the petrol to be used. Then add the entire amount of oil. Mix (shake) the fuel mixture. Add the remaining amount of petrol.
- Mix (shake) the fuel mixture thoroughly before filling the machine's fuel tank.
- Do not mix more than one month's supply of fuel at a time.
- If the machine is not used for some time the fuel tank should be emptied and cleaned.
Chain oil
• We recommend the use of special oil (chain oil) with good adhesion characteristics.
natural_image
Line drawing of a chainsaw with a gear and mounting bracket (no text or symbols)- Never use waste oil. This results in damage to the oil pump, the bar and the chain.
- It is important to use oil of the right grade (suitable viscosity range) to suit the air temperature.
- In temperatures below 0^ (32°F) some oils become too viscous. This can overload the oil pump and result in damage to the oil pump components.
- Contact your servicing dealer when choosing chain oil.
FUEL HANDLING
Fueling

WARNING! Taking the following precautions, will lessen the risk of fire:
Always stop the engine and let it cool for a few minutes before refuelling.
Do not smoke and do not place any hot objects in the vicinity of fuel.
When refuelling, open the fuel cap slowly so that any excess pressure is released gently.
Tighten the fuel cap carefully after refuelling.
Always move the machine away from the refuelling area and source before starting.
Clean the area around the fuel cap. Clean the fuel and chain oil tanks regularly. The fuel filter must be replaced at least once a year. Contamination in the tanks causes malfunction. Make sure the fuel is well mixed by shaking the container before refuelling. The capacities of the chain oil tank and fuel tank are carefully matched. You should therefore always fill the chain oil tank and fuel tank at the same time.
natural_image
Line drawing of a chainsaw with a fuel pump icon (no text or symbols)
WARNING! Fuel and fuel vapour are highly flammable. Take care when handling fuel and chain oil. Be aware of the risks of fire, explosion and those associated with inhalation.

WARNING! Always replace a damaged cap.
Fuel safety
- Never refuel the machine while the engine is running.
- Make sure there is plenty of ventilation when refuelling or mixing fuel (petrol and 2-stroke oil).
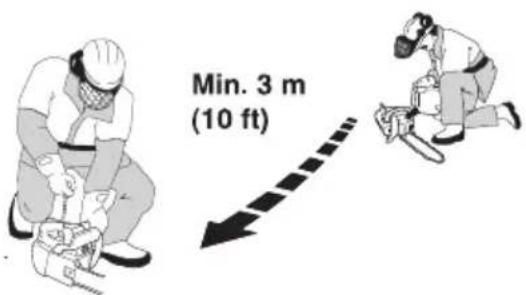
- Move the machine at least 3 m from the refuelling point before starting it.
- Never start the machine:
1 If you have spilt fuel or chain oil on the machine. Wipe off the spillage and allow remaining fuel to evaporate.
2 If you have spilled fuel on yourself or your clothes, change your clothes. Wash any part of your body that has come in contact with fuel. Use soap and water.
3 If the machine is leaking fuel. Check regularly for leaks from the fuel cap and fuel lines.

WARNING! Never use a machine with visible damage to the spark plug guard and ignition cable. A risk of sparking arises, which can cause a fire.
Transport and storage
• Always store the chainsaw and fuel so that there is no risk of leakages or fumes coming into contact with sparks or naked flames from electrical equipment, electric motors, relays/switches, boilers and the like.
• Always store fuel in an approved container designed for that purpose.
- For longer periods of storage or for transport of the chainsaw, the fuel and chain oil tanks should be emptied. Ask where you can dispose of waste fuel and chain oil at your local petrol station.
• The guide bar cover must always be fitted to the cutting attachment when the machine is being transported or in storage, in order to prevent accident contact with the sharp chain. Even a non-moving chain can cause serious cuts to yourself or persons you bump into with an exposed chain.
- Secure the machine during transport.
Long-term storage
Empty the fuel/oil tanks in a well ventilated area. Store the fuel in approved cans in a safe place. Fit the guide bar cover. Clean the machine. See instructions under the heading Maintenance schedule.
Ensure the machine is cleaned and that a complete service is carried out before long-term storage.
Starting and stopping

WARNING! Note the following before starting:
The chain brake must be engaged when the chainsaw is started to reduce the chance of contact with the moving chain during starting.
Never start a chainsaw unless the bar, chain and all covers are fitted correctly. Otherwise the clutch can come loose and cause personal injuries.
Place the machine on firm ground. Make sure you have a secure footing and that the chain cannot touch anything.
If you need to start the chainsaw in the tree, see instructions under the heading Starting the saw in the tree, under the section Working techniques.
Keep people and animals well away from the working area.
Long term inhalation of the engine's exhaust fumes, chain oil mist and dust from sawdust can represent a health risk.
Starting
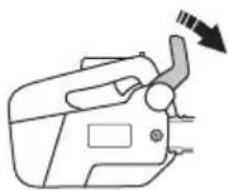
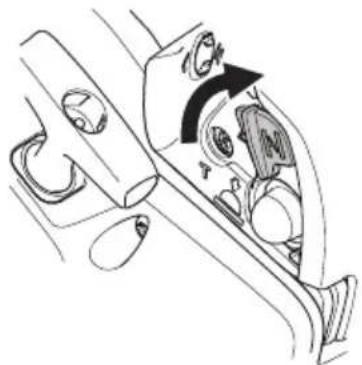
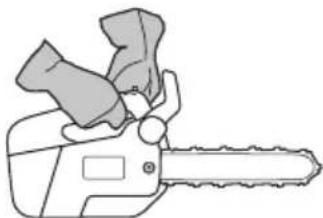
The chain brake must be engaged when the chainsaw is started. Activate the brake by moving the front hand guard forwards.
natural_image
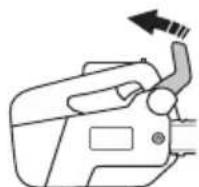
Line drawing of a handheld device with a black arrow indicating direction (no text or symbols)Cold engine
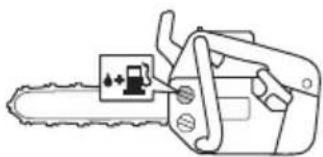
Air purge: Press the primer bulb repeatedly until fuel begins to fill the bulb. The bulb need not be completely filled.
natural_image
Technical line drawing of a car head and neck assembly with an arrow indicating a component (no text or symbols present)Choke: Set the choke control in the choke position.
natural_image
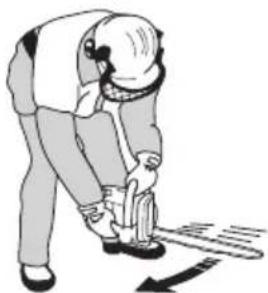
Diagram of a car interior showing hand positioning and wheel movement (no text or symbols)Grip the front handle with your left hand and push the chainsaw to the ground. Grip the starter handle with your right hand and pull out the starter cord slowly until you feel a resistance (as the starter pawls engage) and then pull firmly and rapidly. Never twist the starter cord around your hand.
natural_image
Illustration of a worker in hard hat and mask using a chainsaw to cut a piece (no text or symbols visible)CAUTION! Do not pull the starter cord all the way out and do not let go of the starter handle when the cord is fully extended. This can damage the machine.
Pull the choke control back as soon as the engine fires which can be heard through a "puff" sound. Keep on pulling the cord powerfully until the engine starts.
Warm engine
Air purge: Press the primer bulb repeatedly until fuel begins to fill the bulb. The bulb need not be completely filled.
natural_image
Diagram of a car interior showing a highlighted vehicle component with an arrow pointing to the center (no text or symbols present)STARTING AND STOPPING
Start throttle position: Activate start throttle setting by moving the choke control to the choke position and then pulling it back again.
natural_image
Line drawing of a car interior showing dashboard and steering wheel (no text or symbols)Grip the front handle with your left hand and push the chainsaw to the ground. Grip the starter handle with your right hand and pull out the starter cord slowly until you feel a resistance (as the starter pawls engage) and then pull firmly and rapidly until the engine starts. Never twist the starter cord around your hand.
natural_image
Illustration of a worker in hard hat and safety vest using a power tool (no text or symbols visible)CAUTION! Do not pull the starter cord all the way out and do not let go of the starter handle when the cord is fully extended. This can damage the machine.
The starting procedure engages a function that sets the engine speed above idle speed. Disengage this by gently pressing the throttle trigger and release it. The engine speed will drop to idle and this prevents unnecessary wear to the clutch and to the chain brake.
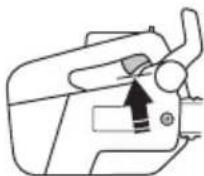
Note! Reset the chain brake by pulling the front hand guard back (marked "PULL BACK TO RESET") towards the front handle. The chainsaw is now ready for use.
natural_image
Line drawing of a hand using a chainsaw to lift a piece of material (no text or symbols)- Never start a chainsaw unless the bar, chain and all covers are fitted correctly. See instructions under the heading Assembly. Without a bar and chain attached
to the chainsaw the clutch can come loose and cause serious injury.
• The chain brake should be activated when starting. Se instructions under the heading Start and stop. Do not drop start. This method is very dangerous because you may lose control of the saw.
- Never start the machine indoors. Exhaust fumes can be dangerous if inhaled.
- Observe your surroundings and make sure that there is no risk of people or animals coming into contact with the cutting equipment.
natural_image
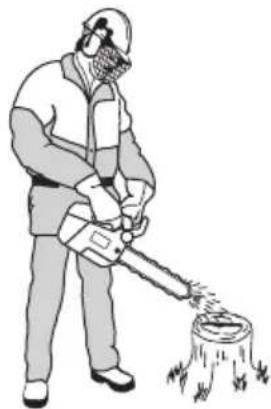
Illustration of a worker using a tool to cut a device while another person with a no-smoking symbol (no text or symbols present)• Always hold the saw with both hands. The right hand should be on the top handle, and the left hand on the front handle. All people, whether right or left handed, should use this grip. Use a firm grip with thumbs and fingers encircling the chainsaw handles.
natural_image
Illustration of a person wearing a hard hat and safety gear, holding a chainsaw (no text or symbols present)Starting the saw in the tree
When starting the saw in the tree, the operator should:
a) apply the chain brake before starting.
b) hold saw on either the left or right of the body when starting:
1 on the left side hold the saw with the left hand on the front handle and thrust the saw away from the body while holding the pull starter cord in the other hand.
2 on the right side, hold the saw with the right hand on either handle and thrust the saw away from the body while holding the pull starter cord in the left hand.
The chain brake should always be engaged before lowering a running saw onto its strop. Operators should always check the saw has sufficient fuel before undertaking critical cuts.
Stopping
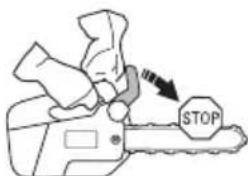
The engine is stopped by pushing the stop switch to the stop position.


WARNING! The information related to working technique in this operator's manual is not considered proper training to operate this tree-service chainsaw. A tree-service chainsaw must be used by trained tree-service operators only! Use without proper training can result in severe injuries. Do not attempt any task that you feel unsure of!
Basic safety rules
IMPORTANT! This section describes basic safety rules for using a chainsaw. This information is never a substitute for professional skills and experience. If you get into a situation where you feel unsafe, stop and seek expert advice. Contact your chainsaw dealer, servicing dealer or an experienced chainsaw user. Do not attempt any task that you feel unsure of!
Operators should never:
- cut with the kickback zone at the tip of the chainsaw guide bar.
- use the chainsaw one-handed.
- attempt to catch falling sections.
- cut in the tree when he/she is only secured with one rope. Always use 2 secured lines.
Before use:

1 Check that the chain brake works correctly and is not damaged.
2 Check that the throttle trigger lockout works correctly and is not damaged.
3 Check that the stop switch works correctly and is not damaged.
4 Check that all handles are free from oil.
5 Check that the anti vibration system works and is not damaged.
6 Check that the muffler is securely attached and not damaged.
7 Check that all parts of the chainsaw are tightened correctly and that they are not damaged or missing.
8 Check that the chain catcher is in place and not damaged.
9 Check the chain tension.
General working instructions
During tree maintenance work above ground level the chainsaw must be secured.
Secure the chainsaw by attaching one end of a safety line to the rope eyelet on the chainsaw and the other end of the safety line to the operators harness. The safety line is a fail safe where if the operator loses control of the chainsaw, the rope/strop vill prevent the chainsaw from falling to the ground. The recommended primary securing method is the belt eyelet to be attached to the sequiring hook on the operators harness. However, if the safety rope is used as primary securing method, the chainsaw must be lowered to the full extent of the safety line and not dropped from working height to the end of the safety rope.
natural_image
Line drawing of a car's front compartment showing internal components and wiring (no text or symbols)Wear personal protective equipment. See instructions under the "Personal protective equipment" heading.
General rules

WARNING! During critical felling operations, hearing protectors should be lifted immediately when sawing is completed so that sounds and warning signals can be heard.
1 If you understand what kickback is and how it happens then you can reduce or eliminate the element of surprise. By being prepared you reduce the risk. Kickback is usually quite mild, but it can sometimes be very sudden and violent.
2 Lack of concentration can lead to kickback if the kickback zone of the bar accidentally touches a branch, nearby tree or some other object.
3 Always hold the chainsaw firmly with your right hand on the top handle and your left hand on the front handle. Wrap your fingers and thumbs around the handles. You should use this grip whether you are right-handed or left-handed. This grip minimises the
WORKING TECHNIQUES
effect of kickback and lets you keep the chainsaw under control.
natural_image
Line drawing of a mechanical tool with a chain and three blades (no text or symbols)4 Never use the chainsaw above shoulder height and try not to cut with the tip of the bar. Never use the chainsaw one-handed!
5 Always use full throttle when cutting!
6 Reduce the speed to idle after every cut (running the engine for too long at full throttle without any load, i.e. without any resistance from the chain during cutting, can lead to serious engine damage).
- Cutting from above = Cutting on the pull stroke.
- Cutting from below = Cutting on the push stroke.
- Cutting on the push stroke increases the risk of kickback.
See instructions under the heading How to avoid kickback.
7 Take great care when you cut with the top edge of the bar, i.e. when cutting from the underside of the object. This is known as cutting on the push stroke. The chain tries to push the chainsaw back towards the user. If the saw chain is jamming, the saw may be pushed back at you.

natural_image
Illustration of a mechanical device with a magnifying glass and curved arrow indicating motion (no text or symbols)8 Unless the user resists this pushing force there is a risk that the chainsaw will move so far backwards that
only the kickback zone of the bar is in contact with the tree, which will lead to a kickback.
9 Cutting with the bottom edge of the bar, i.e. from the top of the object downwards, is known as cutting on the pull stroke. In this case the chainsaw pulls itself towards the tree and the front edge of the chainsaw body rests naturally on the trunk when cutting. Cutting on the pull stroke gives the operator better control over the chainsaw and the position of the kickback zone.
natural_image
Illustration of a mechanical device with a rotating knob and handle (no text or symbols)10 Follow the instructions on sharpening and maintaining your bar and chain. When you replace the bar and chain use only combinations that are recommended by us. See instructions under the headings Cutting equipment and Technical data.
11 Set the spiked bumper (if one is fitted) into the trunk and use it as a lever when applying cutting feed force.
natural_image
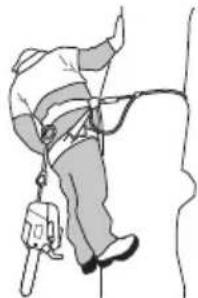
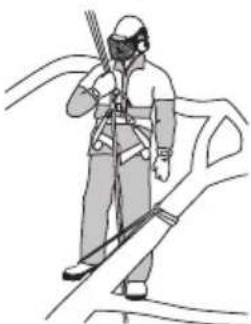
Diagram of a mechanical device with a cylindrical component and a lever, no text or symbols presentWorking with tree-service chainsaws from a rope and harness
This chapter sets out working practices to reduce the risk of injury from tree-service chainsaws when working at height from a rope and harness. While it may form the basis of guidance and training literature, it should not be regarded as a substitute for formal training.
General requirements working at height
Operators of tree-service chainsaws working at height from a rope and harness should never work alone. A competent ground worker trained in appropriate emergency procedures should assist them.
Operators of tree-service chainsaws for this work should be trained in general safe climbing and work positioning techniques and shall properly equipped with harnesses, ropes, strops, karabiners and other equipment for maintaining secure and safe working positions for both themselves and the saw.
WORKING TECHNIQUES
Preparing to use the chainsaw in the tree
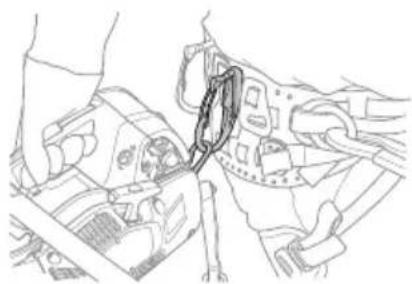
The chainsaw should be checked, fuelled, started and warmed up by the ground worker and the chain brake should be engaged before it is sent up to the operator in the tree. The chainsaw should be fitted with a suitable strop for attaching to the operator's harness:

natural_image
Illustration of a person in full safety gear using a rope and harness (no text or symbols)a) attach the strop around the rope eyelet on the rear of the chainsaw.
Note! The chainsaw should be attached to the harness by using chainsaw strop 577 43 80-01 or similar shock absorbing device.
Secure the chainsaw by attaching one end of a safety line to the rope eyelet on the chainsaw and the other end of the safety line to the operators harness. The safety line is a fail safe where if the operator loses control of the chainsaw, the rope/strop vill prevent the chainsaw from falling to the ground. The recommended primary securing method is the belt eyelet to be attached to the sequiring hook on the operators harness. However, if the safety rope is used as primary securing method, the chainsaw must be lowered to the full extent of the safety line and not dropped from working height to the end of the safety rope.

natural_image
Line drawing of a car's front compartment showing internal components and wiring (no text or symbols)b) provide suitable karabiners to allow indirect (i.e. via the strop) and direct attachment (i.e. at the attachment point on the saw) of saw to the operators harness.
natural_image
Technical line drawing of a mechanical assembly with hands operating a tool (no text or symbols visible)
CAUTION! The belt eyelet is not dimensioned for use with a so-called safety rope. Use the rope eyelet for this purpose.
c) ensure the saw is securely attached when it is being sent up to the operator.
d) ensure the saw is secured to the harness before it is disconnected from the means of ascent.
The chainsaw should only be attached to the recommended attachment points on the harness. These may be at mid-point (front or rear) or at the sides. Where possible attaching the chainsaw to centre rear mid-point will keep it clear of climbing lines and support its weight centrally down the operator's spine.
natural_image
Illustration of a person climbing a rope with a bag attached (no text or symbols)When moving the saw from any attachment point to another, operators should ensure it is secured in the new position before releasing it from the previous attachment point.
Using the chainsaw in the tree
An analysis of accidents with these chainsaws during tree-service operations shows the primary cause as being inappropriate one-handed use of the chainsaw. In the vast majority of accidents, operators fail to adopt a secure work position witch allows them to hold both handles of the chainsaw. This results in an increased risk of injury due to:
• not having a firm grip on the saw if it kicks back.
- a lack of control of the saw such that it is more liable to contact climbing lines and operators body (particularly the left hand and arm)
- loosing control from insecure work position resulting in contact with the saw (unexpected movement during operation of the saw)
WORKING TECHNIQUES
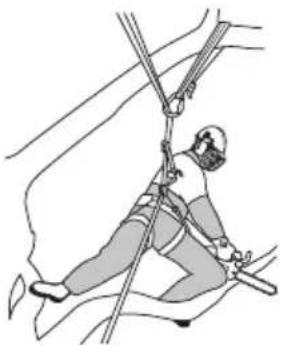
Securing the work position for two-handed use
WARNING! Never use a chainsaw by holding it with one hand. A chainsaw is not safely controlled with one hand; you can cut yourself. Always have a secure, firm grip around the handles with both hands.
To allow the operator to hold the saw with both hands, they should as general rule, aim for secure work position where they are operating the saw at:
- hip level when cutting horizontal sections.
• solar plexus level when cutting vertical sections.
Where the operator is working close into vertical stems with a low lateral forces on their work position, then a good footing may be all that is needed to maintain a secure work position. However as operators move away from the stem, they will need to take steps to remove or counteract the increasing lateral forces by, for example, a re-direct of the main line via a supplementary anchor point or using an adjustable strop direct from the harness to a supplementary anchor point.
natural_image
Illustration of a person in safety gear climbing ropes and harnesses (no text or symbols)Gaining a good footing at the working position can be assisted by use of a temporary foot stirrup created from an endless sling.
natural_image
Illustration of a person in protective gear holding a tool, standing on a slope (no text or symbols)Freeing a trapped saw

WARNING! If the chain jams in the cut: stop the engine! Don't try to pull the chainsaw free. If you do you may be injured by the chain when the chainsaw suddenly breaks free. Use a lever to open up the cut and free the chainsaw.
If the saw should become trapped during cutting, operators should:
- switch off the saw and attach it securely to the tree inboard (i.e. towards the truck side) of the cut or to a separate tool line.
- pull the saw from the kerf whilst lifting the branch as necessary.
- if necessary, use a handsaw or second chainsaw to release the trapped saw by cutting a minimum of 30 cm away from the trapped saw.
Whether a handsaw or a chainsaw is used to free a stuck saw, the release cuts should always be outboard (toward the tips of the branch), in order to prevent the saw being taken with the section and further complicating the situation.
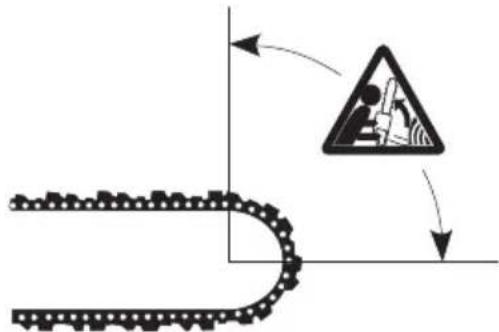
How to avoid kickback

WARNING! Kickback can happen very suddenly and violently; kicking the chainsaw, bar and chain back at the user. If this happens when the chain is moving it can cause very serious, even fatal injuries. It is vital you understand what causes kickback and that you can avoid it by taking care and using the right working technique.
What is kickback?
The word kickback is used to describe the sudden reaction that causes the chainsaw and bar to jump off an object when the upper quadrant of the tip of the bar, known as the kickback zone, touches an object.
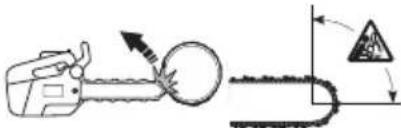
Kickback always occurs in the cutting plane of the bar. Normally the chainsaw and bar are thrown backwards and upwards towards the user. However, the chainsaw may move in a different direction depending on the way it was being used when the kickback zone of the bar touched the object.
Kickback only occurs if the kickback zone of the bar touches an object.
MAINTENANCE
General
The user must only carry out the maintenance and service work described in this manual.
IMPORTANT! Any maintenance other than that described in this manual must be carried out by your servicing dealer (retailer).
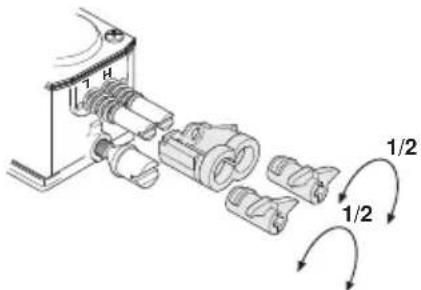
Carburettor adjustment
Due to existing environmental and emissions legislation your chainsaw is equipped with movement limiters on the carburettor adjuster screws. These limit the adjustment possibilities to a maximum of a 1/2 turn.
Your Husqvarna product has been designed and manufactured to specifications that reduce harmful emissions.
Function
- The carburettor governs the engine's speed via the throttle control. Air and fuel are mixed in the carburettor. The air/fuel mixture is adjustable. Correct adjustment is essential to get the best performance from the machine.
-
Adjusting the carburettor means that the engine is adapted to local operating conditions, e.g. climate, altitude, petrol and the type of 2-stroke oil.
• The carburettor has three adjustment controls: -
L = Low speed jet
- H = High speed jet
- T = Idle adjustment screw
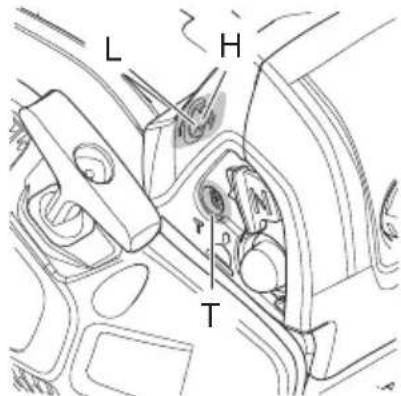
- The L and H-jets are used to adjust the supply of fuel to match the rate that air is admitted, which is controlled with the throttle. If they are screwed clockwise the air/fuel ratio becomes leaner (less fuel) and if they are turned anti-clockwise the ratio becomes richer (more fuel). A lean mixture gives a
higher engine speed and a rich mixture gives a lower engine speed.
- The T-screw regulates the throttle setting at idle speed. If the T-screw is turned clockwise this gives a higher idle speed; turning it anti-clockwise gives a lower idle speed.
Basic settings and running in
The basic carburettor settings are adjusted during testing at the factory. Avoid running at a too high speed during the first 10 hours.
CAUTION! If the chain rotates while idling the T-screw must be turned anti-clockwise until the chain stops.
Rec. idle speed: 2900 rpm
Fine adjustment
When the machine has been "run-in" the carburettor should be finely adjusted. The fine adjustment should be carried out by a qualified person. First adjust the L-jet, then the idling screw T and then the H-jet.
Changing the type of fuel
Fine tuning may be required if the chainsaw, after changing the type of fuel, performs differently with regard to starting, acceleration, maximum speed, etc.
Conditions
- Before any adjustments are made the air filter should be clean and the cylinder cover fitted. Adjusting the carburettor while a dirty air filter is in use will result in a leaner mixture next time the filter is cleaned. This can give rise to serious engine damage.
- Do not attempt to adjust the L and H jets beyond either stop as this could cause damage.
- Now start the machine according to the starting instructions and let it warm up for 10 minutes.
- Place the machine on a flat surface so that the bar points away from you and so that the bar and chain do not come into contact with the surface or other objects.
Low speed jet L
Turn the low speed jet L clockwise until it stops. If the engine accelerates poorly or idles unevenly, turn the low speed jet L anticlockwise until good acceleration and idling are achieved.
Fine adjustment of the idle speed T
Adjust the idle speed with the T-screw. If it is necessary to re-adjust, turn the T-screw clockwise while the engine is running, until the chain starts to rotate. Then turn anti-clockwise until the chain stops. When the idle speed is correctly adjusted the engine should run smoothly in every position and the engine speed should be safely below the speed at which the chain starts to rotate.
MAINTENANCE

WARNING! Contact your servicing dealer, if the idle speed setting cannot be adjusted so that the chain stops. Do not use the chainsaw until it has been properly adjusted or repaired.
High speed jet H
At the factory the engine is adjusted at sea level. When working at a high altitude or in different weather conditions, temperatures and atmospheric humidity, it may be necessary to make minor adjustments to the high speed jet.
CAUTION! If the high speed jet is screwed in too far, it may damage the piston/cylinder.
When test run at the factory, the high speed jet is set so that the engine satisfies the applicable legal requirements at the same time as achieving maximum performance. The carburettor's high speed jet is then locked using a limiter cap in the fully screwed out position. The limiter cap limits the potential to adjust the high speed jet to at most half a turn.
Correctly adjusted carburettor
When the carburettor is correctly adjusted the machine accelerates without hesitation and 4-cycles a little at full throttle. It is also important that the chain does not rotate at idle. If the L-jet is set too lean it may cause starting difficulties and poor acceleration. If the H-jet is set too lean the machine will have less power, poor acceleration and could suffer damage to the engine.
Checking, maintaining and servicing chainsaw safety equipment
Note! All service and repair work on the machine demands special training. This is especially true of the machine's safety equipment. If your machine fails any of the checks described below we recommend that you take it to your servicing dealer.
Chain brake and front hand guard
Checking brake band wear
- Brush off any wood dust, resin and dirt from the chain brake and clutch drum. Dirt and wear can impair operation of the brake.
natural_image
Technical line drawing of a mechanical assembly with no visible text or symbols- Regularly check that the brake band is at least 0,6 mm thick at its thinnest point.
Checking the front hand guard

- Make sure the front hand guard is not damaged and that there are no visible defects such as cracks.
- Move the front hand guard forwards and back to make sure it moves freely and that it is securely anchored to the clutch cover.
natural_image
Illustration of a hand using a chainsaw to lift a tool, showing motion arrows (no text or symbols)MAINTENANCE
Checking the chain brake
- Place the chainsaw on firm ground and start it. Make sure the chain does not touch the ground or any other object. See instructions under the heading Starting and stopping.
natural_image
Illustration of a worker using a power tool to cut a saw (no text or symbols visible)- Grasp the chainsaw firmly, wrapping your fingers and thumbs around the handles.
natural_image
Line drawing of a chain saw with blades (no text or symbols)Apply full throttle and activate the chain brake by tilting your left wrist forward onto the front hand guard. Do not let go of the front handle. The saw chain should stop immediately.
Throttle trigger/throttle trigger lockout

- Make sure that the throttle trigger is locked at idle setting when the throttle trigger lockout is released.
- Press the throttle trigger lockout down and make sure that it returns to its default position when you release it.
- Check that the throttle trigger lockout and the throttle trigger move freely and that both return to their default positions.
- Start the chainsaw and apply full throttle. Release the throttle trigger and check that the saw chain comes to a stop within 3-4 sec. If not, contact your servicing dealer.
Chain catcher
- Check that the chain catcher is not damaged and is firmly attached to the body of the chainsaw.
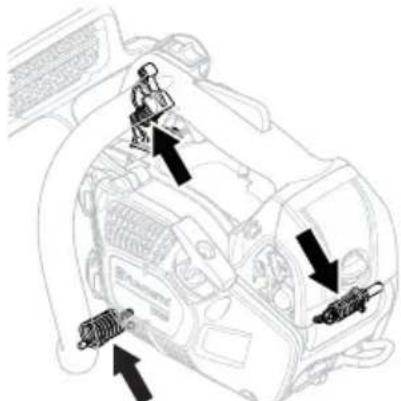
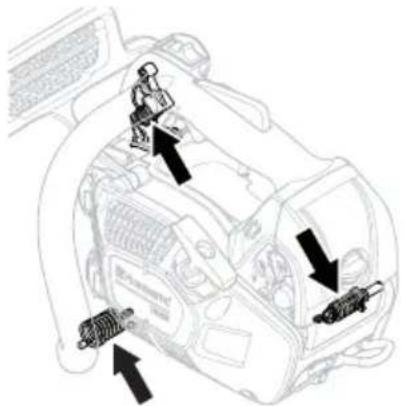
Vibration damping system
natural_image
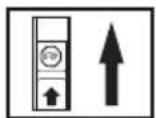
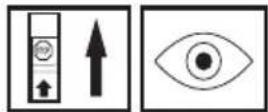
Three black-and-white icons showing mechanical or electrical components: a vertical panel with an arrow, a mitten with a handle, and a push-button tool (no text or symbols)- Regularly check the vibration damping units for cracks or deformation.
natural_image
Line drawing of a chainociper (no text or symbols)MAINTENANCE
- Make sure the vibration damping units are securely attached to the engine unit and handle unit.
natural_image
Diagram of a car interior showing engine components and a worker, with no visible text or symbols.Stop switch
- Start the engine and make sure the engine stops when you move the stop switch to the stop setting.

Muffler

- Never use a machine that has a faulty muffler.

- Regularly check that the muffler is securely attached to the machine.
natural_image
Technical line drawing of a mechanical device with internal components and directional arrows indicating movement (no text or symbols)The muffler is designed to reduce the noise level and to direct the exhaust gases away from the operator. The exhaust gases are hot and can contain sparks, which may cause fire if directed against dry and combustible material.
Starter housing

WARNING! When the recoil spring is wound up in the starter housing it is under tension and can, if handled carelessly, pop out and cause personal injury.
Care must be exercised when replacing the return spring or the starter cord. Wear protective glasses and protective gloves.
Changing a broken or worn starter cord
- Loosen the screws that hold the starter against the crankcase and remove the starter.

natural_image
Technical line drawing of a mechanical assembly with no visible text or symbols- Pull out the cord approx. 30 cm and hook it into the notch in the rim of the pulley. Release the recoil spring by letting the pulley rotate slowly backwards.
natural_image
Illustration of hands connecting a device to a battery pack with a rotating cable (no text or symbols)MAINTENANCE
- Undo the bolt in the centre of the pulley and remove the pulley.
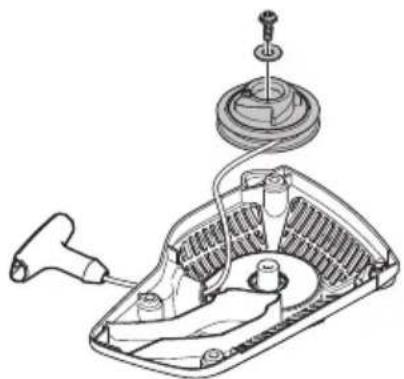
natural_image
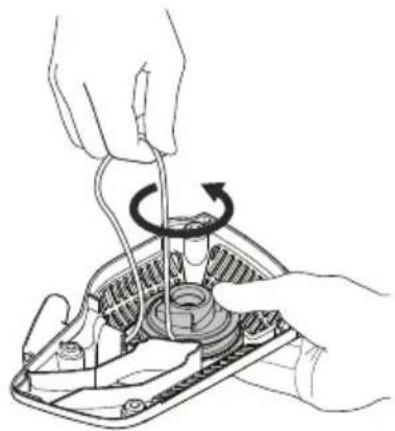
Technical line drawing of a mechanical assembly with a tool and component (no text or symbols)- Insert and fasten a new starter cord to the pulley. Wind approx. 3 turns of the starter cord onto the pulley. Connect the pulley to the recoil spring so that the end of the spring engages in the pulley. Fit the screw in the centre of the pulley. Insert the starter cord through the hole in the starter housing and the starter handle. Make a secure knot in the end of the starter cord.
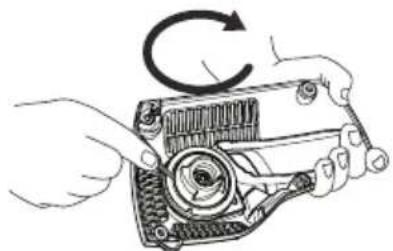
Tensioning the recoil spring
- Hook the starter cord in the notch in the pulley and turn the starter pulley about 2 turns clockwise. Note! Check that the pulley can be turned at least a further 1/2 turn when the starter cord is pulled all the way out.
natural_image
Illustration of hands adjusting a mechanical component with a circular arrow indicating rotation (no text or symbols)Changing a broken recoil spring
- Lift up the starter pulley. See instructions under the heading Changing a broken or worn starter cord. Remember that the recoil spring is coiled under tension in the starter housing.
- Remove the cassette with the recoil spring from the starter.
- Lubricate the recoil spring with light oil. Fit the cassette with recoil spring in the starter. Fit the starter pulley and tension the recoil spring.
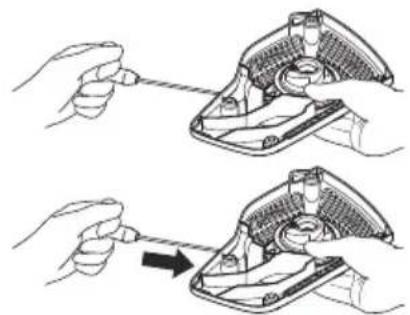
natural_image
Illustration of two hands using a tool to adjust or install a device component (no text or symbols present)Fitting the starter
• To fit the starter, first pull out the starter cord and place the starter in position against the crankcase. Then slowly release the starter cord so that the pulley engages with the pawls.
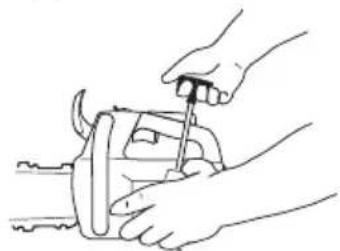
natural_image
Line drawing of hands using a tool to adjust or install a mechanical component (no text or symbols present)• Fit and tighten the screws that hold the starter.
Air filter
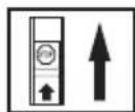
The air filter must be regularly cleaned to remove dust and dirt in order to avoid:
• Carburettor malfunctions.
- Starting problems.
- Loss of engine power.
- Unnecessary wear to engine parts.
• Excessive fuel consumption.
- Rotate the screw counterclockwise one quarter of a turn to remove the air filter cover. Remove the air filter. When refitting, make sure that the air filter seals tightly
MAINTENANCE
against the filter holder. Clean the air filter by brushing or shaking it.
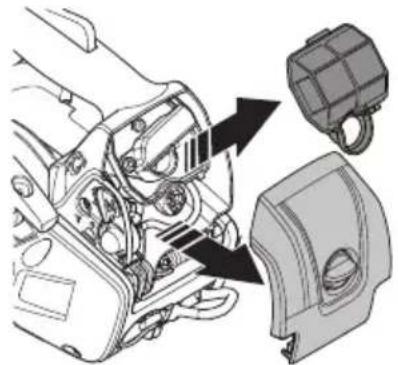
natural_image
Mechanical assembly diagram showing motor components and a close-up of a bracket (no text or labels)The filter can be cleaned more thoroughly by washing it in water and detergent.
An air filter that has been in use for a long time cannot be cleaned completely. The filter must therefore be replaced with a new one at regular intervals. A damaged air filter must always be replaced.
A HUSQVARNA chainsaw can be equipped with different types of air filter according to working conditions, weather, season, etc. Contact your servicing dealer for advice.
Spark plug
The spark plug condition is influenced by:
- An incorrect fuel mixture (too much or incorrect type of oil).
- A dirty air filter.
These factors cause deposits on the spark plug electrodes, which may result in operating problems and starting difficulties.
If the machine is low on power, difficult to start or runs poorly at idle speed: always check the spark plug first before taking any further action. If the spark plug is dirty, clean it and check that the electrode gap is 0.5 mm. The spark plug should be replaced after about a month in operation or earlier if necessary.
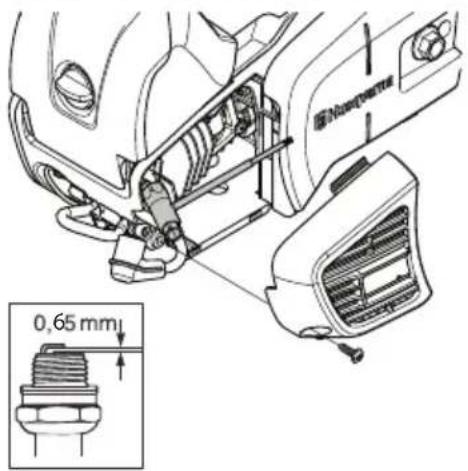
Note! Always use the recommended spark plug type! Use of the wrong spark plug can damage the piston/cylinder. Check that the spark plug is fitted with a suppressor.
Adjustment of the oil pump
The oil pump is adjustable. Adjustments are made by turning the screw with a screwdriver. Turning the screw clockwise will increase the oil flow, turning it anticlockwise will reduce the oil flow.
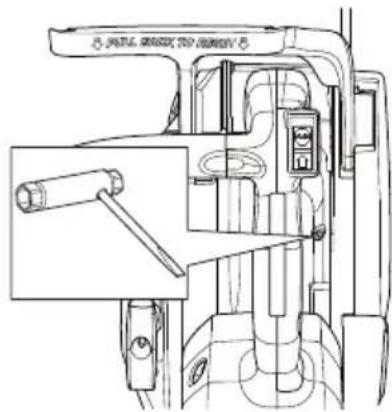
The oil tank should become nearly empty by time fuel is used up. Be sure to refill the oil tank every time when refueling the saw.

WARNING! The engine must not be running when making adjustments.
Cooling system
To keep the working temperature as low as possible the machine is equipped with a cooling system.
The cooling system consists of:
1 Air intake on the starter.
2 Air guide plate.
3 Fins on the flywheel.
4 Clutch cover
Clean the cooling system with a brush once a week, more often in demanding conditions. A dirty or blocked cooling system results in the machine overheating which causes damage to the piston and cylinder.
MAINTENANCE
Trouble shooting
| Starting failure | ||
| Check Possible Cause Action | ||
| Starter pawls Binding pawls | Adjust or replace the pawls. | |
| Clean around the pawls. | ||
| Contact a servicing dealer. | ||
| Fuel tank Incorrect fuel type Drain it and use correct fuel. | ||
| Sparking (no spark) | Spark plug contaminated or wet | Make sure that the spark plug is dry and clean. |
| Spark plug gap incorrect. | Clean the spark plug. Check that the electrode gap is correct. Make sure that the spark plug is fitted with a suppressor. | |
| Refer to technical data for correct electrode gap. | ||
| Spark plug Spark plug loose. Retighten the spark plug | ||
| Engine starts but does not stay running. | ||
| Check Possible Cause Possible action | ||
| Fuel tank Incorrect fuel type Drain it and use correct fuel. | ||
| Carburettor Engine will not idle properly. Contact your servicing dealer. | ||
| Air filter Clogged air filter Clean the air filter. | ||
| Fuel filter Clogged fuel filter Replace the fuel filter. | ||
MAINTENANCE
Maintenance schedule
The following is a list of the maintenance steps that must be performed on the machine. Most of the items are described in the Maintenance section.
| Daily maintenance Weekly maintenance | ance Monthly maintenance | |
| Clean the outside of the machine. Check the cooling system weekly. | Check the brake band on the chain brake for wear. Replace when less than 0.6 mm (0.024 inch) remains at the most worn point. | |
| Check that the throttle trigger lockout and throttle trigger works. | Check the starter, starter cord and return spring. | Check the clutch centre, clutch drum and clutch spring for wear. |
| Clean the chain brake and check that it operates safely. Make sure that the chain catcher is undamaged, and replace it if necessary. | Check that the vibration damping elements are not damaged. | Clean the spark plug. Check that the electrode gap is 0.65 mm. |
| The bar should be turned daily for more even wear. Check the lubrication hole in the bar, to be sure it is not clogged. Clean the bar groove. | Lubricate the clutch drum bearing. Clean the outside of the carburettor. | |
| Check that the bar and saw chain are getting sufficient oil. | File off any burrs from the edges of the bar. | Check the fuel filter and the fuel hose. Replace if necessary. |
| Check the saw chain with regard to visible cracks in the rivets and links, whether the saw chain is stiff or whether the rivets and links are abnormally worn. Replace if necessary. | Empty the fuel tank and clean the inside. | |
| Sharpen the sawchain and check its tension and condition. Check the drive sprocket for excessive wear and replace is necessary. | Clean the carburettor compartment. | Empty the oil tank and clean the inside. |
| Clean the starter housing's air intake. | Clean the air filter. Replace if necessary. | Check all cables and connections. |
| Check that nuts and screws are tight. | ||
| Check that the stop switch works correctly. | ||
| Check that there are no fuel leaks from the engine, tank or fuel lines. | ||
| Check the condition of the air filter. | ||
| Check that the chain does not rotate when the engine is idling. | ||
TECHNICAL DATA
Technical data
| T525 |
Engine
| Cylinder displacement, cm ^3 | 27,0 |
Cylinder bore, mm 35
Stroke, mm 28
Idle speed, rpm 2900
Power, kW/ rpm 1,1/9500
Ignition system
Spark plug NGK CMR6A
Electrode gap, mm 0,65
Fuel and lubrication system
| Fuel tank capacity, litre/cm3 | 0,19/190 |
Oil pump capacity at 8,000 rpm, ml/min 3-9
| Oil tank capacity, litre/cm3 | 0,17/170 |
Type of oil pump Adjustable
Weight
Chainsaw without bar, chain and with empty tanks, kg 2,7
Noise emissions (see note 1)
Sound power level, measured dB(A) 110
Sound power level, guaranteed L_WA dB(A) 111
Sound levels (see note 2)
Equivalent sound pressure level at the operator's ear, dB(A) 98
Equivalent vibration levels, a hveq (see note 3)
| Front handle, m/s^2 | 4,2 |
Rear handle, m/s ^2 4,9
Chain/bar
Standard bar length, inch/cm 10/25
Recommended bar lengths, inch/cm 10-12/25-30
Usable cutting length, inch/cm 8-12/20-30
Pitch, mm 3/8 /9,52, 1/4 /6,35
Thickness of drive links, inch/mm 0.050/1,3
Type of drive sprocket/number of teeth Spur 6, Spur 8
Chain speed at 133% of maximum engine power speed, m/s. 24,1/21,4
Note 1: Noise emissions in the environment measured as sound power ( L_WA ) in conformity with EC directive 2000/14/EC.
Note 2: Equivalent sound pressure level, according to ISO 22868, is calculated as the time-weighted energy total for different sound pressure levels under various working conditions. Typical statistical dispersion for equivalent sound pressure level is a standard deviation of 1 dB (A).
Note 3: Equivalent vibration level, according to ISO 22867, is calculated as the time-weighted energy total for vibration levels under various working conditions. Reported data for equivalent vibration level has a typical statistical dispersion (standard deviation) of 1 m/s^2 .
TECHNICAL DATA
Guide bar and saw chain combinations
The following cutting attachments are approved for the model Husqvarna T525.
| Guide bar Saw chain | |||||
| Length, inch Pitch, inch Gauge, mm | Max. nose radius | Type | Length, drive links (no.) | ||
| 10, 12 1/4 | 1,3 | R10 Husqvarna H | H00 60, 68 | ||
| 10, 12 3/8 7T Husqvarna H37 40, 45 | |||||
Saw chain filing and file gauges
 |  inch/mm inch/mm | 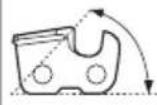 | 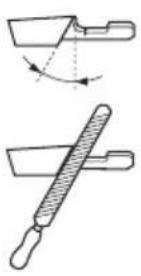 | 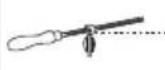 | 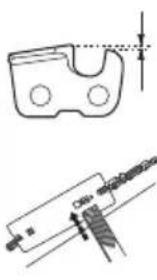 inch/mm inch/mm |  | 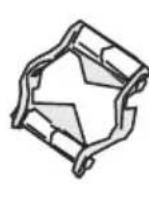 |
| 00 | 5/32"/4,0 | 85° | 30° | 10° | 0,025"/0,65 | —— | —— |
| 37 | 5/32"/4,0 | 80° | 30° | 0° | 0,025"/0,65 | 5056981-03 | 5052437-01 |
EC Declaration of Conformity
Husqvarna AB, SE-561 82 Huskvarna, Sweden, tel: +46-36-146500, declares under sole responsibility that the chainsaw for tree-service Husqvarna T525 from 2017's serial numbers and onwards (the year is clearly stated in plain text on the type plate with subsequent serial number), are in conformity with the requirements of the COUNCIL'S DIRECTIVES:
- of May 17, 2006 "relating to machinery" 2006/42/EC.
- of February 26, 2014 "relating to electromagnetic compatibility" 2014/30/EU.
- of May 8, 2000 "relating to the noise emissions in the environment" 2000/14/EC.
The following standards have been applied: EN ISO 12100-2010, ISO 14982:2009, EN ISO 11681-2:2011
Notified body: 0404, SMP Svensk Maskinprovning AB, Box 7035, SE-750 07 Uppsala, Sweden, has carried out EC type examination in accordance with the machinery directive's (2006/42/EC) article 12, point 3b. The certificates for EC type examination in accordance with annex IX, have the numbers:
0404/17/2479
In addition, SMP, Svensk Maskinprovning AB, Box 7035, SE-750 07 Uppsala, Sweden, has certified conformity with annex V of the Council's Directive of May 8, 2000 "relating to the noise emissions in the environment" 2000/14/EC. The certificates have the numbers:
01/161/111
For information relating to noise emissions, see the Technical data chapter.
The supplied chainsaw conforms to the example that underwent EC type examination.
Husqvarna, 21 July, 2017

Per Gustafsson, Development manager (Authorized representative for Husqvarna AB and responsible for technical documentation.)
EXPLICATION DES SYMBOLES
Use only resistor spark plug
natural_image
Illustration of a person climbing a tree with a diagonal line indicating no movement (no text or symbols)natural_image
Illustration of a person wearing full-body protective gear and a first aid kit (no text or symbols)natural_image
Line drawing of two hand tools: a fire extinguisher and a manual shov (no text or symbols)INSTRUCTIONS GÉNÉRALES DE SÉCURITÉ
natural_image
Line drawing of a chainsaw with a handle and blade (no text or symbols)natural_image
Technical diagram of a mechanical assembly with labeled parts (no readable text or symbols)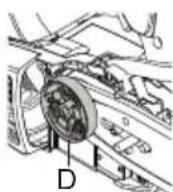
natural_image
Line drawing of a chain-linking tool (no text or symbols)natural_image
Illustration of a person in full gear holding a long pipe bag (no text or symbols)natural_image
Line drawing of a hand using a chainsaw to lift a piece of material (no text or symbols)natural_image
Line drawing of a mechanical tool resembling a chain or saw (no text or symbols)natural_image
Illustration of a worker in protective gear spraying water with a hose (no text or symbols)natural_image
Line drawing of a chainsaw with a hand operating it, showing blade and jaw (no text or symbols)natural_image
Illustration of a person bending over a foot with a curved arrow indicating motion (no text or symbols)natural_image
Line drawing of a chainsaw with motion lines indicating speed (no text or symbols)natural_image
Simple line drawing of a VR headset with motion lines indicating speed (no text or symbols)
Silencieux
natural_image
Simple line drawing of a cylindrical object with length labeled 'L' and a small protrusion at the end (no text or symbols beyond the label)natural_image
Diagram showing a vertical tube inserted into a container and then being pointed at a tip, with no text or symbols present.natural_image
Pure mechanical part diagram showing a looped component and a vertical rod with dimension arrows (no text or symbols)natural_image
Line drawing of a manual chain saw with a circular base and gear blades (no text or symbols)natural_image
Technical line drawing of a mechanical tool with an arrow indicating rotation (no text or symbols)2 Angle d'impact
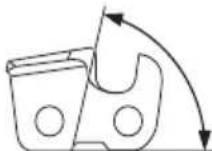
3 Position de la lime
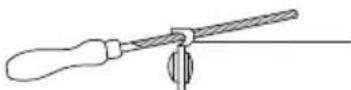
natural_image
Technical line drawing of a mechanical linkage or clamping device (no text or symbols)natural_image
Three technical line drawings of mechanical components: a rod-like tool, a hexagonal bracket, and a multi-pronged bracket (no text or symbols)natural_image
Diagram of a tool interacting with a block, showing an upward arrow (no text or symbols present)natural_image
Four-panel diagram showing directional and symbolic icons: vertical bar with upward arrow, eye, and palm (no text or labels)natural_image
Three technical line drawings of mechanical components: a tool, a part with a slot, and a bracket (no text or symbols)natural_image
Technical line drawing of a mechanical component with no visible text or symbolsnatural_image
Illustration of two hands holding a cylindrical object with directional arrows indicating motion (no text or symbols)natural_image
Technical line drawing of a mechanical device with lever and adjustment mechanism (no text or symbols)natural_image
Technical line drawing of a mechanical device with no visible text or symbolsnatural_image
Illustration of a hand holding a tool with arrows indicating motion (no text or symbols)natural_image
Diagram of a chain drive with a water drop symbol (no text or labels)natural_image
Illustration of a person wearing protective gear using a power tool to clean tree stumps (no text or symbols)natural_image
Simple line drawing of a screwdriver inserted into a mechanical component (no text or symbols)natural_image
Line drawing of a hand holding a tool, no text or symbols presentnatural_image
Line drawing of a hand holding a handheld device (no text or symbols)natural_image
Technical line drawing of a mechanical gear assembly (no text or symbols)natural_image
Mechanical linkage diagram showing chain components with arrows indicating motion (no text or labels)natural_image
Diagram showing a knife with a handle and blade, alongside a separate schematic of a blade with a curved line (no text or symbols)natural_image
Simple line drawing of a curved object with two arrows indicating direction (no text or symbols)natural_image
Mechanical assembly diagram showing a motor and gear assembly with no visible text or symbolsnatural_image
Mechanical assembly diagram showing a gear and component being processed, with an inset view of a bracket (no text or symbols)natural_image
Line drawing of a hand holding a chainocorder with a screwdriver inserted (no text or symbols)natural_image
Illustration of a hand holding a tool with an arrow indicating motion (no text or symbols)natural_image
Line drawing of a car's front bumper and seat assembly (no text or symbols)natural_image
Line drawing of a chainsaw with a warning symbol (no text or labels)natural_image
Line drawing of a chainsaw with a gear icon and mounting bracket (no text or symbols)
natural_image
Line drawing of a handheld device with a black arrow indicating direction (no text or symbols)Moteur froid
natural_image
Technical line drawing of a mechanical component with an arrow indicating a specific part (no text or symbols present)Starter: Tirer la commande de starter.
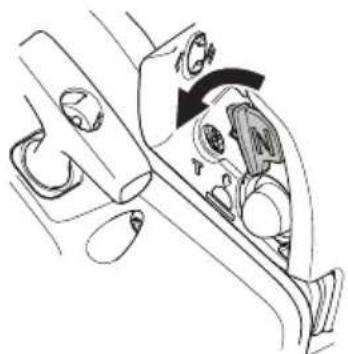
natural_image
Diagram of a car interior showing hand positioning and valve mechanism (no text or labels)natural_image
Illustration of a worker in hard hat and gloves operating a manual power shaver (no text or symbols visible)natural_image
Technical line drawing of a mechanical component with an arrow indicating a specific part (no text or symbols present)natural_image
Diagram of a car interior showing steering wheel, dashboard, and steering wheel (no text or labels)natural_image
Illustration of a worker in hard hat and mask using a chainsaw (no text or symbols)natural_image
Line drawing of a chainsaw with a hand holding the blade and a black arrow indicating motion (no text or symbols)natural_image
Illustration of two workers: one in hard hat and one in protective gear, with a no-smoking symbol (no text or labels)natural_image
Illustration of a person wearing protective gear and holding a chainsaw (no text or symbols)
natural_image
Technical line drawing of a mechanical assembly with no visible text or symbolsnatural_image
Line drawing of a chain-linking tool with a rack and handle (no text or symbols)natural_image
Illustration of a person using a tool to cut tree branches with a prohibition symbol (no text or labels)natural_image
Diagram of a mechanical device with rotating components and directional arrows (no text or symbols)natural_image
Illustration of a mechanical device with rotating components and a circular motion arrow (no text or symbols)natural_image
Simple line drawing of a mechanical device with a circular base and lever (no text or symbols)natural_image
Illustration of a person in full safety gear using a harness and safety harness (no text or symbols)natural_image
Line drawing of a car's front compartment showing internal components and wiring (no text or symbols)natural_image
Technical line drawing of a mechanical assembly with no visible text or symbols
natural_image
Illustration of a person climbing a rope with a safety harness (no text or symbols)natural_image
Illustration of a person in safety gear climbing ropes and harnesses (no text or symbols)natural_image
Illustration of a person in full gear holding a tool, standing on a slope (no text or symbols)ENTRETIEN
Généralités
natural_image
Technical line drawing of a mechanical assembly with no visible text or symbolsnatural_image
Illustration of a hand using a chainsaw to lift a piece of material (no text or symbols)ENTRETIEN
natural_image
Illustration of a worker operating a manual power tool (no text or symbols visible)natural_image
Line drawing of a chain-linking tool with blades and handle (no text or symbols)natural_image
Three black-and-white icons showing directional arrows, a magnifying glass, and a textured object (no text or symbols)natural_image
Line drawing of a chainsaw with motion lines indicating speed (no text or symbols)ENTRETIEN
Bouton d'arrêt
Silencieux
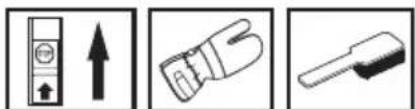
natural_image
Three black-and-white icons showing directional arrows, a magnifying glass, and a stylus (no text or symbols)natural_image
Technical line drawing of a mechanical device with internal components and directional arrows indicating movement (no text or symbols)natural_image
Technical line drawing of a mechanical assembly with no visible text or symbolsENTRETIEN
natural_image
Illustration of hands connecting a mechanical component with a rotating arrow (no text or symbols)natural_image
Technical line drawing of a mechanical assembly with no visible text or symbolsnatural_image
Illustration of hands adjusting a mechanical component with a circular arrow indicating rotation (no text or symbols)natural_image
Illustration of two hands using a tool to adjust or install a mechanical component (no text or symbols present)Montage du lanceur
natural_image
Line drawing of hands using a tool to cut or adjust a mechanical component (no text or symbols)natural_image
Mechanical assembly diagram showing internal components and a close-up of a housing (no text or labels)natural_image
Illustration of a person wearing a full-body mask and full-body gear, next to a first aid kit (no text or symbols visible)natural_image
Line drawing of two containers: a fire extinguisher and a manual shov (no text or symbols)natural_image
Line drawing of a manual chain saw (no text or symbols)natural_image
Technical diagram of a mechanical assembly with labeled component C (no text or symbols present)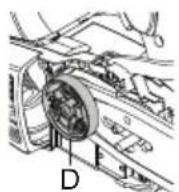
natural_image
Line drawing of a chainocorder with blade and handle (no text or symbols)natural_image
Line drawing of a person wearing a helmet and holding a chain-link device (no text or symbols)natural_image
Line drawing of a hand using a chainsaw to lift a gear (no text or symbols)natural_image
Line drawing of a chain-linking tool with blades and handle (no text or symbols)natural_image
Illustration of a worker in protective gear spraying water with a hose (no text or symbols)natural_image
Line drawing of a chainsaw with a hand operating it, showing blade geometry and a black arrow indicating motion (no text or symbols)natural_image
Illustration of a person bending over a rope with a downward arrow (no text or symbols)natural_image
Line drawing of a chainsaw with motion lines indicating speed (no text or symbols)natural_image
Simple line drawing of a VR headset with motion lines indicating speed (no text or symbols)
Marmitta
natural_image
Simple line drawing of a cylindrical object with length labeled 'L' (no text or symbols beyond the label)NORME GENERALI DI SICUREZZA
natural_image
Technical diagram showing a mechanical component with an arrow indicating direction, alongside a separate view of a tool or device (no text or symbols present)natural_image
Pure mechanical part diagram with no text, numbers, or symbolsnatural_image
Line drawing of a chain-linking tool with chains and a circular ring (no text or symbols)natural_image
Technical line drawing of a mechanical tool with an arrow indicating rotation (no text or symbols)NORME GENERALI DI SICUREZZA
natural_image
Three technical line drawings of mechanical components: a tool, a bracket with internal cavities, and a bracket with gear-like features (no text or symbols)natural_image
Simple line drawing of a tool pressing down on a brick surface, with an arrow indicating motion (no text or symbols)natural_image
Technical diagram showing a mechanical component with directional arrows and a close-up of its internal structure (no text or symbols)natural_image
Three technical line drawings of mechanical components: a tool, a part with cross-section, and a bracket (no text or symbols)natural_image
Technical line drawing of a mechanical component with no visible text or symbolsnatural_image
Illustration of two hands holding a curved object with directional arrows indicating movement (no text or symbols)natural_image
Technical line drawing of a mechanical device with no visible text or symbolsnatural_image
Technical line drawing of a mechanical device with no visible text or symbolsnatural_image
Illustration of a hand holding a chain-linker with arrows indicating force application (no text or symbols)natural_image
Diagram of a chain drive with a water drop symbol (no text or labels)natural_image
Illustration of a person using a power manual to cut tree bark (no text or symbols)natural_image
Simple line drawing of a screwdriver inserted into a slot on a surface (no text or symbols)natural_image
Line drawing of a hand holding a tool, no text or symbols presentnatural_image
Line drawing of a hand holding a smartphone with a stylus (no text or symbols)natural_image
Technical line drawing of a mechanical gear assembly (no text or symbols)natural_image
Line drawing of a pair of scissors with a handle and blade, no text or symbols presentnatural_image
Simple line drawing of a pen-like object with two arrows indicating direction (no text or symbols)natural_image
Mechanical assembly diagram showing a motor and gear assembly with no visible text or symbolsnatural_image
Mechanical assembly diagram showing a gear mechanism and a close-up of a component (no text or symbols)natural_image
Line drawing of a hand using a power tool to adjust or install a mechanical component (no text or symbols present)natural_image
Illustration of a hand holding a coiled cable with a force arrow indicating upward motion (no text or symbols)natural_image
Technical line drawing of a car interior showing engine, battery, and housing components (no text or labels)natural_image
Line drawing of a chainsaw with a warning symbol (no text or labels)natural_image
Line drawing of a chainsaw with a fuel pump icon (no text or symbols)
natural_image
Line drawing of a handheld device with a handle and arrow indicator (no text or symbols)Motore freddo
natural_image
Diagram of a car's internal components with an arrow pointing to a specific area (no text or labels present)natural_image
Diagram of a car interior showing hand positioning and valve mechanism (no text or labels)natural_image
Illustration of a worker in hard hat and gloves operating a manual power shaver (no text or symbols visible)natural_image
Technical line drawing of a car interior showing mechanical components and a directional arrow (no text or symbols)natural_image
Diagram of a car interior showing dashboard and steering wheel (no text or symbols)natural_image
Illustration of a worker in hard hat and gloves handling a mechanical device (no text or symbols visible)natural_image
Line drawing of a hand using a chainsaw to lift a piece of material (no text or symbols)natural_image
Two safety illustrations: one showing a worker using a power tool, the other showing a person with a no-smoking symbol (no text or labels present)natural_image
Illustration of a person in protective gear using a chainsaw (no text or symbols)
natural_image
Line drawing of a car's front and rear assembly showing internal components (no text or symbols)natural_image
Line drawing of a mechanical tool resembling a chain or saw (no text or symbols)natural_image
Illustration of a person using a tool to cut tree branches with a no-smoking symbol (no text or labels)natural_image
Diagram of a mechanical device with a rotating knob and directional arrows indicating motion (no text or symbols)natural_image
Illustration of a mechanical device with a rotating arrow and circular motion indicator (no text or symbols)natural_image
Simple line drawing of a mechanical device with a circular base and lever (no text or symbols)natural_image
Illustration of a person in full safety gear holding equipment, no text or symbols presentnatural_image
Line drawing of a car's front and side views showing engine compartment and wiring (no text or symbols)natural_image
Technical line drawing of a mechanical assembly with no visible text or symbols
natural_image
Illustration of a person climbing a rope with a harness (no text or symbols)natural_image
Illustration of a person in safety gear climbing ropes and harnesses (no text or symbols)natural_image
Illustration of a person in full gear holding a pole, standing on a slope (no text or symbols)MANUTENZIONE
Generalità
natural_image
Technical line drawing of a mechanical assembly with no visible text or symbolsnatural_image
Line drawing of a hand using a chainsaw to lift a piece of wood (no text or symbols)natural_image
Illustration of a worker operating a manual power saw (no text or symbols visible)natural_image
Line drawing of a chain-linking tool with three blades (no text or symbols)natural_image
Three technical diagrams showing directional arrows, a magnified view of a mechanical component, and a separate close-up of a tool (no text or symbols)natural_image
Line drawing of a chainsaw with motion lines indicating speed (no text or symbols)MANUTENZIONE
Marmitta
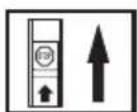
natural_image
Technical line drawing of a mechanical device with internal components and directional arrows indicating movement (no text or symbols)natural_image
Technical line drawing of a mechanical assembly with labeled parts (no text or symbols present)MANUTENZIONE
natural_image
Illustration of hands connecting a mechanical component with a rotating arrow (no text or symbols)natural_image
Technical line drawing of a mechanical assembly with a tool and housing (no text or symbols)natural_image
Illustration of hands holding a mechanical component with a circular arrow indicating rotation (no text or symbols)natural_image
Illustration of two hands using a tool to adjust or install a device component (no text or symbols visible)natural_image
Line drawing of hands using a tool to cut or adjust a mechanical component (no text or symbols)natural_image
Mechanical assembly diagram showing internal components and a close-up of a housing (no text or labels)natural_image
Illustration of a person wearing protective gear and a first aid kit (no text or symbols)natural_image
Line drawing of two different objects: a fire extinguisher and a shovet (no text or symbols)natural_image
Line drawing of a chainsaw with a handle and blade (no text or symbols)natural_image
Line drawing of a mechanical tool resembling a pickaxe or saw (no text or symbols)natural_image
Illustration of a person wearing a helmet and holding a chainsaw (no text or symbols)natural_image
Line drawing of a hand using a chainsaw to lift a piece of wood (no text or symbols)natural_image
Line drawing of a chain-linking tool with handle and blade (no text or symbols)natural_image
Illustration of a person in protective gear using a fire extinguisher (no text or symbols)natural_image
Line drawing of a manual chain saw with a hand holding the blade (no text or symbols)natural_image
Illustration of a person bending over a rope with a hand near the rope (no text or symbols)natural_image
Line drawing of a chainsaw with motion lines indicating speed (no text or symbols)natural_image
Simple line drawing of a VR headset with motion lines indicating speed (no text or symbols)Silenciador
natural_image
Simple line drawing of a cylindrical object with length labeled 'L' (no text or symbols beyond the label)natural_image
Diagram showing a vertical tube inserted into a slot and a triangular tool inserted into a slot (no text or symbols)natural_image
Pure mechanical part diagram with no text, numbers, or symbolsnatural_image
Line drawing of a chain-linking device with chains and a circular component (no text or symbols)natural_image
Technical line drawing of a mechanical tool with an arrow indicating rotation (no text or symbols)2 Ángulo de corte

natural_image
Technical line drawing of a mechanical linkage or clamping device (no text or symbols)natural_image
Three technical line drawings of mechanical components: a screwdriver, a gear-like bracket, and a bracket with cutouts (no text or symbols)natural_image
Diagram of a tool interacting with a block, showing an upward arrow (no text or symbols present)natural_image
Four-panel diagram showing directional and symbolic icons: vertical bar with upward arrow, eye, and palm (no text or labels)natural_image
Three technical line drawings of mechanical components: a radial tool, a rectangular housing, and a bracket-like structure (no text or symbols)natural_image
Pure mechanical diagram showing a tool interacting with a gear (no text or symbols)natural_image
Illustration of two hands holding a curved object with directional arrows indicating motion (no text or symbols)natural_image
Technical line drawing of a mechanical device with no visible text or symbolsnatural_image
Technical line drawing of a mechanical device with no visible text or symbolsnatural_image
Line drawing of a hand using a chain-linker to lift a rope or cable (no text or symbols present)natural_image
Diagram of a chain drive with a close-up inset showing a droplet (no text or symbols)natural_image
Illustration of a person using a power saw to cut tree bark (no text or symbols)natural_image
Simple line drawing of a screwdriver inserted into a mechanical component (no text or symbols)natural_image
Line drawing of a hand holding a tool, no text or symbols presentnatural_image
Line drawing of a hand holding a handheld device (no text or symbols)natural_image
Technical line drawing of a mechanical gear assembly (no text or symbols)natural_image
Line drawing of a knife with a handle and blade, showing a cutaway view (no text or symbols)natural_image
Simple line drawing of a curved object with two arrows indicating direction (no text or symbols)natural_image
Mechanical assembly diagram showing a motor and gear mechanism with no visible text or symbolsnatural_image
Mechanical assembly diagram showing a gear and tool interacting with a bracket (no text or symbols)natural_image
Line drawing of a hand holding a mechanical tool with a screwdriver inserted (no text or symbols)natural_image
Illustration of a hand holding a tool with an arrow indicating direction (no text or symbols)natural_image
Line drawing of a car interior showing the wheel and seat assembly (no text or symbols)natural_image
Line drawing of a chainsaw with a warning symbol (no text or labels)natural_image
Line drawing of a chainsaw with a fuel pump icon (no text or symbols)
natural_image
Line drawing of a handheld device with a black arrow indicating direction (no text or symbols)Motor frío
natural_image
Technical line drawing of a car interior showing engine and dashboard components with an arrow indicating a specific part (no text or symbols present)natural_image
Diagram of a car interior showing steering wheel, dashboard, and steering wheel (no text or labels)natural_image
Illustration of a worker using a power tool to cut a block (no text or symbols visible)natural_image
Diagram of a car's front and side views showing engine components (no text or labels)natural_image
Line drawing of a mechanical component with arrows indicating motion or movement (no text or symbols)natural_image
Illustration of a worker in hard hat and gloves operating a manual power shaver (no text or symbols visible)natural_image
Line drawing of a hand using a chainsaw to lift a piece of material (no text or symbols)natural_image
Simple line drawing of a crossed-out cigarette with smoke and a diagonal slash (no text or symbols)natural_image
Illustration of two workers: one handling a bag, the other holding a cross symbol (no text or labels)natural_image
Illustration of a person in protective gear holding a chainsaw (no text or symbols)
natural_image
Line drawing of a car's front compartment showing internal components and wiring (no text or symbols)natural_image
Line drawing of a chain saw with blades and handle (no text or symbols)natural_image
Illustration of a person using a tool to cut tree branches, no text or symbols presentnatural_image
Diagram of a mechanical device with rotating arm and circular component (no text or symbols)natural_image
Illustration of a mechanical device with a rotating circular component (no text or symbols)natural_image
Diagram of a mechanical device with a cylindrical component and lever mechanism (no text or symbols)natural_image
Illustration of a person in full safety gear holding equipment, no text or symbols presentnatural_image
Line drawing of a car's front compartment showing internal components and wiring (no text or symbols)natural_image
Technical line drawing of a mechanical assembly with hands operating components (no text or symbols)
natural_image
Illustration of a person climbing a rope with a safety harness (no text or symbols)natural_image
Illustration of a person in safety gear climbing ropes and harnesses (no text or symbols)natural_image
Illustration of a person in full gear holding a pole, standing on a slope (no text or symbols)MANTENIMIENTO
Generalidades
natural_image
Technical line drawing of a mechanical assembly with no visible text or symbolsnatural_image
Line drawing of a hand using a chainsaw to cut a tool (no text or symbols present)natural_image
Illustration of a worker in protective gear using a power tool (no text or symbols visible)natural_image
Line drawing of a manual chain saw (no text or symbols)natural_image
Three black-and-white icons showing different mechanical or electrical components: a vertical panel with an arrow, a magnified view of a grip, and a separate tool (no text or symbols)natural_image
Line drawing of a chainsaw with motion lines indicating speed (no text or symbols)MANTENIMIENTO
Botón de parada
Silenciador

natural_image
Three black-and-white icons showing directional arrows, a magnified view of a mechanical component, and a textured object (no text or symbols)natural_image
Technical line drawing of a mechanical device with internal components and directional arrows (no text or symbols)natural_image
Technical line drawing of a mechanical assembly with labeled parts (no text or symbols present)natural_image
Illustration of hands connecting a mechanical component with a rotating arrow (no text or symbols)natural_image
Technical line drawing of a mechanical device with handle and base components (no text or symbols)natural_image
Illustration of hands adjusting a mechanical component with a circular arrow indicating rotation (no text or symbols)natural_image
Illustration of two hands using a tool to adjust or install a small object on a slide (no text or symbols present)natural_image
Line drawing of hands using a tool to cut or adjust a mechanical component (no text or symbols)natural_image
Mechanical assembly diagram showing components like a bracket and housing with directional arrows (no text or labels)natural_image
Simple line and icon depicting a dome-shaped object with a downward arrow above a fuel pump (no text or symbols)

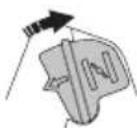
Estrangulador.

natural_image
Illustration of a person wearing full-body protective gear and a first aid kit (no text or symbols)natural_image
Line drawing of two different fire extinguishers, one with a handle and the other with a shovel (no text or symbols)natural_image
Line drawing of a chainsaw with a lever handle (no text or symbols)natural_image
Line drawing of a manual chain saw (no text or symbols)natural_image
Line drawing of a person wearing a hooded jacket and holding a chainsaw (no text or symbols)natural_image
Line drawing of a hand using a chainsaw to lift a wire (no text or symbols)natural_image
Line drawing of a chain-linking tool with blades and handle (no text or symbols)natural_image
Illustration of a worker in protective gear using a power shaver to lift a cylindrical device (no text or symbols)natural_image
Line drawing of a chainsaw with a hand holding the blade and a black arrow indicating motion (no text or symbols)natural_image
Illustration of a person bending over a foot with a small object, no text or symbols presentnatural_image
Line drawing of a chainsaw with motion lines indicating speed (no text or symbols)natural_image
Simple line drawing of a VR headset with motion lines indicating sound waves (no text or symbols)
Silenciador
natural_image
Diagram showing a vertical tube inserted into a slot and a close-up of the slot with a triangular tip (no text or symbols)natural_image
Pure mechanical component diagram without any text, numbers, or symbolsnatural_image
Line drawing of a chain-linking tool with a magnifying glass and coiled spring (no text or symbols)natural_image
Technical line drawing of a mechanical tool with an arrow indicating rotation (no text or symbols)2 Ângulo de ataque
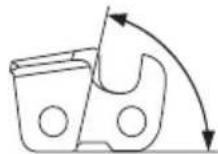
3 Posição da lima
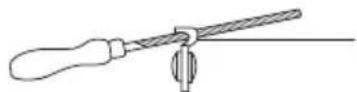
natural_image
Three technical line drawings of mechanical components: a rod, a bracket with internal cavities, and a bracket with cutouts (no text or symbols)natural_image
Simple line drawing of a tool interacting with a block, no text or symbols presentnatural_image
Four black-and-white icons: a vertical bar with number 7, an eye, and a bandage (no text or symbols)natural_image
Three technical line drawings of mechanical components: a tool, a bracket, and a clamping device (no text or symbols)natural_image
Technical line drawing of a mechanical component with a threaded fastener inserted (no text or symbols)natural_image
Illustration of two hands holding a curved object with directional arrows indicating motion (no text or symbols)natural_image
Technical line drawing of a mechanical device with no visible text or symbolsnatural_image
Technical line drawing of a mechanical device with no visible text or symbolsnatural_image
Illustration of a hand holding a chain-linker with arrows indicating force application (no text or symbols)natural_image
Diagram of a chain drive with a close-up inset showing a water drop symbol (no text or labels)natural_image
Illustration of a person wearing a protective gear and bucket cover, using a power tool to lift a tree stump (no text or symbols present)natural_image
Simple line drawing of a screwdriver inserted into a mechanical component (no text or symbols)INSTRUÇÕES GERAIS DE SEGURANÇA
natural_image
Line drawing of a hand holding a ruler, no text or symbols presentnatural_image
Line drawing of a hand holding a smartphone with a circular button (no text or symbols)natural_image
Technical line drawing of a mechanical gear assembly (no text or symbols)natural_image
Three black-and-white icons showing different mechanical or electrical components: a vertical panel with upward arrow, a hand gesture with a handle, and a tool holder (no text or symbols)Verifique regularmente:
natural_image
Diagram showing a pair of saw tools with a central blade and handle, no text or symbols presentnatural_image
Simple line drawing of a tool or plunger with two arrows indicating direction (no text or symbols)INSTRUÇÕES GERAIS DE SEGURANÇA
natural_image
Mechanical assembly diagram showing a motor and gear assembly with no visible text or symbolsnatural_image
Mechanical assembly diagram showing a gear mechanism and a close-up of a component (no text or symbols)natural_image
Line drawing of a hand using a power tool to adjust or install a mechanical component (no text or symbols present)natural_image
Illustration of a hand holding a tool with an arrow indicating direction (no text or symbols)natural_image
Technical line drawing of a car interior showing engine and wheel assembly (no text or symbols)natural_image
Line drawing of a chainsaw with a warning symbol (no text or labels)natural_image
Line drawing of a chainsaw with a fuel pump icon (no text or symbols)
natural_image
Line drawing of a handheld device with a black arrow indicating direction (no text or symbols)Motor frio
natural_image
Diagram of a car interior showing a vehicle's seat and dashboard with an arrow pointing to the wheel (no text or symbols present)natural_image
Diagram of a car interior showing hand positioning and wheel movement (no text or labels)natural_image
Illustration of a worker in hard hat and mask using a power tool (no text or symbols)natural_image
Technical line drawing of a mechanical component with an arrow indicating a specific part (no text or symbols present)natural_image
Diagram of a car interior showing steering wheel, dashboard, and steering wheel (no text or symbols)natural_image
Illustration of a worker in hard hat and safety gear handling equipment (no text or symbols visible)natural_image
Line drawing of a hand using a chainsaw to lift a piece of material (no text or symbols)natural_image
Two safety symbols: a worker in protective gear handling equipment and a construction worker with a no-smoking symbol (no text or labels)natural_image
Illustration of a person wearing protective gear and holding a chainsaw (no text or symbols)TÉCNICA DE TRABALHO

natural_image
Line drawing of a car's head and neck assembly (no text or symbols)natural_image
Line drawing of a chain-linking tool with handle and blade (no text or symbols)natural_image
Illustration of a person using a tool to cut tree branches with a no-smoking symbol (no text or labels)natural_image
Illustration of a hand using a tool to lift a circular component with directional arrows (no text or symbols)natural_image
Illustration of a mechanical device with a rotating ring and directional arrows (no text or symbols)natural_image
Technical line drawing of a mechanical device with a circular component and lever (no text or symbols)TÉCNICA DE TRABALHO
natural_image
Illustration of a person in full safety gear holding equipment, no text or symbols presentnatural_image
Line drawing of a car's front compartment showing internal components and wiring (no text or symbols)natural_image
Technical line drawing of a mechanical assembly with no visible text or symbols
natural_image
Illustration of a person climbing a rope with a device attached (no text or symbols)natural_image
Illustration of a person in safety gear climbing ropes (no text or symbols)natural_image
Illustration of a person in protective gear holding equipment, standing on a utility pole (no text or symbols)MANUTENÇÃO
Noções gerais
natural_image
Technical line drawing of a mechanical assembly with no visible text or symbolsnatural_image
Line drawing of a hand using a chainsaw to cut a tool (no text or symbols present)natural_image
Illustration of a worker using a power saw to cut a mechanical component (no text or symbols visible)natural_image
Line drawing of a chain-linking tool with handle and blade (no text or symbols)natural_image
Three black-and-white icons showing mechanical or electrical components: a vertical knob, an upward arrow, and a magnified view of a tool (no text or symbols)natural_image
Line drawing of a chainsaw with motion lines indicating speed (no text or symbols)MANUTENÇÃO
Contacto de paragem
Silenciador
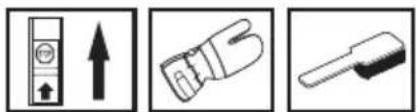
natural_image
Three black-and-white icons showing directional arrows, a magnifying glass, and a brush tool (no text or symbols)natural_image
Technical line drawing of a mechanical component with internal channels and arrows indicating movement (no text or symbols)natural_image
Technical line drawing of a mechanical assembly with no visible text or symbolsnatural_image
Illustration of hands using a tool to adjust or install a mechanical component, no text or symbols present- Desaperte o parafuso no centro do carretel e desmonte o carretel.
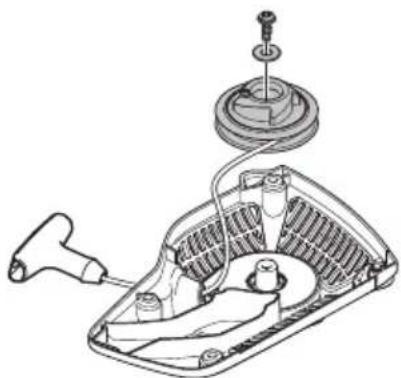
natural_image
Technical line drawing of a mechanical device with a base, spring, and housing (no text or symbols)natural_image
Illustration of hands holding a mechanical component with a circular arrow indicating rotation (no text or symbols)Troca de mola de retorno partida
natural_image
Illustration of two hands using a tool to adjust or install a mechanical component (no text or symbols present)natural_image
Line drawing of hands using a tool to cut or adjust a mechanical component (no text or symbols)- Monte e aperte os parafusos que prendem o dispositivo de arranque.
Filtro de ar
natural_image
Mechanical assembly diagram showing motor components and a close-up of a bracket (no text or labels)natural_image
Illustration of a person climbing a tree with a diagonal line indicating no movement (no text or symbols)natural_image
Illustration of a person wearing a full-body mask and full-body suit, standing next to a first aid kit (no text or symbols visible)natural_image
Line drawing of two objects: a fire extinguisher and a shovel (no text or symbols)natural_image
Line drawing of a chainsaw with a wooden blade and handle (no text or symbols)natural_image
Technical line drawing of a mechanical component with labeled parts (no readable text or symbols)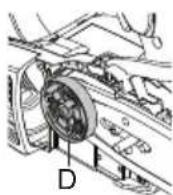
natural_image
Line drawing of a manual chain saw (no text or symbols)natural_image
Line drawing of a person wearing a helmet and holding a chainsaw (no text or symbols)natural_image
Line drawing of a hand using a chainsaw to lift a piece of material (no text or symbols)natural_image
Line drawing of a chain-linking tool with blades and handle (no text or symbols)natural_image
Illustration of a worker spraying water with a hose (no text or symbols)natural_image
Line drawing of a chainsaw with a hand holding the blade and a black arrow indicating motion (no text or symbols)natural_image
Illustration of a person bending over a rope, no text or symbols presentnatural_image
Line drawing of a chainsaw with motion lines indicating speed (no text or symbols)natural_image
Diagram of a car interior showing engine components and a worker in action (no text or labels)natural_image
Simple line drawing of a VR headset with motion lines indicating sound waves (no text or symbols)
Σιγαστήρας
natural_image
Diagram showing a mechanical component with an arrow indicating direction, alongside a separate view of a tool or device (no text or symbols present)natural_image
Pure technical diagram showing a mechanical part with a side view of a cylindrical component (no text or symbols)natural_image
Line drawing of a chain-linking tool with chains and a circular ring (no text or symbols)natural_image
Technical line drawing of a mechanical tool with an arrow indicating rotation (no text or symbols)2 H γωνία κοπής
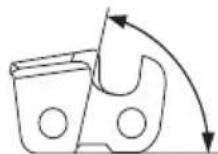
3 Η θέση της λίμας

natural_image
Technical line drawing of a mechanical linkage or bracket assembly (no text or symbols)natural_image
Three black-and-white icons: a vertical bar with upward arrow, an eye, and a wristband (no text or symbols)natural_image
Three technical line drawings of mechanical components: a rod, a bracket with internal cavities, and a bracket with cutouts (no text or symbols)natural_image
Diagram of a tool pressing down on a brick surface with an arrow indicating motion (no text or symbols)natural_image
Four black-and-white line drawings: a vertical bar with upward arrow, an eye, and a hand gesture (no text or symbols)natural_image
Three technical line drawings of mechanical components: a tool, a bracket, and a clamping device (no text or symbols)natural_image
Technical line drawing of a mechanical component with no visible text or symbolsΤέντωμα αλυσίδας
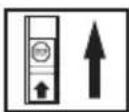

natural_image
Illustration of two hands holding a cylindrical object with directional arrows indicating movement or force (no text or symbols)natural_image
Technical line drawing of a mechanical device with rotating components (no text or symbols)natural_image
Technical line drawing of a mechanical device with no visible text or symbolsnatural_image
Illustration of a hand holding a chainocorder with arrows indicating force application (no text or symbols)natural_image
Diagram of a chain drive with a water drop symbol (no text or labels)natural_image
Illustration of a person using a power saw to cut tree bark (no text or symbols)natural_image
Simple line drawing of a screwdriver inserted into a mechanical component (no text or symbols)natural_image
Line drawing of a hand holding a ruler or pen, no text or symbols presentnatural_image
Line drawing of a hand holding a smartphone with a key inserted (no text or symbols)natural_image
Technical line drawing of a mechanical gear assembly (no text or symbols)natural_image
Pure mechanical component diagram without any text, numbers, or symbolsnatural_image
Line drawing of a pair of scissors with a handle and arrow indicating direction (no text or symbols)natural_image
Simple line drawing of a curved object with two arrows indicating direction (no text or symbols)natural_image
Mechanical assembly diagram showing a motor and gear assembly with no visible text or symbolsnatural_image
Mechanical assembly diagram showing a chain-linking device with gear and mounting bracket (no text or symbols)natural_image
Line drawing of a hand holding a chainsaw with a screwdriver inserted (no text or symbols)natural_image
Illustration of a tool applying material to a surface, showing motion direction (no text or symbols)natural_image
Technical line drawing of a car interior showing engine compartment and wheel assembly (no text or symbols)
natural_image
Illustration of a uniformed officer holding a bag, no text or symbols presentnatural_image
Line drawing of a chainsaw with a gear handle and mounting bracket (no text or symbols)natural_image
Line drawing of a chainsaw with a fuel pump icon (no text or symbols)
natural_image
Line drawing of a handheld device with a black arrow indicating direction (no text or symbols)Κρύος κινητήρας
natural_image
Technical line drawing of a car interior showing structural components and a black arrow indicating a specific part (no text or symbols present)natural_image
Diagram of a car interior showing hand positioning and wheel movement (no text or symbols)natural_image
Illustration of a worker in hard hat and safety gear operating a chainsaw (no text or symbols)natural_image
Technical line drawing of a car interior showing engine and dashboard components with an arrow indicating a specific part (no text or symbols present)natural_image
Line drawing of a car interior showing steering wheel, dashboard, and steering wheel (no text or symbols)natural_image
Illustration of a worker in hard hat and mask performing manual labor on a machine (no text or symbols visible)natural_image
Line drawing of a chainsaw with a hand holding the blade and a black arrow indicating motion (no text or symbols)natural_image
Two safety illustrations: one showing a worker using a tool, the other showing a person with a no-smoking symbol (no text or labels present)natural_image
Illustration of a person wearing a protective gear and holding a chainsaw (no text or symbols)
natural_image
Line drawing of a car's front compartment showing engine, dashboard, and exhaust pipe (no text or symbols)natural_image
Line drawing of a chain-linking tool with handle and blade (no text or symbols)natural_image
Illustration of a person using a tool to cut tree branches, no text or symbols presentnatural_image
Illustration of a hand holding a tool with a magnifying glass nearby (no text or symbols)natural_image
Illustration of a mechanical tool with a circular motion arrow indicating rotational motion (no text or symbols)THXNIKH HPRASIAΣ
natural_image
Technical line drawing of a mechanical device with a circular component and lever (no text or symbols)natural_image
Line drawing of a person wearing full-body protective gear and safety harnesses, holding ropes and equipment (no text or symbols)natural_image
Line drawing of a car's head and neck assembly, showing internal components and wiring (no text or symbols)natural_image
Technical line drawing of a mechanical assembly with hands operating components (no visible text or symbols)
natural_image
Illustration of a person climbing a rope with a safety harness (no text or symbols)natural_image
Illustration of a person climbing ropes with a helmet, no text or symbols presentTHXNIKH HPRASIAΣ
natural_image
Line drawing of a person in protective gear holding a rifle, standing on a slope (no text or symbols)ΣΥΝΤΗΡΗΣΗ
Γηνικά
natural_image
Technical line drawing of a mechanical assembly with no visible text or symbolsnatural_image
Line drawing of a hand using a chainsaw to lift a tree (no text or symbols)natural_image
Illustration of a worker operating a manual power shaver (no text or symbols visible)natural_image
Line drawing of a manual chain saw with blades (no text or symbols)natural_image
Line drawing of a manual chainshaw with motion lines indicating speed (no text or symbols)Διακόπτης Στοπ
ΣΥΝΤΗΡΗΣΗ
Σιγαστήρας
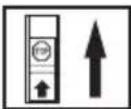


natural_image
Technical line drawing of a mechanical component with internal channels and arrows indicating movement (no text or symbols)natural_image
Technical line drawing of a mechanical assembly with no visible text or symbolsnatural_image
Illustration of hands connecting a mechanical component with a rotating cable (no text or symbols)ΣΥΝΤΗΡΗΣΗ
natural_image
Technical line drawing of a mechanical assembly with a tool and component (no text or symbols)natural_image
Illustration of hands using a mechanical device to rotate or rotate a circular component (no text or symbols present)natural_image
Illustration of two hands using a tool to adjust or install a mechanical component (no text or symbols present)natural_image
Line drawing of hands using a tool to adjust or install a mechanical component (no text or symbols present)natural_image
Mechanical assembly diagram showing motor components and a close-up of a bracket (no text or labels)natural_image
Abstract black-and-white graphic with three stylized shapes: a plus sign, a car with wheels, and a droplet (no text or symbols)Çalışma pozisyonu.
Jikle.
natural_image
Diagram of a mechanical component with an arrow indicating direction (no text or symbols)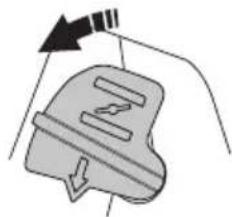
natural_image
Simple line drawing of a mechanical component with an arrow indicating direction (no text or symbols)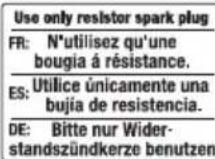
natural_image
Illustration of a person falling off a tree with a diagonal line indicating no movement or restriction (no text or symbols)natural_image
Illustration of a person wearing protective gear and a first aid kit (no text or symbols)natural_image
Line drawing of two different fire extinguishers, one with a handle and the other with a shovel (no text or symbols)natural_image
Line drawing of a manual chain-linker (no text or symbols)natural_image
Line drawing of a mechanical tool resembling a chain or saw (no text or symbols)natural_image
Illustration of a person in uniform holding a chain-link device (no text or symbols)natural_image
Line drawing of a hand using a chainsaw to lift a piece of material (no text or symbols)natural_image
Line drawing of a chain-linking tool with blades and handle (no text or symbols)natural_image
Illustration of a worker in protective gear spraying water with a hose (no text or symbols)natural_image
Line drawing of a chainsaw with a downward arrow indicating motion (no text or symbols)natural_image
Illustration of a person using a tool to clean or wear a surface, with no visible text or symbols.natural_image
Line drawing of a chainsaw with motion lines indicating speed (no text or symbols)GENEL GÜVENLIK AÇIKLAMALARI
natural_image
Simple line drawing of a VR headset with motion lines indicating speed (no text or symbols)
Susturucu
natural_image
Diagram showing a vertical tube inserted into a container and then being placed into a flat object (no text or symbols present)GENEL GÜVENLIK AÇIKLAMALARI
natural_image
Pure mechanical part diagram with no text, numbers, or symbolsnatural_image
Line drawing of a manual chain saw with tools and a circular object nearby (no text or symbols)natural_image
Technical line drawing of a mechanical tool with an arrow indicating rotation (no text or symbols)2 Çarpma açısı

3 Eğenin konumu
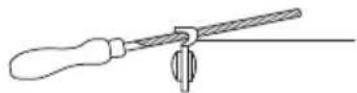
4 Yuvarlak eğe çapí
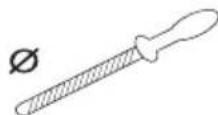
natural_image
Technical line drawing of a mechanical linkage or clamping device (no text or symbols)natural_image
Four black-and-white icons: vertical bar with upward arrow, eye, and glove (no text or symbols)natural_image
Three technical line drawings of mechanical components: a rod, a bracket with internal cavities, and a bracket with protrusions (no text or symbols)GENEL GÜVENLIK AÇIKLAMALARI
natural_image
Simple line drawing of a tool pressing down on a block, with an arrow indicating upward motion (no text or symbols)natural_image
Three simple line drawings: a vertical bar with an upward arrow, an eye, and a glove (no text or symbols)natural_image
Three technical line drawings of mechanical components: a tool, a part with cross-section, and a clamping device (no text or symbols)natural_image
Technical line drawing of a mechanical tool or device with a threaded component inserted (no text or symbols)Zincirin gerilimi


natural_image
Illustration of two hands holding a curved object with directional arrows indicating motion (no text or symbols)natural_image
Technical line drawing of a mechanical device with no visible text or symbolsGENEL GÜVENLIK AÇIKLAMALARI
natural_image
Technical line drawing of a mechanical device with no visible text or symbolsnatural_image
Illustration of a hand holding a chain-linker being inserted into a damaged cable (no text or symbols present)natural_image
Diagram of a chain drive with a close-up inset showing a droplet symbol (no text or labels)natural_image
Illustration of a worker using a power tool to clean tree bark (no text or symbols)natural_image
Line drawing of a screwdriver inserted into a mechanical component (no text or symbols)natural_image
Line drawing of a hand holding a tool, no text or symbols presentnatural_image
Line drawing of a hand holding a smartphone (no text or symbols)natural_image
Technical line drawing of a mechanical gear assembly (no text or symbols)natural_image
Mechanical assembly diagram showing gear and cam components (no text or labels)natural_image
Three black-and-white icons showing different mechanical or electrical components: a vertical panel with an arrow, a hand holding a wrench, and a push-button tool (no text or symbols)Sürekli denetim:
natural_image
Technical line drawing of a saw cutting tool with a handle and blade, alongside a separate schematic diagram (no text or symbols)natural_image
Simple line drawing of a pen-like object with two arrows indicating direction (no text or symbols)GENEL GÜVENLIK AÇIKLAMALARI
natural_image
Mechanical assembly diagram showing a gear and shaft components with an arrow pointing to a specific part (no text or labels present)natural_image
Mechanical assembly diagram showing a cutting tool interacting with a gear-like component, with an inset view of a bracket (no text or symbols present)natural_image
Line drawing of a hand holding a mechanical tool with a screwdriver inserted (no text or symbols)natural_image
Illustration of a tool applying material to a surface, showing an arrow indicating direction (no text or symbols)natural_image
Line drawing of a car interior showing a person working on the wheel and arm (no text or symbols)natural_image
Line drawing of a chainsaw with a warning symbol (no text or labels)natural_image
Line drawing of a chainsaw with a fuel pump icon (no text or symbols)
natural_image
Line drawing of a handheld device with a downward arrow indicating action (no text or symbols)Soğuk motor
natural_image
Technical line drawing of a car's front and side views showing engine components (no text or labels)natural_image
Diagram of a car interior showing hand positioning and wheel movement (no text or symbols)natural_image
Illustration of a worker in hard hat and mask using a chainsaw (no text or symbols)natural_image
Line drawing of a car's front wheel assembly with an arrow indicating the component (no text or symbols present)ÇALIŞTIRMA VE DURDURMA
natural_image
Diagram of a car interior showing steering wheel, dashboard, and steering wheel (no text or labels)natural_image
Illustration of a worker in hard hat and mask operating a manual power shaver (no text or symbols visible)natural_image
Line drawing of a hand using a chainsaw to lift a piece of material (no text or symbols)natural_image
Simple line drawing of a crossed-out cigarette with smoke and a diagonal line (no text or symbols)natural_image
Illustration of a worker handling equipment and a person wearing a crosshair (no text or symbols)natural_image
Illustration of a person wearing a hooded jacket and safety gear, holding a chainsaw (no text or symbols present)ÇALIŞTIRMA VE DURDURMA

natural_image
Line drawing of a car's front and side views showing engine, dashboard, and wheel components (no text or symbols)natural_image
Line drawing of a manual chain saw with blades and handle (no text or symbols)natural_image
Illustration of a person using a tool to cut tree branches with a no-smoking symbol (no text or labels)natural_image
Diagram of a mechanical device with directional arrows indicating motion or force (no text or symbols)natural_image
Simple line drawing of a mechanical device with a rotating wheel and directional arrows (no text or symbols)natural_image
Simple line drawing of a mechanical device mounted on a circular base (no text or symbols)natural_image
Line drawing of a person in full safety gear holding equipment, no text or symbols presentnatural_image
Line drawing of a car's front compartment showing internal components and wiring (no text or symbols)natural_image
Line drawing of a mechanical assembly with gears and components (no text or symbols)
natural_image
Illustration of a person climbing a rope with a harness and safety gear (no text or symbols)natural_image
Illustration of a person in safety gear climbing ropes (no text or symbols)natural_image
Illustration of a person in protective gear holding a tool, standing on a slope (no text or symbols)BAKIM
Genel
natural_image
Technical line drawing of a mechanical assembly with no visible text or symbolsnatural_image
Illustration of a hand using a chainsaw to lift a tool, showing motion arrows (no text or symbols)natural_image
Illustration of a worker in hard hat and mask using a power tool (no text or symbols visible)natural_image
Line drawing of a mechanical tool with a rack and blades (no text or symbols)natural_image
Line drawing of a chainsaw with motion lines indicating speed (no text or symbols)natural_image
Diagram of a car interior showing engine components and a worker in action (no text or labels)Stop düğmesi
Susturucu
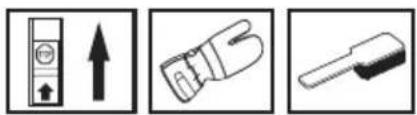
natural_image
Three black-and-white icons showing directional arrows, a stylized glove, and a textured brush (no text or symbols)natural_image
Technical line drawing of a mechanical device with internal components and directional arrows (no text or symbols)natural_image
Technical line drawing of a mechanical assembly with no visible text or symbolsnatural_image
Illustration of hands using a tool to switch a component with a circular arrow indicating rotation (no text or symbols present)BAKIM
natural_image
Technical line drawing of a mechanical device with a handle and base mount (no text or symbols)natural_image
Illustration of hands using a mechanical device to rotate or rotate a circular component (no text or symbols present)natural_image
Illustration of two hands using a tool to adjust or install a mechanical component (no text or symbols present)natural_image
Line drawing of hands using a tool to cut or adjust a mechanical component (no text or symbols)natural_image
Mechanical assembly diagram showing gear and housing components with directional arrows (no text or labels)Use only resistor spark plug
FR: N'utilisez qu'une bougia á résistance. ES: Utilice únicamente una bujía de resistencia. DE: Bitte nur Widerstandszündkerze benutzen
natural_image
Illustration of a person climbing a tree with a diagonal line indicating no movement (no text or symbols)natural_image
Illustration of a person wearing protective gear and a first aid kit (no text or symbols)- Zaštitna kaciga (odobrena u skladu sa standardom EN 12492)
• Zaštita protiv buke
• Zaštitne naočale ili vizir
• Rukavice sa zaštitom od pile
• Hlače sa zaštitom od pile
• Koristite prikladnu zaštitu za ruke. - Čizme sa zaštitom od pile, čeličnim špicom i neklizećim potplatom
• Uvijek imajte kutiju za prvu pomoć pri ruci.
• Vatrogasni aparat i lopata
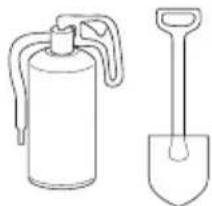
natural_image
Line drawing of two objects: a fire extinguisher and a manual shov (no text or symbols)Odjeća treba biti pripijena ali bez da Vas sputava u kretanju.
natural_image
Line drawing of a chainsaw with a handle and blade (no text or symbols)Budite oprezni prilikom uporabe i nastojte da područje trzaja nikad ne dotakne neki predmet.
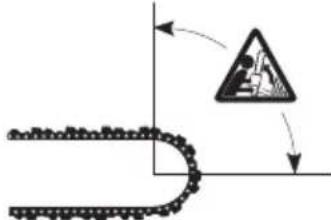
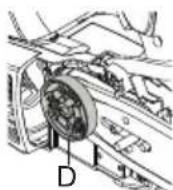
- Prednj štit za ruke nije napravljen samo da bi aktivirao kočnicu za lanac. Vrlo važna sigurunosna mjera je i to da štit sprečava to da Vas lanac udari po lijevoj ruci ukoliko ispustite prednju ručku.
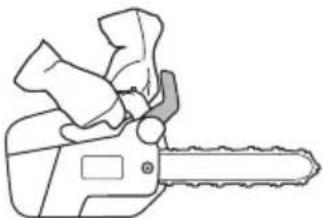
natural_image
Line drawing of a chain-linking tool with handle and blade (no text or symbols)natural_image
Illustration of a person wearing a helmet and holding a chainsaw (no text or symbols)- Da biste otpustili kočnicu za lanac, potegnite prednji štit za ruke prema natrag, prema prednjoj ručci.
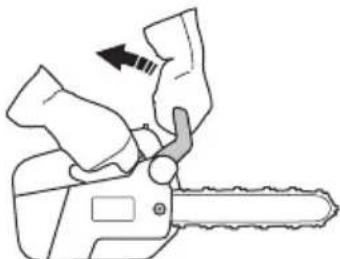
natural_image
Line drawing of a hand using a chainsaw to lift a piece of material (no text or symbols)- Trzaj može biti veoma iznenadan i snažan. Većina trzaja su slabiji i ne aktiviraju uvijek kočnicu za lanac. Ukoliko se to dogodi. Vi biste trebali držati motornu pilu vrlo čvrsto i ne ispustiti je.
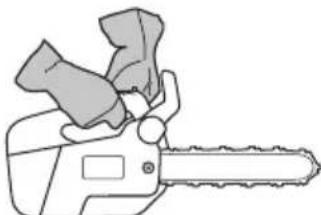
natural_image
Line drawing of a chain-linking tool (no text or symbols)- Način na koji je kočnica za lanac aktivirana, bilo ručno ili automatski, ovisi o snazi trzaja i položaju motorne pile u odnosu na predmet koji je udaren trzajnom zonom mača.
OPĆENITA PRAVILA ZA SIGURNOST NA RADU
natural_image
Illustration of a worker spraying water with a hose (no text or symbols)Ukoliko je trzaj slabiji ili ako se trzajna zona mače nalazi bliže Vas, kočnicu za lanac ćete aktivirati ručno, pokretom lijeve ruke.
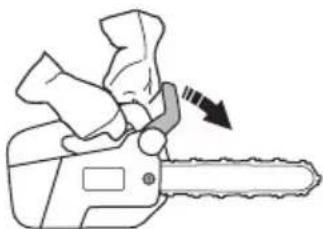
natural_image
Line drawing of a chainsaw with a hand holding a blade and a black arrow indicating motion (no text or symbols)natural_image
Illustration of a person bending over a rope with a hand, no text or symbols presentnatural_image
Line drawing of a chainsaw with motion lines indicating speed (no text or symbols)Strojev sistem za smanjivanje vibracija, smanjuje vibracije koje se od motora i lanca kreću prema ručkama stroja. Tijelo motorne pile, uključujući i opremu za rezanje, je odvojeno od ručki napravama za smanjivanje vibracija.
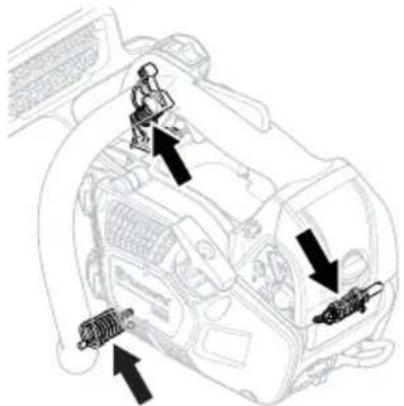
Rezanje tvrdog drveta (većina bjelogorice) uzrokuje jače vibracije nego rezanje mekog drveta (većina crnogorice). Rezanje lancem koji je tup ili neispravan (krive vrste ili loše nabrušen) povečat će vibracije.
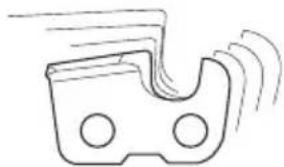
natural_image
Simple line drawing of a VR headset with motion lines indicating speed (no text or symbols)
Prigušivač
Prigušivač je napravljen tako da smanji buku na minimum i da udalji ispušne pare od korsnika.
- Oprema za rezanje uvijek mora biti dobro podmazana i održavana! Lanac koji nije dobro podmazan će puknuti i uzrokovati pretjerano trošenje mača, lanca i pogonskog kotača.
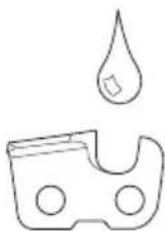
Rezna oprema je oblikovana za minimiziranje povratnog trzaja

UPOZORENJE! Neispravna rezna oprema ili pogrešna kombinacija vodilice i lanca povećava rizik od povratnog trzaja! Koristite samo preporučene kombinacije vodilice/lanca i postupajte u skladu s uputama o brušenju. Pogledajte odjeljak Tehničke karakteristike.
Jedini način da izbjegnete trzaj je taj da osigurate da područje trzaja nikad ništa ne dodiruje.
natural_image
Simple line drawing of a cylindrical object with length labeled 'L' and two small protrusions on top (no text or symbols beyond the label)• Broj zubaca na vrhu kotača mača (T).

- Razmak lanca (=pitch) (col). Razmak između pokretajućih karika lanca mora odgovarati razmaku između zubaca na kotaču vrhu mača i pogonskih karika.
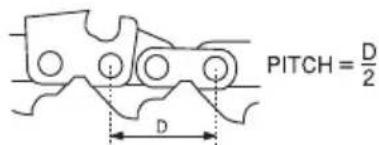
- Broj pogonskih karika (kom.). Broj pogonskih karika je određen dužinom mača, razmacima u lancu i brojem zubaca na kotaču na vrhu mača.

natural_image
Pure mechanical linkage diagram without any text, numbers, or symbols- Širina ureza na maču (col/mm). Urez na poluzi mora odgovarati širini pogonskih karika na lancu.
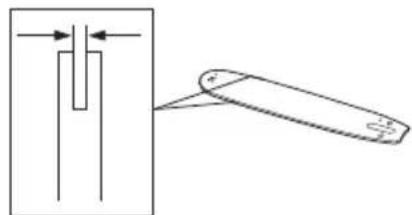
natural_image
Diagram showing a mechanical component with an arrow indicating direction, alongside a separate view of a tool or device (no text or symbols present)OPĆENITA PRAVILA ZA SIGURNOST NA RADU
- Otvor za ulje na lančanoj pili otvor za natezač lanca. Mač mora odgovarati dizajnu motorne pile.
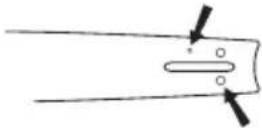
Lanac pile
- Razmak lančane pile (=pitch) (col)
- Širina pogonskih karika (mm/col)
natural_image
Pure technical diagram showing a mechanical part outline and a vertical rod with dimension arrows (no text or symbols)natural_image
Line drawing of a manual cutting tool with a circular head and chain, no text or symbols presentnatural_image
Technical line drawing of a mechanical tool with an arrow indicating rotation (no text or symbols)2 Rezni ugao
3 Položaj turpije
natural_image
Technical line drawing of a mechanical linkage or bracket assembly (no text or symbols)natural_image
Three technical line drawings of mechanical components: a rod, a bracket with internal cavities, and a bracket with holes (no text or symbols)- Provjerite da li je lanac ispravno zategnut. Nedovoljno zategnut lanac je nestabilan u bočnom položaju što otežava propisno naoštrenje.
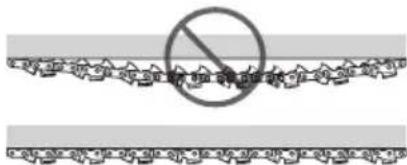
- Uvijek turpijajte rezne zupce sa unutrašnje strane. Smanjite pritisak pri povratnom potezu. Prvo isturpijajte sve zupce na jednoj strani, zatim okrenite motornu pilu i isturpijajte zupce sa druge strane.
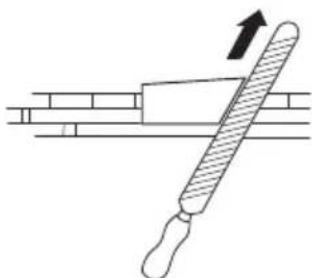
natural_image
Diagram of a tool interacting with a block, showing an upward arrow (no text or symbols present)- Isturpijajte sve zupce na istu dužinu. Kada se dužina reznog zupca smanji na 4 mm (5/32") lanac je istrošen i treba ga zamijeniti.
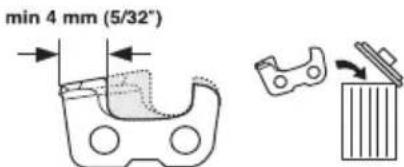
Opći savjet za podešavanje razmaka reznog alata
- Prilikom oštenja reznih zubaca, smanjujete razmak reznog alata (dubina rezanja). Za optimalne rezultate, morate isturpijati zupce reznog alata na preporučenu visinu. Za podešavanje razmaka reznog alata za vaš
model lanca, pogledajte upute iz odjeljka Tehničke karakteristike.
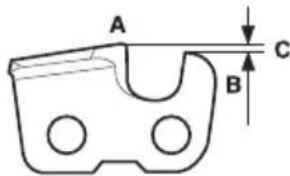

UPOZORENJE! Preveliki razmak reznog alata povećava rizik od povratnog trzaja!
Podešavanje razmaka reznog alata
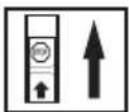

- Rezni zupci trebaju biti naoštreni prije podešavanja razmaka reznog alata. Preporučeno je podešavanje razmaka reznog alata nakon svakog trećeg oštrenja lanca. POZOR! Ova preporuka pretpostavlja da duljina reznih zubaca nije pretjerano smanjena.
natural_image
Technical line drawing of a mechanical tool or device with no visible text or symbolsZatezanje Ianca
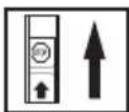

UPOZORENJE! Labav lanac može iskočiti što može dovesti do teških i po život opasnih povreda.
natural_image
Illustration of two hands holding a curved object with directional arrows indicating movement (no text or symbols)- Odvrnite maticu vodilice kojom su pričvršćeni pokrov spojke i kočnica lanca. Koristite kombinirani ključ.
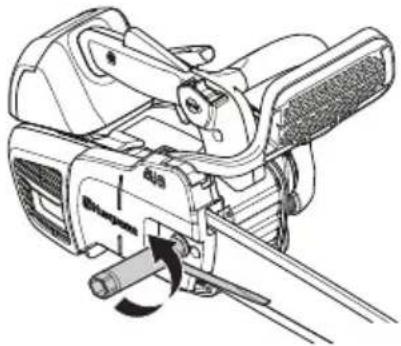
natural_image
Technical line drawing of a mechanical device with rotating components (no text or symbols)- Podignite vrh mača i nategnite lanac tako da, koristeći kombi ključ, zavrnete vijak za natezanje lanca. Zategnite lanac dok ne počne labavo visiti na donjoj stani mača.
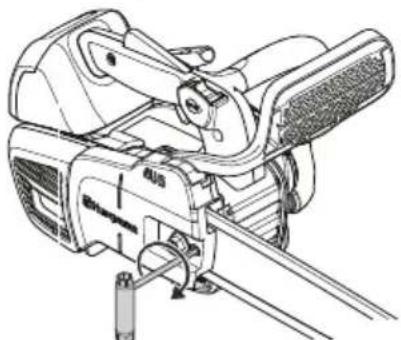
natural_image
Technical line drawing of a mechanical device with no visible text or symbols- Pridržavajući vrh vodilice pritegnite maticu vodilice kombiniranim kliještima. Provjerite možete li rukom slobodno okretati lanac pile te da nije olabavljen s donje strane vodilice.
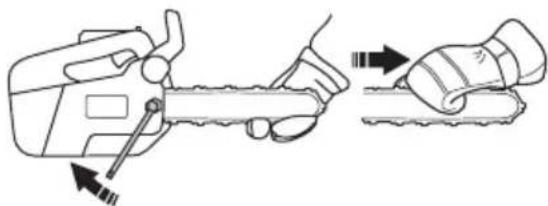
natural_image
Illustration of a hand holding a tool with arrows indicating movement or force (no text or symbols present)Položaj vijaka za pritezanje lanca varira ovisno o našim modelima motornih pila. Za obavijesti o položaju vijka na vašem modelu, pogledajte odjeljak Što je što.
natural_image
Diagram of a chain drive with a water drop symbol (no text or labels)- Spremnici za ulje i gorivo motorne pile oblikovani su tako da goriva nestane prije ulja.
natural_image
Illustration of a person wearing protective gear using a tree stump (no text or symbols)Ukoliko podmazivanje lanca ne radi:
natural_image
Simple line drawing of a screwdriver inserted into a slot on a surface (no text or symbols)natural_image
Line drawing of a hand holding a ruler, no text or symbols present- Provjerite da li se kotač na vrhu mača slobodno okreće i da li je otvor na vrhu s nečim začepljen. Očistite i podmažite po potrebi.

natural_image
Line drawing of a hand holding a smartphone with a pen (no text or symbols)Ukoliko sistem podmazivanja lanca i dalje ne radi nakon što se obavili sve gore navedene provjere, obratite se svom serviseru.
natural_image
Technical line drawing of a mechanical gear assembly (no text or symbols)natural_image
Line drawing of a knife with a handle and blade, showing a cross-section view (no text or symbols)OPĆENITA PRAVILA ZA SIGURNOST NA RADU
- Da li je urez na maču postao istrošen. Zamjenite mač ako je potrebno.

- Da li je vrh mača neravan ili istrošen. Ukoliko se pojavila rupa na jednoj strani vrha mača to znači da je lanac bio nedovoljno zategnut.

natural_image
Simple line drawing of a pen-like object with two arrows indicating direction (no text or symbols)natural_image
Mechanical assembly diagram showing a motor and conveyor system with no visible text or symbols- Postavite lanac preko pogonskog zupčanika i u utor na vodilici. Počnite od gornje strane vodilice.
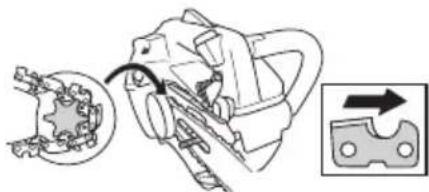
natural_image
Mechanical assembly diagram showing a gear mechanism and a close-up of a component (no text or symbols)- Rubovi reznih članaka na gornjoj strani vodilice obavezno moraju biti okrenuti prema naprijed.
- Prijenosni članci lanca moraju se pravilno postaviti na pogonski zupčanik, a lanac u žlijeb vodilice. Postavite poklopac spojke (kočnica lanca) i prstima zategnite maticu vodilice.
- Zategnite lanac koristeći se kombi ključem. Okrenite vijak za podešavanje mača u smjeru kazaljke na satu. Lanac treba zatezati dok ne prestane visiti na donjoj strani mača. Pogledajte upute u odjeljku Zatezanje lanca.
- Lanac je pravilno zategnut kad nije olabavljen s donje strane vodilice, a može se lako okretati rukom.
natural_image
Line drawing of a hand holding a chain-linking tool with a screwdriver (no text or symbols)- Pri montiranju novog lanca, zategnutost lanca treba često kontrolirati, sve dok se lanac ne uhoda. Redovno provjeravajte zategnutost lanca. Ispravno zategnuti lanac bolje reže i duže traje.
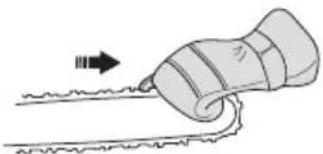
natural_image
Illustration of a hand holding a tool with an arrow indicating direction (no text or symbols)natural_image
Line drawing of a car interior showing engine compartment and wheel (no text or symbols)Sastavljanje naslonjača kore
natural_image
Line drawing of a chainsaw with a small inset showing a warning symbol (no text or labels)- Nikad ne koristite korišteno ulje. To može uzrokovati štetu na pumpi za ulje, maču i lancu.
- Važno je da izaberete ulje koje ima viskoznost koja odgovara temperaturi zraka.
- Na temperaturama ispod 0°C neka ulja postanu previše ljepljiva. To može pretjerano opteretiti pumpu za ulje i oštetiti djelove pumpe za ulje.
- Obratite se Vašem serviseru za savjet pri izboru ulja za lanac.
Punjenje goriva
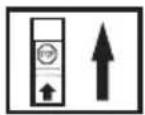

natural_image
Line drawing of a chainsaw with a small icon and label (no text or symbols)
UPOZORENJE! Gorivo i para koja iz njega izlazi su vrlo zapaljivi. Budite oprezni kad radite s gorivom i uljem za lanac. Držite se podalje od plamena i ne udišite pare.

natural_image
Simple line drawing of a mechanical device with a handle and arrow indicator (no text or symbols)Hladan motor
Pumpica za gorivo: Pritisnite pumpu za gorivo više puta dok gorivo ne počne puniti pumpu. Pumpu nije potrebno napuniti do kraja gorivom.
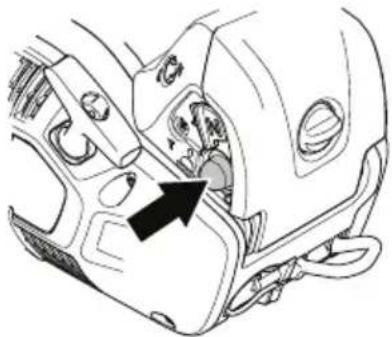
natural_image
Line drawing of a car interior showing engine and dashboard components with an arrow indicating a specific part (no text or symbols present)natural_image
Diagram of a car interior showing hand positioning and wheel movement (no text or symbols)Obuhvatite prednju ručku lijevom rukom i pritisnite motornu pilu prema tlu. Uhvatite ručicu za paljenje desnom rukom i polako izvlačite uže za paljenje dok ne osjetite otpor (aktivirale su se startne kopče), a zatim povucite uže brzo i snažno. Nikad ne omotavajte startno uže oko šake.
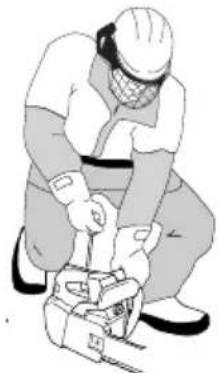
natural_image
Illustration of a worker in hard hat and safety vest operating a chain-linking machine (no text or symbols visible)natural_image
Technical line drawing of a mechanical component with an arrow indicating a specific part (no text or symbols present)UKLJUČIVANJE I ISKLJUČIVANJE
Početni položaj gasa: Uključite gas tako što ćete postaviti kontrolu čoka u položaj čoka i zatim je vratiti natrag.
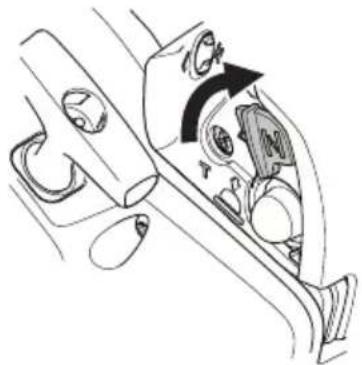
natural_image
Line drawing of a car interior showing a hand turning a valve with an arrow indicating rotation (no text or symbols)Lijevom rukom uhvatite prednju ručku i gurnite motornu pilu prema tlu. Desnom rukom uhvatite ručku za pokretanje i polako izvlačite kabel za paljenje sve dok ne osjetite otpor (nakon uključenja zaklopca pokretača), zatim snažno i naglo povlačite sve dok se motor ne uključi. Nikad ne omotavajte startno uže oko šake.

natural_image
Illustration of a worker in hard hat and gloves handling a chainsaw device (no text or symbols visible)natural_image
Line drawing of a hand using a chainsaw to lift a rack (no text or symbols)- Nikad ne palite motorunu pilu a da mač, lanac i svi poklopci nisu pravilno montirani. Pogledajte uputstva pod naslovom Sastavljanje. Ukoliko vodilica i lanac nisu
natural_image
Two safety illustrations: one showing a worker using a tool, the other showing a person with a no-smoking symbol (no text or labels present)- Uvijek držite drške motorne pile objema rukama. Desnu ruku držite na gornjoj, a lijevu ruku na prednjoj drški. Svi korisnici, Ijevoruki ili desnoruki, trebaju koristiti ovaj zahvat. <:elf "Bold"> Omotajte palčeve i prste oko drške te ju čvrsto držite.
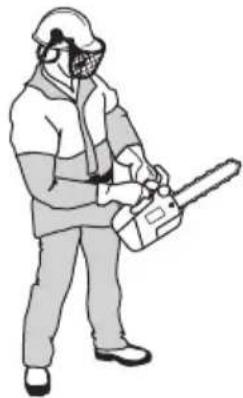
natural_image
Illustration of a person wearing a hard hat and safety gear, holding a chainsaw (no text or symbols present)Početak rada s motornom pilom na stablu
Prije no što počne raditi s motornom pilom na stablu, rukovatelj treba:

natural_image
Line drawing of a car's front compartment showing engine, dashboard, and exhaust components (no text or symbols)Nosite osobnu zaštitnu opremu. Pogledajte uputstva pod naslovom Osobna zaštitna oprema.
Osnovna pravila

UPOZORENJE! Za vrijeme kritičnih trenutaka obaranja drveta, zaštita za uši bi trebala biti skinuta odmah po prestanku pilanja tako da možete čuti zvukove i znakove upozorenja.
1 Kada shvatite što je trzaj i kako do njega dolazi, moći ćete smanjiti ili spriječiti njegovu iznenadnu pojavu. Samim tim što znate da se može dogoditi, smanjujete opasnost. Trzaj je obično prilično slab, međutim ponekada može biti veoma neočekivan i snaža
2 Slaba koncentracija može dovesti do trzaja ako trzajna zona slučajno dotakne granu, susjedno drvo ili neki drugi predmet.
3 Uvijek držite motornu pilu čvrsto tako da Vaša desna ruka bude na gornjoj dršci, a lijeva ruka na prednjoj. Omotajte prste i palac oko ručke. Tako trebate uhvatiti drške bilo da ste lijevak ili dešnjak. Takav način držanja smanjuje
PRINCIP RADA
natural_image
Line drawing of a mechanical tool with three blades and a handle (no text or symbols)4 Nikada ne dižite motornu pilu u vis, iznad ramena i nastojte da ne pilite samo s vrhom mača. Nikada nemojte koristiti motornu pilu samo jednom rukom!

natural_image
Illustration of a person wearing a mask and holding a tool, with a prohibition symbol overlaid (no text or symbols present)5 Uvijek dajte puni gas pri pilanju!
6 Smanjite brzinu na prazni hod poslije svakog rezanja (rad motora pod punim gasom na duže vrijeme i bez otpora koji je prisutan pri pilanju, može dovesti do vrlo ozbiljnog oštećenja motora).
- Pilanje odozgo = Pilanje "povlačenjem" lanca pile.
- Pilanje odozdo = Pilanje "guranjem" lanca pile.
- Pilanje na "guranje" lanca pile znatno povećava opasnost od trzaja.
Pogledajte uputstva pod naslovom Kako da izbjegnete trzaj.
7 Budite vrlo oprezni kad režete samo s gornjim rubom mača, napr. kad režete s donje strane. To se zove rezanje na guranje. Lanac pokušava gurnuti motornu pilu natrag prema korisniku. Kada se lanac zaglavi, motorna pila može biti izbačena prema vama.
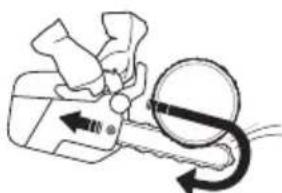
natural_image
Diagram of a mechanical device with rotating arm and curved arrow indicating motion (no text or symbols)8 Ukoliko se korisnik ne odupre toj sili, postoji opasnost da se motorna pila pomakne daleko unatrag da jedino zona trzaja ostane u dodiru s drvom, što će uzrokovati trzaj.
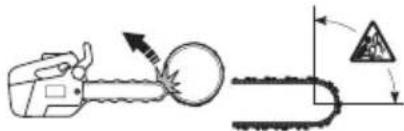
9 Rezanje donjom stranom mača, odnosno s vrha predmeta prema dolje, zove se rezanje povlačeći motornu pilu. U tom slučaju motorna pila će se sama povući prema drvetu, a prednji kraj tjela motorne pile će postati prirodni oslonac za vrijeme rezanja. Rezanje povlačeći pilu daje Vam bolji nadzor nad motornom pilom i položajem zone trzaja.
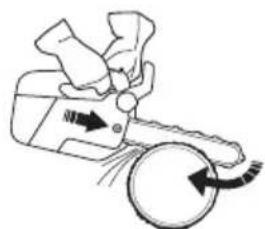
natural_image
Diagram of a mechanical device with rotating arrow and circular motion indicator (no text or symbols)10 Slijedite uputstva o oštenju i održavanju Vašeg mača i lanca. Kada budete zamjenjivali mač ili lanac koristite samo kombinacije koje smo mi preporučili. Pogledajte uputstva pod naslovom Oprema za rezanje i Tehnički podaci.
11 Nazubljeni odbojnik (ako je ugrađen) postavite na deblo i koristite ga kao polugu pri rezanju.
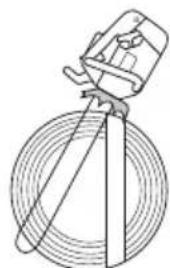
natural_image
Diagram of a mechanical device with a cylindrical component and lever, no text or symbols presentnatural_image
Illustration of a person in full safety gear holding equipment, no text or symbols presenta) pričvrstite uže na ušicu za uže na stražnjem dijelu motorne pile.
natural_image
Line drawing of a car's front compartment showing internal components and wiring (no text or symbols)b) osigurajte prikladne karabinere koji omogućuju neizravno (npr. putem remena) i izravno učvršćivanje (npr. na spojnu točku na pili) motorne pile na remenje rukovatelja,
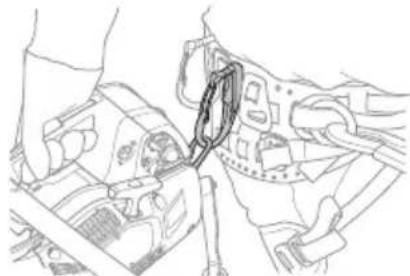
natural_image
Technical line drawing of a mechanical assembly with no visible text or symbols
natural_image
Illustration of a person climbing a rope with a safety harness (no text or symbols)Pri premještanju pile s jedne spojne točke na drugu, rukovatelj mora sigurno pričvrstiti pilu na novu spojnu točku prije no što je odvoji od prethodne.
natural_image
Illustration of a person in a rope harness with ropes and chains (no text or symbols)Radni položaj s dobrim uporištem može se postići izradom privremenog stremena za nogu od zatvorenog remena.
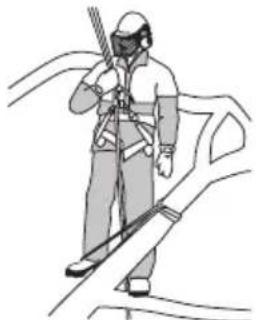
natural_image
Illustration of a person in protective gear holding a tool, standing on a slope (no text or symbols)ODRŽAVANJE
Općenito
Vaš Husqvarna proizvod je oblikovan i proizvden po zahtjevima za smanjenje štetnih ispušnih plinova.
Rad
- Rasplinjač upravlja brojem obrtaja uz pomoč gasa. Zrak i gorivo se miješaju u rasplinjaču. Mješavina zraka i goriva se da podesiti. Da biste maksimalno iskoristili Vaš stroj, to podešavanje mora biti ispravno.
- Podešavanje rasplinjača znači da je motor prilagođen lokalnim uslovima, naprimjer klimi, visinskim prilikama, benzinu i vrsti dvotaktnog ulja koje se koristi.
• Rasplinjač ima tri mogučnosti podešavanja: - L = Sporo ubrizgavanje
- H = Brzo ubrizgavanje
- T = Vijak za podešavanje praznog hoda
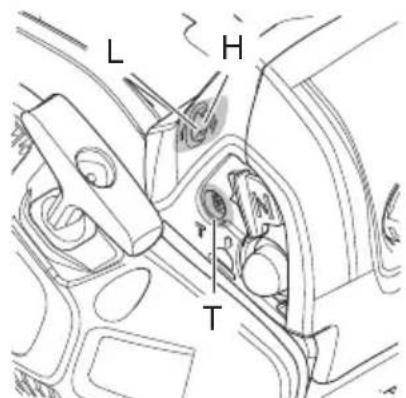
- Podešavanjem na L i H regulira se količina goriva koje je potrebno u odnosu na protok zraka koji prolazi kroz otvor regulacije gasa. Ukoliko su oni zategnuti u smjeru kazaljke na satu, mješavina zrak-gorivo postaje mršava (manje
natural_image
Technical line drawing of a mechanical assembly with no visible text or symbolsnatural_image
Line drawing of a hand using a chainsaw to cut a tool, showing motion arrows (no text or symbols)natural_image
Illustration of a worker using a power tool (no text or symbols visible)- Čvrsto uhvatite pilu tako da prste i palčeve omotate oko obje ručke.
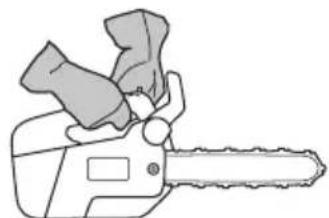
natural_image
Line drawing of a chain-linking tool with three blades (no text or symbols)Dodajte puni gas i aktivirajte kočnicu lanca zakretanjem lijevog zgloba šake prema naprijed na štitnik prednje ruke.
ODRŽAVANJE
Regulator gasa/blokada regulatora gasa

- Provjerite da li je kontrola gasa stavljena na prazan hod prije nego otpustitie gumb za gas.
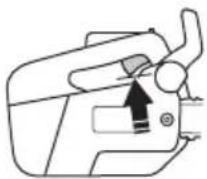
natural_image
Three black-and-white icons showing directional arrows, a magnifying glass, and a textured object (no text or symbols)- Redovno provjeravajte da li su se pojavile pukotine ili nepravilnosti na napravi za smanjivanje vibracija.

natural_image
Line drawing of a chainsaw with motion lines indicating speed (no text or symbols)- Bitno je da su naprave za smanjivanje vibracija sigurno pričvršćene na motor i ručke.
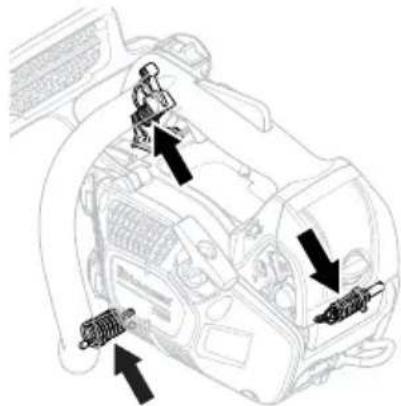
Glavni prekidač
- Upalite motor i provjerite da li se motor zaustavlja kada pritisnete glavni prekidač u stop položaj.
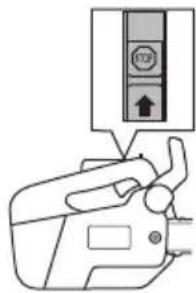
ODRŽAVANJE
Prigušivač
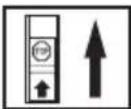
natural_image
Technical line drawing of a vehicle's internal components, showing structural parts and directional arrows (no text or symbols)natural_image
Technical line drawing of a mechanical assembly with no visible text or symbols- Izvucite uže jedno 30 cm i podignite ga do otvora na koloturu. Namjestite povratnu oprugu na nulu tako da pustite kolotur da se polako vrti unazad.
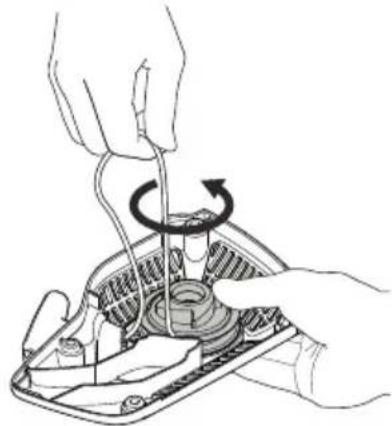
natural_image
Illustration of hands connecting a device to a motor or connector with a rotating arrow (no text or symbols)ODRŽAVANJE
natural_image
Technical line drawing of a mechanical device with a handle and base mount (no text or symbols)natural_image
Illustration of hands using a mechanical device to rotate or rotate a circular arrow (no text or symbols present)natural_image
Illustration of two hands using a tool to adjust or install a device component (no text or symbols present)Sastavljanje naprave za paljenje
- Sastavite napravu za paljenje tako da prvo izvučete uže za paljenje i nakon toga postavite napravu za paljenje uz kućište. Zatim polako otpustite uže za paljenje tako da se kolotur zakači za startne kopče.
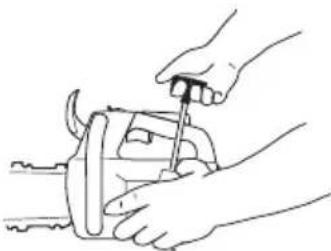
natural_image
Line drawing of hands using a tool to adjust or install a mechanical component (no text or symbols present)natural_image
Mechanical assembly diagram showing motor components and a close-up of a bracket (no text or labels)Detaljnije čišćenje postiže se pranjem filtera s vodom i sapunicom.
Spremnik za ulje trebao bi biti gotovo prazan kada nestane goriva. Ulijte ulje u spremnik svaki put kada ulijevate gorivo u motornu pilu.

UPOZORENJE! Kad vršite podešavanje, motor mora biti isključen.
Rashladni sistem
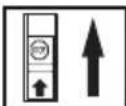
Per Gustafsson, Šef razvoja (Ovlašteni predstavnik tvrtke Husqvarna AB i osoba odgovorna za tehničku dokumentaciju.)
www.husqvarna.com
Original instructions
