
XLIVE - Hand blender BEHRINGER - Free user manual and instructions
Find the device manual for free XLIVE BEHRINGER in PDF.
| Product Type | Audio interface card for digital mixing console |
| Brand | Behringer |
| Model | XLIVE |
| Category | Mixing console |
| Compatibility | Behringer X32 consoles (X32 series) |
| USB Connectivity | USB 2.0, 32 bidirectional channels (audio input/output) |
| Storage | 2 SD/SDHC ports (max 32 GB per card) |
| Recording Formats | WAV PCM 32-bit (44.1 / 48 kHz) |
| Number of Recordable Tracks | 8, 16 or 32 simultaneous tracks |
| Remote Control | HUI / Mackie Control emulation |
| Features | Standalone multitrack recording, playback, markers, automatic switching between SD cards |
| Power Supply | Via the host console (no external power supply) |
| Backup Battery | Compartment for CR123A lithium battery (file protection) |
| Dimensions (approx.) | 100 x 70 x 20 mm (card only) |
| Weight (approx.) | 50 g |
| Cleaning | Dry cloth, avoid moisture |
| Safety | Install with power off; anti-static handling; do not open |
| Repairability | No user-serviceable parts; consult a qualified technician |
| Warranty | Limited warranty (see Music Group website) |
| Minimum System Requirements | PC: Core 2 Duo 2 GHz processor, 1 GB RAM, USB 2.0 port; Mac: Native CoreAudio |
Frequently Asked Questions - XLIVE BEHRINGER
User questions about XLIVE BEHRINGER
0 question about this device. Answer the ones you know or ask your own.
Ask a new question about this device
Download the instructions for your Hand blender in PDF format for free! Find your manual XLIVE - BEHRINGER and take your electronic device back in hand. On this page are published all the documents necessary for the use of your device. XLIVE by BEHRINGER.
USER MANUAL XLIVE BEHRINGER
X32 Expansion Card for 32-Channel Live Recording/Playback on SD/SDHC Cards and USB Audio/MIDI Interface
BESCHRANKTE GARANTIE
The X-LIVE interface card expands on the already stellar performance of the X-USB card that has been standard in X32 consoles for years. The same 32-channel bi-directional audio I/0 via USB 2.0 is available, providing 32 channels for recording and playback, plus remote operation of your BMW via HUI/MackieControl emulation. The addition of twin SD/SDHC slots now provides fully independent, uncompressed recording/playback of up to 32-channels in consistent sessions up to the max capacity of the SD cards. Multi-channel recording without the need for a laptop, as well as virtual sound checks and live backing track support, accurate marker handling and adjustments, and full remote operation from apps or X-TOUCH control surfaces are only some of the new possibilities X-LIVE offers.
2. Installing the X-LIVE Card
Please make sure the X32 series mixer firmware is updated to the most recent release version. Check the product page on behringer.com for the latest available firmware.
CAUTION: Before installing the interface card into the console, make sure that the console's power switch is turned off.
Malfunctions or electrical shock may occur otherwise.
Installation process:
- Make sure that the mixer's power is turned off.
- Remove the outer screws that hold the current card or slot cover in place.
- Gently slide the card out of the slot and set it somewhere safe along with the fastening screws.
- Before removing the K-LIVE card from its protective bag, touch the metal chassis of the console to prevent electrostatic discharges from affecting the sensitive electronic components. Hold the card by the face plate or the two small handles, avoiding contact with the components on the circuit board.
- Align both edges of the card with the guide rails inside the slot and carefully insert the card into the slot. Push the card fully into the slot so that it sits flush against the console's rear panel, ensuring that the contacts are properly connected internally. The screw holes should be naturally aligned.
- Fasten the card with the included screws, or with those that originally held the old card in place. Damage or malfunctions may occur if the card is not fastened.
- Place the old card into the protective bag that the X-LIVE card was packed in, and repackage for safe storage.
3. Recommended Minimum Hardware
Windows
Core 2 Duo CPU, 2 GHz
USB2.0
1GBRAM
Mac
- 1.5 GHz CPU
USB2.0 port - 512 MB RAM
See Specifi cations for recommended operating systems.
4. USB Operation
The USB connection on the X-LIVE card provides 32 channels of bi-direction audio I/O via USB 2.0, as well as MIDI I/O and remote DAW control via HUI/MackieControl emulation. Make sure to download and install the free ASIO driver from behringer.com if you are using a Windows PC. The X-LIVE is CoreAudio compliant and therefore does not need a driver for use on Mac computers.
4.1 Driver Control Panels
Once the driver is installed, you can open the control panel by double-clicking on the small tray icon. These screens will allow configuring the X-LIVE card in the X32 as an audio interface for your computer.
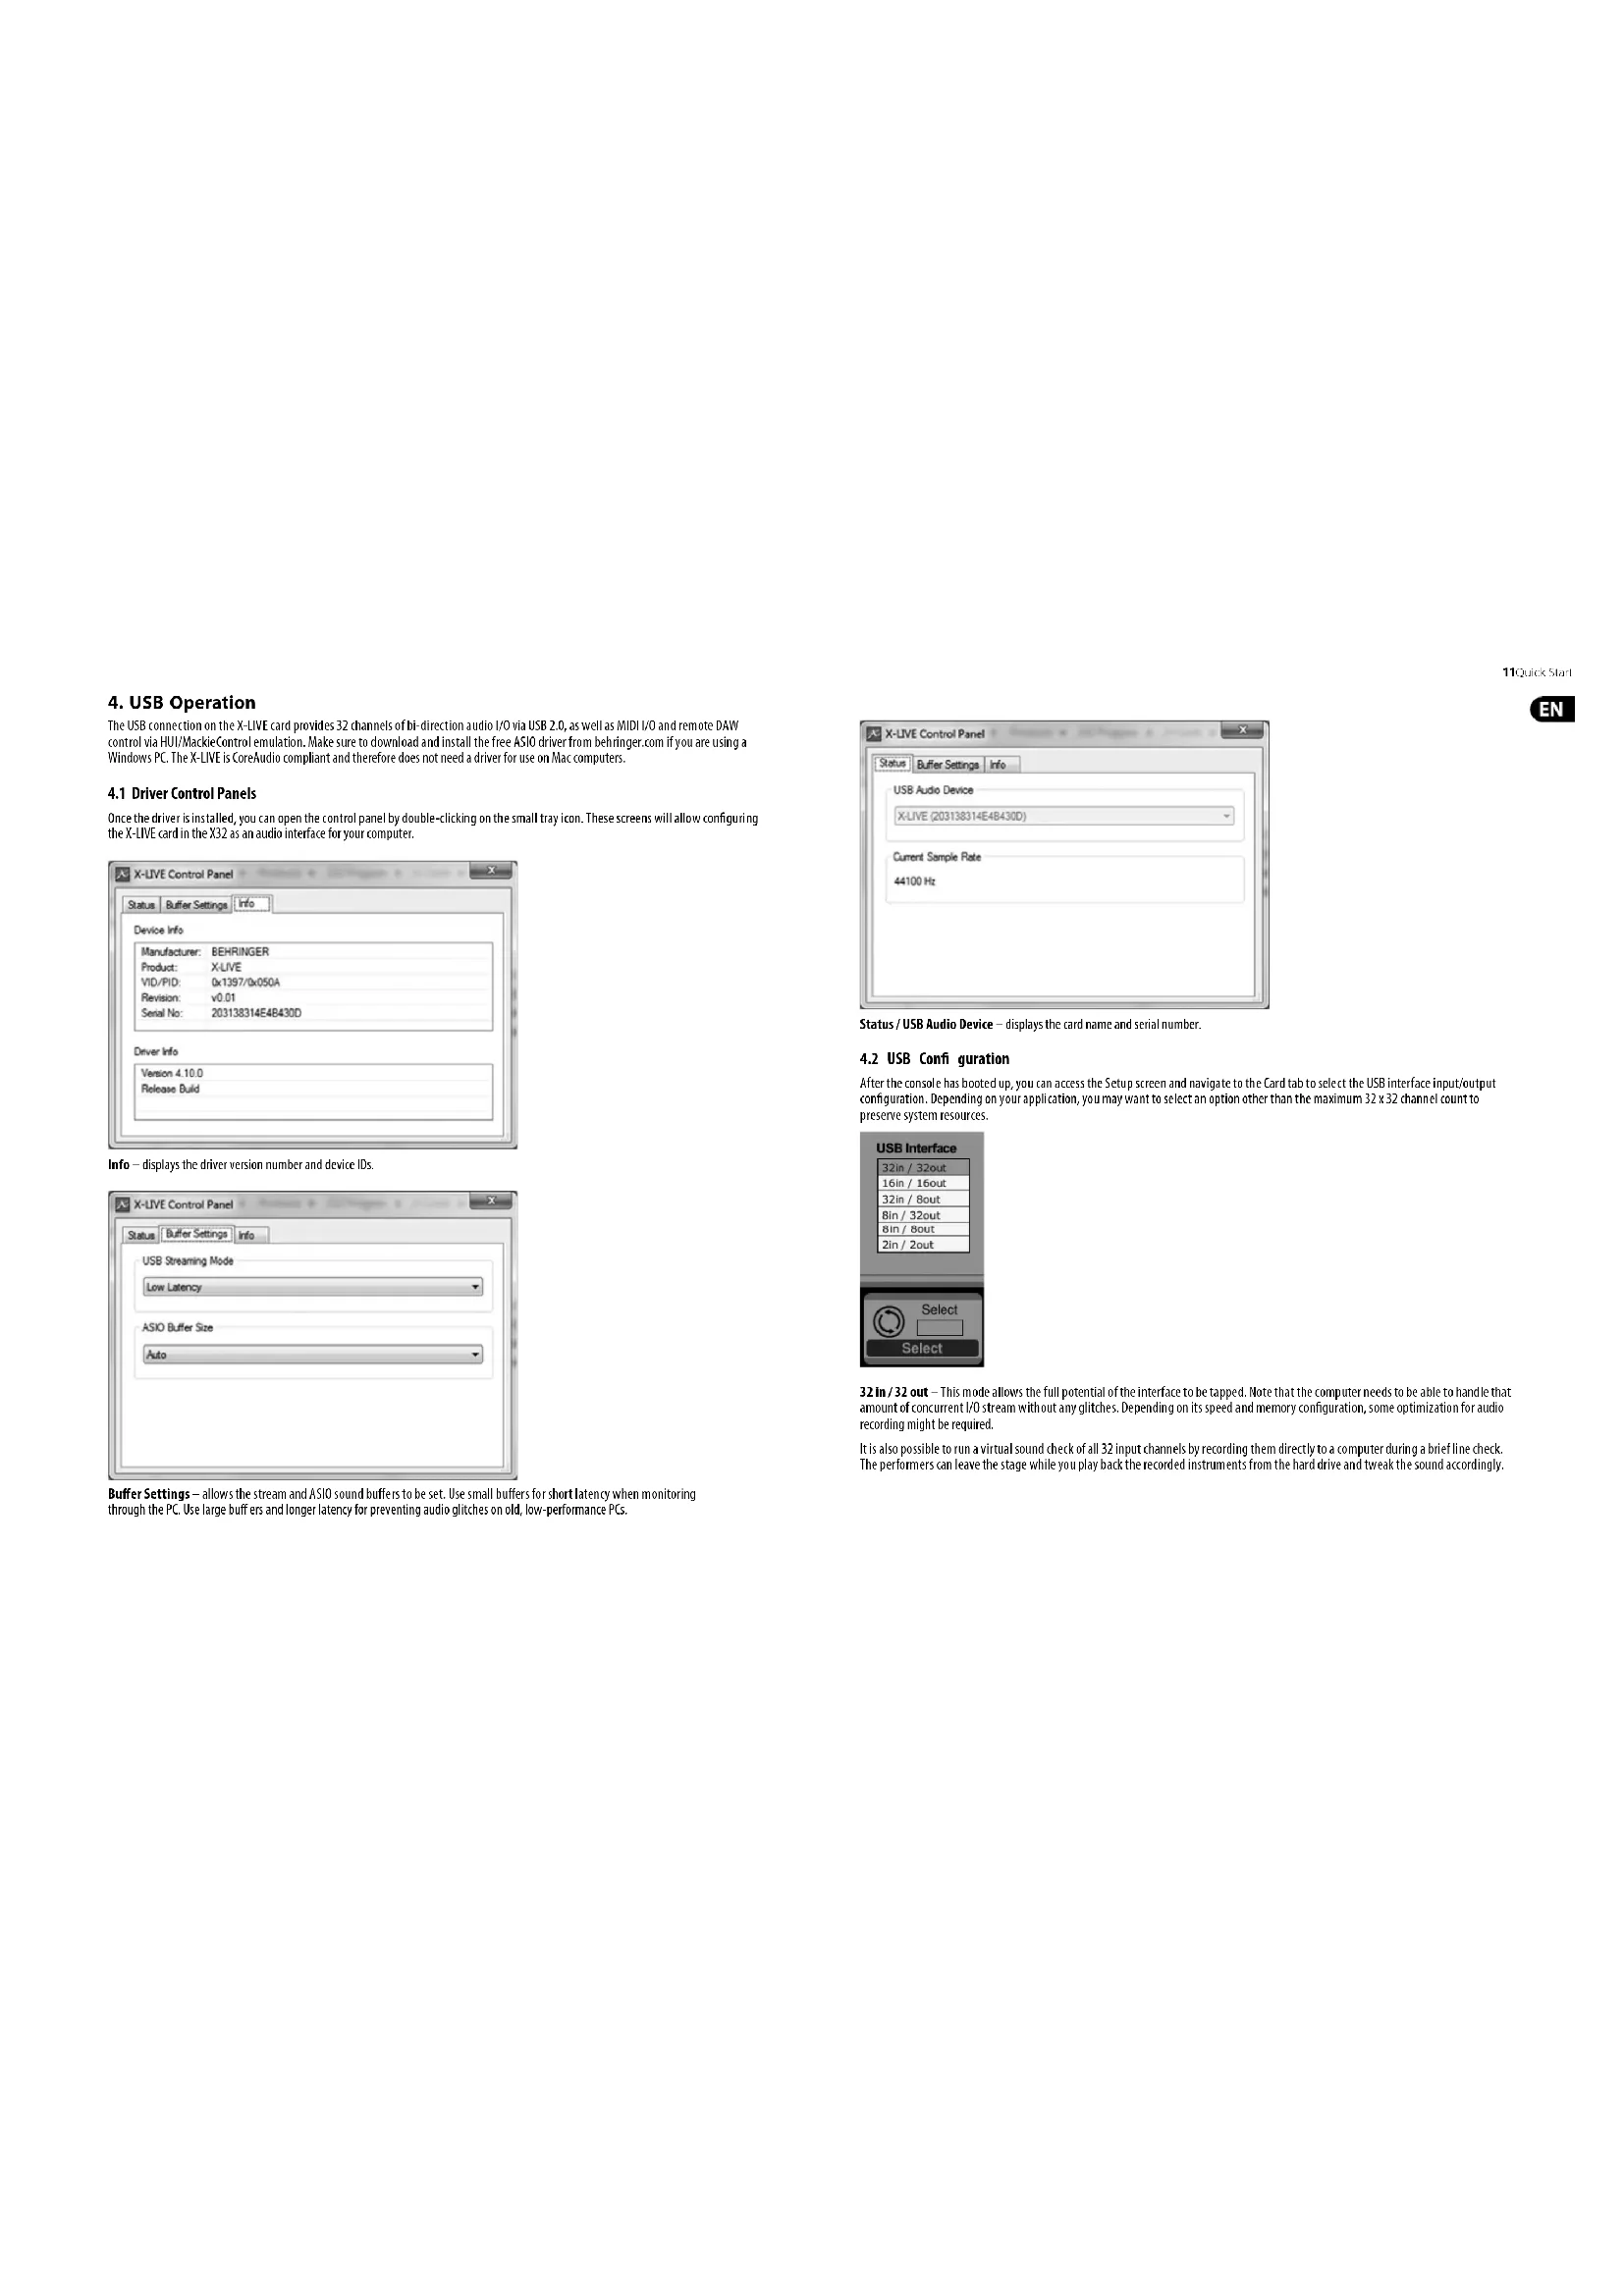
Info - displays the driver version number and device IDs.
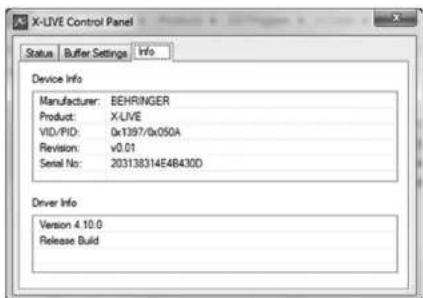
Buffer Settings - allows the stream and ASIO sound buffers to be set. Use small buffers for short latency when monitoring through the PC. Use large buffer and longer latency for preventing audio glitches on old, low-performance PCs.
11Quick Start
EN
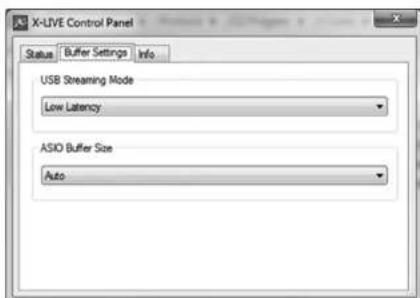
Status/USB Audio Device displays the card name and serial number.
4.2 USB Configuration
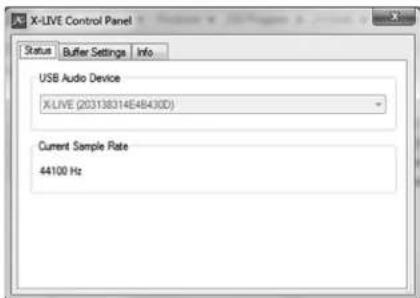
After the console has booted up, you can access the Setup screen and navigate to the Card tab to select the USB Interface input/output configuration. Depending on your application, you may want to select an option other than the maximum 32 x 32 channel count to preserve system resources.
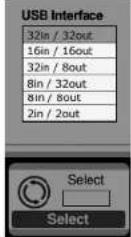
32 in/32 out - This mode allows the full potential of the interface to be tapped. Note that the computer needs to be able to handle that amount of concurrent I/O stream without any glitches. Depending on its speed and memory configuration, some optimization for audio recording might be required.
It is also possible to run a virtual sound check of all 32 input channels by recording them directly to a computer during a brief line check. The performers can leave the stage while you play back the recorded instruments from the hard drive and tweak the sound accordingly.
16in/16 out - If you don't actually need more than 16 concurrent input and output tracks to be exchanged between the console and your PC, then this made might be more appropriate for you. First, it will slow the required bandwidth on the interface down. Second, there will be no excessive I/O tracks in your DAW configuration that might clutter your setup. Third, it allows you to run a fully-featured zero-latency over/undo setup, which would be impossible if signals were run through the computer. In this case, the 16 input signals are put on channels 1-16, while the tape (card) returns are put on channels 17-32. The monitoring is directly fed from Ch1-16 as usual, including all processing and effects. It remains independent from any computer audio latency, even though you can hear back all the recorded tracks without any re-patching.
32 m/8 out - This mode is tailored to suit a typical studio and overdub recording situation, with many input channels but only a few output channels for monitoring of previously recorded takes.
8 in / 32 out - This is a useful mode for utilizing the excellent audio engine and effects processing of the console during final middown of your project. All 32 tracks would be fed from your DAW into the console where all the magic happens. Then only 2-8 tracks of the complete middown would be sent back to the DAW.
8 in / 8 out - This setting is light on processing power while still providing enough h/o for tracking drums or multiple mics on an acoustic guitar or piano.
2 in / 2 out - For recording just the main stereo mix, or playing back from typical media player applications where often only two channels are needed. Use this mode in order to remove all unused channels that would otherwise clutter your PCs audio applications.
Note that the Routing / Home and Card Out tabs allow audio from your computer to be sent to the desired destination. The Routing/home tab now offers to select two alternative input assignments, separately for Recording and Playback operation. See chapter 5.3 for details.
13Quick Start
5. SD Card Operation
The X-LIVE card features a pair of SD/SDHC slots that provide 32 channels of multitrack recording and playback. Simple session management and up to 100 markers allow playback from any desired point, easily cueing up certain songs or backing tracks. Automatic or manual switching from recording to playback routing presents makes it easy to monitor input channels directly while recording, and then listen to the playback from the card returns. The SD cards operate independently from the USB connection, giving you many options for how you incorporate outboard plugins, multichannel input and live recording.
5.1 Overview
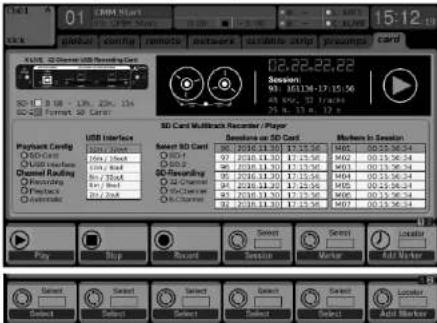
Most of the configuration and operation for the SD card slots and USB connection are handled on the Setup/Card page of the console. From this page, the SD slot or USB can be selected for playback, SD slot 1 or 2 can be selected for recording or marker editing, and the channel count can be specified for recording.
A properly installed and formatted card will appear near the top with a green square, with its file size and remaining recording time indicated. SD cards up to 2 GB and SDHC cards up to 32 GB are officially supported, for use with FAT32 formatting.
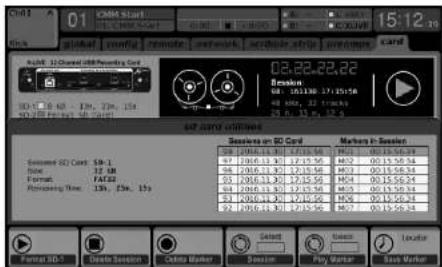
It is best practice before important recordings to press the console's Utility button and format the card. Formatting will delete all data to remove fragmentation and to ensure proper write performance.
A list of recorded sessions and markers for the currently-selected session are listed below the recorder graphics. Transport functions are controlled with the first 3 encoders. Markers can be added to a session during recording or playback to indicate the start of a song or set. Press the page down to the 2nd layer of controls to make changes to the config iteration.
The 'Channel Routing' section is explained in chapter 5.3.
The SD operation can also be controlled by any of the remote apps, as well as MID and the onboard assignable controls. In the X32-Edit software, most of the configuration settings are made on the Setup/Card page, while the recording functions and marker management are done in the Recorder window.
5.2 Recording and File Management
Audio recording on the X-LIVE card can accommodate either 8, 16, or 32-channel sessions of 44.1/48kHz / 32-bit PCM WAVY files. As soon as recording is initiated to one of the 5D cards, a new session is automatically created, allowing the entire take to be organized coherently. To ensure continuous recording of the entire performance, a recording session that has started on one card can seamlessly span over to the other card slot when the fi rst becomes full. In this case, the same session name will appear on both cards.
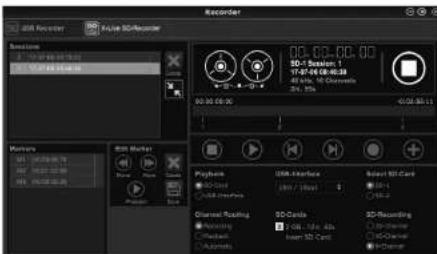
Since a single session may include a full set of songs, markers can be placed during recording or while listening to playback. They can also be adjusted using the remote apps by using the 'Edit Marker' section. This makes it easy to organize the set and quickly jump to a particular section of the recording for playback.
15Quick start
5.3 Channel Routing
The X32 has a convenient routing preset that allows the input channels to quickly flip between the desired monitoring for the recording process, and the playback from the X-LIVE card once recording is finished. While playback would typically be used to assign the card outputs to the mixer inputs, Recording would patch those signals to channel inputs that shall be on mix, i.e. not necessarily the ones being recorded on X-LIVE.
On the Routing/Home page, select 'Record' with the 6th encoder and adjust the input routing using encoders 1-5 (most likely Local or ACS50 from a stagebox). Then turn the 6th encoder to select 'Play' and press the encoder. Now Card 1-8, 9-16, etc. can be selected using encoders 1-5 for the playback preset.

On the Setup/Card page, you can now use the 'Channel Routing' section to quickly flip between these 2 routing scenarios. Keep in mind that the Record/Play presets can be toggled using an assignable control button, scene/snipper automation, or even MID command. A third option on the Setup/Card page, 'Automatic', allows the shift from input manitoring to playback monitoring to follow the current operation. When Stop or Record is pressed in the transport control, the 'Record' routing will be assigned, and when Play or Pause is active the 'Play' preset will be used.
5.4 Separating WAV Files
After recording is complete, the session can be separated into individual WAV files in several ways:
- Play the audio from the SD card directly into a DW program, e.g. Trackion, Reaper, ProTools, Cubase, Logic, Ableton (just to name a few) via the USB connection
Directly open the multi-channel file using Audacity (brilliant open source audio editor available from www.audacityteam.org/) - Using our Python scripts, downloadable from behringer.com
Visit the wiki page at behringerwiki.musico-group.com for more information about separating WAV files.
EN
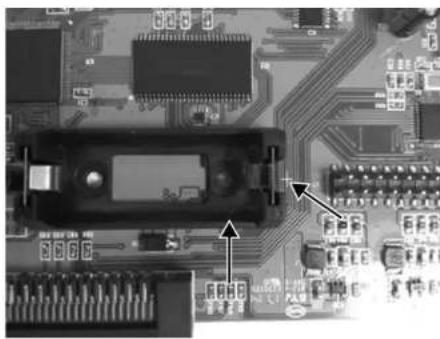
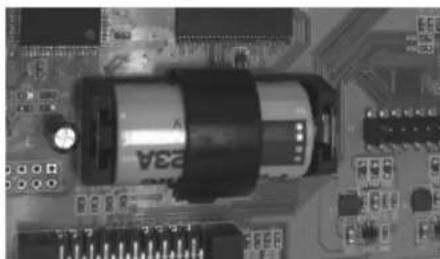
6. Battery Option
The X-LIVE has a battery slot that can accommodate a CR123A Lithium cell battery. This provides protection in case of power blackout, ensuring secure file handling.
To attach the battery, first turn the console power off and remove the X-LIVE card from the expansion slot. Locate the battery slot and install the battery, making sure to orient the positive end toward the “+” mark on the slot.
Reinstall the X-LIVE card as described in chapter 2.
7. Firmware Update
Download the latest firmware package file from the X-LIVE product page on behirer.com. Unpack the zip folder and load the firmware file onto the flash drive's root directory. Plug the flash drive into the X32's top panel USB port.
Press and hold the USB View button while powering on the console. The console will automatically begin updating the firmware, which can take several minutes to complete. When finished, power the console off and an again and resume normal operation.
NOTE: make sure the update files for card firmware and console firmware are not used in the USB root directory at the same time. Do one update after the other, making sure to remove the firmware file from the flash drive after successful installation. You may, however, copy the console firmware file into any subfolder on the USB drive and start the update from Setup/Global console UI.
17Quick Start
1. Introduccion
Procedure installation:
3. Confiuration minimale recommende
Windows
Mac
4.2 Conf guration USB
Um apero n p 10000000000000000000000000000000000000000000000000000000000000000000000000000000000
| Connectors | |
| USB 2.0 high speed, type-B (audio/MIDI interface) 1 | |
| SD card slots, SD/SDHC 2 | |
| Battery for power blackout protection (optional) CR123A Lithium cell | |
| Input/Output Characteristics | |
| USB Audio input / output channels, duplex 32, 16, 8, 2 | |
| SD card input / output channels 32, 16, 8 | |
| Sample rates (console clock) 44.1 kHz / 48 kHz | |
| Sample word length 32 bit PCM | |
| File format (uncompressed multi-channel) WAV 8, 16 or 32 channels | |
| SD/SDHC Card capacity, each slot 1 to 32 GB | |
| Maximum recording time in one consistent session (32-channel, 44.1 kHz, 32-bit on two 32 GB SDHC media) | 200 min |
| Typical performance recording or playback | 32 channels on class 10 media, 8 or 16 channels on class 6 media |
| Indicators | |
| SD card socket indicator for card activity 2 LEDs, amber | |
| USB 2.0 interface active | 1 LED, red |
| Recommended Operating Systems | |
| Windows DAW applications (ASIO, WASAPI and WDM audio device interface) | Win 7 32/64-bit, Win10 32/64-bit |
| Mac OSX DAW applications (Intel CPU only, no PPC support, CoreAudio) | Mac OSX 10.6.8°, 10.7.5, 10.8, 10.9, 10.10, 10.11, 10.12 |
| Physical | |
| Dimensions (H x W x D) | 30 x 165 x 138 mm (1.2 x 6.5 x 5.4") |
| Weight | 0.14 kg (0.3 lbs) |
05X 10.6.8 Core Audio supports up to 16x16 channel audio
Other important information

Important information As
1. Register online.
Please register your new MUSIC Group equipment right after you purchase it by visiting behringer.com. Registering your purchase using our simple online form helps us to process your repair claims more quickly and efficiently. Also, read the terms and conditions of our warranty, if applicable.
- Malfunction. Should your MUSIC Group Authorized Reseller not be located in your vicinity, you may contact the MUSIC Group Authorized Fulfiier for your country listed under "Support" at behringer.com. Should your country not be listed, please check if your problem can be dealt with by our "Online Support" which may also be found under "Support" at behringer.com. Alternatively, please submit an online warranty claim at behringer.com BEFORE returning the product.
3. Power Connections.
Before plugging the unit into a power socket, please make sure you are using the correct mains voltage for your particular model. Faulty fuses must be replaced with fuses of the same type and rating without exception.
E6portantes
1. Registro online.
Responsible Party Name: MUSIC Group Services NV Inc.
Address: 5270 Procyon Street
Las Vegas, NV 89118
USA
Phone Number: +17028008290
X-LIVE
complies with the FCC rules as mentioned in the following paragraph:
This equipment has been tested and found to comply with the limits for a Class B digital device, pursuant to part 15 of the FCC Rules.
These limits are designed to provide reasonable protection against harmful interference in a residential installation. This equipment generates, uses and can radiate radio frequency energy and, if not installed and used in accordance with the instructions, may cause harmful interference to radio communications. However, there is no guarantee that interference will not occur in a particular installation. If this equipment does cause harmful interference to radio or television reception, which can be determined by turning the equipment off and on, the user is encouraged to try to correct the interference by one or more of the following measures:
Reorient or relocate the receiving antenna
-
Increase the separation between the equipment and receiver.
-
Connect the equipment into an outlet on a circuit different from that to which the receiver is connected.
-
Consult the dealer or an experienced radio/TV technician for help. This device complies with Part 15 of the FCC rules. Operation is subject to the following two conditions:
(1) this device may not cause harmful interference, and
(2) this device must accept any interference received.
including interference that may cause undesired operation.
Important information:
Changes or modifi cations to the equipment not expressly approved by MUSIC Group can void the user's authority to use the equipment.
53Quick Start
Dedicate Your Life to MUSIC

- BESCHRANKTE GARANTIE
- Installing the X-LIVE Card
- Installation process:
- Recommended Minimum Hardware
- Windows
- Mac
- USB Operation
- Driver Control Panels
- USB Configuration
- SD Card Operation
- Overview
- Recording and File Management
- Channel Routing
- Separating WAV Files
- EN
- Battery Option
- Firmware Update
- Introduccion
- Procedure installation:
- Confiuration minimale recommende
- Conf guration USB
- Other important information
- Important information As
- Register online.
- Power Connections.
- E6portantes
- Registro online.
- X-LIVE
- Important information:
Brand : BEHRINGER
Model : XLIVE
Category : Hand blender