
UV 588 - Detector OLYMPIA - Free user manual and instructions
Find the device manual for free UV 588 OLYMPIA in PDF.
| Product type | Banknote detector |
| Brand | Olympia |
| Model | UV 588 |
| Dimensions (L × D × H) | 190 × 100 × 110 mm |
| Weight | 460 g (without battery) |
| Power supply | USB 5 V, 1 A |
| Optional battery | Li-ion 3.7 V, e.g. 18650, 2600 mAh |
| Battery life | Approximately 1 hour |
| UV wavelength | 365 nm |
| Detection functions | UV, white light, magnetic, magnifying glass |
| Operating temperature | 0 to 40 °C |
| Operating relative humidity | 60 to 90% |
| Package contents | UV lamp 588, USB cable, instruction manual |
| Maintenance | Clean with a soft lint-free cloth; do not use solvents |
| Safety | Avoid suffocation, burns (hot tube), tripping; do not open |
| Warranty | Return to store with original packaging and receipt |
Frequently Asked Questions - UV 588 OLYMPIA
User questions about UV 588 OLYMPIA
0 question about this device. Answer the ones you know or ask your own.
Ask a new question about this device
Download the instructions for your Detector in PDF format for free! Find your manual UV 588 - OLYMPIA and take your electronic device back in hand. On this page are published all the documents necessary for the use of your device. UV 588 by OLYMPIA.
USER MANUAL UV 588 OLYMPIA
Service-Center Hattingen
Zum Kraftwerk 1
45527 Hattingen
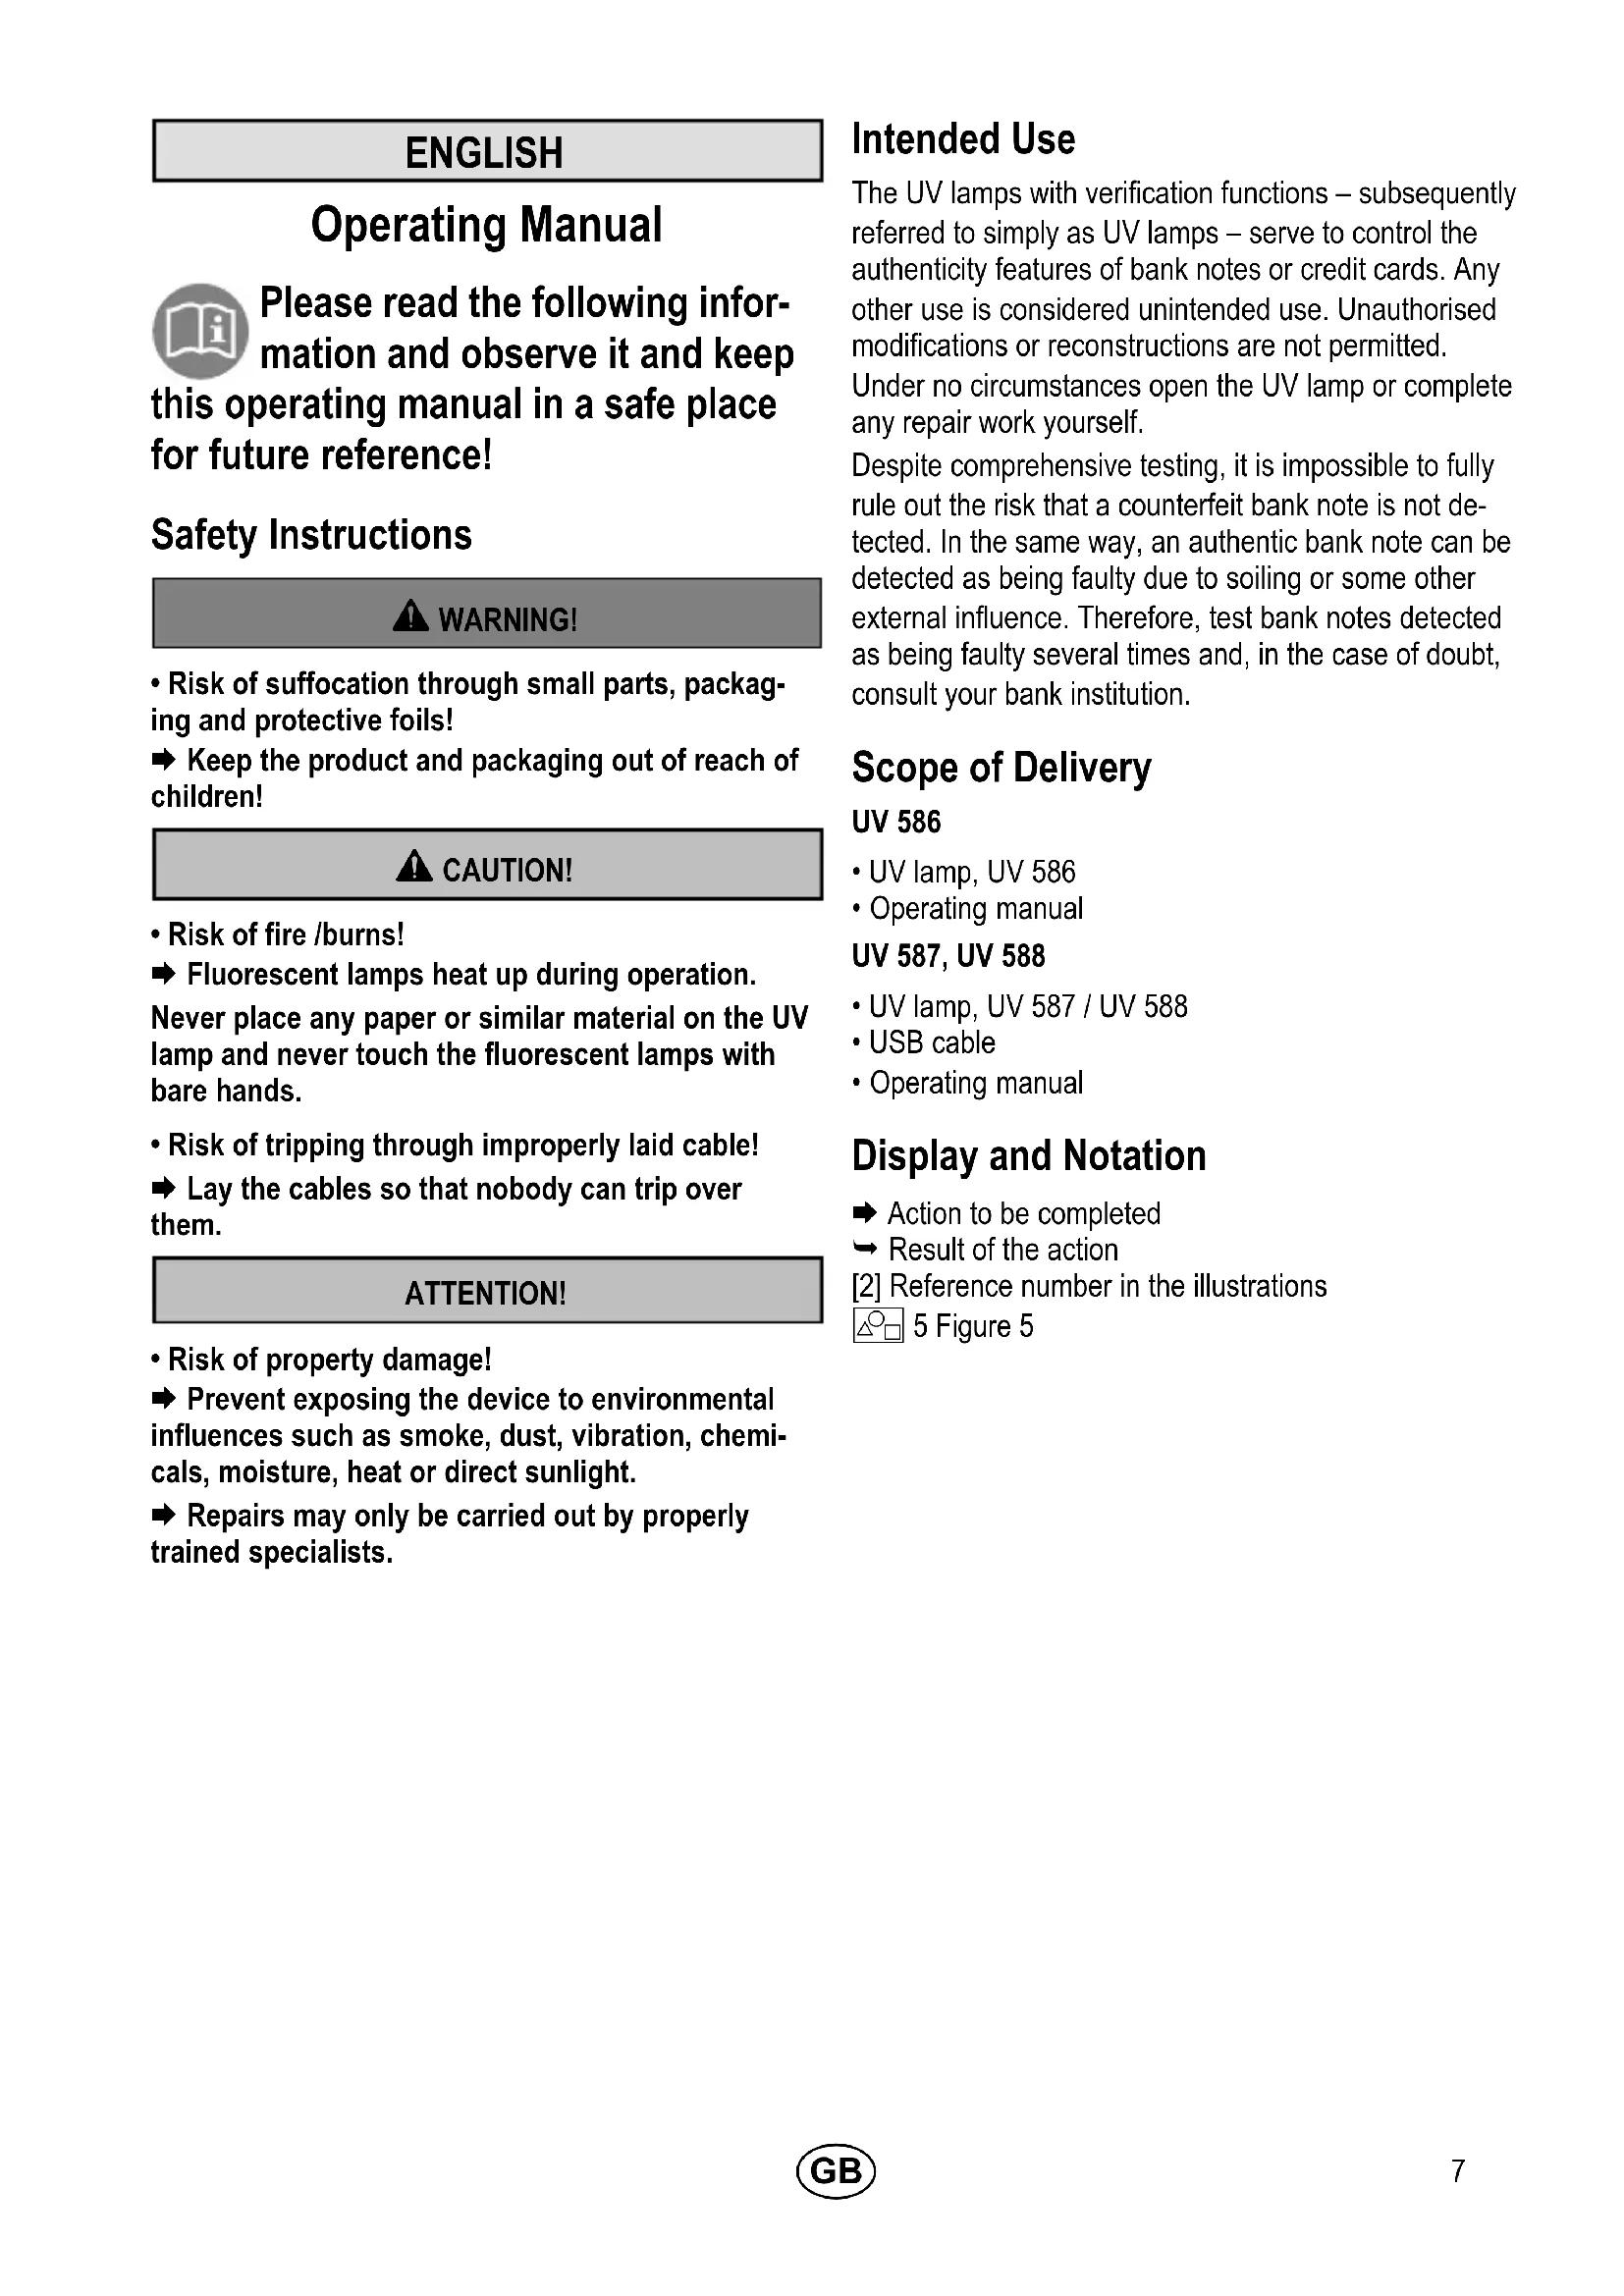
Please read the following information and observe it and keep
this operating manual in a safe place for future reference!
Safety Instructions

WARNING!
- Risk of suffocation through small parts, packaging and protective foils!
Keep the product and packaging out of reach of children!

CAUTION!
- Risk of fire /burns!
Fluorescent lamps heat up during operation.
Never place any paper or similar material on the UV lamp and never touch the fluorescent lamps with bare hands.
- Risk of tripping through improperly laid cable!
Lay the cables so that nobody can trip over them.
ATTENTION!
- Risk of property damage!
Prevent exposing the device to environmental influences such as smoke, dust, vibration, chemicals, moisture, heat or direct sunlight.
Repairs may only be carried out by properly trained specialists.
Intended Use
The UV lamps with verification functions - subsequently referred to simply as UV lamps - serve to control the authenticity features of bank notes or credit cards. Any other use is considered unintended use. Unauthorised modifications or reconstructions are not permitted.
Under no circumstances open the UV lamp or complete any repair work yourself.
Despite comprehensive testing, it is impossible to fully rule out the risk that a counterfeit bank note is not detected. In the same way, an authentic bank note can be detected as being faulty due to soiling or some other external influence. Therefore, test bank notes detected as being faulty several times and, in the case of doubt, consult your bank institution.
Scope of Delivery
UV 586
UV lamp, UV 586
- Operating manual
UV 587, UV 588
UV lamp, UV 587 / UV 588
USB cable
- Operating manual
Display and Notation
Action to be completed
Result of the action
[2] Reference number in the illustrations

5 Figure 5
Operating Elements
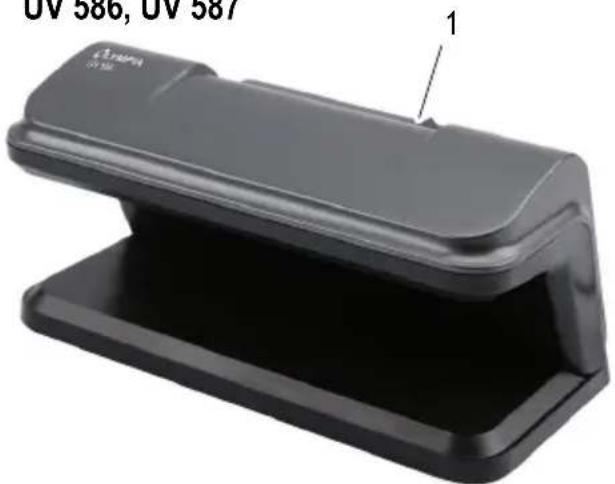
UV 586, UV 587
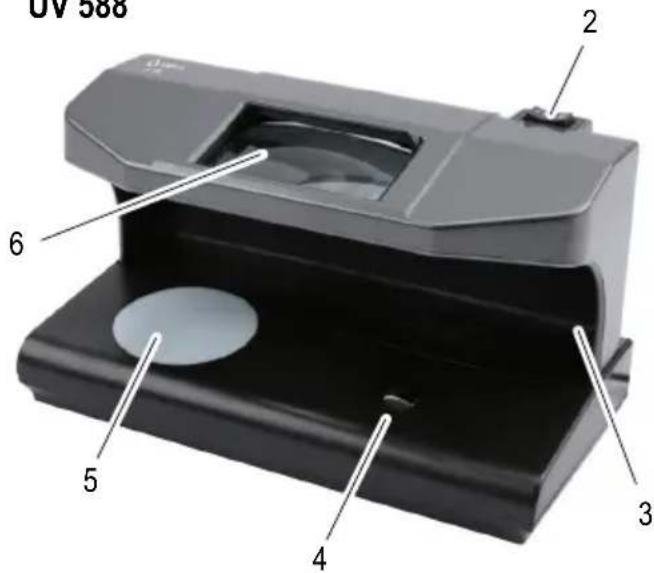
UV 588
Operation
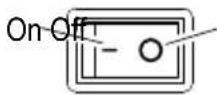
Switching the UV Lamp On and Off
i If you do not intend to use the UV lamp for a longer period, disconnect the UV lamp from the power supply.
UV 586
Connect the power plug to a properly installed power socket.
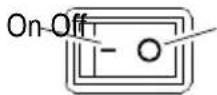
Set the switch [1] to position "I" to switch the UV lamp on.
Set the switch [1] to position "0" to switch the UV lamp off.
UV 587
Use the USB cable supplied to connect the UV lamp to the power supply.
Connect the micro USB plug to the socket in the UV lamp.
Connect the USB A plug to a USB power supply (5 V, 1 A).
Set the switch [1] to position "I" to switch the UV lamp on.
Set the switch [1] to position "0" to switch the UV lamp off.
UV 588
Use the USB cable supplied to connect the UV lamp to the power supply.
Connect the micro USB plug to the "DC Input, Charging Port" socket [9] on the UV lamp.
Connect the USB A plug to a USB power supply (5 V, 1 A).
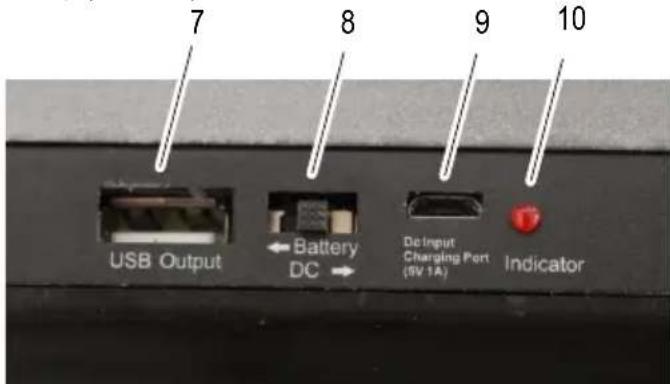
Set the "Battery/DC" switch [8] to "DC".
Set the switch [2] to position "I" [11] for the UV test.
Set the switch [2] to position "II" [12] for white light and magnetic strip test.
Set the switch [2] to position "0" to switch the UV lamp off.

Rechargeable Battery Operation (Option) UV 588
If you operate the UV lamp in conjunction with a rechargeable battery, you can use the UV lamp as a portable device.
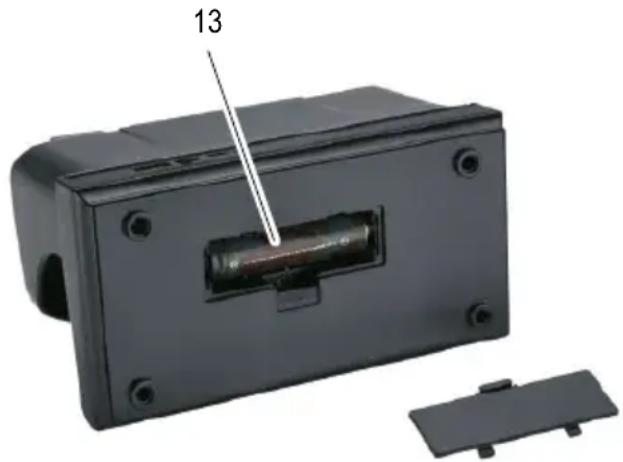
Insert the Li-ion rechargeable battery (see Section "Technical Data") in the battery compartment [13] on the underside of the UV lamp.
Set the "Battery/DC" switch [8] to "Battery".
Use the USB cable.
Connect the micro USB plug to the "DC Input, Charging Port" socket [9] on the UV lamp.
Connect the USB A plug to a USB power supply (5 V, 1 A).
i During the charging time, the switch [2] must be set to position "0". The charging time required is 3 - 4 hours (Modell 18650, 2600 mAh).
The LED indicator [10] flashes during the charging process and lights up continuously when the battery is fully charged.
Disconnect the USB cable from the UV lamp.
The UV lamp can now be used as a portable device.
A typical USB voltage of 5V is provided at the USB Output socket [7].
Switch the UV lamp on using the switch [2].
i If you use the UV lamp on a continuous basis, you can complete tests for about 1 hour.
Functions
The range of functions available is dependent on the device.
UV Lamp (UV 586, UV 587, UV 588)
After switching the device on, wait for about one minute until the UV lamp fulfils the optimum operating conditions.
Bank notes are provided with distinct features which become visible under UV light. Compare the UV characteristics with those of your real banknotes.
Lay the bank note in the UV lamp.
Check the security features (see ^ 1 and ^ 2).
The features are clearly visible.
Please note it is possible that, due to external influences, older bank notes cannot be unambiguously identified as counterfeitits under UV light.
Magnetic Elements (UV 588)
Bank notes are provided with magnetic features resulting from the use of special ink. These features can be controlled with the magnetic read heads [4].
Lay the bank note in the UV lamp.
Press the bank note down firmly on the magnetic read head [4] and move the bank note to and fro with quick movements (see 5).
Guide the metallic strip longitudinally over the magnetic read head [4] (see 5).
The UV lamp issues a short acoustic signal when the corresponding feature is detected and the LED [3] lights up briefly.
White Light (UV 588)
Bank notes are provided with distinct features which become visible in white light. Real bank notes indicate all the features illustrated in 6.
Move the switch [2] to position (II).
The UV lamp switches from UV to white light [5].
Lay the bank notes in the UV lamp.
Control the security features under the white light (see 6), e.g. the watermark.
The features are clearly visible.
Magnification (UV 588)
Bank notes are provided with security features which become visible under a magnifying glass [6].
Lay the bank notes in the UV lamp.
Check the features (see 4)
The microprint can be seen clearly and in detail.
Technical Data
| Model UV 586 | |
| Output 9 W (UV tube) | |
| Wavelength 365 nm | |
| Dimensions 192 × 95 × 95 mm | |
| Power supply 230 V, 50 Hz | |
| Weight 380 g | |
| Temperature (operation) 0 – 40 °C | |
| Relative humidity (operation) | 60 – 90 % |
| Model UV 587 | |
| Output 2 × UV LED | |
| Wavelength 365 nm | |
| Dimensions 192 × 95 × 95 mm | |
| Power supply 5 V, 1 A (USB) | |
| Weight 290 g | |
| Temperature (operation) 0 – 40 °C | |
| Relative humidity (operation) | 60 – 90 % |
| Model UV 588 | |
| Output 2 × UV LED | |
| Wavelength 365 nm | |
| Dimensions 190 × 100 × 110 mm | |
| Power supply 5 V, 1 A (USB) | |
| Rechargeable battery (option) | Li-ion battery, 3.7 V, e.g. Model 18650, 2600 mAh |
| Battery operation time (option) | Approx. 1 hour |
| Weight 460 g (without battery) | |
| Temperature (operation) 0 – 40 °C | |
| Relative humidity (operation) | 60 – 90 % |
Care Instructions
Clean the housing surface with a soft, lint-free cloth.
Clean the UV fluorescent lamps with a soft, lint-free cloth.
Do not use any solvents or cleaning agents.
Information on Disposal
The adjacent symbol indicates that electrical and electronic apparatus and batteries no longer required must be disposed of separate
from domestic waste in accordance with legal directives.
Packaging materials must be disposed of according to local regulations.
Warranty
Dear customer,
we are delighted that you have chosen this equipment. In the case of a defect, please return the device together with the receipt and original packing material to the point of sale.
FRANÇAIS
Mode d'emploi

GBIE CY Declaration of conformity
To view the complete Declaration of Conformity, please refer to the free download available on our website www.go-europe.com.
GB IE CY All rights reserved.
