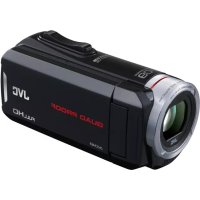
GZHM860 - Camcorder JVC - Free user manual and instructions
Find the device manual for free GZHM860 JVC in PDF.
User questions about GZHM860 JVC
0 question about this device. Answer the ones you know or ask your own.
Ask a new question about this device
Download the instructions for your Camcorder in PDF format for free! Find your manual GZHM860 - JVC and take your electronic device back in hand. On this page are published all the documents necessary for the use of your device. GZHM860 by JVC.
USER MANUAL GZHM860 JVC
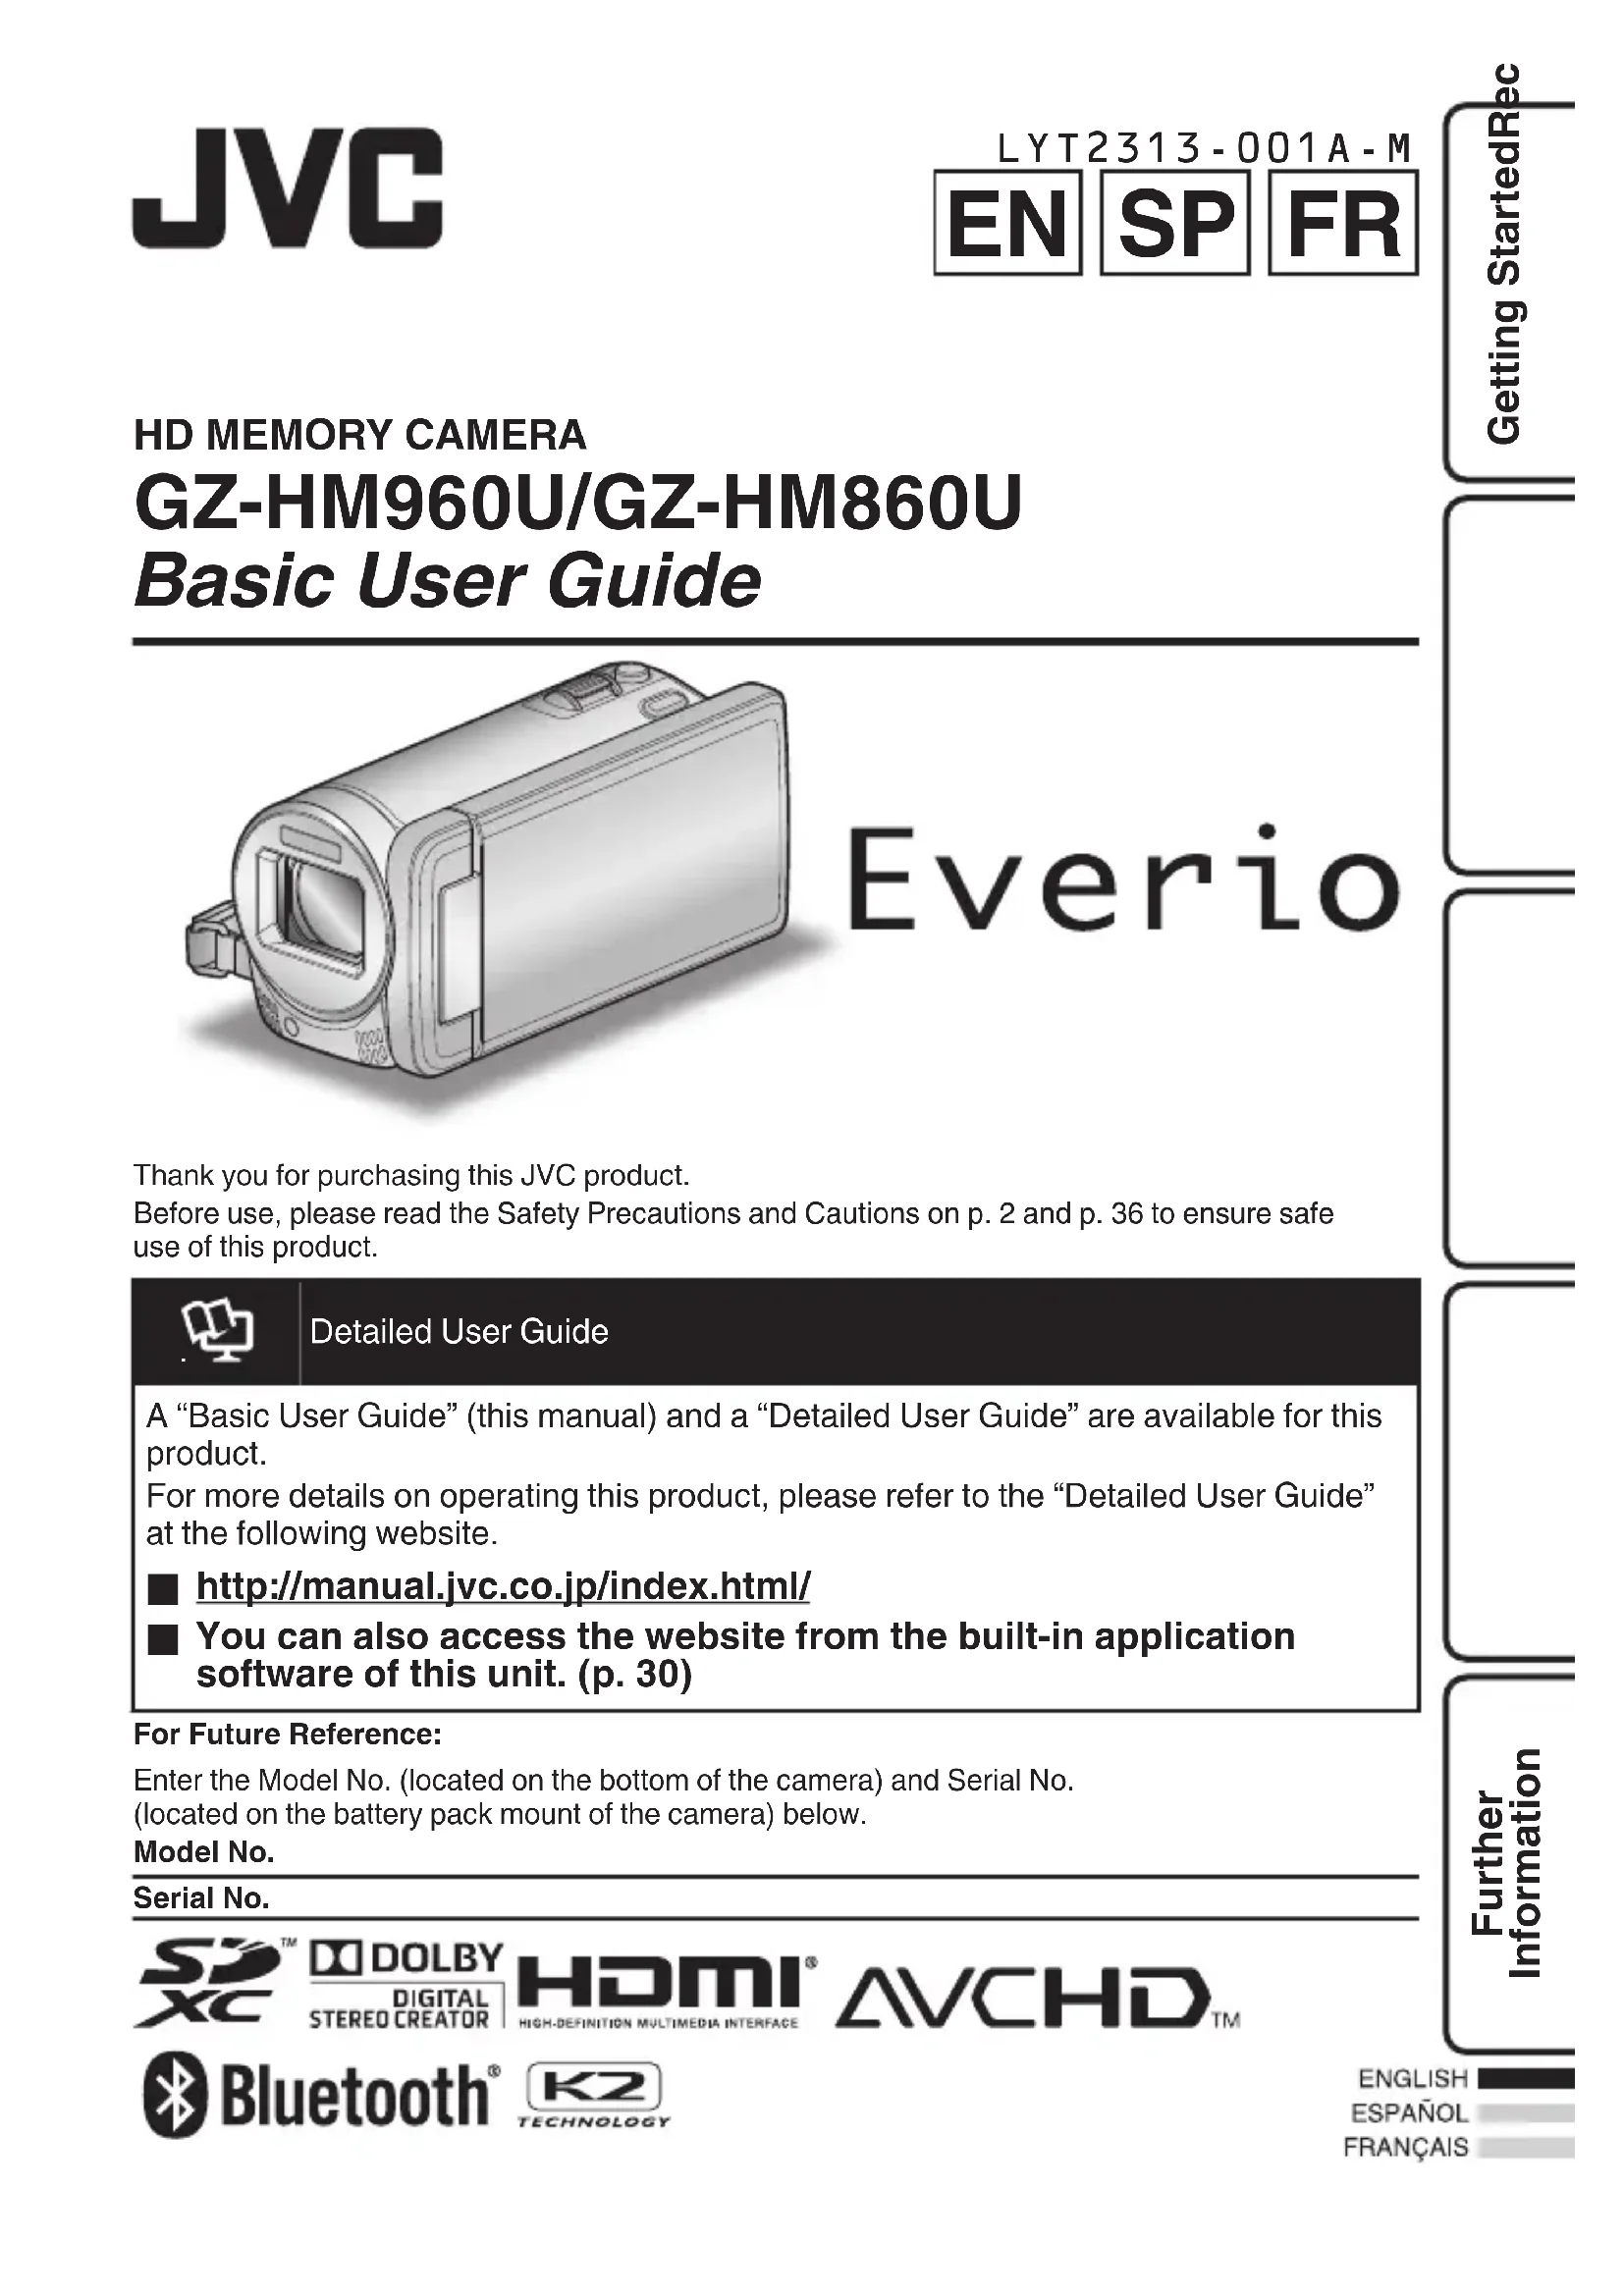
GZ-HM960U/GZ-HM860U Basic User Guide Thank you for purchasing this JVC product.Before use, please read the Safety Precautions and Cautions on p. 2 and p. 36 to ensure safeuse of this product. Detailed User GuideA “Basic User Guide” (this manual) and a “Detailed User Guide” are available for thisproduct.For more details on operating this product, please refer to the “Detailed User Guide”at the following website.
You can also access the website from the built-in application software of this unit. (p. 30) For Future Reference:Enter the Model No. (located on the bottom of the camera) and Serial No.(located on the battery pack mount of the camera) below.Model No.Serial No. EN SP FR
CAUTION: TO REDUCE THE RISK OF ELECTRIC SHOCK, DO NOT REMOVE COVER (OR BACK). NO USER-SERVICEABLE PARTS INSIDE. REFER SERVICING TO QUALIFIED SERVICE PERSONNEL. The lightning flash with arrowhead symbol, within an equilateral triangle, is intended to alert the user to the presence of uninsulated "dangerous voltage" within the product's enclosure that may be of sufficient magnitude to constitute a risk of electric shock to persons. The exclamation point within an equilateral triangle is intended to alert the user to the presence of important operating and maintenance (servicing) instructions in the literature accompanying the appliance.
WARNING: TO PREVENT FIRE OR SHOCK
HAZARD, DO NOT EXPOSE THIS UNIT TO RAIN OR MOISTURE. NOTES:
The rating plate and safety caution are on the bottom and/or the back of the main unit.
The serial number plate is on the battery pack mount.
The rating information and safety caution of the AC adapter are on its upper and lower sides. Caution on Replaceable lithium battery The battery used in this device may present a fire or chemical burn hazard if mistreated. Do not recharge, disassemble, heat above 100°C (212°F) or incinerate. Replace battery with Panasonic, Sanyo, Sony or Maxell CR2025. Danger of explosion or Risk of fire if the battery is incorrectly replaced. Dispose of used battery promptly.
Keep away from children.
Do not disassemble and do not dispose of in fire. For USA-California Only This product contains a CR Coin Cell Lithium Battery which contains Perchlorate Material – special handling may apply.See www.dtsc.ca.gov/hazardouswaste/perchlorate When the equipment is installed in a cabinet or on a shelf, make sure that it has sufficient space on all sides to allow for ventilation (10 cm (3-15/16") or more on both sides, on top and at the rear). Do not block the ventilation holes. (If the ventilation holes are blocked by a newspaper, or cloth etc. the heat may not be able to get out.) No naked flame sources, such as lighted candles, should be placed on the apparatus. When discarding batteries, environmental problems must be considered and the local rules or laws governing the disposal of these batteries must be followed strictly. The apparatus shall not be exposed to dripping or splashing. Do not use this equipment in a bathroom or places with water. Also do not place any containers filled with water or liquids (such as cosmetics or medicines, flower vases, potted plants, cups etc.) on top of this unit. (If water or liquid is allowed to enter this equipment, fire or electric shock may be caused.) Do not point the lens directly into the sun. This can cause eye injuries, as well as lead to the malfunctioning of internal circuitry. There is also a risk of fire or electric shock. CAUTION! The following notes concern possible physical damage to this unit and to the user. Carrying or holding this unit by the LCD monitor can result in dropping the unit, or in a malfunction. Do not use a tripod on unsteady or unlevel surfaces. It could tip over, causing serious damage to the unit. CAUTION! Connecting cables (Audio/Video, etc.) to this unit and leaving it on top of the TV is not recommended, as tripping on the cables will cause the unit to fall, resulting in damage. CAUTION:
The battery pack, the camcorder with battery installed, and the remote control with battery installed should not be exposed to excessive heat such as direct sunlight, fire or the like. The mains plug shall remain readily operable.
Remove the mains plug immediately if the camcorder functions abnormally.
For more information, refer to the Detailed User Guide http://manual.jvc.co.jp/index.html/.
IMPORTANT SAFETY INSTRUCTIONS
1. Read these instructions.
2. Keep these instructions.
3. Heed all warnings.
4. Follow all instructions.
5. Do not use this apparatus near water.
6. Clean only with dry cloth.
7. Do not block any ventilation openings. Install in
accordance with the manufacturer’s instructions.
8. Do not install near any heat sources such
as radiators, heat registers, stoves, or other apparatus (including amplifi ers) that produce heat.
9. Protect the power cord from being walked on or
pinched particularly at plugs, convenience receptacles, and the point where they exit from the apparatus.
10. Only use attachments/accessories specifi ed by
11. Use only with the cart,
stand, tripod, bracket, or table specifi ed by the manufacturer, or sold with the apparatus. When a cart is used, use caution when moving the cart/ apparatus combination to avoid injury from tip-over.
12. Unplug this apparatus during lightning storms or
when unused for long periods of time.
13. Refer all servicing to qualifi ed service personnel.
Servicing is required when the apparatus has been damaged in any way, such as power-supply cord or plug is damaged, liquid has been spilled or objects have fallen into the apparatus, the apparatus has been exposed to rain or moisture, does not operate normally, or has been dropped. If this symbol is shown, it is only valid in the European Union. Remember that this unit is intended for private consumer use only. Any commercial use without proper permission is prohibited. (Even if you record an event such as a show, performance or exhibition for personal enjoyment, it is strongly recommended that you obtain permission beforehand.) Trademarks Make a backup of important recorded data
"AVCHD", "AVCHD" logo, "AVCHD Lite" and "AVCHD Lite" logo are trademarks of Panasonic Corporation and Sony Corporation.
x.v.Color™ is a trademark of Sony Corporation.
HDMI is a trademark of HDMI Licensing, LLC.
Bluetooth and the Bluetooth logo are registered trademark of Bluetooth SIG, Inc.
Manufactured under license from Dolby Laboratories. Dolby and the double-D symbol are trademarks of Dolby Laboratories.
is either registered trademark or trademark of Microsoft Corporation in the United States and/or other countries.
Macintosh is a registered trademark of Apple Inc.
iMovie and iPhoto are trademarks of Apple Inc., registered in the U.S. and other countries.
YouTube™ and the YouTube logo are trademarks and/or registered trademarks of YouTube LLC.
Intel, Intel Core, and Pentium are trademarks or registered trademarks of Intel Corporation or its subsidiaries in the United States and other countries.
Eye-Fi is a trademark of Eye-Fi, Inc.
Other product and company names included in this instruction manual are trademarks and/or registered trademarks of their respective holders. JVC will not be responsible for any lost data. It is recommended to copy your important recorded data to a disc or other recording media for storage. CAUTION: To maintain compliance with FCC’s RF exposure guidelines, use only the supplied antenna. Unauthorized antenna, modification, or attachments could damage the transmitter and may violate FCC regulations. This device complies with Part 15 of the FCC Rules. Operation is subject to the following two conditions: (1) This device may not cause harmful interference. (2) This device must accept any interference received, including interference that may Cause undesired operation. For more information, refer to the Detailed User Guide http://manual.jvc.co.jp/index.html/ 3Model Differences Feature Model GZ-HM960 GZ-HM860 LCD Monitor 3D/2D 2D 2DÆ3D Conversion Playback Available Unavailable AC Adapter AC-V30U AC-V11U Precautions on Playing Back 3D Images (for GZ-HM960) Images recorded in 2D mode can be converted to 3D and played back on this unit. You can enjoy realistic and powerful 3D images by playing back on a 3D compatible TV. Before use, please read the following precautions to ensure safe and comfortable viewing of the 3D images. Playing Back 3D Images This unit makes use of the misalignment between the images that enter the left and right eyes to create the 3D effect during 3D playback. As the images that enter the left and right eyes are different, fatigue may be experienced. In addition, depending on the content of the video, an illusion of movement may be experienced and result in motion sickness. 3D Display on the LCD Monitor 3D images are supported by the LCD monitor. Press the “3D” button to change the display on the LCD monitor between 3D and 2D.
3D effect appears stronger when viewed at approximately 80 cm (11-3/4”) from the front.
3D effect may be weak if viewed from an angle other than the front.
The LCD monitor appears darker when 3D images are displayed. Change the display to 2D when it is difficult to see, such as when using this unit outdoors.
For more information, refer to the Detailed User Guide http://manual.jvc.co.jp/index.html/Precautions
Viewing of 3D images is not recommended for people with medical history of photosensitivity, with heart diseases, feel unwell, suffer from lack of sleep, suffer from fatigue, or are drunk.
Medical conditions may worsen.
If you have vision problems such as short-sightedness, long-sightedness, varying vision in the left and right eyes, or astigmatism, it is recommended to correct your vision by wearing glasses, etc. Stop viewing of 3D images if you see double images.
3D images may appear differently for different people. Correct your vision appropriately before viewing the 3D images.
Stop viewing of 3D images if you experience fatigue or discomfort.
Continual viewing of the 3D images may result in health problems.
Take an adequate rest.
Viewing of 3D images in an environment where shaking of the monitor is expected, such as while riding in a vehicle or during walking, may result in fatigue or discomfort.
If you experience fatigue or discomfort while recording or viewing 3D images on the LCD monitor, set the display to 2D.
Continual viewing of the 3D images may result in health problems.
Rest well after viewing 3D images.
After viewing 3D images, check that you do not experience fatigue or discomfort before driving, etc.
Take a break every 30 to 60 minutes when viewing 3D images.
Keep a distance of at least 3 times the effective height of the screen when viewing 3D images on a 3D compatible TV.
Viewing of 3D images from a distance shorter than the recommended distance may cause visual fatigue. Recommended distance : 42” TV: approx. 1.6 m (5’3”), 46” TV: approx. 1.7 m (5’6-7/8”), 50” TV: approx. 1.9 m (6’2-3/4”), 54” TV: approx. 2.0 m (6’6-3/4”)
Viewing of 3D images is only recommended for ages 5 to 6 and above.
You can also access the website from the built-in application software of this unit. (p. 30) Verifying the Accessories AC AdapterAP-V30U*1(for GZ-HM960)AC AdapterAC-V11U*1(for GZ-HM860)Battery PackBN-VG114URemote ControlRM-V760UUSB Cable(Type A - Mini Type
Optional Accessory: Component Cable (QAM1266-001) SD cards are sold separately. For details on the types of cards that can be used on this unit, refer to p. 12.*1 When using the AC adapter overseas, please prepare a commercially availableconverter plug for the country or region of visit.*2 for AV Cable and optional Component Cable For more information, refer to the Detailed User Guidehttp://manual.jvc.co.jp/index.html/o Attaching the Core Filter Attach the core filter to the power cord of the AC adapter, AV Cable and optionalComponent Cable as shown in the illustration.The core filter reduces interference when this unit is connected to other devices.. 3 cm (1-3/16”)To be connected to this unitRelease the stopper.Wind once Names of Parts and Functions
Flash Lens/Lens Cover Light Remote Sensor Stereo Microphone 3D LCD MonitorTurns the power on/off by opening andclosing. Speaker 3D Button (p. 19)(for GZ-HM960) / AFButton (for GZ-HM860) POWER/CHARGE (Power/Charge)Lamp (p. 10) ACCESS (Access) LampLights up/blinks during recording orplayback. USB Connector (p. 31) HDMI Mini Connector (p. 20) USER (User) ButtonActivates preset functions. A/B (Video/Still Image) ButtonSwitches between video and still imagemodes. M (Power/Information) ButtonRecording Displays the remainingtime (for video only) andbattery power.Playback Displays file informationsuch as recording date.Press and hold to turn the power on/offwhile the LCD monitor is opened. i.AUTO (Intelligent Auto) Button(p. 15) Zoom/Volume Lever (p. 15, 18) SNAPSHOT (Still Image Recording)Button (p. 17) DC Connector (p. 10) START/STOP (Video Recording)Button (p. 15) COMPONENT (Component) Connector(p. 20) AV Connector (p. 21, 26) Grip Belt (p. 11) Tripod Mounting Hole Battery Release Lever (p. 10) SD Card Slot (p. 11)For more information, refer to the Detailed User Guidehttp://manual.jvc.co.jp/index.html/ 7Names of Buttons and Functions on the LCD Monitor The following screens are displayed during the video and still image modes, and operate asthe touch screens. (p. 9)Recording Screen (Video/Still Image).
Face Short Cut Menu ButtonDisplays a short cut screen of facerecognition functions. Zoom Button Recording/Playback Mode ButtonSwitches between recording andplayback modes. Recording Start/Stop Button (p. 15, 17)
Still Image Recording Button Menu Button (p. 32) Display ButtonSome displays disappear afterapproximately 3 seconds. Press thisbutton to show the displays again. Thedisplays appear for approximately 3seconds with every press. Press and holdthis button to fix the displays. Press thisbutton again to release the displays.Playback Screen (Video). 00:01:23 00:12:34
Recording/Playback Mode ButtonSwitches between recording andplayback modes. Index Screen Button (p. 18) Delete Button Volume Adjustment Button (p. 19) Menu Button (p. 32) Operation Buttons (p. 19)Playback Screen (Still Image).
Recording/Playback Mode ButtonSwitches between recording andplayback modes. Index Screen Button (p. 18) Delete Button Menu Button (p. 32) Operation Buttons (p. 19) For more information, refer to the Detailed User Guidehttp://manual.jvc.co.jp/index.html/Index Screen
Recording/Playback Mode Button Switches between recording and playback modes.
Delete Button (p. 18)
Playback Media Button Switches between SD card and built-in memory.
Close Button Using the Touch Screen There are two ways to operate the touch screen, namely "tap" and "drag". The following are some examples. A Tap the displayed button (icon) or thumbnail (file) on the touch screen to make selection. B Drag the thumbnails on the touch screen to search for the desired file. 00:01:23 00:12:34
The touch screen of this unit is pressure-sensitive. When the touch screen does not respond smoothly, apply slightly more force to your fingertip.
Do not press or rub with excessive force.
If you apply a protect sheet or a sticker, the touch screen may not respond smoothly.
Do not operate the touch screen using an object with a sharp or hard tip.
Pressing two or more places at a time may cause a malfunction.
Tap the buttons (icons) on the touch screen accurately. The buttons may not respond if they are not tapped on the right area.
Perform “TOUCH SCREEN ADJUST” if the reactive area of the screen is misaligned with the touched area. (For details, refer to the Detailed User Guide.) (Adjust by lightly tapping with a corner of an SD card, etc. Do not press with an object with a sharp tip or do not press hard.) For more information, refer to the Detailed User Guide http://manual.jvc.co.jp/index.html/
Getting StartedRecordingPlaybackCopying Further InformationCharging the Battery Pack (Base) To detach the battery pack Charging finished: Goes outCharging in progress: BlinksCharging Lamp Plug in the power. AC Adapter To AC OutletCover Connect the DC connector. Mark Align the top of the battery with the mark on this unit, and slide in until the battery clicks into place.The battery pack is not charged at the time of purchase. Attach the battery pack. The AC adapter shown in the illustration is AC-V11U (for GZ-HM860). CAUTION Be sure to use JVC battery packs.
If you use any other battery packs besides JVC battery packs, safety and performance cannot be guaranteed.
Charging time: Approx. 2 h 30 m (using supplied battery pack)
The charging time is when the unit is used at 25°C (77°F). If the battery pack is charged outside the room temperature range of 10°C to 35°C (50°F to 95°F), charging may take a longer time or it may not start. The recordable and playable time may also be shortened under some usage conditions such as at low temperature. Getting Started
For more information, refer to the Detailed User Guidehttp://manual.jvc.co.jp/index.html/Grip Adjustment
Pad Attach the padAdjust the length of the beltPull back the pad Inserting an SD Card To record to the card, it is necessary to perform media settings. (p. 13) When no card is available, set media settings to “BUILT-IN MEMORY” for recording. By default, it is set to “BUILT-IN MEMORY”. (Base)Te r minal Side Open the cover and insert an SD card. Close the LCD monitor.
- Turn off the power of this unit before inserting or removing a card.
To remove the card Push the card inward once, then pull it out straight. (Base) For more information, refer to the Detailed User Guidehttp://manual.jvc.co.jp/index.html/
Getting StartedRecordingPlaybackCopying Further InformationNOTE Operations are confirmed on the following SD cards. Manufacturer Panasonic, TOSHIBA, SanDisk, Eye-Fi Video A Class 4 or higher compatible SD card (2 GB) / Class 4 or higher compatible SDHC card (4 GB to 32 GB) / Class 4 or higher compatible SDXC card (48 GB to 64 GB) (When recording with image quality “UXP”, Class 6 or higher is recommended.) Still Image B SD card (256 MB to 2 GB)/SDHC card (4 GB to 32 GB)/ SDXC card (48 GB to 64 GB) Eye-Fi Eye-Fi Connect X2, Eye-Fi Explore X2, Eye-Fi Pro X2 (A, B)
Using SD cards (including SDHC/SDXC cards) other than those specified above may result in recording failure or data loss.
To protect the data, do not touch the terminals of the SD card.
Eye-Fi is an SD memory card with wireless LAN function. For more information, refer to Detailed User Guide.
When using an SDXC card, check its compatibility with the OS of your computer by referring to the Detailed User Guide.
Both videos and still images can be recorded on one SD card. It is recommended to confirm the video operation of the SD card before usage.
When “SEAMLESS RECORDING” in the menu is set to “ON”, recordings can still be made to the SD card without stopping when the remaining recording time on the built-in memory runs out. (For details on “SEAMLESS RECORDING”, refer to the Detailed User Guide.)
For more information, refer to the Detailed User Guide http://manual.jvc.co.jp/index.html/o To use an SD card Recording can be performed on a card when “REC MEDIA FOR VIDEO” or “REC MEDIA FOR IMAGE” of “COMMON” menu is set to “SD CARD”.
Open the LCD monitor.
Tap “REC MEDIA FOR VIDEO” or “REC MEDIA FOR IMAGE”. REC MEDIA FOR IMAGEREC MEDIA FOR VIDEOCOMMON
To use SD cards that have been used on other devices Format (initialize) the card using “FORMAT SD CARD” from “COMMON” menu. All data on the card will be deleted when it is formatted. Copy all files on the card to a computer before formatting. A Perform steps A - C from “To use an SD card”.
After formatting, tap “OK”. For more information, refer to the Detailed User Guidehttp://manual.jvc.co.jp/index.html/
Getting StartedRecordingPlaybackCopying Further InformationClock Setting
Open the LCD monitor.
The unit turns on. When the LCDmonitor is closed, the unit turns off. Tap “YES” when “SET DATE/TIME!”is displayed..
Set the date and time.. 2011JAN 1 10 00 DATE CLOCK SETTING SET TIME
When the year, month, day, hour, or minuteitem is tapped, “∧” and “∨” will be displayed.Tap “∧” or “∨” to adjust the value. Repeat this step to input the year, month, day,hour, and minute. After setting the date and time, tap “SET”. Select the region where you live andtap “SAVE”. The city name and time difference aredisplayed. Tap “<” or “>” to select the city name.. GMT SAVE
To reset the clock Set the clock with “CLOCK ADJUST”from the “COMMON” menu. Open the LCD monitor. The unit turns on. Tap “MENU”. Tap “Q”. Tap “CLOCK ADJUST”.. COMMONCLOCK ADJUST
Tap “CLOCK SETTING”..
CLOCK SETTINGCLOCK ADJUST
The subsequent setting operations arethe same as steps 3 - 5 on p. 14. To change the display language The language on the display can bechanged. Perform steps A - C from “Toreset the clock”. Tap “LANGUAGE”.. LANGUAGE
Tap to the desired language. NOTE
“SET DATE/TIME!” is displayed whenyou turn on this unit after it has not beenused for a prolonged period.Connect the AC adapter for more than24 hours before setting the clock.(p. 10)
For more information, refer to the Detailed User Guide http://manual.jvc.co.jp/index.html/Video Recording You can record without worrying about the setting details by using the Intelligent Auto mode. Settings such as exposure and focus will be adjusted automatically to suit the shooting conditions.
In case of specific shooting scenes such as person etc., its icon is displayed on the screen. Before recording an important scene, it is recommended to conduct a trial recording. (Telephoto)(Wide angle)ZoomingPress again to stop. Start recording. The mode changes between Intelligent Auto and Manual with every press.If the mode is H Manual, press the S button to switch. Check if the recording mode is P Intelligent Auto. Select video mode.
You can also tap g on the touch screen to record. To stop recording, tap a. In addition, you can also tap T/W to zoom.
Indications during video recording 0:00:0010:10 AM[0:54]Image StabilizerVideo QualityScene CounterBattery IndicatorRecording MediaRemaining Recording Time Recording For more information, refer to the Detailed User Guide http://manual.jvc.co.jp/index.html/
The estimated recording time of the supplied battery pack is approximately 40 minutes. (p. 33)
Do not remove the battery pack, AC adapter, or SD card when the access lamp is lighted. The recorded data may become unreadable.
3D images are supported by the LCD monitor of this unit. To switch to 3D mode, refer to “Playing Back 3D Images”. (p. 19) (for GZ-HM960)
When recording in 3D mode, the image will be recorded in 2D even if the display on the LCD monitor is set to 3D. (for GZ-HM960)
Face registration By registering the face of a person beforehand, focus and brightness can be adjusted automatically by the face tracking function. Up to 6 faces, together with names and priority levels, can be registered. It is recommended to register the faces that are often being recorded by this camera beforehand. For details, refer to “Registering Human Face Personal Authentication Information” in the Detailed User Guide.
TOUCH PRIORITY AE/AF (FACE TRACKING/COLOR TRACKING/AREA SELECT) “TOUCH PRIORITY AE/AF” is a function that adjusts focus and brightness based on a tapped position. By default, “TOUCH PRIORITY AE/AF” in the recording menu is set to “FACE TRACKING”. When the face within a frame on the screen is tapped, appropriate focus and brightness will be adjusted for the tapped face (person). In addition, the setting screen can be displayed by pressing the AF button. (for GZ- HM860) For details, refer to “Capturing Subjects Clearly (TOUCH PRIORITY AE/AF)” in the Detailed User Guide.
For more information, refer to the Detailed User Guide http://manual.jvc.co.jp/index.html/Still Image Recording Lights up during still image recording Press fully Ta k e a still image. Lights up in green when focused Press halfway Set the focus on the subject. Select still image mode.
You can also tap Q on the touch screen to record. However, focus cannot be set by pressing halfway.
Indications during still image recording 10:10 AM[6630]Battery IndicatorRecording MediaRecording in ProgressRemaining Number of ShotsFocusShutter SpeedImage Size For more information, refer to the Detailed User Guide http://manual.jvc.co.jp/index.html/
Getting StartedRecordingPlaybackCopying Further InformationPlaying Back/Deleting Files on this Unit Select and play back the recorded videos or still images from an index screen (thumbnail display).
REL ALLSEL ALLDELETETa p “OK”. Ta p “EXECUTE” when the confirma- tion message appears.A delete mark appears on the selected file. To remove the delete mark, tap again.Ta p on the files to delete.Ta p A. To delete unwanted files Tu r n up the volumeTu r n down the volumeVolume adjustment during playback Ta p u to return to the video index screen. Ta p e to pause playback. Ta p I/J to select the media for playback. Ta p on the file to play back. Select video or still image mode. SET Ta p “SET”. Ta p q again to return to the recording mode. Ta p q on the touch screen to select the playback mode.
The W button on the index screen is only displayed during still image playback. Still images that are recorded continuously within 2 seconds or with the continuous shooting mode will be grouped together and displayed with a green frame on a separate index screen. The index screen changes between the normal index screen and group index screen with every tap of the W button. Playback
For more information, refer to the Detailed User Guide http://manual.jvc.co.jp/index.html/o Playing back 3D images (for GZ-HM960) The mode changes between 3D and 2D with every press of the 3D button.
To play back 3D images, refer also to “Precautions on Playing Back 3D Images”.(p. 4)
Some subjects may appear unnatural when played back in 3D mode. In this case, it is recommended to play back the video in 2D mode.
3D images are supported by the LCD monitor of this unit. You can play back 3D images on the LCD monitor. If you are using a 3D compatible TV, you can also play back 3D images by connecting with an HDMI cable. (p. 20)
To capture a still image during playback Pause the playback and press the SNAPSHOT button.
Usable operation buttons during playback (*) During video playback During still image playback d / e Playback/pause Start/pause slideshow
Stop (returns to index screen) Stop (returns to index screen)
Advances to the next video Advances to the next still image
Returns to the beginning of the scene Returns to the previous still image
Forward slow-motion / Press and hold to start slow playback
Reverse slow-motion / Press and hold to start reverse slow playback
- Continuous playback of images taken by continuous shooting
- The buttons disappear after approximately 3 seconds. Tap on the screen to display the buttons again.
Parallax adjustment (video/still image) (for GZ-HM960) The 3D effect of 3D images may appear either strong or weak. In these cases, you can correct the 3D effect by adjusting the parallax (3D LEVEL ADJUST).
Tap “∧” or “∨” to scroll the screen.
Tap the preferred level (“-2” to “+2”). For more information, refer to the Detailed User Guidehttp://manual.jvc.co.jp/index.html/
Getting StartedRecordingPlaybackCopying Further Informationo 3D display warnings (for GZ-HM960) Fatigue or discomfort may be experienced if you view 3D images for a long period oftime.When viewing 3D images on this unit, a message will be displayed every 30 minutes.To turn off the message display, set “3D DISPLAY WARNING” to “OFF”. To change thesetting, refer to the Detailed User Guide (Menu Settings - COMMON Menu). Playing Back on TV
Connect to a TV.* Refer also to the instruction manual of the TV in use. Turn off the camcorder by pressing the M button for about 2 seconds.
Playing back 3D images on a 3D compatible TV (for GZ-HM960) If you are using a 3D compatible TV, you can play back 3D images by connecting to theHDMI mini connector.
Playing back in HD quality If you are using an HDTV, you can play back in HD quality by connecting to the HDMImini connector. Connecting to the HDMI connector
For more information, refer to the Detailed User Guidehttp://manual.jvc.co.jp/index.html/NOTE
For questions about the TV or method of connection, contact your TV’s manufacturer.
When playing back in HD quality, set “COMPONENT OUTPUT” in the “COMMON” menu to “1080i”. The video is output in standard quality if the setting remains at “480i”.
When 3D images are played back on a 3D compatible TV, the display on the LCD monitor is in 2D. (for GZ-HM960)
When this unit is connected to a 3D compatible TV via an HDMI cable and set to the recording mode while in 3D mode, 3D images will appear on the TV. (for GZ-HM960)
If you experience fatigue or discomfort while viewing 3D images, it is recommended to play back in 2D mode. (for GZ-HM960)
Playing back in standard quality If you are using a conventional TV, you can play back in standard quality by connecting to the AV connector. Connecting to the AV connector
Connect the AC adapter. (p. 10)
This unit powers on automatically when the AC adapter is connected.
Select the TV input switch.
When images look unnatural on the TV Images do not appear on the TV properly.
Disconnect the cable and connect again.
Turn off and on this unit again. Images are projected vertically on the TV.
Set “VIDEO OUTPUT” in the “COMMON” menu to “4:3”. Images are projected horizontally on the TV.
Adjust the TV’s screen accordingly. The color of images looks strange.
If the video was recorded with “x.v.Color” set to “ON”, set the “x.v.Color” setting of the TV to “ON”.
Adjust the TV’s screen accordingly. 3D images are not displayed in 3D. (for GZ- HM960)
Set “HDMI OUTPUT” in the “COMMON” menu to “CERTAIN TV TYPES”.
Set to 3D mode on the TV. For more information, refer to the Detailed User Guidehttp://manual.jvc.co.jp/index.html/
Getting StartedRecordingPlaybackCopying Further InformationCopying Files You can create discs or copy the files on this unit by connecting it to various devices.
Recordable and playable
Not applicable Media Selection Standard Quality HD Quality Page
p. 28 *1 Only on AVCHD compatible devices.
For details, refer to the Detailed User Guide or the help file of Everio MediaBrowser 3 BE. NOTE
Discs created with a DVD writer or external Blu-ray drive as well as files copied to an external hard disk drive can be converted to 3D for playback. (for GZ- HM960)
“AVCHD DVD” enables you to copy (record) videos to a DVD in the high definition quality. Note that they cannot be played back on devices that do not support AVCHD. Copying
For more information, refer to the Detailed User Guidehttp://manual.jvc.co.jp/index.html/Creating Discs with a DVD Writer or External Blu-ray Drive While a DVD writer is used in the following explanation, the same operations apply for anexternal Blu-ray drive. Connect the USB cable and the ACadapter. Turn off the camcorder by pressing theM button for about 2 seconds. Connect the USB cable providedwith the DVD writer. Connect the AC adapter of theDVD writer. Connect the AC adapter to thisunit. This unit powers on automaticallywhen the AC adapter is connected.. AC Adapter To AC OutletDVD Writer(CU-VD3U)To DC ConnectorTo USB Connector
Refer also to the instruction manual ofthe DVD writer or external Blu-ray drive. This unit turns on and the “BACK-UP”menu appears. While the USB cable is connected, the“BACK-UP” menu is displayed. Turn on the DVD writer or external Blu-ray drive and insert a new disc.
To play back the created disc Play back on an AVCHD compatibledevice (such as Blu-ray recorder).
Compatible DVD writers
You can use BE08LU20 from LG. To use the USB cable provided with theexternal Blu-ray drive, purchase theUSB extension cable.*1 The AC adapter shown in theillustration is AC-V11U (for GZ-HM860).*2 Mini-A (Male) – A (Female)(Part number: QAM0852-001)*2: Consult your nearest JVC servicecenter. NOTE
The recordable time on the discvaries according to the way ofrecording. When connected to this unit, allbuttons on the DVD writer (CU-VD50U), other than the powerand eject buttons, will not work. It is recommended to format yourDVD-RW on a computer beforeusing.For more information, refer to the Detailed User Guidehttp://manual.jvc.co.jp/index.html/
Tap “CREATE FROM ALL” (video) or “SAVE ALL” (still image).
You can change the media to save to by selecting “CHANGE REC. MEDIA”. (For details, refer to the Detailed User Guide.)
Selecting “Blu-ray DISC” enables you to save videos in a Blu-ray disc in the high definition quality. (External Blu-ray drives only)
Selecting “DVD(AVCHD)” enables you to save videos in a DVD in the high definition quality.
Selecting “DVD-Video” enables you to save videos in a DVD after converting to the standard image quality.
Tap on the media to copy.
Tap the desired method.
“ALL SCENES” (video)/ “ALL IMAGES” (still image): All videos or still images in this unit are copied. “UNSAVED SCENES” (video)/ “UNSAVED IMAGES” (still image): Videos or still images that have never been copied are automatically selected and copied.
NOYES CREATED?HEADLINE ON THE TOP MENUDO YOU WANT AN AUTOMATICALL SCENES “YES” : Displays the videos with similar recording dates by groups. “NO” : Displays the videos by recording dates.
When “INSERT NEXT DISC” appears, change the disc.
After copying, tap “OK”.
Press and hold the M button for 2 seconds or more to turn off this unit and disconnect the USB cable.
When “DO YOU WANT TO FINALIZE?” appears This appears when “AUTO FINALIZE” in the “COMMON” menu is set to “OFF”.
To play back on other devices, tap “YES”.
To add more files to the DVD later, tap “NO”.
For more information, refer to the Detailed User Guidehttp://manual.jvc.co.jp/index.html/Selecting Files to Copy Select video or still image mode. Tap “SELECT AND CREATE” (video)or “SELECT AND SAVE” (still image)..
SELECT AND CREATEVIDEO BACKUP
You can change the media to save toby selecting “CHANGE REC. MEDIA”.(For details, refer to p. 24 or theDetailed User Guide.) Tap on the media to copy..
SELECT THE MEDIA TO BACK UPSELECT AND CREATE
Tap the desired method.. SELECT FROM SCENESCREATE BY DATESELECT AND CREATE “CREATE BY DATE” (video)/“SAVE BY DATE” (still image):Videos or still images are sorted andcopied according to the date on whichthey were recorded. Æ To A“SELECT FROM SCENES” (video)/“SELECT FROM IMAGES” (still image):Select and copy the desired videos orstill images individually. Æ To B
Tap to select a recording date.
Only files of the selected date will becopied. The subsequent operations are the sameas steps 4 - 8 on the previous page.
A check mark appears on the selected file.
After selecting all the files, tap “SAVE”.
The subsequent operations are the sameas steps 4 - 8 on the previous page.
To check the disc created Select “PLAYBACK” in step 1.CAUTION Do not turn off the power or removethe USB cable until copying iscomplete. If copying is canceled while it is inprogress, the disc will becomeunusable. Videos and still images cannot becopied to the same disc. Files that are not on the indexscreen during playback cannot becopied. Special files cannot becopied either.For more information, refer to the Detailed User Guidehttp://manual.jvc.co.jp/index.html/
Getting StartedRecordingPlaybackCopying Further InformationDubbing Files by Connecting to a DVD Recorder or VCR You can dub videos in standard quality by connecting to a DVD recorder or VCR.Refer also to the instruction manuals of the TV, DVD recorder, VCR, etc. Connect to a VCR/DVD recorder. Turn off the camcorder by pressing the M button for about 2 seconds..
This unit powers on automatically when the AC adapter is connected. Tap q to select the playback mode. Prepare to record. Preparation on TV and VCR/DVD recorder
Switch to a compatible external input. Insert a DVD-R or video tape. Preparation on this unit
Set “VIDEO OUTPUT” in the “COMMON” menu tothe aspect ratio (“4:3” or “16:9”) of the connecting TV. Start recording. Start playback on this unit (p. 18) and press the record button on the recorder. After playback is complete, stop the recording. For more information, refer to the Detailed User Guidehttp://manual.jvc.co.jp/index.html/Using a USB External Hard Disk Drive You can copy video and still image files toa USB external hard disk drive from thisunit. You can also play the files in the USBexternal hard disk drive on this unit.
Compatible external hard disk drives You can use the FreeAgent Desk seriesfrom Seagate or Design by Neil Poultonseries from LaCie. USB external harddisk drives with the capacity over 2 TBcannot be used.
Compatible USB cables To USB ConnectorUSB Cable Provided with External Hard Disk DriveMini-A (Male) – A (Female)(Part number: QAM0852-001)USB Extension CableTo USB Connector
- Consult your nearest JVC servicecenter.Select video or still image mode. Tap “BACK UP”..
Tap on the media to copy..
SELECT THE MEDIA TO BACK UPBACK UP
Tap the desired method..
“ALL SCENES” (video)/“ALL IMAGES” (still image):All videos or still images in this unit arecopied.“UNSAVED SCENES” (video)/“UNSAVED IMAGES” (still image):Videos or still images that have neverbeen copied are automatically selectedand copied. Start backup. Check that there is sufficientremaining space and tap “YES”.
To play back the files copied Select “PLAYBACK” in step 1.Videos or still images saved in an externalhard disk drive can be played back on thisunit.For more information, refer to the Detailed User Guidehttp://manual.jvc.co.jp/index.html/
Getting StartedRecordingPlaybackCopying Further InformationCopying to Computer Verifying System Requirements (Guideline) Windows PCYou can copy files to a PC using the provided software.Right-click on “Computer” (or “My Computer”) in the “Start” menu and select “Properties” tocheck the following items.
Windows 7 / Windows Vista Processor Intel Core Duo, CPU 1.66 GHz or higher (Intel Core 2 Duo, CPU 2.13 GHz or higher recommended) Service Pack 2 (Windows Vista only) Home Basic or Home Premium (Pre-installed versions only) WindowsVista Home Premium (Pre-installed versions only) Windows7 System type: 32-bit / 64-bit Memory: At least 2 GB
Windows XP Memory: At least 1 GBProcessor Intel Core Duo, CPU 1.66 GHz or higher (Intel Core 2 Duo, CPU 2.13 GHz or higher recommended) Service Pack 3 Home Edition or Professional (Pre-installed versions only) Windows XP
Video editing Intel Core i7, CPU 2.53 GHz or higher recommended For more information, refer to the Detailed User Guidehttp://manual.jvc.co.jp/index.html/NOTE
If your PC does not meet the above system requirements, the provided software cannot be used. It is recommended to use a BD/DVD writer (optional).
Still images cannot be recorded to discs using the provided software.
For more information, contact your PC’s manufacturer. Mac Computer You can import files from this unit to a computer using Apple's iMovie '08, '09, '11 (video) or iPhoto (still image). To verify the system requirements, select “About This Mac” from the Apple menu. You can determine the operating system version, processor and amount of memory.
For the latest information on iMovie or iPhoto, refer to the Apple website.
For details on how to use iMovie or iPhoto, refer to the help file of the respective software.
There is no guarantee that the operations will work with all computer environments. For more information, refer to the Detailed User Guide http://manual.jvc.co.jp/index.html/
Getting StartedRecordingPlaybackCopying Further InformationInstalling the Provided Software (Built-in) You can display the recorded images incalendar format and perform simple editingusing the provided software.
Open the LCD monitor.
Turn off the camcorder by pressing theM button for about 2 seconds.
Connect the USB cable and the AC adapter.
AC Adapter To AC OutletUSB Cable (Provided)To DC ConnectorTo USB ConnectorThe AC adapter shown in the illustration is AC-V11U (for GZ-HM860).
This unit turns on and the “BACK-UP”menu appears.
Tap “CONNECT TO PC”.
Perform the following steps on the computer.
Click “Run INSTALL.EXE” in the auto play dialog box.
Click “Continue” on the user account control screen.
“Software Setup” appears after awhile. If it doesn’t appear, double-click“JVCCAM_APP” in “My Computer”(or “Computer”), then double-clickthe “install.exe”.
Follow the on-screen instructions.
Installation ends and icons are createdon the desktop. NOTE
To view the Detailed User Guide, connect to the internet and click “Detailed UserGuide” in step 6. For the operating details of Everio MediaBrowser 3 BE, refer to “Help” -“MediaBrowser Help” on the Everio MediaBrowser 3 BE toolbar. The instructionmanual will appear. For more information, refer to the Detailed User Guidehttp://manual.jvc.co.jp/index.html/Backing Up All Files Before making backup, make sure that there is enoughfree space in the PC’s HDD.Backup will not start if there is not enough free space. Connect the USB cable and the AC adapter. Before connecting, turn off thecamcorder by pressing the M buttonfor about 2 seconds.. AC Adapter To AC OutletUSB Cable (Provided)To DC ConnectorTo USB ConnectorThe AC adapter shown in the illustration is AC-V11U (for GZ-HM860).
This unit turns on and the “BACK-UP”menu appears.
Tap “CONNECT TO PC”.
The provided software EverioMediaBrowser 3 BE starts up on the PC. The subsequent operations are to beperformed on the PC.
Click Saving destination (PC)
After backup is complete, click “OK”. If you encounter any problems with theprovided software Everio MediaBrowser3 BE, please consult the “Pixela UserSupport Center”. (p. 32)
To disconnect this unit from the
Click “Safely Remove Hardware”.
Click “Safely Remove USB Mass Storage Device”.
Disconnect the USB cable and close the LCD monitor. For more information, refer to the Detailed User Guide http://manual.jvc.co.jp/index.html/
The menu differs according to the modein use. Tap “V” to display the face short cutmenu.
Tap “Q” to display the “COMMON”menu. Tap “∧” or “∨” to scroll the screen.
Tap the desired setting.
To exit the screen Tap “L” (quit).
To return to the previous screen Tap “J” (return).
To display the help file Tap “K” (help) and tap the menu item. Help file may not be available for someitems. For more information on thesettings, refer to the Detailed UserGuide.. Customer Support Information Use of this software is authorized according to the terms of the software license. JVC (for inquires regarding this unit) When contacting the nearest JVC office or agency in your country (refer to the JVC Worldwide Service Network at http://www.jvc-victor.co.jp/english/worldmap/index-e.html) about this software, please have the following information ready.
Computer (Manufacturer, Model (Desktop/Laptop), CPU, OS, Memory (MB/GB), Available Hard Disk Space (GB)) Please note that it may take some time to respond to your questions, depending on their subject matter. JVC cannot answer questions regarding basic operation of your computer, or questions regarding specifications or performance of the OS, other applications or drivers. Pixela (for inquires regarding the provided software) Region Language Phone # USA and Canada English +1-800-458-4029 (toll-free) Europe (UK, Germany, France, and Spain) English/German/French/Spanish +800-1532-4865 (toll-free) Other Countries in Europe English/German/French/Spanish +44-1489-564-764 Asia (Philippines) English +63-2-438-0090 nihCanihC ese 10800-163-0014 (toll-free) Homepage: http://www.pixela.co.jp/oem/jvc/mediabrowser/e/ Please check our website for latest information and downloading. Further Information
The actual recording time may be shorter if zooming is used or if recording is stopped repeatedly. (It is recommended to prepare battery packs ready for three times the expected recording time.)
When the battery life is reached, the recording time becomes shorter even if the battery pack is fully charged. (Replace the battery pack with a new one.) For more information, refer to the Detailed User Guidehttp://manual.jvc.co.jp/index.html/
Getting StartedRecordingPlaybackCopying Further InformationTroubleshooting If you encounter problems with this unit, check the following before requesting service. 1 Refer to “Trouble” below. 2 Refer to the “Troubleshooting” section in the “Detailed User Guide”. If you have difficulties operating the unit, refer to the detailed descriptions in the “DetailedUser Guide”. http://manual.jvc.co.jp/index.html/ 3 Refer to the FAQ of new products on JVC’s website.
http://www.jvc.com/ 4 This unit is a microcomputer-controlled device. Electrostatic discharge, external noise and interference (from a TV, a radio, etc.) might prevent it from functioning properly. In such a case, reset the unit.
Turn off the power. (Close the LCD monitor.)
Remove the AC adapter and battery pack from this unit, reattach them, open the LCD monitor and this unit powers on automatically. 5 If the above do not solve the problem, consult your nearest JVC dealer or JVC service center. Trouble TroubleAction PagePowerPOWER/CHARGElamp starts blinkingwhen the monitor isclosed. The battery pack is being charged. RecordingRecording cannot beperformed. Check the A / B button.
Set to the recording mode by tappingthe q button. Recording stopsautomatically. Turn off this unit, wait for a while, andturn it on again. (This unit stopsautomatically to protect the circuit whenthe temperature rises.)
Recording stops automatically after 12hours of continuous recording. PlaybackSound or video isinterrupted. Sometimes playback is interrupted atthe connecting section between twoscenes. This is not a malfunction.
For more information, refer to the Detailed User Guidehttp://manual.jvc.co.jp/index.html/3D images cannot be seen on a 3D compatible TV properly. (for GZ-HM960)
Set “HDMI OUTPUT” in the “COMMON” menu accordingly.
Other problems The lamp does not flash during battery pack charging.
Check the remaining battery power. (When the battery pack is fully charged, the lamp does not flash.)
When charging in either a hot or cold environment, ensure that battery is being charged within the permitted temperature range. (Otherwise, charging may stop to protect the battery pack.)
This is not a malfunction. (This unit may become warm when used for a long time.)
Turn off and on this unit again.
If the above does not solve the problem, back up your files and execute “FORMAT BUILT-IN MEM.” or “FORMAT SD CARD” in the “COMMON” menu. (All data will be deleted.)
Turn off and on this unit again.
Remove the AC adapter and battery pack, then remove and re-insert the SD card.
Remove any dirt from the SD card terminals.
If the above does not solve the problem, back up your files and execute “FORMAT BUILT-IN MEM.” or “FORMAT SD CARD” in the “COMMON” menu. (All data will be deleted.)
When time-lapse recording is stopped with the recorded time less than “0:00:00:17”, the video will not be saved.
For more information, refer to the Detailed User Guide http://manual.jvc.co.jp/index.html/
AC Adapter When using the AC adapter in areas other than the USA The provided AC adapter features automatic voltage selection in the AC range from 110 V to 240 V. USING HOUSEHOLD AC PLUG ADAPTERIn case of connecting the unit’s power cord to an AC wall outlet other than American National Standard C73 series type use an AC plug adapter, called a “Siemens Plug”, as shown.For this AC plug adapter, consult your nearest JVC dealer.Plug Adapter Battery Pack The supplied battery pack is a lithium-ion battery. Before using the supplied battery pack or an optional battery pack, be sure to read the following cautions:Terminals
To avoid hazardsRemove the AC adapter from the AC wall outlet when not in use. Do not leave dust or metal objects adhered to the AC wall outlet or AC adapter (power/DC plug). do not burn.do not short-circuit the terminals. Keep it awayfrom metallic objects when not in use. Whentransporting, carry the battery in a plastic bag.do not modify or disassemble.do not expose the battery to temperaturesexceeding 60°C (140°F), as this may cause thebattery to overheat, explode or catch fire.use only specified chargers.
To prevent damage and prolong service life do not subject to unnecessary shock.charge within the temperature range of 10°Cto 35°C (50°F to 95°F). Cooler temperaturesrequire longer charging time, or in some casesstop charging at all.Warmer temperatures prevent complete charging, or in some cases stop charging at all. store in a cool, dry place. Extended exposureto high temperatures will increase naturaldischarge and shorten service life.keep a 30% battery level (X) if the battery pack is not to be used for a long period of time.In addition, fully charge and then fully discharge the battery pack every 6 months, then continue to store it at a 30% battery level (X).remove from charger or powered unit when notin use, as some machines use current evenwhen switched off.do not drop or subject to strong impact.ATTENTION:The product you have purchased is powered by a rechargeable battery that is recyclable. Please call 1-800-8-BATTERY for information on how to recycle this battery.(USA and Canada only) Recording Medium
Be sure to follow the guidelines below to prevent corruption or damage to your recorded data.
Do not bend or drop the recording medium, or subject it to strong pressure, jolts or vibrations.
Do not splash the recording medium with water.
Do not use, replace, or store the recording medium in locations that are exposed to strong static electricity or electrical noise.
Do not turn off the camcorder power or remove the battery or AC adapter during shooting, playback, or when otherwise accessing the recording medium.
Do not bring the recording medium near objects that have a strong magnetic field or that emit strong electromagnetic waves.
Do not store the recording medium in locations with high temperature or high humidity.
Do not touch the metal parts.
When formatting or erasing data using the camcorder, only the file administration information is changed. The data is not completely erased from the recording medium. If you want to completely erase all of the data, we recommend either using commercially available software that is specially designed for that purpose, or by physically destroying the camcorder with a hammer etc. LCD Monitor
To prevent damage to the LCD monitor, DO NOT ... push it strongly or apply any shocks. ... place the camcorder with LCD monitor on the bottom. To prolong service life ... avoid rubbing it with coarse cloth.
For more information, refer to the Detailed User Guide http://manual.jvc.co.jp/index.html/.
To prevent the unit from dropping,
Fasten the grip belt securely.
When using the camcorder with a tripod, attach the camcorder to the tripod securely. If the camcorder drops, you may be injured and the camcorder may be damaged. When a child uses the unit, there must be parental guidance.Declaration of Conformity Changes or modifications not approved by JVC could void the user’s authority to operate the equipment. This equipment has been tested and found to comply with the limits for a Class B digital device, pursuant to Part 15 of the FCC Rules. These limits are designed to provide reasonable protection against harmful interference in a residential installation. This equipment generates, uses, and can radiate radio frequency energy and, if not installed and used in accordance with the instructions, may cause harmful interference to radio communications. However, there is no guarantee that interference will not occur in a particular installation. If this equipment does cause harmful interference to radio or television reception, which can be determined by turning the equipment off and on, the user is encouraged to try to correct the interference by one or more of the following measures: Reorient or relocate the receiving antenna. Increase the separation between the equipment and receiver. Connect the equipment into an outlet on a circuit different from that to which the receiver is connected. Consult the dealer or an experienced radio/ TV technician for help.This Class B digital apparatus complies with Canadian ICES-003. Cet appareil numérique de la classe B est conforme à la norme NMB-003 du Canada. Main Unit
For safety, DO NOT... open the camcorder’s chassis.... disassemble or modify the unit.... allow inflammables, water or metallic objects to enter the unit.... remove the battery pack or disconnect the power supply while the power is on.... leave the battery pack attached when the camcorder is not in use.... place naked fl ame sources, such as lighted candles, on the apparatus.... expose the apparatus to dripping or splashing.... leave dust or metal objects adhered to the power plug or an AC wall outlet.... insert any objects in the camcorder. Avoid using the unit... in places subject to excessive humidity or dust.... in places subject to soot or steam such as near a cooking stove.... near appliances generating strong magnetic or electric fields (speakers, broadcasting antennas, etc.).... in places subject to extremely high (over 40°C or 104°F) or extremely low (under 0°C or 32°F) temperatures. DO NOT leave the unit... in places of over 50°C (122°F).... in places where humidity is extremely low (below 35%) or extremely high (above 80%).... in direct sunlight.... in a closed car in summer.... near a heater.... in high places such as on a TV. Leaving the unit in high places while a cable is connected may result in a malfunction if the cable is caught and the unit falls onto the floor. To protect the unit, DO NOT... allow it to become wet.... drop the unit or strike it against hard objects.... subject it to shock or excessive vibration during transportation.... keep the lens directed at extremely bright objects for long periods.... expose the lens to direct sunlight.... swing it excessively when using the hand strap.... swing the soft camcorder case excessively when the camcorder is inside it.... store the camcorder in a dusty or sandy area.Model Number : GZ-HM960U/GZ-HM860U Tr a de Name : JVC Responsible party : JVC AMERICAS CORP. Address : 1700 Valley Road Wayne, N. J. 07470 Telephone Number : 973-317-5000 This device complies with Part 15 of FCC Rules. Operation is subject to the following two conditions: (1) This device may not cause harmful interference, and (2) this device must accept any interference received, including interference that may cause undesired operation. in places subject to excessive shock or vibration.... near a television set. For more information, refer to the Detailed User Guide http://manual.jvc.co.jp/index.html/
4.1 W (LCD monitor 2D display) 4.6 W (LCD monitor 3D display)
(when “MONITOR BRIGHTNESS” is set to “STANDARD”)
GZ-HM860 3.7W (when “MONITOR BRIGHTNESS” is set to “STANDARD”) Dimensions (W x H x D) 54 mm x 62 mm x 121 mm (2-1/4" x 2-1/2" x 4-7/8")(W x H x D: excluding grip belt) Mass
GZ-HM960 Approx. 330 g (0.73lbs) (camera only), Approx. 370 g (0.82lbs) (including supplied battery pack)
GZ-HM860 Approx. 310 g (0.68lbs) (camera only), Approx. 350 g (0.77lbs) (including supplied battery pack) Operating environment Allowable operating temperature: 0°C to 40°C (32°F to 104°F) Allowable storage temperature: -20°C to 50°C (-4°F to 122°F) Allowable relative humidity: 35 % to 80 % Image pickup device 1/2.3” 10,620,000 pixels (CMOS) Recording area (Video) 2,820,000 pixels 2,070,000 to 4,770,000 pixels (dynamic zoom) Recording area (Still image) 3,980,000 to 5,290,000 pixels (4:3) 2,990,000 to 3,970,000 pixels (16:9) Lens (Video) F1.2 - 2.8, f= 3.76 mm to 37.6 mm 35 mm conversion: 29.5 mm to 295 mm 35 mm conversion: 29.5 mm to 448 mm (dynamic zoom) Lens (Still image) F1.2 - 2.8, f= 3.76 mm to 37.6 mm 35 mm conversion: 29.7 mm to 297 mm (4:3) 35 mm conversion: 32.4 mm to 324 mm (16:9) Zoom (Video) Optical zoom: Up to 10x Dynamic zoom: Up to 15x (DIS: OFF), Up to 13x (DIS: ON (AIS)) Digital zoom: Up to 200x Zoom (Still image) Optical zoom: Up to 10x Video recording format AVCHD standard, Video: AVC/H.264, Audio: Dolby Digital (2ch) Still image recording format JPEG standard Recording Media Built-in memory (16 GB), SD/SDHC/SDXC card (commercially available), Eye-Fi card (commercially available) Clock battery Rechargeable battery
For more information, refer to the Detailed User Guide http://manual.jvc.co.jp/index.html/AC Adapter (AP-V30U) (For GZ-HM960)* Power supply AC 110 V to 240 V, 50 Hz/60 Hz Output DC 5.2 V, 1 A Allowable operating temperature 0°C to 40°C (32°F to 104°F) (10°C to 35°C (50°F to 95°F) during charging) Dimensions (mm) 78 x 34 x 46 (3-1/8" x 1-3/8" x 1-13/16") (W x H x D: excluding cord and AC plug) Mass Approx. 107 g (0.24 lbs) AC Adapter (AC-V11U) (For GZ-HM860)* Power supply AC 110 V to 240 V, 50 Hz/60 Hz Output DC 5.2 V, 1 A Allowable operating temperature 0°C to 40°C (32°F to 104°F) (10°C to 35°C (50°F to 95°F) during charging) Dimensions (mm) 66 x 28 x 47 (2-5/8" x 1-1/8" x 1-7/8") (W x H x D: excluding cord and AC plug) Mass Approx. 71 g (0.15 lbs)
- When using the AC adapter overseas, please prepare a commercially available converter plug for the country or region of visit.
The specifications and appearance of this product are subject to changes for further improvement without prior notice. Bluetooth Capabilities
Headset You can use a headset (headphone that is integrated with a microphone) to listen to the recorded audio sound during shooting.
GPS Receiver You can use the GPS receiver to record the location information of a recorded movie or still image.
BIP/OPP Transfers still image data to a Bluetooth-compliant device.
Smartphone You can use a registered mobile phone as a remote control for this unit using the pre- installed application on the phone.
For details on Bluetooth, refer to the Detailed User Guide. http://manual.jvc.co.jp/index.html/ For more information, refer to the Detailed User Guidehttp://manual.jvc.co.jp/index.html/
© 2011 Victor Company of Japan, Limited
© 2011 Victor Company of Japan, Limited
© 2011 Victor Company of Japan, Limited