ROGSTRIXGTX1660TIA6GGAMING - Graphic card ASUS - Free user manual and instructions
Find the device manual for free ROGSTRIXGTX1660TIA6GGAMING ASUS in PDF.
User questions about ROGSTRIXGTX1660TIA6GGAMING ASUS
0 question about this device. Answer the ones you know or ask your own.
Ask a new question about this device
Download the instructions for your Graphic card in PDF format for free! Find your manual ROGSTRIXGTX1660TIA6GGAMING - ASUS and take your electronic device back in hand. On this page are published all the documents necessary for the use of your device. ROGSTRIXGTX1660TIA6GGAMING by ASUS.
USER MANUAL ROGSTRIXGTX1660TIA6GGAMING ASUS
Drivers and Utilities
Installation Guide
E15279
Revised Edition V6
March 2019
Copyright © 2019 ASUSTeK Computer Inc. All Rights Reserved.
No part of this manual, including the products and software described in it, may be reproduced, transmitted, transcribed, stored in a retrieval system, or translated into any language in any form or by any means, except documentation kept by the purchaser for backup purposes, without the express written permission of ASUSTeK Computer Inc. ("ASUS").
Product warranty or service will not be extended if: (1) the product is repaired, modified or altered, unless such repair, modification of alteration is authorized in writing by ASUS; or (2) the serial number of the product is defaced or missing.
ASUS PROVIDES THIS MANUAL "AS IS" WITHOUT WARRANTY OF ANY KIND, EITHER EXPRESS OR IMPLIED, INCLUDING BUT NOT LIMITED TO THE IMPLIED WARRANTYES OR CONDITIONS OF MERCHANTABILITY OR FITNESS FOR A PARTICULAR PURPOSE. IN NO EVENT SHALL ASUS, ITS DIRECTORS, OFFICERS, EMPLOYEES OR AGENTS BE LIABLE FOR ANY INDIRECT, SPECIAL, INCIDENTAL, OR CONSEQUENTIAL DAMAGES (INCLUDING DAMAGES FOR LOSS OF PROFITS, LOSS OF BUSINESS, LOSS OF USE OR DATA, INTERRUPTION OF BUSINESS AND THE LIKE), EVEN IF ASUS HAS BEEN ADVISED OF THE POSSIBILITY OF SUCH DAMAGES ARISING FROM ANY DEFECT OR ERROR IN THIS MANUAL OR PRODUCT.
SPECIFICATIONS AND INFORMATION CONTAINED IN THIS MANUAL ARE FURNISHED FOR INFORMATIONAL USE ONLY, AND ARE SUBJECT TO CHANGE AT ANY TIME WITHOUT NOTICE, AND SHOULD NOT BE CONSTRUED AS A COMMITMENT BY ASUS. ASUS ASSUMES NO RESPONSIBILITY OR LIABILITY FOR ANY ERRORS OR INACCURACIES THAT MAY APPEAR IN THIS MANUAL, INCLUDING THE PRODUCTS AND SOFTWARE DESCRIBED IN IT.
Products and corporate names appearing in this manual may or may not be registered trademarks or copyrights of their respective companies, and are used only for identification or explanation and to the owners' benefit, without intent to infringe.
Contents
Notices. 5
Safety information 6
About this guide 7
- Support CD information 8
- VGA drivers 9
2.1 Installing the VGA drivers 9
2.2 Uninstalling the VGA drivers 10
- ASUS GPU Tweak utility 11
3.1 Installing ASUS GPU Tweak 11
3.2 Uninstalling ASUS GPU Tweak 12
- ASUSAPRP 13
4.1 Installing ASUS APRP 13
4.2 Uninstalling ASUS APRP 14
- XSplit Gamecaster 15
5.1 Installing XSplit Gamecaster 15
5.2 Uninstalling XSplit Gamecaster 16
- ASUS AURA 17
6.1 Installing ASUS AURA 17
6.2 UninstallingASUS AURA 18
- Other information 19
7.1Browse the Support CD 19
7.2 Contact Information 19
7.3 Viewing the Readme file 20
Appendix: Basic troubleshooting 21
Notices
Federal Communications Commission Statement
This device complies with Part 15 of the FCC Rules. Operation is subject to the following two conditions:
- This device may not cause harmful interference
- This device must accept any interference received including interference that may cause undesired operation.
This equipment has been tested and found to comply with the limits for a Class B digital device, pursuant to Part 15 of the FCC Rules. These limits are designed to provide reasonable protection against harmful interference in a residential installation. This equipment generates, uses, and can radiate radio frequency energy and, if not installed and used in accordance with manufacturer's instructions, may cause harmful interference to radio communications. However, there is no guarantee that interference will not occur in a particular installation. If this equipment does cause harmful interference to radio or television reception, which can be determined by turning the equipment off and on, the user is encouraged to try to correct the interference by one or more of the following measures:
- Reorient or relocate the receiving antenna.
- Increase the distance between the equipment and receiver.
- Connect the equipment to an outlet on a circuit different from that to which the receiver is connected.
- Consult the dealer or an experienced radio/TV technician for help.

The use of shielded cables for connection of the monitor to the graphics card is required to assure compliance with FCC regulations. Changes or modifications to this unit not expressly approved by the party responsible for compliance could void the user's authority to operate this equipment.
Canadian Department of Communication Statement
This digital apparatus does not exceed the Class B limits for radio noise emissions from digital apparatus set out in the Radio Interference Regulations of the Canadian Department of Communications.
This class B digital apparatus complies with Canadian ICES-003.
REACH
Complying with the REACH (Registration, Evaluation, Authorisation, and Restriction of Chemicals) regulatory framework, we published the chemical substances in our products at ASUS REACH website at http://csr.asus.com/ english/REACH.htm
Macrovision Corporation Product Notice
This product incorporates copyright protection technology that is protected by method claims of certain U.S. patents and other intellectual property rights owned by Macrovision Corporation and other rights owners. Use of this copyright protection technology must be authorized by Macrovision Corporation, and is intended for home and other limited viewing uses only, unless otherwise authorized by Macrovision Corporation. Reverse engineering or disassembly is prohibited.
Safety information
Electrical safety
- When adding or removing devices to or from the system, ensure that the power cables for the devices are unplugged before the signal cables are connected. If possible, disconnect all power cables from the existing system before you add a device.
- Make sure that your power supply is set to the correct voltage in your area. If you are not sure about the voltage of the electrical outlet you are using, contact your local power company.
- If the power supply is broken, do not try to fix it by yourself. Contact a qualified service technician or your retailer.
Operation safety
- Before installing devices on your motherboard, carefully read all the manuals that came with the package.
- Before using the product, make sure all cables are correctly connected and the power cables are not damaged. If you detect any damage, contact your dealer immediately.
- To avoid short circuits, keep paper clips, screws, and staples away from connectors, slots, sockets and circuitry.
- Avoid dust, humidity, and extreme temperature. Do not place the product in any area where it may be exposed to moisture.
- Place the product on a stable surface.
- If you encounter technical problems with the product, contact a qualified service technician or your retailer.
About this guide
Conventions used in this guide
To make sure that you perform certain tasks properly, take note of the following symbols used throughout this manual.

WARNING: Information to prevent injury to yourself when completing a task.

CAUTION: Information to prevent damage to the components when completing a task.
IMPORTANT: Information that you MUST follow to complete a task.

NOTE: Useful tips and additional information for completing a task.
Where to find more information
Refer to the following sources for additional information and for product and software updates.
1. ASUS Websites
The ASUS websites worldwide (https://www.asus.com/) provide updated information on ASUS hardware and software products. The Asus websites are listed in the Asus Contact Information on the inside front cover of this installation guide.
2. Optional Documentation
Your product package may include optional documentation, such as warranty flyers, that may have been added by your dealer. These documents are not part of the standard package.
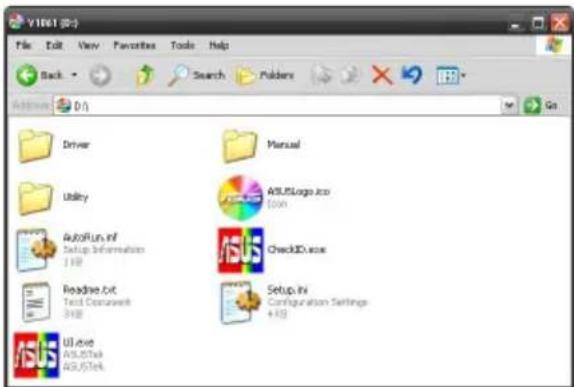
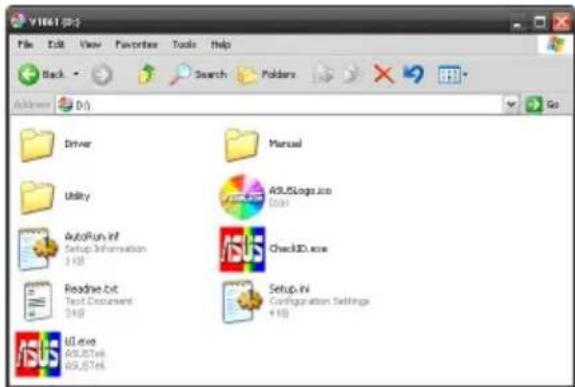
1. Support CD information
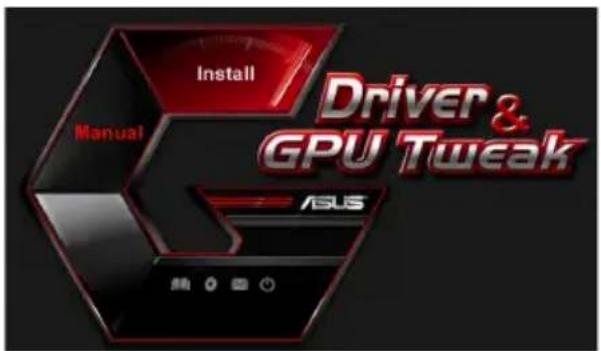
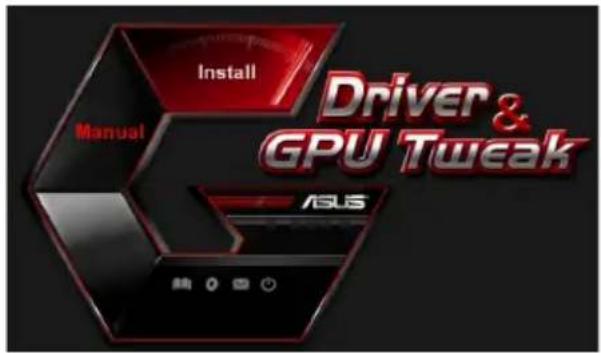
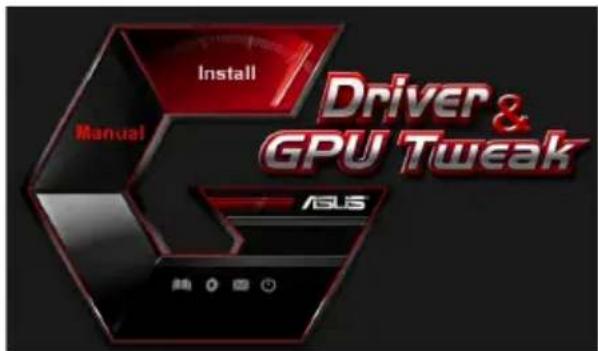
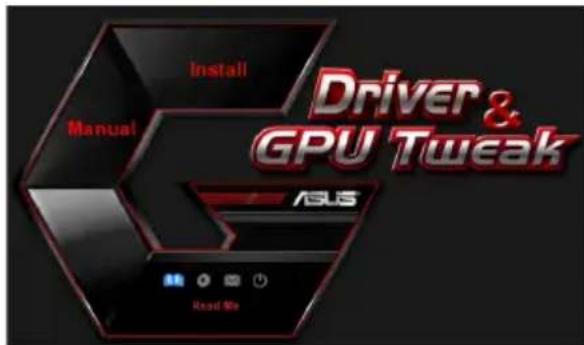
The support CD contains the drivers and utilities for your VGA card. Click the icons on the support CD's main menu to install software, obtain ASUS contact information, browse CD contents, or view the Readme file.
- The screens in this manual are for reference only and may not exactly match what you see on your screen.
- The device driver and utility in the support CD apply only to specific ASUS VGA card models.
- You may need administrator rights to install the drivers and utilities. See your Windows® 10 / 8.1 / 8 / 7 documentation for details.
- The contents of the support CD are subject to change at any time without notice. Visit the ASUS website at www.asus.com for updates.
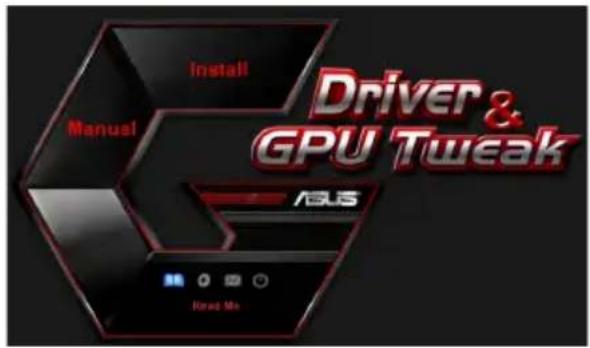
Insert the CD into your computer's optical drive. If Autorun is enabled, the Main Menu launches automatically.
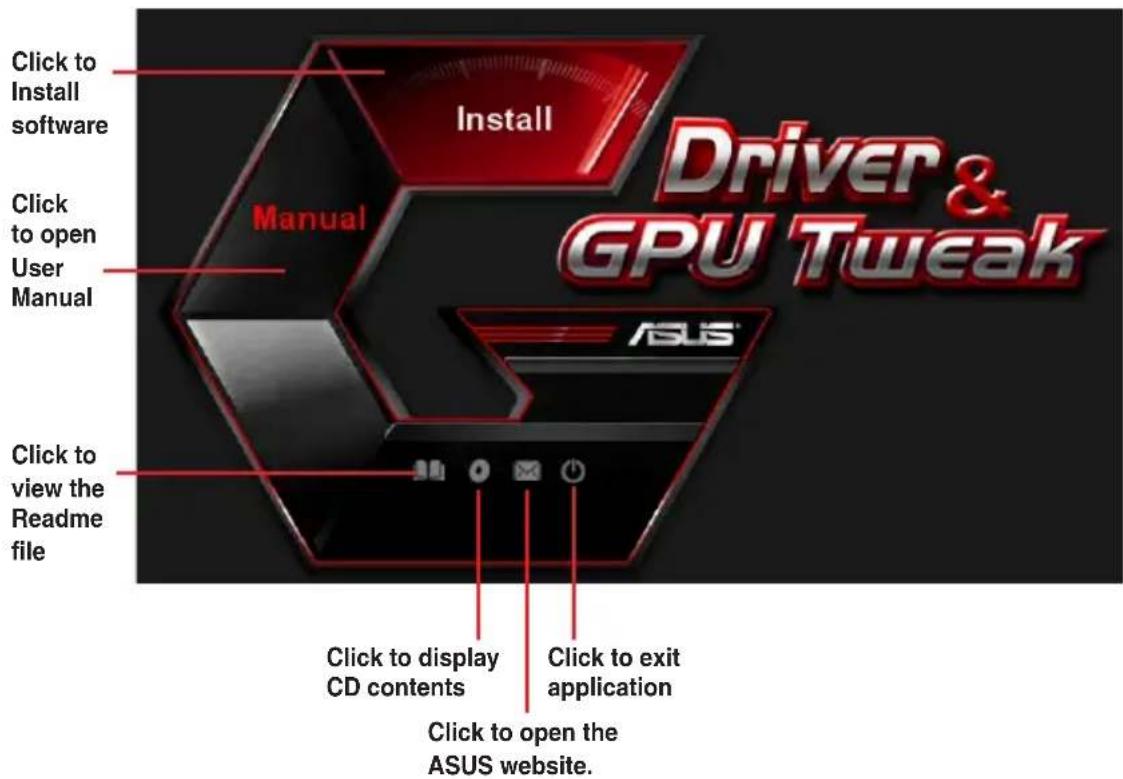

If Autorun is NOT enabled on your computer, browse the contents of the support CD to locate the file UI.exe. Double-click the UI.exe to run the support CD installation program.
2. VGA drivers
The VGA driver is the software program that makes the device work with your operating system. After physically installing your graphics card, use any of the recommended methods in this section to install, update, or remove the VGA driver.
If you are replacing an old graphics card with a new ASUS graphics card, uninstall the old display driver from your system.
2.1 Installing the VGA drivers
2.1.1 Installing the VGA drivers in Windows 10/8.1/8/7 (64-bit)
To install the VGA driver in Windows® 10 / 8.1 / 8 / 7 (64-bit):
-
Insert the support CD into your optical drive.
-
If Autorun is enabled, the main menu appears automatically. If Autorun is disabled, run UI.exe from the root directory of your support CD.
-
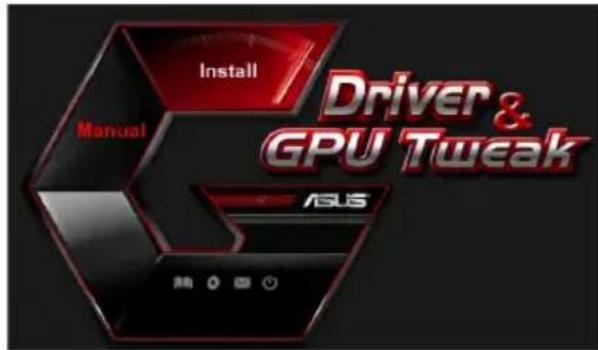
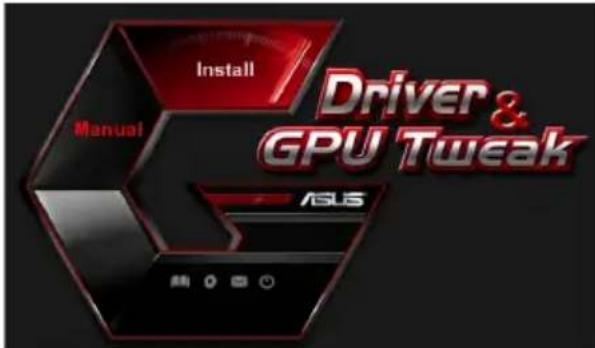
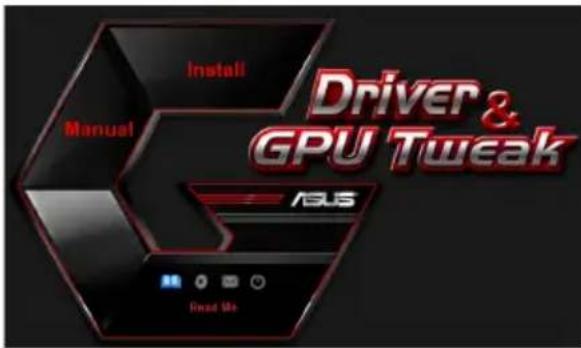
From the main menu, click Install.
-
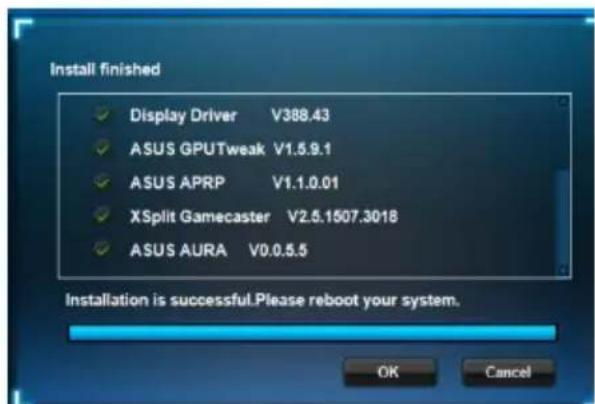
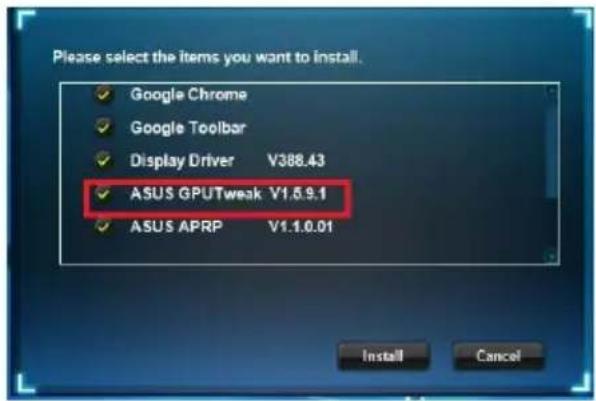
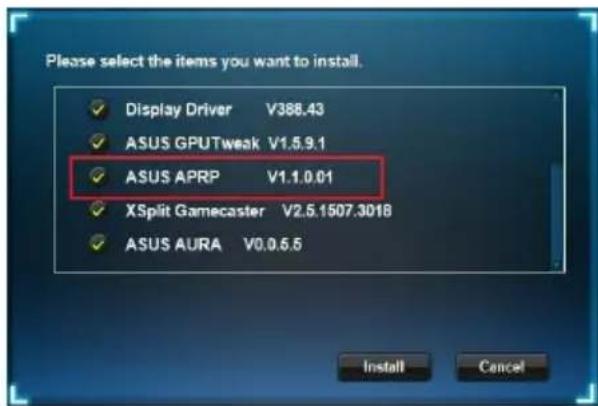
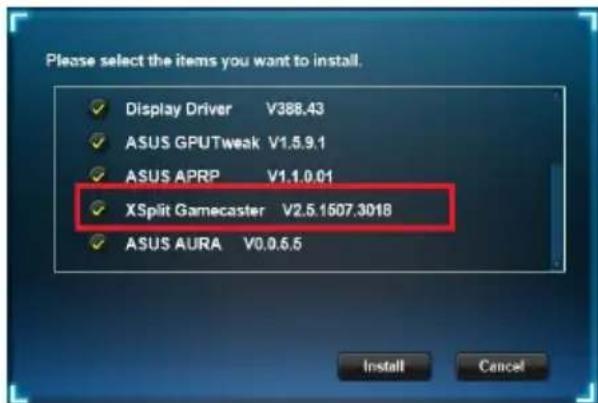
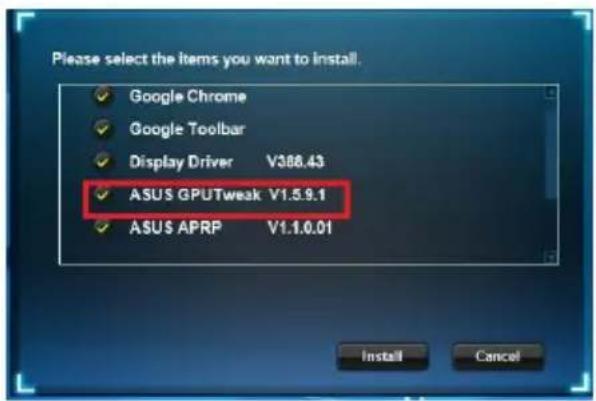
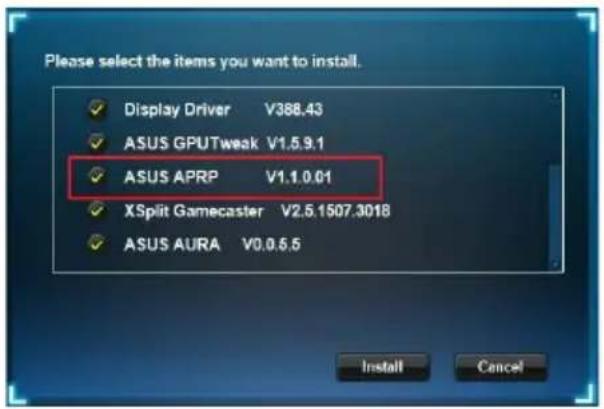
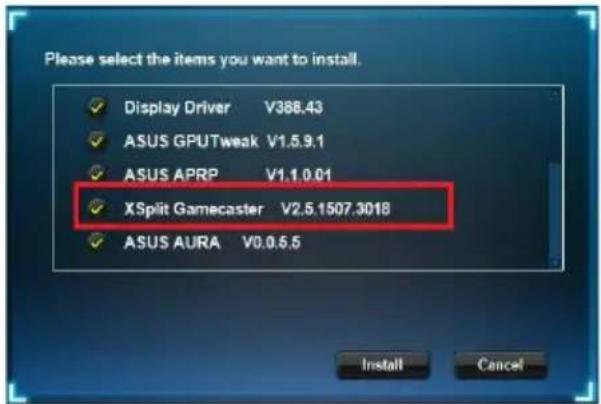
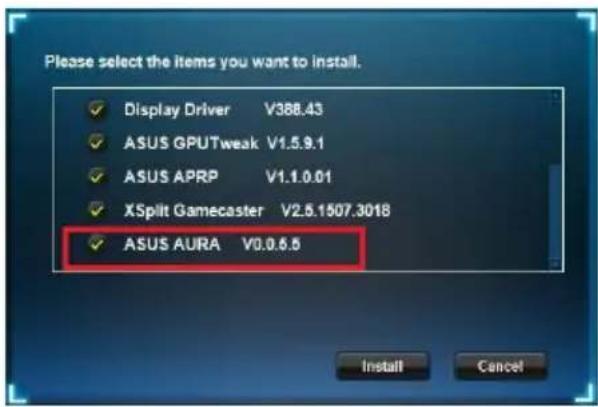
Select Display Driver and click the Install button.
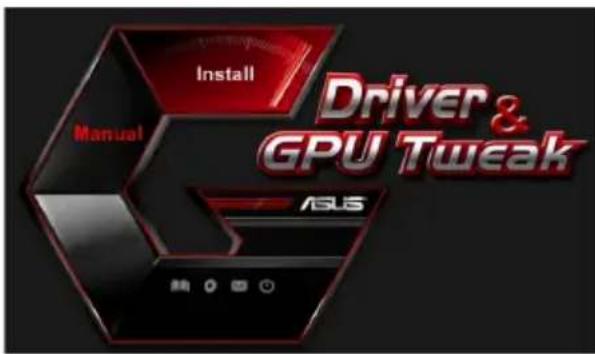
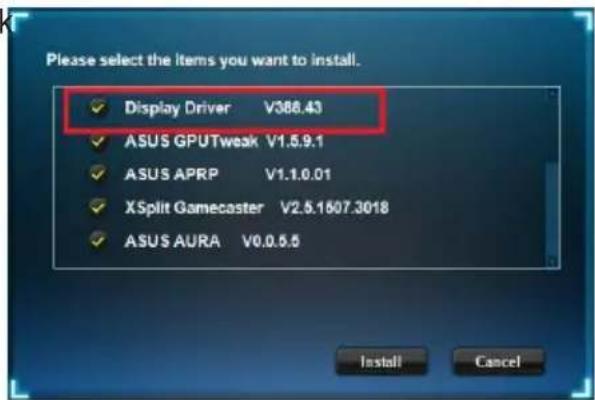
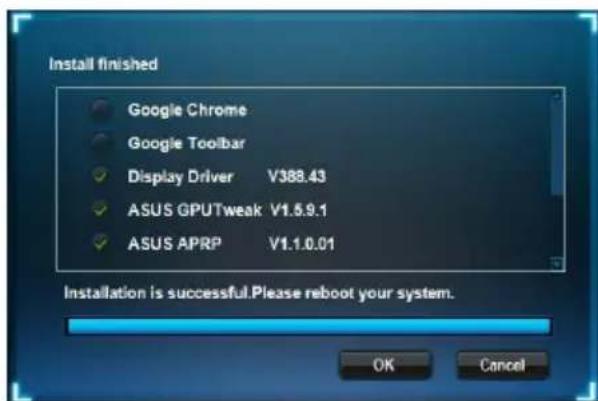
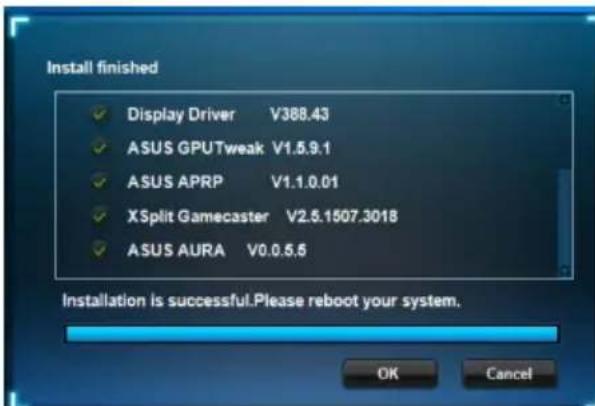
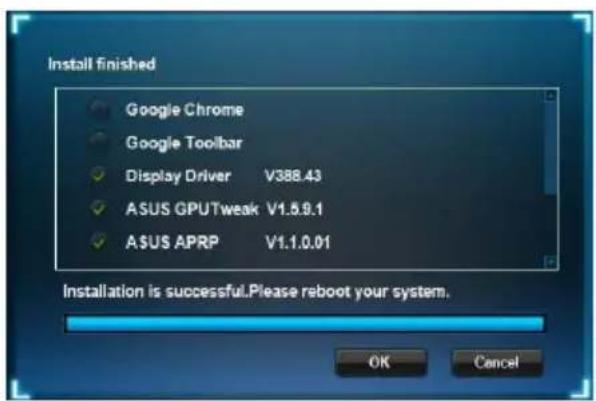
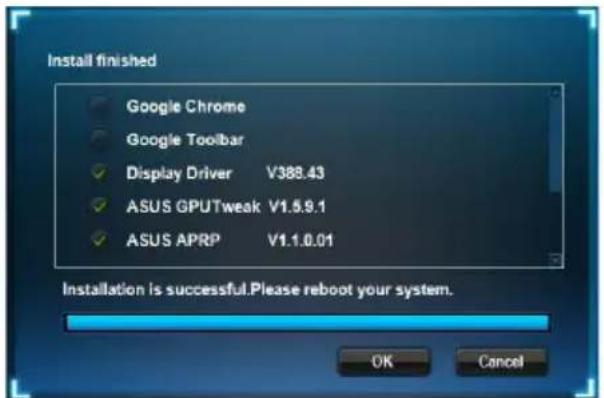
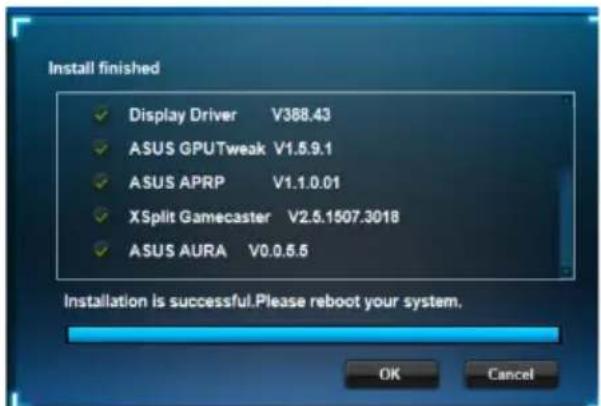
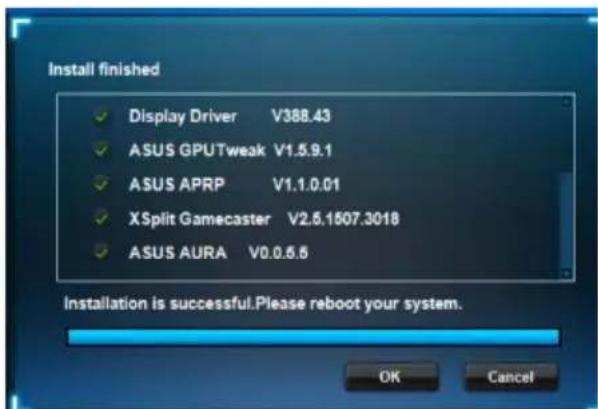
- Once installation is complete, click OK to reboot the system.
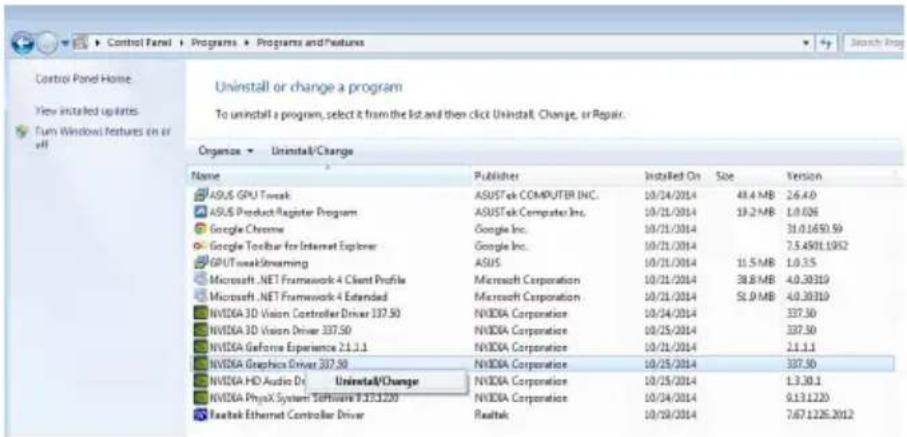
2.2 Uninstalling the VGA drivers
2.2.1 Uninstalling the VGA drivers in Windows 10/8.1/8/7 (64-bit)
To remove the VGA drivers in Windows® 10 / 8.1 / 8 / 7 (64-bit):
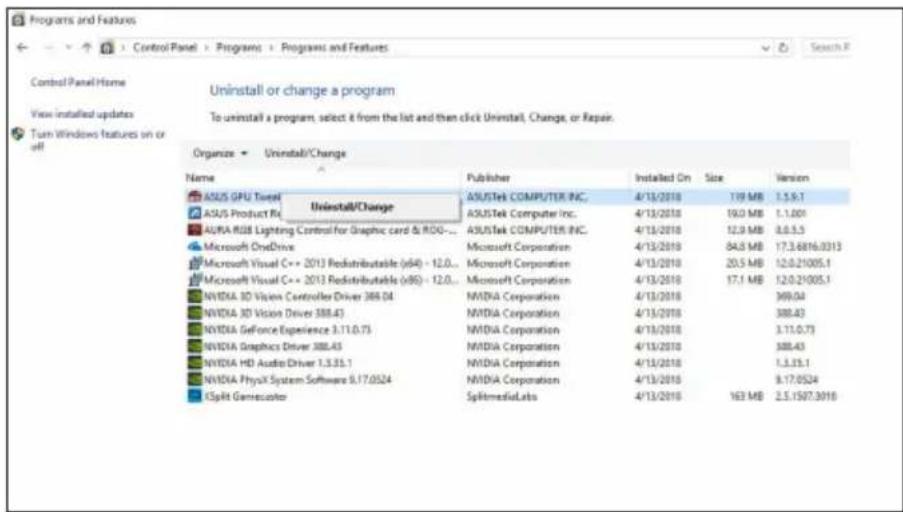
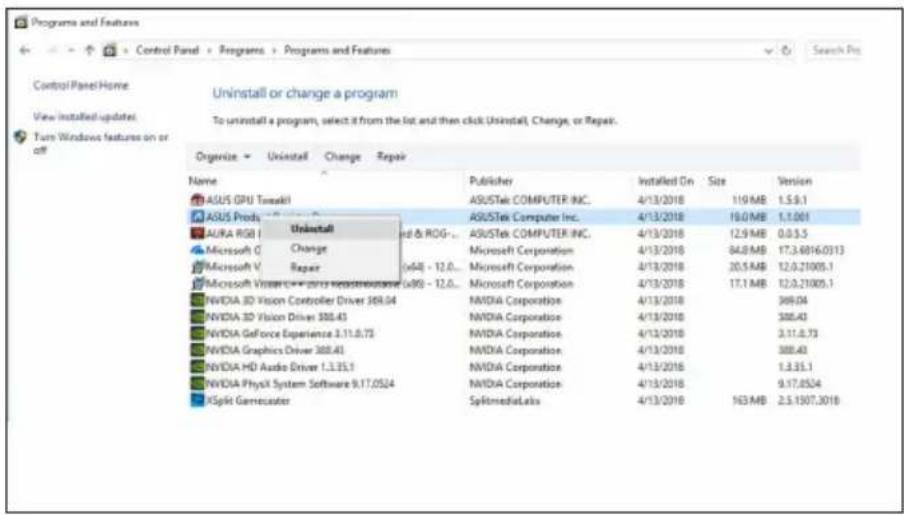
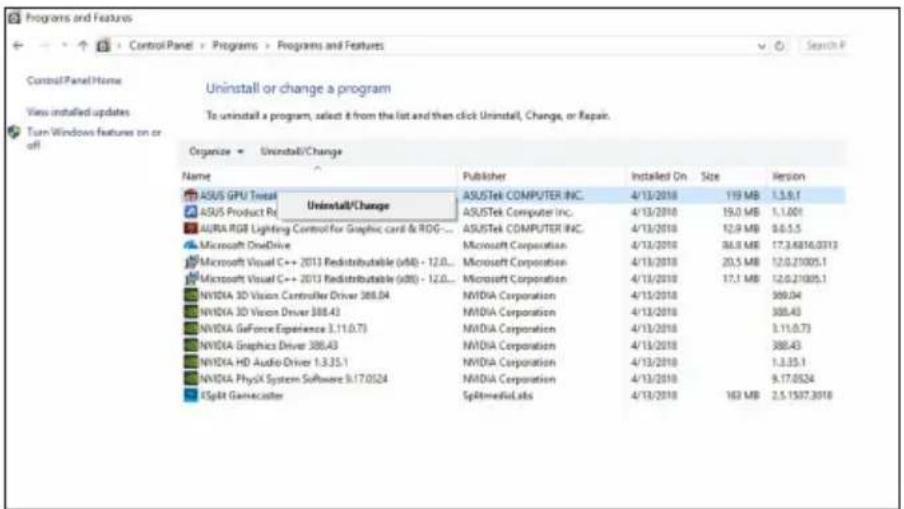
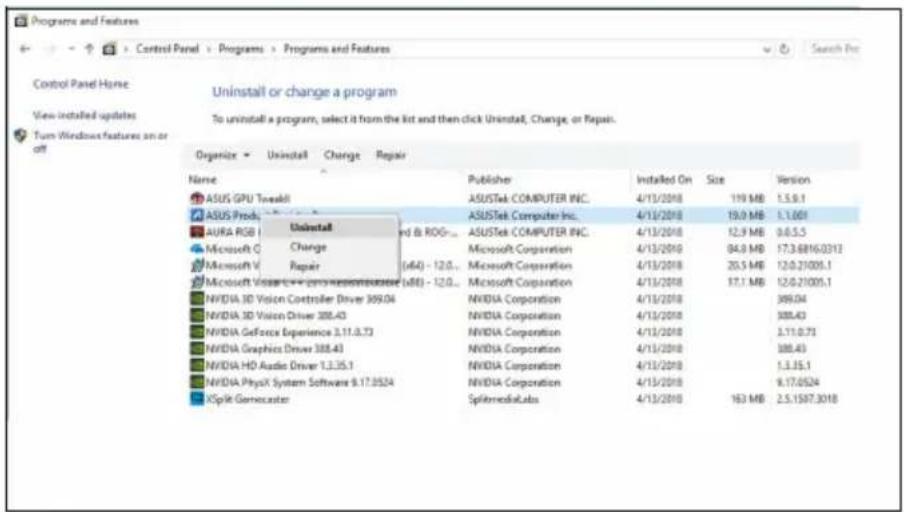
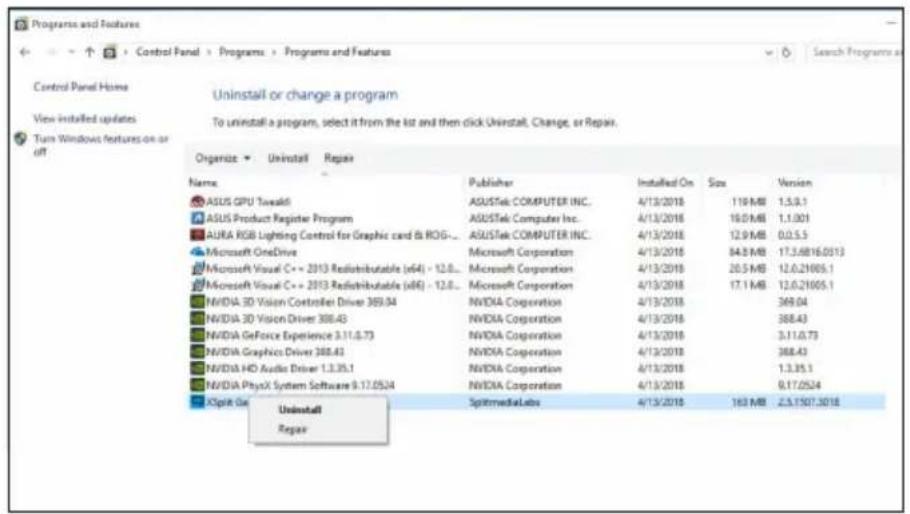
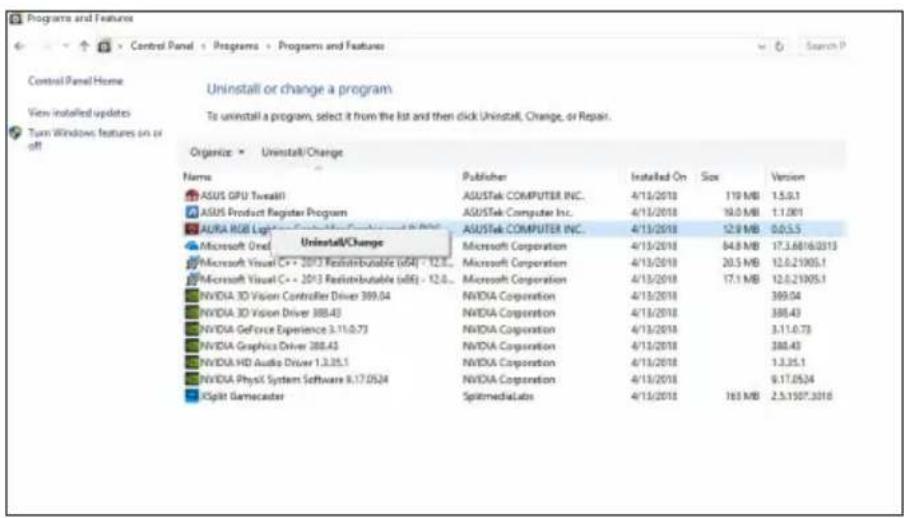
- Click Start > Control Panel > Programs > Programs and Features, select Graphics driver. Click Uninstall.

3. ASUS GPU Tweak utility
ASUS GPU Tweak utility allows you to monitor and optimize the settings of your ASUS Graphics card.
3.1 Installing ASUS GPU Tweak
3.1.1 Installing ASUS GPU Tweak in Windows 10/8.1/8/7 (64-bit)
To install ASUS GPU Tweak in Windows® 10 / 8.1 / 8 / 7 (64-bit):
- Insert the support CD into your optical drive.
- If Autorun is enabled, the main menu appears automatically. If Autorun is disabled, run UI.exe from the root directory of your support CD.
- From the main menu, click Install. Select ASUS GPU Tweak and click the Install button.
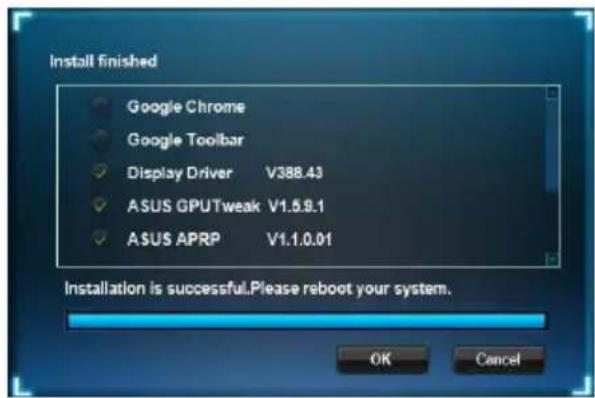
- Once installation is complete, click OK.
3.2 Uninstalling ASUS GPU Tweak
3.2.1 Removing OSUS GPU Tweak in Windows 10/8.1/8/7 (64-bit)
To remove ASUS GPU Tweak in Windows® 10 / 8.1 / 8 / 7 (64-bit):
- Click Start > Control Panel > Programs > Programs and Features, select ASUS GPU Tweak. Click Uninstall.
4. ASUS APRP
4.1 Installing ASUS APRP
4.1.1 Installing ASUS APRP in Windows 10 / 8.1 / 8 / 7 (64-bit)
To install ASUS APRP in Windows® 10 / 8.1 / 8 / 7 (64-bit):
- Insert the support CD into your optical drive.
- If Autorun is enabled, the main menu appears automatically. If Autorun is disabled, run UI.exe from the root directory of your support CD.
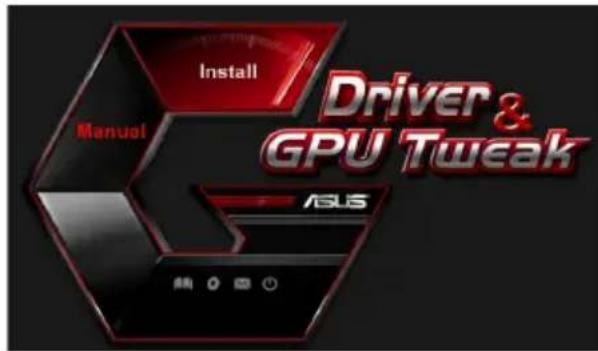
- From the main menu, click Install.
Select ASUS APRP and click the Install button.
- Once installation is complete, click OK.
4.2 Uninstalling ASUS APRP
4.2.1 Removing ASUS APRP in Windows 10/8.1/8/7 (64-bit)
To remove ASUS APRP in Windows® 10 / 8.1 / 8 / 7 (64-bit):
- Click Start > Control Panel > Programs > Programs and Features, select ASUS APRP. Click Uninstall.
5. XSplit Gamecaster
5.1 Installing XSplit Gamecaster
5.1.1 Installing XSplit Gamecaster in Windows 10/8.1/8/7 (64-bit)
To install XSplit Gamecaster in Windows® 10 / 8.1 / 8 / 7 (64-bit):
- Insert the support CD into your optical drive.
- If Autorun is enabled, the main menu appears automatically. If Autorun is disabled, run UI.exe from the root directory of your support CD.
- From the main menu, click Install.
Select XSplit Gamecaster and click the Install button.
- Once installation is complete, click OK.
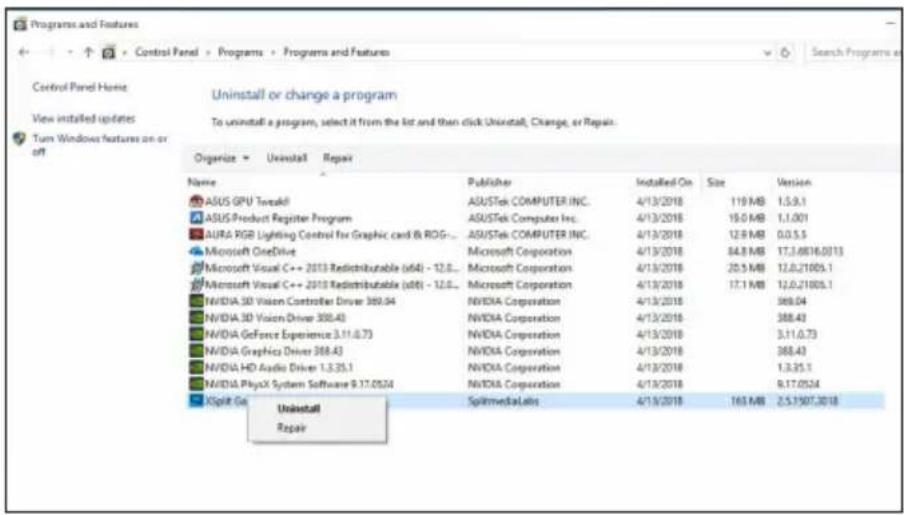
5.2 Uninstalling XSplit Gamecaster
5.2.1 Removing XSplit Gamecaster in Windows 10/8.1/8/7 (64-bit)
To remove XSplit Gamecaster in Windows® 10 / 8.1 / 8 / 7 (64-bit):
- Click Start > Control Panel > Programs > Programs and Features, select XSplit Gamecaster. Click Uninstall.
6. ASUS AURA
6.1 Installing ASUS AURA
6.1.1 Installing ASUS AURA in Windows 10 / 8.1 / 8 / 7 (64-bit)
To install ASUS AURA in Windows® 10 / 8.1 / 8 / 7 (64-bit):
- Insert the support CD into your optical drive.
- If Autorun is enabled, the main menu appears automatically. If Autorun is disabled, run UI.exe from the root directory of your support CD.
- From the main menu, click Install.
Select ASUS AURA and click the Install button.

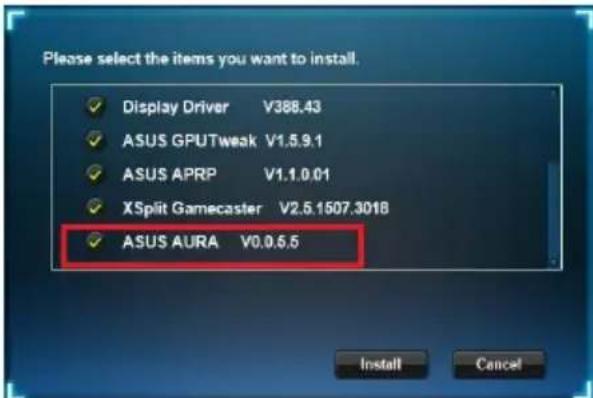
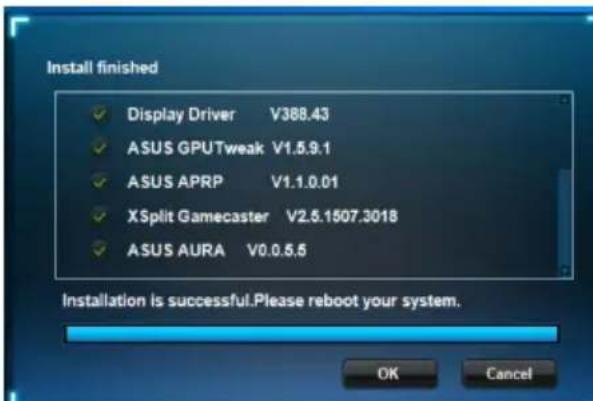
- Once installation is complete, click OK.
6.2 Uninstalling ASUS AURA
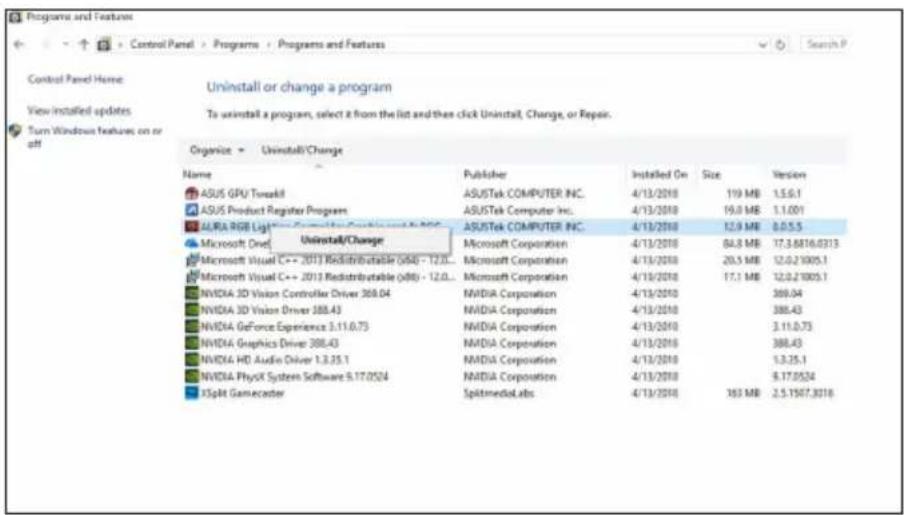
6.2.1 Removing ASUS AURA in Windows 10/8.1/8/7 (64-bit)
To remove ASUS AURA in Windows® 10 / 8.1 / 8 / 7 (64-bit):
- Click Start > Control Panel > Programs > Programs and Features, select ASUS AURA. Click Uninstall.
7. Other information
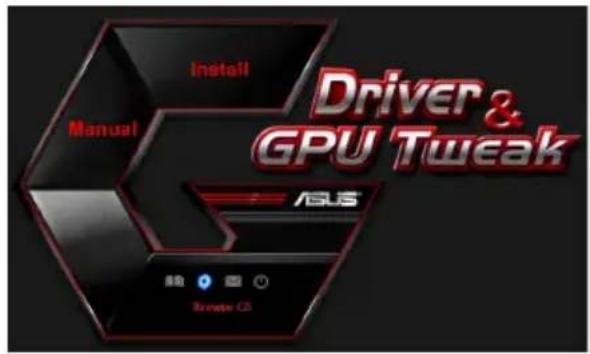
7.1 Browse the Support CD
To browse the support CD:
- Insert the support CD into your optical drive.
- If Autorun is enabled, the main menu appears automatically. If Autorun is disabled, run UI.exe from the root directory of your support CD.

- From the main menu, click Browse CD to view the contents of the CD.
7.2 Contact Information
- Insert the support CD into your optical drive.
- If Autorun is enabled, the main menu appears automatically.
If Autorun is disabled, run UI.exe from the root directory of your support CD.
- From the main menu, click Contact Us to open the ASUS website for additional information.
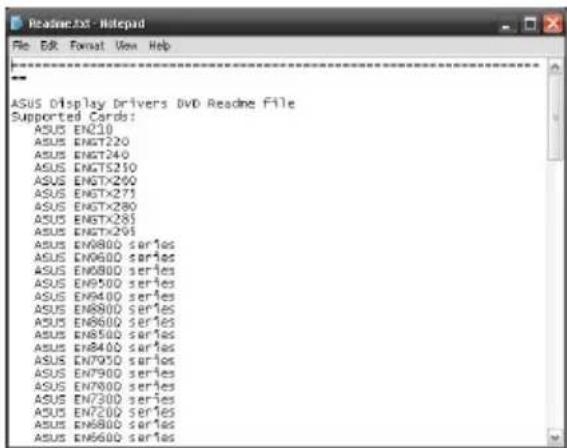
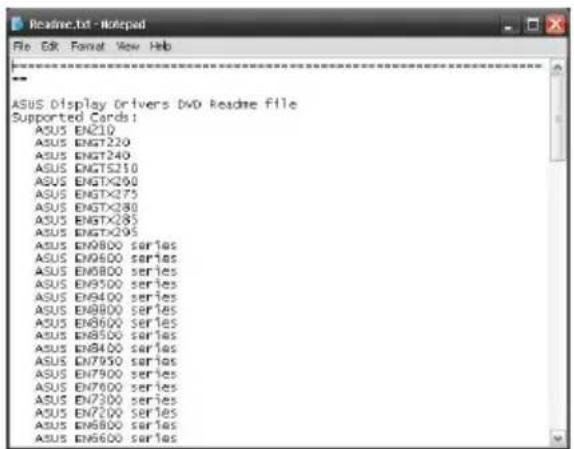
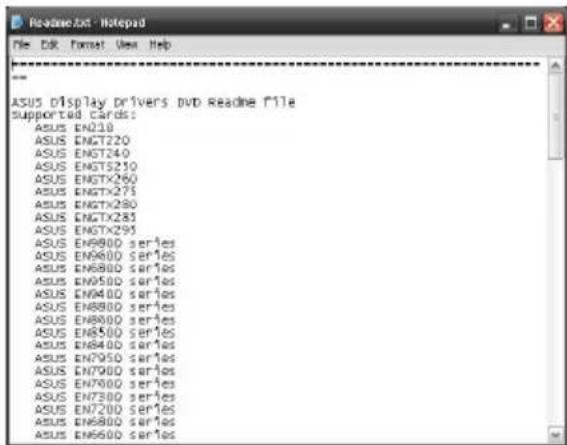
7.3 Viewing the Readme file
To view the Readme file:
- Insert the support CD into your optical drive.
- If Autorun is enabled, the main menu appears automatically. If Autorun is disabled, run UI.exe from the root directory of your support CD.
- From the main menu, click Read Me to display the Readme text file.
Appendix: Basic troubleshooting
If you encounter any of the following scenarios after installing your graphics card, try performing one of the possible solutions before calling for technical support.
If you still have some issues with the product, please visit https://www.asus.com/support for more information.
| Problem No display after the card is installed | |
| Cause Your card might not be properly installed. Solution Make sure that the card is not tilted or skewed on the slot. | |
| Cause Your monitor might not be properly connected. Solution Make sure that the signal cable is properly connected to your monitor and graphics card. | |
| Cause Your graphics card is not supported by your motherboard. Solution Check the technical documentation that came with your motherboard and check the required specifications for your graphics card (e.g. AGP voltage requirement). | |
| Cause The graphics card's auxiliary power is not connected. Solution Make sure that the auxiliary power cables are properly connected with the power supply unit. | |
| Cause Insufficient power supply. Solution Make sure that your power supply unit can provide the minimum power requirement to your system. | |
| Cause Incorrect motherboard hardware system settings (e.g. system control panel connections). Solutions • Make sure that the system control panel cables are connected properly (e.g. power switch, reset). • Make sure that your CPU, CPU fan and/or memory DIMMs are in good working condition and are connected properly. | |
| Problem Wrong color balance | |
| Cause Your card might not be properly installed. Solution Make sure that the card is not tilted or skewed on the slot. | |
| Cause Your video controls might not be properly set. Solution • Manually configure your video controls to your desired settings. • Configure your graphics card display resolution in Dis-play properties. | |
| Cause There may be unsupported graphics card drivers installed in your system. Conflicts may occur with graphics card drivers from different vendors. Solution • Remove any unused graphics card drivers installed on your system. • Install the graphics card driver from the support CD that came with your graphics card package. | |
| Cause The graphics card's auxiliary power is not connected. Solution Make sure that the auxiliary power cables are properly connected to the power supply unit. | |
| Cause If your monitor comes with BNC connectors, the port con-nections may be incorrect. Solution Make sure that all BNC connectors are connected properly to its corresponding port. | |
| Cause Your monitor software settings might be incorrect. Solution Configure your monitor to supported display settings. | |
| Cause Your monitor might not be properly connected. Solution Make sure that the signal cable is properly connected to your monitor and graphics card. | |
| Problem The screen image is garbled | |
| Cause Your monitor cannot support the selected display setting. Solution Make sure that your monitor can support your desired display setting. Refer to the technical documentation that came with your monitor. | |
| Cause Your graphics card cannot support the desired system setting. Solution Make sure that your graphics card can support your desired display setting. See the specifications table that came with this graphics card package. | |
| Cause Some graphics driver files might be corrupt. Solution Remove your current graphics drivers and reinstall the graphics drivers from the support CD. | |
| Cause Poor heat dissipation inside the chassis. Solution Make sure that the chassis fan, CPU, and heatsink with fan, and/or the graphics card GPU fan are working properly. | |
| Cause GPU or VGA memory overclocked beyond optimal working conditions. Solutions Restore default frequency settings of GPU and VGA memory. |

Other problems that you might encounter can be related to other parts or accessories (e.g., motherboard, power supply unit, LCD/CRT) of your system.
AUS
顯示卡
驅動程式與公用程式
安装指南
T15279
第六版
2019年3月
版權所有·不得翻印©2019華碩電腦
Federal Communications Commission Statement
This device complies with Part 15 of the FCC Rules. Operation is subject to the following two conditions:
This device may not cause harmful interference
- This device must accept any interference received including interference that may cause undesired operation.
This equipment has been tested and found to comply with the limits for a Class B digital device, pursuant to Part 15 of the FCC Rules. These limits are designed to provide reasonable protection against harmful interference in a residential installation. This equipment generates, uses, and can radiate radio frequency energy and, if not installed and used in accordance with manufacturer's instructions, may cause harmful interference to radio communications. However, there is no guarantee that interference will not occur in a particular installation. If this equipment does cause harmful interference to radio or television reception, which can be determined by turning the equipment off and on, the user is encouraged to try to correct the interference by one or more of the following measures:
Reorient or relocate the receiving antenna.
- Increase the distance between the equipment and receiver.
- Connect the equipment to an outlet on a circuit different from that to which the receiver is connected.
- Consult the dealer or an experienced radio/TV technician for help.

The use of shielded cables for connection of the monitor to the graphics card is required to assure compliance with FCC regulations. Changes or modifications to this unit not expressly approved by the party responsible for compliance could void the user's authority to operate this equipment.
Canadian Department of Communication Statement
This digital apparatus does not exceed the Class B limits for radio noise emissions from digital apparatus set out in the Radio Interference Regulations of the Canadian Department of Communications.
This class B digital apparatus complies with Canadian ICES-003.
華碩REACH
Federal Communications Commission Statement
This device complies with Part 15 of the FCC Rules. Operation is subject to the following two conditions:
This device may not cause harmful interference
- This device must accept any interference received including interference that may cause undesired operation.
This equipment has been tested and found to comply with the limits for a Class B digital device, pursuant to Part 15 of the FCC Rules. These limits are designed to provide reasonable protection against harmful interference in a residential installation. This equipment generates, uses, and can radiate radio frequency energy and, if not installed and used in accordance with manufacturer's instructions, may cause harmful interference to radio communications. However, there is no guarantee that interference will not occur in a particular installation. If this equipment does cause harmful interference to radio or television reception, which can be determined by turning the equipment off and on, the user is encouraged to try to correct the interference by one or more of the following measures:
Reorient or relocate the receiving antenna.
- Increase the distance between the equipment and receiver.
- Connect the equipment to an outlet on a circuit different from that to which the receiver is connected.
- Consult the dealer or an experienced radio/TV technician for help.

The use of shielded cables for connection of the monitor to the graphics card is required to assure compliance with FCC regulations. Changes or modifications to this unit not expressly approved by the party responsible for compliance could void the user's authority to operate this equipment.
Canadian Department of Communication Statement
This digital apparatus does not exceed the Class B limits for radio noise emissions from digital apparatus set out in the Radio Interference Regulations of the Canadian Department of Communications.
This class B digital apparatus complies with Canadian ICES-003.
华硕REACH
Erklärung des Canadian Department of Communications
Dichiarazione FCC (Federal Communications Commission)
Per installare i driver VGA in Windows® 10 / 8.1 / 8 / 7 (64-bit):
Per disinstallare i driver VGA in Windows® 10 / 8.1 / 8 / 7 (64-bit):
Copyright © 2019 ASUSTeK Computer Inc. All Rights Reserved.
Windows 10 / 8.1 / 8 / 7 (64bit) ASUS AURA to tell
Посiologicals yctaHOBKN
UA15279
IOnOBHeHe BuaHnB Bepcia6
Bepesb2019
Konipaɪr © 2019 ASUSTeK COMPUTER INC. Bci npaba 3acTepekeHo.
XoHa YactnHa cboRo noci6Hnka, BkIIOuAoiu BInpo6n Ta nporpamHe 3a6e3neueHHB HII, 6e3 NcMbOoi 3roDn KOMNaHII ASUSTeK COMPUTER INC. (dani "ASUS") He moke 6yTu BiITbOpema, nepeHa, nepeNcaHa, 36epexeHa B NoUkyOBi CnCTem i a6o nepeKlaJeHa 6yDb-RAKO IHILO MOBOIO B 6ydb-RAKi FOpmI, 6yDb-RAKM YHOM, 3a BKNIOUeyHnM DOKmuNTaui, kYu NOKyeu3 6epira dIra NOaIbWoR OOPNCyBaHH BInpo6om.
IapaHTIO HA Bnpi6 a6o 6cnyroBvBaHH He 6yde npOIOBKeHO y BnAiky, kAnio: (1) Bnpi6 6yIo peMOHTOBaHO, MoNfIKOBAHO uHbOcKOHaNEHO 6e3 NcMbORO d03BOY KOMNaHii ASUS a6o (2) cepiHni Homep Ha Bnpo6i BiCyTHi a6o CTepTNI 3 HbOrO.
ASUS HADAE LEEI NOCIBHNIK "AK E, BE3 KOJINHX TAPAHITBI, BNCIOBJIENHX ABO TAKNX, IIO MAOTbCAHA YBA3I, BKJIOUAYOHN, AIE HE O5MEKJYIOHCb TAPAHITMI ABO YMOBAMTOBAPHORO CTAHY TBAIDIOBIDHOCTI PEBHMN CILJAM. 3A KODHIX OBCTABUN ASUS, INPEKTOPN, OFIUEPN, POBITHKIN YANEHTN KOMPAHII HE HECYTB IIIOBIDAIbHOCTI 3A BYb-RAIKI PPRMI, HABMNCHI YIN BINAIDKOBI, ABO IOBUIH 3BNTKN (BKJIOUAYOHN 3BNTKN, IIO CNPIUHNIIIN BTPATY INBUTKY, BTPATY B13HECY, BTPATY DYHKIOHAIbHOCTI ABO DAHNX, PEPEPNAHNN B13HECY TOIO), HABITb RIKIO ASUS BNYIO NOPEPEDKEHO IPO NOIDHI 3BNTKN, RIKI EPEUYbTATOM DEFEKTY ABO IOMNIKN Y LIX NOCIBHNIK ABO BIP0BI.
TEXHUYI XAPAKTEPNCTIKNA IHOPMALJIA, LIO MICTNTbC B LbOMY NOCIBHNKU, PIIITOTOBAHI JINIEJK DKEPEINO IHOPMALJI; BOHNI IINIAIATb 3MIHI bYb-KOJI INEPEIDXEHN; IX HEMOXHAPO3JIADATNI K3OBO'B'3AHN ASUS. ASUS HE BN3HAE KOJHIX 3OBO'B'3AHb ABO BIINOBIAJbHOCTI 3A6yB-RAI NOMIJKN YH HETOUHCTI, RIKMOKYtB 3'RBINTNCBbOMY NOCIBHNKU, BKJIIOAUOHN BINO6TAA IPOPAMHE 3A5E3NEUEHHN, ONICAHIB HbOMY.
Ha3Bn Bnpo6ib Ta Kopnpaui, HabeJeHb CbOmy KepiBnHTBi, MoKytb 6yTu NHe 6yTu 3apeCTpOBAHmToproBMM Mapkamn abo 6yTu 3axuueHMM ABTOPCbKMM npabAm BiDNOBIDHX KOMNaH. BOHN BxNBAOTbcA DnBn3HaenHH i NoRcHenny y TeKCTi, Ha KopncB bIacNHKB i 6e3 Hamipy npuyuHTn npaba BlaChOCTi.
3mict
Ppimitkn 292
Inphiopmaiz3Texhik6e3nekn 293
Ipro dann noci6nK 294
- Inφopmaζη npo donomixhni kOMnakT-dnck 295
- Драиверн VGA 296
2.1 IHCtAiziaIpaBepaVGA 296
2.2 DeiHctaIyia IpaIbepa VGA 297
- 3actocy Hok ASUS GPU Tweak 298
3.1 IHCtTaeJAsUS GPU Tweak.. 298
3.2 DeiHctaIauIg ASUS GPU Tweak 299
- ASUSAPRP 300
4.1 HcTalauiAsUSAPRP 300
4.2 DeiHctaIauia ASUS APRP 301
- XSplit Gamecaster 302
5.1 Inctaia XSplit Gamecaster 302
5.2 DeiHCTaJIaIg XSplit Gamecaster 303
- ASUS AURA 304
6.1 IHCtanaia ASUS AURA 304
6.2 Deinctauius ASUS AURA 305
2.2 DeiHcTalpaIyaVga
2.2.1 DeiHctanuaIpaBepa VGA y Windows 10/8.1/8/7 (64-6it)
Iio6 BuaNTn dpaBep VGA nra Windows 10/8.1/8/7 (64-6it):
HaTnCHiTb Ha Start (Ctapt) > Control Panel (KoHTpOlbHa naHelenb) > Programs (Pporpamn) > Programs and Features (Pporpamn Ta 3aco6u), Bn6epitb nyHKt, aKn Bn 6aJaTe BnuJaNTn. BnKOHaBwn, HATnCHiTb Ha Uninstall (DeinCTaIIOBaTu).
3. 3actocy Hok ASUS GPU Tweak
3aTocyHOK ASUS GPU Tweak hapae moKnBicb BiDcTeKyBaTu i ONTmI3OByBaTu npametprn rpaiHoi' KapTu ASUS.
3.1 InctaniausASUS GPU Tweak
3.1.1 InctaiaASUS GPU Tweaky Windows 10 / 8.1 / 8 / 7 (64-6it)
Ioo6 iHcTaIIOBAtn ASUS GPU Tweaky Windows 10 / 8.1 / 8 / 7 (64-6it):
- BCTaBTe CD nIITpIMKn Do ONTNUHO DnCKOBODY.
2.ЯкwoakTNBOBAHOaBTO3aNyCK, TOLOBHE MeHIO 3'RABtbcra aBTOMaTnUHO.
KuO aBTO3aNcB uMKHeHO, 3anyctitb UI.exe 3 KopeheBoro MeHIO Ha CD niTpumKn.
- Y rONOBHOMy MeHIO HaTNCiTb Ha Install (IhctaIOBAtn).
Bn6epiTb ASUS GPU Tweak i HaTncHITb Ha KhoNci Install (IhctaJIHOBaTu).
- Koni iHCTaJIci 3aBepuINaC, HATNCiTb Ha OK.
3.2 DeiHcTaIaIaI ASUS GPU Tweak
3.2.1 Видально ASUS GPU Tweaky Windows 10/8.1/8/7 (64-6it)
Iio6 BuaaNTn ASUS GPU Tweaky Windows 10/8.1/8/7 (64-6it):
- Hatncihtb Ha Start (Iyck) > Control Panel (KoHTpOlbHa naHeIb) > Programs (PporpaMn) > Programs and Features (PporpaMn Ta 3ac06n), Bn6epitb ASUS GPU Tweak. Hatncihtb Ha Uninstall (DeiHcTalIOBAtn).
4. ASUSAPRP
4.1 Inchestangia ASUS APRP
4.1.1 Inçtajnz ASUS APRPy Windows® 10/8.1/8/7 (64-6it)
Ioo6 iHcTaIIOBAtn ASUSAPRPyWindows 10 / 8.1 / 8 / 7 (64-6iT):
- BCTaBTe CD nIaTpumKn Do ONTnHOrO DnCKOBODY.
2.ЯкwoakTNBOBAHOaBTO3anyCK, TOLOBHE MeHIO 3'YBNTbCRA ABTOMATNUHO.
Kkuo aBTO3aynck BmKHeHo, 3anycttb UI.exe 3 KopeheBoro MeHIO ha CD niTpumkn.
- Y rONOBHOMy MeHIO HaTNCiTb Ha Install (IhctanIOBAtu).
Bn6epitb ASUS APRP iHaTncHtB Ha Khoi Install (InctanIObatN).
- Koln iHctanayi 3aBepwnnae, HATNCiTb Ha OK.
4.2 DeiHcTalpaIg ASUSAPRP
4.2.1 Видаленя ASUS APRPy Windows® 10/8.1/8/7 (64-6it)
Iio6 BuaaNTn ASUS APRP y Windows 10/8.1/8/7 (64-6it):
- HaTnchItb Ha Start (Iyck) > Control Panel (KoHTpOJIbHa nAHeIb) > Programs (IporpaMn) > Programs and Features (IporpaMn Ta 3aco6n), Bn6epiB ASUS APRP. HaTnchItb Ha Uninstall (DeiHcTaIIOBaTu).
5. XSplit Gamecaster
5.1 In胶囊 XSplit Gamecaster
5.1.1 Inctaia XSplit Gamecaster y Windows 10/8.1/8/7 (64-6it)
Ioo6 iHcTaIIOBAtn XSplit Gamecaster y Windows® 10 / 8.1 / 8 / 7 (64-6it):
- BCTaBTe CD nIaTpUmKn Do ONTNuHOrO dNcKOBOyD.
2.ЯкwoakTNBOBAHOaBTO3aNyCK, TOLOBHE MeHIO 3'YBNTbCra aBTOMaTNoHO.
Kkuo aBTO3aynck BmKHeHO, 3anyctitb UI.exe 3 KopeheBoro MeHIO ha CD niTpumkn.
- Y roNoBHOmy MeHIO HaTnCHiTb Ha Install (InCTaIIOBaTu).
Bn6epitb XSplit Gamecaster iHaTncHItb Ha KhoNci Install (IhctanIOBaTu).
- Koni iHCTaJIaIa 3aBepuINaC, HATNCiTb Ha OK.
5.2 DeiHcTalpaXSplit Gamecaster
5.2.1 Видаленя XSplit Gamecaster y Windows® 10 / 8.1 / 8 / 7 (64-6it)
Iio6 BuaaNTs XSplit Gamecaster y Windows® 10 / 8.1 / 8 / 7 (64-6it):
- HatnciHa Start (Iyck) > Control Panel (KohtpoBha naHelb) > Programs (Pporpam) > Programs and Features (Pporpam Ta 3ac06n), Bn6epitb XSplit Gamecaster. HatnciHa Uninstall (DeinhctalnoBaTu).
6. ASUS AURA
6.1 Inctajci ASUS AURA
6.1.1 InctaiaASUS AURA y Windows 10 / 8.1 / 8 / 7 (64-6it)
Ioo6 iHcTaIIOBAtn ASUS AURA y Windows 10 / 8.1 / 8 / 7 (64-6it):
- BCTaBTe CD nIaTpUmKn do ONTNuHOrO dNCKOBODY.
2.ЯкsoakTUBObaHO aBTO3aNyCK, TOLOBHE MeHIO 3'ABNTbCAr aBTOMaTnUHO.
KuO aTO3aNcBMMKeHo, 3anycttb UI.exe 3 KopeheBoro MeHIO Ha CD nIITpIMKn.
- Y roNoBHOmy MeHIO HaTnCHiTb Ha Install (InctanIOBAtu).
Bn6epitb ASUS AURA i HaTncHITb Ha Khoi Install (InctanIObatn).
- Koni iHCTaJIaIa 3aBepuINnac, HATNCiTb Ha OK.
6.2 DeiHcTalau ASUS AURA
6.2.1 BvdaJIeHnA ASUS AURA y Windows 10 / 8.1 / 8 / 7 (64-6it)
Iio6 BuaaNTu ASUS AURA y Windows 10/8.1/8/7 (64-6iT):
HaTnchItb Ha Start (Iyck) > Control Panel (KoHTpOlbHa nAneB) > Programs (PporpaMn) > Programs and Features (PporpaMn Ta 3ac06n), Bn6epiTb ASUS AURA. HATnCHITb Ha Uninstall (DeiHctanIOBaTu).
- Y roJIOBOMy MeHIO HaTnCHiTb Ha Browse CD (NeperJHyTu CD), 06 nepERJHyTu 3mict CD.
7.2 KoHTaKTHa iHΦopMaúi
- BCTaBTe KOMnAaKr-ДИСК ПIДТРUMKn Do ONTNtHOrO DnCKOBoDy.
2.ЯкwoakTUBOBAHOaBTO3anyck,ABTomTuH03'YBnEtbcraekpaH iHCTanlaIi npaBepaASUSVGA.
Kkuo aBtOMaTHHn 3anyck He hanaTobAHn, 3anyctitb faan UI.exe 3 KopeHeBOrO KaTAnory DonomixHOrO KOMNaKT-DnCKy.
- Y roNoBHOmy MeHIO HaTnCHiTb Ha Contact Us (3BepHyTncsdo Hac), 0o6 nepeytn do Be6-caTy ASUS i diHaTncs 6inbwe.
7.3 O3haioomnu foai
Uo6 neperrnHytn 03HaHOMn faiJ:
- BCTaBTe KOMnakT-ДnCK NiIaTpumKn Do ONTNHOrO DnCKOBODY.
2.ЯкwoakTNBOBAHOABTO3anyck, ABTOMaTHUHO 3'ABJAEbC8ekpaH IHCTaJIiDpaBbepaASUSVGA.
Якшо abTomatnHni 3anyck He HanaTObAHNI, 3anyctiTB faaUl.exe 3 KopeHeBOrO KaTAnory DOONOMIXHOrO KOMNaKT-DnCKy.
- Y rONOBHOMy MeHIO HAtNCiTb Ha Read Me (HTaTu).
Ha ekpaHiz'ABNTbcra Take BIKHO.
Доаtok. Виавлени OCHOBнх HecnpaBHOtei
KIO nICBACTAHOBHeHrpaHOro aAnTePa BUNKaOTb 6yIb-aki 3 HabeJeHX npOBeM, cnpOByte nepeTm, k BnKlnKaTu TexHiCy NiTpUmKy, BnKOHaTu Ondy 3 MOKnBux Oepaui.
Якwo Bce ue BnHkaToB npo6IeMn 3 Bnpo6om, BiDbIaIte cnyK6y niItpmKn https:// www.asus.com/support, o6 otpmaTn 6ilbwe iNphiOpMaJI.
Copyright © 2019 ASUSTeK Computer Inc. Vse pravice pridrzane.
Copyright © 2019 ASUSTeK Computer Inc. Bce npaba 3aunnebl.
JIO6a qactb 3rO pyKOBOCTBA, BJIIOHua 6OpyIOBaHHe H IPOIpaMMHOe 06ecIeueHHe, OINCAHHB E HEM, He MOKET 6b1b dy6IIbPOBaHa, IepcdaHa, Ipc6oPa3OBaHa, coXpaHcHa B cHCTeMc IOHcKa H IN IpeCBeIHa Ha IpyTOI 3bIK B JIO6oI oPme H IN JIO6bIMn CpeCTBaHm, KpOME JOKyMeHTaHn, XpaHnIeCHN KOKyIATEIeM C IeJIbHO pe3epBPOBaHn, 6e3 cneHJIbHO IINCBMeHHOro pa3peIeHn ASUSTeK COMPUTER INC. ("ASUS").
FapaTHHIIpeKpaIaCTc,ccIH:1) H3DEJIe OTRpEOHTnPOBaHO,MOHΦHIIHPoBAHO HIN H3MEHIO 6e3 IIHCbMHeHOrO pa3peHennr ASUS; (2) cepHHbH Hmep H3DEJIH NOBpeJH, Hepa36OpHB JH60 oTCyTCTByer.
KOMIIAHN ASUS IPEIOCTABJET DAHHOE PYKOBOCTBO HA YCJIOBHN KAKECTb,BE3 KAKNX-JINBO TAPAHTHI, IPRMbx HJIN IOJPA3YMEBAEMbIX, BKJIOUAY, B TOM YHCJI, JIOBbIE IIOJPA3YMEBAEMbIE TAPAHTHI HJIN YCJIOBNI FOIOCTH JIA IPOJADKN, HJIN IIPNIOHOCTK KOHKPETHOJI EJIIN HCIOJIb3OBAHNA. KOMIIAHN ASUS, EE INPEKTOPA, PYKOBOINTeJI, COTPYDHNIKI IINI IPEICTABITEJIN HE HECYT HNKAKOI OTBETCTBEHHOCTN 3A JIOBbIE KOCBEHHbIE, FAKTINCHECKNE OCObIE HJIN CJUYAHNBIE YbBITKN (BKJIIOUAY YbBITKN OT YIYIeHHOBIyIbObl, VTPATY DEATEJBHOCTN, HE HCIOJIb3OBAHNE HJIN IOTEPIO DAHHBX, IPEPBHAHNE DEATEJBHOCTN I TOMV IOIDBOHE), IAJKE ECJIN KOMIIAHN ASUS BbUA OCBEJOMJIIEHA O BO3MOJHOCTN YbBITKOB BCJIEDCTBNE DEFEKTA HJIN OIIINbKN B DAHHOM PYKOBOCTBE HJIN IPOJYKTE.
TEXHNUECKHEXAPAKTEPHCTIKN INHΦOPMAUIN, COIDEPKAIIUECBAJAHHOM PYKOBOCTBE, IIPBIOJRTCTOJIbKO BIEJIXO3HAKOMJIEHN. OHIMOTYTBITB3MEHEHB JIIOBOE BPEM BE3 YBEJOMJIEHN IN HE JOJXHBI PACCMATPBATCB KAK OBJ3ATEJBCTBO CO CTOPHO ASUS. KOMIIAHNAUS HE HECET HNKAKOH OTBETCTBEHHOCTH IN OB3ATEJECTB 3A JIOBBIE OIIIBKN IIN HETOHOCTH, KOTOPBIE MOVT COIDEPKATBCB HACTOIAEM PYKOBOCTBE, BKJIOUAY OIICAHNI IIPOJUKUHN IIPOPGAMMHOTO BECEIUEHEN.
IpoNyKIIHnHa3BaHHN KOpnpaHn, HMeIOHecB 3ToM pyKOBoCTBe, MOryT BHTbC3apeHCTpHPOBAHHBMN TopOBbIMN 3HaKaAMn Hn6bITb 3aIIHcEHbIMN ABTOPCKHM IIpaBAMN COOTBECTBYOHN KOMIIaHHN HHCIO.Ib3yOTcR ToJbKO B IeJIAX HHeHTHΦHKaHn.
Copegxanhe
YbeJomJIeHn 358
HnΦopMaunr o npabHJax 6e3oIacIIOCTH 359
O pykoBoIcTBe 360
- HhOpMaIIH O KOMnAaKT-HeKe 361
2.Драиьера Видаеокары 362
2.1 YcTaHOBKa VGA IpaIbCpOB 362
2.2 YdaJIeHne VGA IpaIbepOB 363
- YTHIHTA ASUS GPU Tweak 364
3.1 YcraHObKa ASUS GPU Tweak 364
3.2 YIJIeHHe ASUS GPU Tweak 365
- ASUS AURA 366
4.1 YcTaHOBka ASUS APRP 366
4.2 YdaJIeHHe ASUS APRP 367
- XSplit Gamecaster 368
5.1 YcTaHOBka XSplit Gamecaster 368
5.2 YIaJIeHHe XSplit Gamecaster 369
- ASUS AURA 370
6.1 YcTaHOBka ASUS AURA 370
6.2 YdaJIeHne ASUS AURA 371
7.Дугай Инфорmaць.. 372
7.1 Iipocmotp KOMnakT-tncka 372
7.2KoHTaKTHaIHHOpMaIIH 372
7.3 IpocmoTp paaiJa readme 373
IIpHIOKeHHe: OchOBHbIe HeHCIIpaBHOcTH 374
YBeDOMJIeHnIa
YIOCTOBepeHHe ΦeIepaJIbHoI KOMHcHH IIO cBra3N CIIIA
JaHHoe ycTpoiCTBO COOTBeTCTByeT Yactn 15 PpaBJI FCC. 3KcIIiyataunna o6OpyIOBaHn IOnyCTMa IIpN Co6JIHOdeHHN CJIeIyIOIIHX ycIOBn:
JaHHoe yctpoHCTBO Hc JIOJKHOC3aBaTaB IOMEX
Ha pa60Ty yctpoiCTBa MOrY OKa3bIBaTb BIIHHe BHeIHHne IOMexn, BKJIIOUaIOMexn, Bbl3bBAIOuNe HeKeJIaTeJIbHbIe peKHMbl eTo pa60TbI.
Даиhoe obopyюbaHne 6bIIO IPOTEcTHpoBAHO n COUTeHO COOTBeTCTBYIOIIHM OraHHueHIM IO IIHΦpOBbIM yctpoIcTBaM KJIacca B, B coOTBeTCTBHN cHaCTbIO 15 IIpaBNI FCC. ΘTN ORpaHueHn paCCHTaHbI Ha o6ecNueHHe 3aIHTb I B pa3yMHbIX IpeJIax OT BpeIoHOCHbIX BO3JeICTBH IN PHy UCTAHOBKE B JHIOM IOMeIIeHIN. Данhoe obopyJOBaHne reHepHyET H3IyAcT paIIOuAcTOTHyO 3HepHIO, KOtOpAЯ MOKeT CO3JaBaTb IOMEXN B paIIOOCB3H, ECJIN YcTPOIcTBO YcTAHOJIcHO HJIN HcIIIOJIb3YeTcR He B COOTBeTCTBHN C HHCTpyKIIHM IIPOH3BOIDTeJIr. Tem He MeHee, HeBO3MOJHO rapaTHPObaTb OTCyTCTBNE IOMEX B KAJKdOM KOHKpeIHOM cJIyuae. B cJIyuae, ecJIN DaHHoe obopyJOBaHne DeIcTBNTJEbHO BB3bIBaet IOMEXN B paIIO HJIN TEJIeBH3IOHHOM IprHeme, YTO MOJHO IPOBepHTb, BKJIIOUIHB N BbIKJIIOUHвДaHHoe obopyJOBaHne, POJIb3OBAteJIHO peKOMeHdyEtc IIOJIbITaTbcr YdaJIHTb IOMEXN cJIeIyIOIIHM cpeIcTBaMH:
- IpeopeHHTnPoBaTb HIN IpeMeCTHTb IIpHHMaHOIIyO aHTEHy.
- YBEJHHTb paCCrOHHe MEKdy daHHbIM IIpH6OpOM H IIPHEMHKKOM.
-ПОДКЛHOUHTb ДАнhoe obOpуIDOBaHnE Kpo3eTKepyrOg 3JIeKTPoIIeIN, HeJcJIIn Ta, K KOtOpOI ПОДКЛHOUeH pHcMHNK. - IIpoKoHcyJIbTHnpOBaTbc8c IIpoJaABUOM HJIN KBAJIHΦHIIpOBaHIbIM paIHO-/TB-TexHHKOM.

HcIOb3yIte 3KpaHnpOBaHHbIe Ka6eJIIN IIOIKJIOUeHn MOHHTopa K BnIEoKapTe - 3TO rapaHTHPyET COBmecTHMOCtB C Tpe6OBaHHMn FCC. H3MeHeHn IIN IOIOJIHeHn K IaHIOMy IIYkTy, He cOJIACOBaHHbIe HeIOcpeICTBeHHIO CO CTOpOH, OTBeTCTBEHHIO 3a COOTBeTCTBHe IpaBHJAM, MOrYT CJIeJAbIb HeJeIcTBHTeJIbHbIM IpaBO IOJIb3OBaTeJIHa IIOJIb3OBaHHe IaHHbIM OobpyIOBaHHem.
YIOCTOBepeHHe IenapTaMeHTa IIcpeCTBam CBra3N KaHaIbI
JaHHoe uHpOBoe yctpoiCTBO He IpeBbIaAe T OrpaHnueHn KJIacca B IO BblJeHIO paIHOIIyMa OT uHpOBoBix yctpoiCTB, yCTaHOBJIeHHbIX B IIpaBnIax IIO paIHOIIomExAm JeIapTaMeHTA IIO cpeIcTBam CB3N KaHaIbI.
ДанhoeифpoBoe yctpoiCTBO KlaacBa COOTBeTcBye tcaHapTy ICES-003.
REACH
Corlacno peTlaMeHTy EC REACH (Registration, Evaluation, Authorization, and Restriction of Chemicals - PernctpaHn, OIeHka, Pa3peHnHnHa OrpaHnueHnHa HcNoJIb3ObaHne XHMuecknx BeIscTB), Ha caTe ASUS REACH pa3McIIeH cIIncOK XHMuecknx BeIecTB coIepKaIIuXcB B IpoIyKtax ASUS: http://csr.asus.com/english/REACH.htm
Hhopmaunna 6n3deJnn Koppopaunn Macrovision
YTHINTa ASUS GPU Tweak IO3BOJnCT KOHTPOJnHOBaTb H N3MeHrTB NapaMeTpbl JIOCTHKeHHOITHMajBHoI IPOH3BOJnTeJIbHOcTH BnDEoKapr ASUS.
3.1 YcTaHOBKa ASUS GPU Tweak
3.1.1 YctaHOBka ASUS GPU Tweak B Windows 10 / 8.1 / 8/7 (64-6HT)
Ipa Support CD BbIOHnTe cJeIyoHne HhctpyKHH:
- BcTaBbTe KOMIIaKT-ⅡNCK B OITINueckn IIpNbO.I
- EcJH aBTO3aIyck BKJIIOUeH, IOBHTcMeHIO yCTAHOBKN. EcJH aBTO3aIyck OTKJIIOUeH, 3aIycTHTe UI.exe H3 KOpHeBOJ INpcKTopHH KOMIIaKT-INcKa.
- BJIABHOM MeHIO HaKMITE Browse CD IIO OTO6paKeHHa coepKHMOrO nCKa.

7.2 KoHTaKTHa HhOpMaun
- BcTaBbTe KOMIIaKT-ⅡNCK B OIIITHueckn IIpHBOI.
- EcJIN aBTO3aIyck BKIIIOueH, IIOABHTcM MeHIO yCTaHOBKN.
EcJn aBTO3aIyck OTKJIIOueH, 3aIyCTHTe UI.exe H3 KOpHeBOJ DInpeKTOpHH KOMIIaKTINCKa.
- B IJIaBHOM MeHIO HaKMHTe Contact Us IIЯ IIepexoHa ha caIr ASUS H IIpocMoTpa IIOJOHHTeJIbHOH INHΦOpMaIIHN.
7.3 Ipocmotp faaJra readme
InpocmoTpa faHra readme BbIOJInHe cJeNyUOHe HnctpyKuH:
- BcTaBbTe KOMIIaKT-ⅡHcK B OITnueckn IIpHBoI.
- EcJIN aBTO3aIyck BKJIIOueH, IIOJBNTcMCHIO YCTaHOBKN.
EcHn aBTo3aIyck OTKJIOueH, 3aIyCTHTe UI.exe H3 KOpHeBOI dHpeKTOpHH KOMIIaKT-IMcKa.
- B rJIaBHOM MeHIO HaKMITE Read Me IIOPOcMOTpa faJa readme.