
Compact 10x25 - Binoculars National Geographic - Free user manual and instructions
Find the device manual for free Compact 10x25 National Geographic in PDF.
| Product type | Compact binoculars |
| Brand | National Geographic |
| Model | Compact 10x25 |
| Magnification | 10x |
| Objective diameter | 25 mm |
| Dimensions (approx.) | 12 x 10 x 4 cm |
| Weight (approx.) | 300 g |
| Power supply | None (optical binoculars) |
| Focusing | Central wheel and diopter adjustment |
| Eyecups | Twist-up or rubber, for eyeglass wearers |
| Tripod mounting | Possible with optional adapter (ref. 19-16000 or 19-16500) |
| Maintenance and cleaning | Soft, lint-free cloth, possibly with eyeglass cleaner |
| Protection against dust and moisture | Store the binoculars in the provided carrying case |
| Safety | Never look directly at the sun - risk of blindness, do not disassemble, avoid high temperatures |
| Privacy | Do not observe others in private places |
| Spare parts and repairability | Contact the specialized dealer; tripod adapter available |
| Warranty | 2 years, extension to 5 years if registered within 3 months at www.bresser.de/warranty |
| Customer service | Hotline: +49 (0) 2872 - 80 74-210 |
| General information | Manual available in several languages; contains 44 pages |
Frequently Asked Questions - Compact 10x25 National Geographic
User questions about Compact 10x25 National Geographic
0 question about this device. Answer the ones you know or ask your own.
Ask a new question about this device
Download the instructions for your Binoculars in PDF format for free! Find your manual Compact 10x25 - National Geographic and take your electronic device back in hand. On this page are published all the documents necessary for the use of your device. Compact 10x25 by National Geographic.
USER MANUAL Compact 10x25 National Geographic
NATIONAL GEOGRAPHIC™

BRESSER
FERNGLAS BINOCULARS
DE Bedienungsanleitung
EN Operating Instructions
FR Mode d'emploi
NL Handleiding
ES Istruzioni per l'uso
IT Instrucciones de uso
PL Instrukcja obsługi
RU Руководство по эксплуатации
natural_image
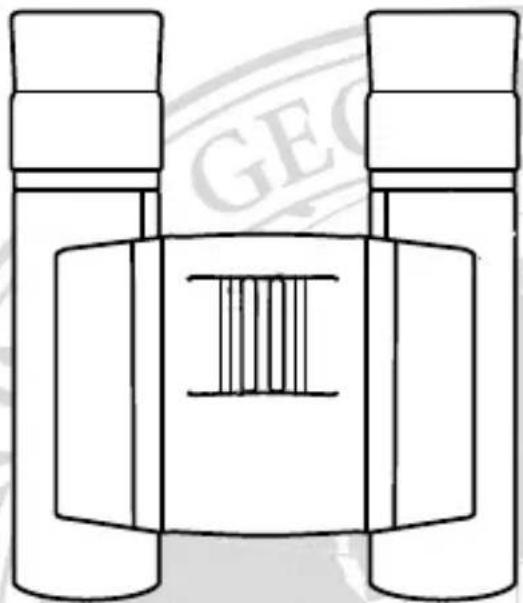
Line drawing of binoculars with a central bar and 'GEO' watermark (no text or symbols on the diagram itself)TYPE: COMPACT

National Geographic's net proceeds support vital exploration, conservation, research, and education programs.

NATIONAL GEOGRAPHIC™

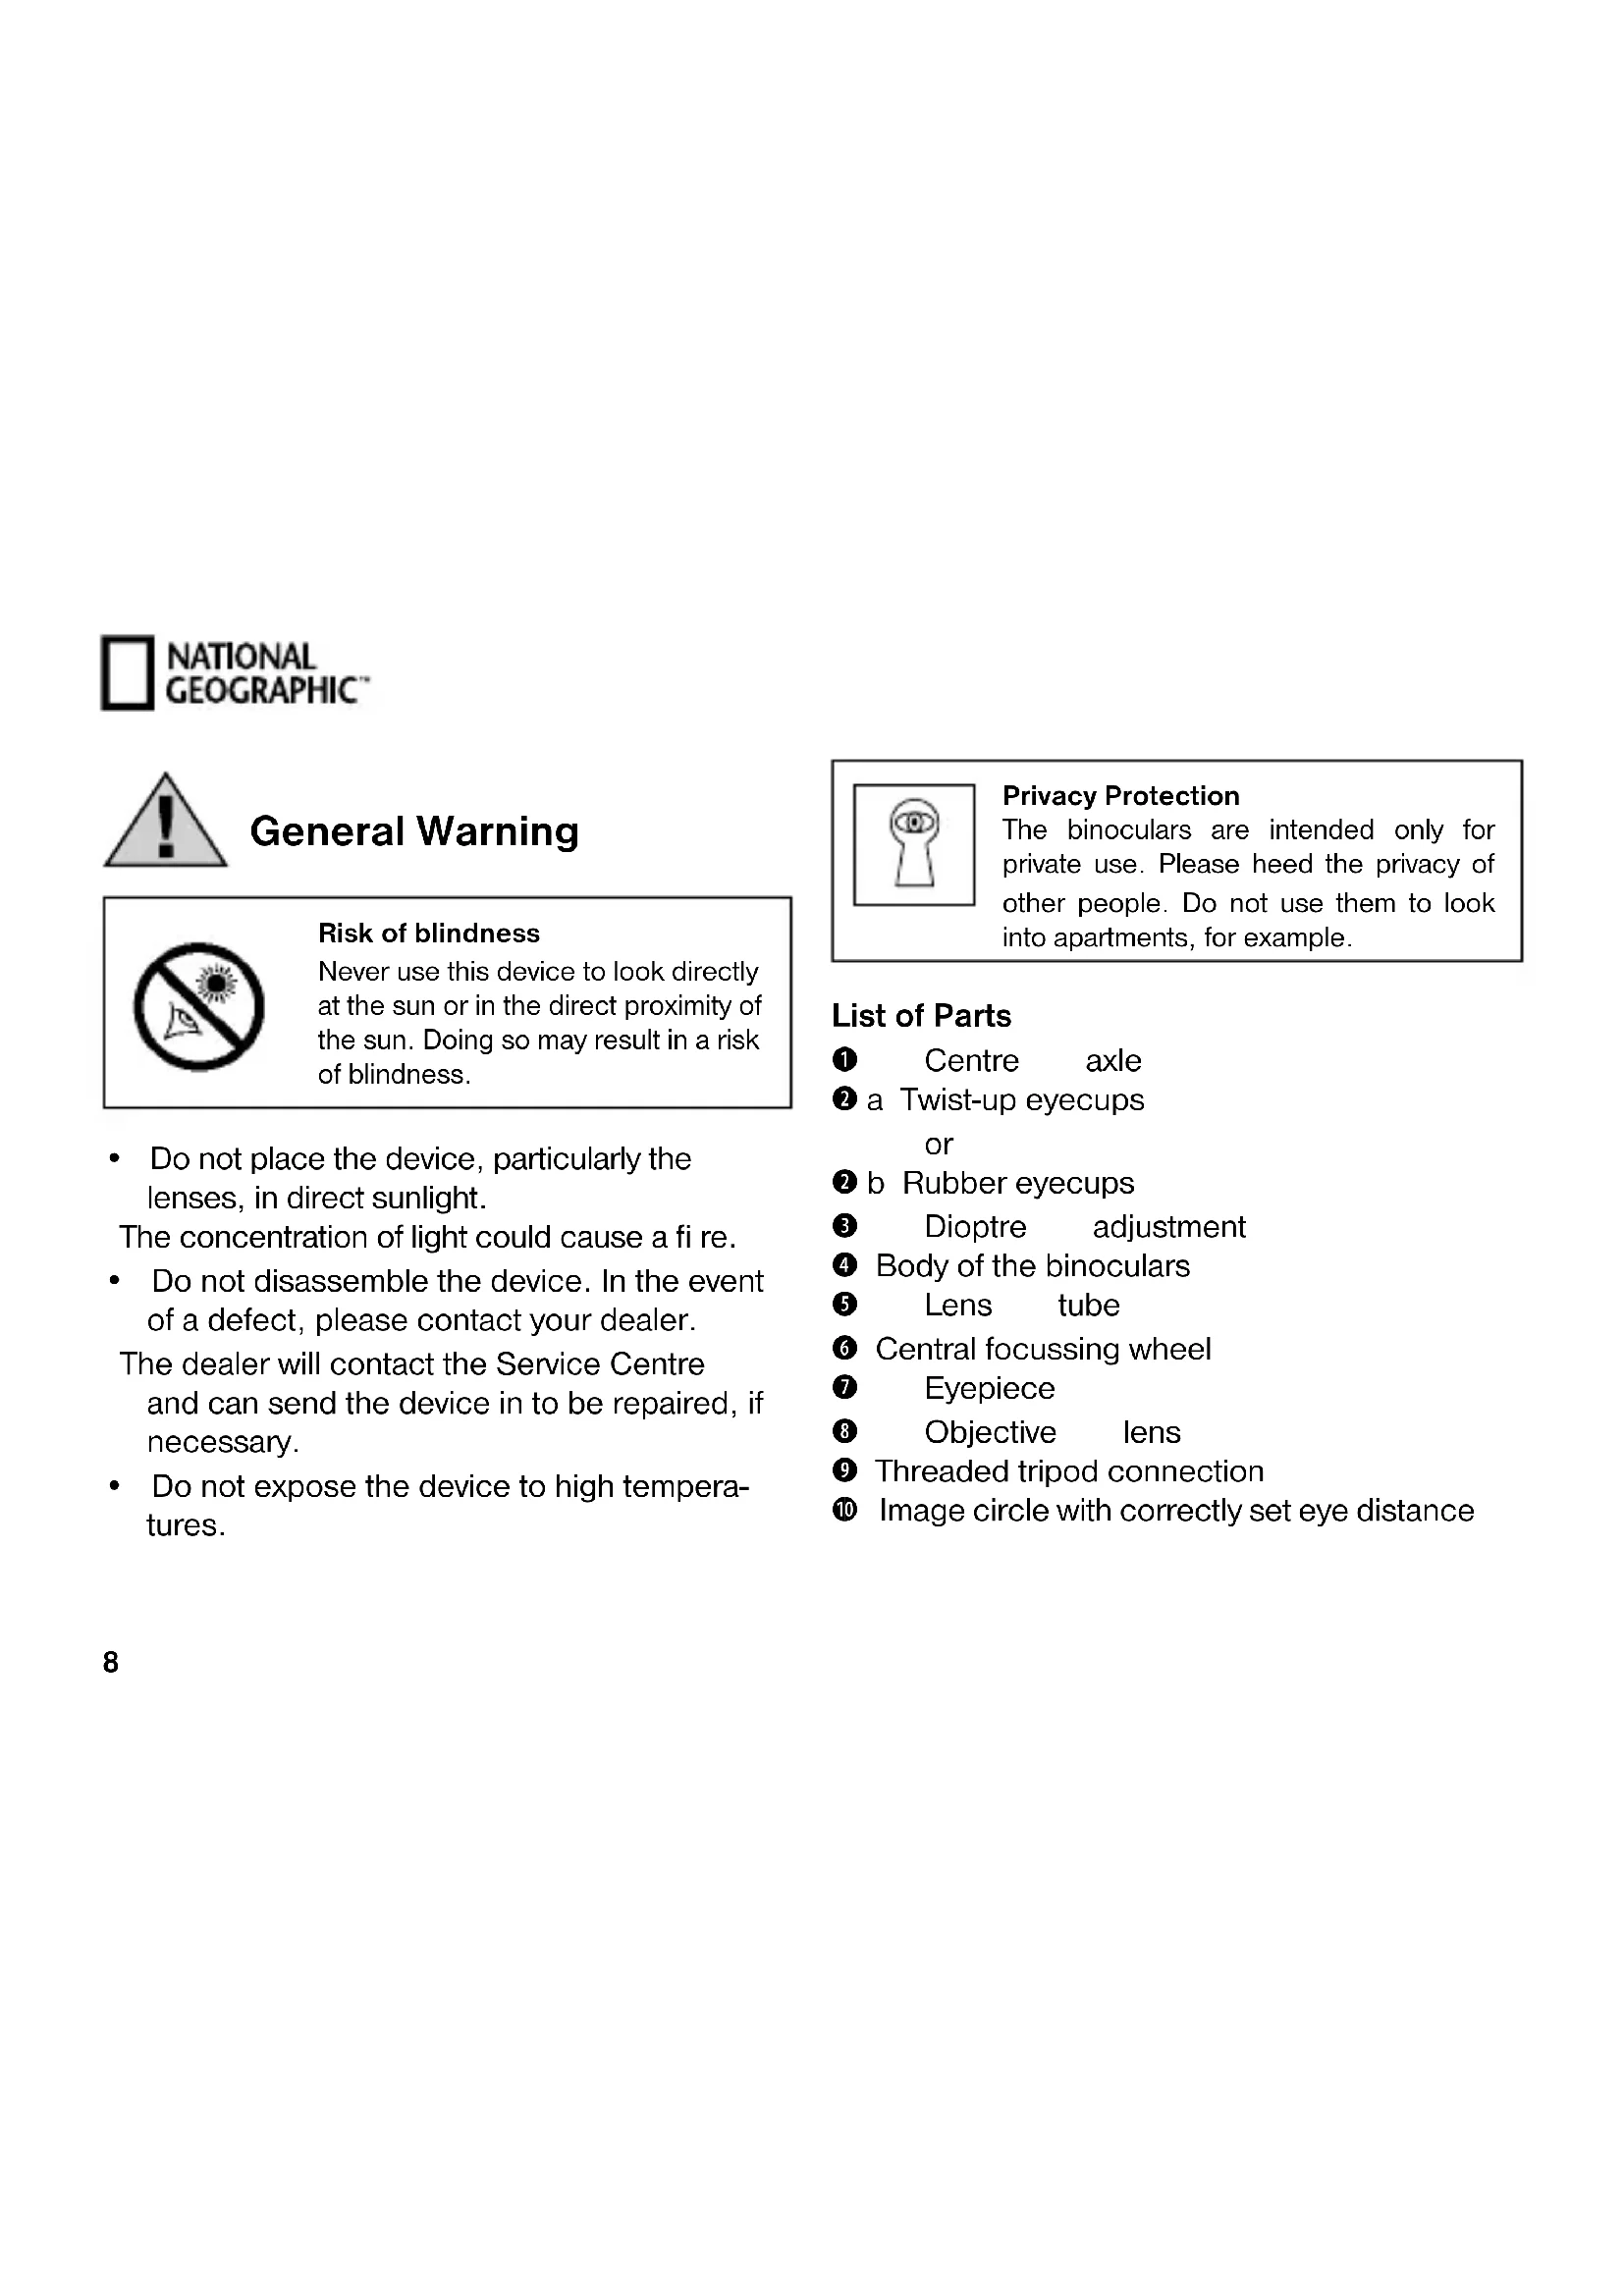
Never use this device to look directly at the sun or in the direct proximity of the sun. Doing so may result in a risk of blindness.
- Do not place the device, particularly the lenses, in direct sunlight.
The concentration of light could cause a fire. - Do not disassemble the device. In the event of a defect, please contact your dealer.
The dealer will contact the Service Centre and can send the device in to be repaired, if necessary. - Do not expose the device to high temperatures.
Privacy Protection
The binoculars are intended only for private use. Please heed the privacy of other people. Do not use them to look into apartments, for example.
List of Parts
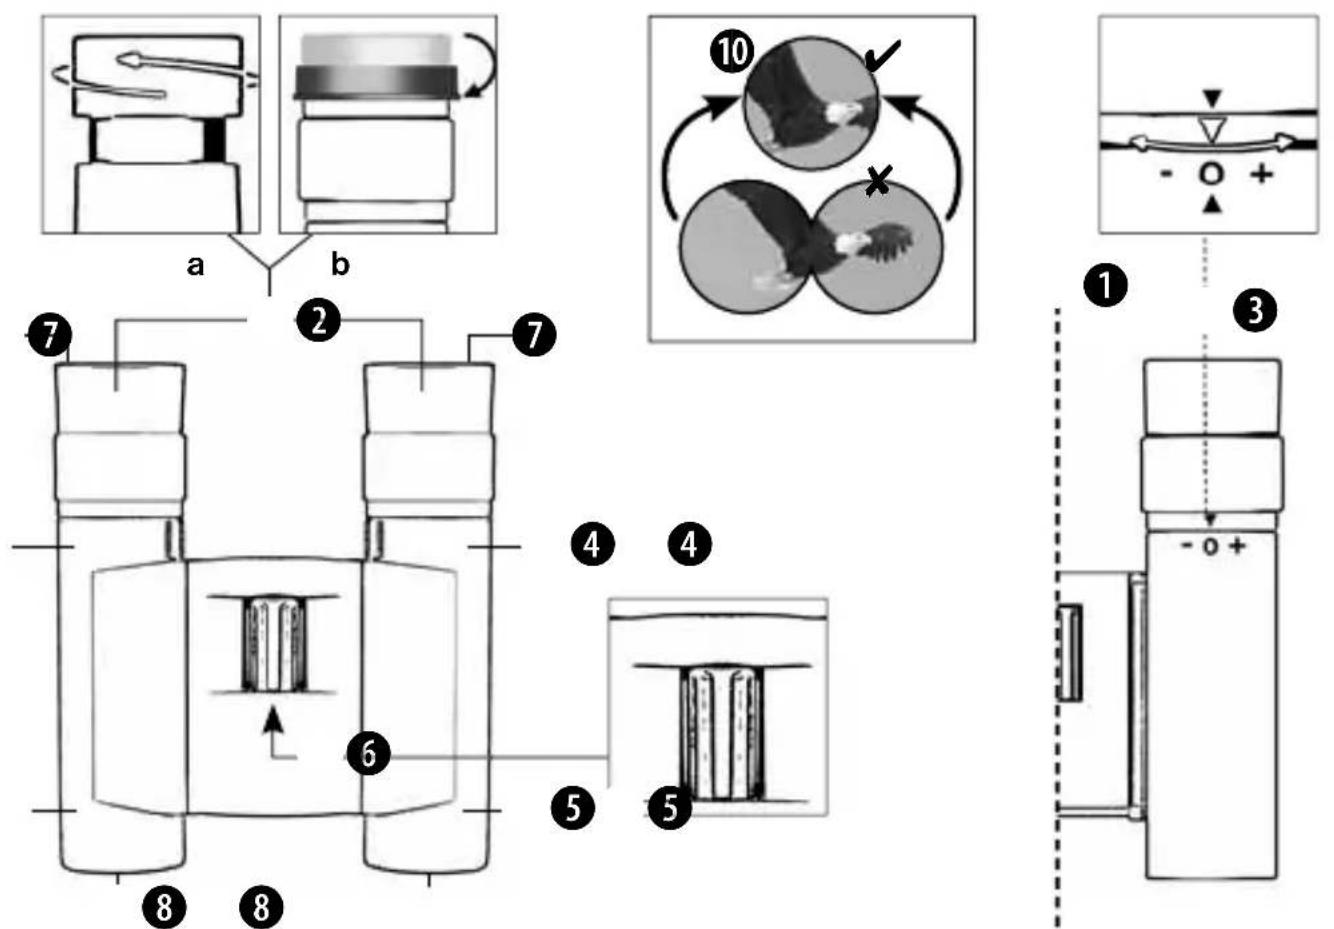
① Centre axle
② a Twist-up eyecups or
② b Rubber eyecups
③ Dioptre adjustment
④ Body of the binoculars
⑤ Lens tube
6 Central focussing wheel
⑦ Eyepiece
8 Objective lens
⑨ Threaded tripod connection
10 Image circle with correctly set eye distance
Eyepieces for spectacle wearers
Depending on the model, your binoculars are equipped with either twist-up eyecups (2a) or rubber eyecups (2b). Since there is a larger distance between the binocular eyepiece and the pupil for those wearing glasses, both eyecup varieties can be adjusted individually.
Twist-up Eyecups (2a)
Screw in the twist-up eyecups (2a) to use the binoculars while wearing glasses. If you are not wearing glasses, unscrew the eyecups to achieve the required distance from your pupils.
OR
Rubber Eyecups (2b)
To use the binoculars while wearing glasses, turn the rubber eyecups (2b) toward the sides and down. If you are not wearing glasses, leave the eyecups in the upright position to achieve the required distance from your pupils.
Adjusting the eyepiece distance
The distance between your eyes differs between individuals. To achieve perfect interaction between your eyes and the eyepieces of your binoculars, set the angle at the centre of the binoculars (1) so that you see a circular image (10). Note this setting for later use.
Adjusting the focus
Look through your binoculars with your right eye closed. Now adjust the image for your left eye by turning the centre wheel (6) until it is sharp and clear. Close your left eye and adjust the image for your right eye by turning the dioptre ring (3) until it is also sharp and clear.
Mounting the binoculars on a tripod
Your binoculars have a threaded tripod connection (9) built in.
The required tripod adapter is available in stores as an optional accessory (Art. No. 19-16000 or
NATIONAL GEOGRAPHIC™
19-16500). With this accessory, you are able to mount your binoculars on a tripod with a DIN mounting thread (e.g. Art. No. 49-22100).
! NOTES on cleaning
- Clean the eyepieces and lenses only with a soft, lint-free cloth, like a microfi bre cloth. To avoid scratching the lenses, use only gentle pressure with the cleaning cloth.
- To remove more stubborn dirt, moisten the cleaning cloth with an eyeglass-cleaning solution and wipe the lenses gently.
- Protect the device from dust and moisture. After use, particularly in high humidity, let the device acclimatize for a short period of time, so that the residual moisture can dissipate before storing. Remove the dust cover and store it in the included bag during use.
DISPOSAL
- Dispose of the packaging materials properly, according to their type, such as paper or cardboard. Contact your local waste-disposal service or environmental authority for information on the proper disposal.
- Please take the current legal regulations into account when disposing of your device. You can get more information on the proper disposal from your local waste-disposal service or environmental authority.
Warranty and warranty term extension
The warranty term is two years from the date of purchase. Please keep your proof of purchase. Register at www.bresser.de/warranty and fi ll out a brief questionnaire to get your warranty term extended to five years. Registration must be completed within three months of purchase (date of receipt) to validate the warranty. If you register thereafter, the warranty term will not be extended. If you have problems with your device, please contact our customer service fi rst. Do not send any products without consulting us fi rst by telephone. Many problems with your device can be solved over the phone.
If the problem cannot be resolved by phone, we will take care of transporting your device to be repaired. If the problem occurred after the warranty ended or it is not covered by our warranty terms, you will receive an estimate of repair costs, free of charge.
Service Hotline: +49 (0) 2872 - 80 74-210

Important for any returns:
Please make sure to return the device carefully packed in the original packaging in order to prevent damage during transport. Also, please enclose your receipt for the device (or a copy) and a description of the defect. This warranty does not imply any restriction of your statutory rights.
Your dealer: ....
Art. No.:
Description of problem:
Name: ....
Telephone: ....
Street: ....
Date of purchase: ....
City/Postcode:......
Signature: ....

BESCHERMING van privacy!
© 2012 National Geographic Society NATIONAL GEOGRAPHIC and Yellow Border Design are trademarks of the National Geographic Society, used under license. All rights reserved.

National Geographic's net proceeds support vital exploration, conservation, research, and education programs.

BRESSER
Bresser GmbH

- NATIONAL GEOGRAPHIC™
- FERNGLAS BINOCULARS
- Privacy Protection
- List of Parts
- Eyepieces for spectacle wearers
- Twist-up Eyecups (2a)
- Rubber Eyecups (2b)
- Adjusting the eyepiece distance
- Adjusting the focus
- Mounting the binoculars on a tripod
- ! NOTES on cleaning
- DISPOSAL
- Warranty and warranty term extension
- Important for any returns:
- BESCHERMING van privacy!
Brand : National Geographic
Model : Compact 10x25
Category : Binoculars