
GHF2W - Tripod Gitzo - Free user manual and instructions
Find the device manual for free GHF2W Gitzo in PDF.
User questions about GHF2W Gitzo
0 question about this device. Answer the ones you know or ask your own.
Ask a new question about this device
Download the instructions for your Tripod in PDF format for free! Find your manual GHF2W - Gitzo and take your electronic device back in hand. On this page are published all the documents necessary for the use of your device. GHF2W by Gitzo.
USER MANUAL GHF2W Gitzo
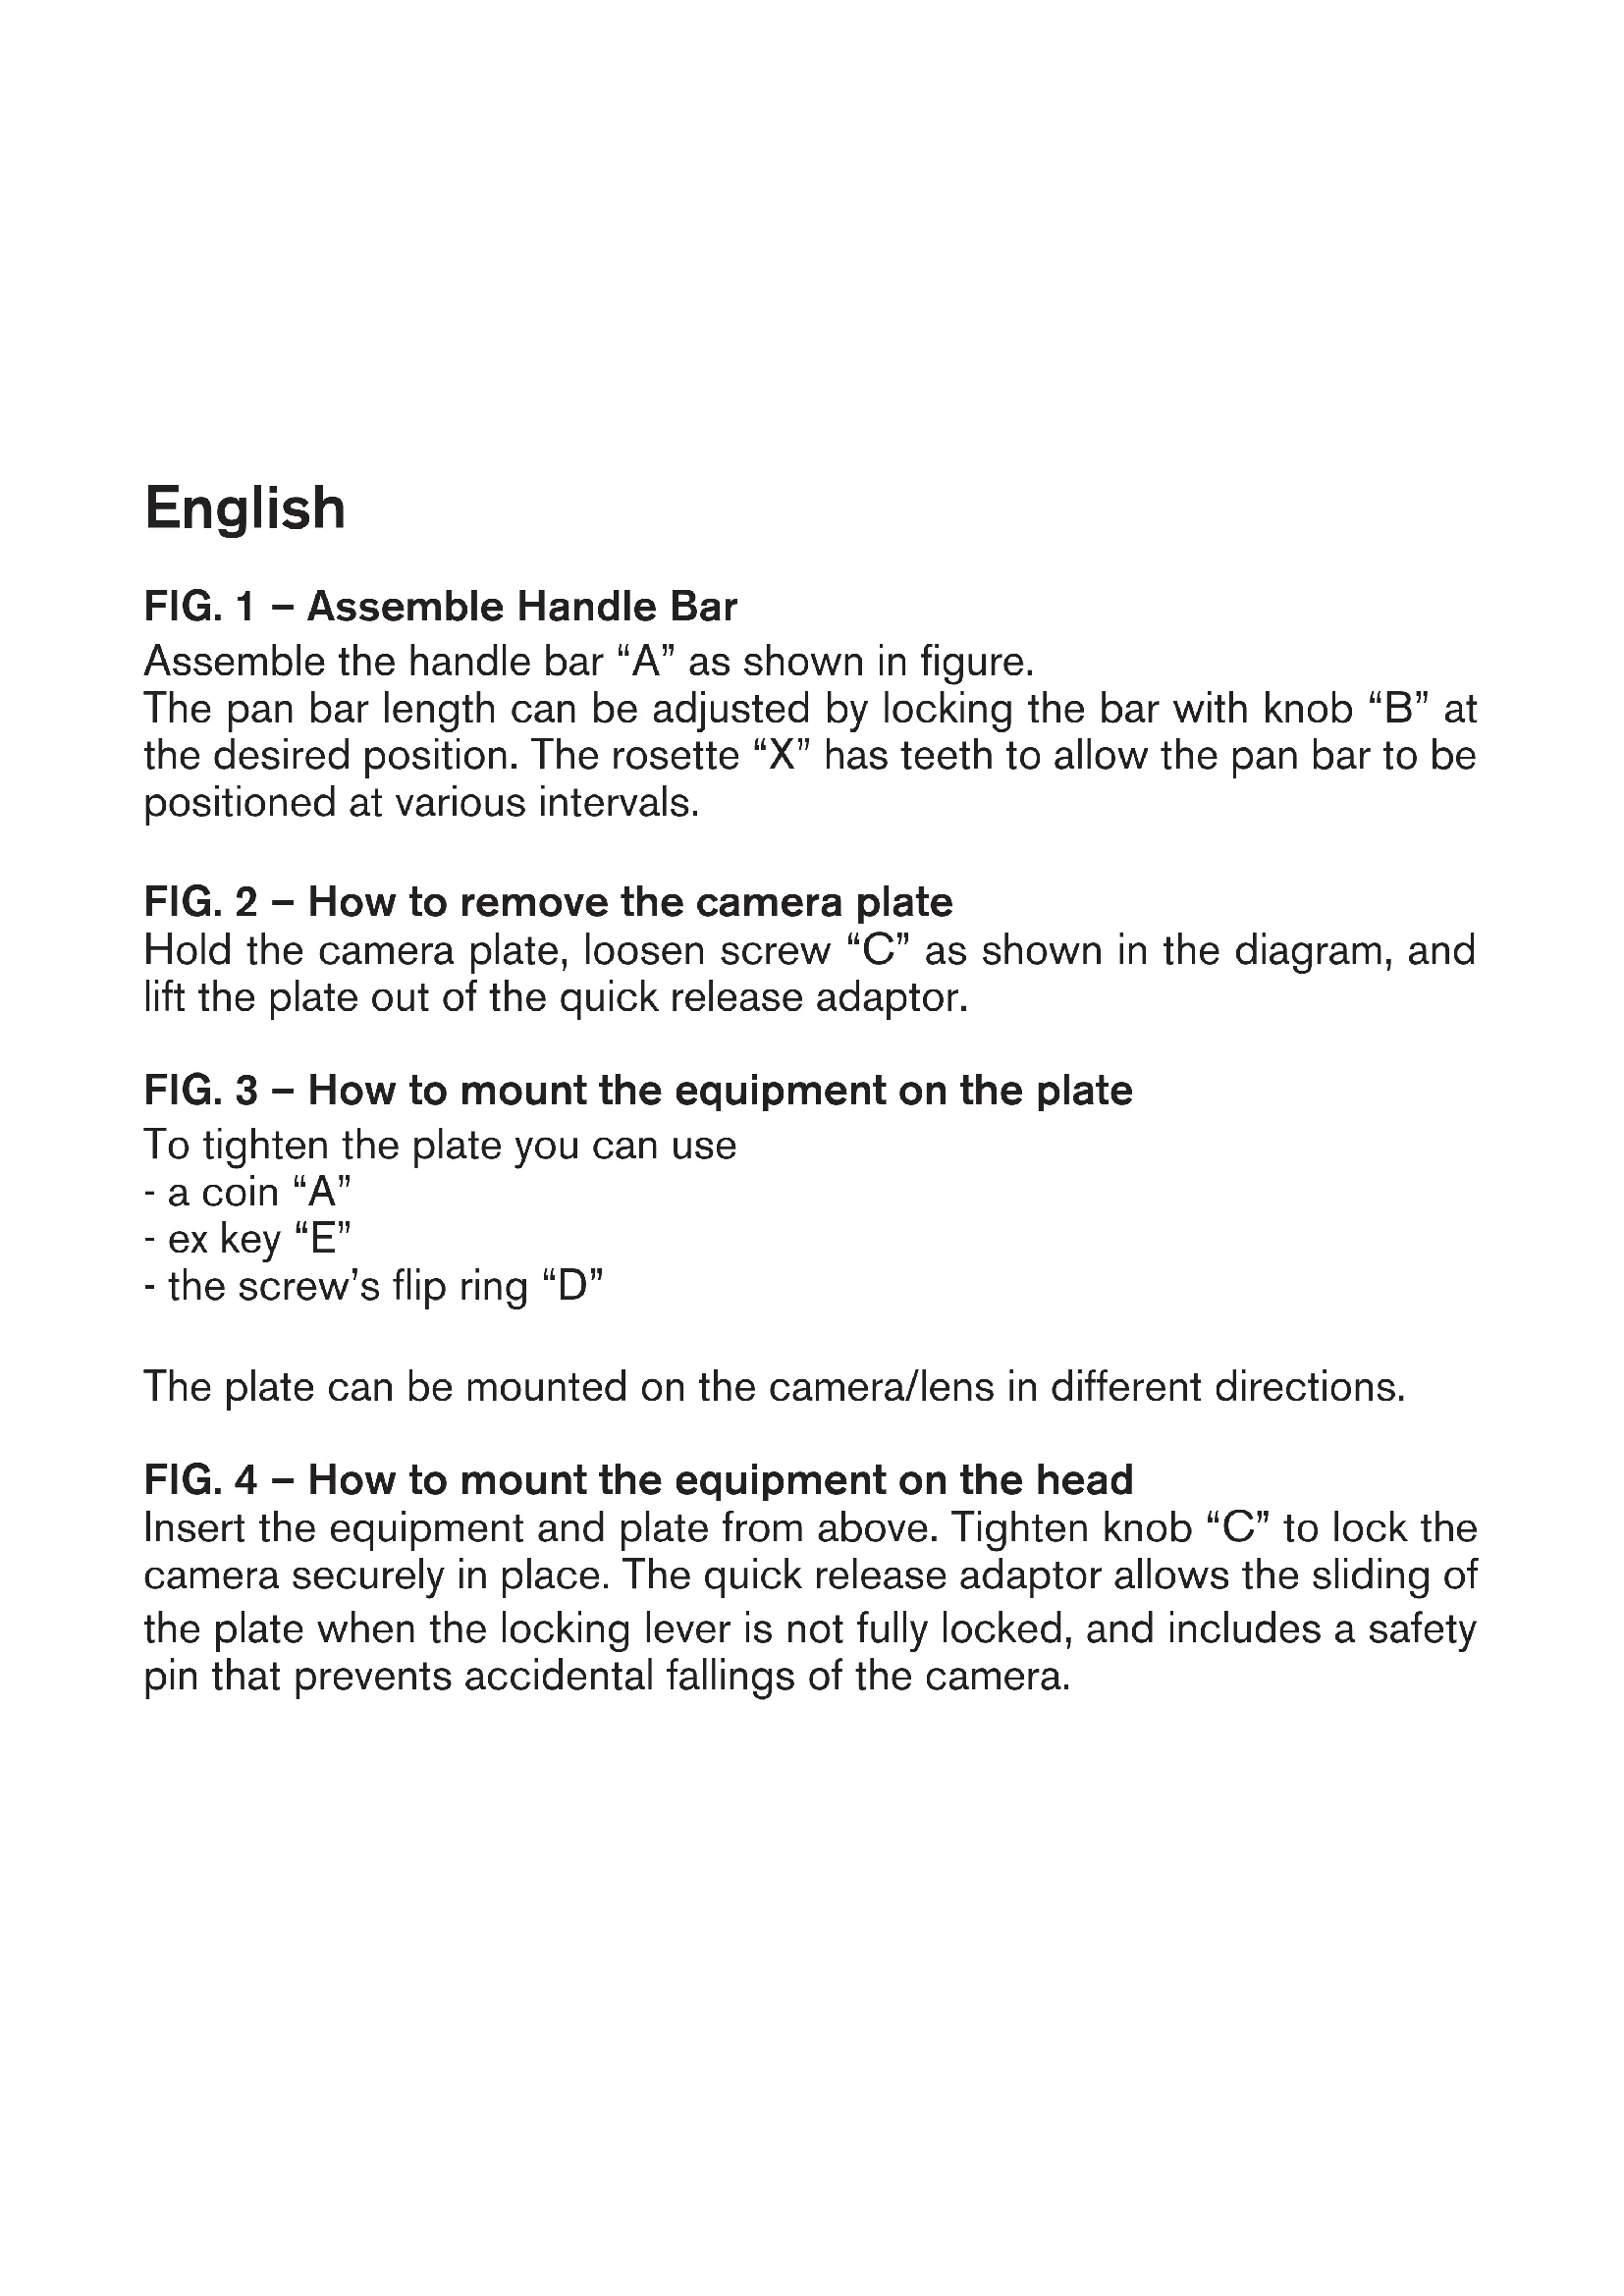
Assemble the handle bar "A" as shown in figure.
The pan bar length can be adjusted by locking the bar with knob "B" at the desired position. The rosette "X" has teeth to allow the pan bar to be positioned at various intervals.
FIG. 2 - How to remove the camera plate
Hold the camera plate, loosen screw "C" as shown in the diagram, and lift the plate out of the quick release adaptor.
FIG. 3 - How to mount the equipment on the plate
To tighten the plate you can use
- a coin "A"
-exkey“E" - the screw's flip ring "D"
The plate can be mounted on the camera/lens in different directions.
FIG. 4 - How to mount the equipment on the head
Insert the equipment and plate from above. Tighten knob "C" to lock the camera securely in place. The quick release adaptor allows the sliding of the plate when the locking lever is not fully locked, and includes a safety pin that prevents accidental fallings of the camera.
FIG. 5-6-7-8-9-10-11-12-13-14 - Counter balance system
The head is provided with a spring loaded counter balance system (ON/OFF, 7 positions) to balance the off centre weight of your equipment. The head is able to support loads up to 4kg (8.8 lbs), and the balance system allows to balance a off centre load up to 2,5kg (5.5 lbs). The head can be used with or without counter balance system.
FIG. 5
Without counter balance system the head behaves like a standard fluid head:
- make sure that the tilt control knob "F" is tightened.
- with one hand pull out and fully rotate the knob "H" to "OFF" position (following the arrow).
- with the other hand hold your equipment and unscrew the knob "F".
FIG. 6
If you want to use the head with counter balance system, proceed as follow:
- unscrew the knob "F" while holding your equipment in order to prevent it from suddenly flopping
- move the equipment in order to reach the "zero" position (indicated by arrow)
FIG. 7 - With the other hand fully rotate the knob "H" to "ON" position (following the arrow).
FIG. 8 - If the equipment doesn't move, it means that you have reached the balance point.
FIG. 9 - If the equipment falls, find the balance point as follow.
- FIG. 10 - Rotate and pull out the knob "H" to "off" position.
- FIG. 11 - Rotate your equipment in the opposite direction of the fall.
- FIG. 12 - Reach the first dash after the "zero" position accordingly to the direction of the fall (always opposite direction) and rotate the knob "H" to "ON" position until it locks into position.
- FIG. 13 - Check if the equipment doesn't move: it means that you have reached the balance point.
- FIG. 14 - If the equipment falls down, repeat the instructions above, selecting the following position (2nd and 3rd dashes after the ). 3rd position allows the maximum balance capacity.
FIG. 15 - Remove equipment from the head
FIG. 16 - Use
N Pan control knob: friction and lock (360^)
F Tilt control knob: friction and lock (+90 / - 60^)
Italiano
This is a text for the purpose of supporting the following.
晋莱伊德将正要参加完他喜欢的活动。