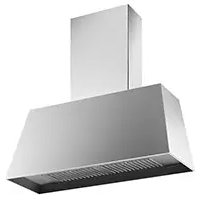
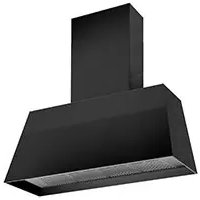
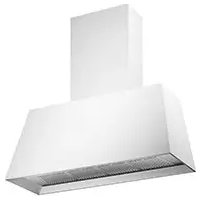
KG36CONX - Basket BERTAZZONI - Free user manual and instructions
Find the device manual for free KG36CONX BERTAZZONI in PDF.
Questions des utilisateurs sur KG36CONX BERTAZZONI
0 question sur cet appareil. Repondez a celles que vous connaissez ou posez la votre.
Poser une nouvelle question sur cet appareil
Download the instructions for your Basket in PDF format for free! Find your manual KG36CONX - BERTAZZONI and take your electronic device back in hand. On this page are published all the documents necessary for the use of your device. KG36CONX by BERTAZZONI.
USER MANUAL KG36CONX BERTAZZONI
- Do not cook on the flame under the hood
- When using fryers, constantly be careful as the overheated oil might catch fire.
- Before starting any cleaning operation disconnect the appliance from the power supply removing the plug or acting on the master switch.
- In case of contemporaneous use of both the hood and other appliances, exhaling fumes and not fed by energy, the room must be ventilated.
- Do not leave burners burning freely (unused)
- Limit the use of the hood to what it has been designed for: remove cooking smells; do not use it for other purposes.
- It is recommended to operate the hood just before starting any cooking operation and to leave it running after cooking for at least 15 minutes and in any case until all smells have vanished.
- Use a damp cloth and neutral washing liquid only.
- Avoid wet cloths and sponges, jets of water, diluents, solvents, alcohol and abrasive substances.
- Before starting any maintenance operation disconnect the appliance from the power supply removing the plug or acting on the master switch.
- Do not connect the exhaust pipe of the appliance to inlet ducts for the fumes produced by burning fed by energy other than the electrical one.
- The minimum safety distance between the gas hob and the hood is 25 "19/32 (650mm).
- Riskless use is obtained when the maximum depression of the room does not exceed 4Pa.
- Hang the hood body to the wall securely, always considering that the distance between the hob and the bottom of the hood must not be lower than 65cm , using the screws supplied.
- Make sure the mains voltage is suitable for supplying the hood with power as shown on the plate inside the appliance.
- This appliance is not intended for use by people (including children) with reduced physical, sensory or mental capabilities, or lack of experience and knowledge, unless they have been given supervision and instruction concerning the use of the appliance by a person responsible for their safety. Children should be supervised to ensure that they do not play with the appliance.
- The room must be sufficiently ventilated when the chimney hood is used contemporaneously with other appliances burning gas or other combustible materials.
- There may be risk of fire if cleaning is not carried out according to what is specified in the instructions.
- WARNING: The accessible parts can become highly hot when the ho bis used.
Cleaning
- Use a damp cloth and neutral washing liquid only.
- Avoid wet cloths and sponges, jets of water, diluents, solvents, alcohol and abrasive substances.
- The hood must be cleaned at least once a month
WARNING
Before starting any cleaning operation disconnect the appliance from the power supply removing the plug or acting on the master switch.
Introduction
The purpose of these instructions is to explain the technical details of your hood and its use. Since these instructions concern more than one hood model, they may refer to components that are not part of the hood that is being installed.
The hood must be used to exhaust cooking fumes outside the room. The air connections can vary from country to country.
We reserve the right to modify the product without any notice, still aiming at improving the appliance.
INSTALLATION INSTRUCTIONS
GENERAL INFORMATION
This hood is fit to be installed on the wall above a hob.
It can be used in Exhaust and Filter version.
Installation
The hood must be installed at the center with respect to the hob.
The minimum distance between the cooktop and the lower part of the hood is 25 "19/32 (650mm).
Warning: the room must be sufficiently ventilated when the chimney hood is used contemporaneously with other appliances burning gas or other combustible materials.
Hood wall mounting
1) Set the distance between the hob and the hood (Fig. 1).
2) Fix the hood to the wall (Fig. 5/L) using the two screws and the two wall plugs supplied (Fig. 5/L).
3) Mount the reduction connector 4"47/64 - 5"29/32 (120/150mm) (Fig.5 O) if the exhaust pipe is 5" 59/64 (Ø125mm)
4) Fix the hood body with two screws and two wall plugs (Fig.5/N) into the lower part of the hood (Fig.5/M).
Exhaust version
Preferably use a pipe 5"29/32 (Ø150mm) or 5" 59/64 (Ø125mm), flexible if possible (Fig.5/H), and stop it by a pipe clamp.
Connect the evacuation pipe to the external conduit and fix it by a pipe clamp. Do not mount the activated charcoal filters.
Installing the pipes
(for exhaust version only)
Fix the anchor bracket to the wall (Fig.5/B) at the desired height using wall plugs and screws supplied (Fig. 5/A).
Insert the upper telescopic pipe (Fig.5/P) into the lower telescopic pipe (Fig.5/F).
Position the lower telescopic pipe on the hood body. Lift up the upper telescopic pipe and fix it to the bracket using the screws supplied (Fig.5C). Fix the lower telescopic pipe to the hood body (Fig.5/G).
Filter version
(sold separately)
The activated charcoal filter cannot be regenerated, therefore it must be replaced at least once every two months.
Insert the filter support bracket into its housing (Fig.4/A-B), fix it with the two screws supplied (Fig.4/C).
Installing the pipes
(for filter version only)
Mount the T connection (Fig.5/E) in the lower telescopic pipe with the screws supplied (Fig.5/D).
Fix the anchor bracket to the wall (Fig.5/B) at the desired height using wall plugs and screws supplied (Fig. 5/A).
Insert the upper telescopic pipe (Fig.5/P) into the lower telescopic pipe (Fig.5/F).
Position the lower telescopic pipe on the hood body. Lift up the upper telescopic pipe and fix it to the bracket using the screws supplied (Fig.5C). Fix the lower telescopic pipe to the hood body (Fig.5/G).
Electrical connection to the mains
Make sure the mains voltage is suitable for supplying the hood with power as shown on the plate inside the appliance.
Mount on the cable a compliant plug suitable for the load to be taken or, in the case of direct connection to the mains, arrange a compliant suitable bipolar switch between the mains and the appliance.
Functional control: check the motor ignition in the various speeds and the lighting.
Use of the hood
It is recommended to operate the hood just before starting any cooking operation and to leave it running after cooking for at least 15 minutes, and in any case until all smells have vanished.
User instructions:
The hood has the following functions (Fig.3):
A- Press the button to switch on the light. Press it again to switch off the light.
B-First suction speed button -ON/OFF
C- Second suction speed button
D- Third suction speed button
E- Timer. Press this button and the motor keeps working at the current speed for 15 minutes, then the hood switches off.
F- Aluminum and charcoal filters alarm:
After 40 hours of operation the hood moves to the alarm status with motor switched off and LED B of the first speed flashes, indicating that the aluminum filters must be cleaned. To RESET the alarm, press keys B and C contemporaneously with motor switched off.
After 120 hours of operation the hood moves to the alarm status with motor switched off and LED C of the second speed, indicating that the charcoal filters must be replaced (if the hood is in filtering version). To RESET the alarm, press keys B and D contemporaneously with motor switched off.
Spare lamp
The hood uses halogen lamps, mind you do not touch them with your hands when replacing them. Use a protection cloth to avoid direct contact with the skin, which could make the lamp unusable.
Remove the glass putting a screwdriver under it. Mount a lamp having the same characteristics as a more powerful one lamp can damage the electrical system seriously.
Metal anti-grease filter
It is necessary to wash the filters at least once a month with hot water and detergent. They can also be washed in the dishwasher. To remove them, just push the handle backwards, start cleaning and repeat the operation counterclockwise (Fig.2/A). To remove the aluminum filter (Fig.2/B), grab the opening tongue, pull it towards you and release it. To reinstall it, carry out the opposite operation.
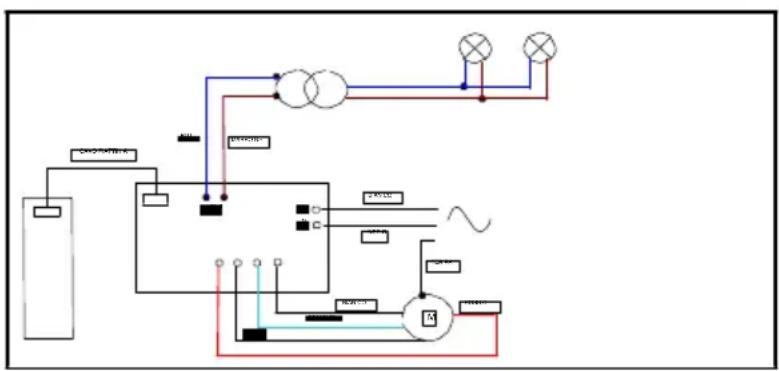
Wiring diagram