
PCHSMR 3052 - Beard trimmer ProfiCare - Free user manual and instructions
Find the device manual for free PCHSMR 3052 ProfiCare in PDF.
| Product type | Beard and hair trimmer with nose/ear attachment |
| Brand | ProfiCare |
| Model | PCHSMR 3052 (PC-HSM/R 3052 NE) |
| Power supply | AC adapter 100-240 V AC / Rechargeable NiMH battery 2 x 1.2 V, 600 mAh |
| Adapter output voltage | DC 3.0 V, 600 mA, 1.8 W max |
| Operating time | Approximately 45 minutes |
| Charging time | 8 hours (first charge: 10 hours) |
| Cutting lengths | 9 levels (3 mm – 16 mm) |
| Thinning function | Yes, by sliding the button |
| Removable trimmer head | Yes, for cleaning |
| Included accessories | Cutting comb, cleaning brush, charging base, adapter, nose/ear trimmer |
| Power supply for nose/ear trimmer | 1 AA 1.5 V battery (not included) |
| Net weight | Approximately 0.267 kg |
| Use | Private, non-professional |
| Cleaning | Cleaning brush, damp cloth; do not immerse |
| Safety | Use under supervision for children from 8 years; do not use if head is damaged |
| Spare parts | Use only original accessories; no user repair |
| Recycling | Removable battery for disposal; device complies with WEEE directive |
| Protection class | II (adapter) |
| Warranty | Not specified in manual; keep receipt |
Frequently Asked Questions - PCHSMR 3052 ProfiCare
User questions about PCHSMR 3052 ProfiCare
0 question about this device. Answer the ones you know or ask your own.
Ask a new question about this device
Download the instructions for your Beard trimmer in PDF format for free! Find your manual PCHSMR 3052 - ProfiCare and take your electronic device back in hand. On this page are published all the documents necessary for the use of your device. PCHSMR 3052 by ProfiCare.
USER MANUAL PCHSMR 3052 ProfiCare
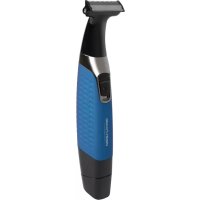
natural_image
Two black-and-blue electric toothbrushes with black and blue designs, one with a metallic tip and the other with a metallic tip (no visible text or symbols)Location of Controls Page 3
User manual......Page 66
Technical Specifications Page 75
Disposal Page 77
Język polski
Spis treści
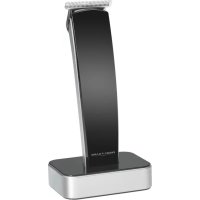
natural_image
Technical line drawings of a hairbrush and its accessories, including top, side, and side views (no text or labels)WAARSCHUWING Risico op letsels!
De scheerkop is vergrendeld in de behuizing.
Location of Controls
1= aprox. 3,0 mm
3= aprox. 6,0 mm
5= aprox. 10,0 mm
7= aprox. 13,0 mm
9= aprox. 16,0 mm
Cargar la unidad
Thank you for choosing our product. We hope you will enjoy using the appliance.
Symbols in these Instructions for Use
Important information for your safety is specially marked. It is essential to comply with these instructions in order to avoid accidents and prevent damage to the machine:

WARNING:
This warns you of dangers to your health and indicates possible injury risks.

CAUTION:
This refers to possible hazards to the machine or other objects

NOTE:
This highlights tips and information.
Notes
General Notes
Read the operating instructions carefully before putting the appliance into operation and keep the instructions including the warranty, the receipt and, if possible, the box with the internal packing. If you give this appliance to other people, please also pass on the operating instructions.
- The appliance is designed exclusively for private use and for the envisaged purpose. This appliance is not fit for commercial use.
- The power adapter is only suitable for use in dry rooms.
- Check if the output current, voltage and the polarity of the power adapter match the information on the connected appliance!
- Do not touch the connected power adapter with wet hands!
- When cleaning if necessary disconnect the appliance from the power adapter.
- Ensure that the cable of the power adapter does not become kinked, jammed, driven over or come into contact with heat sources.
- Do not use a damaged power adapter.
- The appliance and the mains lead have to be checked regularly for signs of damage. If
damage is found the appliance must not be used.
- Do not repair the appliance yourself, but visit an authorized specialist.
- Use only original spare parts.
- In order to ensure your children's safety, please keep all packaging (plastic bags, boxes, polystyrene etc.) out of their reach.

Warning!
Do not allow small children to play with the foil.
There is a danger of suffocation!
Special Safety Instructions for this Ap- pliance

Warning of electrical shock:
- Keep the appliance dry!
- Keep the power adapter dry.
- Do not charge the appliance in the vicinity of bathtubs, sinks, or other vessels containing water.
- If the appliance accidentally should fall into water, disconnect the power adapter from the wall socket immediately.

Warning of electrical shock:
- Charge the appliance in a cool and dry location.
- The appliance is intended for use with safety extra-low voltage. Connect only to a power supply according to the specifications on the rating label.
- If the connection cable of this appliance has been damaged, it must be replaced with a special connection cable available from the manufacturer or its customer service.
- Do not replace any parts. Do not perform any modifications. Risk of electric shock!

Warning: Risk of injury!
- Do not use the appliance if the clipper head is damaged.
- Never remove an attachment during operation!
English
- This appliance may be used by children, from the age of 8 and persons with reduced physical, sensory, or mental capabilities, or persons with inadequate experience and lack of knowledge if they are supervised or have been trained and understand the hazards involved concerning the safe use of the appliance.
• Children must not play with the appliance.
- Cleaning and user maintenance shall not be made by children without supervision.
- Do not use any power adapter other than the one supplied.
- Use the hair / beard trimmer only for trimming scalp hair or whiskers.
Handling Batteries/Rechargeable Batteries
 | Insert correctly! |
 | Do not short circuit! |
70 English
 | Do not disassemble! |
 | Danger of explosion! Do not expose batteries to intense heat, such as sunlight, fire or similar. |
Batteries can leak and lose battery acid. If the appliance is not used for long periods, remove the battery.
Location of Controls
1 Attachment comb
2 Thinning function
3 Cutting length adjustment
4 Indicator light
5 Charger socket
6 On/Off switch
7 Cutting length display
8 Clipper head
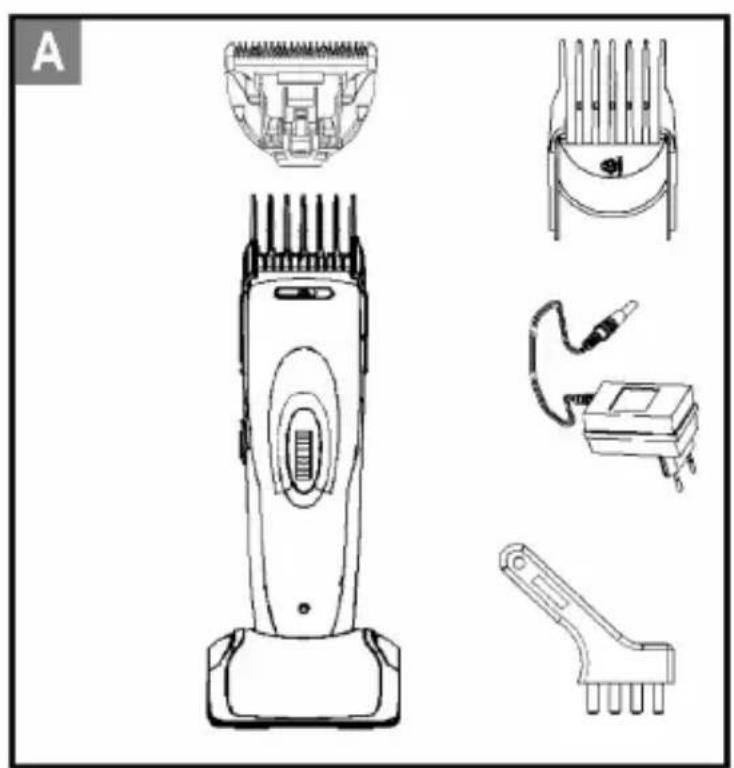
Accessories (Fig. A)
1 Clipper head
1 Hair clipper
1 Charging station/stand
1 Cutting length comb
1 Power adapter
1 Cleaning brush
Table: Cutting step versus cutting length
Cutting step Cutting length
1= approx. 3.0 mm
3= approx. 6.0 mm
5= approx. 10.0 mm
7= approx. 13.0 mm
9= approx. 16.0 mm
Charging the Unit
- Turn the unit off. "0" can be seen on the switch (6).
- Connect the power adaptor connector with one of the following jacks.
- The socket directly at the bottom end of the unit (5).
- Alternatively place the unit in the charging station. The socket is at the rear.
- Plug the power adaptor into a 230 V/50 Hz wall outlet.
- The indicator light remains red during the charging process.

NOTE:
The charge indicator does not indicate the state of charge of the rechargeable battery.
- Charge the unit before first use for 10 hours.

NOTE:
• After initial use, do not charge the battery for longer than 8 hours at one time.
- If the battery is empty, the appliance can be operated from the mains. To do so, connect the adapter directly to the clipper.

CAUTION:
After 8 hours always disconnect from mains power supply.
72 English
NOTE LIFETIME RECHARGEABLE BATTERY
You can extent the lifetime of the rechargeable battery by following these steps:
- Only charge after the battery is nearly exhausted.
- Do not charge for more than 8 hours.
- Charge the unit at temperatures between 0^ and +40^ .
Adjust Cutting Length
- Attach the cutting length comb.
- Set the desired cutting length:
i NOTE:
The cutting length comb can only be adjusted if the appliance is switched off.
- Increasing the cutting length? Turn the wheel (3) in the direction of the blade.
- Decreasing the cutting length? Turn the wheel (3) in the direction of the charger socket.
i NOTE:
You can read the setting from the display (7).
Cut Hair / Beard
- Select the cutting length.
- Switch the appliance on. "I" can be seen on the switch (6) and the indicator lamp lights up green.
i NOTE:
Start with the longest setting and cut your hair / beard in steps to the desired length.
Outlining and Shaving the Neck
- The clipper head allows precise outlining the shape of the beard, even in difficult to reach places as well as a clean shaving of the hairline at the neck.
- Turn the hair clipper off with the switch (6).
- Remove the cutting length comb (1) and turn the hair clipper on again.
Thinning function
- Slide the button (2) towards " 🔊". The blade is partly covered.
- Only the hairs which meet the blade first are cut.
- Slide the button towards " " to turn off the function.
Finish Operation
- Switch off the appliance. "0" can be seen on the switch (6).
Cleaning and Maintenance
- Regular cleaning and maintenance ensures optimum results and long lifetime.
- Turn the unit off and disconnect from mains power supply, if necessary.

WARNING:
- Do not submerge the unit in water.

CAUTION:
- Do not use a wire brush or other abrasives.
-
Do not use sharp or abrasive cleaning agents.
-
Use the cleaning brush to remove remaining hair after use.
- Remove the attachment comb (1).
Attach/Remove Clipper Head
The clipper head is locked to the casing.
- Slide the button (2) towards "○".
- Push back the clipper head with both thumbs to open the catch.
- Regularly apply 1 - 2 drops acid-free oil to the clipper head.
- Replace the clipper head after cleaning first at the bottom and then at the cutting area.
- Clean the casing with a slightly damp cloth, if necessary.
- Replace the attachment comb.
74 English
Nose and ear hair trimmer
Special safety instructions for this appliance
WARNING: Risk of injuries!
- Do not use the appliance if the shaving head, blade holder or blade are deformed or damaged!
- Do not remove the shaving head during operation!
- Do not introduce the appliance further into the nostril / auricle than to the narrow tip of the shaving head.
CAUTION:
- The shaving head and blade are precision-machined and must not to be exposed to heavy loading, impacts or similar.
- Do not put any sharp objects into the shaving head.
-
Protect the appliance from moisture or liquids.
-
This appliance is only meant for removing nose and ear hair. Do not use the appliance for any other purposes.
- Switch off the appliance before cleaning and removing the batteries.
Scope of delivery (without fig.)
1 Nose and ear hair trimmer
1 Transparent protection cap for the shaving head
Inserting of the battery (Battery is not included in the scope of delivery)
- Turn the lower cover towards " " and remove it.
- Insert a 1.5 V battery of the type MIGNON AA into the battery compartment. The positive pole (+) has to show towards the shaving head.
- Close the battery compartment again: Place the marker on the cover " " to the symbol " Turn the cover towards " " until it snaps audibly into place.
Usage
- Remove the transparent protection cap.
-
Slide the switch towards "OFF" in order to turn on the appliance.
-
When the switch snaps audibly into place, the appliance works continuously.
-
If you release the switch before it snaps audibly into place, the appliance will switch off again.
-
Guide the tip of the shaving head into the nostril or auricle.
WARNING:
Only remove the prominent nose or ear hair. Do not forcefully push the appliance into the nostril / auricle. You can hurt yourself when it is inserted too deep!
- Slide the switch back towards "ON" after usage in order to switch off the device.
- Clean the shaving head with the cleaning brush after usage.
- Put the transparent protection cap back on.
Cleaning
WARNING:
- Do not submerge the unit in water.
CAUTION:
- Do not use a wire brush or other abrasives.
-
Do not use sharp or abrasive cleaning agents.
-
Switch off the appliance before cleaning.
- Remove the battery from the battery compartment.
- Loosen the shaving head by turning it anticlockwise and remove it.
- Remove remaining hair from the blade holder using the cleaning brush. You can also blow off the remaining hair from the holder.
- Place the shaving head onto the blade holder again. Turn it tight clockwise until it snaps audibly into place.
- Put the transparent protection cap back on.
Noise emission
The workplace-related emission value is less than 70 dB(A).
Technical Specifications
Model: PC-HSM/R 3052 NE
Net weight incl. adapter: approx. 0.267 kg
76 English
Power adapter (Hair and beard clippers)
Protection class:....II
Power supply: AC 100-240 V, 50/60 Hz, 0.2 A max.
Output: DC 3.0 V, 600 mA, 1.8 W max.
Rechargeable battery (Hair and beard clippers): 2 x 1.2 V, 600 mAh NiMH
Run time: max. 45 minutes
Charging time: 8 hours
Battery (Nose and ear hair trimmer):....1x 1.5 V, Typ: MIGNON LR6, AA, UM3
Subject to change without prior notice!
This device complies with all current CE directives, such as electromagnetic compatibility and low voltage directive and is manufactured according to the latest safety regulations.
Remove / Dispose of Rechargeable Batteries
Hair and beard clippers
This unit is equipped with a rechargeable Ni-MH battery.
Remove the battery before disposing of the unit.
As a consumer you are legally bound to return exhausted batteries/rechargeable batteries.

WARNING:
Disconnect from mains power supply before removing the battery!
- Remove the 4 screws on the bottom of the housing with a small Philips head screw - driver.
- Separate both halves of the casing.
- Remove the rechargeable battery.
Return the battery at a collection point for batteries and/or hazardous waste. Ask your municipality for further information.
Nose and ear hair trimmer
- Remove the battery from the battery compartment.
- Dispose of the battery at an appropriate collection point or distributor. This product must not be disposed of in standard domestic refuse.
Disposal
Meaning of the "Wheelie Bin" Symbol
Take care of our environment, do not dispose of elec-trical appliances via the household waste.
Dispose of obsolete or defective electrical appliances via municipal collection points.
Please help to avoid potential environmental and health impacts through improper waste disposal.
You contribute to recycling and other forms of utilization of old electric and electronic appliances.
Your municipality provides you with information about collecting points.
CTC Clatronic Sp. z o.o
Ul. Brzeska 1
45-960 Opole
90 Język polski
Usuwanie
The Ground Truth image displays a single, solid horizontal line. According to Rule 2 (UNDERSCORE & LINE RULES), this is a stylistic or background line, not a placeholder underscore. Therefore, the OCR result must ignore it and output nothing or only meaningful text. The provided OCR content is "____", which consists of four underscores. This is an incorrect interpretation of the line as a placeholder, violating the rule that stylistic lines must be ignored. The OCR has hallucinated placeholder underscores where none exist in the GT. Hence, the OCR result is inconsistent with the Ground Truth.

- Język polski
- Spis treści
- WAARSCHUWING Risico op letsels!
- Location of Controls
- Cargar la unidad
- Symbols in these Instructions for Use
- WARNING:
- CAUTION:
- NOTE:
- Notes
- General Notes
- Warning!
- Special Safety Instructions for this Ap- pliance
- Warning of electrical shock:
- Warning: Risk of injury!
- English
- English
- Accessories (Fig. A)
- Table: Cutting step versus cutting length
- Cutting step Cutting length
- Charging the Unit
- English
- NOTE LIFETIME RECHARGEABLE BATTERY
- Adjust Cutting Length
- i NOTE:
- Cut Hair / Beard
- Outlining and Shaving the Neck
- Thinning function
- Finish Operation
- Cleaning and Maintenance
- Attach/Remove Clipper Head
- English
- Nose and ear hair trimmer
- Special safety instructions for this appliance
- WARNING: Risk of injuries!
- Scope of delivery (without fig.)
- Inserting of the battery (Battery is not included in the scope of delivery)
- Usage
- Cleaning
- Noise emission
- Technical Specifications
- English
- Remove / Dispose of Rechargeable Batteries
- Hair and beard clippers
- Disposal
- Meaning of the "Wheelie Bin" Symbol
- Język polski
- Usuwanie
Brand : ProfiCare
Model : PCHSMR 3052
Category : Beard trimmer