
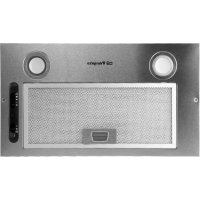
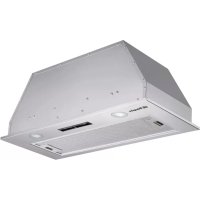
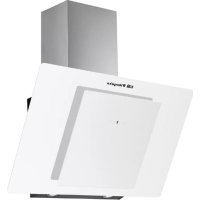
DS 74170 BL - Range hood Orbegozo - Free user manual and instructions
Find the device manual for free DS 74170 BL Orbegozo in PDF.
| Product type | Decorative cooker hood |
| Brand | Orbegozo |
| Model | DS 74170 BL |
| Power supply | 220-240 V ~ 50 Hz |
| Total nominal power | 105 W |
| Motor power | 109 W |
| Lighting | LED 2 W x 2 (removable) |
| Number of speeds | 3 (low, medium, high) |
| Exhaust duct diameter | 150 mm |
| Maximum air flow | ≥ 378 m³/h |
| Air pressure | ≥ 181 Pa |
| Noise level | ≤ 69 dB(A) |
| Minimum distance above cooking surface | 65-75 cm (65 cm for gas) |
| Installation type | External evacuation or recirculation (optional charcoal filter) |
| Grease filters | Metallic, dishwasher safe |
| Charcoal filter | Optional (not included), for recirculation mode |
| Filter maintenance | Every 2 weeks (grease); charcoal every 3-6 months |
| Bulb type | LED 2 W (replacement by a professional) |
| Material | Stainless steel and glass (estimate) |
| Child safety | Supervision required; keep packaging out of reach |
| Installation | Only by a qualified technician |
Frequently Asked Questions - DS 74170 BL Orbegozo
User questions about DS 74170 BL Orbegozo
0 question about this device. Answer the ones you know or ask your own.
Ask a new question about this device
Download the instructions for your Range hood in PDF format for free! Find your manual DS 74170 BL - Orbegozo and take your electronic device back in hand. On this page are published all the documents necessary for the use of your device. DS 74170 BL by Orbegozo.
USER MANUAL DS 74170 BL Orbegozo
Read this manual carefully before running this appliance and save it for reference in order to obtain the best results and ensure safe use.
- This appliance can be used by children aged from 8 years and above and persons with reduced physical, sensory or mental capabilities or lack of experience and knowledge if they have been given supervision or instruction concerning use of the appliance in a safe way and understand the hazards involved. Children must never play with the appliance. Cleaning and user maintenance must never be carried out by children without supervision.
- Children should be supervised to ensure that they do not play with the appliance.
- Keep the appliance and the cable cord out of the reach of children less than 8 years old.
- WARNING: In order to ensure your children's safety, please keep all packaging (plastic bags, boxes, polystyrene etc.) out of their reach.
- If the supply cord is damaged it must be repaired by the Authorized Service Agent in order to avoid hazards.
- Never pull on the cord when unplugging.
- Do not use the unit with a damaged cord or plug, or if it is not working properly.
- Do not handle the appliance with wet hands.
-
Never immerse the appliance in water or any other liquid.
-
Make sure the appliance has been unplugged before cleaning.
- This appliance must be installed following the national regulations for electrical installations.
- This appliance is for household use only.
- In case that you need a copy of the instruction manual, you can ask for it writing an email to sonifer@sonifer.es.
- WARNING: In case of misuse, there is a risk of possible injury.
- Please ask the technical person to do the assembling.
- The cooker hood and its filter mesh should be clean regularly in order to keep in good working order.
- Do not attempt to check the filters while the hood is in operation.
- Do not obstruct the ventilation slots for discharging the air.
- The manufacturer will not be held liable for damages caused by failure to follow the foregoing instructions.
- Ventilation should be provided convenient to the room if used simultaneously a sucker for kitchen and appliances powered by gas or other fuel.
- Risk of fire if the cleaning is not carried out according to instructions.
- Do not flambe under the hood.
-
CAUTION: Accessible parts may become hot when used with cooking appliances.
-
Exhaust air should not be sent by conductors used to evacuate fumes from equipment powered by gas or other fuel.
- The minimum distance between elements of cooking and the bottom of the hood must be at least 65 ~cm if the hood is installed on a gas cooking element. If the instructions for installation of gas cooking element to indicate a greater distance, should be taken into account. The distance of 65 ~cm cannot be reduced.
- The regulations regarding air evacuation must be respected.
NOTICE
- Thank you for choosing our cooker hood. Please read the instruction manual carefully before use.
- The installation work must be undertaken by a qualified and competent fitter.
- The manufacturer disclaims all liability for any damage or injury caused as a result of not following instructions for installation contained in the following text.
The cooker hood is used on 220-240V~50Hz.
FEATURE
- The cooker hood uses high quality materials, and is made with a streamlined design.
- Equipped with a large power low noise electric motor and centrifugal leaf, it produces strong suction, low noise, non stick grease filter and easy to clean.
- Special wind tunnel construction and oil collector design, free dirt will be absorbed in a second.
INSTALLATION
Outside vent
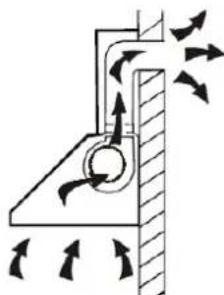
If you have an outlet to the outside, your cooker hood can be connected as below picture by an extraction duct.
- Before installation, turn the unit off and unplug it from the mains.
- The cooker hood should be place at a distance of 65-75cm above the cooking surface for best effect.
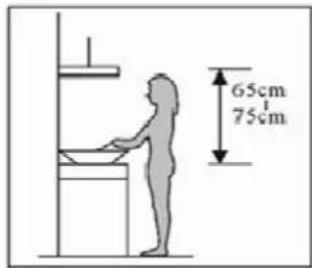
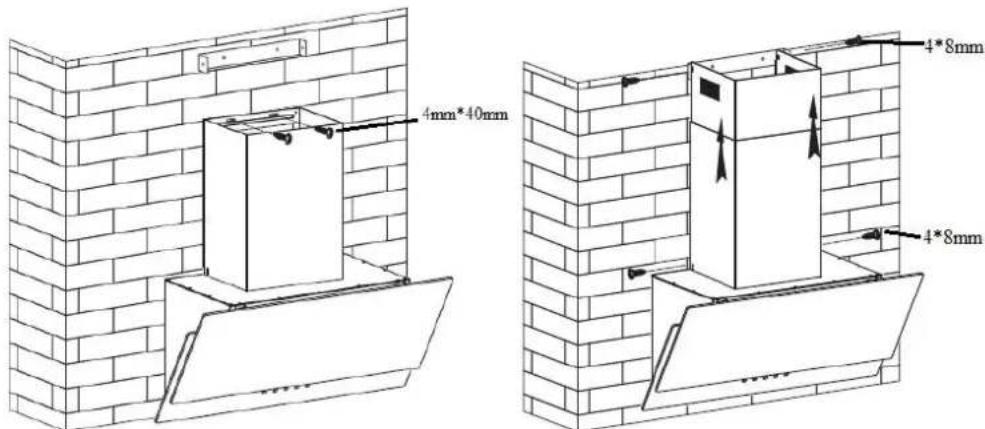
- After decide the cooker hood height, measure the position of the holes for hanging hood and inner chimney bracket. Drill 4 holes, 2 for inner chimney bracket and 2 for hanging the hood. Place the wall plugs and screw the screw to hang the hood not to the bottom. Hang the hood and screw the screws until the bottom. Screw the inner chimney bracket in its position.
- Place the exhaust pipe in air outlet of the hood, on the top. Adjust the exhaust pipe with a flange.
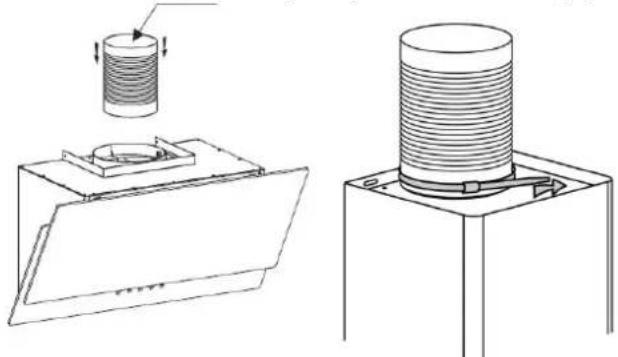
- For better assemble of the hood, you can fix to the wall with 2 inner screws. Remove the filter and mark the screw's position on the wall. Take down the hood and drill the holes, place the wall plugs and hang the hood again. Screw the hood to the wall with these security holes.
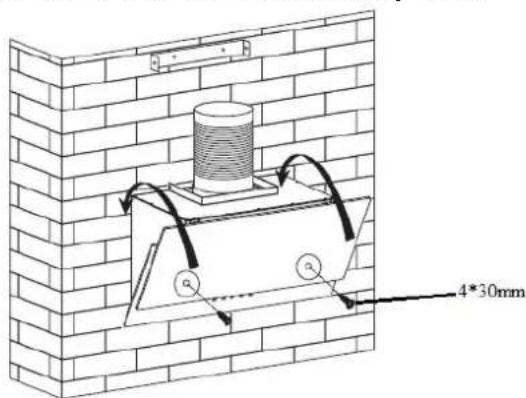
- Place the inner chimney inside the outer chimney. Screw the outer chimney bracket to the chimney. Drill two holes on the wall to place outer chimney bracket.
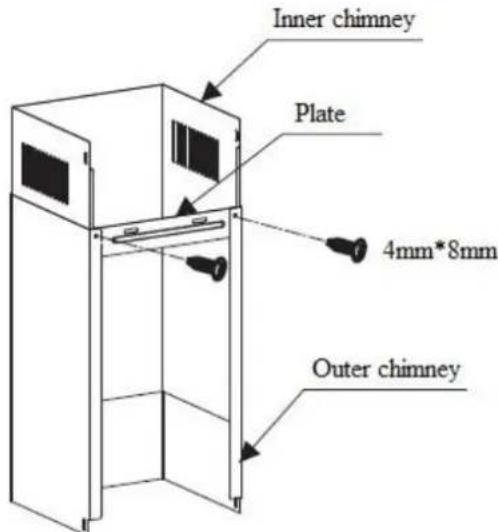
- Place the assembled chimney on the hood. Fix outer chimney bracket to the wall with screws. Conect the exhaust pipe to the exhausting hole. Move up the inner chimney to inner chimney bracket nad screw them.
Vent inside
If you do not have an outlet to the outside, the exhaust pipe is not required and the installation is similar to the one shown in the "INSTALLATION (VENT OUTSIDE)" section but you have to install carbon filter (not included) in the motor.
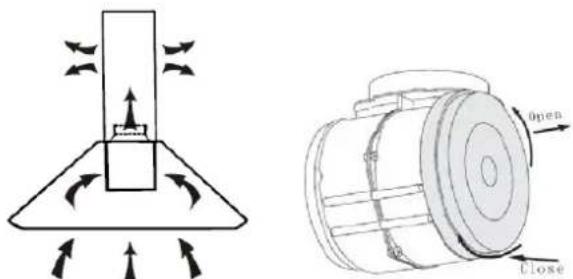
To put the carbon filter, place on the side of motor and turn until fit it. In order to install the activated carbon filter, the filter should be detached first. When activated carbon filters are attached, the suction power will be lowered.
OPERATION
How to use the control panel
- 0 button, press this button to switch off the hood.
- button, press this button to select low power.
- button, press this button to select medium power.
- button, press this button to select high power.
- button, press this button to turn on the light. Press it again to turn off.
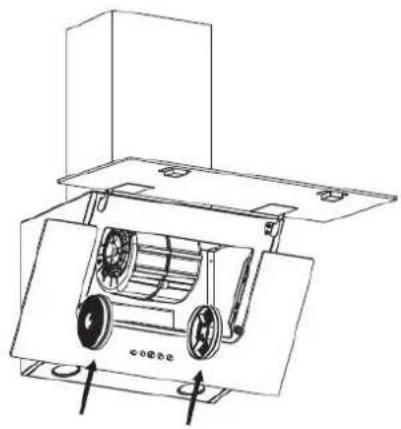
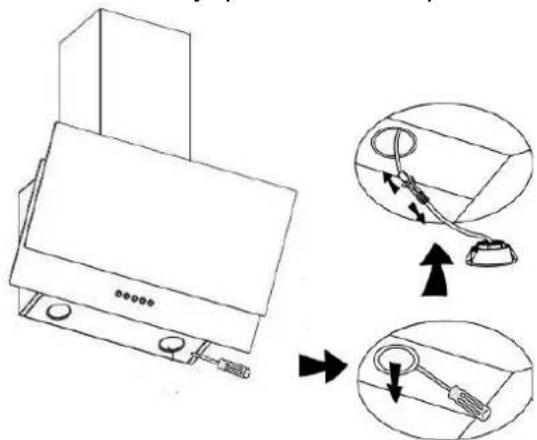
Bulb replacement
- Switch the unit off and pull out the plug first.
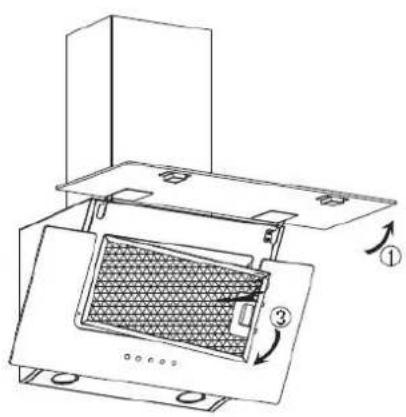
- Take out the filter and use the screw driver to take out the frame as the below pic showed.
- Replace with same type of bulb (LED 2W)
Note: Light replacement should be carried out by qualified service personnel only.
MAINTENANCE
Proper maintenance of the cooker Hood will assure proper performance of the unit. Before cleaning, switch the unit off and unplug the appliance.
- Regular cleaning. Use a soft cloth moistened with hand-warm mildly soapy water or household cleaning detergent. Never use metal pads, chemical, abrasive material or stiff brush to clean the unit.
- Cleaning for metallic anti-grease filters. Clean filters regularly, every two weeks, depending of usage, to prevent any risk of fire. The filters collect grease, smoke and dust, so the filters are directly affecting the
efficiency of the cooker hood. If not cleaned, the grease residue (potential flammable) will saturate on the filters. Clean it with household cleaning detergent and warm water.

PROBLEMS AND SOLUTIONS
| Problem | Cause | Solution | |
| Light on but motor does not work | The leaf blocked | Get rid of the blocking | |
| The capacitor damaged | Replace capacitor | ||
| The motor jammed bearing damaged | Replace the motor | ||
| Light does not work, motor does not work | Beside the above mentioned, check the following: | ||
| Light damaged | Replace lights | ||
| Power cord looses | Connect the wires as per the electric diagram | ||
| Oil leakage | One way valve and the air ventilation entrance are not tightly sealed | Take down the one way valve and seal with glue | |
| Leakage from the connection of U-shaped section and cover | Take U-shaped section down and seal with soap or Paint | ||
| Shake of the body | The leaf damage and causes shaking | Replace the leaf | |
| The motor is not tightly hanged | Lock the motor tightly | ||
| The body is not tightly hanged | Fixed the body tightly | ||
| Insufficient suction | The distance between the body and the gas top too long | Readjust the distance | |
| Too much ventilation from open doors or windows | Choose a new place and resemble the machine | ||
| The Hood inclines | The fixing screws are not tight enough | Tighten the hanging screw and make it horizontal | |
| The hanging screw is not tight enough | Tighten the hanging screw and make it horizontal | ||
ELECTRICAL DIAGRAM.
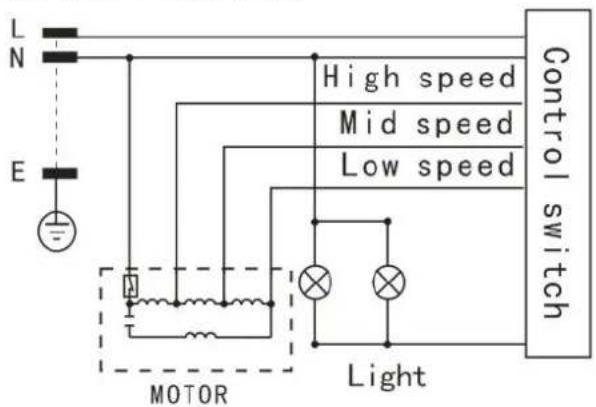
AC 220-240V/50Hz
MAIN PARAMETERS
| Rated Input | 220V-240V, 50Hz |
| Rated Power | 105W |
| Lighting Power | 2WX2 |
| Motor Power | 109W |
| Drive Mode | Single Motor |
| Speed | Speed I Speed II Speed III |
| Air tube diameter | 150MM |
| Air output | ≥378m3/h |
| Air pressure | ≥181Pa |
| Noise | ≤69dB(A) |
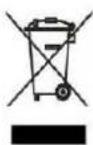
Disposal of old electrical appliances.
The European directive 2002/96/EC on Waste Electrical and Electronic Equipment (WEEE), requires that old household electrical appliances must not be disposed of in the normal unsorted municipal waste stream. Old appliances must be collected separately in order to optimize the
recovery and recycling of the materials they contain, and reduce the impact on human health and the environment.
The crossed out "wheeled bin" symbol on the product reminds you of your obligation, that when you dispose of the appliance, it must be separately collected.
Consumers should contact their local authority or retailer for information concerning the correct disposal of their old appliance.
DECLARATION OF CONFORMITY: This device complies with the requirements of the Low Voltage
Directive 2014/35/EU and the requirements of the EMC directive 2014/30/EU.
FRANÇAIS
AVIS DE SECURITE


Brand : Orbegozo
Model : DS 74170 BL
Category : Range hood