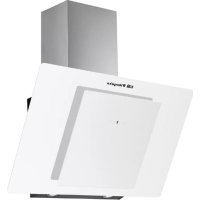
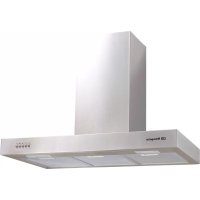
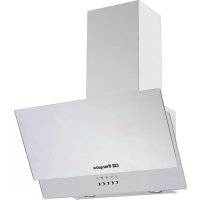
DS 75160 BL - Basket Orbegozo - Free user manual and instructions
Find the device manual for free DS 75160 BL Orbegozo in PDF.



| Brand | Orbegozo |
| Model | DS 75160 BL |
| Product type | Decorative wall hood |
| Width | 75 cm |
| Minimum distance from cooking surface | 65 cm (for gas cooking, may vary according to instructions) |
| Control type | 4-button touch control |
| Number of speeds | 3 (low, medium, high) |
| Lighting | Built-in LED |
| Grease filter | Manually washable metal filter (do not wash in dishwasher) |
| Charcoal filter | Optional (not supplied), to be changed annually |
| Timer | Adjustable automatic shut-off (5 minutes) |
| Exhaust type | External (duct Ø150 mm) or recirculation with charcoal filter |
| Power supply | 220-240 V ~ 50 Hz |
| Regular maintenance | Monthly cleaning of grease filter, yearly replacement of charcoal filter (if used) |
| Safety | Never flambé under the hood, monitor frying, minimum safety distance |
| Installation | By a qualified technician, compliance with national electrical standards |
| Repairability | Approved technical service for replacement of parts (LED, filter, etc.) |
Frequently Asked Questions - DS 75160 BL Orbegozo
User questions about DS 75160 BL Orbegozo
0 question about this device. Answer the ones you know or ask your own.
Ask a new question about this device
Download the instructions for your Basket in PDF format for free! Find your manual DS 75160 BL - Orbegozo and take your electronic device back in hand. On this page are published all the documents necessary for the use of your device. DS 75160 BL by Orbegozo.
USER MANUAL DS 75160 BL Orbegozo
natural_image
Two 3D-rendered geometric objects with layered surfaces, one white and one black, against a plain background (no text or symbols)DS 75XXX BL.N/DS 80XXX BL.N
Sonifer,S.A.
Read this manual carefully before running this appliance and save it for reference in order to obtain the best results and ensure safe use.
natural_image
Diagram of a mechanical or fluidic system with directional arrows indicating flow or movement (no text or symbols)natural_image
Hand holding a plug inserted into an electrical outlet (no text or symbols visible)natural_image
Isometric line drawing of a brick wall with internal components and directional arrows indicating construction or movement (no text or symbols)natural_image
Pure geometric diagram showing intersecting planes and dashed lines without any text, numbers, or symbolsnatural_image
Diagram showing a brick wall with two electrical outlets and a box on a base, with an arrow indicating rotation (no text or symbols)natural_image
Diagram showing a coiled pipe being inserted into a housing, with an arrow indicating the process (no text or symbols present)natural_image
Line drawing of a brick chimney mounted on a wall, with no text or symbols present.natural_image
Diagram of a mechanical or fluid system with directional arrows and a central block, no text or symbols present.natural_image
Two-step diagram showing a hand pressing down on a flat surface with an arrow indicating direction (no text or symbols)natural_image
Technical line drawing of a mechanical component with no visible text or symbolsAvisos:
-
This appliance can be used by children aged from 8 years and above and persons with reduced physical, sensory or mental capabilities or lack of experience and knowledge if they have been given supervision or instruction concerning use of the appliance in a safe way and understand the hazards involved. Children must never play with the appliance. Cleaning and user maintenance must never be carried out by children without supervision.
-
Children should be supervised to ensure that they do not play with the appliance.
-
Keep the appliance and the cable cord out of the reach of children less than 8 years old.
-
WARNING: In order to ensure your children's safety, please keep all packaging (plastic bags, boxes, polystyrene etc.) out of their reach.
-
If the supply cord is damaged it must be repaired by the Authorized Service Agent.
-
Never pull on the cord when unplugging.
-
Do not use the unit with a damaged cord or plug, or if it is not working properly.
-
Do not handle the appliance with wet hands.
-
Never immerse the appliance in water or any other liquid.
-
Make sure the appliance has been unplugged before cleaning.
-
This appliance must be installed following the national regulations for electrical installations.
-
This appliance is for household use only .
-
In case that you need a copy of the instruction manual, you can ask for it writing an email to sonifer@sonifer.es.
-
WARNING: In case of misuse, there is a risk of possible injury.
- The cooking vapors must not be discharged into a flue used for venting combustion fumes or gases, nor into a duct used as a flue for rooms in which open flame appliances are installed. The installation for the discharge of the vapors must comply with all local and national codes and safety standards. If the hood is being used in the outdoor vented mode where other vented fuel-burning appliances are installed, you must check to make sure that there is a sufficient supply of air to the room.
- Never let the children operate the machine
- The cooker hood is for home use only, not suitable for barbecue, Roast shop and other commercial purpose.
- Please ask the technical person to do the assembling.
- The cooker hood and its filter mesh should be clean regularly in order to keep in good working order.
- Before cleaning, please switch the power off at the main supply.
- Clean the cooker hood according to the instruction manual and keep the cooker hood from the danger of burning.
- If there is any fault with the appliance, please call the service department to arrange a service engineer.
- If the supply cord is damaged it must be repaired by its manufacturer, its Service Agent or a similarly qualified person in order to avoid a hazard.
- This appliance must be installed following the national regulations for electrical installations.
- Do not attempt to check the filters while the hood is in operation.
- Do not obstruct the ventilation slots for discharging the air.
- Do not touch the lamps or the lamp diffusers after prolonged use of the hood.
- Flambéing food beneath the hood is strictly prohibited.
- Avoid using and open flame, as it could damage the filters and increase the risk of fire.
- Never leave frying food unattended to prevent hot oil from catching fire.
- Before performing any maintenance, disconnect the hood from the electrical mains.
- The manufacturer will not be held liable for damages caused by failure to follow the foregoing instructions.
- Exhaust air should not be sent by conductors used to evacuate fumes from equipment powered by gas or other fuel.
- The minimum distance between elements of cooking and the bottom of the hood must be at least 65cm if the hood is installed on a gas cooking element. If the instructions for installation of gas cooking element to indicate a greater distance, should be taken into account. The distance of 65cm cannot be reduced.
- The regulations regarding air evacuation must be respected.
INSTALLATION
Preparation of installation
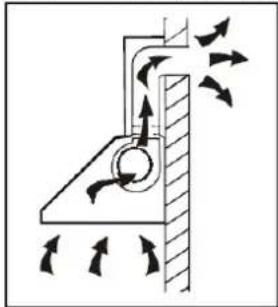
a. If you have an outlet to the outside, your cooker hood can be connected as below picture by means of an extraction duct (enamel, aluminum, flexible pipe with and interior diameter of 150mm).
natural_image
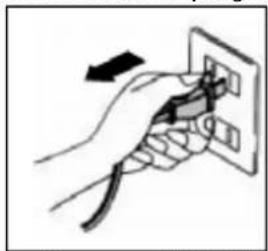
Diagram of a mechanical or fluidic system with directional arrows indicating flow or movement (no text or symbols present)b. Before installation, turn off the cooker hood and unplug it from the outlet.
natural_image
Hand holding a plug inserted into an electrical outlet, with an arrow indicating direction (no text or symbols)c. The cooker hood should be placed at a distance of 65-75cm above cooking surface for best effect.
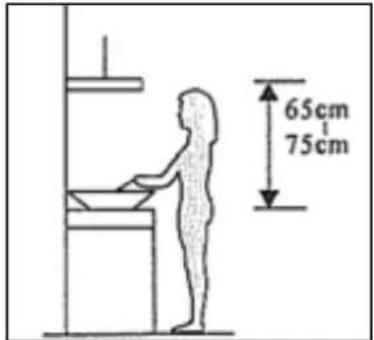
Installation (outlet to outside)
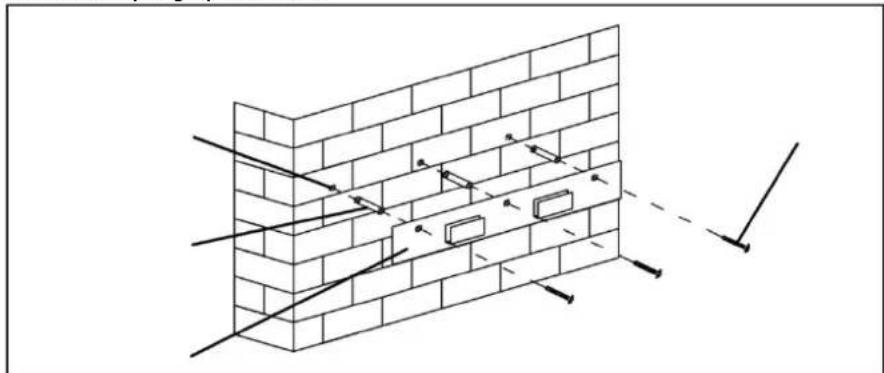
- Drill 3x8mm holes to accommodate the bracket. Screw and tighten the bracket onto the wall with the screws and screw plugs provided.
natural_image
Isometric line drawing of a brick wall with embedded rectangular openings and diagonal lines indicating construction or alignment (no text or symbols)- Your model DS 75XXX/DS 80XXX needs to make 4x8mm holes more, place the hood in bracket, mark the 4 points as the below picture shows, remove the hood and drill the holes. Place the screw plug.
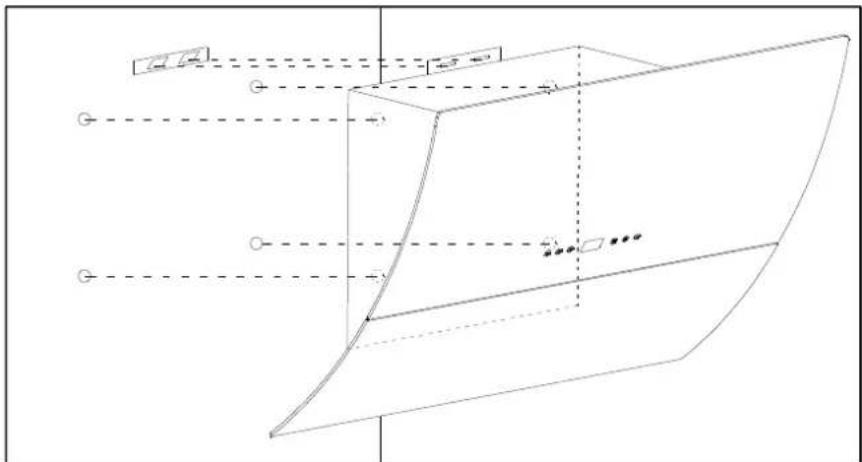
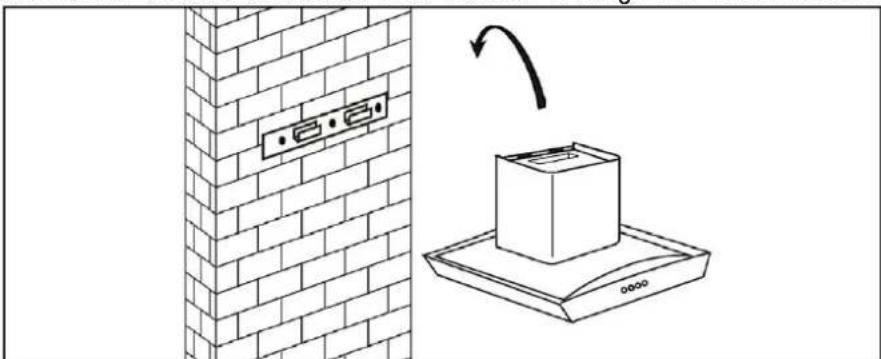
- Hang the hood on wall bracket and screw it to the wall through the 4 holes drilled before.
natural_image
Diagram showing a brick wall corner with electrical outlets and a 3D box mounted on a base, with an arrow indicating rotation (no text or symbols)- Fix reducer to the hood. Then place the extraction's tube in the reducer as below picture shows.
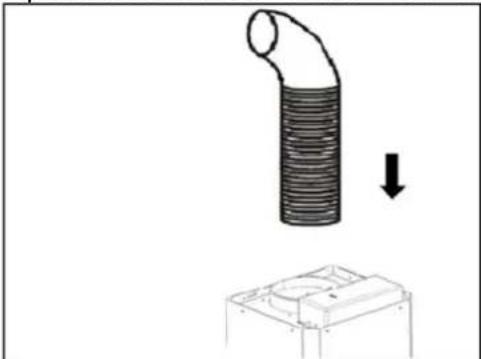
natural_image
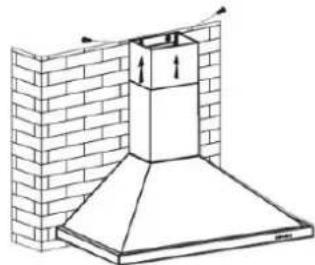
Diagram showing a cylindrical pipe being lifted by a downward arrow into a mechanical housing (no text or symbols)- Assembly of outer chimney: outer chimney is assembled with two provided plates, one plane and other in "U". Put top chimney in bottom chimney and screw plane plate in bottom chimney as it is shown in below picture.
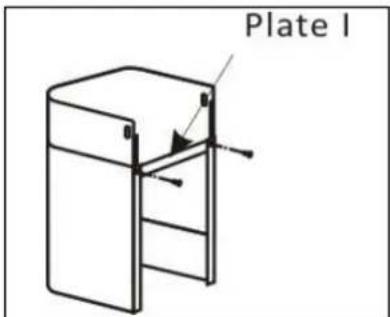
- Installation of chimney: put it on the hood and screw it to the flanges which are on top side of hood.
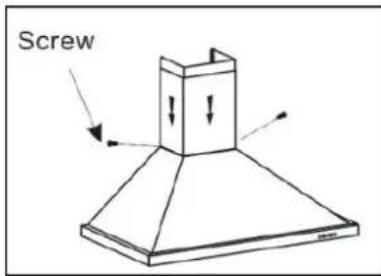
- Place "U" plate on desired height, mark and drill two holes on the wall, put the screw plugs and screw the plate to the wall.
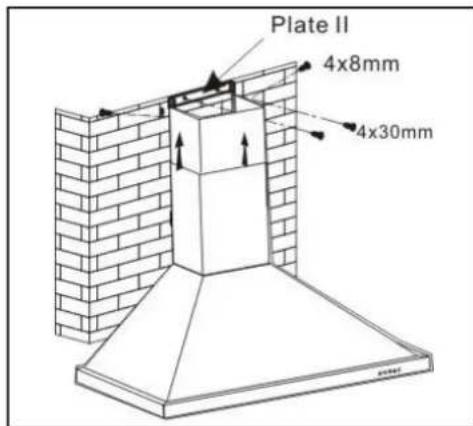
- Go up the top chimney until "U" plate and screw top chimney to "U" plate.
natural_image
Line drawing of a brick chimney mounted on a wall, with directional arrows indicating airflow or movement (no text or symbols)Installation (vent inside)
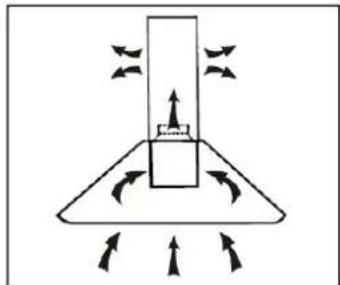
If you don't have outlet to outside, the extractor tube will not be necessary and the installation will be as previous section.
natural_image
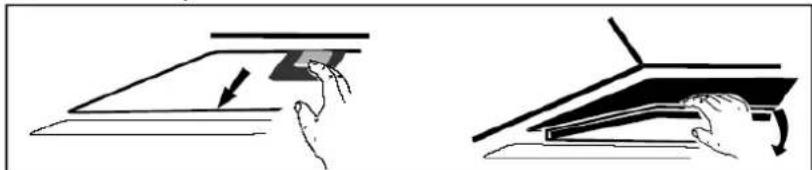
Diagram of a conical structure with directional arrows indicating force or movement (no text or symbols)The carbon filter (not provided) can be used to avoid odors. To install carbon filter, first you should remove grease filter. Pulse block button and pull.
natural_image
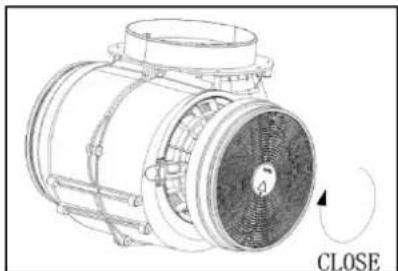
Two-step diagram showing a hand pressing down on a flat surface with an arrow indicating direction (no text or symbols)Place the carbon filter in the motor as below picture shows and turn it until sound "click". Do the same on the other side.
natural_image
Technical line drawing of a mechanical component with no visible text or symbolsAdvices:
- Ensure carbon filter is well placed. Otherwise, it can fall and damages the hood.
- When the carbon filter is placed, the suction power will be lower.
TOUCH CONTROL

ON/OFF: turn on and turn off the motor.
+Speed up: pulse it to increase the suction power of the hood.
Speed down: pulse it to reduce the suction power of the Hood.
Light.
8 Display digital: it will show the speed of motor: 1, low; 2, middle; 3, high; 4, very high (only available in models DS 80170 y DS 80190).
Auto-off: keep pushed the buttons + y — for 1 second, the display will twinkle and will start a countdown of 5 minutes. After 5 minutes, the motor and light will turn off automatically and will sound a whistle.
MAINTENANCE
Before cleaning the hood, ensure it is turned off and unplugged.
Cleaning of hood's outer
Use a soft cloth dampened with water and soft soap or domestic detergent. Never use metal scourer, abrasive products or hard brush to clean it, it could scrape.
Monthly cleaning of grease filter
IMPORTANT: clean the filter each month to avoid risk of fire.
The filter collect grease, smoke and dust, so efficiency of hood depends on state of filter. If it is not clean, the wastes of grease (potentially flammable) will block the filter. Remove it and immerse in water with soap or detergent. After that, rinse and leave drying. Grease filter cannot be clean in dishwasher.
Annual change of carbon filter
Apply only to vent inside hood (not connected to outlet outside). This filter traps the odors and should be changed once a year at least, depending how frequently you use the hood.
Change a light
This hood has LED light, therefore it is not probable to fail, in the case it happens, check with assistant service to provide you the suitable spare part.
TROUBLESHOOTING
| Trouble | Cause | Solution |
| The light turn on but the motor doesn’t work. | The blade of fan is block. | Turn off the Hood and take it to technical service to fix it. |
| The motor is damaged. | ||
| Motor and light don’t work. | The cord is not plug. | Plug the cord to mains. |
| Serious vibration in the unit. | The blade of motor is damaged. | Turn off the hood and take it to technical service. |
| Motor is not adjusted firmly. | Turn off the hood and take it to technical service. | |
| The Hood is not well hung on the bracket. | Get down the hood and check if bracket is well located. | |
| Suction performance | Too much distance between the hood and cooking surface. | Readjust the distance to 65-75cm. |
Disposal of old electrical appliances.
The European directive 2002/96/EC on Waste Electrical and Electronic Equipment (WEEE), requires that old household electrical appliances must not be disposed of in the normal unsorted municipal waste stream. Old appliances must be collected separately in order to optimize the recovery and recycling of the materials they contain, and reduce the impact on human health and the environment.
The crossed out “wheeled bin” symbol on the product reminds you of your obligation, that when you dispose of the appliance, it must be separately collected.
DECLARATION OF CONFORMITY:
This device complies with the requirements of the Low Voltage Directive 2006/95/EC and the requirements of the EMC directive 2004/108/EC.
FRANÇAIS
AVIS DE SÉCURITÉ
natural_image
Diagram of a mechanical or fluidic system with directional arrows indicating flow or movement (no text or symbols)natural_image
Hand holding a plug inserted into an electrical outlet (no text or symbols visible)natural_image
Diagram showing a brick wall corner with electrical outlets and a 3D box mounted on a base, with an arrow indicating rotation (no text or symbols)natural_image
Diagram showing a cylindrical pipe being lifted by a downward arrow into a box (no text or symbols)natural_image
Line drawing of a brick chimney mounted on a wall, showing structural details without any text or symbols.natural_image
Diagram of a mechanical or fluid system with directional arrows and a central block, no text or symbols present.natural_image
Illustration showing two hand-drawn diagrams of a mechanical or architectural component, one with an arrow and the other with a curved handle (no text or symbols)natural_image
Technical line drawing of a mechanical component with no visible text or symbolsConseils:
natural_image
Diagram of a mechanical or fluidic system with directional arrows indicating flow or movement (no text or symbols)natural_image
Hand holding a plug inserted into an electrical outlet (no text or symbols visible)natural_image
Diagram of a brick wall with internal rectangular openings and diagonal lines, no text or symbols presentnatural_image
Diagram showing a brick wall with electrical outlets and a box on a base, with an arrow indicating rotation (no text or symbols)natural_image
Diagram showing a cylindrical pipe being lifted by a downward arrow into a 3D box (no text or symbols)natural_image
Line drawing of a chimney mounted on a brick wall, no text or symbols presentnatural_image
Diagram of a conical object with directional arrows indicating motion or force, no text or symbols presentnatural_image
Two-step diagram showing hand positioning of a laptop with a scroll, no text or symbols presentnatural_image
Technical line drawing of a mechanical component with no visible text or symbolsDicas:
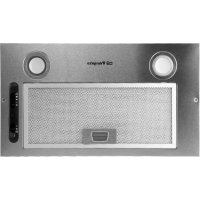
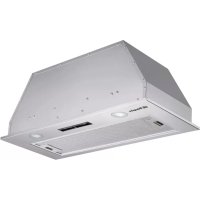
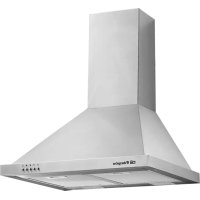
Brand : Orbegozo
Model : DS 75160 BL
Category : Basket