BTPD001 - Drill Batavia - Free user manual and instructions
Find the device manual for free BTPD001 Batavia in PDF.

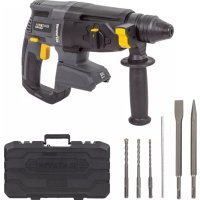
| Product type | Hammer drill |
| Brand | Batavia |
| Model | BTPD001 |
| Mains voltage | 230 V ~ 50 Hz |
| Rated power | 420 W |
| No-load speed | 0 - 1500 min⁻¹ |
| Impact rate | 0 - 6600 min⁻¹ |
| Chuck capacity | 1.5 - 13 mm |
| Drilling capacity (wood) | 20 mm |
| Drilling capacity (concrete) | 10 mm |
| Drilling capacity (metal) | 13 mm |
| Weight | 1.3 kg |
| Protection class | II (double insulation) |
| Sound pressure level (LₚA) | 87.5 dB(A) (K=3 dB) |
| Sound power level (LₚW) | 98.5 dB(A) (K=3 dB) |
| Vibration (main handle) | 10.768 m/s² (K=1.5 m/s²) |
| Functions | Drilling, hammer drilling |
| Speed variation | Electronic (trigger) |
| Rotation direction | Reversible left/right |
| Drill bit fixing system | SDS+ and keyed chuck (with adapter) |
| Auxiliary handle | Yes, adjustable |
| Depth stop | Yes, adjustable |
| Warranty | 2 years |
Frequently Asked Questions - BTPD001 Batavia
User questions about BTPD001 Batavia
0 question about this device. Answer the ones you know or ask your own.
Ask a new question about this device
Download the instructions for your Drill in PDF format for free! Find your manual BTPD001 - Batavia and take your electronic device back in hand. On this page are published all the documents necessary for the use of your device. BTPD001 by Batavia.
USER MANUAL BTPD001 Batavia
Operating instructions
Gebruiksaanwijzing
Mode d'emploi
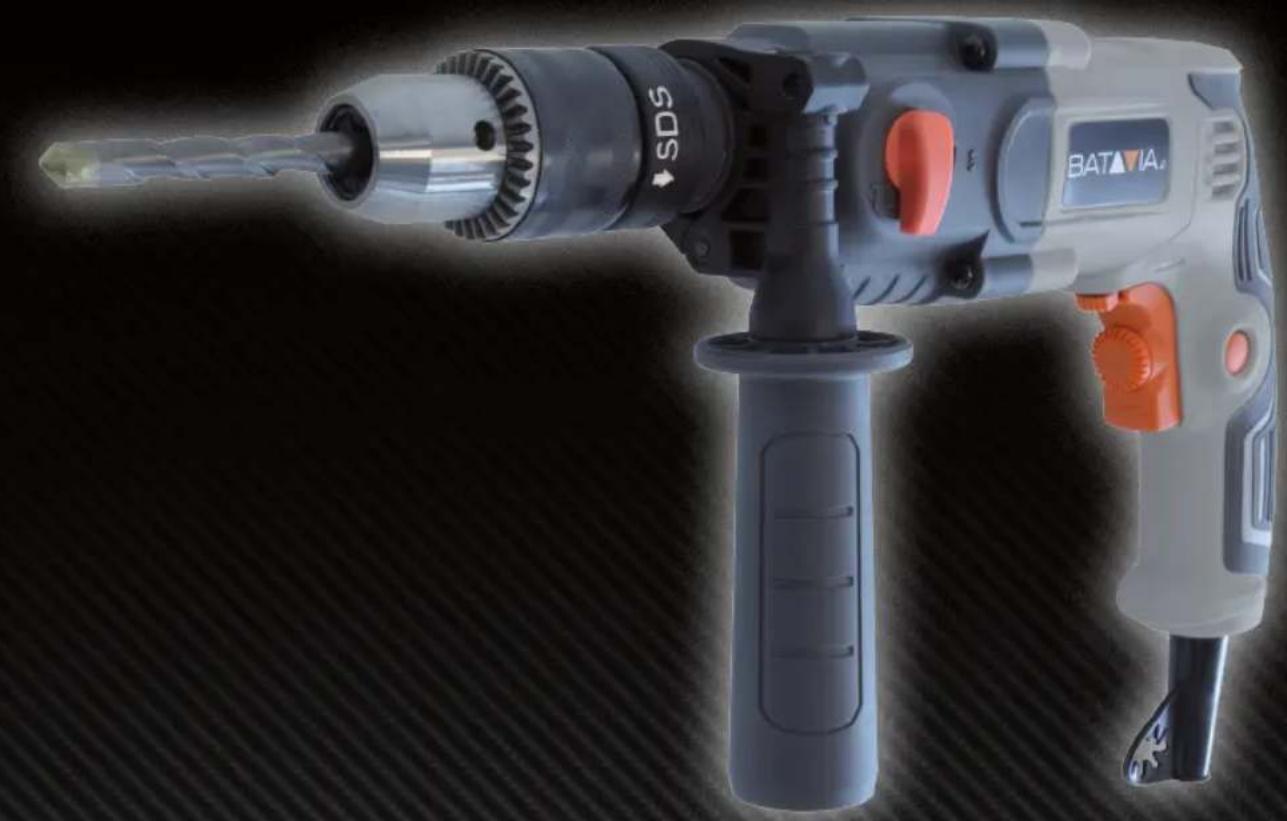
natural_image
Exterior view of a Batavia electric drill with visible tool handle and grip (no text or symbols on the device itself)Modell-Nr. BT-PD001
Art.Nr. 7062052
Bohrhammer
Rotary hammer
| Overview | Page 4 + 5 |
| Safety Notes | Page 13 |
| Operating | Page 15 |
| Auxiliary handgrip | Page 15 |
| Exchanging and removing drill bits | Page 16 |
| Setting depth gauge | Page 16 |
| Function selection switch | Page 16 |
| The On/Off switch | Page 16 |
| Adjusting of the maximum rotation speed | Page 16 |
| Switching the direction of rotation | Page 17 |
| Hammer drilling in concrete or brick | Page 17 |
| Maintenance and cleaning | Page 17 |
| Technical Data | Page 18 |
INHOUDSOPGAVE
- Right/Left selection switch
- On/Off switch
- Speed control
- Lock on button
- Mode selection button
- Auxiliary handle
- Locking sleeve
- Chuck
- Ventilation holes
OVERZICHT
natural_image
Close-up of hands assembling a mechanical gear component with a metal handle (no visible text or symbols)Instruction manuals provide valuable hints for using your new device. They enable you to use all functions, and they help you avoid misunderstandings and prevent damage. Please take the time to read this manual carefully and keep it for future reference.
GENERAL SAFETY INSTRUCTIONS FOR POWER TOOLS

WARNING! Read all instructions Failure to follow all instructions listed below may result in electric
shock, fire and/or serious injury.
The term “power tool” in all of the warnings listed below refers to your mains operated (corded) power tool or battery operated (cordless) power tool.
Save these instructions for future reference!
- Work area
a. Keep work area clean and well lit. Cluttered and dark areas invite accidents.
b. Do not operate power tools in explosive atmospheres, such as in the presence of flammable liquids, gases or dust.
Power tools create sparks which may ignite the dust of fumes.
c. Keep children and bystanders away while operating a power tool.
Distractions can cause you to lose control.
- Electrical safety
a. Power tool plugs must match the outlet. Never modify the plug in any way. Do not use any adapter plugs which earthed (grounded) power tools.
Unmodified plugs and matching outlets will reduce risk of electric shock.
b. Avoid body contact with earthed or grounded surfaces such as pipes, radiators, ranges and refrigerators.
There is an increased risk of electric shock if your body is earthed or grounded.
c. Do not expose power tools to rain or wet conditions.
Water entering a power tool will increase the risk of electric shock.
d. Do not abuse the cord. Never use the cord for carrying, pulling or unplugging the power tool. Keep cord away from heat, oil, sharp edges or moving parts.
Damaged or entangled cords increase the risk of electric shock.
e. When operating a power tool outdoors, use an extension cord suitable for outdoor use.
Use of a cord suitable for outdoor use reduces the risk of electric shock.
f. Always use tool in conjunction with a residual circuit breaker device.
The use of a residual circuit breaker device reduces the risk of electric shock.
- Personal safety
a. Stay alert, watch what you are doing and use common sense when operating a power tool. Do not use a power tool while you are tired or under the influence of drugs, alcohol or medication.
A moment of inattention while operating power tools may result in serious personal injury.
b. Use safety equipment. Always wear eye protection.
Safety equipment such as dust mask, non-skid safety shoes, hard hat, or hearing protection used for appropriate conditions will reduce personal injuries.
c. Avoid accidental starting. Ensure the switch is in the off position before plugging in.
Carrying power tools with your finger on the switch or plugging in power tools that have the switch on invites accidents.
d. Remove any adjusting key or wrench before turning the power tool on.
A wrench or a key left attached to a rotating part of the power tool may result in personal injury.
English
e. Do not overreach. Keep proper footing and balance at all times.
This enables better control of the power tool in unexpected situations.
f. Dress properly. Do not wear loose clothing or jewellery. Keep your hair, clothing and gloves away from moving parts.
Loose clothes, jewellery or long hair can be caught in moving parts.
g. If devices are provided for the connection of dust extraction and collection facilities, ensure these are connected and properly used.
The use of these pieces of equipment reduce hazards caused by dust.
4. Power tool use and care
a. Do not force the power tool. Use the correct power tool for your application.
The correct power tool will do the job better and safer at the rate for which it was designed.
b. Do not use the power tool if the switch does not turn it on and off.
Any power tool that cannot be controlled with the switch is dangerous and must be repaired.
c. Disconnect the plug from the power source before making any adjustments, changing accessories, or storing power tools.
Such preventive safety measures reduce the risk of starting the power tool accidentally.
d. Store idle power tools out of the reach of children and do not allow persons unfamiliar with the power tool or these instructions to operate the power tool.
Power tools are dangerous in the hands of untrained users.
e. Maintain power tools. Check for misalignment or binding of moving parts, breakage of parts and any other condition that may affect the power tools operation. If damaged, have the power tool repaired before use.
Many accidents are caused by poorly maintained power tools.
f. Keep cutting tools sharp and clean.
Properly maintained cutting tools with sharp cutting edges are less likely to bind and are easier to control.
g. Use the power tool, accessories and tool bits etc., in accordance with these instructions and in the manner intended for the particular type of power tool, taking into account the working conditions and the work to be performed.
Use of the power tool for operations different from intended could result in a hazardous situation.
5. Service
a. Please use a qualified expert who uses original replacement parts to repair your power tool. This will ensure proper functioning of the power tool.
SAFETY INSTRUCTIONS FOR ROTARY HAMMERS
Explanation of the symbols

Denotes risk of personal injury, loss of life or damage to the tool in case of non-observance of the instructions in this manual.

Indicates electrical shock hazard.

Wear ear and eye protection.

Wear a dust mask. Working with wood, metals and other materials may produce dust that is harmful to health. Do not work with material containing asbestos.
Specific safety instructions
For use of this machine/tool:
- Inspect the surface to be drilled for hidden electrical wiring, gas pipes or other obstacles (for example, using a metal detector).
- Check the following points:
- Does the appliance's voltage corre-
spond with the mains power supply voltage?
- Are power cords, insulation and plug in good order: sound, not loose or damaged?
- Is there a good, firm connection at the mains socket?
- Does the drill show any sign of abnormal running, overheating or excessive sparking?
-
Whenever any of the problems mentioned above appear, immediately cease using the machine and have it repaired by an expert.
-
Wear ear protectors. Exposure to noise can cause hearing loss.
- Use auxiliary handles supplied with the tool. Loss of control can cause personal injury.
Hold power tool by insulated gripping surfaces, when performing an operation where the cutting accessory may contact hidden wiring or its own cord. Cutting accessory contacting a "live" wire may make exposed metal parts of the power tool "live" and give the operator an electric shock.
Electrical safety
When using electric machines always observe the safety regulations applicable in your country to reduce the risk of fire, electric shock and personal injury. Read the following safety instructions and also the enclosed safety instructions.

Always check that the mains voltage is the same as on the type plate of the machine.

Class II machine - Double insulation - You don't need any earthed plug.
Replacement of power cords or plugs
Immediately dispose of old cords and plugs once they have been replaced.
It is dangerous to plug a loose power cord into a mains power socket.
Use of extension leads
Only ever use approved extension leads that are suitable for the power rating of the machine. The minimum core thickness is 1.5 mm2. Whenever using a reel extension lead, always fully unroll the lead.
Immediately switch off the machine when:
- Excessive sparking of the carbon brushes and verticiliosis in the collector.
- Interruption of the mains plug, mains lead or mains lead damage.
- Defect switch
- Smoke or stench of scorched isolation
OPERATING

Hammer drills require very little operator pressure. Excessive pressure on the tool can lead to unnecessary overheating of the motor, and burning of the driven tool.
AUXILIARY HANDGRIP
The auxiliary handgrip can be rotated 360° around the drill head, enabling safe and comfortable operation, for both left and right-handed users.
- Loosen the handgrip by turning it anticlockwise.
- Rotate the handgrip to the desire position.
- Retighten the handgrip in the new position.
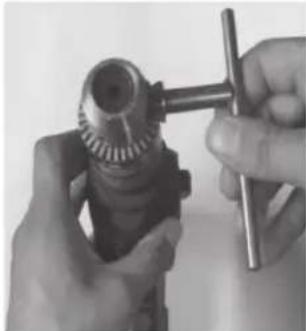
EXCHANGING AND REMOVING DRILL BITS

Before exchanging bits, first remove the power plug from the wall socket.

Inspect bits regularly during use. Blunt bits should be re-sharpened or replaced.
natural_image
Close-up of hands assembling a mechanical gear component with a wrench (no visible text or symbols)When you want to use an SDS + drill, the chuck needs to be open completely. Turn the chuck key anti-clockwise until you hear a click. Now you need to pull down the release ring and insert the SDS + drill.
When not using the SDS + drill system you are able to use conventional drills (wood, metal, concrete) and bits by using the keyed chuck.
SETTING DEPTH GAUGE
Fig. A
- Loosen the handgrip by turning it anticlockwise.
- Insert the depth gauge ruler through the hole in the auxiliary handgrip.
- Slide the ruler to the desired depth. Retighten the screw firmly.
FUNCTION SELECTION SWITCH
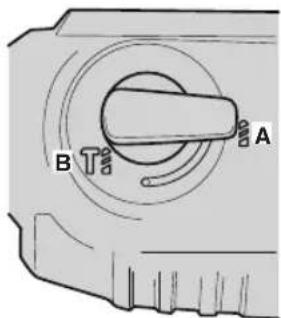
text_image
B AThe correct position of the selection switch for each machine function is given in the diagram.
A: Drilling
B: Hammer Drilling
THE ON/OFF SWITCH
Fig. A
- Switch the machine on by pressing the triggerswitch (2). When you release the triggerswitch (2) the machine will turn off.
Switch-lock
- You can lock the On/Off switch by pressing the triggerswitch (2) and then pressing knob (4). Release the switch-lock by pressing the triggerswitch (2) shortly.
Speed-control
- The rotation-speed can be continuously adjusted from 0 to 1500 and 0 to 6600 rotations per minute by pressing the switch (2) deeper or less deep.
ADJUSTING OF THE MAXIMUM ROTATION SPEED
- Switch the machine on by pressing triggerswitch (2).
- Lock the triggerswitch (2) by pressing knob (4).
- Adjust the speed by turning the small wheel (3) to the desired maximum rotation speed.
SWITCHING THE DIRECTION OF ROTATION
- Direction of rotation counter-clockwise: shift switch to “▶”.
- Direction of rotation clockwise: shift switch to “◀”.
This function is only available when the machine is set to "drill mode".
User tips
Always use the machine with the auxiliary handgrip firmly anchored in place – you will not only work with more comfort, you will also work with more precision.
HAMMER DRILLING IN CONCRETE OR BRICK

Caution: Stone drills can get very hot.
It may be necessary to drill with smaller bits and re-drill to nominal size so that later the plug is firmly seated.
For large bores, for instance in very hard concrete, use a smaller bit for pilot drilling and re-drill to nominal size.
Do not apply a lot of pressure on the machine, let the machine do the work, guiding the machine with light pressure is sufficient.
Hold the machine with the auxiliary handle, the bit can jam, particularly with deep bores, and the machine will turn.
MAINTENANCE

Take care that the machine is not connected to power whenever maintenance work on the mechanical parts is taking place.
These machines are designed to function problem-free for a long period with a minimum of maintenance. Through regular cleaning and correct treatment, you help assure a long working life for your machine.
Defects
The machine should be regularly inspected for the following possible defects, and repaired if necessary.
- Damage to power cord
- Broken on/off trigger assembly.
- Short circuiting.
- Damaged moving parts.
Trouble shooting
1. When switched on, the motor does not turn
- Failure in power supply.
- Check the power supply.
- Poor contact in the on/off trigger.
- Repair or replace the trigger assembly.
- Mains voltage too low.
-
Extension lead too long, or too light.
-
Damaged motor.
- Have your machine repaired by an expert.
• Carbon brushes worn. - Replace the carbon brushes.
2. Motor generates excessive noise, and runs too slowly or not at all
- Motor is overloaded due to excessive pressure or drilling depth.
- Reduce the pressure or drilling depth, reduce power.
- Damaged motor.
- Have your machine repaired by an expert.
• Supply voltage too low. - Adjust the supply voltage.
• Carbon brushes worn. - Replace the carbon brushes.
3. Overheating in the transmission case
• Overloading of machine, or blunt drill bit
- Reduce the loading, or hone the drill bit.
- Reduced voltage.
- Adjust the supply voltage.
4. Heavy sparking from the motor
- Inspect the carbon brushes for wear.
Cleaning
Clean the machine casings regularly with a soft cloth, preferably after each use. Make sure that the ventilation openings are free of dust and dirt. Remove very persistent dirt using a soft cloth moistened with soapsuds. Do not use any solvents such as gasoline, alcohol, ammonia, etc. Chemicals such as these will damage the synthetic components.
Faults
Should a fault occur, e.g. after wear of a part, please contact the service address on the warranty card. Separate you find an exploded view showing the parts that can be ordered.
TECHNICAL DATA
| Rated voltage: . . . . . . . 230 V~50 Hz |
| Rated power: . . . . . . . . . . . . . . . . . . . . . . . . . . . . . . . . . . . . . . . . . . . . . . . . . . . . . . . . . . . . . . . . . . . . . . . . . . . . . . . . . . . . . . . . . . . . . . . . . . . . |
| No load speed: . . . . . . . . . . . . . . . . . . . . . . . . . . . . . . . . . . . . . . . . . . . . . . . . . . . . . . . . . . . . . . . . . . . . . . . . . . . . . . . . . . . . . . . . . . . . . . . . . . |
Vibration level
The vibration emission level stated in this instruction manual has been measured in accordance with a standardised test given in EN 60745; it may be used to compare one tool with another and as a preliminary assessment of exposure to vibration when using the tool for the applications mentioned
- using the tool for different applications, or with different or poorly maintained accessories, may significantly increase the exposure level
- the times when the tool is switched off or when it is running but not actually doing the job, may significantly reduce the exposure level
Protect yourself against the effects of vibration by maintaining the tool and its accessories, keeping your hands warm, and organizing your work patterns
DISPOSAL

Do not dispose of electric power tools with domestic refuse.
The electric power tool is shipped in packaging to reduce transport damage.
This packaging is a raw material and as such can either be reused or can be fed back into the raw material cycle. The electric power tool and its accessories are made from various materials such as metals and plastics. Take defective components to a special refuse collection point. Ask about these at your specialist shop or local council.
EC-DECLARATION OF CONFORMITY
We, the Batavia GmbH, Weth. Buitenhuisstraat 2a, NL-7951 SM Staphorst, declare by our own responsibility that the product, Item-No 7062052, is according to the basic requirements, which are defined in the European Directives Electromagnetic Compatibility 2004/108/EC (EMC), 2006/42/EC (Machinery), 2006/95/EC Low Voltage Directive (LVD) and their amendments. For the evaluation of conformity, the following harmonized standards were consulted:
EN 60745-1: 2009+A11;
EN 60745-2-6: 2010;
EN 55014-1: 2006+A1;
EN55014-2: 1997+A1+A2;
EN 61000-3-2: 2006+A1+A2;
EN 61000-3-3: 2008
Staphorst, 15 February 2014

text_image
Handwritten signature or scribble on a stylized oval shape, possibly from a document or form.Meino Seinen, QA Representative Batavia GmbH, Weth. Buitenhuisstraat 2a, 7951 SM Staphorst, Netherlands
The product and the user manual may be subject to changes. Technical data may be changed without prior notice.
GEACHTE KLANT
natural_image
Close-up of hands assembling a mechanical gear with a wrench (no visible text or symbols)Staphorst, 15 February 2014

text_image
JohnsonThe product and the user manual may be subject to changes. Technical data may be changed without prior notice.
CHER CLIENT
natural_image
Close-up of hands assembling a mechanical gear component (no visible text or symbols)CE-DÉCLARATION DE CONFORMITÉ
text_image
Handwritten signature or scribble on a plain backgroundThis product has got a 2 year warranty
Dear Client, if for any reason this product is not working, please ensure you contact our
Client Service Centre. Ensure you have your original receipt of purchase. This warranty covers all defects in workmanship or materials in this Batavia product for a two year period from the date of purchase. The warranty does not cover any malfunction, or defect resulting from misuse, neglect, alteration, or repair.
Other European countries | Customer Services
Monday till Friday from 8 am until 4 pm

00800 66477400
Overige landen Europa | Klantenservice