DSL40 - Lamp Dörr - Free user manual and instructions
Find the device manual for free DSL40 Dörr in PDF.



User questions about DSL40 Dörr
0 question about this device. Answer the ones you know or ask your own.
Ask a new question about this device
Download the instructions for your Lamp in PDF format for free! Find your manual DSL40 - Dörr and take your electronic device back in hand. On this page are published all the documents necessary for the use of your device. DSL40 by Dörr.
USER MANUAL DSL40 Dörr
natural_image
Technical line drawing of a rectangular electronic device with circular holes and mounting tabs (no text or symbols)TEILEBESCHREIBUNG NOMENCLATURE NOMENCLATURA
text_image
Technical diagram of a remote control device with numbered parts and labeled components11.3 ROHS KONFORMITÄT
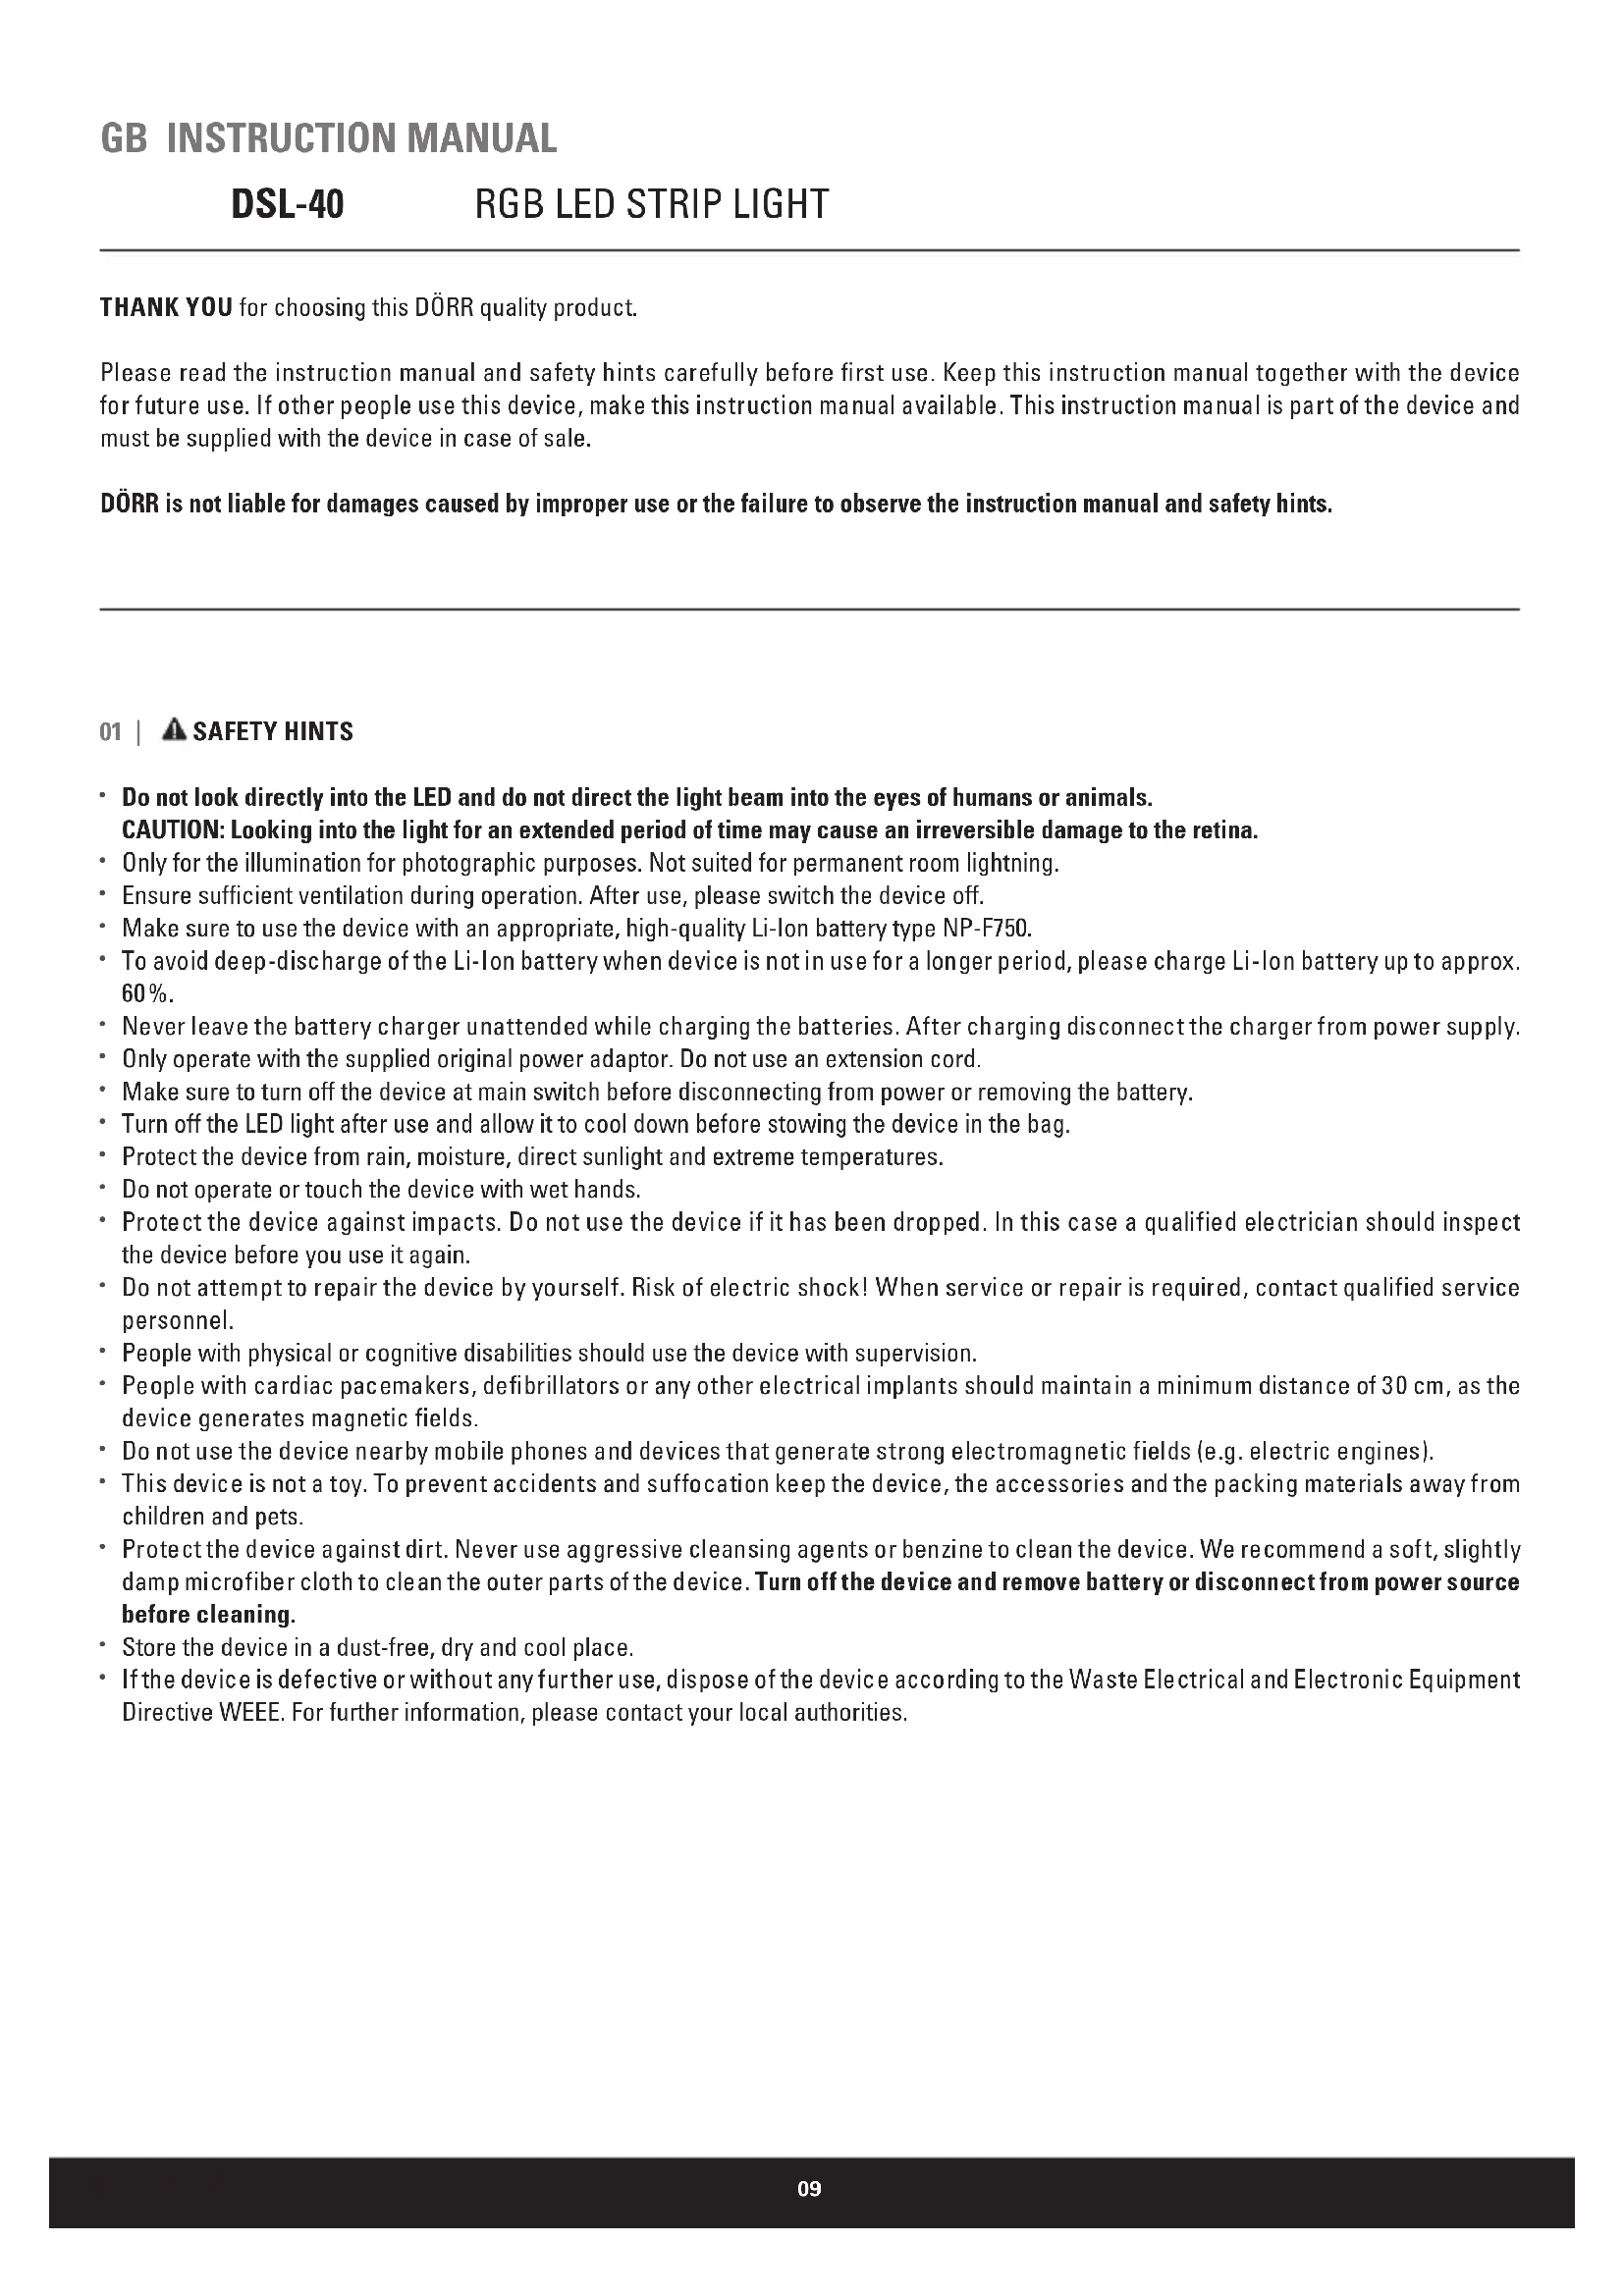
THANK YOU for choosing this DÖRR quality product.
Please read the instruction manual and safety hints carefully before first use. Keep this instruction manual together with the device for future use. If other people use this device, make this instruction manual available. This instruction manual is part of the device and must be supplied with the device in case of sale.
DÖRR is not liable for damages caused by improper use or the failure to observe the instruction manual and safety hints.
01

SAFETY HINTS
- Do not look directly into the LED and do not direct the light beam into the eyes of humans or animals. CAUTION: Looking into the light for an extended period of time may cause an irreversible damage to the retina.
- Only for the illumination for photographic purposes. Not suited for permanent room lightning.
- Ensure sufficient ventilation during operation. After use, please switch the device off.
• Make sure to use the device with an appropriate, high-quality Li-Ion battery type NP-F750.
• To avoid deep-discharge of the Li-Ion battery when device is not in use for a longer period, please charge Li-Ion battery up to approx. 60%. - Never leave the battery charger unattended while charging the batteries. After charging disconnect the charger from power supply.
- Only operate with the supplied original power adaptor. Do not use an extension cord.
• Make sure to turn off the device at main switch before disconnecting from power or removing the battery. - Turn off the LED light after use and allow it to cool down before stowing the device in the bag.
- Protect the device from rain, moisture, direct sunlight and extreme temperatures.
- Do not operate or touch the device with wet hands.
- Protect the device against impacts. Do not use the device if it has been dropped. In this case a qualified electrician should inspect the device before you use it again.
- Do not attempt to repair the device by yourself. Risk of electric shock! When service or repair is required, contact qualified service personnel.
• People with physical or cognitive disabilities should use the device with supervision. - People with cardiac pacemakers, defibrillators or any other electrical implants should maintain a minimum distance of 30 cm, as the device generates magnetic fields.
- Do not use the device nearby mobile phones and devices that generate strong electromagnetic fields (e.g. electric engines).
- This device is not a toy. To prevent accidents and suffocation keep the device, the accessories and the packing materials away from children and pets.
- Protect the device against dirt. Never use aggressive cleansing agents or benzine to clean the device. We recommend a soft, slightly damp microfiber cloth to clean the outer parts of the device. Turn off the device and remove battery or disconnect from power source before cleaning.
- Store the device in a dust-free, dry and cool place.
- If the device is defective or without any further use, dispose of the device according to the Waste Electrical and Electronic Equipment Directive WEEE. For further information, please contact your local authorities.
Only use high-quality batteries of popular brands. When inserting the battery please respect the correct polarity (+/-). Please remove battery when device is not in use for a long period of time. Do not throw the batteries into fire, do not short-circuit and do not disassemble them. Never charge non-rechargeable batteries – risk of explosion! Remove leaking batteries from the device immediately. Risk of battery acid burn! Clean the contacts before inserting fresh batteries. In case of contact with battery acid, rinse the affected area immediately with water and contact a doctor. Batteries can be dangerous to life if swallowed. Keep batteries away from small children and pets. Do not dispose of batteries in household waste (see also capture "Disposal of Batteries/Accumulators").
03 | PRODUCT DESCRIPTION
With its' almost limitless variety of colours, you can achieve creative accents with the DÖRR DSL-40 RGB LED Strip Light. The colours, the saturation, the brightness, as well as the colour temperature in the white light mode, are steplessly variable and create dynamic effects for product shootings or for indoor and outdoor shots.
- RGB colours (red, green, blue) can be adjusted as desired
• Colour temperature for white light adjustable from 3200 - 5500 K
• Operation via supplied (replacement) NP-F750 Li-Ion battery (including battery charger) or via the supplied power adapter
• Supplied with wrist strap, hook for hanging and hardcase
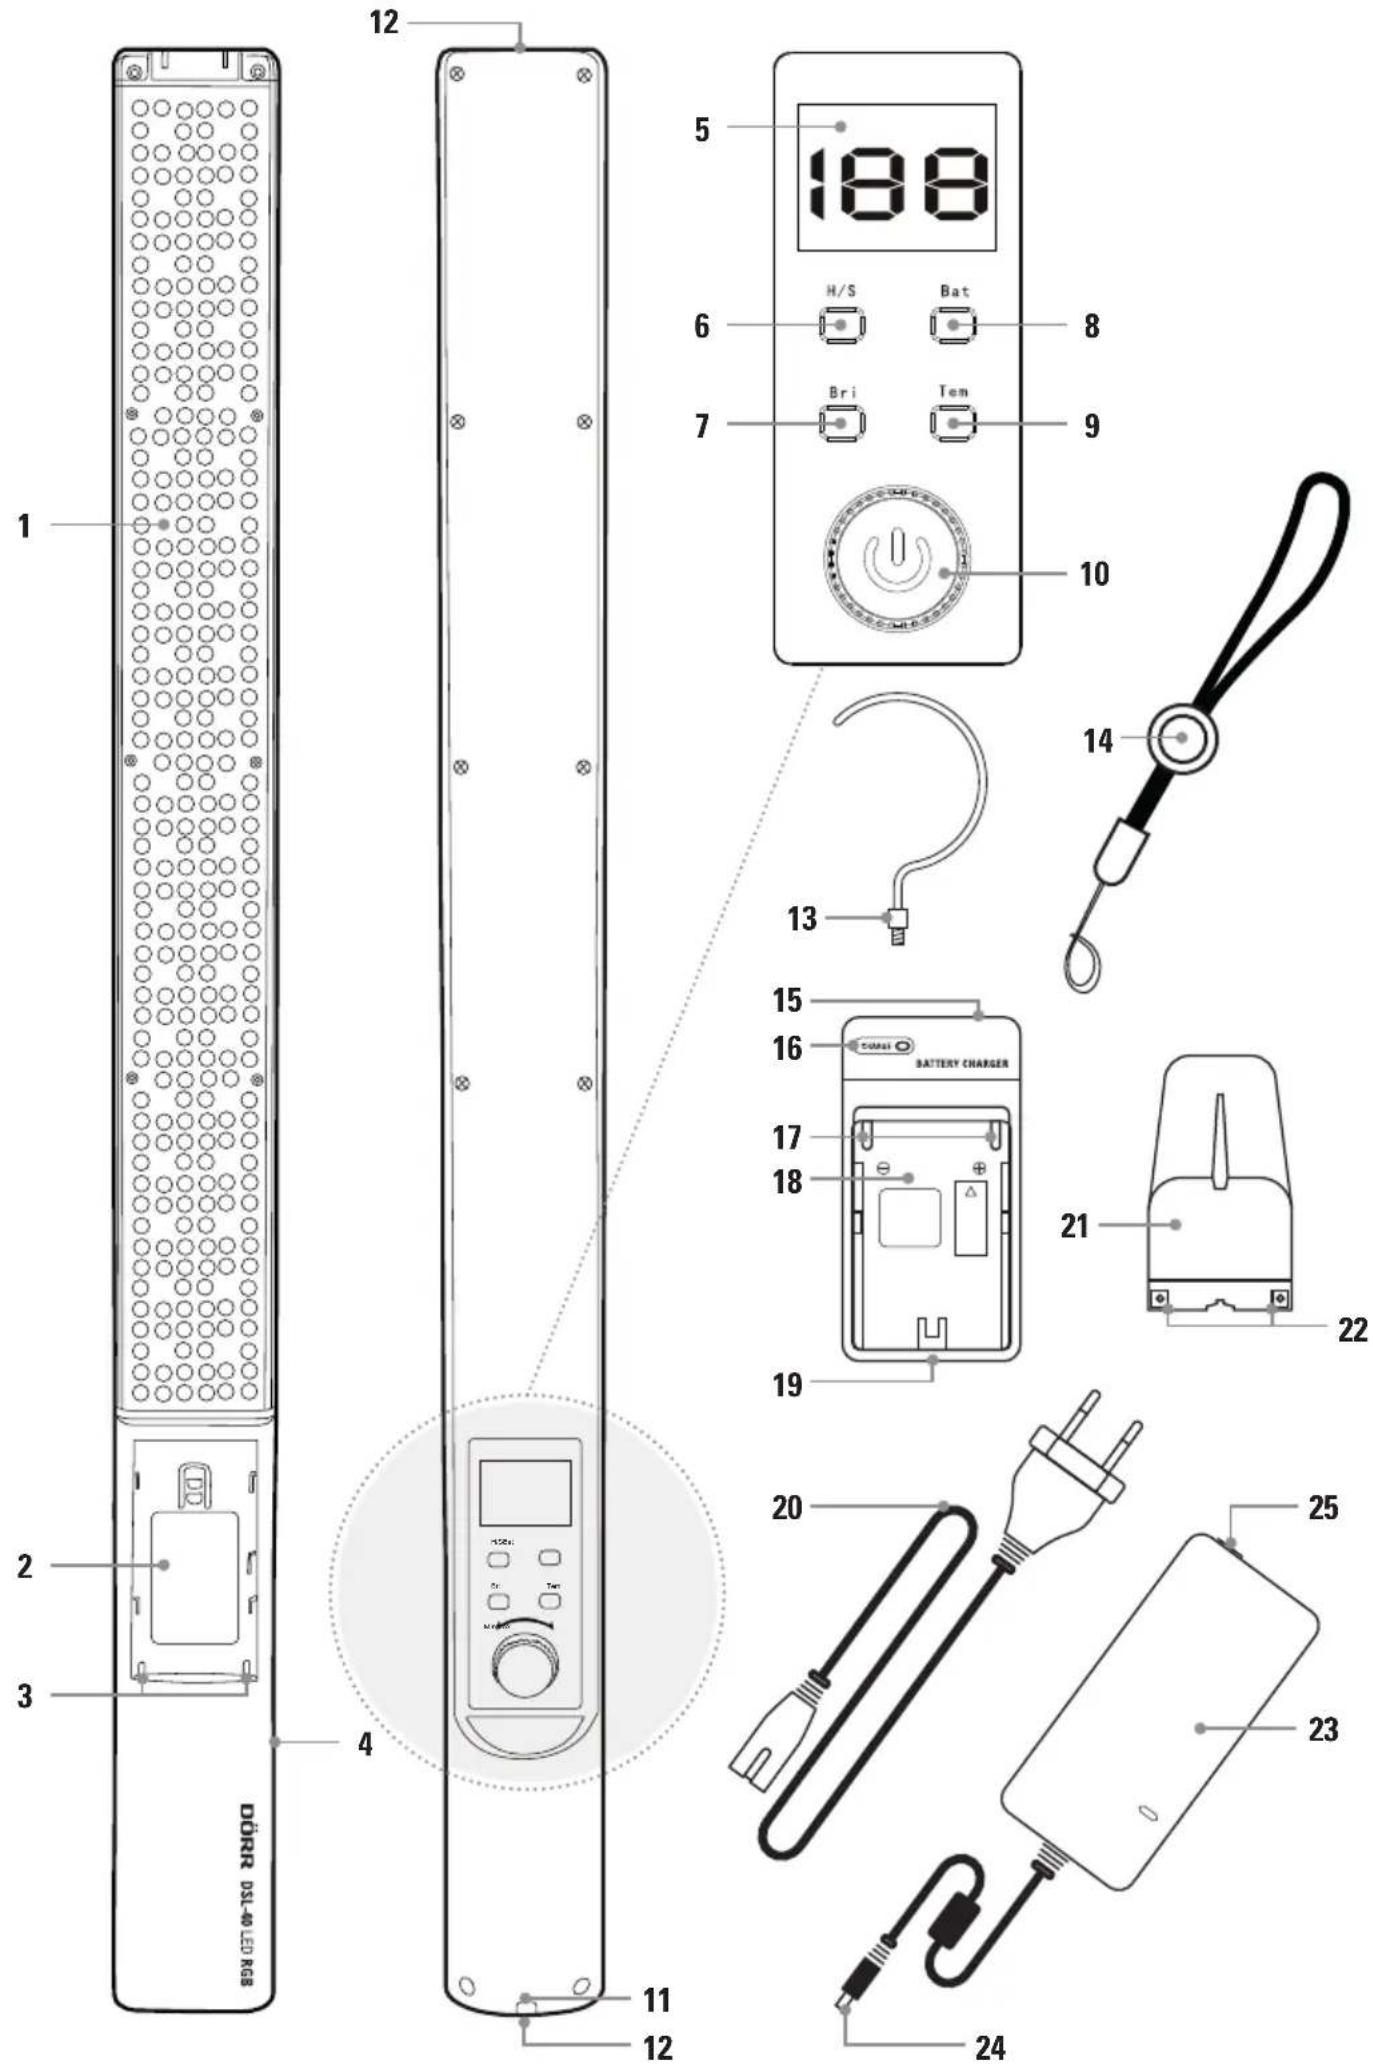
04 | NOMENCLATURE > PAGE 02
04.1 DSL-40 RGB LIGHT
1 LED illuminated area
2 Battery slot
3 Battery contact pins
4 Socket for power adapter
5 LCD Display
6 Button H/S = hue and saturation
7 Button Bri = brightness
8 Button Bat = battery capacity indicator
9 Button Tem = colour temperature
10 Main switch (rotary control)
11 Eyelet for wrist strap
12 ¼ inch tripod mount/mount for hook
13 Hook for hanging
14 Wrist strap
04.2 BATTERY CHARGER + LI-ION BATTERY + POWER ADAPTER
15 Battery charger
16 LED charging indicator
17 Battery contact pins +/-
18 Battery slot
19 Socket for power cable
20 Power cable
21 Li-Ion battery
22 Battery contacts +/-
23 Power adapter
24 Connector plug to RGB light
25 Socket for power adapter
05 | FIRST COMMISSIONING
05.1 CHARGING THE LI-ION BATTERY
Before first use of the DSL-40 RGB light, please fully charge the Li-Ion battery (21) with the supplied battery charger (15).
CAUTION
Only charge rechargeable Li-Ion batteries of the type NP-F750 with the supplied battery charger!
The charger is not suited to charge other battery types!
Insert the power cable (20) to the cable socket of battery charger (19) and connect with an electrical outlet. The LED charging indicator (16) lights up green.
Place the Li-Ion battery (21) over the centre of the charging slot (18) and pay attention to the correct polarity (markings +/- on the battery and in the charging slot). Slide the battery fully forward until it touches the battery contact pins (17). If battery is inserted properly
and the charging process has started, the LED charging indicator (16) lights up red. When battery is fully charged, the LED charging indicator (16) turns green. Slide the Li-Ion battery backwards and remove it from the charging slot. Disconnect the battery charger from the electrical outlet.
CAUTION
Never leave the battery charger unattended while charging the battery. After charging, disconnect the charger from the power supply.
NOTE To avoid deep-discharge of the Li-Ion battery when DSL-40 RGB light is not in use
for a longer period, please charge Li-Ion battery up to approx. 60%.
Replacement battery from DÖRR optionally available from DÖRR in stores: DÖRR Li-Ion battery (Replace-) NP-F750
Item-No.
980152
05.2 INSERTING THE LI-ION BATTERY INTO THE DLS-40 RGB LIGHT
CAUTION
Before inserting or removing the Li-Ion battery, make sure that the DSL-40 RGB light is turned off.
Insert the Li-Ion battery (21) into the battery slot (2) with the battery contacts (22) facing to the battery contact pins (3). Slide the battery fully forward until it touches the battery contact pins (3).
To remove the Li-Ion battery (21), slide the battery backwards and remove it out of the battery slot.
05.3 OPERATION WITH POWER SUPPLY
Alternatively, the DSL-40 RGB light can be operated with the supplied power supply (23):
First connect the power cable (20) to the cable socket (25) of power adapter. Insert the connector plug (24) of power adapter to the power adapter socket (4) of the DSL-40 RGB light and connect with an electrical outlet.
NOTE While operating with the power supply, the Li-Ion battery can stay inside the battery slot.
CAUTION
Press the main switch (10) to turn off the DSL-40 RGB light after using.
06 | MOUNTING
06.1 MOUNTING ON A TRIPOD
For mounting on a tripod, a 14 inch tripod mount (12) is located at both ends of the DSL-40 RGB light.
NOTE Various tripods from DÖRR optionally available in stores.
06.2 HANGING UP
To hang up the DSL-40 RGB light in suitable places in the studio or outdoor, screw the supplied hook (13) in one of the 14 inch tripod mounts (12).
06.3 WRIST STRAP
To avoid dropping the DSL-40 RGB light while doing shootings like for e.g. Light Painting, we recommend to attach the supplied wrist strap (14) to the eyelet (11). The wrist strap can be adjusted to the size of your wrist.
07.1 TURNING ON/OFF
Press the main switch (10) to turn the DSL-40 RGB light on or off. Turn the main switch to the left or to the right (10) to adjust settings.
07.2 BUTTON H/S (SETTING HUE AND SATURATION)
H/S mode red = setting of hue
Press the button H/S (6). If it lights up red, turn the main switch (10) to the left or right to set the desired colour.
Possible settings from 0 - 199:
| Colours | Orange | Yellow | Green | Turquoise | Blue | Purple | Pink | Red |
| From approx. | 5 | 20 | 50 | 75 | 90 | 145 | 180 | 198 |
H/S mode green = setting of saturation
After setting the desired color as described above, press the H/S button (6), so it lights up green. By turning the main switch (10) to the left or right, the saturation of the hue can be adjusted from 0 - 100%.
07.3 BUTTON Bri (SETTING OF BRIGHTNESS)
To adjust the brightness, press the button Bri (7), so it lights up white. By turning the main switch (10) to the left or right, the brightness can be adjusted from 20 - 100%.
07.4 BUTTON Tem (SETTING OF COLOUR TEMPERATURE)
Please note: The setting of colour temperature is only possible in white light mode.
Press the button Tem (9) to switch to the white light mode (button lights up white).
By turning the main switch (10) to the left or right, the colour temperature can be adjusted from 3200 K – 5500 K.
The LCD display (5) shows the values as follows:
For example: 32 = 3200 K, 45 = 4500 K, 55 = 5500 K etc.
07.5 BUTTON Bat (BATTERY CAPACITY INDICATOR)
If you operate the DSL-40 RGB light with battery, press the button Bat (8) to indicate the remaining charge in the LCD display (5).
The LCD display (5) shows the values as follows: P0 (=0% remaining charge) to P9 (=90% remaining charge)
If you press the button Bat (8) while operating he DSL-40 RGB light with power adapter, the LCD display (5) will indicate "dc".
CAUTION
Press the main switch (10) to turn off the DSL-40 RGB light after usage.
Never use aggressive cleansing agents or benzine to clean the device. We recommend a soft, slightly damp microfiber cloth to clean the outer parts of the device. Make sure to turn off the device and remove battery or disconnect from power source before cleaning! Store the device in a dust-free, dry and cool place. This device is not a toy – keep it out of reach of children. Keep away from pets.
TECHNICAL SPECIFICATIONS
| DSL-40 RGB STRIP LIGHT | |
| Number of LEDs 159 LEDs 3200 K / 159 LEDs 5500 K / 40 LEDs RGB | |
| Colour temperature 3200 K - 5500 K (in white light mode) | |
| Power 36 W | |
| Beam angle 45°, RGB LEDs 110° | |
| Colour rendering index (CRI) 95 R | a |
| Illuminance 5500 K: at 0,5 m approx. 1242 Lux/at 1 m approx. 337 Lux | |
| 3200 K: at 0,5 m approx. 940 Lux/at 1 m approx. 322 Lux | |
| Operation via | (Replace-) NP-F750 Li-Ion battery 7,2 V 4400 mAh (△31,68 Wh)Power Adapter AC100~240V 50/60Hz DC9V/3.0A (both included) |
| Operating time with fully charged battery approx. 4 hours | |
| Dimensions illuminated area approx. 410 x 40 mm | |
| Dimensions approx. 610 x 50 x 37 mm | |
| Weight approx. 455 g without battery/640 g with battery | |
| BATTERY CHARGER FOR NP-F750 | |
| Input AC 100 - 240 V 50/60 Hz 150 mA (max.) | |
| Output | DC 8,4 V/600 mA |
| Dimensions approx. 85 x 46 x 40 mm | |
| Weight approx. 118 g | |
SCOPE OF DELIVERY
| 1x DSL-40 RGB Strip Light |
| 1x Li-Ion battery (Replace-) NP-F750 |
| 1x Battery charger |
| 1x Power adapter |
| 1x Power cable |
| 1x Hook |
| 1x Wrist strap |
| 1x Hardcase |
| 1x Instruction manual |

11.1 DISPOSAL OF BATTERIES/ACCUMULATORS
Batteries are marked with the symbol of a crossed out bin. This symbol indicates that empty batteries or accumulators which can no longer be charged should not be disposed of with household waste. Waste batteries may contain harmful substances that can cause damage to health and to the environment. Please use the return and collection systems available in your country for the disposal of the waste batteries.

11.2 WEEE INFORMATION
The Waste Electrical and Electronic Equipment Directive (WEEE Directive) is the European community directive on waste electrical and electronic equipment, which became European law in February 2003. The main purpose of this directive is to prevent electronic waste. Recycling and other forms of waste recovery should be encouraged to reduce waste. The symbol (trash can) on the product and on the packing means that used electrical and electronic products should not be disposed of with general household waste. It is your responsibility to dispose of all your electronic or electrical waste at designated collection points. Disposing of this product correctly will help to save valuable resources and it is a significant contribution to protect our environment as well as human health. For more information about the correct disposal of electrical and electronic equipment, recycling and collection points please contact your local authorities, waste management companies, your retailer or the manufacturer of this device.
11.3 ROHS CONFORMITY
This product is compliant with the European directive 2011/65/EU of June 08, 2011 for the restriction of use of certain hazardous substances in electrical and electronic equipment (RoHS) and its amendments.

11.4 CEMARKING
The CE marking complies with the European directives.