
PGH4IX - Cooker PROLINE - Free user manual and instructions
Find the device manual for free PGH4IX PROLINE in PDF.
| Product type | Gas hob |
| Brand | Proline |
| Model | PGH4IX |
| Number of burners | 4 |
| Burner types | 1 rapid (3.0 kW), 2 semi-rapid (1.75 kW), 1 auxiliary (1.0 kW) |
| Total gas power | 7.5 kW |
| Electrical supply | 220-240 V ~ 50/60 Hz, 15 W (ignition) |
| Dimensions (W x D x H) | 590 x 510 x 45 mm (approx) |
| Net weight | 8 kg (approx) |
| Hob energy efficiency | 57.9 % |
| Rapid burner - power | 3.0 kW |
| Semi-rapid burners - power | 1.75 kW each |
| Auxiliary burner - power | 1.0 kW |
| Injector diameters (NG) | Rapid: 1.30 mm, Semi-rapid: 1.00 mm, Auxiliary: 0.78 mm |
| Injector diameters (LPG) | Rapid: 0.87 mm, Semi-rapid: 0.66 mm, Auxiliary: 0.50 mm |
| Compatible gas types | Natural gas (I2H) and LPG (butane/propane) |
| Surface material | Tempered glass |
| Safety devices | Electronic ignition, safety thermocouple (automatic gas shut-off) |
| Supplied accessories | LPG conversion injectors (4), seal gasket, fixing brackets, screws, gas connection |
| Maintenance and cleaning | Glass surface cleanable with soft cloth and soapy water; removable pan supports |
| Repairability | Interchangeable injectors, accessible flame adjustment screw |
Frequently Asked Questions - PGH4IX PROLINE
User questions about PGH4IX PROLINE
0 question about this device. Answer the ones you know or ask your own.
Ask a new question about this device
Download the instructions for your Cooker in PDF format for free! Find your manual PGH4IX - PROLINE and take your electronic device back in hand. On this page are published all the documents necessary for the use of your device. PGH4IX by PROLINE.
USER MANUAL PGH4IX PROLINE
Hotline Marty France
- This appliance is intended for domesc household use only and should not be used for any other purpose or in any other applicaon, such as for non-domesc use or in a commercial environment.
- This appliance can be used by children aged from 8 years and above and persons with reduced physical, sensory or mental capabilities or lack of experience and knowledge if they have been given supervision or instrucon concerning use of the appliance in a safe way and understand the hazards involved. Children shall not play with the appliance. Cleaning and user maintenance shall not be made by children without supervision.
- If the supply cord is damaged, it must be replaced by the manufacturer, its service agent or similarly qualified persons in order to avoid a hazard.
- For the details concerning the method and frequency of cleaning, please see secon "Cleaning and Maintenance" on page14-15.
- This appliance is for cooking purposes only. It must not be used for other purposes, for example room heang.
-
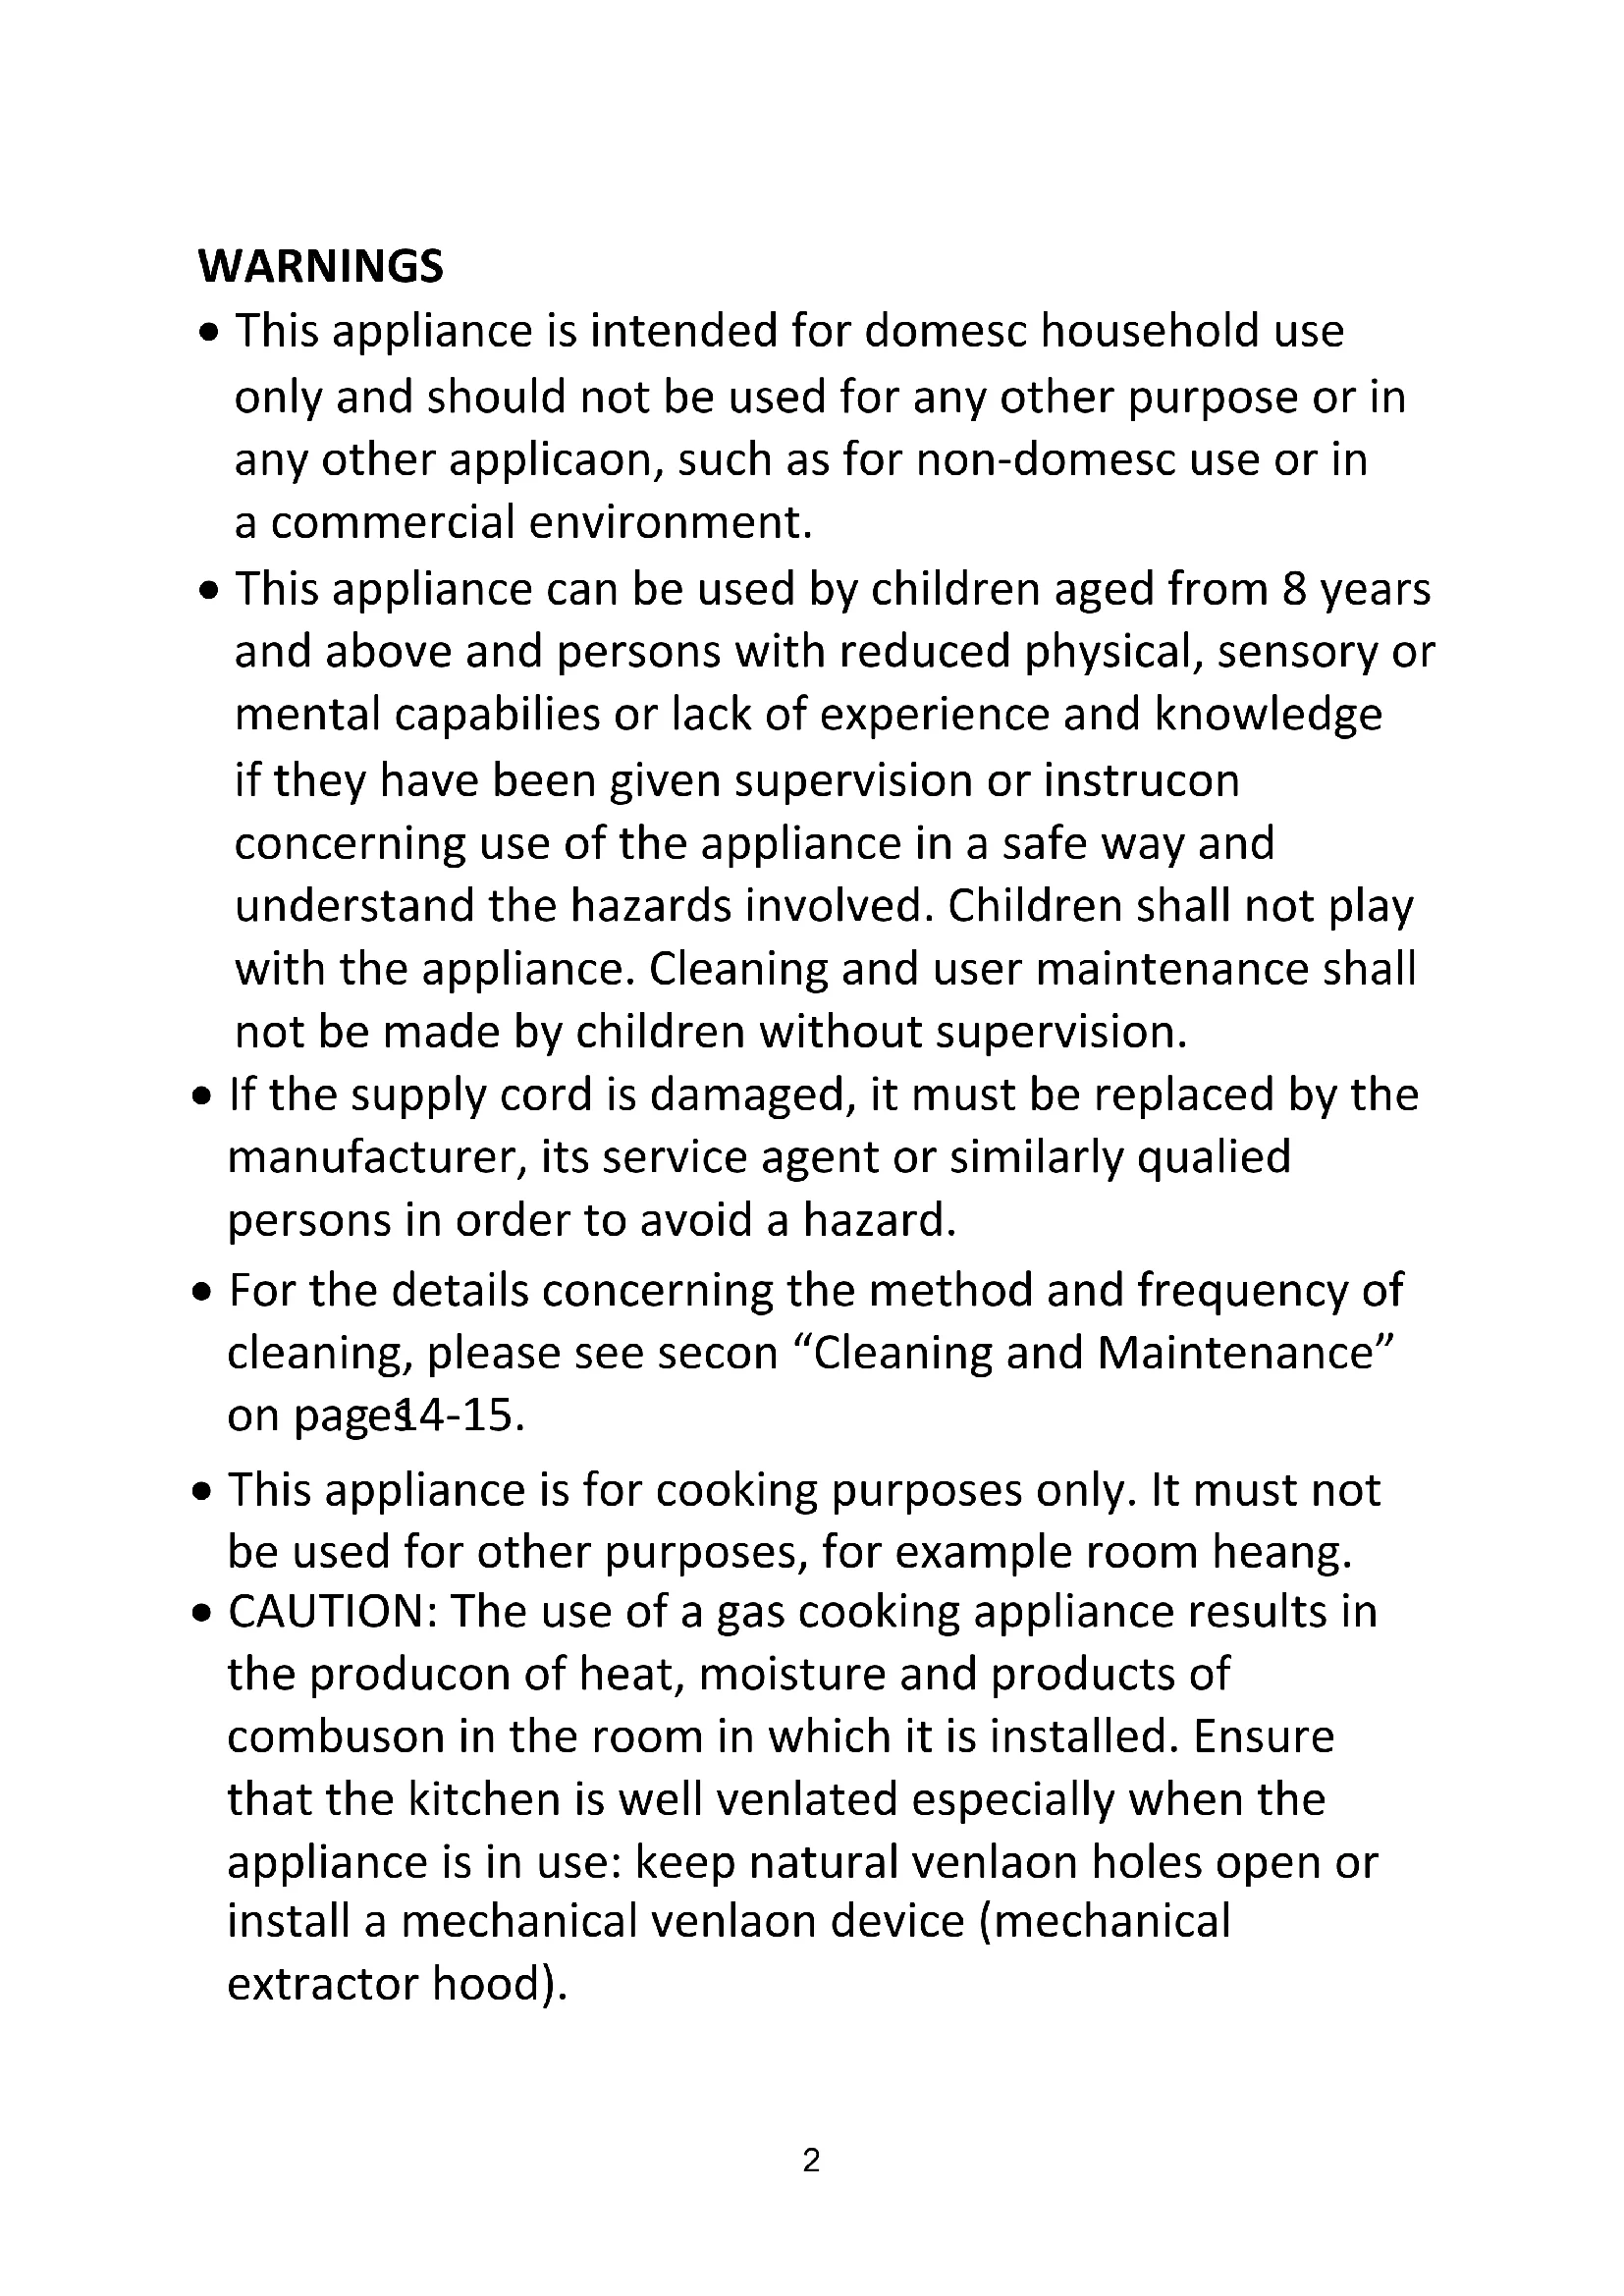
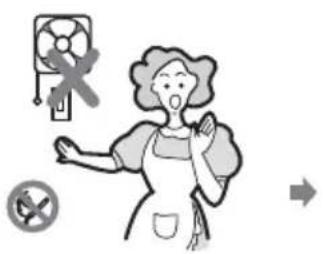
CAUTION: The use of a gas cooking appliance results in the producon of heat, moisture and products of combuson in the room in which it is installed. Ensure that the kitchen is well ventilated especially when the appliance is in use: keep natural venlaon holes open or install a mechanical venlaon device (mechanical extractor hood).
-
Prolonged intensive use of the appliance may call for additional venlaon, for example opening of a window, or more eecve venlaon, for example increasing the level of mechanical venlaon where present.
- Prior to installation, ensure that the local distribution conditions (nature of the gas and gas pressure) and the adjustment of the appliance are compatible.
- The adjustment conditions for this appliance are stated on the label (or data plate).
- This appliance is not connected to a combustion products evacuation device. It shall be installed and connected in accordance with current installation regulations. Particular attention shall be given to the relevant requirements regarding ventilation.
-
CAUTION: "In case of hotplate glass breakage:
-
shut immediately off all burners and any electrical heating element and isolate the appliance from the power supply,
-
do not touch the appliance surface,
- do not use the appliance."
IMPORTANT SAFETY INSTRUCTIONS

Read these warnings carefully before installing or using the hob.
- Only use the appliance for preparing food. Never use it as a heater.
- Keep the appliance clean. Food residuals may cause a re.
- Do not aempt to modify the hob in any way.
- Do not use the hob if it is in contact with water. Do not operate the hob with wet hands.
-
Ensure that the control knobs are in the posion when not in use, before removing cooking pans or cleaning.
-
When using another appliance, ensure that the power cord of the hob does not come into contact with the hot surfaces of this appliance.
- Unstable or misshapen pans should not be used on the hob as they can cause an accident by pping or spillage.
- Never leave the hob unaended when cooking.
- Never use plasc or aluminium foil dishes on the hob.
- Perishable food, plasc items and aerosols may be aected by heat and should not be stored above or below the hob.
- Do not spray aerosols in the vicinity of the appliance while it is in operation.
- Do not use a steam jet or any other high pressure equipment to clean the appliance.
- The hob should only be repaired or serviced by an authorised service engineer.
The fuel gas contains mercaptan so that you can smell the gas leak (smell of roen garlic or egg). If gas seems to leak, take the acons as follows:
- Do not turn on the light.
- Do not switch on/o any appliance and do not touch any plug.
- Do not use the telephone.
Stop using the hob and turn the control knobs to the posion.
Open the window to venlate.
Contact service centre by using a phone outside.


No re tool

Must Do
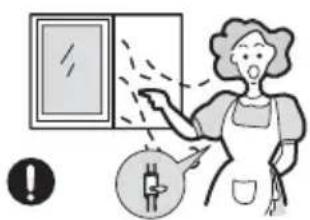
DESCRIPTION
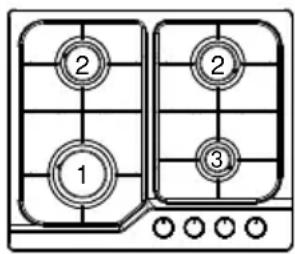
- Rapid burner
- Semi-rapid burners
- Auxiliary burner
- Control knobs
Accessories
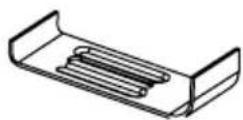
Bracket (4)

Sponge (4)

Screw (4)
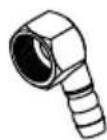
Elbow
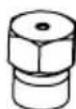
Injector (4)
INSTALLATION
This appliance must be installed by a competent person as stated in
the local gas safety standards and regulaons and only used in a well ventilated space. Ensure that once the hob is installed, it is easily accessible for the engineer in the event of a breakdown.
Warnings
- Do not modify this appliance.
- Prior to installaon, ensure that the local distribuon conditions (nature of the gas and gas pressure) and the adjustment of the appliance are compatible.
- Before installaon, ensure that the gas and electrical supply comply with the type stated on the rang label.
- The manufacturer declines any liability should the safety measures not be observed.
- Protect your appliance against atmospheric ects. Do not expose it to sun, rain, snow, etc.
- This appliance is not connected to a combuson products evacuaon device. It shall be installed and connected in accordance with current installaon regulaons. Parcular aenon shall be given to the relevant requirements regarding venlaon.
- Before installing, turn off the gas and electricity supply to the appliance.
- Ensure that the gas pipe and electrical cable are installed in such a way that they do not touch any parts of the appliance which may become hot.
- Gas pipe or connector should not be bent or blocked by any other appliances.
Posioning
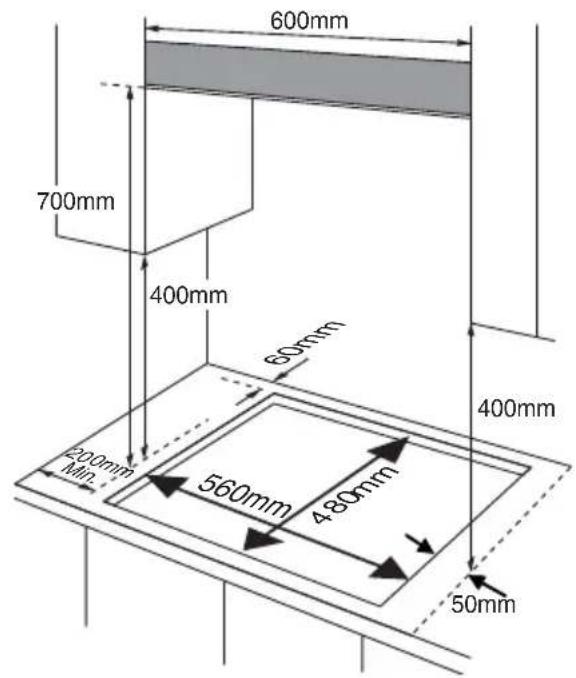
CLEARANCES REQUIRED WHEN FITTING THE HOB WITH A COOKER HOOD ABOVE
This appliance is to be built into a kitchen unit or 600mm worktop, providing the following minimum distances are allowed:
- The edges of the hob must be a minimum distance of 60mm from a side or rear wall.
- 700mm between the highest point of the hob surface (including the burners) and the underside of any horizontal surface directly above it.
- 400mm between the hob surfaces, providing that the underside of the horizontal surface is in line with the outer edge of the hob. If the underside of the horizontal surface is lower than 400mm , then it must be at least 50mm away from the outer edges of the hob.
- 50mm clearance around the appliance and between the hob surface and any combustible surface.
- You must have a gap of at least 25mm and at most 74mm between the underneath of the appliance and any surface that is below it.
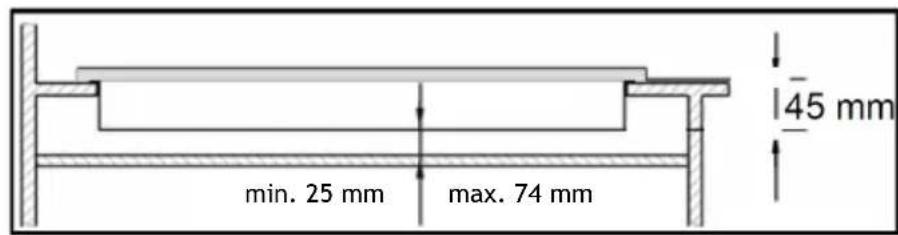
-
A minimum disatance of 200mm must be le between the side edges of the hob and any adjacent cabinet or wall.
-
The adjacent furniture and all materials used in the installaon must be able to withstand a minimum temperature rise of 85^ above the ambient temperature during operaon.
- An oven must have forced venlaon to install the hob above it.
Fing the hob into the worktop

- Remove the pan supports, the burner cap and crown and carefully turn the appliance upside down and place it on a cushioned mat.
Take care that the ignion devices and ame supervision devices are not damaged in this operon.
- Apply the sponge provided around the edge of the appliance.
- Do not leave a gap in the sealing agent or overlap the thickness.
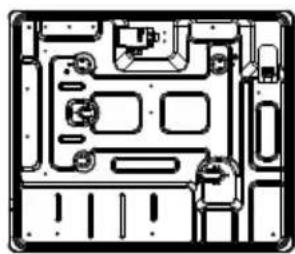
Boom view
Do not use a silicon sealant to seal the appliance against the aperture.
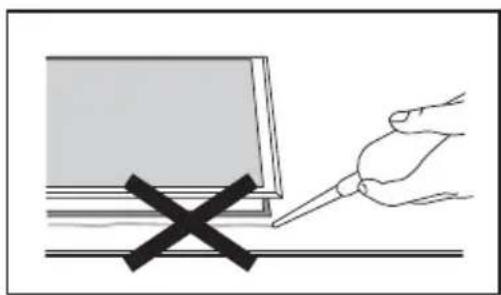
This will make it difficult to remove the appliance from the aperture in future, particularly if it needs to be serviced.
- Place the brackets over the holes that match the size of the screws. There are one set of screw holes in each corner of the hob.
Aach the brackets to the hob by slightly ghtening the screws through the bracket.
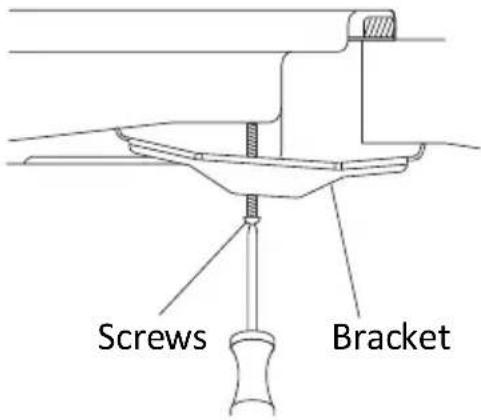
- Carefully turn the hob back over the then gently lower it into the aperture that you have cut out.
- Adjust the brackets and fully ghten the to secure the hob into posion.
ELECTRICAL CONNECTIONS
Any electrical work required to install this hob should be carried out by a qualified electrician or competent person in accordance with the local regulaons.
Before switching on, make sure the electricity supply voltage is the same as that indicated on the hob rang label.
Ensure that the hob supply cable does not come into contact with surfaces with temperatures higher than 50^ C.
GAS CONNECTION
This appliance is supplied to run on LPG (Liqueed Petroleum Gas) and NG (Natural Gas). This appliance must be installed and connected by qualified persons in accordance with the local gas connecen laws and regulaons.
Gas specicaon
| Type of Gas | BURNER: | Rapid (large) | Semi-rapid (medium) | Auxiliary (small) |
| Natural Gas | THERMAL POWER (kW): | 3.0 | 1.75 | 1.0 |
| INJECTOR DIAMETER (mm): | 1.30 | 1.00 | 0.78 | |
| LPG Gas | THERMAL POWER (kW): | 3.0 | 1.75 | 1.0 |
| FLOW RATE (g/h): | 219 | 127 | 73 | |
| INJECTOR DIAMETER (mm): | 0.87 | 0.66 | 0.50 |
Natural gas category: I2H (20) / I2E+
LPG (Liqueed Petroleum Gas) gas category: I3+(28-30/37)
Total heat input: 7.5kW(546g/h)
COMMISSIONING
When the hob has been fully installed it will be necessary to check the minimum ame seng. To do this, follow the procedure below.
- Turn the gas tap to the MAX posion and ignite.
- Set the gas tap to the MIN ame posion then turn the control knob from
to several mes. If the ame is unstable or is exguished follow the procedure below.
Procedure:
Re-ignite the burner and set to Remove the control knob. To adjust, use a thin bladed screwdriver (not supplied) and turn the adjustment screw unl the ame is steady and does not exinguish, when the knob is turned from
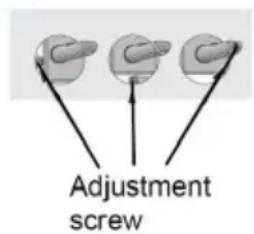
to

Repeat this procedure for all burners.
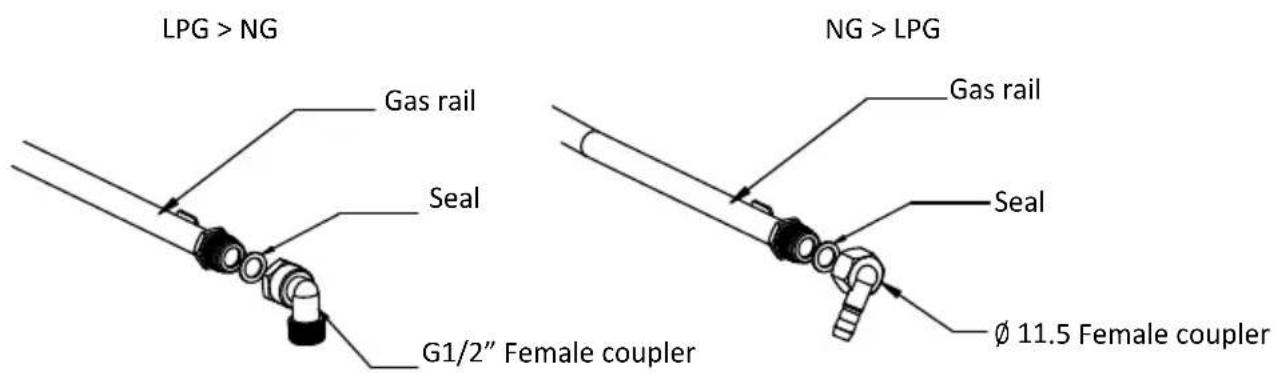
CONVERSION FROM NATURAL GAS TO LPG
Important
The replacement / conversion of the gas hob should only be undertaken by a competent person.
It is important to note that this model is designed for use with natural gas but can be converted for use with butane or propane gas providing the correct injectors are ed and the gas rate is adjusted to suit.
Method
- Ensure that the control knobs are in the posion.
- Cut o the gas supply and disconnect the hob from the mains socket.
- Remove all pan supports, burner caps, crowns and control knobs.
- With a 7mm box spanner (not supplied), unscrew the burner injectors and replace them with the appropriate LPG injectors.
To adjust the gas rate
With a thin bladed screwdriver (not supplied), completely ghten down the by-pass adjustment screw.
OPERATION
Switching On a Burner
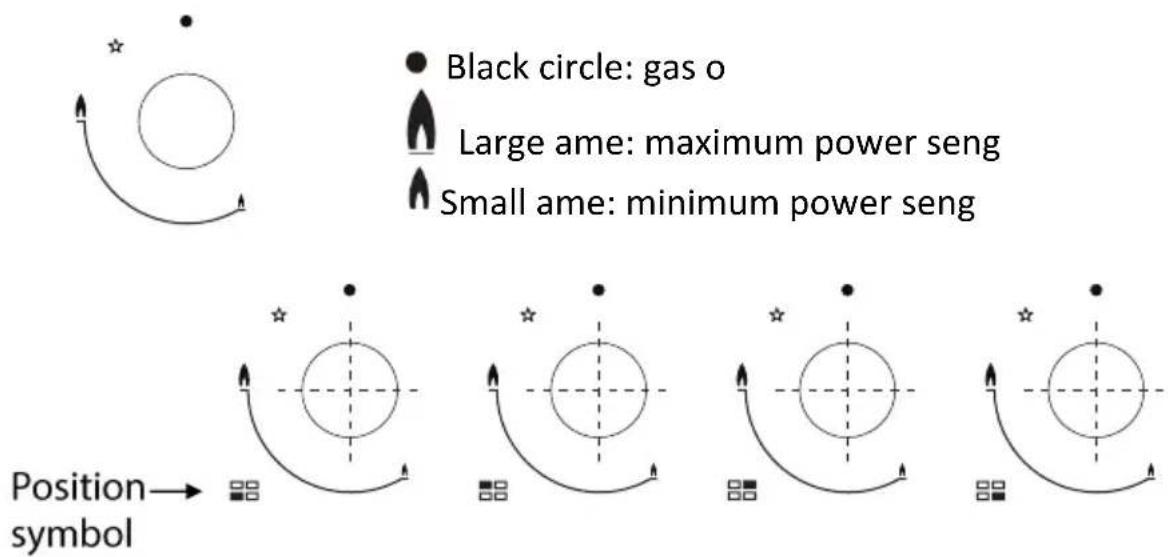
To determine which knob controls which burner, check the posion symbol next to the control knob.
-
Press the control knob of the required burner and turn it anticlockwise to the maximum power seng.
-
While the control knob is sll pressed down, sparks will be produced on the burner. The ame will ignite.
-
In case of ignition failure, you can use any type of lighter or ame (cigaree lighter, matches, etc.) and bring it close to the burner. CARE MUST BE TAKEN when using this method.
-
Release the control knob.
-
Turn the control knob to the required seng.
-
Carefully watch foods being fried at a high power seng, which may cause ignition.
- Always heat fat slowly and watch as it heats.
- Foods for frying should be as dry as possible. Frost on frozen foods or moisture on fresh foods can cause hot fat to bubble up and over the sides of the pan.
- Never try to move a pan of hot fat. Wait unl the fat is completely cool.

Risk of deagraon!
If aer 15 seconds the ame does not ignite, switch o the burner and open a nearby window or door to venlate the room. Wait at least 1 minute before trying to switch the burner back on.
If you cannot light the burner even aer several aempts, check the cap and crown are in the correct posion.
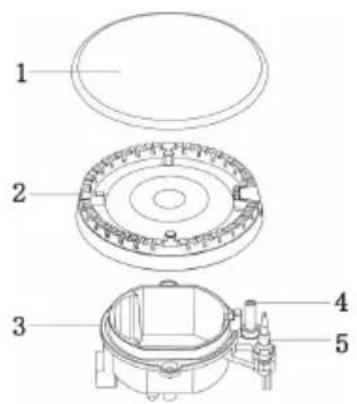
- Burner cap
- Burner crown
- Burner plate
- Ignion sparker
5.Thermocouple
NOTE: When switching on a burner, aer installaon or a power cut, it is normal for the ignition spark to be acvated automatically.
WARNING: If the burner ames are accidentally blown out, switch o the burner and do not try to relight it for at least 1 minute.
Switching O a Burner
Turn the corresponding control knob clockwise to the posion.
Cooking Pans
Suitable pans
| Burner | Minimum pan diameter | Maximum pan diameter |
| Rapid burner | 20 cm | 24 cm |
| Semi-rapid burners | 16 cm | 18 cm |
| Auxiliary burner | 12 cm | 16 cm |
Precauons for use
- Use pans which are the right size for each burner (see above table). Do not use small pans on large burners. The ame must not touch the sides of the pans.
- Only use pans with a at base.
- Always posion pans over the centre of the cooking zone, and turn the handles to a safe posion so they cannot be knocked or grabbed.
- Never operate the hob without pans.
-
When you do not use the appliance, keep the gas valve o.
-
Take care when frying food in hot oil or fat, as the overheated splashes could easily ignite.
- As soon as liquid starts boiling, turn down the ame so that it will keep the liquid simmering.
- If the control knobs are difficult to turn, please contact your local service centre.
CLEANING AND MAINTENANCE

Always turn o the gas valve and disconnect the hob from the mains
socket before any cleaning or maintenance operon is carried out.
The hob is best cleaned whilst it is sll warm, as spillage can be removed more easily than if it is le to cool.
Hob top
Regularly clean the hob top using a so cloth well wrung out in warm soapy water. Avoid the use of the following:
household detergent and bleaches;
impregnated pads unsuitable for non-sck saucepans;
- steel-wool pads;
- bath/sink stain removers.
When cleaning the hob top, make sure that no water ows inside the burner caps, as this may block the injectors.
Pan supports, burner caps and crowns
The pan supports, burner caps and crowns can be removed for cleaning. Clean them using hot soapy water and remove marks with a mild paste cleaner. If the marks are particularly difficult to remove, a well moistened soap impregnated steel wool pad can be used with caunon.
Aer cleaning, be sure to wipe dry with a so cloth and to re-assemble the parts correctly.
Ignion sparker and thermocouple
The holes and grooves must be clean for the ame to ignite properly. If the ignion sparkers are dirty they will not light properly. Clean them regularly using a small non-wire brush. The ignion sparkers must not suer any serious impacts.
The thermocouples are extremely important since they cut gas supply in case a tame goes out during cooking; be sure to keep them clean.
Maintenance
Periodically check the gas connecon pipe. Even if any simple abnormality is felt, inform the technical service to have it changed. We recommend the gas connecon parts to be changed once a year.
TROUBLESHOOTING
If the hob is not working properly, please carry out the following checks before calling the technical assistance service.
| Problem | Possible soluon |
| There is no spark when lighng the gas. | Check that the hob is plugged in and the electrical supply is switched on. |
| Check the burner caps and crowns have been replaced correctly, e.g. aer cleaning. | |
| The burner ame is not uniform. | Check the holes and grooves on the burners are not blocked. |
| Check the burner caps and crowns have been replaced correctly, e.g. aer cleaning. |
TECHNICAL DATA SHEET
Below is the sheet of domesc hob according to EU regulaon No. 66/2014.
| Model idencaon | PGH4IX |
| Type of hob | Gas hob |
| Number of gas burners | 4 |
| Energy eciency for rapid gas burner (le rear gas burner) | EEgas burner 58.7 % |
| Energy eciency for semi-rapid gas burner (le and right front gas burners) | EEgas burner 57.5 % |
| Energy eciency for the gas hob | EEgas hob 57.9 % |
To achieve maximum energy eciency, it is recommended to use pans with
recommended size for each burner above. If there is no special cooking requirement, turn the control knob to the maximum posion. Keep the burner and pan support clean.
Note:
Energy eciency according to EU regulaon No. 66/2014.
The tesng method is in compliance with the requirements of EN 30-1-1:2008 + A3:2013 and EN 30-2-1:2015.
Rangs: 220 - 240V^50Hz - 60Hz
1-3.0kW
2-1.75 kW
3-1.0kW
DISPOSAL

As a responsible retailer we care about the environment. As such we urge you to follow the correct disposal procedure for the appliance and packaging materials. This will help conserve natural resources and ensure that it is recycled in a manner that protects health and the environment.
You must dispose of this appliance and its packaging according to local laws and regulaons.
Because this appliance contains electronic components, the appliance and its accessories must be disposed of separately from household waste when the appliance reaches its end of life.
Contact your local authority to learn about disposal and recycling. The appliance should be taken to your local collecon point for recycling. Some collecon points accept appliance free of charge.
We apologise for any inconvenience caused by minor inconsistencies in these instrucons, which may occur as a result of product improvement and development.
EU Declaration of Conformity
Product Description:
The object of the declaration described above is in conformity with the relevant Union harmonisation legislation:
Low Voltage Directive (LVD)
Eco design requirements for energy-related products (ErP)
RoHS
Appliance burning gaseous fuels regulation
EMC:
EN 55014-1:2017+A11:2020
EN 55014-2:2015
EN IEC 61000-3-2:2019
EN 61000-3-3:2013+A1:2019
LVD:
EN 60335-2-102: 2016
EN 60335-1: 2012 + A11: 2014 + A13: 2017 + A1: 2019 + A14: 2019 + A2: 2019
EN 62233:2008
ErP :
(EU) No 66/2014
EN 30-2-1:2015
GAR:
This declaration of conformity is drawn up under the sole responsibility of the manufacturer.
The person responsible for this declaration is:
Place, Date / Lieu :
Ivry-sur-Seine, jun 27, 2022


- Hotline Marty France
- IMPORTANT SAFETY INSTRUCTIONS
- The fuel gas contains mercaptan so that you can smell the gas leak (smell of roen garlic or egg). If gas seems to leak, take the acons as follows:
- DESCRIPTION
- Accessories
- INSTALLATION
- Warnings
- Posioning
- Fing the hob into the worktop
- ELECTRICAL CONNECTIONS
- GAS CONNECTION
- Gas specicaon
- COMMISSIONING
- Procedure:
- CONVERSION FROM NATURAL GAS TO LPG
- Important
- Method
- To adjust the gas rate
- OPERATION
- Switching On a Burner
- Risk of deagraon!
- Switching O a Burner
- Cooking Pans
- Precauons for use
- CLEANING AND MAINTENANCE
- Hob top
- Pan supports, burner caps and crowns
- Ignion sparker and thermocouple
- Maintenance
- TROUBLESHOOTING
- TECHNICAL DATA SHEET
- Note:
- DISPOSAL
- EMC:
- LVD:
- ErP :
- GAR:
Brand : PROLINE
Model : PGH4IX
Category : Cooker