
J651 - Wristwatch JAGUAR - Free user manual and instructions
Find the device manual for free J651 JAGUAR in PDF.



| Product type | Quartz watch |
| Brand | Jaguar |
| Model | J651 |
| Power source | Battery (type not specified) |
| Main functions | Time display, date, chronograph (seconds, minutes, hours counter, split time, totalizer) |
| Time setting | By crown in position III |
| Quick date correction | By crown in position II |
| Setting date and time after battery change | Specific procedure described in the manual |
| Adjusting chronograph hands to zero position | Possible via pushers A and B after entering correction mode |
| Care and cleaning | Do not immerse, clean with a soft cloth |
| Safety | Follow WEEE regulations for recycling |
| Spare parts and repairability | Not specified – contact an authorized retailer |
| General information | Manual available for free download in PDF format |
Frequently Asked Questions - J651 JAGUAR
User questions about J651 JAGUAR
0 question about this device. Answer the ones you know or ask your own.
Ask a new question about this device
Download the instructions for your Wristwatch in PDF format for free! Find your manual J651 - JAGUAR and take your electronic device back in hand. On this page are published all the documents necessary for the use of your device. J651 by JAGUAR.
USER MANUAL J651 JAGUAR
natural_image
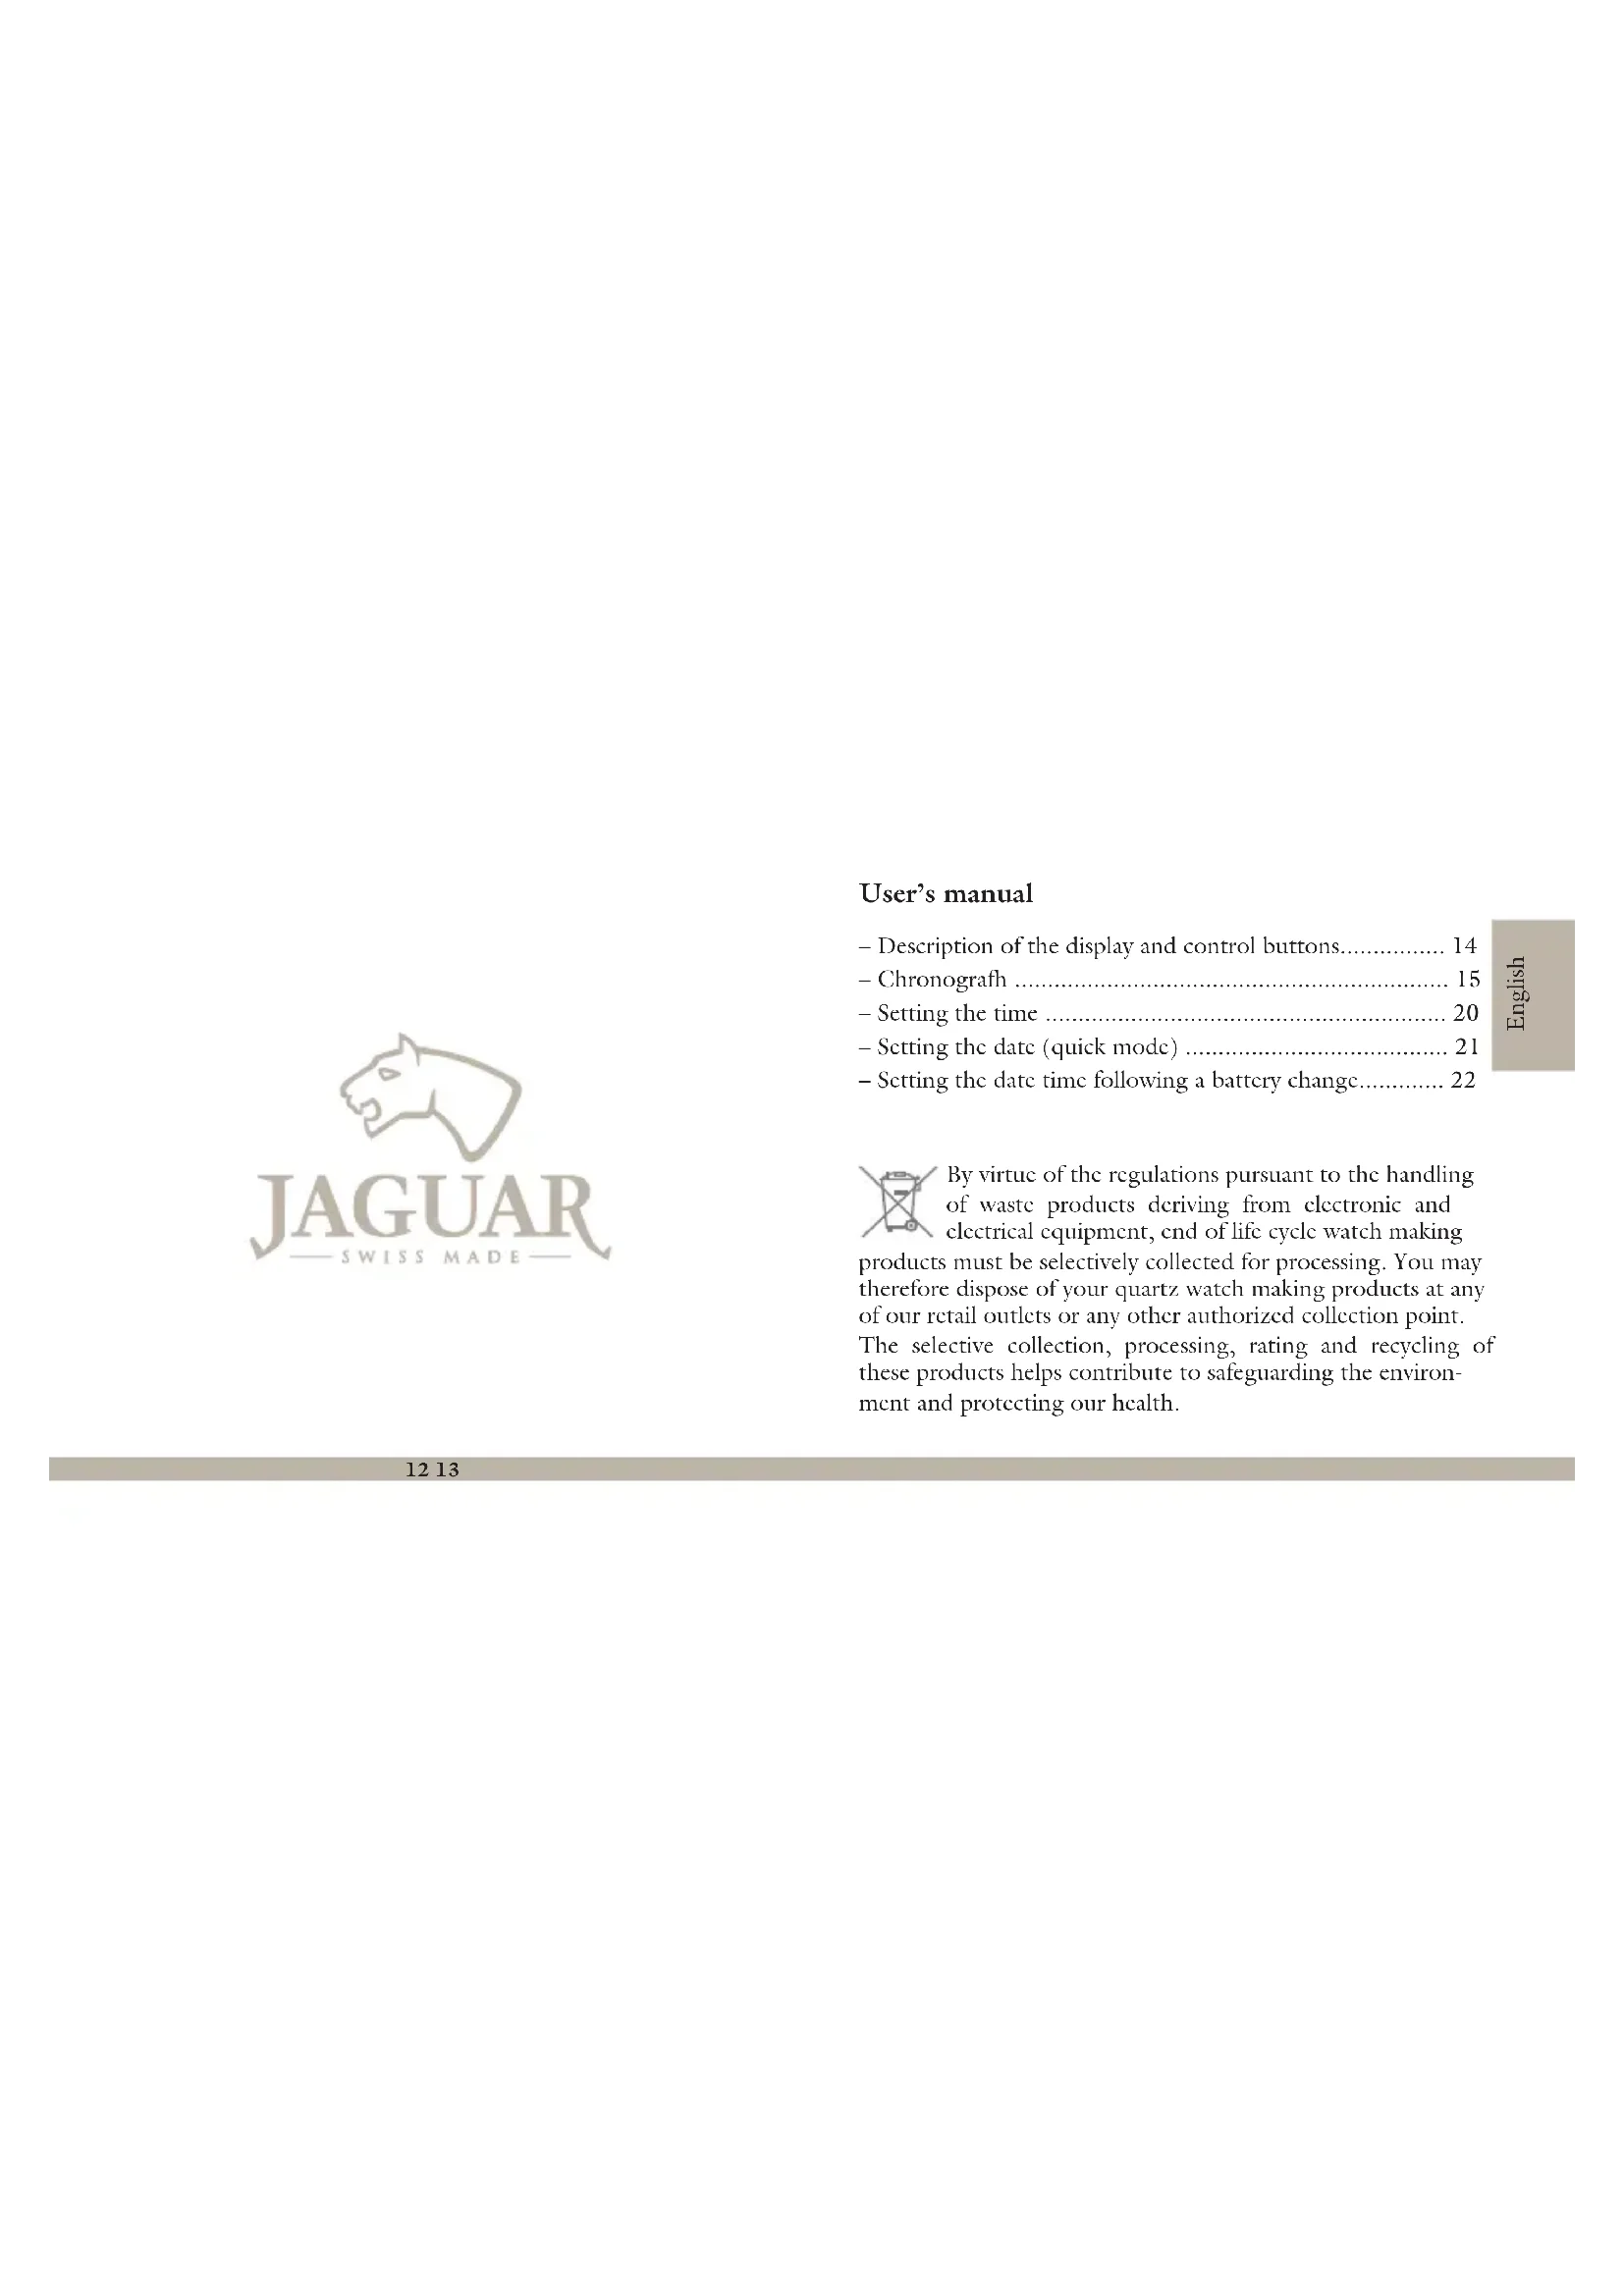
Line drawing of a stylized animal head in profile (no text or symbols)JAGUAR SWISS MADE
USER GUIDE IJM5030D
INDEX
Español > p.01
English > p.13
Français > p.25
Deutsch > p.37
Italiano > p.49
Manual del usuario

- Description of the display and control buttons.... 14
- Chronograph 15
- Setting the time 20
- Setting the date (quick mode) 21
- Setting the date time following a battery change.... 22

By virtue of the regulations pursuant to the handling of waste products deriving from electronic and electrical equipment, end of life cycle watch making products must be selectively collected for processing. You may therefore dispose of your quartz watch making products at any of our retail outlets or any other authorized collection point.
The selective collection, processing, rating and recycling of these products helps contribute to safeguarding the environment and protecting our health.
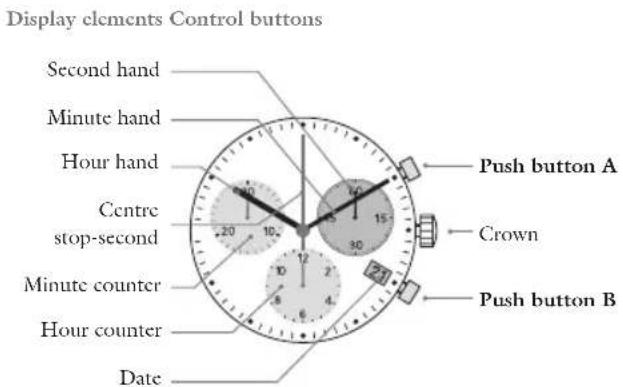
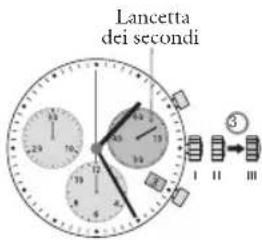
Description of the display and control buttons
Chronograph: Basic function
START/STOP/RESET
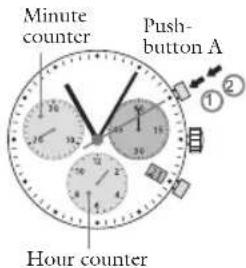
Example:
① Start: Press push-button A.
② Stop: to stop the timing, press push-button A once more and read the three chronograph hand: 1h/20min/10sec
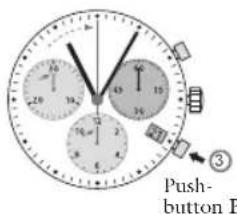
③ Zero positioning:
Press push-button B. (The three chnorograph hands will be reset to their zero positions).
Chronograph: Accumulated timing
Minute counter
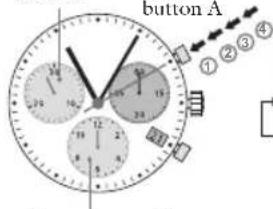
Hour counter Hour counter
Example: Example:
① Start: (start timing)
② Stop: (c.g. 15 min 5 sec following ①)
③ Restart: (timing is resumed)
-④ *Stop: (c.g. 13 min 5 sec following ③)
= 28 min 10 sec
(the accumulated measured time is shown).
⑤ Reset:
The three chronograph hands are returned to their zero positions
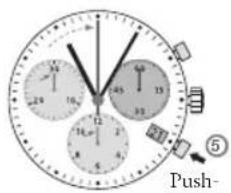
Please note:
Following*4, the accumulation of the timing can be continued by pressing push-button A (Restart / Stop, Restart/Stop,...)
Chronograph
Intermediate or interval timing
Minute counter
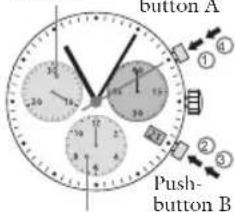
Push-button A
① Start: (start timing)
Display interval: c.g. 10 minutes, 10 seconds (timing continues in the background).
② Making up the measured time:
(the 3 chronograph hands are quickly advanced to the ongoing measured time).
③ Stop: (Final time is displayed)
④ Reset:
The 3 chronograph hands are returned to their zero position.
Please note:
Following ③, further intervals or intermediates can be displayed by pressing push-button B (display interval/make up measured time,...)
Adjusting the chronograph hands to zero position
Minute counter Center stop-second
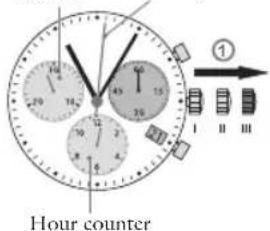
Example:
One or several chronograph hand are not in their correct zero positions and have to be adjusted (e.g. following a battery change).
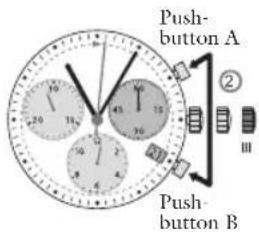
① Pull out the crown to position III (all 3 chronograph hands are in their correct or incorrect zero position).
② Keep push-buttons A and B depressed simultaneously for at least 2 seconds (the centre stop-second rotates by 360^ corrective mode is activated)

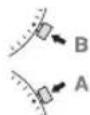
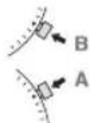
Adjusting the centre stop second:
Single step √A 1 x short
Continuous long
Adjusting the next hand B
Adjusting the hour counter hand (position 6h)
Single step A1 x short Continuous long
Adjusting the next hand B
Adjusting the minute counter hand (position 9h)
Single step 1x short Continuous long
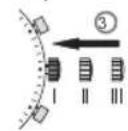
③ Returning the crown to position I Termination of the chronograph hands adjustment (can be carried out at any time)
Setting the time
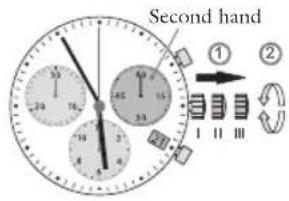
① Pull out the crown to position III * (the watch stops).
② Turn the crown until you reach the correct time 8:45.
③ Push the crown back into position 1.*
Setting the date (quick mode)
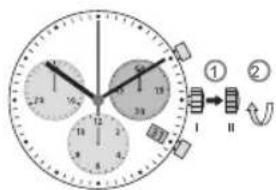
① Pull out the crown to position II (the watch continues to run).
② Turn the crown until the correct date 1 appears.
③ Push the crown back into position 1.
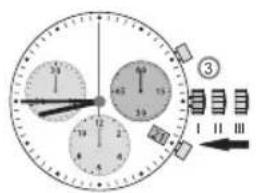
Please note: Please note:
In order to set the time to the exact * second, ① must be pullet out when the second hand is in position "60" (I). Once the hour and minute hands have been set, ③ must be pushed back into position I at the exact second.
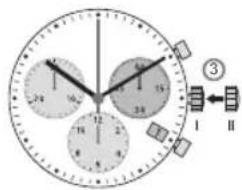
During the date changing phase between 9 PM and 12 PM; the date must be set to the date of the following day.
Setting the date/time
Following a battery change
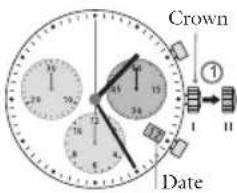
Example:
Date/time on the watch: 17/1:25 AM – Present date/time: 4/8:30 PM –
① Pull out the crown to position II (the watch continues to run).
② Turn the crown until yesterday's date appears 3.
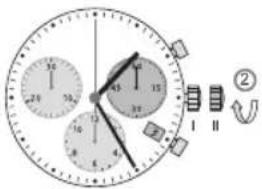

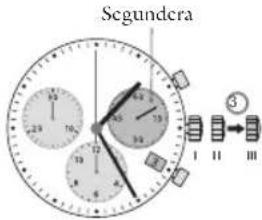


③ Pull out the crown to position * III (the watch stops).
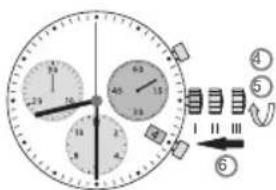
④ Turn the crown until the correct date appears.
⑤* Continue to turn the crown * until the correct time 8:30 PM appears.
⑥ Push the crown back into position 1.
Please note:
To set your watch to the exact * second please refer to the chapter entitled "setting the time".
- Please observe the AM/PM clock * rhythm.

Mode d'emploi
Compteur des heures
Exemple:
Nota: Nota:

Hinweise: Hinweise:

Notare:


natural_image
Empty white rectangle with black border (no text or symbols)FESTINA GROUP
Via Layetana, 20
08003 BARCELONA
A COMPANY OF THE FESTINA GROUP

- JAGUAR SWISS MADE
- INDEX
- Manual del usuario
- Description of the display and control buttons
- Chronograph: Basic function
- START/STOP/RESET
- Example:
- Chronograph: Accumulated timing
- Example: Example:
- Please note:
- Chronograph
- Intermediate or interval timing
- Adjusting the chronograph hands to zero position
- Setting the time
- Setting the date (quick mode)
- Please note: Please note:
- Setting the date/time
- Following a battery change
- Mode d'emploi
- Exemple:
- Nota: Nota:
- Hinweise: Hinweise:
- Notare:
Brand : JAGUAR
Model : J651
Category : Wristwatch