
BKK 2304 - Iron BEKO - Free user manual and instructions
Find the device manual for free BKK 2304 BEKO in PDF.
| Product type | Steam iron |
| Brand | Beko |
| Model | BKK 2304 |
| Power supply | 220-240 V~ 50/60 Hz |
| Power | 1800-2200 W |
| Continuous steam output | 25 g/min |
| Steam shot output | 70 g/min |
| Water tank capacity | Not specified in the manual |
| Dry ironing | Yes |
| Steam ironing | Yes |
| Steam shot | Yes |
| Spray mist | Yes |
| Vertical steam | Yes |
| Anti-drip system | Yes |
| Anti-scale system | Yes |
| Self-cleaning function | Yes |
| Thermal fuse | Yes |
| Electrical insulation class | I |
| Soleplate | Metal (not specified) |
| Weight | Not specified |
| Dimensions | Not specified |
| Warranty | Compliant with applicable legislation |
Frequently Asked Questions - BKK 2304 BEKO
User questions about BKK 2304 BEKO
0 question about this device. Answer the ones you know or ask your own.
Ask a new question about this device
Download the instructions for your Iron in PDF format for free! Find your manual BKK 2304 - BEKO and take your electronic device back in hand. On this page are published all the documents necessary for the use of your device. BKK 2304 by BEKO.
USER MANUAL BKK 2304 BEKO
Please read this user manual first!
Dear Customer,
Thank you for preferring a Beko product. We hope that you get the best results from your product which has been manufactured with high quality and state-of-the-art technology. Therefore, please read this entire user manual and all other accompanying documents carefully before using the product and keep it as a reference for future use. If you handover the product to someone else, give the user manual as well. Follow all warnings and information in the user manual.
Explanation of symbols
Throughout this user manual the following symbols are used:

Important information or useful hints about usage.

Warning for dangerous situations with regard to life and property.
Warning for electric shock.
Warning for hot surfaces.

This product has been produced in environmentally friendly, modern facilities
CONTENTS
1 Important instructions for safety and environment 4-6
1.1 General safety 4
1.2 Compliance with the Waste Electrical and Electronic Equipment Regulation and disposal of the appliance. 6
1.3 Packaging information 6
2 Your steam iron 7
2.1 Overview 7
2.1.1 Controls and parts 7
2.1.2. Technical data. 7
3 Preparation 8-10
3.1 Initial use 8
3.2 Energy saving 9
3.3Ironing tips 9
4 Operation of the Appliance 11-13
4.1 Filling the water tank. 11
4.2 Setting the temperature. 11
4.3 Steam ironing. 12
4.4 Dry ironing 12
4.5 Shock steam. 12
4.6 Water spray 13
4.7 Vertical steam. 13
5 Cleaning and maintenance 14-15
5.1 Cleaning. 14
5.2 Lime removing feature (Self-Clean) 14
5.3 Lime protection system (Anti-Calc). 15
5.4 Storage 15
6 Troubleshooting 16
1 Important instructions for safety and environment
This section includes safety instructions that helps you avoid physical injuries or economic damages.
The warranty shall terminate in case of incompliance to the instructions.
1.1 General safety
-
This appliance is built in compliance with the international safety standards.
-
This appliance can be used by children aged from 8 years and above and persons with reduced physical, sensory or mental capabilities or lack of experience and knowledge if they have been given supervision or instruction concerning use of the appliance in a safe way and understand the hazards involved. Children shall not play with the appliance. Cleaning and user maintenance shall not be made by children without supervision.
- Please do not leave the appliance unsupervised when plugged in.
- Unplug the appliance before filling its water tank with water.
- Use and keep the appliance on a stable surface.
1 Important instructions for safety and environment
-
When placing the iron on its stand, ensure that the surface on which the stand is placed is stable.
-
Contact an authorized service if the appliance is dropped on the floor, leaking or damaged otherwise. Do not use the appliance until it is repaired.
- Keep children at 8 or below away from the appliance and its power cord when used or left to cool down.
- The appliance is not intended for outdoor use.
- Use genuine parts or the parts recommended by the Manufacturer only.
-
Do not disassemble the appliance.
-
The electric power supply should fit the specifications indicated on the label.
-
The mains should be equipped and protected with a minimum 16 A fuse.
- Use the appliance on an earthed socket.
- Do not use the appliance with an external extension cord
- Do not pull the cord to unplug the appliance.
- Unplug the appliance before cleaning.
- Do not wind the cord around appliance.
- Avoid touching the plug if your hands are moist or wet when the appliance is plugged in.
1 Important instructions for safety and environment
- If the cord is damaged, it must be replaced by authorized service or similarly qualified persons in order to avoid a hazard.
- The soleplate of the appliance may overheat. Contacting with hot surfaces may cause burns.
- Do not use the appliance near or around explosive or inflammable environments or materials.
- Keep packaging materials away from children.
1.2 Compliance with the Waste Electrical and Electronic Equipment Regulation and disposal of the appliance.

This product do not include any hazardous and/or prohibited materials defined in the Waste Electrical and Electronic Equipment Regulation issued by the Ministry of Environment and Urban Planning. Complies with the Waste Electrical and Electronic Equipment Regulation. This product is manufactured with high quality components and materials
that can be recycled and reused. For this reason, do not dispose of this product together with domestic or other wastes. Instead, leave the appliance in a recycling collection point designed for electric and electronic equipments. Ask the local authority about such collection points. You can contribute protection of the environment and natural resources by delivering used electronic products for recycling.
1.3 Packaging information
The packaging is produced from recyclable materials in accordance with the national legislation. Do not dispose of packaging wastes together with domestic or other type of wastes; leave them to the packaging collection points specified by the local authority.
2 Your steam iron
2.1 Overview
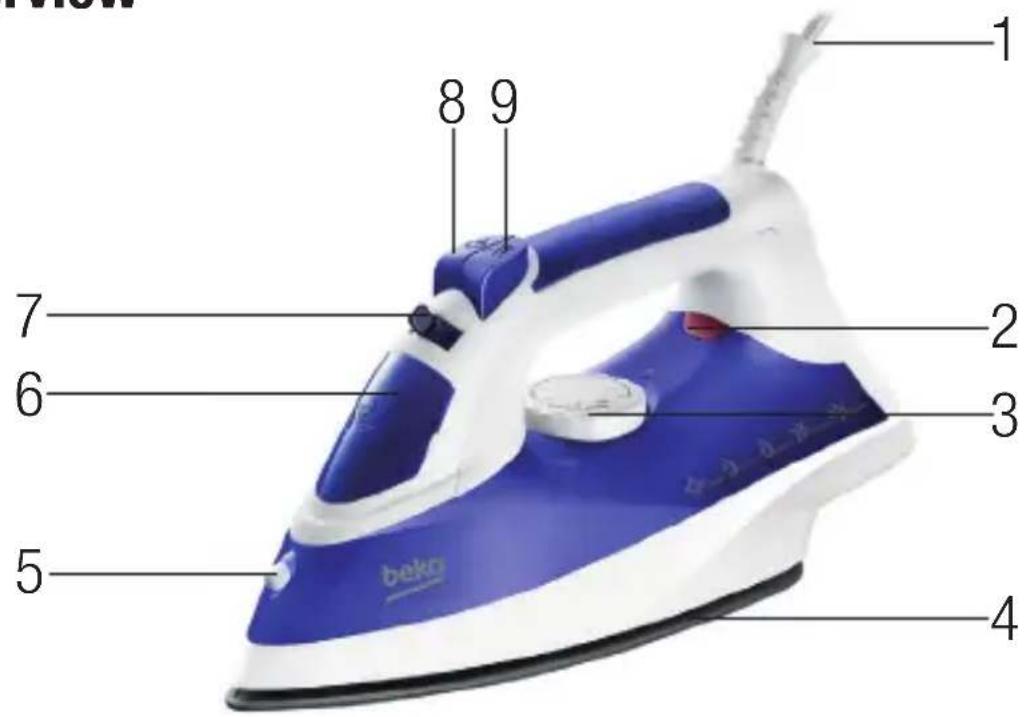
2.1.1 Controls and parts
1- Power cord
2- Thermostat warning light
3- Temperature setting dial
4- Soleplate
5- Water spray nozzle
6- Water refill lid
7- Steam setting and self clean knob
8- Shock steam button
9- Water spray button
2.1.2 Technical data
Voltage : 220-240V~, 50/60 Hz
Power consumption : 1800- 2200 W
Isolation class : I
Constant steam amount : 25 g/min
Shock steam amount : 70 g/min
Thermostat heat setting :Yes
Dry Ironing :Yes
Shock steam :Yes
Water spray :Yes
Anti-drip
:Yes
Thermic fuse :Yes
Vertical steaming :Yes
Self-Clean function :Yes
Anti Calc :Yes
The values which are declared in the markings affixed on your product or the other printed documents supplied with it represent the values which were obtained in the laboratories pursuant to the pertinent standards. These values may vary according to the usage of the appliance and ambient conditions.
3 Preparation
3.1 Initial use
- Remove all package materials, labels and protective foil and dispose of them in accordance with the applicable legal regulations.
- Please clean the outer parts of the appliance as described in the section "Cleaning and Maintenance".
- Place the appliance on an even, stable, dry and non-slip surface.

In the first use, a light odor may arise from the iron. This condition will turn to be normal after a couple of uses.

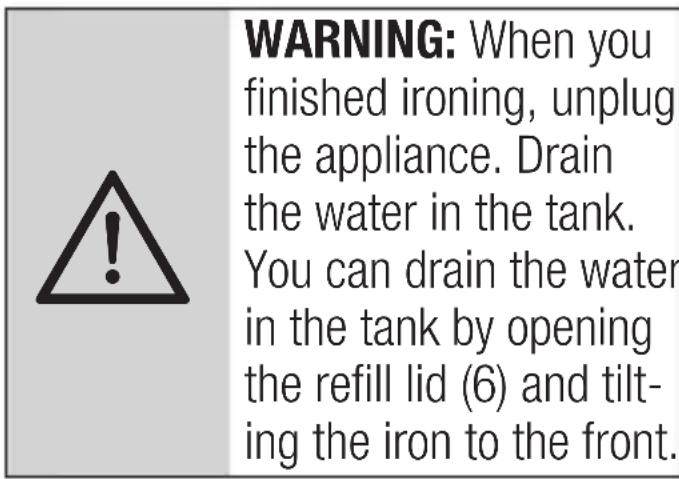
WARNING: When your iron is filled with excessive water, it may overflow. To avoid this, make sure that the level of water in the appliance does not exceed the MAX. line.

In order to generate steam, the soleplate (4) has to rise to a certain level of temperature. By means of the 'anti-drip' feature of your iron, water dripping from the soleplate of the iron shall be prevented until the soleplate attains the temperature required.
- If water runs out during ironing, after unplugging, you can top up water without waiting it to cool down.
- Iron your garments which require a low temperature first and then those requiring high temperatures. If the temperature is reduced when the appliance has a high temperature setting, it might be necessary to wait for 3 to 4 minutes for the heat to come down to the set level.
3 Preparation
3.2 Energy saving
To save energy:
- You should use an appropriate temperature setting. If you do not know the appropriate temperature setting, start from the lowest setting and increase the temperature until the fabric is ironed well.
In order to perform a good ironing try to use the steam at intervals. Using steam continuously will cause more surplus humidity on your products which may lead to re-creasing of your fabric while losing the extra humidity.
3.3 Ironing tips
In order to learn the appropriate ironing temperature to be used for the garment, always read the care label on your garment before setting temperature.
- As the iron gets warmer in a shorter time compared to the time elapsing to cool it down, synthetics, silks and other fabrics alike should be ironed at the beginning by using lower temperature settings.
- If the garment is made of a blend of different fabrics, always start ironing by using the lowest temperature setting first.
- Silk and other textiles which tend to brighten must be ironed on the reverse side. Velvets and other lustrous fabrics must be ironed under little pressure and in one direction only. Always keep the iron moving during ironing.
- Do not use the steam function when ironing colored silk clothes. This may cause stains.
3 Preparation
- Garments made of 100% pure wool can be ironed using steam. Set the temperature setting dial preferably to the MAX setting and lay a dry towel between the garment and the iron.
- Ironing wool garments can cause them to 'shine'. It is therefore recommended to iron such garments inside out.

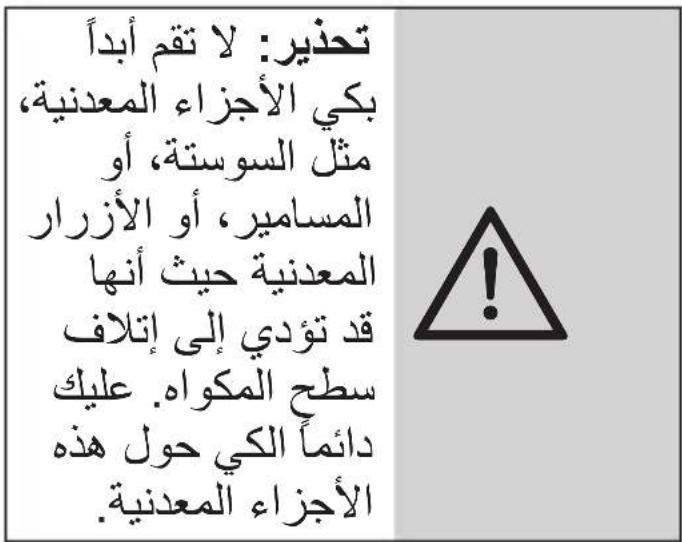
WARNING: Never iron on metal parts, such as zippers, rivets, or metal buttons as they could damage the soleplate. Always iron around these metal parts.
4 Operation of the Appliance
4.1 Filling the water tank
Always unplug the appliance.
Push the steam setting knob
(7) to left and bring to "0" (off) position.
- Open the water refill lid (6) of the iron and fill in water.
- Close the water refill lid (6).
Even if you will iron your garments without steam; water should be available in the appliance in order to use the water spray when you need it.
- Do not fill the water reservoir with perfume, vinegar, laundry starch, lime removers or other products or chemicals which shall facilitate the ironing process.
- If your tap water is excessively limy, we recommend to use a mixture of tap water with purified water.
4.2 Setting the temperature
After plugging in the iron, set re quired ironing temperature by turning the temperature setting dial (3) to the appropriate position (see the temperature and steam settings table below).
You can increase the temperature of your appliance by turning the temperature setting dial (3) clockwise.
When you are setting the temperature of your appliance, we recommend to consider the following table.
| Fabric Type | Temperature Setting | Steam Setting |
| Synthetic | ● | Without steam |
| Silk | ● | Without steam |
| Wool | ●● | Steam |
| Cotton | ●●● | Steam |
| Linen - Jeans | Max Steam |
4 Operation of the Appliance
In order to learn the ironing temperature to be used, check the garment's care label.
- When the thermostat warning light (2) turns off, your iron will have reached the desired temperature.
- If you don't know the fabric of your garment, first iron an invisible part of your garment and determine a correct ironing temperature for it.
In order to prevent the bright stains that may form on the synthetic fabrics such as silk, iron on the reverse side of the fabric. Do not use the spray feature in order to prevent the stain formation.
4.3 Steam ironing
Pull the steam setting knob (7) to the right or left and bring it to steam level "1-2" as you desire.
4.4 Dry ironing
- In order to make dry ironing, you should bring the steam setting knob (7) to "0" (off) position. Having water in the iron would be advantageous; you may use the water spray button (9) when necessary.
4.5 Shock steam
During ironing, in order to remove the tenacious creases, you can gain strong steam by pressing on the shock steam button (8) for 3-4 times in 5-second intervals.
- When you start to iron, shock steam may not emit in your first couple of presses. In order to gain shock steam, the temperature setting dial (3) should be at or a higher level.
- You can open the creased parts of the garments with the steam power which is obtained by pressing the shock steam button (8) during steam ironing. However if this process is maintained without an interruption, water may also come from the soleplate (4) along with the steam.
4 Operation of the Appliance
4.6 Water spray
Make sure there is sufficient water in the water tank. Spray function can be used in order to remove tenacious creases by pressing the water spray button (9) during dry or steam ironing.
4.7 Vertical steam
While the iron is in a vertical position, by pressing the shock steam button (8), you can remove wrinkles and creases from your curtains and your garments on the hanger with the steam you will get by pressing the shock steam button.

WARNING: Never direct the steam to the clothes on the people or the garments on pets.
5 Cleaning and maintenance
5.1 Cleaning
- Turn off and unplug the appliance before each cleaning process.
- Wait until your iron cools down completely.
- Use a slightly damp cloth to clean the outer surface of the iron. Then wait until it dries out completely.
- Wipe the sediments and residues on the soleplate with a slightly damp cloth and soft, nonabrasive liquid cleaner as necessary.
5.2 Lime removing feature (Self-Clean)
Use the self-clean feature once in every 2 to 3 weeks. If the water of your network is very hard (if lime particles fall down from the base of the appliance), we recommend you to use the self-clean function more frequently.
Always unplug your iron.
- Fill in the water reservoir up to Max. level.
- Do not add vinegar etc. and other lime removing substances into the water reservoir.
Pull the steam setting knob (7) to left and bring to the seamless ironing "0" position.
Plug in the appliance to a grounded outlet and bring the soleplate temperature to maximum.
- Hold the iron over the sink and turn the steam setting and self-clean knob (7) to the "Self Clean" position.
5 Cleaning and maintenance
- Keep the button on the self-cleak position. Gently shake the iron to left and right. Continue this process when the water in the water tank finishes. Release the button when the water is fully drained.
During this process, the water in the tank comes down into the steam generation reservoir quickly and is released through the soleplate holes along with the lime particles (if any). - Unplug the appliance and gently move it on an old cloth. Keep ironing until the water and lime stains left on the base are removed. Wait until the iron cools down before storing it.
5.3 Lime protection system (Anti-Calc)
The lime protection system in the water tank of your iron prevents clogging of the steam holes. Lime protection system is always active and there is no need to replace it.
5.4 Storage
If you do not intend to use the steam iron for a long time, please store it carefully.
Make sure that the iron is unplugged and cooled down completely before storing it.
- Empty the water reservoir.
- Please keep the steam iron and its accessories in their original packages.
- Store them in a cool and dry place.
Make sure that the appliance is stored in a place out of the reach of children.
6 Troubleshooting
Although the iron is plugged in, its soleplate (4) does not heat up.
- The appliance may be improperly connected. >> Check the plug and power cord (1) of iron.
- Temperature setting dial (3) may be at the min. position. >> Turn the temperature setting dial to the steam sign.
Iron does not generate steam.
- Water tank may not contain sufficient amount of water. >>>> Fill the water reservoir with water up to Max. level.
- Steam setting knob (7) may be at the O position. >>> Take the steam setting knob to steam position. >>> Soleplate (4) may not be hot enough. "Anti-Drip" system which prevents water dripping may be active. Turn the iron temperature setting dial (3) to the steam sign. Seat the iron in a vertical position and wait for the base to heat up.
Shock Steam - Vertical Steam does not function.
- These functions may have been used too frequently in a very short period of time. >> Keep ironing at a horizontal position and wait for a while before using the shock steam function again. >> Soleplate (4) may not be hot enough. Turn the iron temperature setting dial to the steam sign. Seat the iron in a vertical position and wait for the base to heat up.
Water drops fall down onto the fabric during ironing.
- You may not have fully closed the water refill lid (6). >>> Close the water refill lid (6) completely.
Sediments and particles drop off from the base during ironing.
- If the water you use for your iron is too limy, such sediments may form. >> Use the self-clean function for once or a few times. In your next ironing session, add soft water into your appliance.
The appliance drops water after it cools down or stored.
- You may have left the iron on a horizontal position while there is water in its tank.
Empty the water tank.
Stains on the soleplate.
- Wet garments might have been ironed and the soleplate (4) has had lime stains. >> After the appliance cools down to a satisfactory level, wipe the soleplate (4) with a microfiber knitted or cotton cloth.
4.1 HanoJIHeHne emKoCTn IJIa BODbl
- OTKJIIOUHTe npIbOp OT əJIeKTPocETn. CdBnHbTe peRyJIaTOp nOdau napa (7) BJIeBO B nOLOXKeHne «0» (BbIKJIIOUcHo).
- OTKpoIte Ha yTIORe KpbIshky 3aJIINBHOrO OTBepCTnA (6) n 3aJIeIte BODy.
3akpoTe KpbIshky 3aJIbHoro OTBepCTna (6). - PekomeHnyeTcHaJIbBaTb BODyBpe3epByap, daxe npi rJaXeHn 6e3napa, yTo6bl npi Heo6xOIMOCtN MOxHO 6blIO nCNoJb3OBaTb pa36pbI3rNBaTeJIb BObl.
-
Hn B Koem clyuae He do6abIyTe B BODy dUxN, yKcyc, cpeCTBa IJIa NODkpaxMaINbAHN, cpeCTBa npOTNB HaKNII INI dpyrIne XmMueckne cpeCTBa IJIa OblerueHn rJaKeHn.
-
Ecni BOIOnpoBOHaB BODa CNIuKOM JKeCTKaJ, peKOMeHdyEtCra NcNoJIb-3OBaTb CMeCb BOIOnpoBOHOI N OUnIeHHO'BODbl.
4.2 Hac tropona TempeatypbI
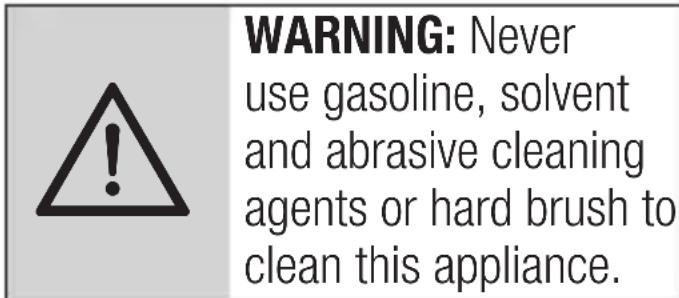
HnB Koem cnyae He nCNoIb3yIte IJRA YNCTKN PNI- 6opaa 6eH3nH, paCTBOpNTeIN, a6pa- 3NBhIe YNCTaIe CpeIcTBA INJXKeCTKne IZeTKn.
5Чистka n o6cnyxnbHne
Jy j 1 J 1 J 1 J 1 J 1 J 1 J 1 J 1 J 1 J 1 J 1 J 1 J 1 J 1 J 1 J 1 J 1 J 1 J 1 J 1 J 1 J 1 J 1 J 1 J 1 J 1 J 1 J 1 J 1 J 1 J 1 J 1 J 1 J 1
155 jgol all 151
142 10
151 151 g oall all j! 1
. 151 151
Jolilololololololololololololololololololololololololololololololololololololololololololol
.
5.2
()
J5 0 11 1 1 1 1 1 1
3 2
()
sui (jglil dla jn kll
1
L
1
121
J 1
d = 1
"0" 1
()
J 1
.
J 1
(7)
"
5.1
J 1
a + b = 3
.2
3
1
Lolai
dcll llaa g wolg 4
.
1
.

.
aolal 1
(7) 1 + 52 + 1 - 52 + 1 = 3 + 12( 2)
2
(6)
-
12j 1
-
1 11111
JSLJI !
i
j全球i

4.6
a 11 a 12
jsc bll yclll all jy
.1 9)
4.7
6
(8)
J 1
iclai l c wlll g jilll
biyally 1ie Jssiw gill jilly
.
j1i 124
1
11 1
y

4.4
.0" 7
Jn Jn nn nnnn
. 9
4.5
s g j 1c Jgssll sik
J"8" jj 2r j 1c bii. 5 3-4
Jg Jgl Jgl 10
JgJgJgJgJgJgJgJgJgJgJgJgJgJgJgJgJgJgJgJgJgJgJgJgJgJgJgJgJgJgJgJgJgJgJgJgJgJgJgJgJgJgJgJgJgJgJgJgJgJgJ gJ gJ gJ gJ gJ gJ gJ gJ gJ gJ gJ gJ gJ gJ gJ gJ gJ gJ gJ gJ gJ gJ gJ gJ g
y y j 8"8" 4
- 1
(2)
5 1g jy jy S lbc
1 1
1
4.3
"3" 1
. aclll jolc oljil
i j 1
J 1
100% 100%
J
J
J
J
J
J
J
J
J
J
J
J
J
J
J
J
J
J
J
J
J
J
J
J
J
J
J
J
J
J
J
J
J
J
J
J
J
J
J
J
J
J
J
J
J
J
J
J
J
J
j
j
j
j
j
j
j
j
j
j
j
j
j
j
j
j
j
j
j
j
j
j
j
j
j
j
j
j
j
j
j
j
j
j
j
j
j
j
j
j
j
j
j
j
j
j
j
j
j
j
j
j
j
j
j
j
j
j
j
y 1. j"g" g
iill 1 iiiill Jai g
aaiy 5 no dy .saiall
g jai yaiy 1 aclll aiaai
al golil g 1 baa 1
gol all lai I aie I bao
1 1
3.2
:aaal bai
1 1 1 1 1 1 1 1 1 1 1 1 1 1 1 1 1 1 1 1 1 1 1 1 1 1 1 1
1 1 1 1 1 1 1 1 1 1 1 1 1 1 1 1 1 1 1 1 1 1 1 1 1 1 1 1 1 1 1 1
a a a a a a a a a a a a a a a a a a a a a a a a a a a a a a a a a a a a a
aall abll lss
.
.
.
.
.
.
.
.
.
.
.
.
.
.
.
.
.
.
.
.
.
.
.
.
.
.
.
.
.
.
.
.
.
.
.
.
.
. 1
.
.
.
.
.
.
.
.
.
.
.
.
.
.
.
.
.
.
.
.
.
.
.
.
.
.
.
.
.
.
.
.
.
.
.
.
.
.
.
.
.
.
.
.
.
.
.
.
.
.
.
.
.
.
.
.
.
.
.
.
.
.
.
.
.
.
.
.
.
.
.
.
.
.
.
.
.
.
.
.
.
.
.
.
.
.
.
.
.
.
.
.
.
.
.
.
.
.
.
.
2
2
2
2
2
2
2
2
2
2
2
2
2
2
2
2
2
2
2
2
2
2
2
2
2
2
2
2
2
2
2
2
2
2
2
2
2
2
2
2
2
2
2
2
2
2
2
2
2
2
2
1
y. g b y 1g a jy Ic
Igblj n Jl jgl
Jb j gl w Jn JbY Ie Jlc
45 j gl d ic aal jls g jll jc
.
.
.
17
JcLw gll aXwI Lgol wll Joo
a
.
aolll 1.1
.
A
J 1
aaii 1
1/1
i 1
j j 1

- Please read this user manual first!
- Explanation of symbols
- CONTENTS
- Important instructions for safety and environment 4-6
- Your steam iron 7
- Preparation 8-10
- Operation of the Appliance 11-13
- Cleaning and maintenance 14-15
- Troubleshooting 16
- Important instructions for safety and environment
- General safety
- Compliance with the Waste Electrical and Electronic Equipment Regulation and disposal of the appliance.
- Packaging information
- Your steam iron
- Overview
- Controls and parts
- Technical data
- Preparation
- Initial use
- Energy saving
- To save energy:
- Ironing tips
- Operation of the Appliance
- Filling the water tank
- Setting the temperature
- Steam ironing
- Dry ironing
- Shock steam
- Water spray
- Vertical steam
- Cleaning and maintenance
- Cleaning
- Lime removing feature (Self-Clean)
- Lime protection system (Anti-Calc)
- Storage
- Troubleshooting
- HanoJIHeHne emKoCTn IJIa BODbl
- Hac tropona TempeatypbI
- 5Чистka n o6cnyxnbHne
- 5.2
- ()
- 5.1
- 4.6
- 4.7
- 4.4
- 4.5
- 4.3
Brand : BEKO
Model : BKK 2304
Category : Iron