USER MANUAL LB 251S HUSQVARNA
LC 151, LC 151S, LB 251S, LB 256SP
EAC
EN Operator's manual 2-20
Engine troubleshooting.... 16
Transportation, storage and disposal.... 17
Technical data.... 18
EC Declaration of Conformity.... 20
Introduction
Product description
The product is a pedestrian-controlled rotary lawn mower. For LC 151, LC 151S attach the grass catcher to collect the grass. Attach the side discharge deflector for side discharge of the grass. For LC 151, LC 151S attach a mulch kit to cut the grass into fertilizer.
Intended use
Use the product to cut grass. Do not use the product for other tasks.
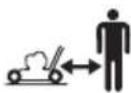
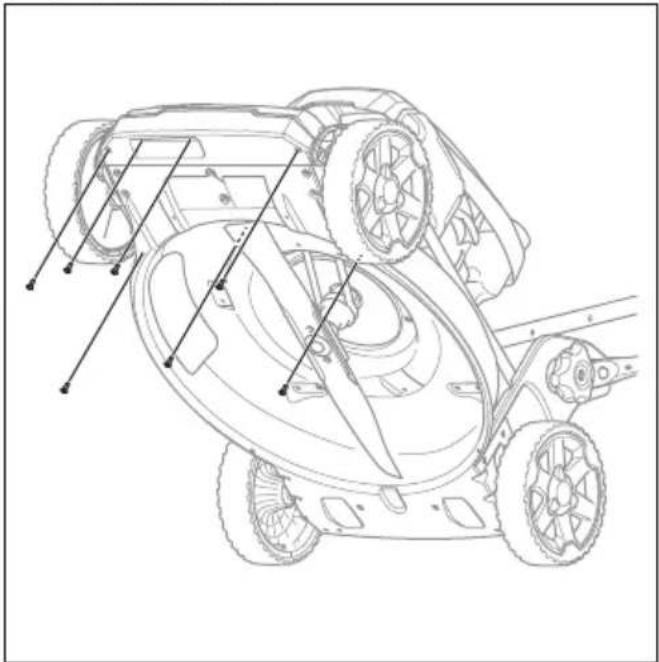
Product overview
text_image
Technical diagram of a lawn mower with numbered parts and an inset view showing mechanical components.
- Handlebar
- Engine brake handle
- Drive bail (LC 151S, LB 256SP)
- Drive lever (LB 251S)
- Rear cover (LC 151, LC 151S)
- Grass catcher (LC 151, LC 151S)
- Handle height knobs
- Cutting height lever
- Oil cap and dipstick
- Side discharge cover
-
Muffler
-
Spark plug
- Carburetor
- Fuel tank cap
- Symbols
- Cutting cover
- Air filter
- Side deflector
- Mulch kit (accessory for LC 151, LC 151S)
- Starter rope handle
- Operator's manual
Symbols on the product

WARNING! Be careful and use the product correctly. This product can cause serious injury or death to the operator or others.

Please read the operator's manual carefully and make sure that you understand the instructions before use.
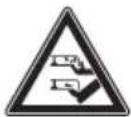
Look out for thrown objects and ricochets.
Keep persons and animals at a safe distance from the work area.
Warning: Keep hands and feet away from the rotating blade.
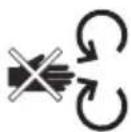
Warning: Keep hands and feet away from rotating parts.
Stop the engine and remove the ignition cable before repairs or maintenance.

This product is in accordance with applicable EC directives.

Noise emission to the environment according to the European Community's Directive. The product's emission is specified in the Technical data chapter and on the label.
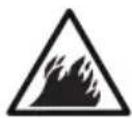
Risk of fire.

Do not breathe in exhaust fumes. The exhaust fumes from the engine contain carbon monoxide, an odourless, poisonous and very dangerous gas. Do not start the engine indoors or in closed spaces.
Hot surface.

Fill the engine with oil before you start the product.
Note: Other symbols/decals on the product refer to certification requirements for some commercial areas.
Product liability
As referred to in the product liability laws, we are not liable for damages that our product causes if:
• the product is incorrectly repaired.
• the product is repaired with parts that are not from the manufacturer or not approved by the manufacturer.
• the product has an accessory that is not from the manufacturer or not approved by the manufacturer.
- the product is not repaired at an approved service center or by an approved authority.
Euro V Emissions

WARNING: Tampering with the engine voids the EU type-approval of this product.
Safety
Safety definitions
Warnings, cautions and notes are used to point out specially important parts of the manual.

WARNING: Used if there is a risk of injury or death for the operator or bystanders if the instructions in the manual are not obeyed.

CAUTION: Used if there is a risk of damage to the product, other materials or the adjacent area if the instructions in the manual are not obeyed.
Note: Used to give more information that is necessary in a given situation.
General safety instructions

WARNING: Read the warning instructions that follow before you use the product.
- This product is dangerous if used incorrectly or if you are not careful. Injury or death can occur if you do not obey the safety instructions.
- This product produces an electromagnetic field during operation. This field may under some circumstances interfere with active or passive medical implants. To reduce the risk of serious or fatal injury we recommend persons with medical implants to consult their physician and the medical implant manufacturer before operating this product.
• Always be careful and use your common sense. If you are not sure how to operate the product in a special situation, stop and speak to your Husqvarna dealer before you continue.
- Keep in mind that the operator will be held responsible for accidents that involve other persons or their property.
- Keep the product clean. Make sure that you can clearly read signs and decals.
- Do not let a person use the product unless you make sure that they read and understand the contents of the operator's manual.
- Do not let a child operate the product.
- Keep children away from the work area. A responsible adult must be there at all times.
- Do not let a person, without knowledge of the instructions, operate the product.
• Always monitor a person, with decreased physical capacity or mental capacity, that uses the product. A responsible adult must be there at all times.
- Do not use the product if you are tired, ill, or under the influence of alcohol, drugs or medicine. This has a negative effect on your vision, alertness, coordination and judgment.
- Do not use the product if it is defective.
- Do not change this product or use it if it is possible that it has been changed by others.
- Do not change the adjustment for the engine speed control.
Work area safety

WARNING: Read the warning instructions that follow before you use the product.
- Remove objects such as branches, twigs and stones from the work area before you use the product.
-
Objects that hit against the cutting equipment can eject and cause damage to persons and objects. Keep bystanders and animals at a safe distance from the product.
-
Never use the product in bad weather such as fog, rain, strong winds, intense cold and risk of lightning. To use the product in bad weather or in moist or wet locations is tiring. Bad weather can cause dangerous conditions, such as slippery surfaces.
- Look out for persons, objects and situations that can prevent safe operation of the product.
- Look out for obstacles, such as roots, stones, twigs, pits and ditches. Long grass can hide obstacles.
- To cut grass on slopes can be dangerous. Do not use the product on ground that slopes more than 15^ .
- Operate the product across the face of slopes. Do not move up and down.
- Be careful when you go near hidden corners and objects that prevent a clear view.
Work safety

WARNING: Read the warning instructions that follow before you use the product.
- Use this product to cut grass lawns only. It is not permitted to use it for other tasks.
- Use personal protective equipment. Refer to Personal protective equipment on page 5.
- Make sure that you know how to stop the engine quickly in an emergency.
- Never start the engine in a closed space or near flammable material. The exhaust fumes from the engine are hot and can contain sparks which can start a fire.
- Do not operate the product unless the blade and all covers are attached correctly. An incorrectly attached blade can come loose and cause personal injury.
- Make sure that the blade does not hit objects such as stones and roots. This can do damage to the blade and bend the engine shaft. A bent axle causes heavy vibration and a very high risk that the blade becomes loose.
- If the blade hits an object or if vibrations occur, stop the product immediately. Disconnect the ignition cable from the spark plug. Examine the product for damages. Repair damages or let an authorised service agent do the repair.
- Never attach the engine brake handle permanently to the handle when the engine is started.
- Put the product on a stable, flat surface and start it. Make sure that the blade does not hit the ground or other objects.
• Always stay behind the product when you operate it.
- Let all the wheels stay on the ground and keep 2 hands on the handle when you operate the product. Keep your hands and feet away from the rotating blades.
- Do not tilt the product when the engine is started.
-
Be careful when you pull the product rearward.
-
Never lift up the product when the engine is started. If you must lift the product, first stop the engine and disconnect the ignition cable from the spark plug.
- Do not walk rearward when you operate the product.
- Stop the engine when you move across areas without grass, for example paths made of gravel, stone and asphalt.
- Do not run with the product when the engine is started. Always walk when you operate the product.
- Stop the engine before you change the cutting height. Never make adjustments with the engine started.
- Never let the product stay out of view with the engine started. Stop the engine and make sure that the cutting equipment does not rotate.
Safety instructions for operation
Personal protective equipment

WARNING: Read the warning instructions that follow before you use the product.
- Personal protective equipment cannot fully prevent injury but it decreases the degree of injury if an accident does occur. Let your dealer help you select the right equipment.
- Use hearing protection if the noise level is higher than 85 dB.
- Use heavy-duty slip-resistant boots or shoes. Do not use open shoes or go with bare feet.
- Use heavy, long pants.
- Use protective gloves when necessary, for example when you attach, examine or clean the cutting equipment.
Safety devices on the product

WARNING: Read the warning instructions that follow before you use the product.
- Do not use a product with defective safety devices.
- Do a check of the safety devices regularly. If the safety devices are defective, speak to your Husqvarna service agent.
To do a check of the cutting cover
The cutting cover decreases vibrations in the product and decreases the risk of injury from the blade.
- Examine the cutting cover to make sure that there are no damages such as cracks.
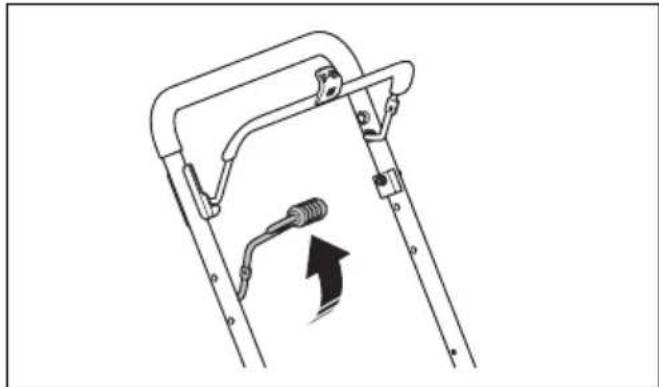
To do a check of the engine brake handle
The engine brake handle stops the engine. When the engine brake handle is released, the engine stops.
- Start the engine and then release the engine brake handle. If the engine does not stop in 3 seconds, let an approved Husqvarna service agent adjust the engine brake.
natural_image
Simple line drawing of a mechanical lever mechanism with a curved arrow indicating motion (no text or symbols)
To do a check of the rear cover
The rear deflector decreases the risk that objects eject in the direction of the operator.
- Make sure that the rear cover is not damaged.
- Make sure that the springs that close the rear cover are not damaged.
- Replace damaged springs and damaged parts.
- Make sure that the rear cover can move smoothly on the hinges.
Muffler
The muffler keeps the noise levels to a minimum and sends the exhaust fumes away from the operator.
Do not use the product if the muffler is missing or defective. A defective muffler increases the noise level and the risk of fire.

WARNING: The muffler becomes very hot during and after use and when the engine operates at idle speed. Be careful near flammable materials and/or fumes to prevent fire.
To do a check of the muffler
- Examine the muffler regularly to make sure that it is attached correctly and not damaged.
Fuel safety

WARNING: Read the warning instructions that follow before you use the product.
- Do not start the product if there is fuel or engine oil on the product. Remove the unwanted fuel/oil and let the product dry.
- If you spill fuel on your clothing, change clothing immediately.
- Do not get fuel on your body, it can cause injury. If you get fuel on your body, use soap and water to remove the fuel.
- Do not start the product if the engine has a leak. Examine the engine for leaks regularly.
-
Be careful with fuel. Fuel is flammable and the fumes are explosive and can cause injuries or death.
-
Do not breathe in the fuel fumes, it can cause injury. Make sure that there is a sufficient airflow.
- Do not smoke near the fuel or the engine.
- Do not put warm objects near the fuel or the engine.
- Do not add the fuel when the engine is on.
• Make sure that the engine is cool before you refuel.
- Before you refuel, open the fuel tank cap slowly and release the pressure carefully.
- Do not add fuel to the engine in an indoor area. Not sufficient airflow can cause injury or death because of asphyxiation or carbon monoxide.
- Tighten the fuel tank cap fully. If the fuel tank cap is not tightened, there is a risk of fire.
- Move the product a minimum of 3 m / 10 ft from the position where you filled the tank before a start.
- Do not fill the fuel tank fully. Heat causes the fuel to expand. Keep a space at the top of the fuel tank.
Safety instructions for maintenance

WARNING: Read the warning instructions that follow before you use the product.
- The exhaust fumes from the engine contain carbon monoxide, an odourless, poisonous and very dangerous gas. Do not start the engine indoors or in closed spaces.
- Before you do the maintenance on the product, stop the engine and remove the ignition cable from the spark plug.
- Use protective gloves when you do maintenance on the cutting equipment. The blade is very sharp and cuts can easily occur.
• Accessories and changes to the product that are not approved by the manufacturer, can cause serious injury or death. Do not change the product. Always use accessories that are approved by the manufacturer.
- If the maintenance is not done correctly and regularly, the risk of injury and damage to the product increases.
- Only do the maintenance as given in this owner's manual. All other servicing must be done by an approved Husqvarna service agent.
- Let an approved Husqvarna service agent do servicing on the product regularly.
- Replace damaged, worn or broken parts.
Assembly
Introduction

WARNING: Before you assemble the product, you must read and understand the safety chapter.

WARNING: Remove the spark plug cable from the spark plug before you assemble the product.
To assemble the handle
- Push the screw (A) through the handle (B), the plastic washer (C) and the handle support bracket (D).

text_image
A
B
C
D
E
-
Tighten the nut (E) fully.
-
Push the screw (F) through the washer (G) and the handle support bracket.
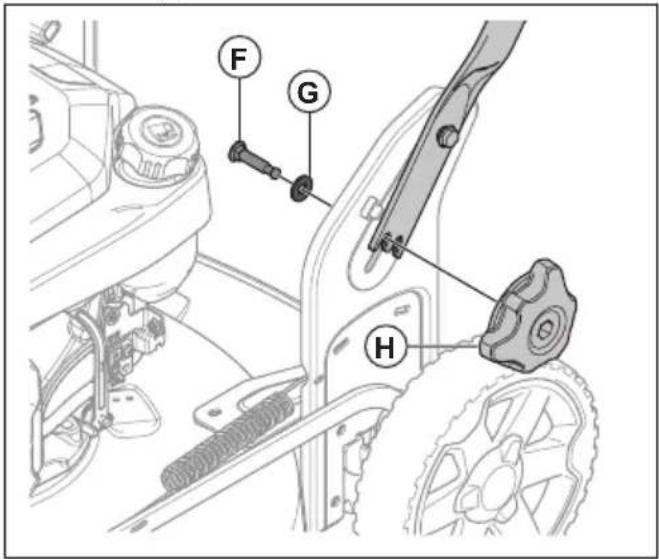
text_image
Technical diagram of a mechanical assembly with labeled parts F, G, and H
- Tighten the knob (H) fully.
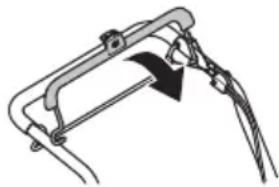
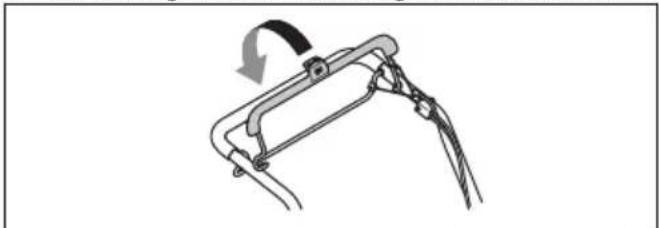
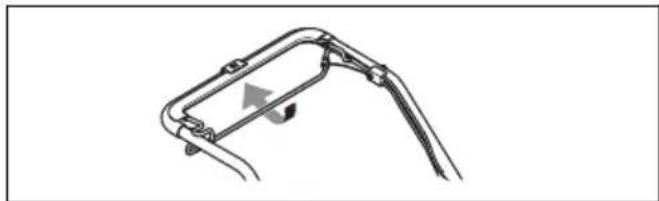
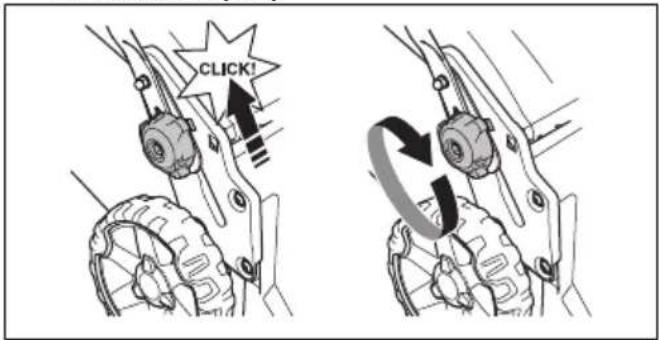
To adjust the handle
- Loosen the lower knobs.
- Move the knobs to the lower end of the grooves on the left and the right side of the product.
natural_image
Mechanical assembly diagram showing two stages of a gear mechanism with rotating components (no text or labels)
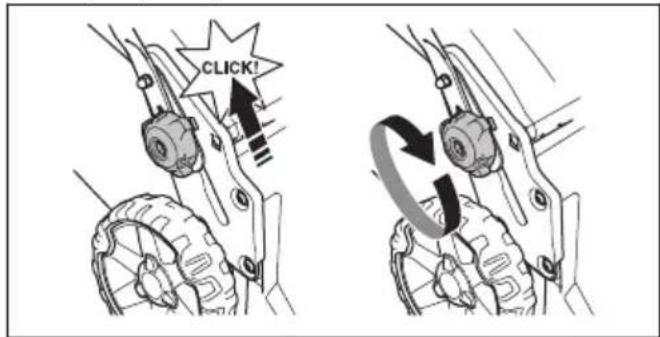
- Set the handle height in one of the 2 available positions.
- Move the knobs up in the direction of the handle until they stop and you hear a click.
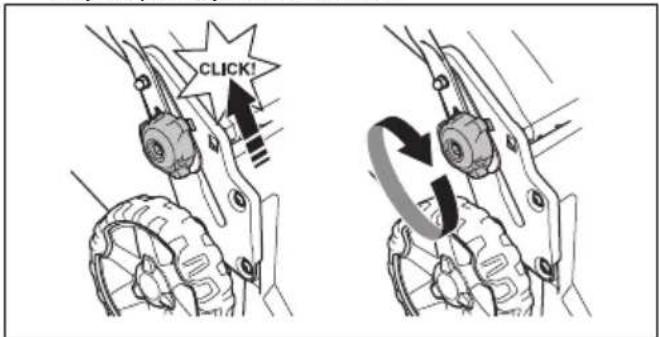
text_image
CLICK!
- Tighten the knobs fully.
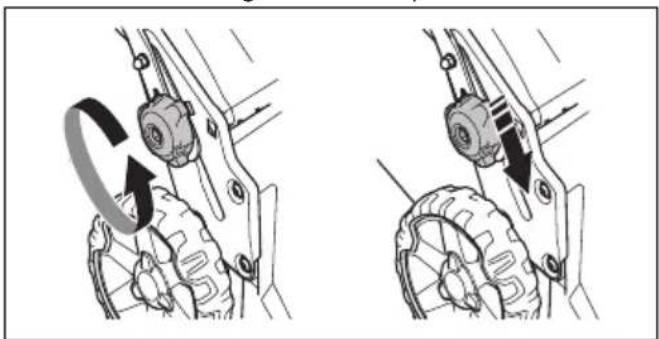
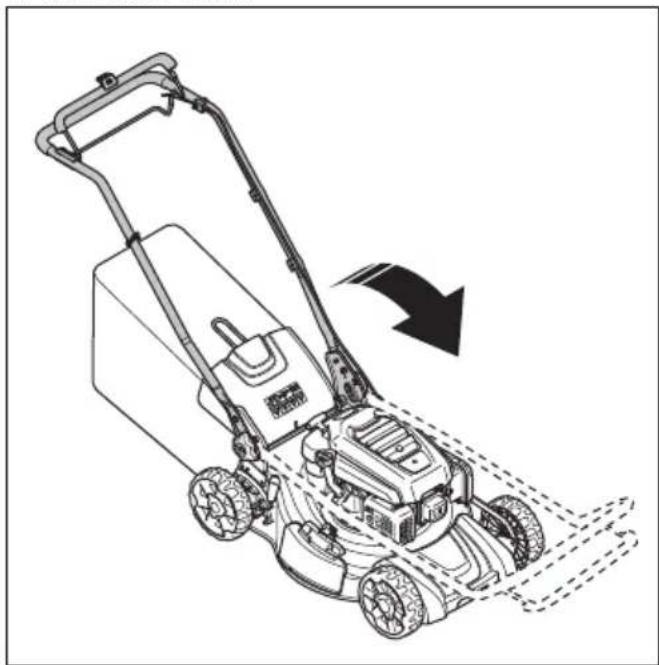
To set the product in transport position
-
Loosen the lower knobs.
-
Move the knobs to the lower end of the grooves on the left and the right side of the product.
natural_image
Mechanical assembly diagram showing two stages of a gear mechanism with no visible text or symbols
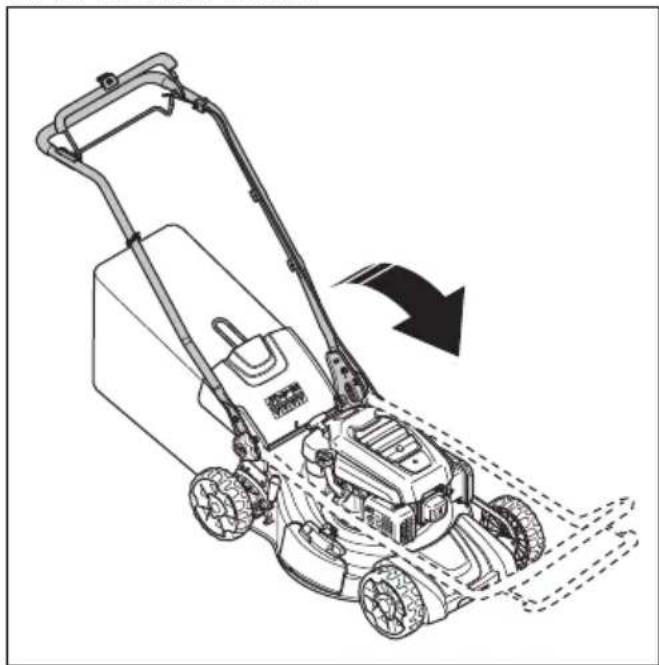
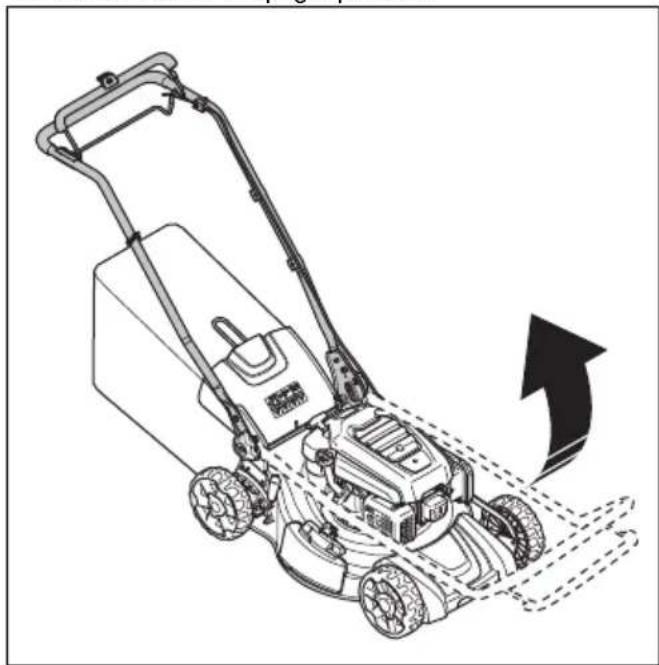
- Fold the handle forward.
natural_image
Line drawing of a lawn mower with an arrow indicating clockwise motion (no text or symbols)
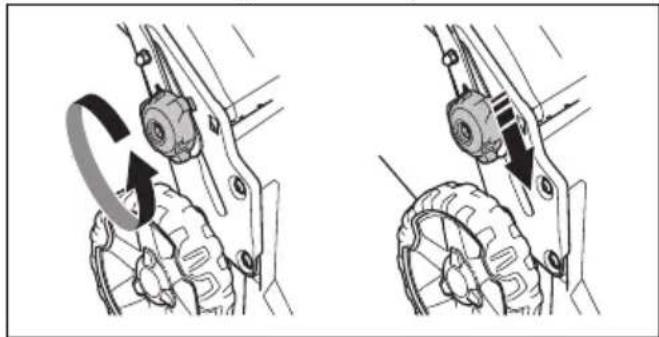
To set the product in operation position
- Fold the handle to upright position.
natural_image
Line drawing of a lawn mower with an arrow indicating clockwise motion (no text or symbols)
- Move the knobs up in the direction of the handle until they stop and you hear a click.
text_image
CLICK!
- Tighten the knobs fully.
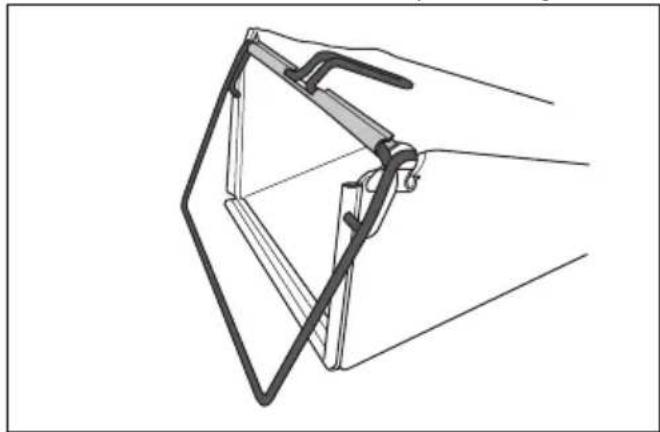
To assemble the grass catcher (LC 151, LC 151S)
- Attach the grass catcher frame to the grass bag with the rigid part of the bag on the bottom. Keep the handle of the frame out of the top of the bag.
natural_image
Technical line drawing of a mechanical clamp or bracket assembly (no text or symbols)
- Attach the grass bag to the frame with the clips.

natural_image
Diagram of a hand holding a mechanical device with directional arrows indicating rotation or movement (no text or symbols present)
Operation
Introduction

WARNING: Before you operate the product, you must read and understand the safety chapter.
Husqvarna Connect
Husqvarna Connect is a free app for your mobile device. The Husqvarna Connect app gives extended functions for your Husqvarna product:
• Extended product information.
• Information about, and help with, product parts and servicing.
To start to use Husqvarna Connect
- Download the Husqvarna Connect app on your mobile device.
- Register in the Husqvarna Connect app.
- Do the instruction steps in the Husqvarna Connect app to connect and register the product.
Before you operate the product
- Read the operator's manual carefully and make sure that you understand the instructions.
- Examine the cutting equipment to make sure that it is correctly attached and adjusted. See To examine the cutting equipment on page 13.
- Fill the fuel tank. See To fill fuel on page 8.
- Fill the oil tank and do a check of the oil level. See To do a check of the oil level on page 14.
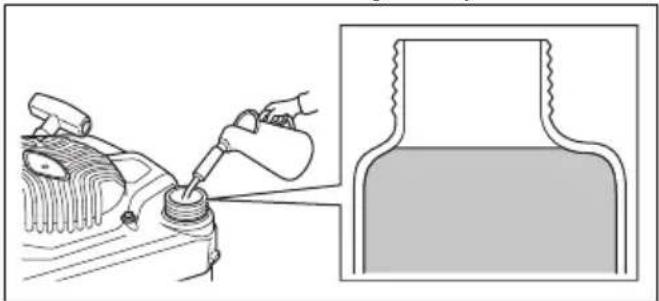
To fill fuel
If available, use low-emission/alkylate gasoline. If low-emission/alkylate gasoline is not available, use good quality unleaded gasoline or leaded gasoline with octane number not less than 90.
CAUTION: Do not use gasoline with an octane number less than 90 RON (87 AKI). This can cause damage to the product.
- Open the fuel tank cap slowly to release the pressure.
- Fill slowly with a fuel can. If you spill fuel, remove it with a cloth and let remaining fuel dry off.
natural_image
Illustration of a hand pouring liquid into a car engine, with a magnified inset showing the same component (no text or symbols present)
- Clean the area around the fuel tank cap.
- Tighten the fuel tank cap fully. If the fuel tank cap is not tightened, there is a risk of fire.
- Move the product a minimum of 3 m (10 ft) from the position where you filled the tank before a start.
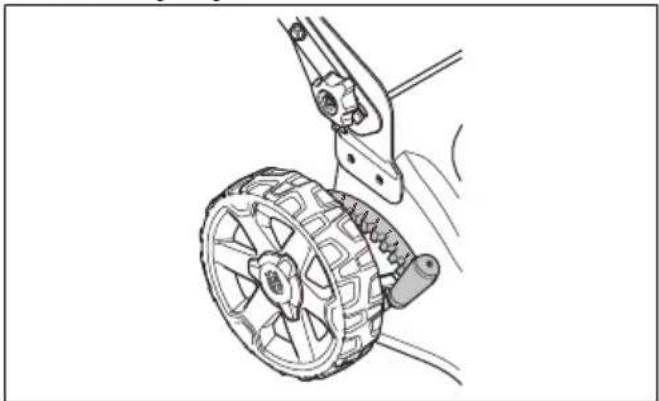
To set the cutting height
- Move the cutting height lever rearward to increase the cutting height.
- Move the cutting height lever forward to decrease the cutting height.
natural_image
Technical line drawing of a mechanical assembly with a wheel and connecting rod (no text or symbols)

CAUTION: Do not set the cutting height too low. The blades can hit the ground if the surface of the lawn is not level.
To start the product
- Make sure that the ignition cable is connected to the spark plug.
- Stay behind the product.
- Hold the engine brake handle against the handlebar.
natural_image
Diagram of a mechanical lever mechanism with an arrow indicating rotational motion (no text or symbols)
-
Hold the starter rope handle with your right hand.
-
Slowly pull out the starter rope until you feel some resistance.
- Pull with force to start the engine.

WARNING: Do not twist the starter rope around your hand.
To use the drive on the wheels LC 151S & LB 256SP
- Push the drive bail in the direction of the handlebar.
natural_image
Diagram of a mechanical bracket with a curved handle and a directional arrow, no text or symbols present
- Release the drive bail to disengage the drive, for example when you go near an obstacle.
- Before you pull the product rearward, disengage the drive and push the product forward approximately 10 cm.
To use the drive on the wheels (LB 251S)
- Pull the drive lever in the direction of the handlebar.
natural_image
Diagram of a mechanical device with a spring-loaded lever and directional arrow (no text or symbols)
- Push the drive lever away from the handlebar to disengage the drive, for example when you go near an obstacle.
Note: The drive lever is automatically disengaged when you release the engine brake handle.
- Before you pull the product rearward, push the drive lever away from the handlebar and push the product forward approximately 10 cm to fully disengage the drive.
To stop the product
• To stop the drive only, release the drive bail (LC 151S, LB 256SP) or the drive lever (LB 251S).
• To stop the engine, release the engine brake handle.
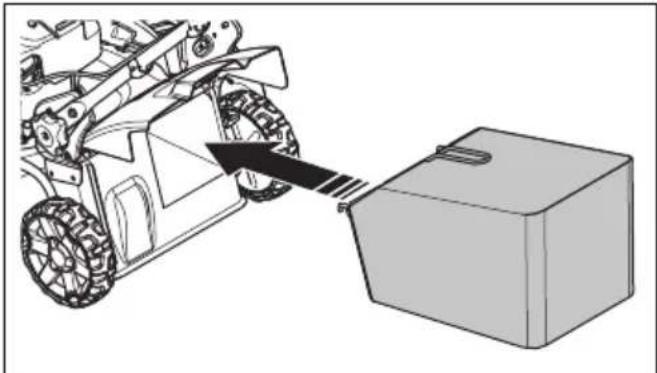
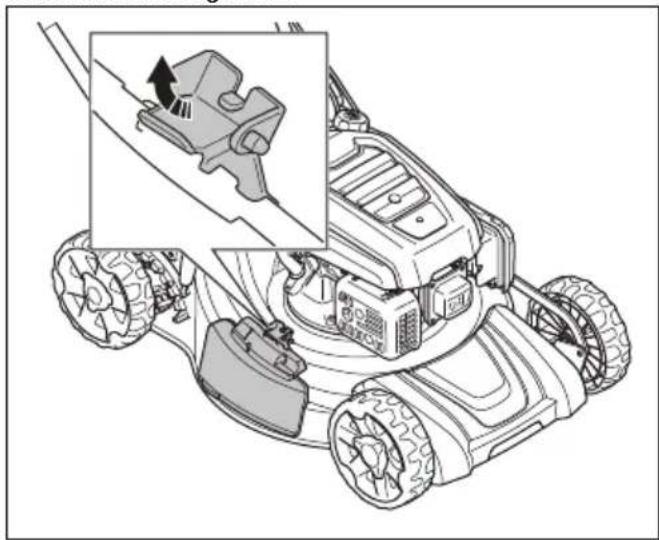
To use the product with the grass catcher (LC 151, LC 151S)

WARNING: Do not operate the product without a grass catcher installed or without the rear cover closed. Objects can eject and cause injury to the operator.
- Lift the rear cover and remove the mulch plug if it is installed.
natural_image
Technical line drawing of a mechanical assembly with two wheels and a bracket, showing no text or symbols
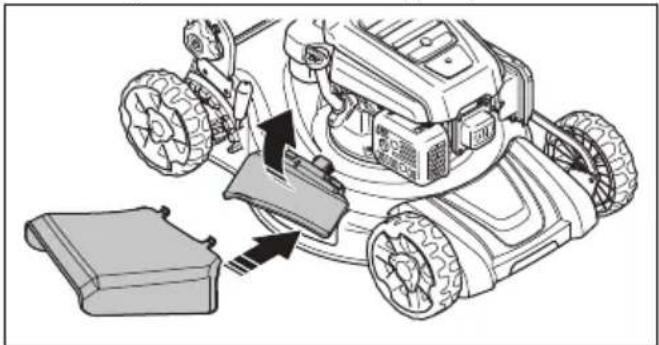
- Assemble the grass catcher, refer to To assemble the grass catcher (LC 151, LC 151S) on page 8.
- Put the grass catcher on the bracket.
- Release the rear cover and put it on top of the grass bag frame.
natural_image
Diagram of a robotic vehicle pulling a box, showing mechanical components and motion arrows (no text or symbols)
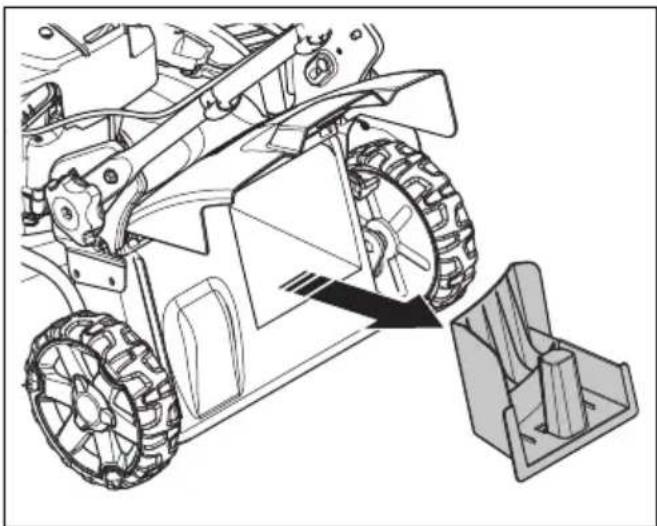
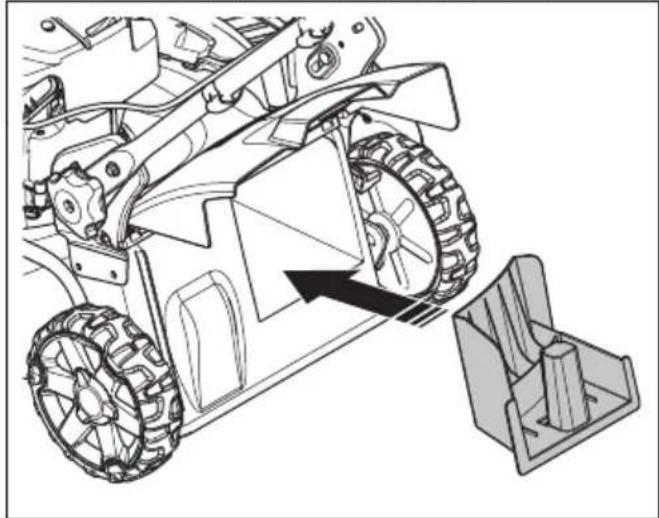
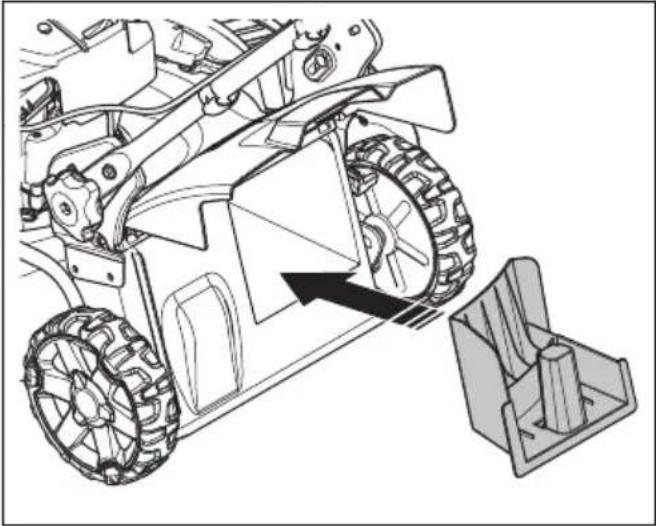
To change the product to mulch mode (LC 151, LC 151S)
Make sure the engine is off before you change the product to mulch mode.
-
Lift the rear cover and remove the grass catcher, if it is installed.
-
Put the mulch plug into the discharge channel.
natural_image
Technical line drawing of a mechanical vehicle with visible gears and a base component (no text or symbols)
- Close the rear cover and make sure that it is tightly closed against the mulch plug.
Note: To increase the performance of the mulch mode, replace the blade with the mulch blade accessory. Refer to To replace the blade on page 13
To change the product to side discharge mode
- Lift the rear cover and remove the grass bag, if it is installed.
- Close the rear cover and make sure that it is tightly closed against the product.
- Lift the discharge lock.
natural_image
Line drawing of a lawn mower with a close-up inset showing the blade and handle mechanism (no text or symbols)
- Open the side discharge cover and install the side discharge deflector onto the support pins.
natural_image
Technical illustration of a lawn mower assembly with a base case and mechanical components (no text or symbols)
- Let the side discharge cover close against the side discharge deflector. Make sure that the side discharge deflector is tightly in position before you operate the product.
Note: To increase the performance in side discharge mode, install the mulch plug.
natural_image
Technical line drawing of a mechanical vehicle showing tire tracks and mounting bracket (no text or symbols)
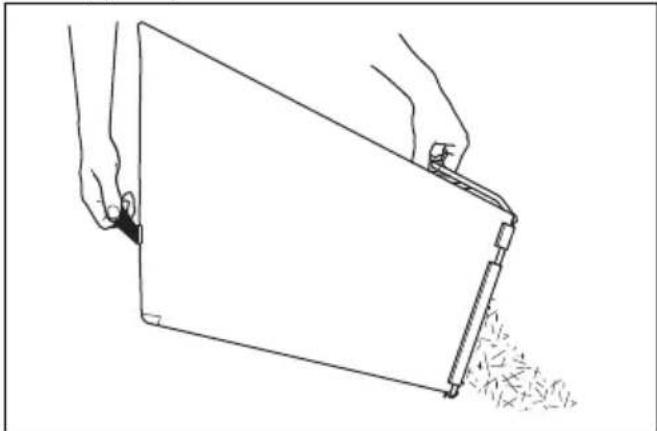
To empty the grass catcher

CAUTION: Lift the grass catcher when you move it to prevent wear.
- Lift the grass catcher with the frame handle.
- Use the frame handle and the bag handle when you empty the grass catcher.
natural_image
Line drawing of hands holding a tablet device with a scroll, no text or symbols present
To get a good result
• Always use a sharp blade. A blunt blade gives an irregular result and the cut surface of the grass becomes yellow. A sharp blade also uses less energy than a blunt blade.
- Do not cut more than 13 of the length of the grass. Use the highest cutting height when you start to cut the grass. Examine the result and lower the cutting height to an applicable level. If the grass is very long, operate slowly and cut 2 times if it is necessary.
- Cut in different directions each time to prevent stripes in the lawn.
- Lift the rear cover and remove the grass catcher.
- If a mulch plug and a mulch blade are attached, remove them.
- Close the rear cover before you operate the product. When you operate the product, the cut grass discharges below the rear cover.
- Keep the cutting cover clean. Buildup from grass and dirt on the inner side of the cutting cover can decrease the cutting result. Refer to To clean the inner surface of the cutting cover on page 12.
Maintenance
Introduction

WARNING: Before you do maintenance, you must read and understand the safety chapter.
For all servicing and repair work on the product, special training is necessary. We guarantee the availability of professional repairs and servicing. If your dealer is not a service agent, speak to them for information about the nearest service agent.
Maintenance schedule

CAUTION: Make sure that the air filter is up and not against the ground when you tilt the product. Risk of engine damage.
The maintenance intervals are calculated from daily use of the product. The intervals change if the product is not used daily.
For maintenance identified with * refer to instructions in Safety devices on the product on page 5.
| Maintenance Daily Monthly Each season | | | |
| Do a general inspection X | | | |
| Examine the oil level X | | | |
| Replace the oil (the first time after 5 h of use, then after each 50 h of use)1 | | | X |
| Clean the product X | | | |
| Examine the cutting equipment X | | | |
| Examine the cutting cover * X | | | |
| Examine the engine brake handle * X | | | |
| Examine the muffler * X | | | |
| Examine the spark plug. Clean or replace the spark plug if it is necessary | | | X |
| Examine the air filter X | | | |
| Clean the air filter2 | | X | |
| Replace the air filter X | | | |
| Examine the fuel system X | | | |
| Clean the cooling fins on the cylinder X | | | |
| Examine and adjust the clutch wire (LC 151S, LB 251S, LB 256SP) X | | | |
| Clean below the transmission cover (LB 251S) X | | | |
To do a general inspection
- Make sure that all nuts and screws on the product are tightened correctly.
To clean the product externally
• Use a brush to remove leaves, grass and dirt.
- Make sure that the air intake on the top of the engine is not blocked.
- Do not use a high pressure washer to clean the product.
- If you use water to clean the product, do not flush water directly on the engine.
To clean the inner surface of the cutting cover
- Empty the fuel tank.
- Tilt the product. Make sure that the spark plug point up.

CAUTION: If the product is put with the air filter down, the engine can become damaged.
- Hose down the inner surface of the cutting cover with water.
To clean below the transmission cover (LB 251S)
- Empty the fuel tank.
- Tilt the product. Make sure that the spark plug point up.

CAUTION: If the product is put with the air filter down, the engine can become damaged.
- Remove the 7 screws.
natural_image
Technical line drawing of a mechanical assembly with labeled parts (no text or symbols present)
-
Remove the transmission cover.
-
Clean the surface with a brush.

CAUTION: Water or contamination below the transmission cover can cause damage to the transmission.
- Install the transmission cover and the 7 screws.
To examine the cutting equipment

WARNING: To prevent accidental start remove the ignition cable from the spark plug.

WARNING: Use protective gloves when you do maintenance on the cutting equipment. The blade is very sharp and cuts can easily occur.
-
Examine the cutting equipment for damage or cracks. Always replace a damaged cutting equipment.
-
Look at the blade to see if it is damaged or blunt.
Note: It is necessary to balance the blade after it is sharpened. Let a service center sharpen, replace and balance the blade. If you hit an obstacle that causes the product to stop, replace the damaged blade. Let the service center estimate if the blade can be sharpened or must be replaced.
To replace the blade
- Lock the blade with a block of wood.
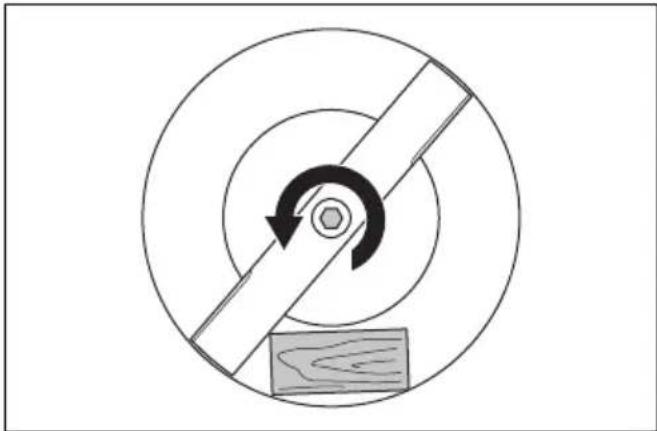
natural_image
Diagram of a circular mechanical or electrical component with concentric rings and a central rotating arrow, featuring a wooden block at the base (no text or symbols)
-
Remove the blade bolt and spring washer.
-
Remove the blade.
-
Examine the blade support and blade bolt to see if there are damages.
-
Examine the engine shaft to make sure that it is not bent.
-
When you attach the new blade, point the angled ends of the blade in the direction of the cutting cover.

natural_image
Diagram showing a blade under an arch with arrows indicating direction, above grass (no text or symbols)
-
Make sure that the blade is aligned with the center of the engine shaft.
-
Lock the blade with a block of wood. Attach the spring washer and tighten the bolt and washer with a torque of 43 - 47 Nm.

natural_image
Diagram of a mechanical or electrical component with concentric circles and a central rotating arrow, no text or symbols present.
- Pull the blade around by hand and make sure that it turns freely.

WARNING: Use heavy duty gloves.
The blade is very sharp and cuts can easily occur.
- Start the product to do a test of the blade. If the blade is not correctly attached, there is vibration in the product or the cutting result is unsatisfactory.
To do a check of the oil level

CAUTION: A too low oil level can do damage to the engine. Do a check of the oil level before you start the product.
- Put the product on level ground.
- Remove the oil tank cap with the attached dipstick.
- Clean the oil from the dipstick.
- Put the dipstick fully into the oil tank to give a correct picture of the oil level.
- Remove the dipstick.
- Examine the oil level on the dipstick.
- If the oil level is low, fill with engine oil and do a check of the oil level again.
To replace the engine oil

WARNING: Engine oil is very hot directly after the engine is stopped. Let the engine become cool before you drain the engine oil. If you spill engine oil on your skin, clean with soap and water.
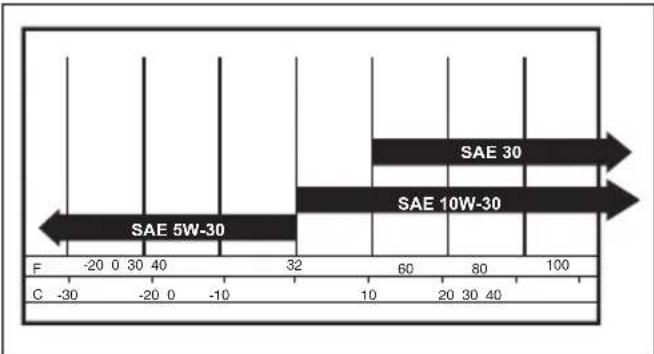
bar
| Category | Value |
|---|---|
| SAE 5W-30 | -20 |
| SAE 5W-30 | 32 |
| SAE 10W-30 | 60 |
| SAE 10W-30 | 80 |
| SAE 30 | 100 |
- Operate the product until the fuel tank is empty.
- Remove the ignition cable from the spark plug.
- Remove the oil tank cap.
- Put a container below the product to collect the engine oil in.
- Tilt the product to drain the engine oil from the oil tank.
- Fill with new engine oil of the type recommended in Technical data on page 18.
- Do a check of the oil level. Refer to To do a check of the oil level on page 14.
To examine the spark plug

CAUTION: Always use the recommended spark plug type. Incorrect spark plug type can cause damage to the product.
- Examine the spark plug if the engine is low on power, is not easy to start or does not operate correctly at idle speed.
• To decrease the risk of unwanted material on the spark plug electrodes, obey these instructions:
a) Make sure that the idle speed is correctly adjusted.
b) Make sure that the fuel mixture is correct.
c) Make sure that the air filter is clean.
- If the spark plug is dirty, clean it and make sure that the electrode gap is correct, refer to Technical data on page 18.
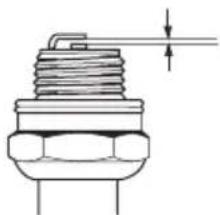
natural_image
Technical line drawing of a mechanical component with threaded end and central shaft (no text or symbols)
- Replace the spark plug if it is necessary.
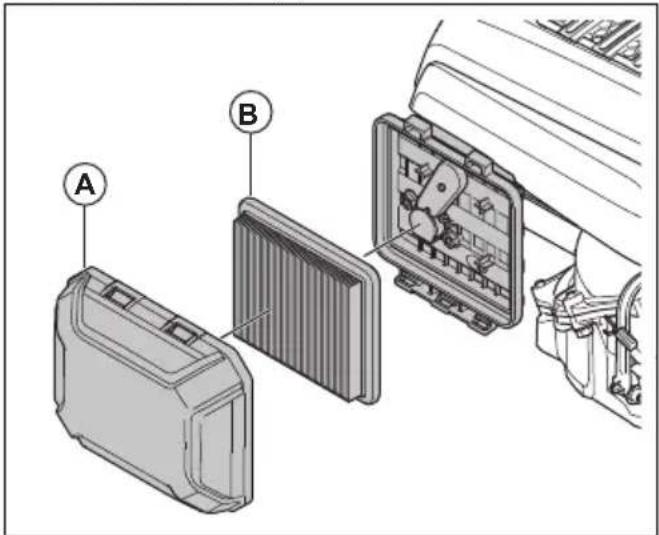
Air filter
A dirty air filter can cause the engine to be damaged or not operate correctly. Do maintenance on the air filter more frequently in dusty conditions. Refer to Maintenance on page 11 for information about when to replace the air filter.
Note: Always replace a damaged air filter.
To remove and install the air filter
WARNING: Use protective gloves.
- Push the clips on the air filter cover.
-
Carefully remove the air filter cover (A) from the engine.
-
Remove the air filter (B).
text_image
Technical diagram showing labeled components of an air conditioner unit, including housing, panel, and internal compartments.
- Examine the air filter for damages. Replace a damaged air filter.
- Clean and examine the air filter. Refer to To clean the air filter on page 15.
- Install in the opposite sequence.
To clean the air filter
A dirty air filter can cause the engine to be damaged or not operate correctly. Do maintenance on the air cleaner more frequently in dusty conditions.
See Maintenance on page 11 for information about when to replace the air filter.
- Remove the air filter cover and remove the filter.
- Clean the filter by hitting it against a flat surface. Do not use solvent with petroleum, kerosene or compressed air to clean the filter.
Note: Air filters in operation for a long time cannot be cleaned fully. Replace the air filter at regular intervals. Damaged air filters must always be replaced.
- When you assemble the air filter, make sure that it fully seals against the filter holder.
To do a check of the side discharge deflector
The side discharge deflector is attached to the side discharge opening of the product. It decreases the risk of objects to eject in the direction of the mow position of the operator.
- Make sure that the side discharge deflector is not damaged.
- Examine the side discharge deflector. Make sure that you do not see defects, such as cracks or broken springs that push the door to close.
- Replace the side discharge deflector or the springs if they are damaged.
To examine the fuel system
- Examine the fuel tank cap and the seal for the fuel tank cap to make sure that there are no damages.
- Examine the fuel hose to make sure that there are no leaks. If the fuel hose is damaged, let a service agent replace it.
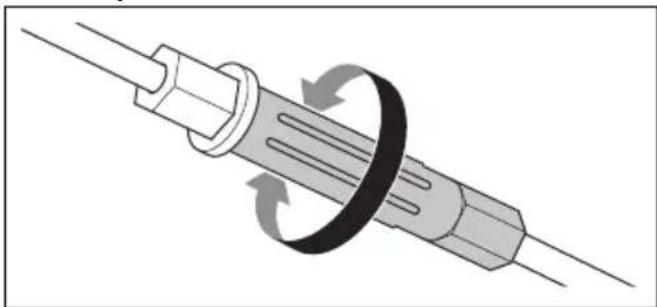
To adjust the clutch wire (LC 151S, LB 251S, LB 256SP)
For the situations that follow, it is necessary to decrease the length of the clutch wire:
• The drive of the wheels does not engage when you pull the drive bail or the speed control lever.
• The product moves slowly when the drive of the wheels is engaged.
For the situations that follow, it is necessary to extend the length of clutch wire:
- The product moves when the drive of the wheels is not engaged.
- Adjust the clutch wire.
a) To decrease the length of clutch wire, turn the adjuster screw counterclockwise.
b) To extend the length of the clutch wire, turn the adjustment screw clockwise.
natural_image
Diagram of a mechanical component with rotating arrows indicating motion (no text or symbols)
If the product continues to drive unsatisfactory after the adjustment, speak to you servicing dealer
Engine troubleshooting
| Problem Possible cause Solution | | |
| The engine does not start. The | ignition cable is not connected correctly. | Connect the ignition cable to the spark plug. |
| The fuel tank is empty. Fill the fuel tank with the fuel tank is empty. Fill the fuel tank with the fuel tank is empty. Fill the fuel tank with the fuel tank is empty. Fill the fuel tank with the fuel tank is empty. | th correct fuel type. |
| The fuel is old. Drain the fuel tank and the fuel is old. Drain the fuel tank and the fuel is old. Drain the fuel tank and the fuel is old. Drain the fuel tank and the fuel is old. | carburetor. Refuel with new gasoline. |
| There is dirt in the carburetor or fuel line. | Clean the carburetor and/or fuel line. |
| The spark plug is defective. Adjust the elec | ctrode gap, clean or re-place the spark plug. |
| There is fuel on the spark plug. Clean the | spark plug. |
| The engine does not stop. The | stop mechanism is defective. Disconnect the | ignition cable from the spark plug. Let an approved service agent repair the product. |
| The engine does not operate smoothly. | The ignition cable is not connected correctly. | Connect the ignition cable to the spark plug. |
| There is dirt in the fuel line or the fuel has expired. | Clean the fuel line. Fill the fuel tank with new fuel of the correct type. |
| There is blockage in the fuel tank cap. Clean the fuel tank cap. | lean the fuel tank cap. |
| There is water or dirt in the fuel system. Drain the fuel tank. Fill the fuel tank with new fuel of the correct type. | drain the fuel tank. Fill the fuel tank with new fuel of the correct type. |
| The air filter is dirty. Clean the air filter. | |
| The carburetor must be adjusted. Let a ser | servicing dealer adjust the carburetor. |
| The engine becomes too hot. The | the engine oil level is too low. Fill engine oil. | |
| The air flow is not sufficient. | Clean the air filter and the air filter housing. |
| The carburetor must be adjusted. Let a ser | servicing dealer adjust the carburetor. |
| There is misfire in the engine when it operates at high speed. | The electrode gap in the spark plug is too small. | Adjust the electrode gap. |
| Unusual noises from the engine during normal load. | Incorrect type of gasoline. | Drain the fuel tank and the carburetor. Refuel with new gasoline. Refer to To fill fuel on page 8. If the problem continues speak to your local service dealer. |
| The engine does not operate smoothly at idle speed. | The spark plug is dirty, defective or the electrode gap is too wide. | Adjust the electrode gap or replace the spark plug. |
| The carburetor must be adjusted. Adjust the carburetor. | |
| The air filter is dirty. Clean the air filter. | |
Transportation, storage and disposal
Transportation and storage
- For storage and transportation of the product and fuel, make sure that there are no leaks or fumes. Sparks or open flames, for example from electrical devices or boilers, can start a fire.
• Always use approved containers for storage and transportation of fuel.
- Empty the fuel tank before you put the product in storage for a long period of time. Discard the fuel at an applicable disposal location
- Safely attach the product during transportation to prevent damage and accidents.
- Keep the product in a locked area to prevent access for children or persons that are not approved.
- Keep the product in a dry and frost free area.
Disposal
- Obey the local recycling requirements and applicable regulations.
- Discard all chemicals, such as engine oil or fuel, at a service center or at an applicable disposal location.
- When the product is no longer in use, send it to a Husqvarna dealer or discard it at a recycling location.
Technical data
Technical data
| LC 151 LC 151S L | B 251S LB 256SP | | |
| Engine |
| Brand Husqvarna Husqvarna Husqvarna | Husqvarna | | | |
| Engine type Single cylinder, | 4-Stroke, Forced Air Cooling, OHV | Single cylinder, 4-Stroke, Forced Air Cooling, OHV | Single cylinder, 4-Stroke, Forced Air Cooling, OHV | Single cylinder, 4-Stroke, Forced Air Cooling, OHV |
| Displacement, cm3 | 166 166 166 166 | | | |
| Speed, rpm 2800 2800 2800 2800 | | | | |
| Nominal engine output, kW3 | 2.7 2.7 2.7 2.7 | | | |
| Ignition system |
| Spark plug Husqvarna HQT- | 7 | Husqvarna HQT-7 | Husqvarna HQT-7 | Husqvarna HQT-7 |
| Electrode gap, mm 0.7–0.8 0.7–0.8 0.7 | -0.8 0.7–0.8 | | | |
| Fuel and lubrication system |
| Engine lubrication type Splash Splash | Splash Splash | | | |
| Fuel tank capacity, litre 1.0 1.0 1.0 1.0 | | | | |
| Oil tank capacity, litre | 0.5 0.5 0.5 0.5 | | | |
| Engine oil4 | Husqvarna SAE 30 | Husqvarna SAE 30 | Husqvarna SAE 30 | HusqvarnaSAE 30 |
| Weight |
| With empty tanks, kg | 31.1 | 32.6 | 32.0 | 33.1 |
| Noise emissions5 |
| Sound power level, measured, dB(A) | 97 | 97 | 95 | 98 |
| Sound power level, guaranteed, LWA dB(A) | 98 | 98 | 96 | 98 |
| Sound levels6 |
| LC 151 LC 151S LB 251S LB 256SP | | |
| Sound pressure level at operators ear, dB(A) | 85 85 82 88 | | | |
| Vibration levels7 |
| Vibrations handlebar, m/s2 | 8.5 8.5 4.7 7.5 | | | |
| Cutting equipment |
| Cutting height, mm 25–75 25–75 25–75 | 25–75 | | | |
| Cutting width, mm 510 510 510 560 | | | | |
| Cutting system Collection / Bio- | Clip® / Side dis-charge | Collection / Bio-Clip® / Side dis-charge | BioClip® / Side discharge | BioClip® / Side discharge |
| Blade - standard Collection | 598562601 | Collection 598562601 | Mulch 597683901 | Mulch 598563601 |
| Blade - Accessory Mulch | 597683901 | Mulch 597683901 | - | - |
| Grass catcher capacity, liter 65 65 -- | | | | |
| Drive |
| Self walk speed, km/h – 3.6 4.0 3.6 | | | | |
Husqvarna AB, SE-561 82 Huskvarna, Sweden, tel:
+46-36-146500, declares that the lawn mower
Husqvarna LC 151, LC 151S, LB 251S, LB 256SP from
the year 2020 and onwards, complies with the
requirements of the COUNCIL'S DIRECTIVE:
- of June 8, 2011 on the “restriction of use of certain hazardous substances” 2011/65/EU
• of May 17, 2006 "relating to machinery" 2006/42/EC
- of February 26, 2014 "relating to electromagnetic compatibility" 2014/30/EU
- of May 8, 2000 "relating to the noise emissions in the environment" 2000/14/EC
Information relating to noise emissions, see Technical data.
The following standards have been applied:
EN ISO 5395-1:2013, EN ISO 5395-1:2013/A1, EN ISO
5395-2:2013, EN ISO 5395-2:2013/A1:2016, EN ISO
5395-2:2013/A2:2017, EN ISO 14982:2009
If not otherwise stated, the above listed standards are the latest published versions.
Notified body: 0404, RISE SMP Svensk Maskinprovning AB, Box 7035, SE-750 07 Uppsala, Sweden has performed conformity assessment according to Annex VI of directive 2000/14/EC.
Huskvarna, 2021-11-30
$$
\Delta \cdot \mathrm {d u}
$$
Claes Losdal, Development Manager/Garden Products
(Authorized representative for Husqvarna AB and responsible for technical documentation)
Съдържание
Въведение.... 21
Безопасност....22
Монтаж....26
Операция.... 28
Поддръжка....32
text_image
Technical diagram of a lawn mower with numbered parts and exploded view, including labeled parts for identification.
natural_image
Simple line drawing of a mechanical clamp or lever mechanism (no text or symbols)
text_image
Technical diagram of a mechanical assembly with labeled parts F, G, and H
- Затегнете фиксатора (Н) докрай.
natural_image
Mechanical assembly diagram showing two stages of a gear mechanism with no visible text or symbols
natural_image
Mechanical assembly diagram showing two stages of a gear mechanism with no visible text or symbols
natural_image
Line drawing of a lawn mower with a directional arrow indicating motion (no text or symbols)
natural_image
Line drawing of a lawn mower with motion arrows indicating blade movement (no text or symbols)
natural_image
Technical line drawing of a mechanical clamp or bracket assembly (no text or symbols)
natural_image
Diagram of a hand holding a mechanical frame with rotational arrows indicating movement (no text or symbols)
Операция
Въведение

natural_image
Illustration of a hand pouring liquid into a bottle, with an inset showing the same container (no text or symbols present)
natural_image
Technical line drawing of a mechanical assembly with a wheel and spring mechanism (no text or symbols)

natural_image
Diagram of a mechanical linkage or lever mechanism with an arrow indicating rotational motion (no text or symbols present)
natural_image
Diagram of a mechanical bracket with a curved handle and arrow indicating direction (no text or symbols)
natural_image
Diagram of a mechanical device with a lever mechanism and directional arrow (no text or symbols)
natural_image
Technical line drawing of a mechanical vehicle with visible gears and a base component (no text or symbols)
natural_image
Diagram of a robotic arm pulling a box, showing mechanical components and motion direction (no text or symbols)
natural_image
Technical line drawing of a mechanical device with visible gears and a base component (no text or symbols)
natural_image
Line drawing of a lawn mower with an inset showing the blade being inserted (no text or symbols present)
natural_image
Technical illustration of a lawn mower with a base panel and mechanical components (no text or symbols)
natural_image
Technical line drawing of a mechanical assembly with gears and a base component (no text or symbols)
natural_image
Line drawing of hands holding a tablet device with granular material inside (no text or symbols)
natural_image
Technical line drawing of a robotic lawn mower with visible wheelbars and mounting brackets (no text or labels)
natural_image
Diagram of a circular mechanical or electrical component with concentric rings and a central rotating arrow, featuring a wooden block at the bottom (no text or symbols)
natural_image
Diagram showing a blade under an arch with directional arrows indicating force or movement (no text or symbols)
natural_image
Abstract black ink brush strokes on white background, no text or symbols present
natural_image
Diagram of a mechanical or electrical component with concentric circles and a central rotating arrow, no text or symbols present.
natural_image
Technical line drawing of a mechanical component with threaded body and mounting holes (no text or symbols)
text_image
Technical diagram showing labeled components of an air conditioner unit, including a housing, panel, and internal components.
natural_image
Diagram of a cable or connector with rotating arrows indicating motion (no text or symbols)
text_image
Technical diagram of a lawn mower with numbered parts and an inset view showing mechanical components.
natural_image
Simple line drawing of a mechanical clamp or lever mechanism (no text or symbols)
text_image
Technical diagram of a mechanical assembly with labeled parts F, G, and H
natural_image
Mechanical assembly diagram showing two stages of a gear mechanism with no visible text or symbols
natural_image
Mechanical assembly diagram showing two stages of a gear mechanism with rotating components (no text or labels)
natural_image
Line drawing of a lawn mower with an arrow indicating clockwise motion (no text or symbols)
natural_image
Line drawing of a lawn mower with an arrow indicating clockwise motion (no text or symbols)
natural_image
Technical line drawing of a mechanical clamp or bracket assembly (no text or symbols)
natural_image
Diagram of a hand holding a mechanical device with directional arrows indicating rotation or movement (no text or symbols present)
Provoz
Úvod

natural_image
Illustration of a hand pouring liquid into a bottle, with a close-up view of the bottle's side panel (no text or symbols)
natural_image
Technical line drawing of a mechanical assembly with a wheel and attached components (no text or symbols)

natural_image
Diagram of a mechanical lever mechanism with a curved arrow indicating rotational motion (no text or symbols)
natural_image
Technical line drawing of a mechanical bracket or clamp assembly (no text or symbols)
natural_image
Diagram of a mechanical device with a lever mechanism and directional arrow (no text or symbols)
natural_image
Technical line drawing of a tracked vehicle showing tire tracks and wheel assembly (no text or symbols)
natural_image
Diagram of a robotic arm pulling a box with an arrow indicating motion (no text or symbols present)
natural_image
Technical line drawing of a grass lawn cutter with visible tire tracks and mechanical components (no text or symbols)
natural_image
Line drawing of a lawn mower with a close-up inset showing the blade and handle (no text or symbols)
natural_image
Technical illustration of a lawn mower assembly with a base case and mechanical components (no text or symbols)
natural_image
Technical line drawing of a wheeled vehicle showing tire tracks and mounting bracket (no text or symbols)
natural_image
Line drawing of hands holding a flatboard with a tool, partially covered by a pile of paper (no text or symbols)
natural_image
Technical line drawing of a mechanical assembly with labeled parts (no text or symbols present)
natural_image
Diagram of a circular mechanical or electrical component with concentric rings and a central rotating arrow, featuring a wooden block at the base (no text or symbols)
natural_image
Diagram showing a tool interacting with grass under an arch, with arrows indicating direction (no text or symbols)
natural_image
Diagram of a mechanical or electrical component with concentric circles and a central rotating arrow, no text or symbols present.
natural_image
Technical line drawing of a mechanical component with threaded body and shaft (no text or symbols)
text_image
Technical diagram showing labeled parts of a car air conditioner unit, including housing, panel, and internal components.
natural_image
Diagram of a mechanical component with rotating arrows indicating motion (no text or symbols)
text_image
Technical diagram of a lawn mower with numbered parts and an inset showing the component layout.
natural_image
Simple line drawing of a mechanical clamp or lever mechanism (no text or symbols)
natural_image
Mechanical assembly diagram showing two stages of a gear mechanism with rotating components (no text or labels)
natural_image
Mechanical assembly diagram showing two stages of a gear mechanism with no visible text or symbols
natural_image
Line drawing of a lawn mower with a directional arrow indicating motion (no text or symbols)
natural_image
Line drawing of a lawn mower with an arrow indicating clockwise motion (no text or symbols)
natural_image
Technical line drawing of a mechanical clamp or bracket assembly (no text or symbols)
natural_image
Diagram of a hand holding a rectangular device with four curved arrows indicating rotational or directional motion (no text or symbols)
Drift
Indledning

natural_image
Illustration of a car engine being serviced with a hand using a tool, alongside a close-up of the engine casing (no text or symbols)
natural_image
Technical line drawing of a mechanical assembly with a wheel and spring mechanism (no text or symbols)

natural_image
Diagram of a mechanical lever mechanism with an arrow indicating rotational motion (no text or symbols present)
natural_image
Technical line drawing of a mechanical bracket or bracket with a curved handle and mounting feet (no text or symbols)
natural_image
Technical line drawing of a mechanical device with a scroll and directional arrow (no text or symbols)
natural_image
Technical line drawing of a mechanical vehicle with visible gears and wheels, showing a mechanical assembly with a bracket (no text or symbols)
natural_image
Illustration of a robotic vehicle with a moving cart and a box, showing motion direction (no text or symbols)
natural_image
Technical line drawing of a mechanical assembly with gears and a base component (no text or symbols)
natural_image
Line drawing of a lawn mower with an inset showing the blade being inserted (no text or symbols present)
natural_image
Diagram of a lawn mower with attached belt and battery, showing mechanical components without any text or symbols
natural_image
Technical line drawing of a mechanical vehicle with visible gears and a base component (no text or symbols)
natural_image
Line drawing of hands holding a tablet device with a scroll wheel, no text or symbols present
natural_image
Technical line drawing of a robotic car with visible wheels and suspension components (no text or symbols)
natural_image
Diagram of a circular mechanical or electrical component with concentric rings and a central rotating arrow, featuring a wooden block at the base (no text or symbols)
natural_image
Diagram showing a tool interacting with grass under an arch, with arrows indicating direction (no text or symbols)
natural_image
Diagram of a mechanical device with a rotating shaft and wooden base, no text or symbols present
natural_image
Technical line drawing of a spark plug with threaded body and mounting base (no text or symbols)
text_image
Diagram showing parts of an air conditioner unit with labeled components A and B
natural_image
Diagram of a mechanical component with rotating arrows indicating motion (no text or symbols)
text_image
Technical diagram of a lawn mower with numbered parts and exploded view, including labeled parts for identification.
natural_image
Simple line drawing of a mechanical lever mechanism with a curved arrow indicating motion (no text or symbols)
text_image
Technical diagram of a mechanical assembly with labeled parts F, G, and H
natural_image
Mechanical assembly diagrams showing gear and cam mechanism (no text or labels)
natural_image
Mechanical assembly diagram showing two stages of a gear mechanism with rotating components (no text or labels)
natural_image
Line drawing of a lawn mower with a directional arrow indicating motion (no text or symbols)
natural_image
Line drawing of a lawn mower with an arrow indicating clockwise motion (no text or symbols)
natural_image
Technical line drawing of a mechanical clamp or bracket assembly (no text or symbols)
natural_image
Diagram of a hand holding a rectangular device with four curved arrows indicating rotational or directional motion (no text or symbols)
Betrieb
Einleitung

natural_image
Illustration of a mechanical device being processed with a tool, alongside a close-up view of a container filled with liquid (no text or symbols)
natural_image
Technical line drawing of a mechanical device with a wheel and attached components (no text or symbols)

natural_image
Diagram of a mechanical lever mechanism with a curved arrow indicating rotation (no text or symbols)
natural_image
Diagram of a mechanical clamp or bracket with a curved handle and arrow indicating direction (no text or symbols)
natural_image
Diagram of a mechanical device with a curved handle and directional arrow (no text or symbols)
natural_image
Technical line drawing of a mechanical assembly with gears and a base component (no text or symbols)
natural_image
Diagram showing a vehicle with a moving cart and a box, no text or symbols present
natural_image
Technical line drawing of a mechanical assembly with gears and a base component (no text or symbols)
natural_image
Technical line drawing of a lawn mower with an inset showing the blade assembly (no text or symbols)
natural_image
Diagram of a robotic vehicle with a box and gear assembly, showing mechanical components without any text or symbols.
natural_image
Technical line drawing of a mechanical device with visible gears and a base component (no text or symbols)
natural_image
Line drawing of hands holding a tablet with a pen inserted, showing a tray and scroll (no text or symbols)
natural_image
Technical line drawing of a mechanical lawn mower with labeled components (no text or symbols present)
natural_image
Diagram of a circular mechanical or electrical component with concentric rings and a central rotating arrow, featuring a wooden block at the base (no text or symbols)
natural_image
Diagram showing a blade under an arch with arrows indicating direction, above grass (no text or symbols)
natural_image
Diagram of a mechanical or electrical component with concentric circles and a central rotating arrow, no text or symbols present.
natural_image
Technical line drawing of a spark plug (no text or symbols)
text_image
Technical diagram showing parts of an air conditioner unit with labeled components A and B
natural_image
Diagram of a cable with a looped cable wrapped around it, showing motion direction (no text or symbols)
text_image
Technical diagram of a lawn mower with numbered parts and labeled parts for identification.
natural_image
Diagram of a mechanical lever mechanism with a black arrow indicating motion direction (no text or symbols)
text_image
Technical diagram of a mechanical assembly with labeled parts F, G, and H
natural_image
Mechanical assembly diagrams showing gear and motor components with directional arrows (no text or labels)
natural_image
Mechanical assembly diagram showing two stages of a gear mechanism with no visible text or symbols
natural_image
Line drawing of a lawn mower with a directional arrow indicating motion (no text or symbols)
natural_image
Line drawing of a lawn mower with an arrow indicating clockwise motion (no text or symbols)
natural_image
Technical line drawing of a mechanical clamp or bracket assembly (no text or symbols)
natural_image
Diagram of a hand holding a mechanical device with directional arrows indicating rotation or movement (no text or symbols)
Λειτουργία
Εισαγωγή

natural_image
Illustration of a hand pouring liquid into a bottle, with a close-up view of the bottle's side panel (no text or symbols)
natural_image
Technical line drawing of a mechanical assembly with a wheel and spring (no text or symbols)

natural_image
Diagram of a mechanical clamp or bracket with an arrow indicating rotation (no text or symbols present)
natural_image
Line drawing of a mechanical bracket or bracket with an arrow indicating direction (no text or symbols)
natural_image
Diagram of a mechanical device with a lever mechanism and directional arrow (no text or symbols)
natural_image
Technical line drawing of a tracked vehicle with visible tire tracks and mounting bracket (no text or symbols)
natural_image
Diagram of a robotic arm pulling a box, showing motion and assembly (no text or symbols)
natural_image
Technical line drawing of a mechanical device with visible gears and a base component (no text or symbols)
natural_image
Line drawing of a lawn mower with a close-up inset showing the blade and handle (no text or symbols)
natural_image
Technical illustration of a robotic lawn mower with a base panel and mechanical components (no text or symbols)
natural_image
Technical line drawing of a mechanical vehicle showing tire tracks and mounting bracket (no text or symbols)
natural_image
Line drawing of hands holding a tablet device with a scroll wheel, no text or symbols present
natural_image
Technical line drawing of a lawn mower with visible wheelbars and mounting brackets (no text or labels)
natural_image
Diagram of a circular mechanical or electrical component with concentric rings and a central rotating arrow, featuring a wooden block at the base (no text or symbols)
natural_image
Diagram showing a blade under an arch with arrows indicating direction, above grass (no text or symbols)
natural_image
Diagram of a mechanical or electrical component with concentric circles and a central rotating shaft, no text or symbols present.
natural_image
Technical line drawing of a spark plug with threaded end and shaft (no text or symbols)
text_image
Technical diagram showing labeled parts of a car air conditioner unit, including housing, panel, and internal components.
natural_image
Diagram of a cable or connector with rotating arrows indicating motion (no text or symbols)
text_image
Technical diagram of a lawn mower with numbered parts and an inset view showing mechanical components.
natural_image
Simple line drawing of a mechanical lever mechanism (no text or symbols)
text_image
Technical diagram of a mechanical assembly with labeled parts F, G, and H
natural_image
Mechanical assembly diagrams showing gear and cam mechanism (no text or labels)
natural_image
Mechanical assembly diagram showing two stages of a gear mechanism with no visible text or symbols
natural_image
Line drawing of a lawn mower with a directional arrow indicating motion (no text or symbols)
natural_image
Line drawing of a lawn mower with motion arrows indicating blade movement (no text or symbols)
natural_image
Technical line drawing of a mechanical clamp or bracket assembly (no text or symbols)
natural_image
Diagram of a hand holding a mechanical clamp or bracket with directional arrows indicating rotation (no text or symbols)
Funcionamiento
Introducción

natural_image
Illustration of a hand pouring liquid into a bottle, with a magnified inset showing the same container (no text or symbols present)
natural_image
Technical line drawing of a mechanical assembly with a wheel and attached bracket (no text or symbols)

natural_image
Diagram of a mechanical lever mechanism with an arrow indicating rotational motion (no text or symbols)
natural_image
Diagram of a mechanical bracket with an arrow indicating direction (no text or symbols)
natural_image
Diagram of a mechanical device with a curved handle and a directional arrow indicating motion (no text or symbols)
natural_image
Technical line drawing of a mechanical vehicle with visible gears and a base component (no text or symbols)
natural_image
Diagram of a robotic arm pulling a box, showing mechanical components and motion direction (no text or symbols)
natural_image
Technical line drawing of a mechanical assembly with gears and a base component (no text or symbols)
natural_image
Line drawing of a lawn mower with an inset showing the blade and handle mechanism (no text or symbols)
natural_image
Diagram of a robotic vehicle with a battery and housing, showing mechanical components and a directional arrow (no text or symbols)
natural_image
Technical line drawing of a mechanical assembly with a gear and base component, no text or symbols present
natural_image
Line drawing of hands holding a tablet device with a scroll wheel (no text or symbols)
natural_image
Technical line drawing of a mechanical vehicle with multiple wheels and a mounted component (no text or symbols)
natural_image
Diagram of a circular mechanical or electrical component with concentric rings and a central rotating arrow, no text or symbols present.
natural_image
Diagram showing a blade under an arch with arrows indicating direction, above grass (no text or symbols)
natural_image
Diagram of a mechanical or electrical component with concentric circles and a rotating arrow, no text or symbols present.
natural_image
Technical line drawing of a spark plug with threaded shaft and mounting base (no text or symbols)
text_image
Technical diagram showing labeled parts of an air conditioner unit with components A and B
natural_image
Diagram of a screwdriver with rotating cable and connecting rod (no text or symbols)
text_image
Technical diagram of a lawn mower with numbered parts and an inset view showing mechanical components.
natural_image
Diagram of a mechanical clamp or lever mechanism with a black arrow indicating direction (no text or symbols present)
Tagumise katte kontrollimine
text_image
Technical diagram of a mechanical assembly with labeled parts F, G, and H
natural_image
Mechanical assembly diagram showing two stages of a gear mechanism with rotating components (no text or labels)
natural_image
Mechanical assembly diagram showing two stages of a gear mechanism with no visible text or symbols
natural_image
Line drawing of a lawn mower with an arrow indicating clockwise motion (no text or symbols)
natural_image
Line drawing of a lawn mower with an arrow indicating clockwise motion (no text or symbols)
natural_image
Technical line drawing of a mechanical clamp or bracket assembly (no text or symbols)
natural_image
Diagram of a hand holding a mechanical device with directional arrows indicating rotation or movement (no text or symbols present)
Töö
Sissejuhatus

natural_image
Illustration of a hand pouring liquid into a bottle, with a close-up view of the bottle's side panel (no text or symbols)
natural_image
Technical line drawing of a mechanical device with a wheel and attached components (no text or symbols)

natural_image
Diagram of a mechanical lever mechanism with an arrow indicating rotational motion (no text or symbols)
natural_image
Technical line drawing of a mechanical bracket or bracket with a curved handle and mounting holes (no text or symbols)
natural_image
Diagram of a mechanical device with a lever mechanism and directional arrow (no text or symbols)
natural_image
Technical line drawing of a tracked vehicle with visible tire tracks and mounting bracket (no text or symbols)
natural_image
Line drawing of a mechanical device with a box attached, showing a force or collision between the components (no text or symbols present)
Toote seadistamine multšimisrežiimile (LC 151, LC 151S)
natural_image
Technical line drawing of a mechanical assembly with gears and a base component (no text or symbols)
natural_image
Line drawing of a lawn mower with a close-up inset showing the blade and handle (no text or symbols)
natural_image
Technical illustration of a lawn mower assembly with a base case and mechanical components (no text or symbols)
natural_image
Technical line drawing of a mechanical vehicle showing tire tracks and mounting bracket (no text or symbols)
natural_image
Line drawing of hands holding a flatboard with a clip, no text or symbols present
natural_image
Technical line drawing of a mechanical vehicle with labeled parts (no text or symbols present)
natural_image
Diagram of a circular mechanical or electrical component with concentric rings and a central rotating arrow, featuring a wooden block at the base (no text or symbols)
natural_image
Diagram showing a blade under an arch with arrows indicating direction, above grass (no text or symbols)
natural_image
Diagram of a mechanical or electrical component with concentric circles and a central rotating arrow, no text or symbols present.
natural_image
Technical line drawing of a mechanical component with threaded end and shaft (no text or symbols)
text_image
Technical diagram showing labeled components of an air conditioner unit, including housing, panel, and internal compartments.
natural_image
Diagram of a mechanical component with rotating arrows indicating motion (no text or symbols)
text_image
Technical diagram of a lawn mower with numbered parts and an inset view showing mechanical components.
natural_image
Simple line drawing of a mechanical clamp or lever mechanism (no text or symbols)
natural_image
Mechanical assembly diagram showing two stages of a gear mechanism with rotating components (no text or labels)
natural_image
Mechanical assembly diagram showing two stages of a gear mechanism with no visible text or symbols
- Taita kahva eteen.
natural_image
Line drawing of a lawn mower with motion arrows indicating blade movement (no text or symbols)
natural_image
Line drawing of a lawn mower with an arrow indicating clockwise motion (no text or symbols)
natural_image
Technical line drawing of a mechanical clamp or bracket assembly (no text or symbols)
natural_image
Diagram of a hand holding a rectangular device with four curved arrows indicating rotational or directional motion (no text or symbols)
Käyttö
Johdanto

natural_image
Illustration of a hand using a tool to apply liquid into a bottle, with no visible text or symbols.
natural_image
Technical line drawing of a mechanical device with a wheel and attached bracket (no text or symbols)

natural_image
Diagram of a mechanical clamp or bracket with a curved arrow indicating rotation (no text or symbols)
natural_image
Diagram of a mechanical bracket with a curved handle and a triangular component, no text or symbols present
natural_image
Diagram of a mechanical device with a curved handle and a directional arrow indicating motion (no text or symbols)
natural_image
Technical line drawing of a mechanical vehicle with visible gears and a base component (no text or symbols)
natural_image
Diagram showing a vehicle with a moving cart and a box, no text or symbols present
natural_image
Technical line drawing of a mechanical vehicle with visible gears and a base component (no text or symbols)
natural_image
Line drawing of a lawn mower with a close-up inset showing the blade and handle (no text or symbols)
natural_image
Diagram of a lawn mower with attached belt switch and battery pack (no text or labels)
natural_image
Technical line drawing of a mechanical device with visible gears and a base component (no text or symbols)
natural_image
Line drawing of hands holding a tablet device with a tool, no text or symbols present
natural_image
Technical line drawing of a robotic lawn mower with visible blade and wheel components (no text or labels)
natural_image
Diagram of a circular mechanical or electrical component with concentric rings and a central rotating arrow, featuring a wooden block at the base (no text or symbols)
natural_image
Diagram showing a blade under load with arrows indicating direction, above grass (no text or symbols)
natural_image
Diagram of a mechanical or electrical component with concentric circles and a central rotating arrow, no text or symbols present.
natural_image
Technical line drawing of a mechanical component with threaded end and shaft (no text or symbols)
text_image
Technical diagram showing labeled parts of an air conditioner unit with components A and B
natural_image
Diagram of a mechanical component with rotating arrows indicating motion (no text or symbols)
text_image
Technical diagram of a lawn mower with numbered parts and an inset view showing mechanical components.
Attention : projections et ricochets.
natural_image
Simple line drawing of a mechanical clamp or lever mechanism (no text or symbols)
text_image
Technical diagram of a mechanical assembly with labeled parts F, G, and H
natural_image
Mechanical assembly diagram showing two stages of a gear mechanism with rotating components (no text or labels)
natural_image
Mechanical assembly diagram showing two stages of a gear mechanism with rotating components (no text or labels)
natural_image
Line drawing of a lawn mower with an arrow indicating clockwise motion (no text or symbols)
natural_image
Line drawing of a lawn mower with motion arrows indicating blade movement (no text or symbols)
natural_image
Technical line drawing of a mechanical clamp or bracket assembly (no text or symbols)
natural_image
Diagram of a hand holding a rectangular device with four curved arrows indicating rotational or directional motion (no text or symbols)
Utilisation
Introduction

natural_image
Illustration of a car engine being refueled into a bottle, with no visible text or symbols
natural_image
Technical line drawing of a mechanical device with a wheel and clamping mechanism (no text or symbols)
natural_image
Diagram of a mechanical lever mechanism with an arrow indicating rotational motion (no text or symbols)
natural_image
Diagram of a mechanical bracket with a curved handle and arrow indicating direction (no text or symbols)
natural_image
Diagram of a mechanical device with a lever and directional arrow, no text or symbols present
natural_image
Technical line drawing of a mechanical assembly with gears and a base component (no text or symbols)
natural_image
Diagram showing a robotic arm pulling a box with an arrow indicating motion (no text or symbols present)
natural_image
Technical line drawing of a mechanical assembly with gears and a base component (no text or symbols)
natural_image
Line drawing of a lawn mower with an inset showing the blade and handle mechanism (no text or symbols)
natural_image
Diagram of a robotic car with a battery and housing, showing mechanical components and a directional arrow (no text or symbols)
natural_image
Technical line drawing of a mechanical vehicle with visible gears and a base component (no text or symbols)
natural_image
Line drawing of hands holding a tablet device with a scroll wheel (no text or symbols)
natural_image
Technical line drawing of a lawn mower with labeled components (no text or symbols present)
natural_image
Diagram of a circular mechanical or electrical component with concentric rings and a central rotating arrow, no text or symbols present.
natural_image
Diagram showing a blade under an arch with arrows indicating direction, above grass (no text or symbols)
natural_image
Diagram of a mechanical or electrical component with concentric circles and a rotating arrow, no text or symbols present.
natural_image
Technical line drawing of a spark plug (no text or symbols)
text_image
Technical diagram showing labeled parts of an air conditioner unit with components A and B
natural_image
Diagram of a screwdriver with rotating cable and connecting rod (no text or symbols)
text_image
Technical diagram of a lawn mower with numbered parts and exploded view, including labeled parts for identification.
natural_image
Simple line drawing of a mechanical lever with a curved handle and tassel (no text or symbols)
text_image
Technical diagram of a mechanical assembly with labeled parts F, G, and H
- Zategnite kotačić (H) do kraja.
Prilagodba ručke
- Otpustite donje vijke.
- Pomaknite kotačiće u donji dio utora na lijevoj i desnoj strani proizvoda.

natural_image
Mechanical assembly diagram showing two stages of a gear mechanism with rotating components (no text or labels)
- Postavite visinu ručke u jednu od dva dostupna položaja.
- Pomičite kotačiće gore u smjeru ručke dok se ne zaustave uz škljocaj.
text_image
CLICK!
natural_image
Mechanical assembly diagram showing two stages of a gear mechanism with no visible text or symbols
natural_image
Line drawing of a lawn mower with an arrow indicating clockwise motion (no text or symbols)
natural_image
Line drawing of a lawn mower with an arrow indicating clockwise motion (no text or symbols)
natural_image
Technical line drawing of a mechanical clamp or bracket assembly (no text or symbols)
natural_image
Diagram of a hand holding a mechanical device with directional arrows indicating rotation or movement (no text or symbols present)
Rad
Uvod

UPOZORENJE: Prije rada s proizvodom morate pročitati i usvojiti poglavlje o sigurnosti.
Husqvarna Connect
Husqvarna Connect besplatna je aplikacija za mobilni uređaj. Aplikacija Husqvarna Connect pruža vam dodatne funkcije za proizvod Husqvarna.
- Opširnije informacije o proizvodu.
natural_image
Illustration of a hand pouring liquid into a bottle, with a close-up view of the bottle's side panel (no text or symbols)
natural_image
Technical line drawing of a mechanical assembly with a wheel and attached components (no text or symbols)

natural_image
Diagram of a mechanical linkage or lever mechanism with a curved arrow indicating rotation (no text or symbols present)
natural_image
Diagram of a mechanical bracket with a curved handle and a triangular component, no text or symbols present
natural_image
Diagram of a mechanical device with a curved handle and a directional arrow indicating motion (no text or symbols)
natural_image
Technical line drawing of a mechanical assembly with two wheels and a base component (no text or symbols)
natural_image
Diagram of a vehicle with a moving cart and a box, showing motion direction (no text or symbols)
natural_image
Technical line drawing of a mechanical vehicle showing tire assembly and mounting bracket (no text or symbols)
natural_image
Line drawing of a lawn mower with an inset showing the blade being inserted (no text or symbols present)
natural_image
Diagram of a lawn mower assembly with a base case and mechanical components (no text or labels)
natural_image
Technical line drawing of a mechanical vehicle showing front wheel, rear wheels, and internal gear assembly (no text or symbols)
natural_image
Line drawing of hands holding a flatboard with a clip, partially covered by a textured surface (no text or symbols)
Za dobar ishod
natural_image
Technical line drawing of a mechanical assembly with labeled parts (no text or symbols present)
natural_image
Diagram of a circular mechanical or electrical component with concentric rings and a central rotating arrow, featuring a wooden block at the base (no text or symbols)
natural_image
Diagram showing a tool interacting with grass under an arch, with arrows indicating direction (no text or symbols)
- Nož mora biti poravnat sa središtem vratila motora.
- Blokirajte nož drvenim blokom. Postavite elastični rasječeni prsten i zategnite vijak i podlošku na zatezni moment od 43 – 47 Nm.

natural_image
Diagram of a mechanical or electrical component with concentric circles and a central rotating arrow, no text or symbols present.
natural_image
Technical line drawing of a spark plug with threaded shaft and mounting base (no text or symbols)
text_image
Technical diagram showing labeled components of a car air conditioner unit, including parts A and B with visible internal structure.
natural_image
Diagram of a screwdriver with rotating and curved motion arrows indicating rotation (no text or symbols)
Ako nakon podešavanja i dalje niste zadovoljni pogonom proizvoda, obratite se servisnom distributeru
Rješavanje problema na motoru
| Problem Mogući uzrok Rješenje | | |
| Motor se ne pokreće. Kabel za | paljenje nije pravilno spojen. Priključite kabel za paljenje na svjećicu. |
| Prazan je spremnik za gorivo. Napunite spremnik za gorivo pravilnom vrstom goriva. |
| Gorivo je staro. Ispraznite spremnik za gorivo i rasplinjač. Napunite ga novim gorivom. |
| Prljavština u rasplinjaču ili dovodu goriva. | Očistite rasplinjač i/ili dovod goriva. |
| Svjećica nije ispravna. Prilagodite razmak | elektroda, očistite ili zamijenite svjećicu. |
| Na svjećici ima goriva. Očistite svjećicu. | |
| Motor se ne zaustavlja. Mehan | zam za zaustavljanje nije ispravan. | Odspojite kabel za paljenje od svjećice. Popravak proizvoda prepustite odobre-nom serviseru. |
| Motor ne radi neometano. Kabel | za paljenje nije pravilno spojen. Priključite kabel za paljenje na svjećicu. |
| Ima prljavštine u dovodu goriva ili je gori-vu istekao rok. | Očistite vod za gorivo. Napunite sprem-nik za gorivo novim gorivom odgovaraju-će vrste. |
| Blokiran je čep spremnika za gorivo. Očistite čep spremnika za gorivo. |
| Ima vode ili prljavštine u sustavu goriva. | spraznite spremnik za gorivo. Napunite spremnik za gorivo novim gorivom odgo-varajuće vrste. |
| Filtar zraka je prljav. Očistite filtar zraka. | |
| Rasplinjač se mora podesiti. Podešavanje | rasplinjača prepustite ser-viseru. |
| Motor se previše zagrijava. Premiska je razina ulja u motoru. Nadolijte motorno ulje. |
|
|
|
| Kada motor radi na visokoj br-zini, dolazi do zatajenja moto-ra. | Premalen je razmak između elektroda u svjećici. | Prilagodite razmak između elektroda. |
| Motor tijekom uobičajenog op-terećenja proizvodi neobične zvukove. | Neispravna vrsta goriva. | Ispraznite spremnik za gorivo i raspli-njač. Napunite ga novim gorivom. Pogle-dajte Ulijevanje goriva na stranici 206. Ako se problem nastavi pojavljivati, obra-tite se lokalnom servisnom distributeru. |
| Motor ne radi neometano u praznom hodu. | Svjećica je prljava, neispravna ili je pre-velik razmak između elektroda. | Prilagodite razmak elektroda ili zamijeni-te svjećicu. |
| Rasplinjač se mora podesiti. Podesite rasplinjač. |
| Filtar zraka je prljav. Očistite filtar zraka. | |
Prijevoz, spremanje i zbrinjavanje
text_image
Technical diagram of a lawn mower with numbered parts and exploded view, including labeled parts and parts numbered 1 to 21.
natural_image
Simple line drawing of a mechanical clamp or lever mechanism (no text or symbols)
text_image
Technical diagram of a vehicle's gear assembly with labeled parts F, G, and H
- Húzza meg teljesen a gombot (H).
natural_image
Mechanical assembly diagrams showing gear and motor components with directional arrows (no text or labels)
natural_image
Mechanical assembly diagrams showing gear and motor components with rotational motion arrows (no text or labels)
natural_image
Line drawing of a lawn mower with a directional arrow indicating motion (no text or symbols)
natural_image
Line drawing of a lawn mower with motion arrows indicating blade movement (no text or symbols)
natural_image
Technical line drawing of a mechanical clamp or bracket assembly (no text or symbols)
natural_image
Diagram of a hand holding a rectangular device with directional arrows indicating rotation or movement (no text or symbols present)
Üzemeltetés
Bevezető

natural_image
Illustration of a hand pouring liquid into a bottle, with a close-up view of the bottle filled with liquid (no text or symbols)
natural_image
Technical line drawing of a mechanical device with a wheel and spring mechanism (no text or symbols)

natural_image
Diagram of a mechanical clamp or bracket with a curved arrow indicating rotation (no text or symbols)
natural_image
Diagram of a mechanical bracket with a curved handle and a triangular component, no text or symbols present
natural_image
Diagram of a mechanical device with a curved handle and a hanging rod, showing motion direction (no text or symbols)
natural_image
Technical line drawing of a mechanical vehicle with visible gears and mounting brackets (no text or symbols)
natural_image
Diagram of a robotic arm pulling a box, showing mechanical components and motion direction (no text or symbols)
natural_image
Technical line drawing of a mechanical vehicle showing tire assembly and mounting bracket (no text or symbols)
natural_image
Line drawing of a lawn mower with a close-up inset showing the blade and handle (no text or symbols)
natural_image
Diagram of a robotic car with a battery and housing, showing mechanical components without any text or symbols.
natural_image
Technical line drawing of a wheeled vehicle with visible tire tracks and mounting bracket (no text or symbols)
natural_image
Line drawing of hands holding a tablet device with a scroll wheel (no text or symbols)
natural_image
Technical line drawing of a grass lawn mower with labeled components (no text or symbols present)
natural_image
Diagram of a circular mechanical or electrical component with concentric rings and a central rotating arrow, no text or symbols present.
natural_image
Diagram showing a blade under an arch with arrows indicating direction, above grass (no text or symbols)
natural_image
Diagram of a mechanical or electrical component with concentric circles and a central rotating arrow, no text or symbols present.
natural_image
Technical line drawing of a spark plug with threaded shaft and mounting base (no text or symbols)
text_image
Technical diagram showing labeled components of an air conditioner unit, including housing, panel, and internal compartments.
natural_image
Diagram of a mechanical component with rotational arrows indicating motion (no text or symbols)
text_image
Technical diagram of a lawn mower with numbered parts and an inset view showing mechanical components.
natural_image
Diagram of a mechanical lever mechanism with a curved arrow indicating motion (no text or symbols)
text_image
Technical diagram of a mechanical assembly with labeled parts F, G, and H
- Serrare completamente la manopola (H).
natural_image
Mechanical assembly diagrams showing gear and motor components with rotational motion arrows (no text or labels)
natural_image
Mechanical assembly diagrams showing gear and cam mechanism (no text or labels)
natural_image
Line drawing of a lawn mower with a directional arrow indicating motion (no text or symbols)
natural_image
Line drawing of a lawn mower with an arrow indicating clockwise motion (no text or symbols)
natural_image
Technical line drawing of a mechanical clamp or bracket assembly (no text or symbols)
natural_image
Diagram of a hand holding a mechanical device with four curved arrows indicating rotational or directional motion (no text or symbols)
Utilizzo
Introduzione
natural_image
Illustration of a hand pouring liquid into a bottle, with no visible text or symbols
natural_image
Technical line drawing of a mechanical assembly with a wheel and spring (no text or symbols)

natural_image
Diagram of a mechanical linkage or lever mechanism with an arrow indicating rotational motion (no text or symbols present)
natural_image
Diagram of a mechanical bracket with a curved handle and arrow indicating direction (no text or symbols)
natural_image
Diagram of a mechanical device with a lever and directional arrow (no text or symbols)
natural_image
Technical line drawing of a mechanical vehicle with visible gears and a base component (no text or symbols)
natural_image
Diagram of a robotic arm pulling a box, showing mechanical components and motion direction (no text or symbols)
natural_image
Technical line drawing of a mechanical vehicle with visible gears and a base component (no text or symbols)
natural_image
Line drawing of a lawn mower with a close-up inset showing the blade and handle (no text or symbols)
natural_image
Technical illustration of a robotic vehicle with gear and battery components, showing mechanical assembly (no text or symbols)
natural_image
Technical line drawing of a mechanical vehicle showing tire assembly and mounting bracket (no text or symbols)
natural_image
Line drawing of hands holding a tablet device with a scroll wheel (no text or symbols)
natural_image
Technical line drawing of a mechanical vehicle with labeled parts (no text or symbols present)
natural_image
Diagram of a circular mechanical or electrical component with internal rotation arrows and a wooden block (no text or symbols)
natural_image
Diagram showing a blade under an arch with arrows indicating direction, above a textured ground surface (no text or symbols)
natural_image
Diagram of a mechanical or electrical component with concentric circles and a rotating arrow, no text or symbols present.
natural_image
Technical line drawing of a spark plug with threaded shaft and nut (no text or symbols)
text_image
Technical diagram showing labeled parts of an air conditioner unit with components A and B
natural_image
Diagram of a mechanical component with rotational arrows indicating motion (no text or symbols)
text_image
Technical diagram of a lawn mower with numbered parts and labeled parts for identification.
natural_image
Simple line drawing of a mechanical clamp or lever mechanism (no text or symbols)
リヤカバーの点検
text_image
Technical diagram of a mechanical assembly with labeled parts F, G, and H
- ノブ(H)を完全に締め込みます。
ハンドルの調節方法
natural_image
Mechanical assembly diagrams showing gear and motor components with directional arrows (no text or labels)
natural_image
Mechanical assembly diagram showing two stages of a gear mechanism with no visible text or symbols
- ハンドルを前側に折り畳みます。
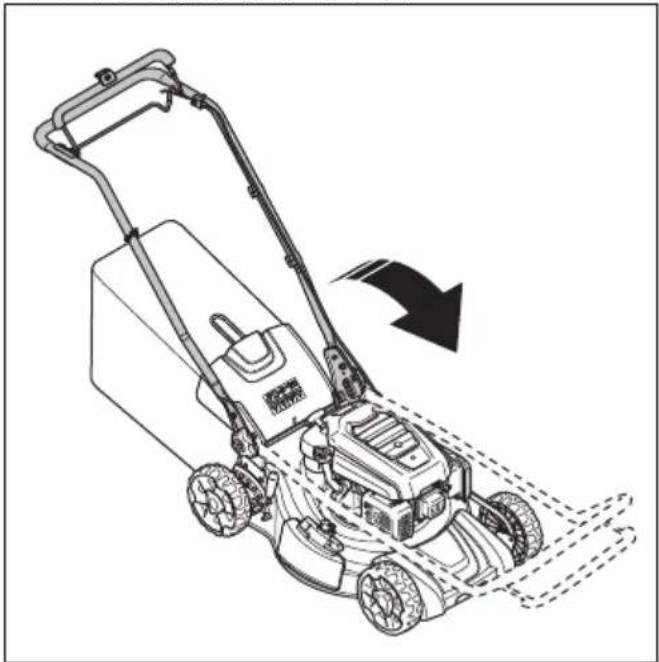
natural_image
Line drawing of a lawn mower with a directional arrow indicating motion (no text or symbols)
製品を操作位置にセットする方法
natural_image
Line drawing of a lawn mower with motion arrows indicating blade movement (no text or symbols)
natural_image
Technical line drawing of a mechanical clamp or bracket assembly (no text or symbols)
natural_image
Diagram of a hand holding a rectangular device with four curved arrows indicating rotational or directional motion (no text or symbols)
Operation (動作)
はじめに

natural_image
Illustration of a hand pouring liquid into a bottle, with a close-up view of the bottle's side panel (no text or symbols)
natural_image
Technical line drawing of a mechanical device with a wheel and attached bracket (no text or symbols)

natural_image
Diagram of a mechanical clamp or bracket with a curved arrow indicating rotation (no text or symbols)
natural_image
Diagram of a mechanical bracket with a curved handle and arrow indicating direction (no text or symbols)
natural_image
Diagram of a mechanical device with a lever and directional arrow (no text or symbols)
natural_image
Technical line drawing of a mechanical vehicle with visible gears and mounting brackets (no text or symbols)
natural_image
Diagram of a robotic arm pulling a box with an arrow indicating motion (no text or symbols present)
natural_image
Technical line drawing of a tracked vehicle showing tire tracks and mounting bracket (no text or symbols)
natural_image
Line drawing of a lawn mower with an inset showing the blade being cut (no text or symbols present)
natural_image
Technical illustration of a lawn mower with a battery and mechanical components (no text or symbols)
natural_image
Technical line drawing of a mechanical vehicle showing a wheel assembly and mounting bracket (no text or symbols)
グラスキャッチャーを空にする方法

natural_image
Line drawing of hands holding a tablet device with a scroll wheel (no text or symbols)
良好に芝を刈る方法
natural_image
Technical line drawing of a lawn mower with visible wheelbars and mounting brackets (no text or labels)
natural_image
Diagram of a circular mechanical or electrical component with concentric rings and a central rotating arrow, featuring a wooden block at the bottom (no text or symbols)
natural_image
Diagram showing a blade under an arch with arrows indicating direction (no text or symbols)
text_image
Handwritten Chinese characters in a brush script, possibly a signature or annotation
natural_image
Diagram of a mechanical or electrical component with concentric circles and a central rotating arrow, no text or symbols present.
natural_image
Technical line drawing of a spark plug with threaded shaft and mounting base (no text or symbols)
text_image
Technical diagram showing labeled parts of a car air conditioner unit, including housing, panel, and internal components.
natural_image
Diagram of a screwdriver with a black strap and directional arrows indicating motion (no text or symbols)
text_image
Technical diagram of a lawn mower with numbered parts and an inset view showing mechanical components.
natural_image
Simple line drawing of a mechanical clamp or lever mechanism with no text or symbols
Galinio gaubto patikra
text_image
Technical diagram of a mechanical assembly with labeled parts F, G, and H
natural_image
Mechanical assembly diagram showing two stages of gear meshing and rotational motion (no text or symbols)
natural_image
Mechanical assembly diagram showing two stages of a gear mechanism with no visible text or symbols
natural_image
Line drawing of a lawn mower with an arrow indicating clockwise motion (no text or symbols)
natural_image
Line drawing of a lawn mower with an arrow indicating clockwise motion (no text or symbols)
natural_image
Technical line drawing of a mechanical clamp or bracket assembly (no text or symbols)
natural_image
Diagram of a hand holding a rectangular device with four curved arrows indicating rotational or directional motion (no text or symbols)
Naudojimas
lvadas

natural_image
Illustration of a hand pouring liquid into a bottle, with a close-up view of the bottle filled with liquid (no text or symbols)
natural_image
Technical line drawing of a mechanical assembly with a wheel and lever (no text or symbols)

natural_image
Diagram of a mechanical lever mechanism with a curved arrow indicating rotation (no text or symbols)
natural_image
Mechanical bracket diagram showing a curved handle with a triangular load symbol (no text or labels)
natural_image
Diagram of a mechanical device with a lever and directional arrow (no text or symbols)
natural_image
Technical line drawing of a mechanical vehicle with visible gears and mounting brackets (no text or symbols)
natural_image
Illustration of a wheeled vehicle with a moving box and arrow indicating motion (no text or symbols)
natural_image
Technical line drawing of a mechanical vehicle with visible gears and mounting brackets, showing no text or symbols.
natural_image
Line drawing of a lawn mower with an inset showing the blade assembly (no text or symbols)
natural_image
Diagram of a lawn mower with attached belt and battery, showing mechanical components without any text or symbols
natural_image
Technical line drawing of a mechanical assembly with gears and a base component (no text or symbols)
natural_image
Line drawing of hands holding a flatboard with a tool, partially covered by a pile of papers (no text or symbols)
natural_image
Technical line drawing of a lawn mower with visible wheelbars and mounting brackets (no text or labels)
natural_image
Diagram of a circular mechanical or electrical component with concentric rings and a central rotating arrow, featuring a wooden block at the base (no text or symbols)
natural_image
Diagram showing a tool interacting with grass under an arch, with arrows indicating direction (no text or symbols)
natural_image
Diagram of a mechanical or electrical component with concentric circles and a central rotating arrow, no text or symbols present.
- Ranka pasukite peilj ir patikrinkite, ar jis laisvai sukasi.

bar
| Category | Current (F) | Voltage (F) |
|---|---|---|
| SAE 5W-30 | -20 | -30 |
| SAE 10W-30 | 32 | 10 |
| SAE 30 | 60 | 80 |
| Total Current (F) | -30 | -30 |
The chart displays a single bar representing the current value for each category. The 'SAE 5W-30' bar is shorter than the 'SAE 10W-30' bar, indicating a lower current value. The 'Total Current (F)' bar extends to 100, suggesting the total current is 100 units. The arrow labels indicate direction of the current direction.
natural_image
Technical line drawing of a mechanical component with threaded body and shaft (no text or symbols)
text_image
Technical diagram showing labeled parts of an air conditioner unit with component A and B
natural_image
Diagram of a mechanical component with rotating arrows indicating motion (no text or symbols)
text_image
Technical diagram of a lawn mower with numbered parts and an inset view showing mechanical components.
natural_image
Diagram of a mechanical lever mechanism with a curved arrow indicating motion (no text or symbols)
text_image
Technical diagram of a mechanical assembly with labeled parts F, G, and H
natural_image
Mechanical assembly diagram showing two stages of a gear mechanism with no visible text or symbols
natural_image
Mechanical assembly diagrams showing gear and cam mechanism (no text or labels)
natural_image
Line drawing of a lawn mower with a directional arrow indicating motion (no text or symbols)
natural_image
Line drawing of a lawn mower with motion arrows indicating blade movement (no text or symbols)
natural_image
Technical line drawing of a mechanical clamp or bracket assembly (no text or symbols)
natural_image
Diagram of a hand holding a rectangular device with four curved arrows indicating rotational or directional motion (no text or symbols)
Lietošana
levads

natural_image
Illustration of a hand pouring liquid into a bottle, with a close-up view of the bottle's side panel (no text or symbols)
natural_image
Technical line drawing of a mechanical device with a wheel and attached bracket (no text or symbols)
natural_image
Diagram of a mechanical clamp or bracket with a curved arrow indicating rotation (no text or symbols)
natural_image
Diagram of a mechanical bracket with a curved handle and arrow indicating rotation (no text or symbols)
natural_image
Diagram of a mechanical device with a spring mechanism and directional arrow (no text or symbols)
natural_image
Technical line drawing of a mechanical vehicle showing tire tracks and mounting bracket (no text or symbols)
natural_image
Diagram showing a robotic arm pulling a box onto a vehicle (no text or symbols present)
natural_image
Technical line drawing of a mechanical device with visible gears and a base component (no text or symbols)
natural_image
Line drawing of a lawn mower with an inset showing the blade assembly (no text or symbols)
natural_image
Diagram of a robotic lawn mower with a battery and mechanical components, showing no text or symbols.
natural_image
Technical line drawing of a mechanical vehicle with two wheels and a close-up view of the base component (no text or symbols)
natural_image
Line drawing of hands holding a tablet device with a scroll wheel (no text or symbols)
natural_image
Technical line drawing of a robotic lawn mower with visible wheelbars and mounting brackets (no text or labels)
natural_image
Diagram of a circular mechanical or electrical component with concentric rings and a central rotating arrow, no text or symbols present.
natural_image
Diagram showing a blade under an arch with arrows indicating direction, above grass (no text or symbols)
natural_image
Diagram of a mechanical or electrical component with concentric circles and a rotating arrow, no text or symbols present.
natural_image
Technical line drawing of a spark plug with threaded end and shaft (no text or symbols)
- Ja nepieciešams, nomainiet aizdedzes sveci.
Gaisa filtrs
text_image
Diagram showing labeled parts of a car air conditioner unit, including a plastic case, fan cover, and internal compartments.
natural_image
Diagram of a mechanical component with rotating arrows indicating motion (no text or symbols)
text_image
Technical diagram of a lawn mower with numbered parts and labeled parts for identification.
natural_image
Mechanical lever diagram showing a handle and pivot point (no text or symbols)
natural_image
Mechanical assembly diagram showing two stages of a gear mechanism with no visible text or symbols
natural_image
Mechanical assembly diagrams showing gear and cam mechanism (no text or labels)
natural_image
Line drawing of a lawn mower with a directional arrow indicating motion (no text or symbols)
natural_image
Line drawing of a lawn mower with motion arrows indicating blade movement (no text or symbols)
natural_image
Technical line drawing of a mechanical clamp or bracket assembly (no text or symbols)
natural_image
Diagram of a hand holding a device with directional arrows indicating rotation or movement (no text or symbols present)
Werking
Inleiding

natural_image
Illustration of a hand pouring liquid into a bottle, with a close-up view of the bottle's side panel (no text or symbols)
natural_image
Technical line drawing of a mechanical assembly with a wheel and levers (no text or symbols)

natural_image
Diagram of a mechanical linkage or lever mechanism with no visible text or symbols
natural_image
Diagram of a mechanical bracket with a curved handle and arrow indicating direction (no text or symbols)
natural_image
Diagram of a mechanical device with a lever and directional arrow (no text or symbols)
natural_image
Technical line drawing of a mechanical vehicle showing tire tracks and mounting bracket (no text or symbols)
natural_image
Diagram of a vehicle with a moving cart and a box, showing mechanical components and an arrow indicating motion (no text or symbols present)
natural_image
Technical line drawing of a mechanical vehicle showing tire assembly and mounting bracket (no text or symbols)
natural_image
Line drawing of a lawn mower with a close-up inset showing the blade and handle mechanism (no text or symbols)
natural_image
Diagram of a robotic car with attached battery pack and mechanical components (no text or symbols)
natural_image
Technical line drawing of a mechanical vehicle showing tire tracks and mounting bracket (no text or symbols)
De grasopvangbak legen

natural_image
Line drawing of hands holding a tablet device with a scroll wheel (no text or symbols)
natural_image
Technical line drawing of a lawn mower with visible wheelbars and mounting brackets (no text or labels)
natural_image
Diagram showing a circular structure with concentric rings and a central hexagon, featuring a diagonal stripe and a wooden block below (no text or symbols)
natural_image
Diagram showing a curved structure with arrows pointing to a rectangular object, no text or symbols present

natural_image
Abstract sketch of a textured surface with no discernible text, symbols, or structured elements.
natural_image
Diagram of a mechanical or electrical component with concentric circles and a rotating arrow, no text or symbols present.
natural_image
Technical line drawing of a spark plug with threaded shaft and mounting base (no text or symbols)
• Vervang de bougie indien nodig.
Luchtfilter
text_image
Diagram showing internal components of an air conditioner unit with labeled parts A and B
natural_image
Diagram of a screwdriver with a black strap and directional arrows indicating motion (no text or symbols)
text_image
Technical diagram of a lawn mower with numbered parts and exploded view, including labeled parts for identification.
- Styre
- Motorbremsehändtak
- Sikkerhetsbøyle (LC 151S, LB 256SP)
- Kjørespak (LB 251S)
- Bakdeksel (LC 151, LC 151S)
- Oppsamler (LC 151, LC 151S)
- Knotter for justering styrehøyde
- Spak for regulering av klippehøyde
- Oljetanklokk og peilepinne
- Sideutkastdeksel
-
Lyddemper
-
Tennplugg
- Forgasser
- Drivstofflokk
- Symboler
- Klippedeksel
- Luftfilter
- Sidedeflektor
- finfordelingssett (tilbehør til LC 151, LC 151S)
- Startsnorhåndtak
- Bruksanvisning
natural_image
Simple line drawing of a mechanical clamp or lever mechanism (no text or symbols)
Slik kontrollerer du det bakre dekselet
text_image
Technical diagram of a mechanical assembly with labeled parts F, G, and H
natural_image
Mechanical assembly diagram showing two stages of a gear mechanism with no visible text or symbols
natural_image
Mechanical assembly diagram showing two stages of a gear mechanism with no visible text or symbols
- Vipp styret forover.
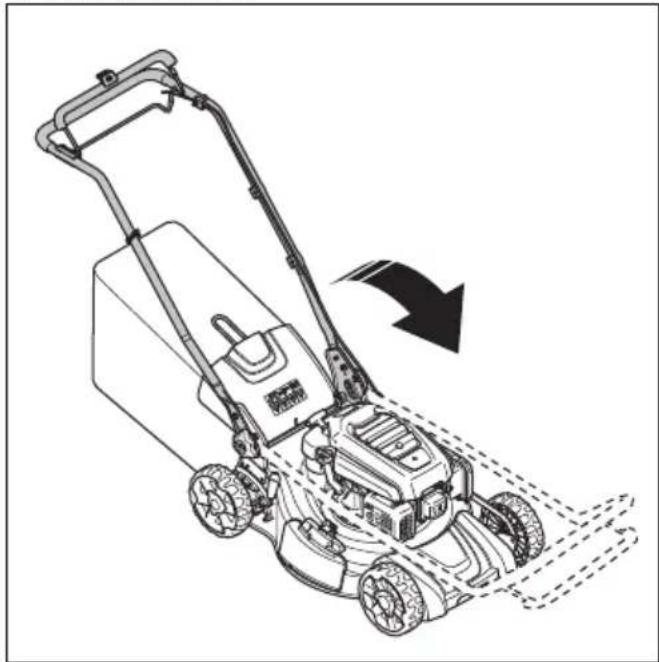
natural_image
Line drawing of a lawn mower with a directional arrow indicating motion (no text or symbols)
Slik setter du produktet i driftsstilling
natural_image
Line drawing of a lawn mower with motion arrows indicating blade movement (no text or symbols)
natural_image
Technical line drawing of a mechanical clamp or bracket assembly (no text or symbols)
natural_image
Diagram of a hand holding a rectangular device with four curved arrows indicating rotational or directional motion (no text or symbols)
Drift
Innledning

ADVARSEL: Før du bruker produktet, må du lese og forstå kapittelet om sikkerhet.
Husqvarna Connect
Husqvarna Connect er en kostnadsfri app for mobilenheten din. Husqvarna Connect-appen gir utvidede funksjoner for Husqvarna-produktet ditt:
natural_image
Illustration of a hand pouring liquid into a bottle, with a magnified inset showing the same container (no text or symbols present)
natural_image
Technical line drawing of a mechanical assembly with a wheel and clamping mechanism (no text or symbols)

natural_image
Diagram of a mechanical lever mechanism with an arrow indicating rotational motion (no text or symbols)
natural_image
Technical line drawing of a mechanical bracket or bracket with a curved handle and mounting holes (no text or symbols)
- Løsne sikkerhetsbøylen for å frakoble driften, for eksempel när du går nær en hindring.
- Før du trekker produktet bakover, må du koble ut driften og skyve produktet forover med ca. 10 cm.
natural_image
Diagram of a mechanical device with a lever mechanism and directional arrow (no text or symbols)
natural_image
Technical line drawing of a mechanical vehicle with visible gears and wheels, showing a close-up of the wheel assembly (no text or symbols)
natural_image
Illustration of a vehicle with a cart being pulled into a box (no text or symbols)
Slik bytter du til finfordelingsmodus (LC 151, LC 151S)
natural_image
Technical line drawing of a mechanical assembly with gears and a base component (no text or symbols)
- Lukk det bakre dekselet, og kontroller at det sitter tett inntil finfordelingspluggen.
natural_image
Line drawing of a lawn mower with a close-up inset showing the blade and handle (no text or symbols)
natural_image
Diagram of a lawn mower with attached belt and battery, showing mechanical components without any text or symbols
natural_image
Technical line drawing of a mechanical vehicle with visible gears and a base component (no text or symbols)
natural_image
Line drawing of hands holding a flatboard with a clip, partially covered by a plastic sheet (no text or symbols)
natural_image
Technical line drawing of a robotic lawn mower with visible blades and wheel supports (no text or labels)
natural_image
Diagram of a circular mechanical or electrical component with concentric rings and a central rotating arrow, featuring a wooden block at the base (no text or symbols)
natural_image
Diagram showing a blade under an arch with arrows indicating direction, above grass (no text or symbols)
natural_image
Diagram of a mechanical or electrical component with concentric circles and a central rotating arrow, no text or symbols present.
bar
| Category | Current (F) | Voltage (F) |
|---|---|---|
| SAE 5W-30 | -20 | -30 |
| SAE 10W-30 | 32 | 10 |
| SAE 30 | 60 | 80 |
| Total Current (F) | -30 | -30 |
The chart displays a single bar representing the current value for each category. The 'SAE 5W-30' bar is shorter than the 'SAE 10W-30' bar, indicating a lower current value. The 'Total Current (F)' bar extends to 100, suggesting the total current is 100 units. The arrow labels indicate direction of the current direction.
- Bruk produktet til drivstofftanken er tom.
- Fjern tenningskabelen fra tennpluggen.
- Ta av oljetanklokket.
- Sett en beholder under produktet for å samle opp olje.
- Vipp produktet for å tappe av oljen fra tanken.
- Fyll på ny motorolje av typen som anbefales i Tekniske data på side 353
- Kontroller oljenivået. Se Slik kontrollerer du oljenivået på side 349.
Kontrollere tennpluggen

OBS: Bruk alltid anbefalt type tennplugg.
Feil tennpluggtype kan føre til skade på produktet.
natural_image
Technical line drawing of a spark plug with threaded end and shaft (no text or symbols)
text_image
Diagram showing parts of an air conditioner unit with labeled components A and B
natural_image
Diagram of a mechanical component with rotating arrows indicating motion (no text or symbols)
Hvis produktet fortsatt går på en lite tilfredsstillende måte etter justeringen, må du ta kontakt med serviceforhandleren.
text_image
Technical diagram of a lawn mower with numbered parts and an inset view showing mechanical components.
natural_image
Diagram of a mechanical lever mechanism with a curved handle and arrow indicating motion (no text or symbols)
text_image
Technical diagram of a mechanical assembly with labeled parts F, G, and H
natural_image
Mechanical assembly diagram showing two stages of a gear mechanism with no visible text or symbols
natural_image
Mechanical assembly diagrams showing gear and cam mechanism (no text or labels)
natural_image
Line drawing of a lawn mower with an arrow indicating clockwise motion (no text or symbols)
natural_image
Line drawing of a lawn mower with motion arrows indicating blade movement (no text or symbols)
natural_image
Technical line drawing of a mechanical clamp or bracket assembly (no text or symbols)
natural_image
Diagram of a mechanical device with directional arrows indicating rotation or movement (no text or symbols)
Przeznaczenie
Wstęp

• Extended product information.
• Information about, and help with, product parts and servicing.
natural_image
Illustration of a hand pouring liquid into a bottle, with a close-up view of the bottle's side panel (no text or symbols)
natural_image
Technical line drawing of a vehicle wheel assembly with motion indicators (no text or symbols)

natural_image
Diagram of a mechanical lever mechanism with a curved arrow indicating rotational motion (no text or symbols)
natural_image
Diagram of a mechanical component with a curved bracket and arrow indicating direction (no text or symbols)
natural_image
Diagram of a mechanical device with a lever mechanism and directional arrow (no text or symbols)
natural_image
Technical line drawing of a mechanical assembly with gears and a base component (no text or symbols)
natural_image
Diagram of a vehicle being pulled into a box, showing motion and structural details (no text or symbols)
natural_image
Technical line drawing of a mechanical device with visible gears and a base component (no text or symbols)
natural_image
Technical line drawing of a lawn mower with an inset showing the blade assembly (no text or symbols)
natural_image
Diagram of a robotic lawn mower with a base device and mechanical components (no text or labels)
natural_image
Technical line drawing of a mechanical device with visible gears and a base component (no text or symbols)
natural_image
Line drawing of hands holding a flatboard with a ruler inserted, showing material being poured into (no text or symbols)
natural_image
Technical line drawing of a robotic car with visible wheels and structural components (no text or symbols)
natural_image
Diagram of a circular mechanical or electrical component with concentric rings and a central rotating arrow, featuring a wooden block at the base (no text or symbols)
natural_image
Diagram showing a blade cutting through a curved structure with arrows indicating direction, above grass (no text or symbols)
natural_image
Diagram of a mechanical gear or pulley system with rotational arrow and base, no text or symbols present
bar
| Category | Value |
|---|---|
| F | -20 |
| C | -30 |
| 40 | -20 |
| -10 | -10 |
| 32 | 32 |
| 60 | 60 |
| 80 | 80 |
| 100 | 100 |
The chart displays a single bar representing the current value for each configuration: 'SAE 5W-30' and 'SAE 10W-30'. The right side shows arrows pointing to the positions of the bars.
natural_image
Technical line drawing of a spark plug with threaded shaft and mounting base (no text or symbols)
text_image
Technical diagram showing labeled parts of an air conditioner unit, including housing, panel, and internal components.
natural_image
Diagram of a screwdriver with a rotating head and rope, showing motion arrows (no text or symbols)
text_image
Technical diagram of a lawn mower with numbered parts and an inset view showing mechanical components.
natural_image
Simple line drawing of a mechanical clamp or lever mechanism (no text or symbols)
text_image
Technical diagram of a vehicle's mechanical assembly with labeled parts F, G, and H
natural_image
Mechanical assembly diagrams showing gear and motor components with directional arrows (no text or labels)
natural_image
Mechanical assembly diagram showing two stages of a gear mechanism with rotational motion arrows (no text or labels)
natural_image
Line drawing of a lawn mower with a directional arrow indicating motion (no text or symbols)
natural_image
Line drawing of a lawn mower with an arrow indicating clockwise motion (no text or symbols)
natural_image
Technical line drawing of a mechanical clamp or bracket assembly (no text or symbols)
- Fixe o saco de relva à estrutura com os grampos.
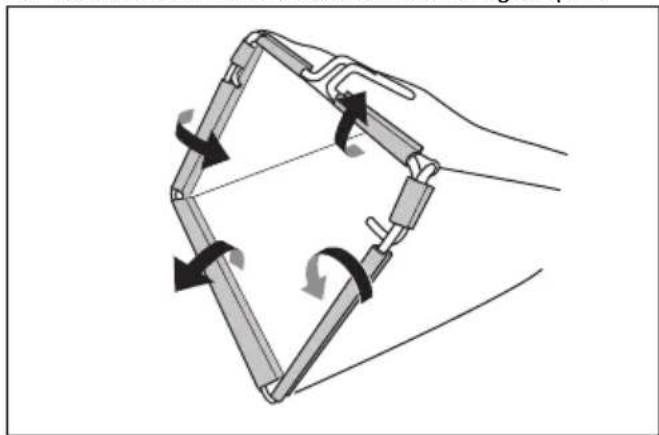
natural_image
Diagram of a hand holding a segmented device with directional arrows indicating rotation or movement (no text or symbols present)
Funcionamento
Introdução

natural_image
Illustration of a hand pouring liquid into a bottle, with a close-up view of the bottle's side panel (no text or symbols)
natural_image
Technical line drawing of a mechanical assembly with a wheel and spring (no text or symbols)

natural_image
Diagram of a mechanical clamp or bracket with a curved arrow indicating rotation (no text or symbols)
natural_image
Diagram of a mechanical bracket with a curved handle and arrow indicating direction (no text or symbols)
natural_image
Diagram of a mechanical device with a lever and directional arrow (no text or symbols)
natural_image
Technical line drawing of a mechanical vehicle with visible gears and mounting brackets (no text or symbols)
natural_image
Diagram of a mechanical device with a moving cart and a box, showing no text or symbols.
natural_image
Technical line drawing of a mechanical assembly with gears and a base component (no text or symbols)
natural_image
Line drawing of a lawn mower with an inset showing the blade assembly (no text or symbols)
natural_image
Diagram of a robotic vehicle with gear and battery, showing mechanical components and motion direction (no text or labels)
natural_image
Technical line drawing of a mechanical vehicle showing tire assembly and mounting bracket (no text or symbols)
natural_image
Line drawing of hands holding a tablet device with a scroll wheel (no text or symbols)
Para obter bons resultados
natural_image
Technical line drawing of a mechanical vehicle with labeled components (no text or symbols present)
natural_image
Diagram of a circular mechanical or electrical component with concentric rings and a central rotating arrow, featuring a wooden block at the base (no text or symbols)
natural_image
Diagram showing a blade under load with arrows indicating direction, above a grassy field (no text or symbols)
natural_image
Diagram of a mechanical or electrical component with concentric circles and a central rotating arrow, no text or symbols present.
natural_image
Technical line drawing of a spark plug with threaded shaft and nut (no text or symbols)
text_image
Technical diagram showing labeled parts of an air conditioner unit with components A and B
natural_image
Diagram of a mechanical component with rotating arrows indicating motion (no text or symbols)
text_image
Technical diagram of a lawn mower with numbered parts and labeled parts for identification.
natural_image
Simple line drawing of a mechanical lever mechanism (no text or symbols)
text_image
Technical diagram of a mechanical assembly with labeled parts F, G, and H
- Strângeti complet rozeta (H).
natural_image
Mechanical assembly diagram showing two stages of a gear mechanism with no visible text or symbols
natural_image
Mechanical assembly diagram showing two stages of a gear mechanism with no visible text or symbols
natural_image
Line drawing of a lawn mower with a directional arrow indicating motion (no text or symbols)
natural_image
Line drawing of a lawn mower with an arrow indicating clockwise motion (no text or symbols)
natural_image
Technical line drawing of a mechanical clamp or bracket assembly (no text or symbols)
natural_image
Diagram of a hand holding a rectangular device with four curved arrows indicating rotational or directional motion (no text or symbols)
Functionarea
Introducere

natural_image
Illustration of a hand pouring liquid into a bottle, with a close-up view of the bottle's side panel (no text or symbols)
natural_image
Technical line drawing of a mechanical assembly with a wheel and spring mechanism (no text or symbols)

natural_image
Diagram of a mechanical clamp or bracket with a curved arrow indicating rotation (no text or symbols)
natural_image
Diagram of a mechanical bracket with a curved handle and arrow indicating direction (no text or symbols)
natural_image
Diagram of a mechanical device with a lever and directional arrow (no text or symbols)
natural_image
Technical line drawing of a mechanical vehicle with visible gears and mounting brackets (no text or symbols)
natural_image
Diagram showing a robotic arm pulling a box with an arrow indicating motion (no text or symbols present)
natural_image
Technical line drawing of a mechanical vehicle with visible gears and a base component (no text or symbols)
natural_image
Technical line drawing of a lawn mower with an inset showing the blade assembly (no text or symbols)
natural_image
Diagram of a robotic vehicle with a battery and housing, showing mechanical components and a directional arrow (no text or symbols)
natural_image
Technical line drawing of a grassy tractor with visible tire tracks and mounting bracket (no text or symbols)
natural_image
Line drawing of hands holding a tablet device with a scroll wheel (no text or symbols)
natural_image
Technical line drawing of a mechanical vehicle with labeled parts (no text or symbols present)
natural_image
Diagram of a circular mechanical or electrical component with concentric rings and a central rotating arrow, featuring a wooden block at the base (no text or symbols)
natural_image
Diagram showing a tool interacting with grass under an arch, with arrows indicating direction (no text or symbols)
natural_image
Diagram of a mechanical or electrical component with concentric circles and a central rotating arrow, no text or symbols present.
natural_image
Technical line drawing of a mechanical component with threaded body and threaded shaft (no text or symbols)
text_image
Technical diagram showing labeled parts of a car air conditioner unit, including housing, panel, and internal components.
natural_image
Diagram of a mechanical component with rotating arrows indicating motion (no text or symbols)
text_image
Technical diagram of a lawn mower with numbered parts and exploded view, including labeled parts for identification.
natural_image
Diagram of a mechanical clamp or lever mechanism with a black arrow indicating direction (no text or symbols present)
text_image
Technical diagram of a mechanical assembly with labeled parts F, G, and H
natural_image
Mechanical assembly diagram showing two stages of a gear mechanism with no visible text or symbols
natural_image
Mechanical assembly diagram showing two stages of a gear mechanism with no visible text or symbols
natural_image
Line drawing of a lawn mower with a directional arrow indicating motion (no text or symbols)
natural_image
Line drawing of a lawn mower with an arrow indicating clockwise motion (no text or symbols)
natural_image
Technical line drawing of a mechanical clamp or bracket assembly (no text or symbols)
natural_image
Diagram of a hand holding a rectangular device with four curved arrows indicating rotational or directional motion (no text or symbols)
Эксплуатация
Введение

natural_image
Illustration of a hand pouring liquid into a bottle, with a close-up view of the bottle's side panel (no text or symbols)
natural_image
Technical line drawing of a mechanical device with a wheel and attached bracket (no text or symbols)

natural_image
Diagram of a mechanical lever mechanism with rotation arrow (no text or symbols)
natural_image
Diagram of a mechanical bracket with a curved handle and a small arrow indicating direction (no text or symbols)
natural_image
Diagram of a mechanical device with a spring mechanism and directional arrow (no text or symbols)
natural_image
Technical line drawing of a mechanical vehicle with visible gears and mounting brackets (no text or symbols)
natural_image
Diagram showing a vehicle being loaded onto a box, with no visible text or symbols
natural_image
Technical line drawing of a mechanical assembly with gears and a base component (no text or symbols)
natural_image
Line drawing of a lawn mower with a close-up inset showing the blade and handle (no text or symbols)
natural_image
Diagram of a robotic vehicle with a battery and housing, showing mechanical components and a directional arrow (no text or symbols)
natural_image
Technical line drawing of a mechanical vehicle with visible gears and a close-up of its base component (no text or symbols)
natural_image
Line drawing of hands holding a tablet device with a scroll wheel (no text or symbols)
natural_image
Technical line drawing of a robotic car with visible wheels and suspension components (no text or symbols)
natural_image
Diagram of a circular mechanical or electrical component with internal rotation arrows and a wooden block (no text or symbols)
natural_image
Diagram showing a blade under load with arrows indicating direction, above grass (no text or symbols)
natural_image
Diagram of a mechanical or electrical component with concentric circles and a central rotating arrow, no text or symbols present.
natural_image
Technical line drawing of a mechanical component with threaded end and shaft (no text or symbols)
text_image
Technical diagram showing labeled components of an air conditioner unit, including a housing, fan, and internal panel assembly.
natural_image
Diagram of a screwdriver with rotating coil and connecting rod (no text or symbols)
text_image
Technical diagram of a lawn mower with numbered parts and an inset view showing mechanical components.
natural_image
Simple line drawing of a mechanical clamp or bracket with a handle and arrow indicating direction (no text or symbols)
text_image
Technical diagram of a mechanical assembly with labeled parts F, G, and H
- Gombík (H) utiahnite na doraz.
Nastavenie rukoväti
natural_image
Mechanical assembly diagrams showing gear and cam mechanism (no text or labels)
natural_image
Mechanical assembly diagram showing two stages of a gear mechanism with no visible text or symbols
- Skopte držadlo dopredu.
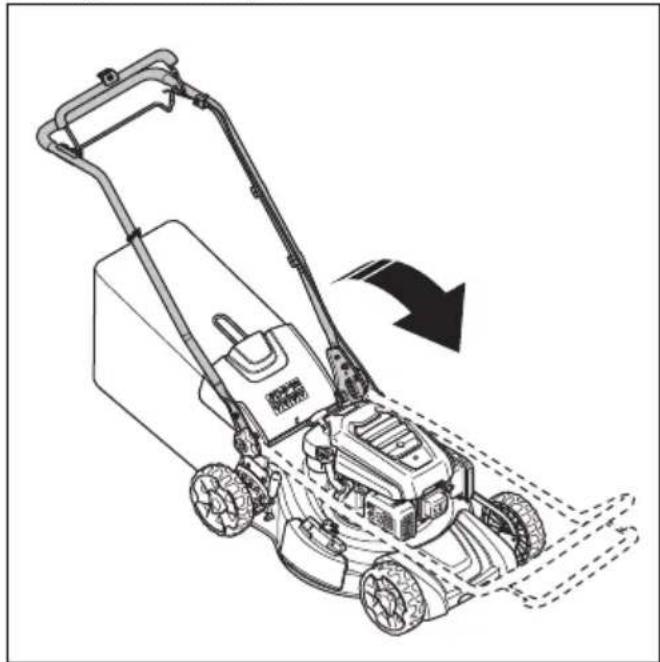
natural_image
Line drawing of a lawn mower with a directional arrow indicating motion (no text or symbols)
natural_image
Line drawing of a lawn mower with motion arrows indicating clockwise motion (no text or symbols)
- Posuňte gombíky nahor smerom k rukováti, kým sa nezastavia a nebudete počut' kliknutie.
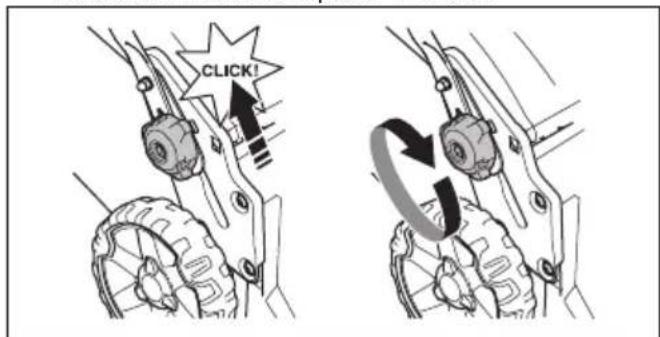
text_image
CLICK!
- Gombíky utiahnite na doraz.
natural_image
Technical line drawing of a mechanical clamp or bracket assembly (no text or symbols)
- Pripevnite vak na trávu do rámu pomocou svoriek.
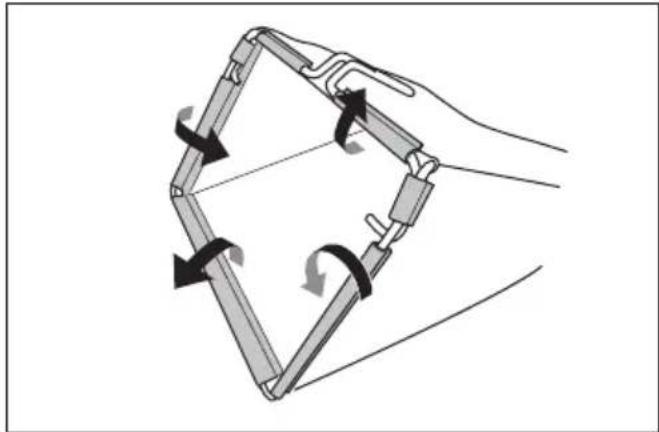
natural_image
Diagram of a hand holding a rectangular device with four curved arrows indicating rotational or directional motion (no text or symbols)
Prevádzka
Úvod

natural_image
Illustration of a hand pouring liquid into a bottle, with a close-up view of the bottle's side panel (no text or symbols)
natural_image
Technical line drawing of a mechanical assembly with a wheel and spring (no text or symbols)

natural_image
Diagram of a mechanical clamp or bracket with a curved arrow indicating rotation (no text or symbols)
natural_image
Mechanical component diagram showing a bracket with a curved handle and a directional arrow (no text or symbols)
natural_image
Diagram of a mechanical device with a lever and directional arrow (no text or symbols)
natural_image
Technical line drawing of a mechanical vehicle with visible gears and mounting brackets (no text or symbols)
natural_image
Diagram of a vehicle with a moving cart and a box, showing motion direction (no text or symbols)
natural_image
Technical line drawing of a mechanical device with visible gears and a base component (no text or symbols)
natural_image
Line drawing of a lawn mower with a close-up inset showing the blade and handle (no text or symbols)
natural_image
Diagram of a robotic lawn mower with a base case and mechanical components, no text or symbols present
natural_image
Technical line drawing of a mechanical assembly with two wheels and a separate 3D component (no text or symbols)
natural_image
Line drawing of hands holding a tablet device with a scroll wheel (no text or symbols)
natural_image
Technical line drawing of a lawn mower with visible wheelbars and mounting brackets (no text or labels)
natural_image
Diagram of a circular mechanical or electrical component with concentric rings and a central rotating arrow, no text or symbols present.
natural_image
Diagram showing a blade under an arch with arrows indicating direction, above grass (no text or symbols)
natural_image
Diagram of a mechanical or electrical component with concentric circles and a rotating arrow, no text or symbols present.
natural_image
Technical line drawing of a spark plug with threaded end and shaft (no text or symbols)
text_image
Diagram showing parts of an air conditioner unit with labeled components A and B
natural_image
Diagram of a screwdriver with rotating cable and connecting rod (no text or symbols)
text_image
Technical diagram of a lawn mower with numbered parts and an inset view showing mechanical components.
natural_image
Diagram of a mechanical lever mechanism with a curved handle and tassel (no text or symbols)
Preverjanje zadnjega pokrova
text_image
Technical diagram of a mechanical assembly with labeled parts F, G, and H
- Do konca zategnite gumbni vijak (H).
Nastavitev ročaja
natural_image
Mechanical assembly diagram showing two stages of a gear mechanism with rotating components (no text or labels)
natural_image
Mechanical assembly diagram showing two stages of a gear mechanism with no visible text or symbols
natural_image
Line drawing of a lawn mower with an arrow indicating clockwise motion (no text or symbols)
natural_image
Line drawing of a lawn mower with an arrow indicating clockwise motion (no text or symbols)
natural_image
Technical line drawing of a mechanical clamp or bracket assembly (no text or symbols)
- Vrečo za travo s sponkami pritrdite na ogrodje.

natural_image
Diagram of a hand holding a mechanical device with directional arrows indicating rotation or movement (no text or symbols present)
Delovanje
Uvod

OPOZORILO: Pred uporabo izdelka morate prebrati in razumeti poglavje o varnosti.
Husqvarna Connect
natural_image
Illustration of a hand pouring liquid into a bottle, with a close-up view of the bottle's side panel (no text or symbols)
natural_image
Technical line drawing of a mechanical assembly with a wheel and attached components (no text or symbols)

POZOR: Ne nastavite višino rezanja prenizko. Rezila lahko trčijo ob tla, će površina travnika ni ravna.
Zagon izdelka
natural_image
Diagram of a mechanical lever mechanism with an arrow indicating rotational motion (no text or symbols)
- Z desno roko držite ročico zaganjalne vrvice.
- Zaganjalno ročico počasi izvlecite, da začutite nekoliko upora.
- Močno povlecite, da zaženete motor.

OPOZORILO: Zaganjalne vrvice ne navijajte okoli zapestja.
Za pogon koles LC 151S & LB 256SP
natural_image
Diagram of a mechanical bracket with an arrow indicating direction (no text or symbols)
natural_image
Diagram of a mechanical device with a spring mechanism and directional arrow (no text or symbols)
natural_image
Technical line drawing of a mechanical vehicle with visible gears and a base component (no text or symbols)
- Sestavite zbiralnik za travo, glejte Namestitev zbiralnika za travo (LC 151, LC 151S) na strani 464.
- Na nosilec namestite zbiralnik za travo.
- Sprostite zadnji pokrov in ga namestite na ogrodje vreče za travo.

natural_image
Line drawing of a robotic arm pulling a box, no text or symbols present
Priprava izdelka za mulčenje (LC 151, LC 151S)
natural_image
Technical line drawing of a mechanical vehicle with visible gears and a base component (no text or symbols)
- Zaprite zadnji pokrov in se prepričajte, da se tesno prilega ob vložek za mulčenje.
natural_image
Line drawing of a lawn mower with a close-up inset showing the blade and handle (no text or symbols)
natural_image
Diagram of a lawn mower assembly with a base case and mechanical components (no text or labels)
natural_image
Technical line drawing of a mechanical vehicle showing tire assembly and mounting bracket (no text or symbols)
Praznjenje zbiralnika za travo

POZOR: Ko se premaknete, dvignite zbiralnik za travo, da preprečite obrabo.
natural_image
Line drawing of hands holding a flatboard with a clip, showing material being inserted (no text or symbols)
Kako doseči dober rezultat
natural_image
Technical line drawing of a mechanical vehicle with labeled parts (no text or symbols present)
-
Odstranite zaščitni pokrov menjalnika.
-
Površine očistite s krtačko.

natural_image
Diagram of a circular mechanical or electrical component with concentric rings and a central rotating arrow, featuring a wooden block at the base (no text or symbols)
- Odstranite vijak rezila in vzmetno podložko.
- Odstranite rezilo.
- Preverite, ali sta nosilec in vijak rezila poškodovana.
- Preglejte, ali je motorna gred zvita.
- Ko pritrdite novo rezilo, usmerite nagnjene strani rezila v smer pokrova rezila.
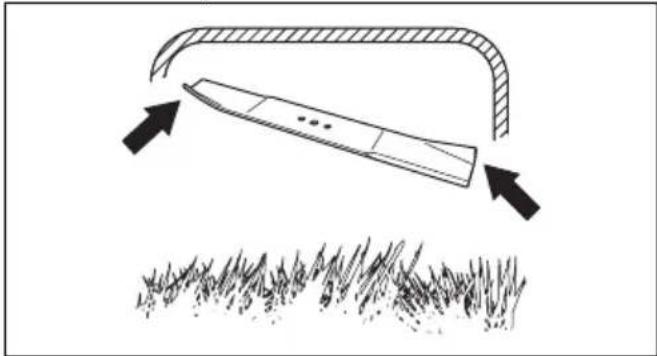
natural_image
Diagram showing a blade under load with arrows indicating direction, above grass (no text or symbols)
- Prepričajte se, da je rezilo poravnano s središčem motorne gredi.
- Rezilo blokirajte z leseno klado. Pritrdite podložko vzmeti in privijte vijak in podložko z zateznim momentom 43 – 47 Nm.
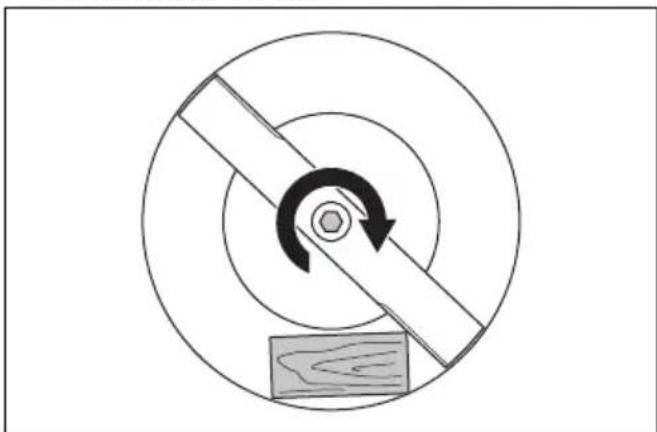
natural_image
Diagram of a mechanical or electrical component with concentric circles and a central rotating arrow, no text or symbols present.
- Ročno zavrtite rezilo in se prepričajte, da se prosto obrača.

natural_image
Technical line drawing of a mechanical component with threaded body and shaft (no text or symbols)
text_image
Technical diagram showing labeled parts of an air conditioner unit with components A and B
natural_image
Diagram of a mechanical component with rotating arrows indicating motion (no text or symbols)
text_image
Technical diagram of a lawn mower with numbered parts and an inset view showing mechanical components.
- Upravljačka drška
- Ručica kočnice motora
- Pritiskivač pogona (LC 151S, LB 256SP)
- Poluga za pokretanje (LB 251S)
- Zadnji poklopac (LC 151, LC 151S)
- Hvatač trave (LC 151, LC 151S)
- Dugmad za podešavanje visine ručice
- Poluga visine košenja
- Poklopac rezervoara za ulje i šipka za merenje
-
Poklopac bočnog pražnjenja
-
Prigušivač
- Svećica
- Karburator
- Poklopac rezervoara za gorivo
- Simboli
- Poklopac košenja
- Filter za vazduh
- Bočni usmerivač
-
Komplet za usitnjavanje (dodatak za LC 151, LC 151S)
-
Ručica užeta startera
-
Korisničko uputstvo
Simboli na proizvodu

UPOZORENJE! Budite pažljivi i koristite proizvod na pravilan način. Ovaj proizvod može prouzrokovati teške telesne povrede ili smrt rukovaoca i drugih osoba.

natural_image
Diagram of a mechanical clamp or lever mechanism with a black arrow indicating direction (no text or symbols present)
Provera zadnjeg poklopca
Zadnji usmerivač smanjuje rizik da predmeti budu izbačeni u smeru rukovaoca.
- Uverite se da zadnji poklopac nije oštećen.
- Uverite se da opruge koje zatvaraju zadnji poklopac nisu polomljene.
- Zamenite polomljene opruge i oštećene delove.
- Uverite se da se zadnji poklopac može slobodno pomerati na šarkama.
Prigušivač
Prigušivač održava nivoe buke na minimumu i šalje izduvne gasove od rukovaoca.
text_image
Technical diagram of a mechanical assembly with labeled parts F, G, and H
natural_image
Mechanical assembly diagram showing two stages of a gear mechanism with no visible text or symbols
- Stavite ručku u jedan od 2 položaja za visinu.
- Pomerite dugmad nagore u smeru ručke dok se ne zaustave i ne čujete klik zvuk.
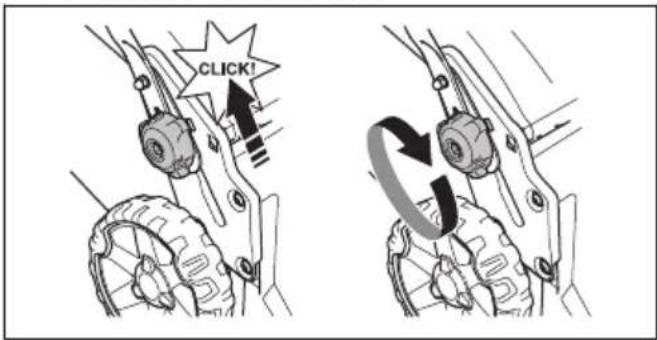
text_image
CLICK!
- Potpuno zategnite dugmad.
natural_image
Mechanical assembly diagram showing two stages of a gear mechanism with no visible text or symbols
- Sklopite ručku unapred.
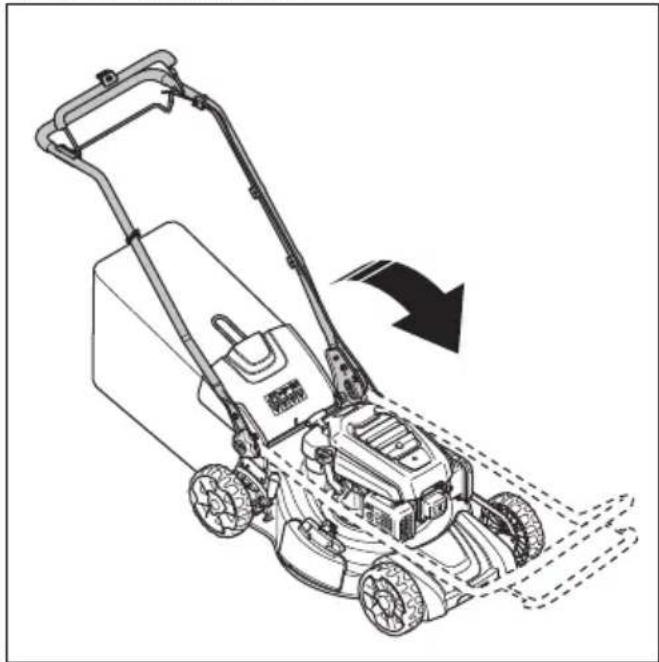
natural_image
Line drawing of a lawn mower with an arrow indicating clockwise motion (no text or symbols)
natural_image
Line drawing of a lawn mower with an arrow indicating clockwise motion (no text or symbols)
- Pomerite dugmad nagore u smeru ručke dok se ne zaustave i ne čujete klik zvuk.
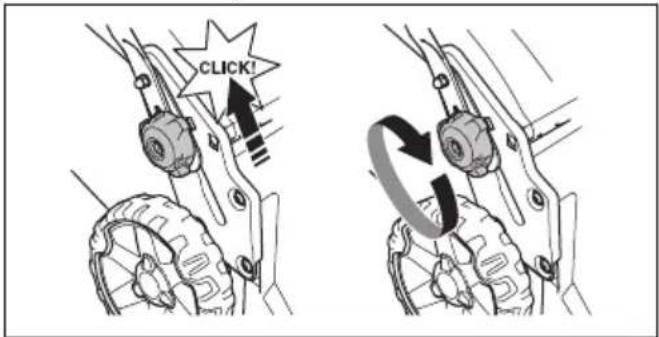
text_image
CLICK!
- Potpuno zategnite dugmad.
Sklapanje hvatača trave (LC 151, LC 151S)
natural_image
Technical line drawing of a mechanical clamp or bracket assembly (no text or symbols)
- Postavite vreću za travu na ram pomoću spojnica.
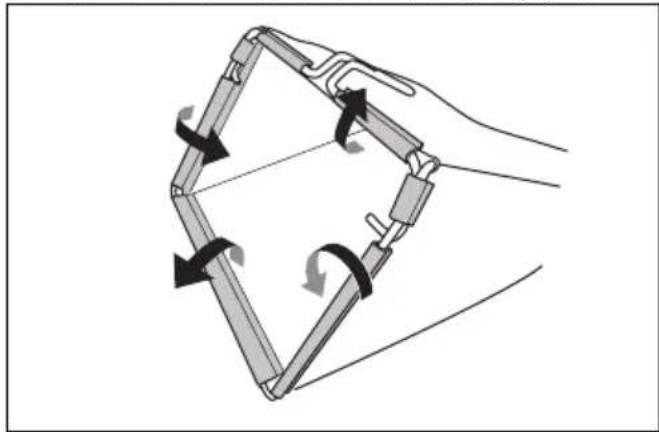
natural_image
Diagram of a hand holding a rectangular device with four curved arrows indicating rotational or directional motion (no text or symbols)
Rukovanje
Uvod

natural_image
Illustration of a hand pouring liquid into a bottle, with a close-up view of the bottle filled with liquid (no text or symbols present)
- Obrišite deo oko čepa rezervoara za gorivo.
- Do kraja zategnite čep rezervoara za gorivo. Ako čep rezervoara za gorivo nije zategnut, postoji opasnost od požara.
- Izmaknite proizvod bar 3 m (10 stopa) od mesta na kojem ste sipali gorivo pre pokretanja.
natural_image
Mechanical diagram showing a wheel and mechanical components with motion lines (no text or symbols)

natural_image
Diagram of a mechanical lever mechanism with a curved arrow indicating rotation (no text or symbols present)
- Držite ručicu užeta startera desnom rukom.
- Lagano izvlačite uže startera dok ne osetite otpor.
- Snažno povucite da biste pokrenuli motor.

UPOZORENJE: Nemojte namotavati uže startera oko ruke.
Korišćenje pogona na točkićima LC 151S & LB 256SP
• Gurnite pritiskivač pogona u smeru upravljača.
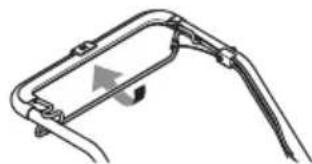
natural_image
Diagram of a mechanical clamp or bracket with a curved handle and arrow indicating direction (no text or symbols)
- Otpustite pritiskivač pogona da biste deaktivirali pogon, na primer, kada se nalazite blizu prepreke.
- Pre nego što povučete proizvod unazad, odvojte pogon i gurnite proizvod ka napred približno 10 cm.
Korišćenje pogona na točkićima (LB 251S)
- Povucite ručicu pogona u smeru ručice.
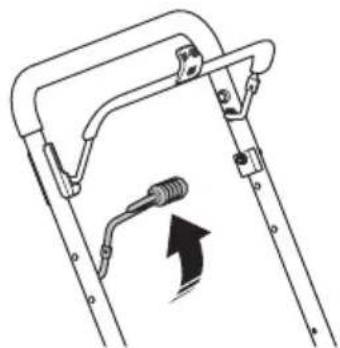
natural_image
Diagram of a mechanical device with a lever and directional arrow (no text or symbols)
- Gurnite ručicu pogona dalje od ručke da biste deaktivirali pogon, na primer, kada se nalazite blizu prepreke.
Napomena: Pogonska ručica se automatski deaktivira kad pustite ručicu kočnice motora.
- Pre nego što povučete proizvod unazad, gurnite pogonsku ručicu dalje od drške i gurnite proizvod unapred oko 10 cm da biste potpuno odvojili pogon.
Zaustavljanje proizvoda
- Da biste zaustavili samo pogon, otpustite pritiskivač pogona (LC 151S, LB 256SP) na pogonskoj ručici (LB 251S).
- Da biste zaustavili motor, pustite ručicu kočnice motora.
Korišćenje proizvoda sa hvatačem trave (LC 151, LC 151S)

UPOZORENJE: Nemojte raditi sa proizvodom bez postavljenog hvatača trave ili bez zatvorenog zadnjeg poklopca. Predmeti mogu da budu izbačeni i prouzrokuju povredu rukovaoca.
- Podignite zadnji poklopac i uklonite zapušač za usitnjavanje ako je postavljen.
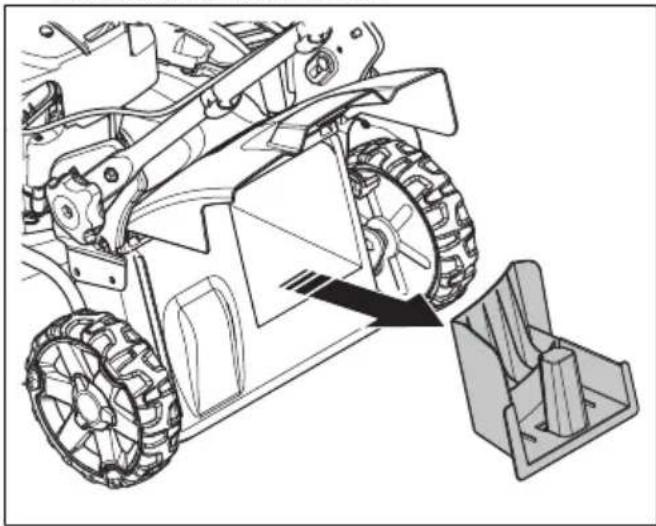
natural_image
Technical line drawing of a mechanical vehicle with visible gears and mounting brackets (no text or symbols)
- Sklopite hvatač trave, pogledajte Sklapanje hvatača trave (LC 151, LC 151S) na stranici 483.
- Postavite hvatač trave na držač.
- Otpustite zadnji poklopac i postavite ga na vrh rama vreće za travu.
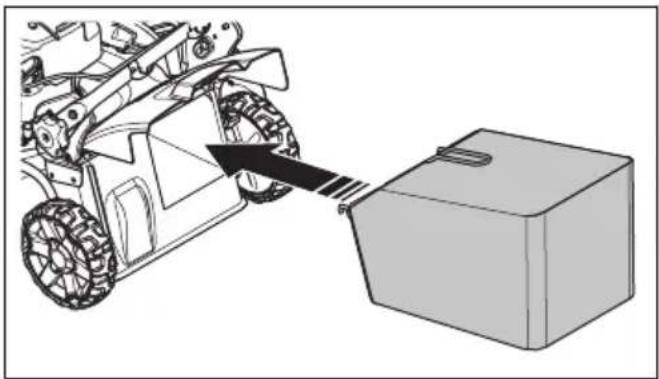
natural_image
Diagram of a vehicle with a moving cart and a box, showing motion direction (no text or symbols)
Promena proizvoda u režim za usitnjavanje (LC 151, LC 151S)
Uverite se da je motor isključen pre pripreme proizvoda za režim usitnjavanja.
natural_image
Technical line drawing of a mechanical assembly with gears and a base component, showing no text or symbols.
- Zatvorite zadnji poklopac i uverite se da dobro naleže na zapušač za usitnjavanje.
Napomena: Da biste povećali performanse režima za usitnjavanje, zamenite nož opremom za nož za usitnjavanje. Pogledajte Zamena sečiva na stranici 488
natural_image
Line drawing of a lawn mower with a close-up inset showing the blade and handle (no text or symbols)
- Otvorite poklopac za bočno pražnjenje i postavite bočni usmeravač na osovinice.
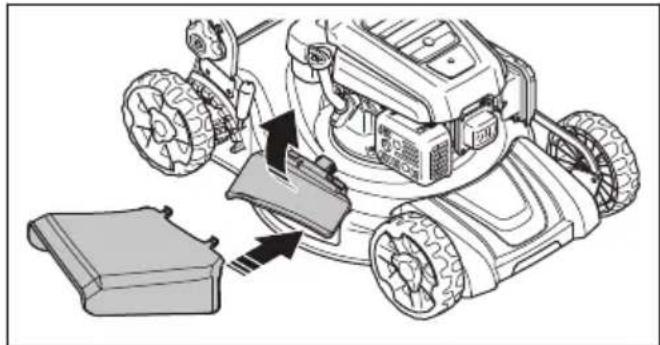
natural_image
Diagram of a lawn mower with attached belt and battery, showing mechanical components without any text or symbols
- Neka se poklopac za bočno pražnjenje nasloni na usmeravač. Uverite se da usmeravač bočno izbacivanje dobro naleže na mesto pre korišćenja proizvoda.
natural_image
Technical line drawing of a mechanical vehicle with visible gears and a base component (no text or symbols)
Pražnjenje hvatača trave

OPREZ: Podignite hvatač trave kada ga pomerite da biste sprečili habanje.
- Podignite hvatač trave sa ručkom rama.
- Upotrebite ručku rama i ručku trave kada praznite hvatač trave.

natural_image
Line drawing of hands holding a flatboard with a tool, partially covered by a pile of papers (no text or symbols)
Za dobre rezultate
- Uvek koristite oštro sečivo. Tupo sečivo daje neujednačeni rezultat i pokošena površina trave postaje žuta. Oštro sečivo takođe koristi manje energije nego tupo sečivo.
- Nemojte kositi više od 13 dužine trave. Kad počnete da kosite travu, koristite najveću visinu košenja. Pregledajte rezultat i spustite visinu košenja na prihvatljivi nivo. Ako je trava veoma visoka, vozite polako i kosite 2 puta ako bude potrebno.
- Kosite u različitim smerovima svaki put da biste izbegli pruge na travnjaku.
- Podignite zadnji poklopac i uklonite hvatač trave.
- Ako su postavljeni priključak za usitnjavanje i sečivo za usitnjavanje, uklonite ih.
- Zatvorite zadnji poklopac pre rada proizvodom. Kad koristite proizvod, pokošena trava se izbacuje ispod zadnjeg poklopca.
- Poklopac košenja mora da bude čist. Naslage trave i prljavštine s unutarnje strane poklopca košenja mogu da umanje rezultate košenja. Pogledajte Čišćenje unutrašnje površine poklopca mehanizma za košenje na stranici 487
Održavanje
Uvod

natural_image
Technical line drawing of a robotic car with visible wheels and suspension components (no text or symbols)
natural_image
Diagram of a circular mechanical or electrical component with concentric rings and a central rotating arrow, featuring a wooden block at the base (no text or symbols)
- Uklonite zavrtanj sečiva i opružnu podlošku.
- Uklonite nož.
- Pregledajte nosač sečiva i vijak sečiva kako biste videli postoje li oštećenja.
- Pregledajte osovinu motora kako biste se uverili da nije savijena.
- Kada postavite novo sečivo, usmerite savijene krajeve sečiva u smeru poklopca košenja.
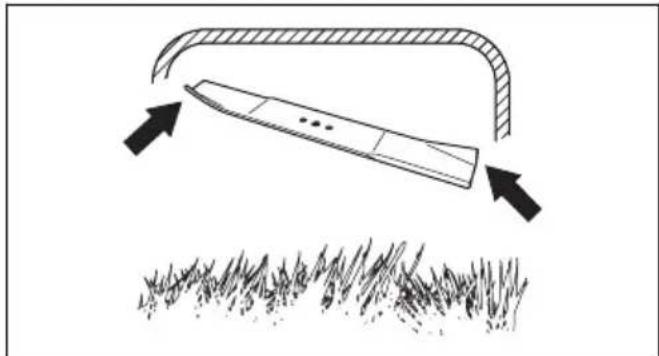
natural_image
Diagram showing a blade under load with arrows indicating force direction, above grass (no text or symbols)
- Pobrinite se da je nož poravnat sa sredinom osovine motora.
- Blokirajte sečivo pomoću komada drveta. Postavite opružnu podlošku i zategnite vijak i podlošku na moment pritezanja od 43 – 47 Nm.

natural_image
Diagram of a mechanical or electrical component with concentric circles and a central rotating arrow, no text or symbols present.
- Povucite sečivo rukom da biste proverili da li se slobodno okreće.

natural_image
Technical line drawing of a mechanical component with threaded spring and bolted base (no text or symbols)
- Zamenite svećicu ako je potrebno.
Filter za vazduh
Prljav filter za vazduh može da izazove kvar ili nepravilan rad motora. Održavajte filter za vazduh češće ako radite u prašnjavim uslovima. Pogledajte Održavanje na stranici 486 za informacije o vremenu zamene filtera za vazduh.
text_image
Technical diagram showing labeled parts of an air conditioner unit with component A and B
-
Proverite da li je filter za vazduh oštećen. Zamenite oštećeni filter za vazduh.
-
Očistite i pregledajte filter za vazduh. Pogledajte Čišćenje filtera za vazduh na stranici 490
-
Postavite obrnutim redosledom.
Čišćenje filtera za vazduh
Prljav filter za vazduh može da izazove kvar ili nepravilan rad motora. Održavajte filter za vazduh češće ako radite u prašnjavim uslovima.
natural_image
Diagram of a mechanical component with rotating arrows indicating motion (no text or symbols)
Ako se proizvod i posle podešavanja ne kreće kako bi trebalo, obratite se serviseru
Rešavanje problema sa motorom
| Problem Mogući uzrok Rešenje | | |
| Motor ne može da se pokrene. | Kabl za paljenje nije ispravno povezan. Povežite kabl za paljenje na svećicu. |
| Rezervoar za gorivo je prazan. Napunite rezervoar za gorivo odgovara-jućim tipom goriva. |
| Gorivo je staro. Ispraznite rezervoar za gorivo i karburator. Sipajte nov benzin. |
| Prljavština u karburatoru ili vodu goriva. Očistite karburator i/ili vod goriva. |
| Svećica je neispravna. Podesite zazor elektroda, očistite ili za-menite svećicu. |
| Svećica je zamašćena. Očistite svećicu. |
| Motor ne može da se zaustavi. | Mehanizam za zaustavljanje je neispravan. | Uklonite kabl za paljenje sa svećice. Ne-ka ovlašćeni serviser popravi proizvod. |
| Motor ne radi mirno. Kabl za paljenje nije ispravno povezan. Povežite kabl za paljenje na svećicu. |
| Prljavština se nakupila u vodu goriva ili je istekao rok trajanja goriva. | Očistite vod goriva. Napunite rezervoar za gorivo novim gorivom odgovarajućeg tipa. |
| Postoji zapušenje u poklopcu rezervoara za gorivo. | Očistite poklopac rezervoara za gorivo. |
| Voda ili prljavština se nalaze u sistemu za gorivo. | Ispraznite rezervoar za gorivo. Napunite rezervoar za gorivo novim gorivom odgovarajućeg tipa. |
| Filter za vazduh je zaprljan. Očistite filter za vazduh. |
| Potrebno je podesiti karburator. Neka serviser podesi karburator. |
| Motor se prekomerno zagreva. | Nivo motornog ulja je prenizak. Napunite motornim uljem. |
| Protok vazduha nije dovoljan. Očistite filter za vazduh i kućište filtera za vazduh. |
| Potrebno je podesiti karburator. Neka serviser podesi karburator. |
| Pojavljuje se zastoj u motoru kada radi pri velikoj brzini. | Zazor elektroda u svećici je premali. Podesite zazor elektroda. |
| Neobična buka motora tokom normalnog opterećenja. | Pogrešan tip benzina. Ispraznite rezervoar za gorivo i karburator. Sipajte nov benzin. Pogledajte Dosi-panje goriva na stranici 483 Ako se problem zadrži, obratite se lokalnom serviseru. |
| Motor ne radi mirno u brzini praznog hoda. | Svećica je zaprljana, oštećena ili je zazor elektroda prevelik. | Podesite zazor elektroda ili zamenite svećicu. |
| Potrebno je podesiti karburator. Podesite karburator. |
| Filter za vazduh je zaprljan. Očistite filter za vazduh. |
text_image
Technical diagram of a lawn mower with numbered parts and labeled parts for identification.
natural_image
Simple line drawing of a mechanical lever mechanism with a curved handle and lever (no text or symbols)
Kontrollera den bakre käpan
text_image
Technical diagram of a mechanical assembly with labeled parts F, G, and H
natural_image
Mechanical assembly diagram showing two stages of a gear mechanism with rotating components (no text or labels)
natural_image
Mechanical assembly diagram showing two stages of a gear mechanism with no visible text or symbols
natural_image
Line drawing of a lawn mower with an arrow indicating clockwise motion (no text or symbols)
natural_image
Line drawing of a lawn mower with an arrow indicating clockwise motion (no text or symbols)
natural_image
Technical line drawing of a mechanical clamp or bracket assembly (no text or symbols)
natural_image
Diagram of a hand holding a rectangular device with four curved arrows indicating rotational or directional motion (no text or symbols)
Drift
Introduktion

natural_image
Illustration of a hand pouring liquid into a car engine, with a magnified inset showing the same component (no text or symbols present)
natural_image
Technical line drawing of a mechanical device with a wheel and attached components (no text or symbols)

natural_image
Diagram of a mechanical lever mechanism with an arrow indicating rotational motion (no text or symbols)
natural_image
Diagram of a mechanical bracket with a curved handle and a directional arrow indicating motion (no text or symbols)
natural_image
Diagram of a mechanical device with a lever mechanism and directional arrow (no text or symbols)
natural_image
Technical line drawing of a mechanical assembly with two wheels and a bracket, showing no text or symbols
natural_image
Diagram of a robotic vehicle pulling a box, showing mechanical components and motion arrows (no text or symbols)
natural_image
Technical line drawing of a mechanical vehicle with visible gears and a base component (no text or symbols)
natural_image
Line drawing of a lawn mower with a close-up inset showing the blade and handle (no text or symbols)
natural_image
Diagram of a robotic lawn mower with attached battery pack and mechanical components (no text or labels)
natural_image
Technical line drawing of a mechanical vehicle showing front wheel, rear wheels, and internal components (no text or symbols)
natural_image
Line drawing of hands holding a flatboard with a tool, partially covered by a pile of paper (no text or symbols)
Få ett bra resultat
natural_image
Technical line drawing of a mechanical assembly with labeled parts (no text or symbols present)
natural_image
Diagram of a circular mechanical or electrical component with concentric rings and a central rotating arrow, featuring a wooden block at the base (no text or symbols)
natural_image
Diagram showing a tool interacting with grass under an arch, with arrows indicating direction (no text or symbols)
natural_image
Diagram of a mechanical or electrical component with concentric circles and a central rotating arrow, no text or symbols present.
natural_image
Technical line drawing of a spark plug with threaded body and mounting base (no text or symbols)
text_image
Technical diagram showing labeled parts of a car air conditioner unit, including housing, panel, and internal components.
natural_image
Diagram of a mechanical component with rotational arrows indicating motion (no text or symbols)
text_image
Technical diagram of a lawn mower with numbered parts and an inset view showing mechanical components.
natural_image
Simple line drawing of a mechanical clamp or lever mechanism with no text or symbols
text_image
Technical diagram of a mechanical assembly with labeled parts F, G, and H
natural_image
Mechanical assembly diagram showing two stages of a gear mechanism with rotating components (no text or labels)
natural_image
Mechanical assembly diagram showing two stages of a gear mechanism with no visible text or symbols
natural_image
Line drawing of a lawn mower with an arrow indicating clockwise motion (no text or symbols)
natural_image
Line drawing of a lawn mower with an arrow indicating clockwise motion (no text or symbols)
natural_image
Technical line drawing of a mechanical clamp or bracket assembly (no text or symbols)
natural_image
Diagram of a hand holding a rectangular device with four curved arrows indicating rotational or directional motion (no text or symbols)
Çalışma
Giriş

natural_image
Illustration of a hand pouring liquid into a bottle, with a close-up view of the bottle's side panel (no text or symbols)
natural_image
Technical line drawing of a mechanical assembly with a wheel and attached bracket (no text or symbols)

natural_image
Diagram of a mechanical linkage or lever mechanism with no visible text or symbols
natural_image
Diagram of a mechanical clamp or bracket with a curved handle and arrow indicating direction (no text or symbols)
natural_image
Diagram of a mechanical device with a lever and directional arrow (no text or symbols)
natural_image
Technical line drawing of a mechanical vehicle with visible gears and a base component (no text or symbols)
natural_image
Diagram of a vehicle with a tire being pulled into a box, showing mechanical components and motion direction (no text or symbols)
Ürünü malç moduna getirme (LC 151, LC 151S)
natural_image
Technical line drawing of a mechanical vehicle showing tire assembly and mounting bracket (no text or symbols)
natural_image
Technical line drawing of a lawn mower with mechanical components and a close-up inset showing the blade assembly (no text or symbols)
natural_image
Diagram of a lawn mower with gear and belt assembly, showing mechanical components and a base case (no text or labels)
natural_image
Technical line drawing of a mechanical device with visible gears and a base component (no text or symbols)
natural_image
Line drawing of hands holding a flatboard with a clip, showing material being poured into the cover (no text or symbols)
İyi sonuç alma
natural_image
Technical line drawing of a mechanical assembly with labeled parts (no text or symbols present)
natural_image
Diagram of a circular mechanical or electrical component with concentric rings and a central rotating arrow, featuring a wooden block at the base (no text or symbols)
natural_image
Diagram showing a blade under load with arrows indicating direction, above a grassy field (no text or symbols)
natural_image
Diagram of a mechanical or electrical component with concentric circles and a central rotating shaft, no text or symbols present.
bar
| Category | Value |
|---|---|
| F | -20 |
| C | -30 |
| 40 | -20 |
| -10 | -10 |
| 32 | 32 |
| 60 | 60 |
| 80 | 80 |
| 100 | 100 |
The chart displays a single bar representing the current value for each configuration: 'SAE 5W-30' and 'SAE 10W-30'. The right side shows an arrow labeled 'SAE 30' pointing rightward.
natural_image
Technical line drawing of a spark plug with threaded end and shaft (no text or symbols)
text_image
Technical diagram showing labeled parts of an air conditioner unit with component A and B
natural_image
Diagram of a mechanical component with rotational arrows indicating motion (no text or symbols)
text_image
Technical diagram of a lawn mower with numbered parts and exploded view, including labeled parts for identification.
natural_image
Diagram of a mechanical lever mechanism with a black arrow indicating motion direction (no text or symbols)
text_image
Technical diagram of a vehicle gear assembly with labeled parts F, G, and H
natural_image
Mechanical assembly diagrams showing gear and cam mechanism (no text or labels)
natural_image
Mechanical assembly diagram showing two stages of gear meshing and rotational motion (no text or symbols)
natural_image
Line drawing of a lawn mower with an arrow indicating clockwise motion (no text or symbols)
natural_image
Line drawing of a lawn mower with motion arrows indicating blade movement (no text or symbols)
natural_image
Technical line drawing of a mechanical clamp or bracket assembly (no text or symbols)
natural_image
Diagram of a mechanical device with directional arrows indicating rotation or movement (no text or symbols)
Експлуатація
Вступ

natural_image
Illustration of a hand pouring liquid into a bottle, with no visible text or symbols
natural_image
Technical line drawing of a mechanical assembly with a wheel and attached components (no text or symbols)

natural_image
Diagram of a mechanical lever mechanism with an arrow indicating rotational motion (no text or symbols)
natural_image
Diagram of a mechanical bracket with an arrow indicating direction (no text or symbols)
natural_image
Diagram of a mechanical device with a lever mechanism and directional arrow (no text or symbols)
natural_image
Technical line drawing of a mechanical assembly with gears and a base component (no text or symbols)
natural_image
Diagram showing a robotic arm pulling a box with an arrow indicating motion (no text or symbols present)
natural_image
Technical line drawing of a mechanical device with visible gears and a base component (no text or symbols)
natural_image
Line drawing of a lawn mower with an inset showing the blade and handle mechanism (no text or symbols)
natural_image
Diagram of a lawn mower with attached belt and battery, showing mechanical components without any text or symbols
natural_image
Technical line drawing of a mechanical assembly with gears and a base component (no text or symbols)
natural_image
Line drawing of hands holding a flatboard with a clip, partially covered by a plastic sheet (no text or symbols)
natural_image
Technical line drawing of a robotic lawn mower with visible wheelbars and mounting brackets (no text or labels)
natural_image
Diagram of a circular mechanical or electrical component with concentric rings and a central rotating arrow, featuring a wooden block at the base (no text or symbols)
natural_image
Diagram showing a blade cutting through a curved structure with arrows indicating direction, above a grassy field (no text or symbols)
natural_image
Diagram of a mechanical or electrical component with concentric circles and a rotating arrow, no text or symbols present.
natural_image
Technical line drawing of a mechanical component with threaded end and shaft (no text or symbols)
text_image
Technical diagram showing labeled parts of an air conditioner unit with components A and B
natural_image
Diagram of a screwdriver with rotating cable and connecting rod (no text or symbols)
text_image
Technical diagram of a lawn mower with numbered parts and an inset view showing the blade structure.
natural_image
Simple line drawing of a mechanical lever mechanism with a curved arrow indicating motion (no text or symbols)
检查后盖
text_image
Technical diagram of a mechanical assembly with labeled parts F, G, and H
- 完全拧紧旋钮 (H)。
调节手柄
natural_image
Mechanical assembly diagrams showing gear and motor components with directional arrows (no text or labels)
natural_image
Mechanical assembly diagrams showing gear and motor components with rotational motion arrows (no text or labels)
- 向前折叠手柄。
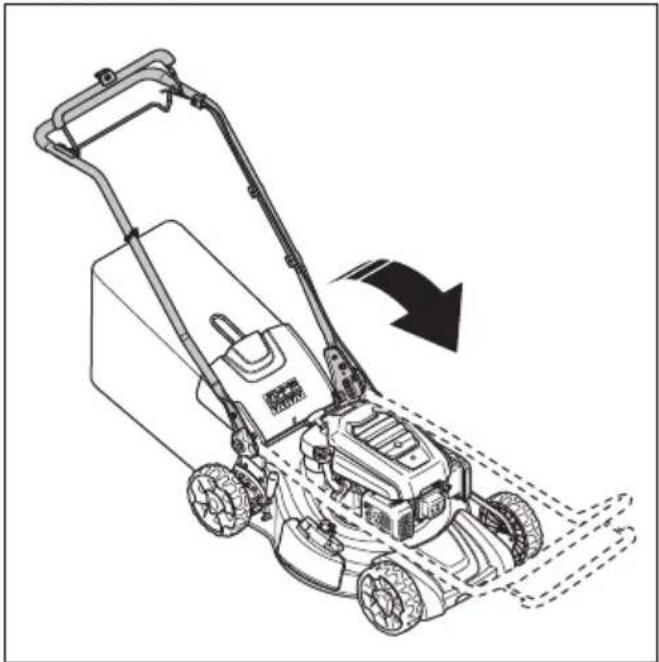
natural_image
Line drawing of a lawn mower with a directional arrow indicating motion (no text or symbols)
将产品设置在工作位置
- 将手柄折起到竖直位置。
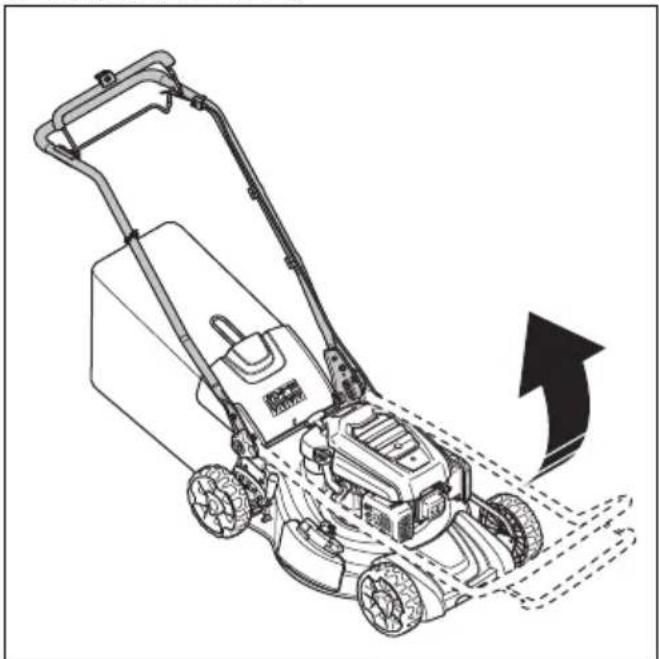
natural_image
Line drawing of a lawn mower with motion arrows indicating blade movement (no text or symbols)
natural_image
Technical line drawing of a mechanical clamp or bracket assembly (no text or symbols)
- 用夹子将草袋连接至框架。
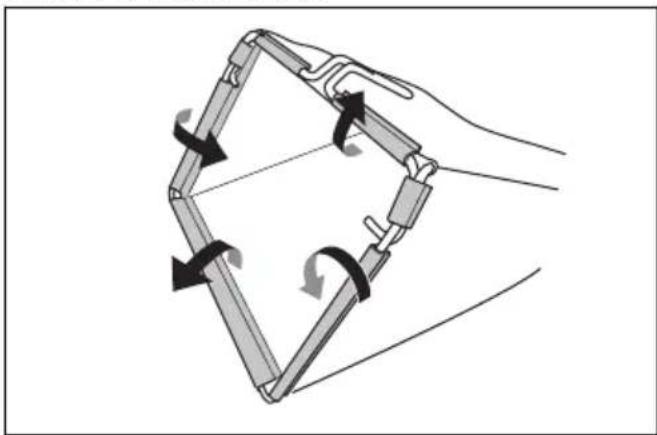
natural_image
Diagram of a hand holding a folded or secured object with directional arrows indicating rotation (no text or symbols)
操作
引言

natural_image
Illustration of a mechanical device being processed with a tool, alongside a close-up view of a container (no text or symbols)
natural_image
Mechanical diagram showing a wheel and connecting rod assembly (no text or symbols)

natural_image
Diagram of a mechanical lever mechanism with a curved arrow indicating rotational motion (no text or symbols)
natural_image
Diagram of a mechanical bracket with a curved handle and arrow indicating direction (no text or symbols)
natural_image
Diagram of a mechanical device with a curved handle and directional arrow (no text or symbols)
natural_image
Technical line drawing of a mechanical vehicle with visible gears and mounting brackets, showing assembly details (no text or symbols)
natural_image
Illustration of a robotic arm pulling a box with an arrow indicating motion (no text or symbols)
natural_image
Technical line drawing of a mechanical assembly with gears and a base component (no text or symbols)
- 关上后盖,确保其紧靠在地面覆盖插件上。
natural_image
Line drawing of a lawn mower with an inset showing the blade and handle mechanism (no text or symbols)
natural_image
Diagram of a lawn mower with attached device and battery, showing mechanical components without any text or symbols
natural_image
Technical line drawing of a mechanical assembly with gears and a base component (no text or symbols)
清空集草袋

natural_image
Line drawing of hands holding a tablet device with a scroll wheel, no text or symbols present
为获得良好的作业效果
natural_image
Technical line drawing of a lawn mower with visible wheelbars and mounting brackets (no text or labels)
- 拆下变速箱盖。
- 用刷子清洁表面。

natural_image
Diagram of a circular mechanical or electrical component with concentric rings and a central rotating arrow, featuring a wooden block at the bottom (no text or symbols)
natural_image
Diagram showing a tool interacting with grass under an arch, with arrows indicating direction (no text or symbols)
natural_image
Diagram of a mechanical or electrical component with concentric circles and a central rotating arrow, no text or symbols present.
- 用手拉住刀片旋转,确保刀片转动自如。

natural_image
Technical line drawing of a mechanical component with threaded base and shaft (no text or symbols)
- 必要时请更换火花塞。
空气滤清器
text_image
Diagram showing internal components of an air conditioner unit with labeled parts A and B
natural_image
Diagram of a mechanical component with rotating arrows indicating motion (no text or symbols)
text_image
Black and white barcode image with vertical lines and a small number '1' at the bottom right.